
目录
无注解方式component-scan使用
之前,我们需要扫描工程下一些类上所标注的注解,这些常用注解有:
@Controller,@Service,@Component,@Repository
通过在Spring的配置文件中配置context:component-scan扫描对应包下扫描这些注解的方式:
<beans xmlns="http://www.springframework.org/schema/beans"
    xmlns:xsi="http://www.w3.org/2001/XMLSchema-instance"
    xmlns:p="http://www.springframework.org/schema/p"
    xmlns:context="http://www.springframework.org/schema/context"
    xsi:schemaLocation="http://www.springframework.org/schema/beans
         http://www.springframework.org/schema/beans/spring-beans.xsd
         http://www.springframework.org/schema/context
         http://www.springframework.org/schema/context/spring-context-2.5.xsd">

    <!--@Controller,@Service,@Component,@Repository-->
    <context:component-scan base-package="com.jektong.spring"/>

</beans>
注解方式**@ComponentScan**使用
建三个类,依次将
@Controller,@Repository,@Service,标注这些类:
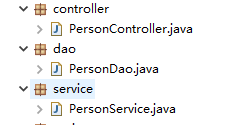
图1
现在通过使用注解**@ComponentScan的方式来扫描所在包下面的这些类:之前定义的PersonConfig修改:**
package com.jektong.config;

import org.springframework.context.annotation.Bean;
import org.springframework.context.annotation.ComponentScan;
import org.springframework.context.annotation.Configuration;

import com.jektong.spring.Person;

@Configuration
@ComponentScan("com.jektong")
public class PersonConfig {

    @Bean("person01")
    public Person person() {
        return new Person("李四",21);
    }
}
测试,看是否扫描到这些注解所标注的类:PersonTest.java
@Test
public  void test02() {
    ApplicationContext ac = new AnnotationConfigApplicationContext(PersonConfig.class);
    Person bean = ac.getBean(Person.class);
    System.out.println(bean);

    String[] beanDefinitionNames = ac.getBeanDefinitionNames();
    for (String string : beanDefinitionNames) {
        System.out.println(string);
    }
}
测试效果:除了Spring要自动加载的配置类以外也显示了刚才添加的配置类:
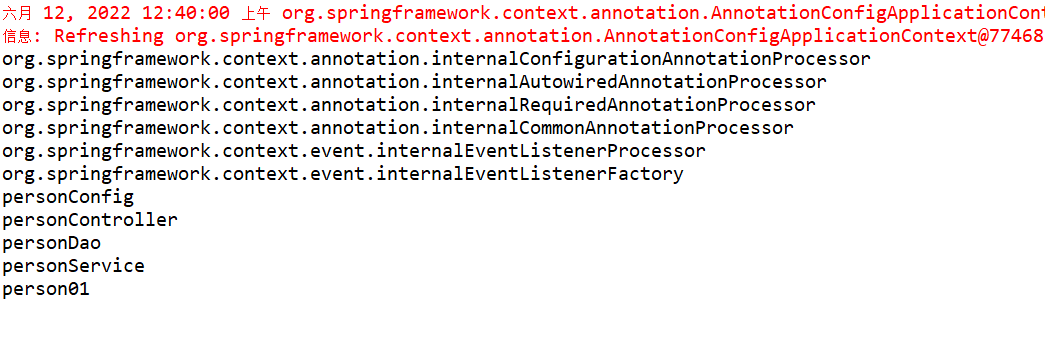
图2
为何会出现PersonConfig,因为@Configuration本 身就是@Component注解的:
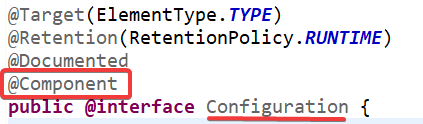
图3
@ComponentScan的扫描规则
如果需要指定配置类的扫描规则, @ComponentScan提供对应的扫描方式@Filter进行配置类的过滤:
// 扫描包的时候只规定扫描一些注解配置类。
Filter[] includeFilters() default {};

// 扫描包的时候可以排除一些注解配置类。
Filter[] excludeFilters() default {};
Filter其实也是一个注解,相当于@ComponentScan的子注解,可以看图4:
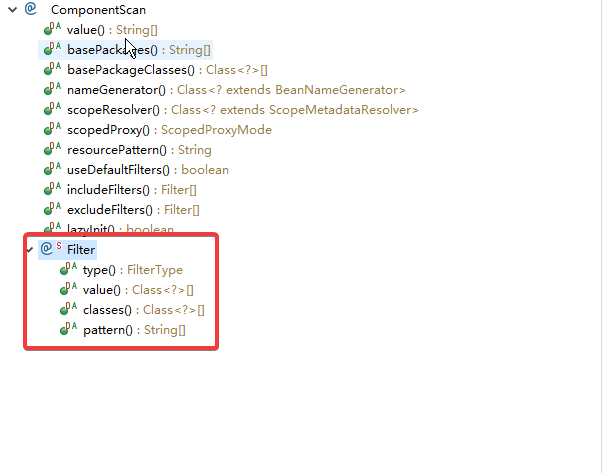
图4
Filter对应的过滤规则如下:
第一种:扫描包的时候只规定扫描一些注解配置类【includeFilters】。
使用这个includeFilters过滤规则,必须解除默认的过滤规则,
使用【useDefaultFilters = false】:
package com.jektong.config;

import org.springframework.context.annotation.Bean;
import org.springframework.context.annotation.ComponentScan;
import org.springframework.context.annotation.ComponentScan.Filter;
import org.springframework.context.annotation.Configuration;
import org.springframework.context.annotation.FilterType;
import org.springframework.stereotype.Controller;

import com.jektong.spring.Person;

@Configuration
@ComponentScan(value = "com.jektong",includeFilters  = {
        @Filter(type = FilterType.ANNOTATION,value= {Controller.class})
},useDefaultFilters = false )
public class PersonConfig {

    @Bean("person01")
    public Person person() {
        return new Person("李四",21);
    }
}
这样就只会扫描用@Controller,标注的配置类交给Spring容器中了:
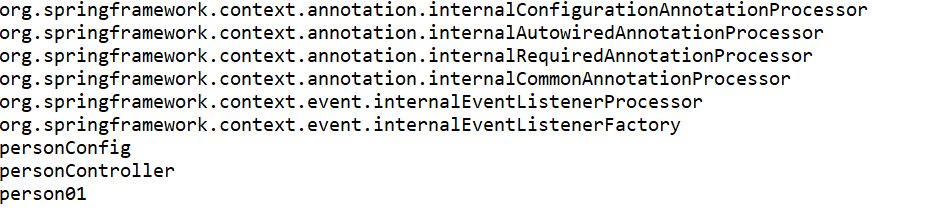
图5
第二种:扫描包的时候可以排除一些注解配置类【excludeFilters 】。
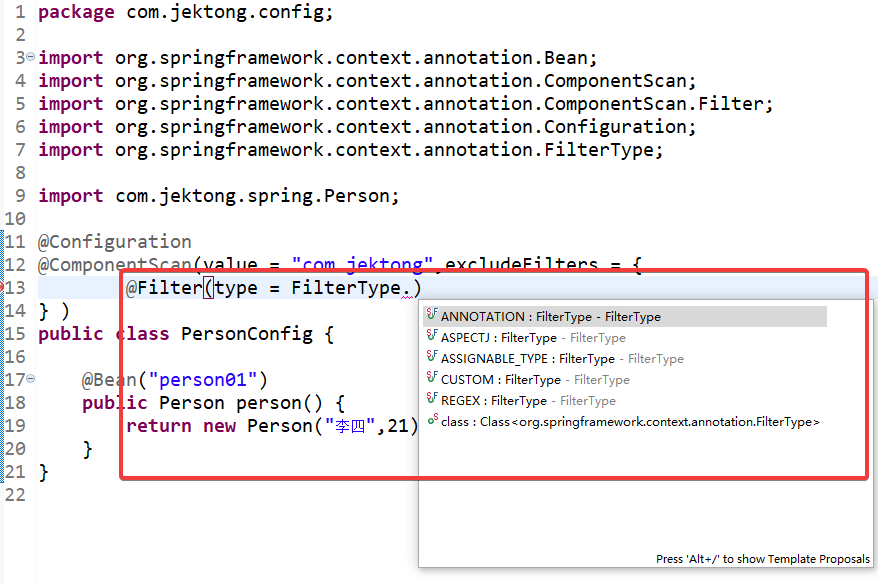
图6
@Filter看上图,有5种不同类型的过滤策略。拿第一种举例,我们需要过滤使用@Controller注解的配置类:
package com.jektong.config;

import org.springframework.context.annotation.Bean;
import org.springframework.context.annotation.ComponentScan;
import org.springframework.context.annotation.ComponentScan.Filter;
import org.springframework.context.annotation.Configuration;
import org.springframework.context.annotation.FilterType;
import org.springframework.stereotype.Controller;

import com.jektong.spring.Person;

@Configuration
@ComponentScan(value = "com.jektong",excludeFilters = {
        @Filter(type = FilterType.ANNOTATION,value= {Controller.class})
} )
public class PersonConfig {

    @Bean("person01")
    public Person person() {
        return new Person("李四",21);
    }
}
测试看一下发现图2中的personController不会交给Spring容器去管理了:
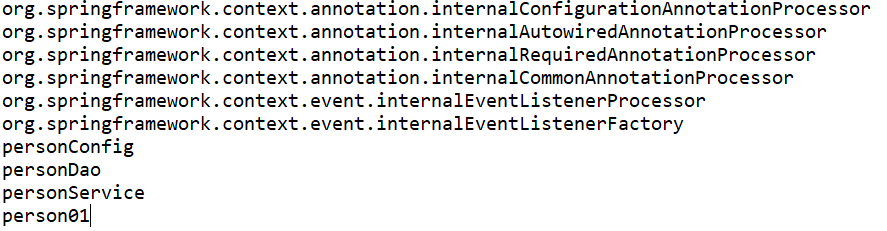
图7
上面的图6展示出5种不同类型的过滤策略,上面介绍了注解类型(FilterType.ANNOTATION),还有四种:
重点看一下CUSTOM自定义扫描策略。

从源码看,自定义扫描注解类型需要实现**TypeFilter接口,下面就写一个实现类MyFilter.java:**在实现类中可以自定义配置规则:
package com.jektong.config;

import java.io.IOException;

import org.springframework.core.io.Resource;
import org.springframework.core.type.AnnotationMetadata;
import org.springframework.core.type.ClassMetadata;
import org.springframework.core.type.classreading.MetadataReader;
import org.springframework.core.type.classreading.MetadataReaderFactory;
import org.springframework.core.type.filter.TypeFilter;

public class MyFilter implements TypeFilter {

    @Override
    public boolean match(MetadataReader metadataReader, MetadataReaderFactory metadataReaderFactory)
            throws IOException {
        // 查看当前类的注解。
        AnnotationMetadata annotationMetadata = metadataReader.getAnnotationMetadata();
        // 查看当前扫描类的信息
        ClassMetadata classMetadata = metadataReader.getClassMetadata();
        // 获取当前类资源
        Resource resource = metadataReader.getResource();
        String className = classMetadata.getClassName();
        System.out.println("className===>" + className);
        // 只要类名包含er则注册Spring容器
        if(className.contains("er")) {
            return true;
        }
        return false;
    }
}
测试:
PersonConfig 中进行扫描:
package com.jektong.config;

import org.springframework.context.annotation.Bean;
import org.springframework.context.annotation.ComponentScan;
import org.springframework.context.annotation.ComponentScan.Filter;
import org.springframework.context.annotation.Configuration;
import org.springframework.context.annotation.FilterType;
import org.springframework.stereotype.Controller;

import com.jektong.service.PersonService;
import com.jektong.spring.Person;

@Configuration
@ComponentScan(value = "com.jektong",includeFilters  = {
        @Filter(type = FilterType.CUSTOM,value= {MyFilter.class})
},useDefaultFilters = false )
public class PersonConfig {

    @Bean("person01")
    public Person person() {
        return new Person("李四",21);
    }
}
可以看出扫描出包下面的类只要带“er”的全部扫描出来,并配置给Spring容器:

ASSIGNABLE_TYPE:按照指定的类型去加载对应配置类:
package com.jektong.config;

import org.springframework.context.annotation.Bean;
import org.springframework.context.annotation.ComponentScan;
import org.springframework.context.annotation.ComponentScan.Filter;
import org.springframework.context.annotation.Configuration;
import org.springframework.context.annotation.FilterType;
import org.springframework.stereotype.Controller;

import com.jektong.service.PersonService;
import com.jektong.spring.Person;

@Configuration
@ComponentScan(value = "com.jektong",includeFilters  = {
        @Filter(type = FilterType.ASSIGNABLE_TYPE,value= {PersonService.class})
},useDefaultFilters = false )
public class PersonConfig {

    @Bean("person01")
    public Person person() {
        return new Person("李四",21);
    }
}
尽管我们将PersonService.java上的注解去掉,使用ASSIGNABLE_TYPE依然会加载出来(自行测试)。
ASPECTJ与REGEX基本不用,不用了解。
以上就是**@ComponentScan**的具体用法,该兴趣的话可以看一下源码。
版权归原作者 爪哇斗罗 所有, 如有侵权,请联系我们删除。