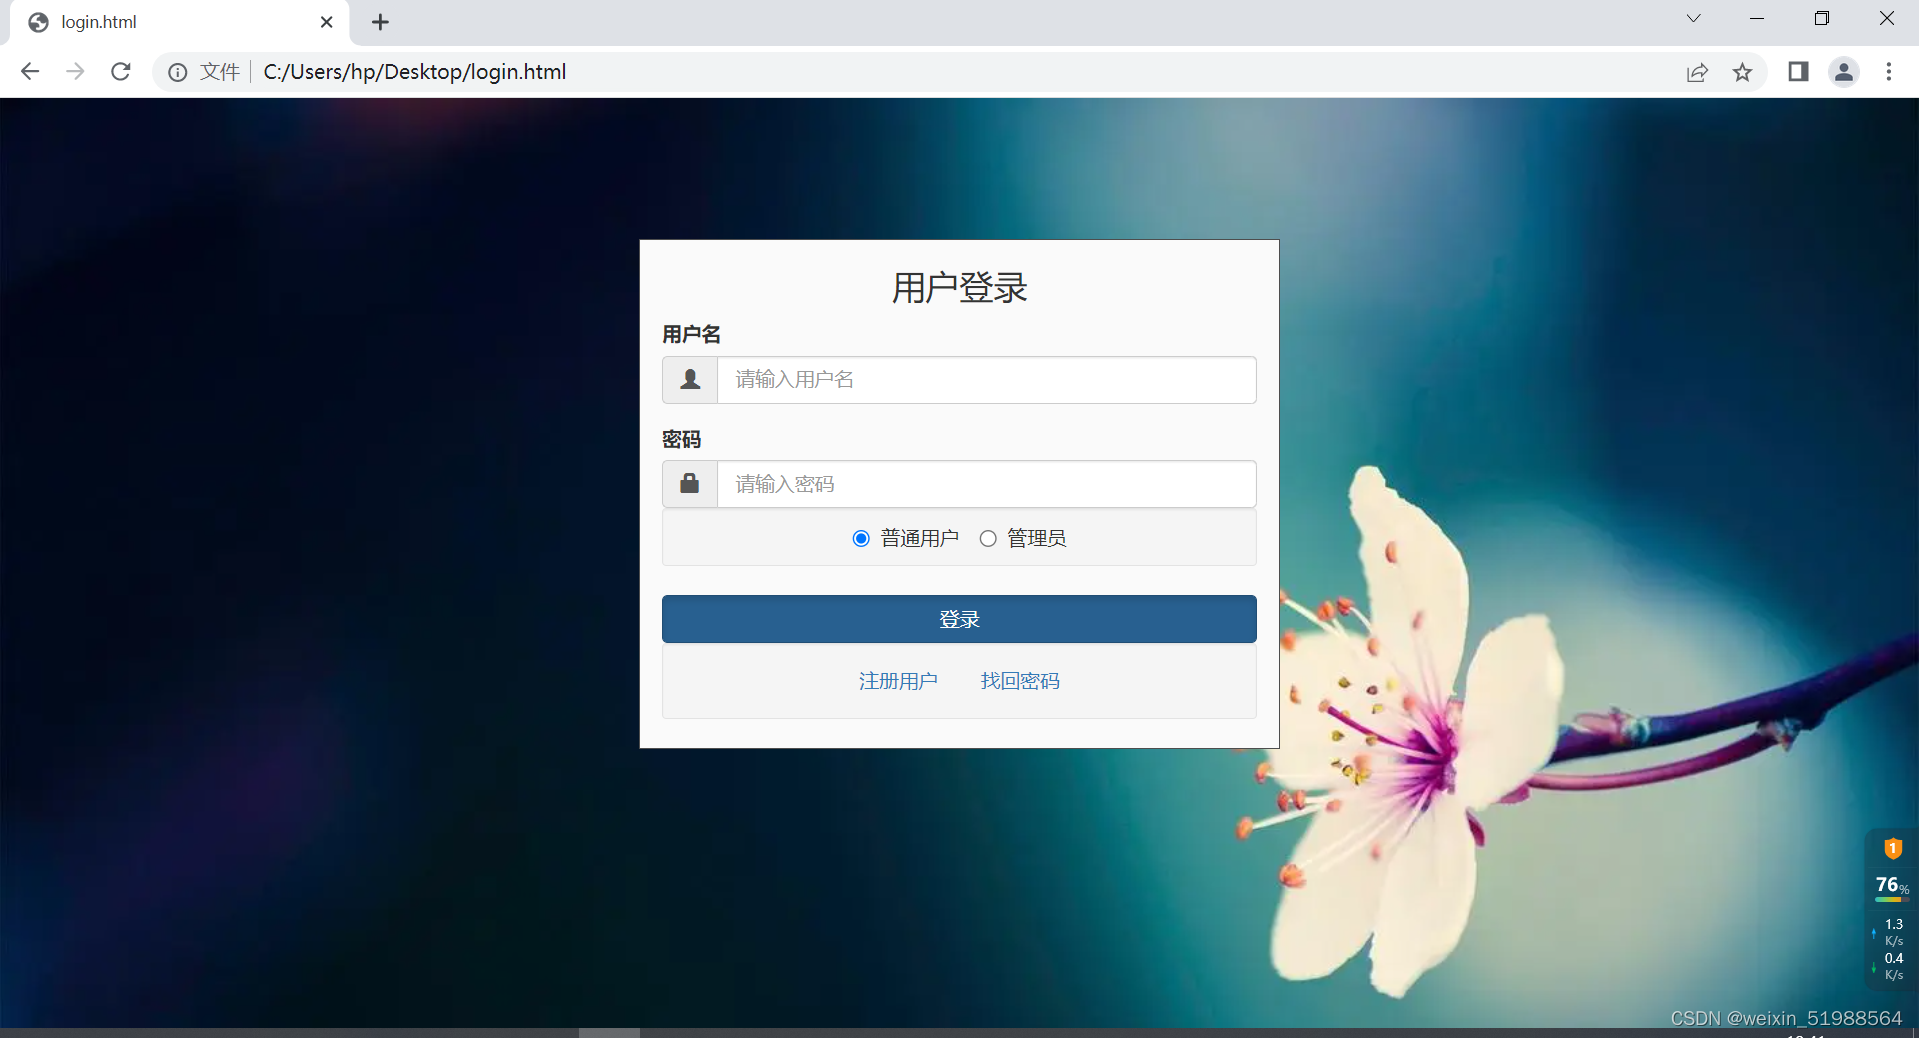
一、使用bootstrap框架写一个简易的前端登录页面。
先上截图

下面开始记录本人使用bootstrap框架写这个登录页面的过程
1、bootstrap需要的配置文件
<!-- 新 Bootstrap 核心 CSS 文件 -->
<link href="https://cdn.staticfile.org/twitter-bootstrap/3.3.7/css/bootstrap.min.css" rel="stylesheet">

<!-- jQuery文件。务必在bootstrap.min.js 之前引入 -->
<script src="https://cdn.staticfile.org/jquery/2.1.1/jquery.min.js"></script>

<!-- 最新的 Bootstrap 核心 JavaScript 文件 -->
<script src="https://cdn.staticfile.org/twitter-bootstrap/3.3.7/js/bootstrap.min.js"></script>
** 2、如何修改背景图片**
body
        {
            background-image:url(C:/Users/hp/Desktop/01.webp);//此处可修改背景图片
            background-size:cover;
            background-repeat: no-repeat;
        }
3、如何写一个图标与输入框附合的表单
例如这样 
<div class="input-group">
                            <span class="input-group-addon"><i class="glyphicon glyphicon-user"></i></span>
                            <input type="text" class="form-control" id="username" placeholder="请输入用户名">
                         </div>
** 4、如何写一组单选框**
<div class="well well-sm" style="text-align:center;">
                        <label class="radio-inline">
                            <input type="radio" name="optionsRadios" id="optionsRadios1" value="option1" checked> 普通用户
                        </label>
                        <label class="radio-inline">
                            <input type="radio"name="optionsRadios"id="optionsRadios1"values="option2">管理员
                        </label>
                    </div>
5、最后附上完整代码:
<!DOCTYPE html> <!--告知浏览器是哪一个版本-->
<html>
    <head>
        <meta charset="utf-8"> <!--定义页面使用编码-->
        <meta name="viewport" content="width=device-width, initial-scale=1.0,maximum-scale=1.0, user-scalable=no"><!--适应手机-->
<!-- 新 Bootstrap 核心 CSS 文件 -->
<link href="https://cdn.staticfile.org/twitter-bootstrap/3.3.7/css/bootstrap.min.css" rel="stylesheet">

<!-- jQuery文件。务必在bootstrap.min.js 之前引入 -->
<script src="https://cdn.staticfile.org/jquery/2.1.1/jquery.min.js"></script>

<!-- 最新的 Bootstrap 核心 JavaScript 文件 -->
<script src="https://cdn.staticfile.org/twitter-bootstrap/3.3.7/js/bootstrap.min.js"></script>

<!-- css样式表 -->
<style>
    body
        {
            background-image:url(C:/Users/hp/Desktop/01.webp);
            background-size:cover;
            background-repeat: no-repeat;
        }
    .loginform{
        /*上边界距离*/
        margin-top: 100px;
    }

</style>

    </head>
<body>
<div class="loginform">
    <!-- <h1 class="text-center">电子相册系统</h1> -->
    <div class="container-fluid">
        <div class="row bg">
            <div class="col-md-4 col-md-offset-4" style="border: #4d4d4d solid 1px;background-color: hsl(0, 0%, 98%);">
                <form class="form-container" role="form">
                    <h3 class="text-center">用户登录</h3>
                    <div class="form-group">
                        <label for="username">用户名 </label>
                        <div class="input-group">
                            <span class="input-group-addon"><i class="glyphicon glyphicon-user"></i></span>
                            <input type="text" class="form-control" id="username" placeholder="请输入用户名">
                         </div>
                    </div>

                    <div class="form-group">
                        <label for="password">密码</label>
                        <div class="input-group">
                            <span class="input-group-addon"><i class="glyphicon glyphicon-lock"></i></span>
                            <input type="password" class="form-control" id="password" placeholder="请输入密码">
                    </div>

                    <div class="well well-sm" style="text-align:center;">
                        <label class="radio-inline">
                            <input type="radio" name="optionsRadios" id="optionsRadios1" value="option1" checked> 普通用户
                        </label>
                        <label class="radio-inline">
                            <input type="radio"name="optionsRadios"id="optionsRadios1"values="option2">管理员
                        </label>
                    </div>

                    <div>
                        <button class="btn btn-primary btn-block active" id="in" type="submit">登录</button>
                    </div>

                    <div class="well well-sm" style="text-align:center;">
                    <button type="button" class="btn btn-link">注册用户</button>
                    <button type="button" class="btn btn-link">找回密码</button>
                    </div>

                </form>
            </div>
        </div>
    </div>
</div>
</body>
</html>
6、最后的最后,仅以此文记录本新手小白开发电子相册管理系统的过程,如有错误或建议,欢迎指正!感激不尽!
版权归原作者 weixin_51988564 所有, 如有侵权,请联系我们删除。