
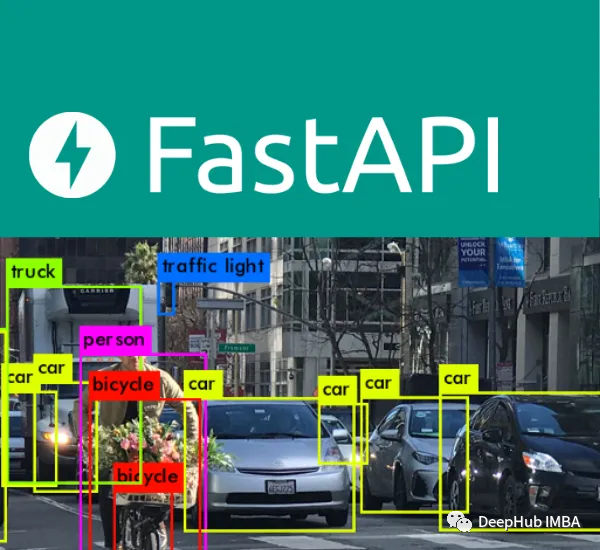
YOLO是You Only Look Once(你只看一次)的缩写,它具有识别图像中的物体的非凡能力,在日常应用中会经常被使用。所以在本文中,我们将介绍如何使用FastAPI的集成YOLOv5,这样我们可以将YOLOv5做为API对外提供服务。
Python有几个web框架,其中最突出的两个是Flask和FastAPI。Flask是一个轻量级且灵活的框架,非常适合中小型web应用程序,而FastAPI是一个相对较新的框架,旨在快速轻松地构建api。
FastAPI
FastAPI是一个现代的web框架,可以用于基于OpenAPI标准使用Python 3.6+构建api。FastAPI提供的代码只需进行最小的调整即可用于生产环境。FastAPI与ASGI(异步服务器网关接口)的集成使其成为最快的Python框架之一。
设置环境
建立虚拟环境是软件开发和数据科学中至关重要的第一步。虽然并不总是强制性的,但强烈建议这样做。虚拟环境隔离了项目的依赖项,确保了稳定性和兼容性。这种做法简化了版本管理,使项目更有组织性和可维护性。简而言之,它是提高项目质量的最佳实践。
python3 -m venv my_project
然后使用命令激活来启动虚拟环境
my_project/bin/activate
训练定制YOLOv5模型
我们这里不介绍详细的训练流程,第一是因为官方有代码可以直接使用,第二是因为我们主要介绍部署的步骤。
这里使用6种食物数据集进行训练,这些数据集在Roboflow上进行了预先注释,可以对鸡翅,炸薯条,饺子,热狗,甜甜圈,华夫饼图像进行分类。如果你有自己的图像并想要创建一个数据集,你也可以在Roboflow上手动注释它们。
python train.py - img 416 - batch 16 - epochs 100 - data {dataset.location}/data.yaml - cfg ./models/custom_yolov5s.yaml - weights '' - name yolov5s_results - cache
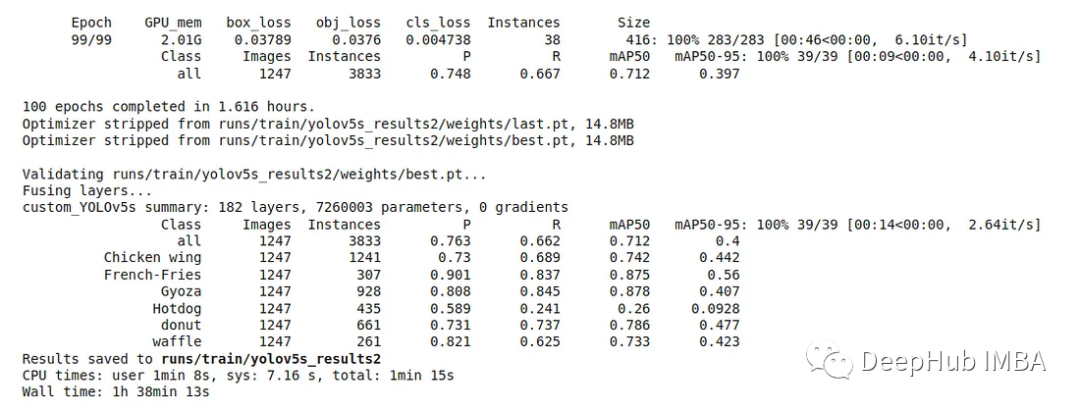
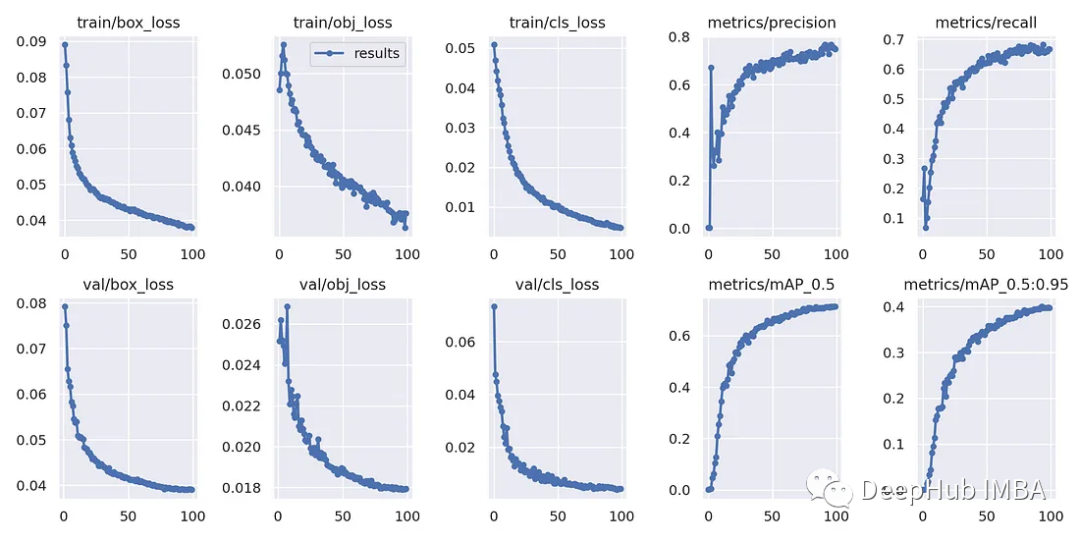
只需要上面一句就可以进行训练,结果如下
精度(P): 0.763(所有类别的平均值)
召回率(R): 0.662(所有类别的平均值)
mAP50 (IoU 0.5的平均精度):0.712(所有类别的平均值)
mAP50-95: 0.4(所有类别的平均值)
使用FastAPI进行模型推理
下面是一个最简单的项目目录结构模板:
 ├── README.md
 ├── main.py # The main program
 ├── model
 │   ├── __init__.py
 │   └── best.pt # Custom training model
 ├── requirements.in # Used to generate requirements.txt
 ├── requirements.txt # Install dependencies: pip install -r requirements.txt
 ├── segmentation.py # Importing the local YOLOv5 and resize images
 └── yolov5 # You can obtain this from https://github.com/ultralytics/yolov5
main.py
这是一个有3个函数:
@app.get(' /notify/v1/health '),这是检查应用程序运行状况的端点。它返回一个带有消息“OK”的JSON响应。这个端点用于检查Kubernetes的readinessProbe和liveessprobe。
@app.post(" /object-to-json "),这个端点处理图像中对象的检测,并以JSON格式返回结果。它需要一个图像文件作为输入。
@app.post(" /object-to-img "),这个端点执行对象检测并返回带有注释对象的图像。它还需要一个图像文件作为输入,并将带注释的图像作为响应发送。
 #import statement
 fromfastapiimportFastAPI, File#building the API
 fromsegmentationimportget_yolov5, get_image_from_bytes#segmentation functions
 fromstarlette.responsesimportResponse#handling API responses
 importio
 fromPILimportImage
 importjson
 fromfastapi.middleware.corsimportCORSMiddleware

 #initialize and obtain the model
 model=get_yolov5()

 #FastAPI application setup
 app=FastAPI(
     title="Custom YOLOV5 Machine Learning API",
     description="""Obtain object value out of image
                     and return image and json result""",
     version="0.0.1",
 )

 #CORS (Cross-Origin Resource Sharing) middleware, allows the API to be accessed from different domains or origins.

 origins= [
     "http://localhost",
     "http://localhost:8000",
     "*"
 ]

 app.add_middleware(
     CORSMiddleware,
     allow_origins=origins,
     allow_credentials=True,
     allow_methods=["*"],
     allow_headers=["*"],
 )

 #Checking health of application, returns “OK” JSON response

 @app.get('/notify/v1/health')
 defget_health():
     """
     Usage on K8S
     readinessProbe:
         httpGet:   path: /notify/v1/health
             port: 80
     livenessProbe:
         httpGet:
             path: /notify/v1/health
             port: 80
     :return:
         dict(msg='OK')
     """
     returndict(msg='OK')


 @app.post("/object-to-json")
 asyncdefdetect_food_return_json_result(file: bytes=File(...)):
     input_image=get_image_from_bytes(file)
     results=model(input_image)
     detect_res=results.pandas().xyxy[0].to_json(orient="records")  # JSON img1 predictions
     detect_res=json.loads(detect_res)
     return {"result": detect_res}


 @app.post("/object-to-img")
 asyncdefdetect_food_return_base64_img(file: bytes=File(...)):
     input_image=get_image_from_bytes(file)
     results=model(input_image)
     results.render()  # updates results.imgs with boxes and labels
     forimginresults.imgs:
         bytes_io=io.BytesIO()
         img_base64=Image.fromarray(img)
         img_base64.save(bytes_io, format="jpeg")
     returnResponse(content=bytes_io.getvalue(), media_type="image/jpeg")
segmentation.py定义了2个方法:
1、Get_yolov5():这是yolov5可以使用定制模型的地方。
Model = torch.hub.load('。/yolov5 ', ' custom ', path= ' ./model/best.pt ', source= ' local '):它从本地目录加载自定义yolov5模型。' custom '参数指定模型架构,' ./model/best.pt '是定制训练模型文件的路径,' source '表示模型位于本地。conf = 0.5:设置对象检测的置信度阈值。只有置信水平大于0.5的对象才会被包含在检测结果中。
2、Get_image_from_bytes():调整图像大小以确保与模型期望的兼容性。
input_image = image .open(io.BytesIO(binary_image)).convert(" RGB "):它读取二进制图像数据并将其转换为RGB格式的PIL (Python Imaging Library)图像。它计算图像的宽度和高度,并确定调整因子以适应指定的max_size。Resized_image是通过根据计算的尺寸调整输入图像的大小来创建的,确保它不超过最大大小。
启动项目
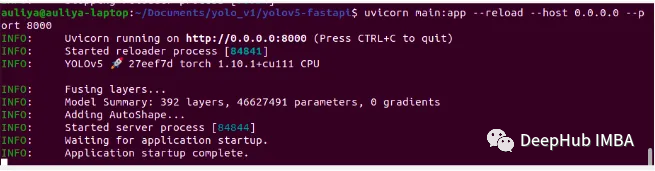
在终端上输入以下命令
uvicorn main:app — reload — host 0.0.0.0 — port 8000
成功运行程序时,它将看起来像这样
测试结果
在浏览器中打开http://127.0.0.1:8000/docs#/。你应该看到有3个端点的Open API文档:
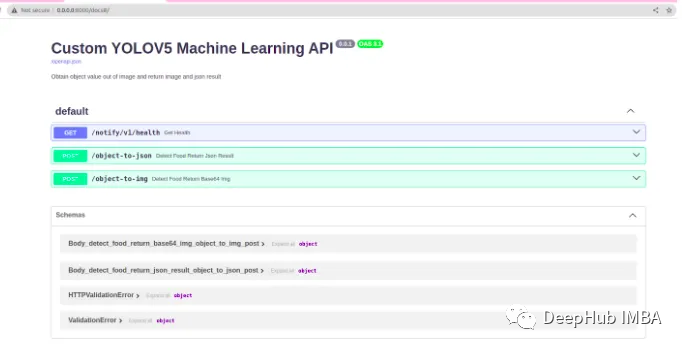
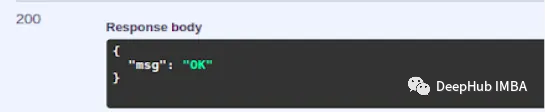
/notify/v1/health 返回一个JSON响应,其中包含消息' OK '。你可以通过点击try it out并执行来检查,输出如下:
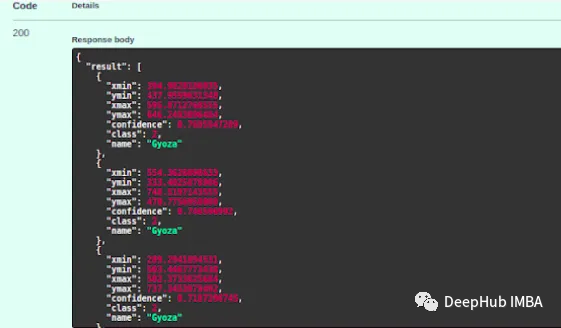
/object-to-json 处理图像中对象的检测,并以JSON格式返回结果。它需要一个图像文件作为输入。
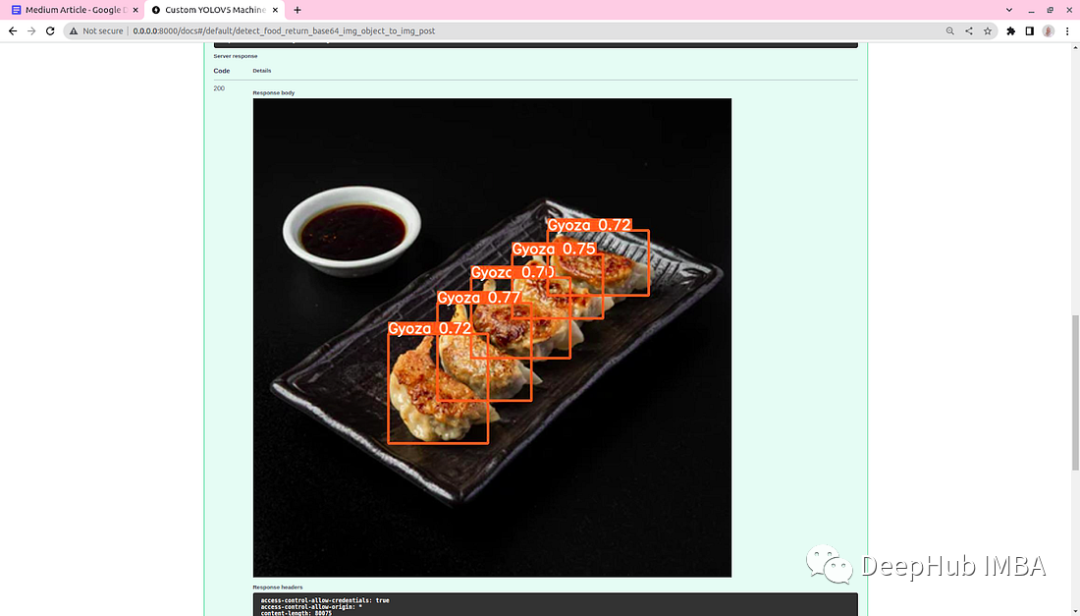
/object-to-img 执行对象检测并返回带有注释对象的图像。它还需要一个图像文件作为输入,并将带注释的图像作为响应发送。
这样我们的程序就完成了
总结
这里我们看到了yolov5模型的部署的完整过程,并且这个过程是可以应用到生产环境的。但是这里我们发现了一个新的命令 'uvicorn'.
Uvicorn 是基于 uvloop 和 httptools 构建的非常快速的 ASGI 服务器。因为 Uvicorn 是一个非常快速、可靠且易于使用的 ASGI 服务器,可以在处理大量并发连接时保持稳定和高效。Uvicorn 还支持 WebSocket 和 HTTP/2 等新特性,它符合 FastAPI 提倡的现代 Web 开发理念。所以使用 Uvicorn 作为 FastAPI 的 Web 服务器是一个很好的选择。
作者:auliyafirdaus