

个人主页: 几分醉意的CSDN博客_传送门
本文目录
💖基于注解的DI
✨概念
基于注解的DI:使用spring提供的注解,完成java对象创建,属性赋值。
注解使用的核心步骤:
1.在源代码加入注解,例如@Component。
2.在spring的配置文件,加入组件扫描器的标签。
✨@Component注解创建对象
@Component: 表示创建对象,对象放到容器中。 作用是
属性:value ,表示对象名称,也就是bean的id属性值位置:在类的上面,表示创建此类的对象。
 @Component(value="myStudent") 等同于
<bean id="myStudent"class="com.ba01.Student"/>
//使用value 指定对象的名称//@Component(value = "myStudent")//省略value@Component("myStudent")//没有提供自定义对象名称, 使用框架的默认对象名称:类名首字母小写//@ComponentpublicclassStudent{privateString name;privateint age;publicStudent(){System.out.println("Student无参数构造方法");}@OverridepublicStringtoString(){return"Student{"+"name='"+ name +'\''+", age="+ age +'}';}}
✨声明组件扫描器
声明组件扫描器:使用注解必须加入这个语句。
<context:component-scanbase-package="注解所在的包名"/>
    component-scan:翻译过来是组件扫描器,组件是java对象。
        属性: base-package 注解在你的项目中的包名。
              框架会扫描这个包和子包中的所有类,找类中的所有注解。
              遇到注解后,按照注解表示的功能,去创建对象, 给属性赋值。
认识了组件扫描器,然后我们来到Spring配置文件来使用它
<?xml version="1.0" encoding="UTF-8"?><beansxmlns="http://www.springframework.org/schema/beans"xmlns:xsi="http://www.w3.org/2001/XMLSchema-instance"xmlns:context="http://www.springframework.org/schema/context"xsi:schemaLocation="http://www.springframework.org/schema/beans
       http://www.springframework.org/schema/beans/spring-beans.xsd
       http://www.springframework.org/schema/context
       https://www.springframework.org/schema/context/spring-context.xsd"><!--声明组件扫描器:使用注解必须加入这个语句
        component-scan:翻译过来是组件扫描器,组件是java对象。
            属性: base-package 注解在你的项目中的包名。
                  框架会扫描这个包和子包中的所有类,找类中的所有注解。
                  遇到注解后,按照注解表示的功能,去创建对象, 给属性赋值。
    --><context:component-scanbase-package="com.b01"/></beans>
注意:最上面的都是一些需要的约束文件,当你把组件扫描器写上去后,也会自动的添加对应的约束文件。
那么接下来我们创建一个测试类,进行测试。
publicclassMyTest{@Testpublicvoidtest01(){String config="applicationContext.xml";ApplicationContext ctx =newClassPathXmlApplicationContext(config);//后面的myStudent是上面@Component注解创建对象时设置的对象名Student student =(Student) ctx.getBean("myStudent");System.out.println("student=="+student);}}
✨创建对象的四个注解
经过刚刚的学习,我们已经了解了@Component注解创建对象的使用方法,那么还有其它的相关注解吗?当然有,下面我们将介绍的是和@Component功能相同的创建对象的注解。
- **
: 放在dao接口的实现类上面,表示创建dao对象,持久层对象,能访问数据库。**@Repository
**2).
@Service
: 放在业务层接口的实现类上面, 表示创建业务层对象, 业务层对象有事务的功能。**
**3.
@Controller
:放在控制器类的上面,表示创建控制器对象。 属于表示层对象。控制器对象能接受请求,把请求的处理结果显示给用户。**
**以上四个注解都能创建对象,但是
@Repository @Service @Controller
有角色说明, 表示对象是分层的。**
✨扫描多个包的三种方式
<?xml version="1.0" encoding="UTF-8"?><beansxmlns="http://www.springframework.org/schema/beans"xmlns:xsi="http://www.w3.org/2001/XMLSchema-instance"xmlns:context="http://www.springframework.org/schema/context"xsi:schemaLocation="http://www.springframework.org/schema/beans
       http://www.springframework.org/schema/beans/spring-beans.xsd
       http://www.springframework.org/schema/context
       https://www.springframework.org/schema/context/spring-context.xsd"><!--声明组件扫描器:使用注解必须加入这个语句
        component-scan:翻译过来是组件扫描器,组件是java对象。
            属性: base-package 注解在你的项目中的包名。
                  框架会扫描这个包和子包中的所有类,找类中的所有注解。
                  遇到注解后,按照注解表示的功能,去创建对象, 给属性赋值。
    --><context:component-scanbase-package="com.b01"/><!--扫描多个包的三种方式--><!--第一种,使用多次组件扫描器--><context:component-scanbase-package="com.b01"/><context:component-scanbase-package="com.b02"/><!--第二种,使用分隔符( ;或,),指定多个包--><context:component-scanbase-package="com.b01;com.b02"/><!--第三种:指定父包--><context:component-scanbase-package="com"/></beans>
✨@Value简单类型属性赋值
@Value: 简单类型属性赋值
属性:value 简单类型属性值
位置:1.在属性定义的上面 ,无需set方法,推荐使用。2.在set方法的上面。
在属性定义的上面定义
packagecom.bjpowernode.ba02;importorg.springframework.beans.factory.annotation.Value;importorg.springframework.stereotype.Component;@Component("myStudent")publicclassStudent{@Value(value ="李四")privateString name ;//括号里面的value也可以省略@Value("20")privateint age;publicStudent(){System.out.println("Student无参数构造方法");}@OverridepublicStringtoString(){return"Student{"+"name='"+ name +'\''+", age="+ age +'}';}}
第二种方式:在set方法的上面
packagecom.bjpowernode.ba02;importorg.springframework.beans.factory.annotation.Value;importorg.springframework.stereotype.Component;@Component("myStudent")publicclassStudent{privateString name ;privateint age;publicStudent(){System.out.println("Student无参数构造方法");}@Value("22")publicvoidsetAge(int age){System.out.println("setAge===="+age);this.age = age;}@OverridepublicStringtoString(){return"Student{"+"name='"+ name +'\''+", age="+ age +'}';}}
✨@Value使用外部属性配置文件
这里我创建了一个名为myconf.properties的配置文件

然后在配置文件输入相应的内容。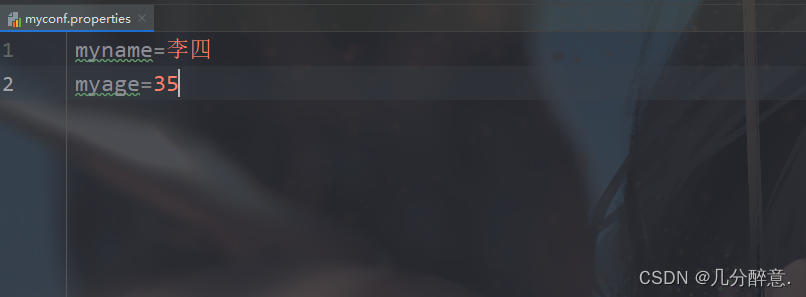
然后我们打开spring配置文件,在spring文件中读取使用它
<?xml version="1.0" encoding="UTF-8"?><beans xmlns="http://www.springframework.org/schema/beans"
       xmlns:xsi="http://www.w3.org/2001/XMLSchema-instance"
       xmlns:context="http://www.springframework.org/schema/context"
       xsi:schemaLocation="http://www.springframework.org/schema/beans
       http://www.springframework.org/schema/beans/spring-beans.xsd
       http://www.springframework.org/schema/context
       https://www.springframework.org/schema/context/spring-context.xsd"><!--声明组件扫描器:使用注解必须加入这个语句
        component-scan:翻译过来是组件扫描器,组件是java对象。
            属性: base-package 注解在你的项目中的包名。
                  框架会扫描这个包和子包中的所有类,找类中的所有注解。
                  遇到注解后,按照注解表示的功能,去创建对象, 给属性赋值。
    --><context:component-scan base-package="com.b01"/><!--读取外部的属性配置文件
        property-placeholder:读取properties这样的文件
    --><context:property-placeholder location="classpath:/myconf.properties"/></beans>
注意:location=“classpath:/类路径”
下一步我们开始还有外部文配置件。
**
语法 :@Value(${"key"})
**
@Component("myStudent")publicclassStudent{//使用外部属性文件中的数据,语法 @Value(${"key"})@Value("${myname}")privateString name ;privateint age;publicStudent(){System.out.println("Student无参数构造方法");}publicvoidsetName(String name){this.name = name;}//使用外部属性文件中的数据@Value("${myage}")publicvoidsetAge(int age){System.out.println("setAge===="+age);this.age = age;}@OverridepublicStringtoString(){return"Student{"+"name='"+ name +'\''+", age="+ age +'}';}}
✨@Autowired引用类型属性赋值
 * @Autowired: spring框架提供的,给引用类型赋值的,使用自动注入原理。
 *             支持byName,byType。默认是byType.
💫byType自动注入
位置:1)在属性定义的上面,无需set方法,推荐使用2)在set方法的上面
创建一个School类
@Component("mySchool")publicclassSchool{@Value("安徽大学")privateString name;@Value("安徽的合肥市")privateString address;publicvoidsetName(String name){this.name = name;}publicvoidsetAddress(String address){this.address = address;}@OverridepublicStringtoString(){return"School{"+"name='"+ name +'\''+", address='"+ address +'\''+'}';}}
在Student类中使用School
@Component("myStudent")publicclassStudent{//默认使用byType@AutowiredprivateSchool school;publicStudent(){System.out.println("Student无参数构造方法");}@OverridepublicStringtoString(){return"Student{"+"name='"+ name +'\''+", age="+ age +", school="+ school +'}';}}
Spring配置文件
<?xml version="1.0" encoding="UTF-8"?><beans xmlns="http://www.springframework.org/schema/beans"
       xmlns:xsi="http://www.w3.org/2001/XMLSchema-instance"
       xmlns:context="http://www.springframework.org/schema/context"
       xsi:schemaLocation="http://www.springframework.org/schema/beans
       http://www.springframework.org/schema/beans/spring-beans.xsd
       http://www.springframework.org/schema/context
       https://www.springframework.org/schema/context/spring-context.xsd"><context:component-scan base-package="com.bjpowernode.ba07"/><!--读取外部的属性配置文件
        property-placeholder:读取properties这样的文件
    --><context:property-placeholder location="classpath:/myconf.properties"/></beans>
测试
publicclassMyTest3{@Testpublicvoidtest01(){String config="applicationContext.xml";ApplicationContext ctx =newClassPathXmlApplicationContext(config);Student student =(Student) ctx.getBean("myStudent");System.out.println("student=="+student);}}
💫byName自动注入
byName自动注入
1.@Autowired:给引用类型赋值。
2.@Qualifer(value=“bean的id”):从容器中找到指定名称的对象,把这个对象赋值给引用类型。
@Component("myStudent")publicclassStudent{//byName@Autowired@Qualifier("mySchool")privateSchool school;publicStudent(){System.out.println("Student无参数构造方法");}@OverridepublicStringtoString(){return"Student{"+"name='"+ name +'\''+", age="+ age +", school="+ school +'}';}}
测试
publicclassMyTest3{@Testpublicvoidtest01(){String config="applicationContext.xml";ApplicationContext ctx =newClassPathXmlApplicationContext(config);Student student =(Student) ctx.getBean("myStudent");System.out.println("student=="+student);}}
💫required属性
 *        属性:required :boolean类型的属性, 默认true
 *             true:spring在启动的时候,创建容器对象时候,会检查引用类型是否赋值成功。
 *                   如果赋值失败, 终止程序执行,并报错。
 *             false:引用类型赋值失败,程序正常执行,不报错。引用类型的值是null
示例: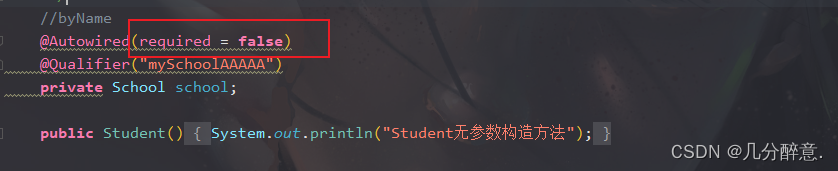
✨@Resource引用类型属性赋值
 * 引用类型
 * @Resource: 来自jdk中,给引用类型赋值的,支持byName,byType.默认是byName
 *             spring支持这个注解的使用。
 *      位置:1)在属性定义的上面,无需set方法, 推荐使用
 *            2)在set方法的上面
 *
 *  说明,使用jdk1.8带有@Resource注解, 高于jdk1.8没有这个@Resource,
 *  需要加入一个依赖。
 *    <dependency>
 *       <groupId>javax.annotation</groupId>
 *       <artifactId>javax.annotation-api</artifactId>
 *       <version>1.3.2</version>
 *     </dependency>
💖投票传送门(欢迎伙伴们投票)
版权归原作者 几分醉意. 所有, 如有侵权,请联系我们删除。