
9 都什么时候了,你还不会整合SSM🤦♂️🤦♂️🤦♂️
👵👵👵需求:
🐱🚀🐱🚀🐱🚀使用ssm框架完成对 account 表的增删改查操作。
💖💖💖最后,框架搭建完后,阿红手写了一个完整的CRUD的demo,请看第9章节···
步骤分析👀👀👀
- 准备数据库和表记录
- 创建web项目
- 编写mybatis在ssm环境中可以单独使用
- 编写spring在ssm环境中可以单独使用
- spring整合mybatis
- 编写springMVC在ssm环境中可以单独使用
- spring整合springMVC
1. 准备数据库和表记录
CREATE TABLE `account` (
`id` int(11) NOT NULL AUTO_INCREMENT,
`name` varchar(32) DEFAULT NULL,
`money` double DEFAULT NULL,
PRIMARY KEY (`id`)) ENGINE=InnoDB AUTO_INCREMENT=3 DEFAULT CHARSET=utf8;
insert  into `account`(`id`,`name`,`money`) values (1,'tom',1000),(2,'jerry',1000);
2. 创建web项目
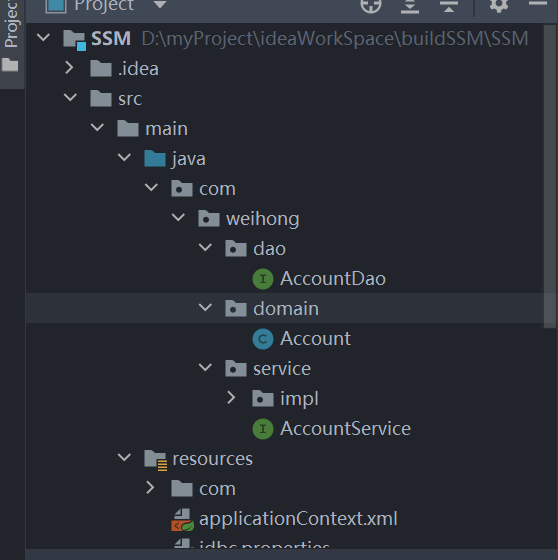
3.编写mybatis在ssm环境中可以单独使用
3.1 导入相关依赖
<packaging>war</packaging><dependencies><!-- 数据库连接驱动--><dependency><groupId>mysql</groupId><artifactId>mysql-connector-java</artifactId><version>5.1.47</version></dependency><!-- 配置数据库连接池--><dependency><groupId>com.alibaba</groupId><artifactId>druid</artifactId><version>1.1.15</version></dependency><!-- mybatis依赖--><dependency><groupId>org.mybatis</groupId><artifactId>mybatis</artifactId><version>3.5.4</version></dependency><!-- junit依赖--><dependency><groupId>junit</groupId><artifactId>junit</artifactId><version>4.12</version><scope>test</scope></dependency>
3.2 创建Account实体
publicclassAccount{private Integer id;private String name;private String money;//省略get和set方法 }
3.3 创建AccountDao接口
/**
     * 查询所有信息
     * @return
     */
     List<Account>findAll();
3.4 创建AccountDao.xml映射文件
<?xml version="1.0" encoding="UTF-8"?><!DOCTYPE mapper PUBLIC "-//mybatis.org//DTD Mapper 3.0//EN""http://mybatis.org/dtd/mybatis-3-mapper.dtd"><mapper namespace="com.weihong.dao.AccountDao"><select id="findAll" resultType="Account">
        select * from account
    </select></mapper>
3.5 创建mybatis核心配置文件
jdbc.properties文件:
jdbc.driver=com.mysql.jdbc.Driver
jdbc.url=jdbc:mysql://127.0.0.1:3306/smd
jdbc.username=root
jdbc.password=root
SqlMapConfig.xml文件:
<?xml version="1.0" encoding="UTF-8"?><!DOCTYPE configuration
        PUBLIC "-//mybatis.org//DTD Config 3.0//EN""http://mybatis.org/dtd/mybatis-3-config.dtd"><configuration><!--    加载配置文件--><properties resource="jdbc.properties"/><!--    给实体重命名,方便在sql.xml配置简单--><typeAliases><package name="com.weihong.domain"/></typeAliases><!--    配置数据量连接信息--><environments default="dev"><environment id="dev"><transactionManager type="JDBC"></transactionManager><dataSource type="POOLED"><property name="driver" value="${jdbc.driver}"/><property name="url" value="${jdbc.url}"/><property name="username" value="${jdbc.username}"/><property name="password" value="${jdbc.password}"/></dataSource></environment></environments><!--    加载映射文件--><mappers><package name="com.weihong.dao"/></mappers></configuration>
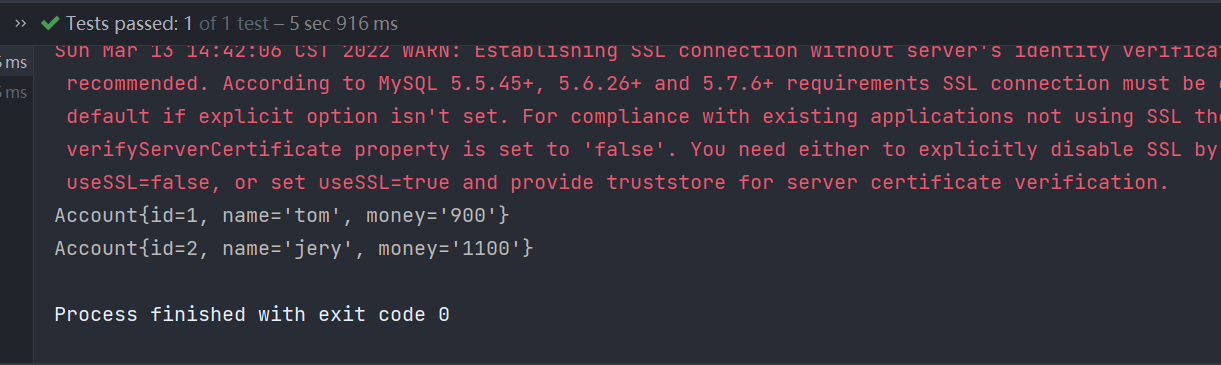
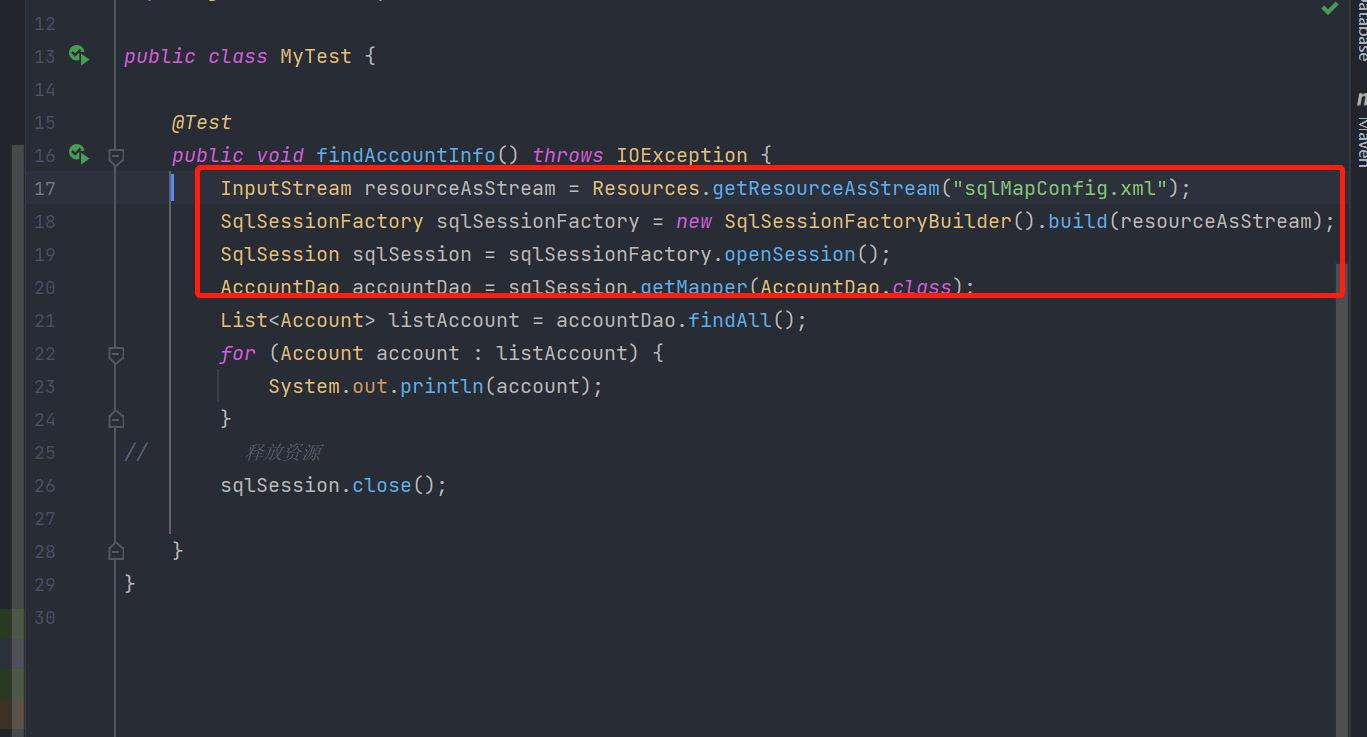
3.6 测试代码
publicclassMyTest{@TestpublicvoidfindAccountInfo()throws IOException {
        InputStream resourceAsStream = Resources.getResourceAsStream("sqlMapConfig.xml");
        SqlSessionFactory sqlSessionFactory =newSqlSessionFactoryBuilder().build(resourceAsStream);
        SqlSession sqlSession = sqlSessionFactory.openSession();
        AccountDao accountDao = sqlSession.getMapper(AccountDao.class);
        List<Account> listAccount = accountDao.findAll();for(Account account : listAccount){
            System.out.println(account);}//        释放资源
        sqlSession.close();}}
3.7 测试结果
4. 编写spring在ssm环境中可以单独使用
4.1相关坐标
<!-- Spring依赖 start--><!-- spring版本--><dependency><groupId>org.springframework</groupId><artifactId>spring-context</artifactId><version>5.2.15.RELEASE</version></dependency><!-- spring切面--><dependency><groupId>org.aspectj</groupId><artifactId>aspectjweaver</artifactId><version>1.8.13</version></dependency><!-- spring-jdbc对jdbc进行封装 --><dependency><groupId>org.springframework</groupId><artifactId>spring-jdbc</artifactId><version>5.0.6.RELEASE</version></dependency><!-- spring-tx:提供事务的支持--><dependency><groupId>org.springframework</groupId><artifactId>spring-tx</artifactId><version>5.2.15.RELEASE</version></dependency><!-- spring测试--><dependency><groupId>org.springframework</groupId><artifactId>spring-test</artifactId><version>5.1.5.RELEASE</version></dependency><!-- spring依赖结束 end-->
4.2 创建AccountService接口
publicinterfaceAccountService{

     List<Account>findAccount();}
4.3 创建AccountServiceImpl实现
@ServicepublicclassAccountServiceImplimplementsAccountService{@Overridepublic List<Account>findAccount(){
        System.out.println("执行了业务方法!");return null;}}
4.4 创建spring核心配置文件
applicationContext.xml:
<?xml version="1.0" encoding="UTF-8"?><beansxmlns="http://www.springframework.org/schema/beans"xmlns:xsi="http://www.w3.org/2001/XMLSchema-instance"xmlns:context="http://www.springframework.org/schema/context"xmlns:tx="http://www.springframework.org/schema/tx"xmlns:aop="http://www.springframework.org/schema/aop"xsi:schemaLocation="
           http://www.springframework.org/schema/beans
        http://www.springframework.org/schema/beans/spring-beans.xsd
           http://www.springframework.org/schema/context
        http://www.springframework.org/schema/context/spring-context.xsd
        http://www.springframework.org/schema/tx
        http://www.springframework.org/schema/tx/spring-tx.xsd
        http://www.springframework.org/schema/aop
        http://www.springframework.org/schema/aop/spring-aop.xsd"><!--注解组件扫描--><context:component-scanbase-package="com.weihong"/></beans>
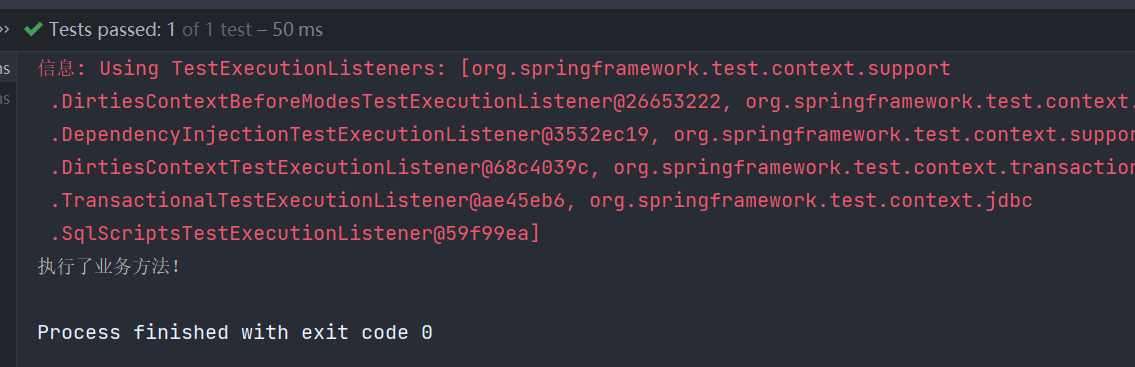
4.5 测试代码
@RunWith(SpringJUnit4ClassRunner.class)@ContextConfiguration("classpath:applicationContext.xml")publicclassSpringTest{@Autowiredprivate AccountService accountService;@Testpublicvoidtest1(){
        accountService.findAccount();}}
4.6 测试结果
5. spring整合mybatis
5.1 整合思想:
将mybatis接口代理对象的创建权交给spring管理,我们就可以把dao的代理对象注入到service中,此时也就完成了spring与mybatis的整合了。
也就是摒弃这几行代码,通过代理对象注入到service中。
5.2 导入整合包
<!--spring整合mybatis --><dependency><groupId>org.mybatis</groupId><artifactId>mybatis-spring</artifactId><version>1.3.1</version></dependency>
5.3 spring配置文件管理mybatis
注意:此时可以将mybatis主配置文件删除。
<?xml version="1.0" encoding="UTF-8"?><beansxmlns="http://www.springframework.org/schema/beans"xmlns:xsi="http://www.w3.org/2001/XMLSchema-instance"xmlns:context="http://www.springframework.org/schema/context"xmlns:tx="http://www.springframework.org/schema/tx"xmlns:aop="http://www.springframework.org/schema/aop"xsi:schemaLocation="
           http://www.springframework.org/schema/beans
        http://www.springframework.org/schema/beans/spring-beans.xsd
           http://www.springframework.org/schema/context
        http://www.springframework.org/schema/context/spring-context.xsd
        http://www.springframework.org/schema/tx
        http://www.springframework.org/schema/tx/spring-tx.xsd
        http://www.springframework.org/schema/aop
        http://www.springframework.org/schema/aop/spring-aop.xsd"><!--注解组件扫描--><context:component-scanbase-package="com.weihong"/><!--    spring整合mybatis start___ --><!--    加载配置文件 --><context:property-placeholderlocation="classpath:jdbc.properties"/><!--利用阿里巴巴德鲁伊druid连接数据库--><beanid="dataSource"class="com.alibaba.druid.pool.DruidDataSource"><propertyname="driverClassName"value="${jdbc.driver}"/><propertyname="url"value="${jdbc.url}"/><propertyname="username"value="${jdbc.username}"/><propertyname="password"value="${jdbc.password}"/></bean><!--    SqlSessionFactory创建交给spring的IOC容器--><beanid="sessionFactoryBean"class="org.mybatis.spring.SqlSessionFactoryBean"><!--    数据库环境配置--><propertyname="dataSource"ref="dataSource"/><!--    类型别名配置--><propertyname="typeAliasesPackage"value="com.weihong.domain"/><!--如果要引入mybatis主配置文件,可以通过如下配置 --><!-- <property name="configLocation" value="classpath:SqlMapConfig.xml"/> --></bean><!--    映射接口扫描配置,由spring创建代理对象,交给IOC容器 --><beanclass="org.mybatis.spring.mapper.MapperScannerConfigurer"><propertyname="basePackage"value="com.weihong.dao"/></bean></beans>
5.4 修改AccountServiceImpl
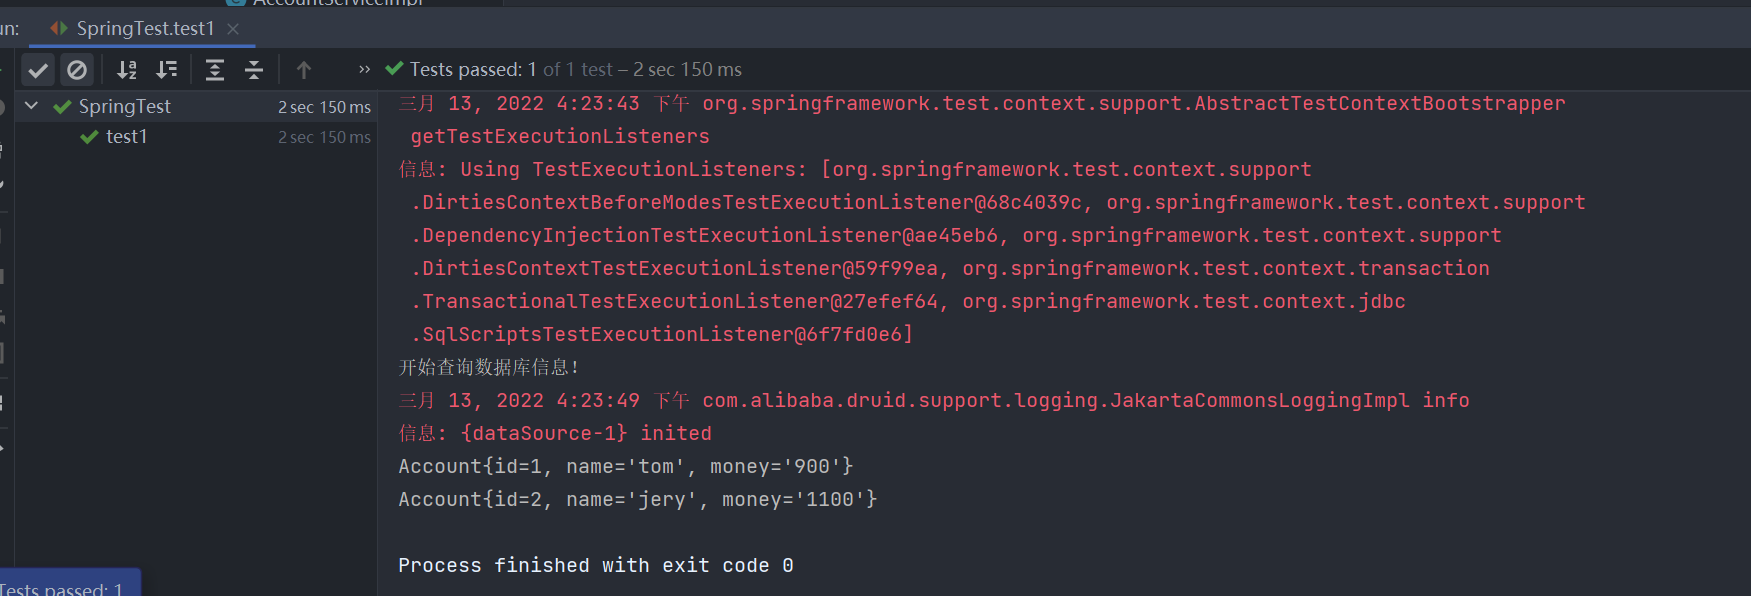
@ServicepublicclassAccountServiceImplimplementsAccountService{@Autowiredprivate AccountDao accountDao;@Overridepublic List<Account>findAccount(){
        System.out.println("开始查询数据库信息!");
        List<Account> list = accountDao.findAll();return list;}}
5.5 运行结果
6. 配置springMVC在ssm环境中可以单独使用
访问到controller里面的方法查询所有账户,并跳转到list.jsp页面进行列表展示
6.1 导入相关依赖
<!-- spring mvc 依赖 start--><!-- 引入spring MVC --><dependency><groupId>org.springframework</groupId><artifactId>spring-webmvc</artifactId><version>5.1.5.RELEASE</version></dependency><!-- 引入jsp依赖--><dependency><groupId>javax.servlet</groupId><artifactId>javax.servlet-api</artifactId><version>3.1.0</version></dependency><dependency><groupId>javax.servlet.jsp</groupId><artifactId>jsp-api</artifactId><version>2.2</version></dependency><!-- 引入spring的el表达式--><dependency><groupId>jstl</groupId><artifactId>jstl</artifactId><version>1.2</version></dependency>
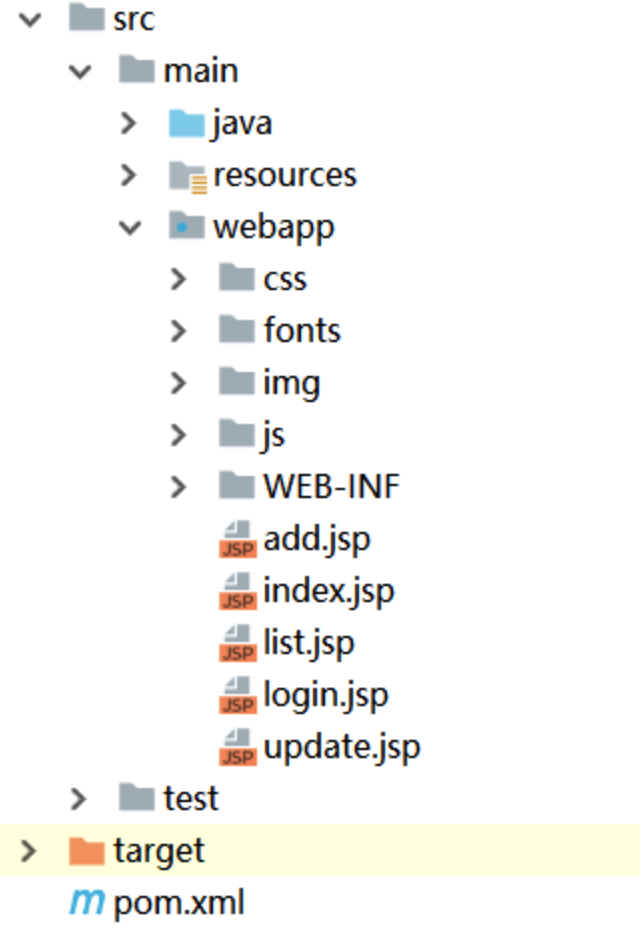
6.2 导入页面资源
6.3 配置前端控制器DispathcerServlet
<?xml version="1.0" encoding="UTF-8"?><web-appxmlns="http://xmlns.jcp.org/xml/ns/javaee"xmlns:xsi="http://www.w3.org/2001/XMLSchema-instance"xsi:schemaLocation="http://xmlns.jcp.org/xml/ns/javaee http://xmlns.jcp.org/xml/ns/javaee/web-app_4_0.xsd"version="4.0"><!--前端控制器--><servlet><servlet-name>DispatcherServlet</servlet-name><servlet-class>org.springframework.web.servlet.DispatcherServlet</servlet-class><!-- web项目启动,让其去加载spring-mvc的配置文件 --><init-param><param-name>contextConfigLocation</param-name><param-value>classpath:spring-mvc.xml</param-value></init-param><!-- 加载顺序--><load-on-startup>2</load-on-startup></servlet><!--/会匹配到所有的访问路径,但是不会匹配到像*.jsp这样的方法url /login /add /update /a.jsp(带后缀名的拦截不到)--><!--/和/*的区别--><servlet-mapping><servlet-name>DispatcherServlet</servlet-name><url-pattern>/</url-pattern></servlet-mapping><!-- post中文处理--><filter><filter-name>CharacterEncodingFilter</filter-name><filter-class>org.springframework.web.filter.CharacterEncodingFilter</filter-class><init-param><param-name>encoding</param-name><param-value>utf-8</param-value></init-param></filter><filter-mapping><filter-name>CharacterEncodingFilter</filter-name><url-pattern>/*</url-pattern></filter-mapping><!-- web异常处理机制--><error-page><error-code>404</error-code><location>/404.jsp</location></error-page><error-page><error-code>500</error-code><location>/500.jsp</location></error-page><!-- spring 与 web容器整合--><listener><listener-class>org.springframework.web.context.ContextLoaderListener</listener-class></listener><context-param><param-name>contextConfigLocation</param-name><param-value>classpath:applicationContext.xml</param-value></context-param></web-app>
6.4 AccountController和 list.jsp
@ControllerpublicclassAccountController{@RequestMapping("/findAll")public String findAll(Model model){
        Account account =newAccount();
        List<Account> list =newArrayList<>();
        account.setId(1);
        account.setName("张三");
        account.setMoney("1000");
        list.add(account);
        model.addAttribute("list",list);return"list";}}
<c:forEach items="${list}" var="account"><tr><td><input type="checkbox" name="ids" value="${account.id}"></td><td>${account.id}</td><td>${account.name}</td><td>${account.money}</td><td><a class="btn btn-default btn-sm" href="${pageContext.request.contextPath}/account/findById?id=${account.id}">修改</a> <a class="btn btn-default btn-sm" href="">删除</a></td></tr></c:forEach>
6.5 配置springMVC核心配置文件
<?xml version="1.0" encoding="UTF-8"?><beansxmlns="http://www.springframework.org/schema/beans"xmlns:mvc="http://www.springframework.org/schema/mvc"xmlns:context="http://www.springframework.org/schema/context"xmlns:xsi="http://www.w3.org/2001/XMLSchema-instance"xsi:schemaLocation="http://www.springframework.org/schema/beans
    http://www.springframework.org/schema/beans/spring-beans.xsd
    http://www.springframework.org/schema/mvc
    http://www.springframework.org/schema/mvc/spring-mvc.xsd
    http://www.springframework.org/schema/context
    http://www.springframework.org/schema/context/spring-context.xsd"><!--   1. 注解扫描--><context:component-scanbase-package="com.weihong.controller"/><!--    2. mvc注解增强 --><mvc:annotation-driven/><!--    3.视图解析 --><beanclass="org.springframework.web.servlet.view.InternalResourceViewResolver"><propertyname="prefix"value="/"/><propertyname="suffix"value=".jsp"/></bean><!--    4.实现静态资源映射--><!--    方式一:所有静态资源全解开--><mvc:default-servlet-handler/><!--    方式二:指定资源--><!--    <mvc:resources mapping="/js/**" location="/js/" />--></beans>
7. spring整合springMVC
7.1 整合思想
spring和springMVC其实根本就不用整合,本来就是一家。
但是我们需要做到spring和web容器整合,让web容器启动的时候自动加载spring配置文件,web容器销毁的时候spring的ioc容器也销毁。
7.2 spring和web容器整合
ContextLoaderListener加载【掌握】
可以使用spring-web包中的ContextLoaderListener监听器,可以监听servletContext容器的创建和销毁,来同时创建或销毁IOC容器。
<!-- spring 与 web容器整合--><listener><listener-class>org.springframework.web.context.ContextLoaderListener</listener-class></listener><context-param><param-name>contextConfigLocation</param-name><param-value>classpath:applicationContext.xml</param-value></context-param>
7.3 修改AccountController
@ControllerpublicclassAccountController{@Autowiredprivate AccountService accountService;@RequestMapping("/findAll")public String findAll(Model model){
        List<Account> account = accountService.findAccount();
        model.addAttribute("list",account);return"list";}}
8. spring配置声明式事务
<!-- spring的声明式事务--><!--1.事务管理器--><bean id="dataSourceTransactionManager"class="org.springframework.jdbc.datasource.DataSourceTransactionManager"><property name="dataSource" ref="dataSource"/></bean><!--2.开始事务注解的支持--><tx:annotation-driven/>
9. 框架演示
❤❤❤最后为了,框架的完整性,阿红特地写了一个demo
✨✨框架适用于毕业设计、或者大作业,需要的私信博主,或者直接下载也行
🎃项目功能有:
- 查询账户所有基本信息
- 实现账户信息的修改
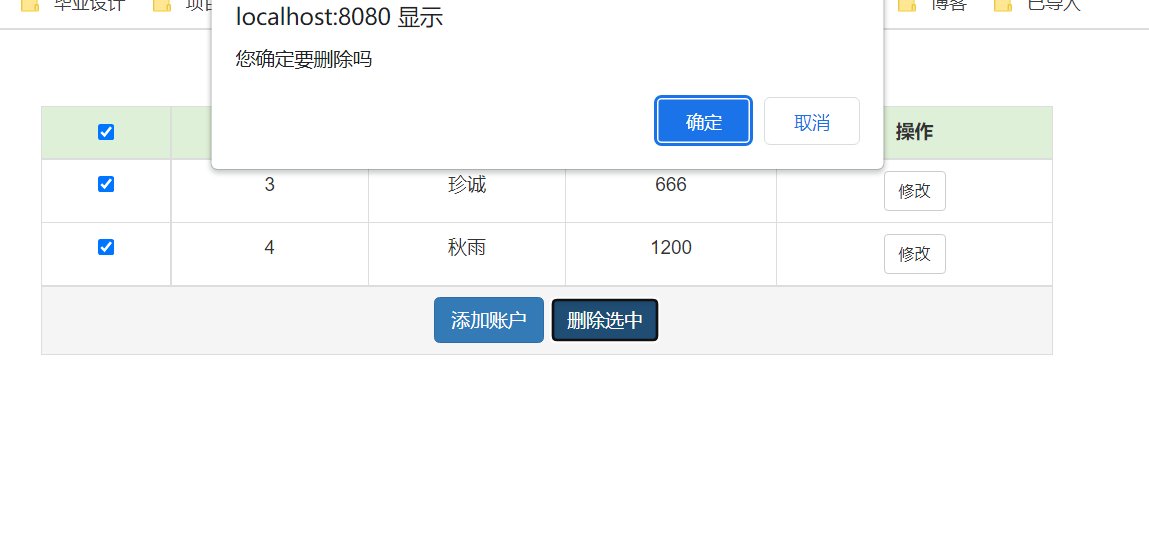
- 实现单条或多条信息的删除
🥠运行后项目主页:

🍿查询所有账户信息页面:

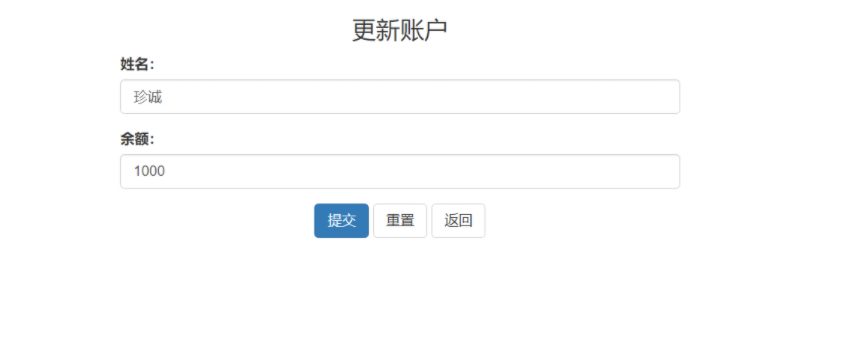
🥞修改对应账户信息页面
- 跳转页面,并查询出对应的数据进行回显
🏎可多选或单选删除对应账户信息
💖💖💖都看到这了,动动小手点个关注吧💖💖💖
💖💖💖都看到这了,动动小手点个关注吧💖💖💖
💖💖💖都看到这了,动动小手点个关注吧💖💖💖
以上均为所有SSM的配置整合,整理不易,喜欢的请关注关注阿红。最后附上整合好的框架源码:源码地址

版权归原作者 程序员阿红 所有, 如有侵权,请联系我们删除。