
简介
Node-RED是一款可以进行可视化编程的低代码工具, 在快速构建原型和做小型应用有着较大优势. 在Node-RED中构建图形化(GUI)界面通常使用Dashboard完成, 其UI简约好看, 但其界面无法自定义, 只能使用现有的节点组件, 对于特殊界面无法满足. 因此Node-RED社区推出了uibuilder. 其可以使用HTML/JS/CSS等自定义构建页面, 同时也可以引入其它框架(Vue, React等)和组件库(Vue-Bootstrap等), 在通讯层面则通过封装的socket.io与Node-RED通讯. 在本文中就uibuilder与Node-RED的使用做出简要说明.
uibuilder安装
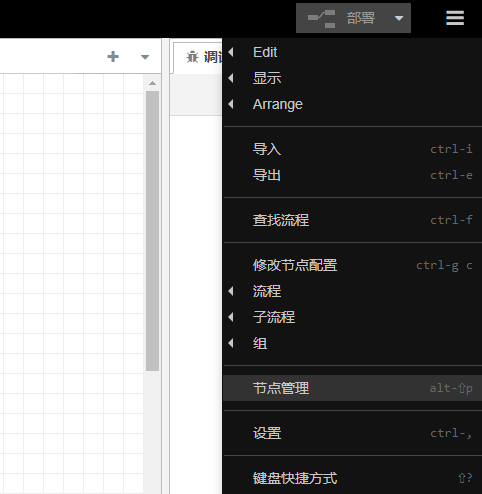
- 点击右上角打开菜单, 进入节点管理页面
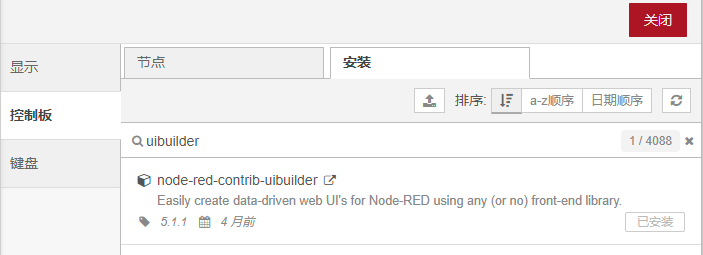
- 点击安装, 在输入框输入uibuilder, 点击安装
 [注] 如果安装遇到问题, 切换网络再次尝试, 如果仍有问题, 可以参照官网安装教程
uibuilder初始项目解析
实例化uibuilder
从左侧找到uibuilder节点, 双击进行配置.
URL为访问地址, 不可重复. 配置完成后, 点击完成.
再点击部署后, uibuilder即可正常使用. 访问对应的URL即可看到如下页面.
文件结构
如果Template 选择的是 ‘Blank template, no framework’ 即 空白模板, 不使用框架. 则uibuilder对于该节点仅有三个文件
index.html页面结构index.js完成对应功能index.css页面样式(美化)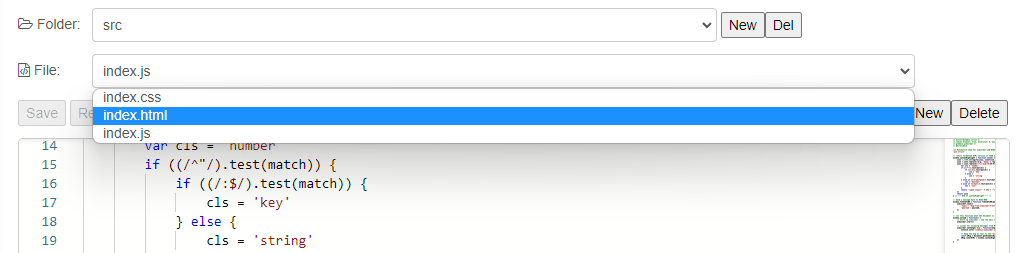
页面结构
<!doctypehtml><htmllang="en"><head><metacharset="utf-8"><metaname="viewport"content="width=device-width, initial-scale=1"><title>Blank template - Node-RED uibuilder</title><metaname="description"content="Node-RED uibuilder - Blank template"><linkrel="icon"href="./images/node-blue.ico"><linktype="text/css"rel="stylesheet"href="./index.css"media="all"></head><bodyclass="uib"><h1>uibuilder Blank Template</h1><buttononclick="fnSendToNR('A message from the sharp end!')">Send a msg back to Node-RED</button><preid="msg"class="syntax-highlight">Waiting for a message from Node-RED</pre><scriptsrc="../uibuilder/vendor/socket.io/socket.io.js"></script><scriptsrc="./uibuilderfe.min.js"></script><scriptsrc="./index.js"></script></body></html>
该HTML分为两部分
<head>
与
<body>
.
<head>
制定页面的元信息, 标题/ICON/引入样式等.
<body>
为页面实际主体, 最主要的是
<button>
与
<pre>
;
<button>
即为按钮, 其
onclick
(点击)绑定为
fnSendToNR('A message from the sharp end!')
. 当点击该按钮时, 会调用函数
fnSendToNR
, 并且以
'A message from the sharp end!'
为参数.
<pre>
为后续显示消息的容器, 绑定
id
为
msg
, 后续会根据
id
查找到该元素进行操作.
其次引入了三个外部的JavaScript文件,
socket.io.js
用于和Node-RED通信,
uibuilderfe.min.js
为
uibuilder
自身依赖提供简单易用接口,
index.js
为自定义的JavaScript文件.
页面功能
// Send a message back to Node-RED
window.fnSendToNR = function fnSendToNR(payload) {
    uibuilder.send({
        'topic': 'msg-from-uibuilder-front-end',
        'payload': payload,
    })
}
// run this function when the document is loaded
window.onload = function() {
    // Start up uibuilder - see the docs for the optional parameters
    uibuilder.start()

    // Listen for incoming messages from Node-RED
    uibuilder.onChange('msg', function(msg){
        console.info('[indexjs:uibuilder.onChange] msg received from Node-RED server:', msg)

        // dump the msg as text to the "msg" html element
        const eMsg = document.getElementById('msg')
        eMsg.innerHTML = window.syntaxHighlight(msg)
    })
}
index.js
中较为核心的是两个函数
fnSendToNR
与
window.onload
.
在
index.html
中,
<button>
的
onclick
属性绑定的方法具体实现就在这里. 调用该方法既是调用
uibuild.send
(该接口来自于
uibuilderfe.min.js
), 其向Node-RED发送一个对象, 其中
payload
对应函数的参数, 即
index.html
中的
'A message from the sharp end!'
;
window.onload
为一个回调函数, 当页面加载完成后会调用该函数, 在该函数中, 首先通过
uibuilder.start()
与Node-RED建立
socket.io
通信, 之后通过
uibuilder.onChange('msg', function(msg){ ... })
监听来自Node-RED的数据. 收到数据后, 首先通过
document.getElementById
获取到放置消息的容器, 之后通过
eMsg.innerHTML = window.syntaxHighlight(msg)
将收到的数据放入该容器.
页面样式
@importurl("./uib-styles.css");
页面样式较为简单, 仅引入了uibuilder公共样式.
案例
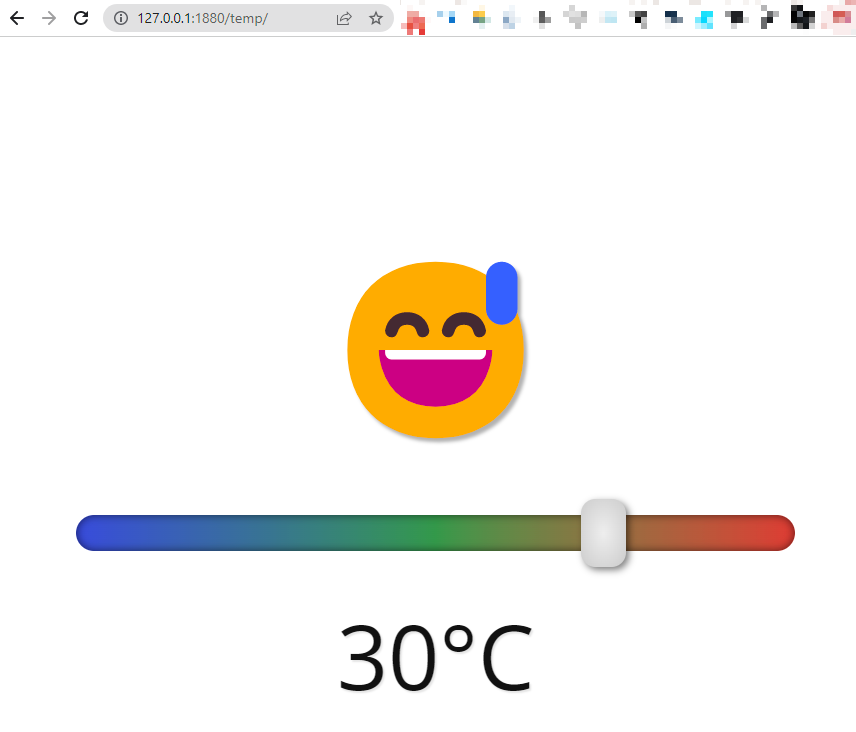
为了更完整的介绍uibuilder使用, 这里通过一个小案例引入. 假如我们需要实现一个显示当前温度的页面, 如下图(项目来自于CodePen).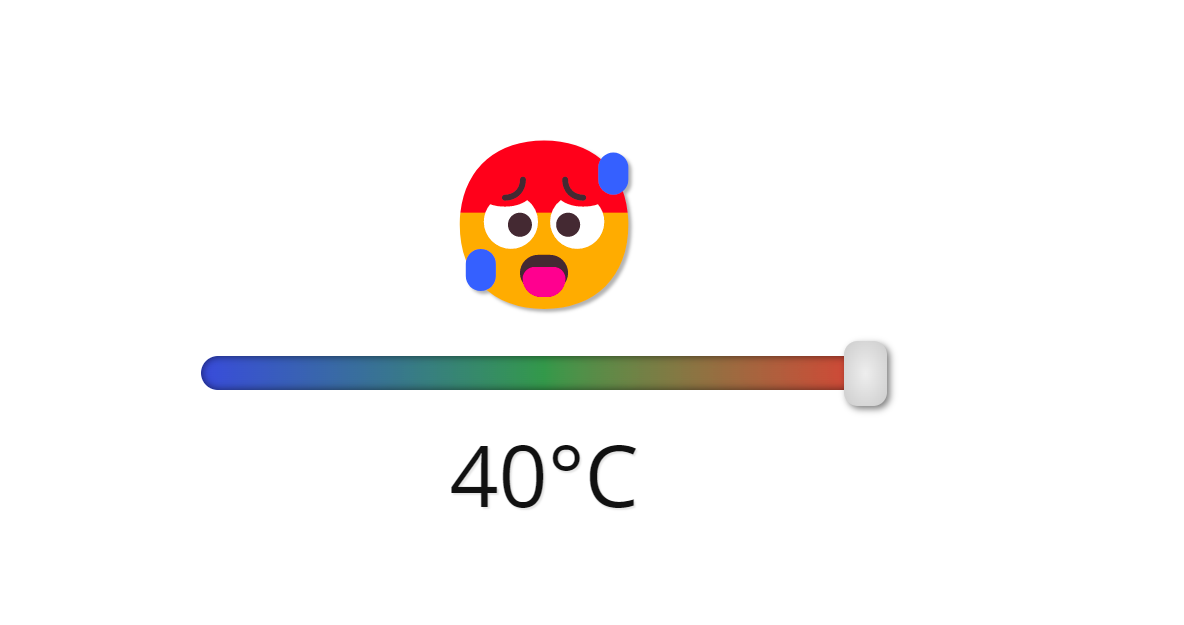
其代码可以在CodePen找到.
首先将
index.html
的代码进行合并(删除原有
button
及
pre
, 新增
span
,
input
及
p
).
<!doctypehtml><htmllang="en"><head><metacharset="utf-8"><metaname="viewport"content="width=device-width, initial-scale=1"><title>Blank template - Node-RED uibuilder</title><metaname="description"content="Node-RED uibuilder - Blank template"><linkrel="icon"href="./images/node-blue.ico"><linktype="text/css"rel="stylesheet"href="./index.css"media="all"></head><bodyclass="uib"><spanclass="emoji"role="img"aria-label="happy face">😊</span><inputtype="range"class="slider"min="0"max="40"value="20"aria-label="temperature in degrees celsius"><pclass="temperature"><spanclass="temperature-output">20</span>°C</p><scriptsrc="../uibuilder/vendor/socket.io/socket.io.js"></script><scriptsrc="./uibuilderfe.min.js"></script><scriptsrc="./index.js"></script></body></html>
修改
index.js
document.addEventListener("DOMContentLoaded", () => {
    const emoji = document.querySelector('.emoji'),
        slider = document.querySelector('.slider'),
        tempOutput = document.querySelector('.temperature-output'),
        displayTemp = temperature => {
            //Display temperature
            tempOutput.textContent = temperature;

            //Display emoji
            if (temperature >= 0 && temperature <= 8) {
                emoji.textContent = '🥶';
                emoji.setAttribute('aria-label', 'freezing face');
            } else if (temperature > 8 && temperature <= 16) {
                emoji.textContent = '😬';
                emoji.setAttribute('aria-label', 'cold face');
            } else if (temperature > 16 && temperature <= 24) {
                emoji.textContent = '😊';
                emoji.setAttribute('aria-label', 'happy face');
            } else if (temperature > 24 && temperature <= 32) {
                emoji.textContent = '😅';
                emoji.setAttribute('aria-label', 'warm face');
            } else {
                emoji.textContent = '🥵';
                emoji.setAttribute('aria-label', 'hot face');
            }

            uibuilder.send({
                'topic': 'msg-from-uibuilder-front-end',
                'payload': temperature,
            })
        }

    // Start up uibuilder - see the docs for the optional parameters
    uibuilder.start()

    // Listen for incoming messages from Node-RED
    uibuilder.onChange('msg', function (msg) {
        console.info('[indexjs:uibuilder.onChange] msg received from Node-RED server:', msg)

        // dump the msg as text to the "msg" html element

        displayTemp(msg.payload);
        slider.value = msg.payload;

        // const eMsg = document.getElementById('msg')
        // eMsg.innerHTML = window.syntaxHighlight(msg)
    })
    slider.addEventListener('input', () => displayTemp(slider.value));
});

// Send a message back to Node-RED
window.fnSendToNR = function fnSendToNR(payload) {
    uibuilder.send({
        'topic': 'msg-from-uibuilder-front-end',
        'payload': payload,
    })
}
替换
index.css
:root{font-size: 20vmin;}body{display: flex;flex-direction: column;justify-content: center;align-items: center;height: 100vh;}.emoji{font-size: 1em;margin-bottom: 0.3em;text-align: center;text-shadow: 0.02em 0.02em 0.02em rgba(0, 0, 0, 0.3);}.slider{font:inherit;width: 4em;height: 0.2em;border-radius: 1em;background-image:linear-gradient(90deg, #384bdc, #33994a, #df3b33);box-shadow: inset 0 0 0.05em rgba(0, 0, 0, 0.6);-webkit-appearance: none;-moz-appearance: none;appearance: none;}.slider::-webkit-slider-thumb{position: relative;width: 0.25em;height: 0.38em;border-radius: 0.08em;background-image:radial-gradient(#eee, #ccc);filter:drop-shadow(0.02em 0.02em 0.02em rgba(0, 0, 0, 0.5));cursor: pointer;-webkit-appearance: none;appearance: none;}.slider::-moz-range-thumb{position: relative;width: 0.25em;height: 0.38em;border-radius: 0.08em;background-image:radial-gradient(#eee, #bbb);filter:drop-shadow(0.02em 0.02em 0.02em rgba(0, 0, 0, 0.5));cursor: pointer;border: none;-moz-appearance: none;appearance: none;}.temperature{font-family:'Open Sans', Arial, sans-serif;font-size: 0.5em;font-weight: 400;margin-top: 0.45em;color: #111;text-shadow: 0.02em 0.02em 0.02em rgba(0, 0, 0, 0.1);}

版权归原作者 梅干菜烧饼不加肉 所有, 如有侵权,请联系我们删除。