写在前面 // 如果文章有问题的地方, 欢迎评论区或者私信指正
未雨绸缪
什么是Selenium
在测试领域中,Selenium是一个用于自动化测试和浏览器自动化的开源框架。它允许开发人员编写脚本来模拟用户在浏览器中的行为,自动执行一系列操作,如点击按钮、填写表单、导航到不同页面等。Selenium最初是为Web应用程序的自动化测试而创建的,但后来也被广泛用于进行网络数据抓取和网页内容爬取,特别是那些需要JavaScript渲染的页面。Selenium提供了多种编程语言的绑定,包括Python、Java、C#、JavaScript等,使开发人员能够使用自己熟悉的编程语言来编写自动化脚本。Selenium Grid是Selenium的一个功能,它允许同时在多个浏览器和操作系统上运行测试,从而提供了更广泛的测试覆盖范围。
一个简单的用例
public class Main {
    public static void main(String[] args) {
        ChromeOptions options = new ChromeOptions() ;
        options .addArguments("--remote-allow-origins=*");
        WebDriver webDriver = new ChromeDriver(options) ;
        webDriver.get("https://www.baidu.com") ;
    }
}
下面来一一解释:
ChromeOptions options = new ChromeOptions() ;
ChromeOptions options = new ChromeOptions();这行代码是创建了一个新的ChromeOptions对象实例,并将其赋值给变量options。ChromeOptions类是Selenium WebDriver中用于配置Chrome浏览器启动选项的一个类。- 通过
ChromeOptions对象,你可以设置各种启动参数、扩展程序、用户配置文件等,以定制Chrome浏览器的行为。例如,你可以设置浏览器窗口的大小、禁用图片加载、启用或禁用JavaScript等。 - 在你创建
ChromeOptions对象之后,你通常会使用它的方法来添加配置选项。例如,你可以使用addArguments方法来添加命令行参数,使用setExperimentalOption方法来设置实验性选项,或者添加用户数据目录等。例如下面的语句:
options .addArguments("--remote-allow-origins=*");
- 具体来说,
--remote-allow-origins=*这个参数是用来控制哪些远程页面或应用可以与此浏览器实例进行通信的。当设置为*时,它允许任何来源的页面或应用与浏览器实例进行通信。
WebDriver webDriver = new ChromeDriver(options) ;
- 这行代码是在使用Selenium WebDriver来初始化一个新的Chrome浏览器实例。
- WebDriver 是Selenium WebDriver库中的一个核心接口, 用于与浏览器进行通信,以自动化网页操作。
- ChromeDriver: 这是WebDriver接口的一个实现,专门用于与Chrome浏览器进行通信。它封装了与Chrome浏览器实例交互所需的所有细节。
- 这行代码创建了一个新的ChromeDriver实例,并使用之前配置好的
options对象来初始化它。初始化后的ChromeDriver实例赋值给了webDriver变量,之后你就可以通过这个变量来控制Chrome浏览器了。
webDriver.get("https://www.baidu.com") ;
- 打开百度首页。
元素定位
元素的定位是自动化测试的核心,想要操作一个对象,就必须先拿到他,你可以类比一下我们使用js或者jquery来操作html元素,你可以通过一个标签的class或者id属性来定位。元素的定位有很多种方法,也是通过各种属性进行定位,但是无论什么方法,都必须保证页面上该属性的唯一性。
webdriver 提供了一系列的对象定位方法,常用的有以下几种:
- id
- name
- class name
- link text
- partial link text
- tag name
- xpath
- css selector
对其定位并获取到这个元素的时候,你就可以对其进行各种操作,例如点击,输入文本等:
- click 点击对象
- send_keys 在对象上模拟按键输入
- clear 清除对象输入的文本内容
- submit 提交
- text 用于获取元素的文本信息
操作对象后面讲解
id定位

id属性在我们页面元素中式唯一的(在整个页面当中),但不是所有的元素都有id,有的元素只有class属性,所以的一般具有id元素的可以使用id来定位:
<input type="text" class="s_ipt" name="wd" id="kw" maxlength="100" autocomplete="off">
package com.example.forumspringboot27;

import org.openqa.selenium.By;
import org.openqa.selenium.WebDriver;
import org.openqa.selenium.WebElement;
import org.openqa.selenium.chrome.ChromeDriver;
import org.openqa.selenium.chrome.ChromeOptions;

public class Main {
    public static void main(String[] args) {
        ChromeOptions options = new ChromeOptions();
        options.addArguments("--remote-allow-origins=*");
        WebDriver webDriver = new ChromeDriver(options);
        webDriver.get("https://www.baidu.com");

        // 找到百度搜索输入框
        // 通过CSS选择器
        WebElement baidu_searcch = webDriver.findElement(By.cssSelector(".s_ipt"));

        // 输入信息
        baidu_searcch.sendKeys("软件测试");

    }
}
然后就会自动打开百度的页面然后再对应的 **.s_ipt **对应的标签中输入 "软件测试"
xpath定位
    XPath 是一种在XML 文档中定位元素的语言。因为HTML 可以看做XML 的一种实现,所以selenium 用户可是使用这种强大语言在web 应用中定位元素。XPath 扩展了上面id 和name 定位方式,提供了很多种可能性。
     XPATH的获取可以用chrome的F12开发者模式中Element-右键-copy-copy xpath来获取
基于xml,通过xpath:
WebElement baidu_search_xpath = webDriver.findElement(By.xpath("//*[@id=\"kw\"]"));
baidu_search_xpath.sendKeys("软件测试2");
你可能会问,什么是xpath?
XPath,全称XML Path Language,即XML路径语言,是一种在XML文档中查找信息的语言。XPath最初是用来搜寻XML文档的,但同样适用于HTML文档的搜索。XPath使用路径表达式来选取XML文档中的节点或节点集,并可用于从XML文档中提取信息。XPath是XSLT标准中的重要核心组件,并且是W3C标准之一。XPath提供了丰富的标准函数库来处理字符串值、数值、日期和时间比较、节点和QName操作、序列操作、逻辑值等。
XPath的主要作用包括:
- 在XML文档中查找信息:XPath用于在XML文档中通过元素和属性进行导航,以确定XML文档中某部分的位置,并遍历XML文档中的元素和属性。
- 作为XSLT的主要元素:XPath在XSLT标准中是一个主要元素,必须遵循XPath才能使用XSLT文档。XSLT常用于将XML文档转换为其他格式,如HTML。
- 提供标准函数库:XPath含有超过100个内建的函数,用于处理各种数据类型和操作,如字符串值、数值、日期和时间比较、节点和QName处理、序列处理以及逻辑运算等。
XPath路径表达式与常规的电脑文件系统中的表达式非常相似,使用这些表达式可以在XML文档树状结构中查找节点。因此,XPath在XML数据处理和转换中扮演着重要角色。如需了解更多关于XPath的详细信息,建议查阅相关编程书籍或在线教程。
--
学习xml:https://www.w3school.com.cn/xml/https://www.w3school.com.cn/xml/
--
我们现在讲述的例子中,主要存在两种类型的xpath:
- 绝对路径:/html/head/title (不常用)
- 相对路径: - 相对路径 + 索引- 相对路径 + 属性值- 相对路径 + 通配符- 相对路径 + 文本匹配
name定位
如果这个元素有name,并且元素的name命名在整个页面是**唯一**的,那么我们可以用name来定位这个元素。用上面百度输入框的例子,其中元素的属性name=”wd”
<input type="text" class="s_ipt" name="wd" id="kw" maxlength="100" autocomplete="off">
    public static void testByName() {
        ChromeOptions options = new ChromeOptions();
        options.addArguments("--remote-allow-origins=*");
        WebDriver webDriver = new ChromeDriver(options);
        webDriver.get("https://www.baidu.com");

        webDriver.findElement(By.name("wd")).sendKeys("你好");
    }

tag name 定位和class name 定位
    从上面的百度输入框的属性信息中,我们看到,不单单只有id 和name 两个属性, 比如class 和tagname(标签名)input 就是一个标签的名字,可以通过find_element_by_tag_name("input") 函数来定位。class="s_ipt",通过find_element_by_class_name("s_ipt")函数定位百度输入框。
     在这里要注意的是,不是所有的元素用 tag name或者 class name来定位元素,首先要保证该元素的这两种属性在页面上是**唯一**的,才能够准确的定位。

    虽然方便,但是要注意唯一性。

     还是以百度的为例子:
<input type="text" class="s_ipt" name="wd" id="kw" maxlength="100" autocomplete="off">
    public static void testByName() {
        ChromeOptions options = new ChromeOptions();
        options.addArguments("--remote-allow-origins=*");
        WebDriver webDriver = new ChromeDriver(options);
        webDriver.get("https://www.baidu.com");

        webDriver.findElement(By.className("s_ipt")).clear();
        // 这里需要注意,下面这种方式要尤其注意有没有重复的tagName
//      webDriver.findElement(By.tagName("input")).sendKeys("hello");

    }
这里如何定位不一一讲解,可以自行search。。。
操作元素
前面讲到了不少知识都是定位元素,定位只是第一步,定位之后需要对这个元素进行操作。是鼠标点击还是键盘输入,或者清除元素的内容,或者提交表单等。这个取决于定位元素需要进行的下一步操作。webdriver 中比较常用的操作对象的方法有下面几个:
- click 点击对象
- send_keys 在对象上模拟按键输入
- clear 清除对象输入的文本内容
- submit 提交
- text 用于获取元素的文本信息
- getAttribute 用于获取webDriver对象的属性值
click
触发鼠标点击事件,也就是你拿到一个元素,button也好,input也好,只要执行click操作,就相当于鼠标直接去点击,例如百度页面有一个搜索框和一个百度一下的按钮:
<input type="submit" value="百度一下" id="su" class="btn self-btn bg s_btn">
<input type="text" class="s_ipt" name="wd" id="kw" maxlength="100" autocomplete="off">
我们首先获取这两个元素,然后在输入框中输入“软件测试”,然后再获取“百度一下”这个元素,然后执行click操作:
    public static void testClick() {
        ChromeOptions options = new ChromeOptions();
        options.addArguments("--remote-allow-origins=*");
        WebDriver webDriver = new ChromeDriver(options);
        webDriver.get("https://www.baidu.com");

        // 获取输入框
        WebElement kw = webDriver.findElement(By.id("kw"));
        // 输入"软件测试"
        kw.sendKeys("软件测试");

        // 获取"百度一下"
        WebElement su = webDriver.findElement(By.id("su"));
        // 执行click操作
        su.click();
    }
输出:

send_keys
也就是键盘事件,这里不多赘述:
// 获取输入框
WebElement kw = webDriver.findElement(By.id("kw"));
// 输入"软件测试"
kw.sendKeys("软件测试");
submit
submit意思为提交,可以看见们刚才百度一下那个按钮是一个input标签,type为submit:
<input type="submit" value="百度一下" id="su" class="btn self-btn bg s_btn">
这个时候将click操作变为submit也是可以的:
WebElement su = webDriver.findElement(By.id("su"));
// 执行click操作
// su.click();
su.submit();
text
获取文本信息,例如百度的页脚有这么一行,对应的html为:

<div id="bottom_layer" class="s-bottom-layer s-isindex-wrap" style="visibility: visible; width: 100%;">
<div class="s-bottom-layer-content">
<p class="lh"><a class="text-color" href="//home.baidu.com" target="_blank">关于百度</a></p>
<p class="lh"><a class="text-color" href="http://ir.baidu.com" target="_blank">About Baidu</a></p>
<p class="lh"><a class="text-color" href="//www.baidu.com/duty" target="_blank">使用百度前必读</a></p>
<p class="lh"><a class="text-color" href="//help.baidu.com" target="_blank">帮助中心</a></p>
<p class="lh"><a class="text-color" href="https://e.baidu.com/?refer=1271" target="_blank">企业推广</a></p>
<p class="lh"><a class="text-color"
href="http://www.beian.gov.cn/portal/registerSystemInfo?recordcode=11000002000001"
target="_blank">京公网安备11000002000001号</a></p>
<p class="lh"><a class="text-color" href="https://beian.miit.gov.cn" target="_blank">京ICP证030173号</a></p>
<p class="lh" style="display: inline-block;"><span class="text-color">互联网新闻信息服务许可证11220180008</span></p>
<p class="lh" style="display: inline-block;"><span class="text-color">网络文化经营许可证: 京网文〔2023〕1034-029号</span></p>
<p class="lh" style="display: inline-block;"><a class="text-color" href="//www.baidu.com/licence/"
target="_blank">信息网络传播视听节目许可证 0110516</a></p>
<p class="lh" style="display: none;"><span class="text-color">互联网宗教信息服务许可证编号:京(2022)0000043</span></p>
<p class="lh" style="display: none;"><span class="text-color">药品医疗器械网络信息服务备案(京)网药械信息备字(2021)第00159号</span></p>
<p class="lh" style="display: none;"><span class="text-color">医疗器械网络交易服务第三方平台备案凭证(京)网械平台备字(2020)第00002号</span></p>
<p class="lh" style="display: none;"><span class="text-color">药品网络交易服务第三方平台备案凭证(京)网药平台备字〔2023〕第000002号</span></p>
<p class="lh" style="display: none;"><span class="text-color">©2024 Baidu </span></p>
<div class="accessibility-icon"><span class="c-icon"></span></div>
<div class="open-content-info"><span class="c-icon c-color-gray2"></span>
<div class="tip-hover-panel" style="top: -118px; right: -12px; display: none;">
<div class="rest_info_tip">
<div class="tip-wrapper">
<p class="lh tip-item" style="display: none;"><a class="text-color" href="http://ir.baidu.com"
target="_blank">About Baidu</a></p>
</div>
<div class="tip-wrapper">
<p class="lh tip-item" style="display: none;"><a class="text-color" href="//www.baidu.com/duty"
target="_blank">使用百度前必读</a></p>
<p class="lh tip-item" style="display: none;"><a class="text-color" href="//help.baidu.com"
target="_blank">帮助中心</a></p>
<p class="lh tip-item" style="display: none;"><a class="text-color" href="https://e.baidu.com/?refer=1271"
target="_blank">企业推广</a></p>
<p class="lh tip-item" style="display: none;"><a class="text-color"
href="http://www.beian.gov.cn/portal/registerSystemInfo?recordcode=11000002000001"
target="_blank">京公网安备11000002000001号</a></p>
</div>
<div class="tip-wrapper">
<p class="lh tip-item" style="display: none;"><a class="text-color" href="https://beian.miit.gov.cn"
target="_blank">京ICP证030173号</a></p>
<p class="lh tip-item" style="display: none;"><span class="text-color">互联网新闻信息服务许可证11220180008</span></p>
</div>
<div class="tip-wrapper">
<p class="lh tip-item" style="display: none;"><span class="text-color">网络文化经营许可证: 京网文〔2023〕1034-029号</span>
</p>
</div>
<div class="tip-wrapper">
<p class="lh tip-item" style="display: none;"><a class="text-color" href="//www.baidu.com/licence/"
target="_blank">信息网络传播视听节目许可证 0110516</a></p>
</div>
<div class="tip-wrapper">
<p class="lh tip-item"><span class="text-color">互联网宗教信息服务许可证编号:京(2022)0000043</span></p>
</div>
<div class="tip-wrapper">
<p class="lh tip-item"><span class="text-color">药品医疗器械网络信息服务备案(京)网药械信息备字(2021)第00159号</span></p>
</div>
<div class="tip-wrapper">
<p class="lh tip-item"><span class="text-color">医疗器械网络交易服务第三方平台备案凭证(京)网械平台备字(2020)第00002号</span></p>
</div>
<div class="tip-wrapper">
<p class="lh tip-item"><span class="text-color">药品网络交易服务第三方平台备案凭证(京)网药平台备字〔2023〕第000002号</span></p>
</div>
<div class="tip-wrapper">
<p class="lh tip-item"><span class="text-color">©2024 Baidu </span></p>
</div>
</div>
</div>
</div>
</div>
</div>
我们获取顶部id为bottom_layer的标签,然后获取text:
    public static void testText() {
        ChromeOptions options = new ChromeOptions();
        options.addArguments("--remote-allow-origins=*");
        WebDriver webDriver = new ChromeDriver(options);
        webDriver.get("https://www.baidu.com");

        WebElement bottomLayer = webDriver.findElement(By.id("bottom_layer"));
        System.out.println(bottomLayer.getText());
    }
控制台输出:

getAttribute
getAttribute
是 Selenium WebDriver 提供的一个方法,用于获取 HTML 元素的特定属性值。这在自动化测试或网页数据抓取时非常有用。下面是一些使用
getAttribute
的示例操作:
- 获取元素的
属性class
WebElement element = driver.findElement(By.id("someElementId"));
String className = element.getAttribute("class");
System.out.println("Class name: " + className);
- 获取元素的
属性(对于链接)href
WebElement link = driver.findElement(By.linkText("Some Link Text"));
String href = link.getAttribute("href");
System.out.println("Link href: " + href);
- 获取元素的
属性(对于输入框)value
WebElement inputField = driver.findElement(By.id("inputFieldId"));
String inputValue = inputField.getAttribute("value");
System.out.println("Input value: " + inputValue);
- 获取元素的
属性style
WebElement styledElement = driver.findElement(By.id("styledElementId"));
String style = styledElement.getAttribute("style");
System.out.println("Style: " + style);
- 获取元素的
属性id
WebElement elementWithID = driver.findElement(By.xpath("//div[@class='someClass']"));
String id = elementWithID.getAttribute("id");
System.out.println("Element ID: " + id);
- 获取元素的自定义数据属性(如
属性)data-
WebElement customElement = driver.findElement(By.id("customElementId"));
String dataAttribute = customElement.getAttribute("data-custom-attribute");
System.out.println("Custom data attribute: " + dataAttribute);
在使用
getAttribute
方法时,你需要知道你想要获取的属性的名称,并将其作为字符串参数传递给该方法。这将返回该属性的当前值。如果元素不存在或属性不存在,Selenium 通常不会抛出异常,而是返回
null
或空字符串。因此,在使用返回的属性值之前,进行非空检查通常是一个好习惯。
注意:在使用
getAttribute
之前,确保你已经找到了正确的元素,并且该元素确实包含了你想要获取的属性。否则,你可能会得到
null
或不正确的值。
添加等待
等待通常用于确保页面元素在尝试与之交互之前**已完全加载和可用**。Selenium提供了几种等待策略,包括显式等待和隐式等待。
显示等待
    显示等待可以设置一个等待条件, 具体就是使用WebDriverWait的对象的until方法来设置等待对象, 例如下面的代码案例中, 为这个id为myElementId的元素设置等待条件:最多等待10s.

    在使用Selenium的显示等待(Explicit Waits)时,如果设定的超时时间到达而期望的条件仍未满足,那么会抛出
TimeoutException
异常。显示等待允许你明确指定一个等待条件和一个最长等待时间。在等待期间,Selenium会定期检查指定的条件是否成立。如果条件在超时之前成立,则等待结束并继续执行后续代码;如果超时时间到达而条件仍未成立,则会抛出异常
import org.openqa.selenium.support.ui.ExpectedConditions;
import org.openqa.selenium.support.ui.WebDriverWait;

// ... 其他代码 ...

WebDriverWait wait = new WebDriverWait(driver, Duration.ofSeconds(10)); // 等待最多10秒
WebElement element = wait.until(ExpectedConditions.visibilityOfElementLocated(By.id("myElementId")));
在上面的代码中,
WebDriverWait
对象被设置为最多等待10秒。然后,它使用
until
方法和
ExpectedConditions.visibilityOfElementLocated
来等待具有特定ID的元素变得可见。
隐式等待
隐式等待(Implicit Waits)在Selenium中用于设置WebDriver在查找元素时应该等待的最长时间。如果在设定的时间内元素没有被找到,WebDriver将抛出一个
NoSuchElementException
。隐式等待对WebDriver实例的生命周期内的所有元素查找操作都有效。
import org.openqa.selenium.WebDriver;
import org.openqa.selenium.chrome.ChromeDriver;
import org.openqa.selenium.support.ui.ExpectedConditions;
import org.openqa.selenium.support.ui.WebDriverWait;
import java.util.concurrent.TimeUnit;

public class ImplicitWaitExample {
    public static void main(String[] args) {
        // 设置系统属性以指向ChromeDriver的位置
        System.setProperty("webdriver.chrome.driver", "path/to/chromedriver");

        // 创建WebDriver实例
        WebDriver driver = new ChromeDriver();

        try {
            // 打开网页
            driver.get("http://example.com");

            // 设置隐式等待为10秒
            driver.manage().timeouts().implicitlyWait(10, TimeUnit.SECONDS);

            // 查找元素,WebDriver将等待最多10秒直到元素出现
            // 如果在10秒内元素没有出现,将抛出NoSuchElementException
            WebElement element = driver.findElement(By.id("someElementId"));

            // 对元素进行其他操作...

        } finally {
            // 关闭浏览器
            driver.quit();
        }
    }
}
显示等待和隐式等待的特点
显示等待(Explicit Waits)和隐式等待(Implicit Waits)在Selenium中都是用来处理页面元素加载和可用性的重要策略,但它们之间存在一些关键的区别:
显示等待(Explicit Waits)
特点:
- 精确性:显示等待允许你针对特定的条件或元素进行等待,确保在继续执行代码之前这些条件或元素已经满足。
- 灵活性:你可以为显示等待定义多种条件,如元素可见性、可点击性、文本内容等。
- 作用域:显示等待只作用于指定的代码块或元素查找操作,不会影响其他操作。
- 性能:只会在需要的时候等待,不会造成不必要的延迟。
使用场景:
- 当你需要等待某个特定元素或条件成立时。
- 当你需要更精确的控制等待时间时。
隐式等待(Implicit Waits)
特点:
- 全局性:隐式等待设置后,它将应用于WebDriver实例的所有元素查找操作。
- 简单性:隐式等待的设置相对简单,只需设置一次即可。
- 限制:隐式等待只针对元素查找操作,它不会等待元素变为可交互状态(如可点击)。
- 性能影响:隐式等待可能导致不必要的等待时间,因为它会在每次元素查找时都生效。
使用场景:
- 当你不需要特别精确的控制,只需要确保元素在查找时存在即可。
- 当你不希望为每个元素查找操作都单独设置等待时。
总结
显示等待和隐式等待各有其优缺点,适用于不同的场景。显示等待提供了更高的灵活性和精确性,但设置相对复杂;而隐式等待设置简单且全局生效,但可能导致不必要的性能损耗。在实际使用中,建议根据具体需求选择合适的等待策略。在大多数情况下,显示等待由于其精确性和灵活性,更受测试开发人员的青睐。
浏览器操作
浏览器前进后退

    public static void testBrowerOperation() throws InterruptedException {
        ChromeOptions options = new ChromeOptions();
        options.addArguments("--remote-allow-origins=*");
        WebDriver webDriver = new ChromeDriver(options);
        // 进入百度首页
        webDriver.get("https://www.baidu.com");

        WebElement element = webDriver.findElement(By.cssSelector("#kw"));
        // 输入框输入 521
        element.sendKeys("521");
        WebElement element1 = webDriver.findElement(By.cssSelector("#su"));

        Thread.sleep(3000);
        // 点击搜索
        element1.click();

        Thread.sleep(3000);
        // 浏览器后退
        webDriver.navigate().back();
        Thread.sleep(3000);
        // 刷新浏览器
        webDriver.navigate().refresh();
        Thread.sleep(3000);
        // 浏览器前进
        webDriver.navigate().forward();
    }
控制浏览器滚动条
也就是 控制浏览器最右端的滚动条 ...
    public static void scroll() throws InterruptedException {
        ChromeOptions options = new ChromeOptions();
        options.addArguments("--remote-allow-origins=*");
        WebDriver webDriver = new ChromeDriver(options);
        webDriver.get("https://www.baidu.com");
        WebElement element = webDriver.findElement(By.cssSelector("#kw"));
        // 输入框输入 521
        element.sendKeys("521");
        WebElement element1 = webDriver.findElement(By.cssSelector("#su"));

        Thread.sleep(3000);
        // 点击搜索
        element1.click();

        Thread.sleep(3000);
        ((JavascriptExecutor)webDriver).executeScript("document.documentElement.scrollTop=10000");
    }
这里的top指的是往下滑动, 当然也有向右, 或者向上,等等.
设置浏览器宽、高, 全屏操作


    public static void setSize() throws InterruptedException {
        ChromeOptions options = new ChromeOptions();
        options.addArguments("--remote-allow-origins=*");
        WebDriver webDriver = new ChromeDriver(options);
        webDriver.get("https://www.baidu.com");
        WebElement element = webDriver.findElement(By.cssSelector("#kw"));
        // 输入框输入 521
        element.sendKeys("521");
        WebElement element1 = webDriver.findElement(By.cssSelector("#su"));

        Thread.sleep(3000);
        // 点击搜索
        element1.click();

        // 窗口最大化
        Thread.sleep(3000);
        webDriver.manage().window().maximize();

        // 全屏
        Thread.sleep(3000);
        webDriver.manage().window().fullscreen();

        // 自定义窗口大小
        Thread.sleep(3000);
        webDriver.manage().window().setSize(new Dimension(800,500));
    }
关闭浏览器
直接关闭浏览器, 会清空数据与缓存 :
    public static void page05() throws InterruptedException {
        ChromeOptions options = new ChromeOptions();
        options.addArguments("--remote-allow-origins=*");
        WebDriver webDriver = new ChromeDriver(options);
        webDriver.get("https://www.baidu.com");

        WebElement element = webDriver.findElement(By.cssSelector("#s-top-left > a:nth-child(1)"));
        element.click();
        Thread.sleep(4000);

        // 退出浏览器(关闭浏览器)
        webDriver.quit();
    }
关闭标签
使用close操作关闭当前页标签, 不会关闭浏览器以及浏览器相关数据和缓存 :
    public static void page06() throws InterruptedException {
        ChromeOptions options = new ChromeOptions();
        options.addArguments("--remote-allow-origins=*");
        WebDriver webDriver = new ChromeDriver(options);
        webDriver.get("https://www.baidu.com");

        WebElement element = webDriver.findElement(By.cssSelector("#s-top-left > a:nth-child(1)"));
        element.click();
        Thread.sleep(4000);

        // 关闭原始页面对象的页签
        webDriver.close();
    }
窗口的切换
     一些页面会直接在本地进行跳转, 本地页面的地址就变了, 但是你操作的对象还是原来webDriver 所get到的对象, 所以这个时候需要进行一个切换.

    所以我们需要获取资源, 获取所有窗口句柄
webDriver.getWindowHandles()

// webDriver.getWindowHandle 是获取当前webDriver get打开的窗口句柄

 但是当前的get页面还是: www.baidu.com , 也就是:
webDriver.get("https://www.baidu.com");
所以需要对其进行一个页面转化
    public static void page07() throws InterruptedException {
        ChromeOptions options = new ChromeOptions();
        options.addArguments("--remote-allow-origins=*");
        WebDriver webDriver = new ChromeDriver(options);
        webDriver.get("https://www.baidu.com");

        // 获取百度主页新闻 元素
        WebElement element = webDriver.findElement(By.cssSelector("#s-top-left > a:nth-child(1)"));
        element.click();
        Thread.sleep(2000);

        // 获取所有的窗口句柄
        Set<String> windowHandles = webDriver.getWindowHandles();
        String targetHandler = "";
        for(String x : windowHandles) {
            targetHandler = x;
            System.out.println("============================" + targetHandler);
        }
        // 将当前页面切换到新的页面, 然后在新的页面中进行测试
        // 此处你可以理解为将webDriver.get换成了targetHandler
        webDriver.switchTo().window(targetHandler);

        Thread.sleep(2000);
        WebElement element1 = webDriver.findElement(By.cssSelector("#ww"));
        element1.sendKeys("新闻联播");
        WebElement element2 = webDriver.findElement(By.cssSelector("#s_btn_wr"));
        element2.click();
    }
键盘事件
键盘按键用法
使用键盘的组合键
    public static void testKeyBoard() throws InterruptedException {
        ChromeOptions options = new ChromeOptions();
        options.addArguments("--remote-allow-origins=*");
        WebDriver webDriver = new ChromeDriver(options);
        webDriver.get("https://www.baidu.com");

        Thread.sleep(3000);
        WebElement element = webDriver.findElement(By.cssSelector("#kw"));
        // 输入框输入 521
        element.sendKeys("521");

        // ctrl + A 全选
        Thread.sleep(3000);
        element.sendKeys(Keys.LEFT_CONTROL, "A");
        // ctrl + X 剪切
        Thread.sleep(3000);
        element.sendKeys(Keys.LEFT_CONTROL,"x");
        // ctrl + V 粘贴
        Thread.sleep(3000);
        element.sendKeys(Keys.LEFT_CONTROL,"v");
    }
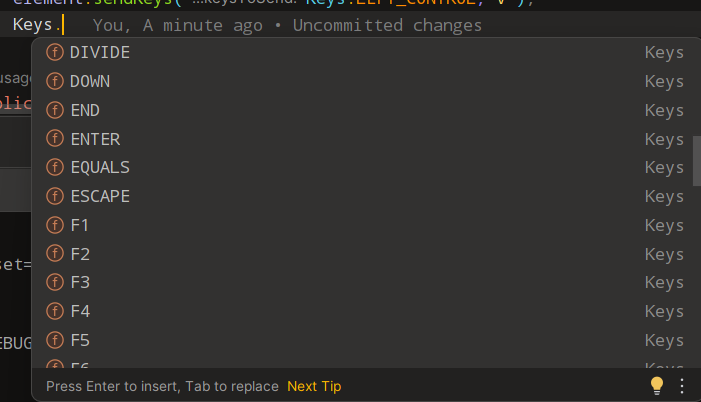
上述代码中, Keys用来指定键盘上的一些功能按键:

后面的字母如其名,就是指的字母按键, 不区分大小写.
下面是一些按钮的例子:
- 通过send_keys()调用按键:
- send_keys(Keys.TAB) # TAB
- send_keys(Keys.ENTER) # 回车
- send_keys(Keys.SPACE) #空格键
- send_keys(Keys.ESCAPE) #回退键(Esc)
组合键实例:
- send_keys(Keys.CONTROL,'a') #全选(Ctrl+A)
- send_keys(Keys.CONTROL,'c') #复制(Ctrl+C)
- send_keys(Keys.CONTROL,'x') #剪贴(Ctrl+X)
- send_keys(Keys.CONTROL,'v') #粘贴(Ctrl+V)
鼠标事件
    public static void test09() throws InterruptedException {
        ChromeOptions options = new ChromeOptions();
        options.addArguments("--remote-allow-origins=*");
        WebDriver webDriver = new ChromeDriver(options);
        webDriver.get("https://www.baidu.com");
        Thread.sleep(3000);

        WebElement kw = webDriver.findElement(By.id("kw"));
        kw.sendKeys("鲜花");
        WebElement su = webDriver.findElement(By.id("su"));
        su.click();
        Thread.sleep(3000);
        // 找到图片按钮
        WebElement webElement = webDriver.findElement(By.cssSelector("#s_tab > div > a.s-tab-item.s-tab-item_1CwH-.s-tab-pic_p4Uej.s-tab-pic"));

        // 鼠标右击
        Thread.sleep(3000);
        Actions actions = new Actions(webDriver);
        actions.moveToElement(webElement).contextClick().perform();
    }
下面说一下上述代码的具体执行流程:
设置ChromeOptions:- 创建了一个
ChromeOptions对象。- 使用addArguments("--remote-allow-origins=*")设置了一个命令行参数,允许所有远程来源的连接。这在某些场景下可能是必要的,例如当你想要允许跨域请求时。初始化WebDriver:- 使用上面设置的
options创建了一个ChromeDriver实例,即一个Chrome浏览器的WebDriver。- WebDriver是一个接口,允许你编程式地控制浏览器。打开网页:- 使用
webDriver.get("https://www.baidu.com")打开百度首页。等待:-
Thread.sleep(3000);使得线程休眠3秒,确保网页已经加载完成。这不是最佳实践,因为等待时间可能不够或过长。更好的做法是使用Selenium的等待机制,如WebDriverWait。搜索操作:- 找到搜索框元素(id为"kw"),并输入"鲜花"。- 找到搜索按钮元素(id为"su"),并执行点击操作。
再次等待:- 又是一个3秒的等待。
找到图片按钮:- 使用CSS选择器找到图片按钮元素。选择器看起来有些复杂,并且可能不稳定,因为它依赖于特定的DOM结构和类名。如果百度网站的DOM结构发生变化,这个选择器可能就不再有效。
鼠标右击:- 使用
Actions类来模拟鼠标移动到元素上并右击的操作。上述代码中, Actions类用来生成用户行为, 所有的用户行为都存储在Actions对象中, 然后通过对应的行为 + perform来执行行为
Actions类的一些常用操作:

- contextClick() 右击
- doubleClick() 双击
- dragAndDrop() 拖动
- moveToElement() 移动
- ..... 等等
选定行为之后, 调用行为的perform方法来执行方法.
定位一组元素
有一个复选框页面:
<html>
<head>
  <meta http-equiv="content-type" content="text/html;charset=utf-8" />
  <title>Checkbox</title>
</head>
<body>
<h3>checkbox</h3>
<div class="well">
  <form class="form-horizontal">
    <div class="control-group">
      <label class="control-label" for="c1">checkbox1</label>
      <div class="controls">
        <input type="checkbox" id="c1" />
      </div>
    </div>
    <div class="control-group">
      <label class="control-label" for="c2">checkbox2</label>
      <div class="controls">
        <input type="checkbox" id="c2" />
      </div>
    </div>
    <div class="control-group">
      <label class="control-label" for="c3">checkbox3</label>
      <div class="controls">
        <input type="checkbox" id="c3" />
      </div>
    </div>
    <div class="control-group">
      <label class="control-label" for="r1">radio</label>
      <div class="controls">
        <input type="radio" id="r1" />
      </div>
    </div>
    <div class="control-group">
      <label class="control-label" for="r2">radio</label>
      <div class="controls">
        <input type="radio" id="r2" />
      </div>
    </div>
  </form>
</div>
</body>
</html>

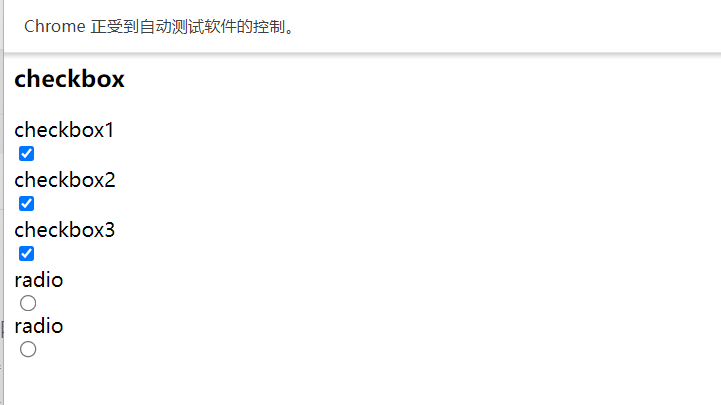
这五个元素都是属于input标签, 但是他们的type不同, 前三个是checkbox, 后面两个是radio,也就是单选.
下面的操作是, 选取前三个checkbox来点击 :
    public static void page01() {
        ChromeOptions options = new ChromeOptions();
        options.addArguments("--remote-allow-origins=*");
        WebDriver webDriver = new ChromeDriver(options);
        webDriver.get("http://127.0.0.1:5500/test01.html");
        // 设置隐式等待
        webDriver.manage().timeouts().implicitlyWait(3,TimeUnit.SECONDS);
        List<WebElement> input = webDriver.findElements(By.cssSelector("input"));
        for (WebElement x : input) {
            // 如果这个input的type为checkbox就进行点击
            String type = x.getAttribute("type");
            if (type.equals("checkbox")) {
                x.click();
            }
        }
    }

测试结果如下:

如果选中的这几个input元素的type类型为checkbox, 就给他选中...
多层框架/窗口定位
处理框架(Frame)
当需要定位的元素位于某个框架内时,首先需要切换到该框架。这可以通过
switchTo().frame()
方法实现。
WebDriver driver = new ChromeDriver();
driver.get("http://example.com");

// 切换到框架(假设框架的id是"myFrame")
driver.switchTo().frame("myFrame");

// 现在可以定位框架内的元素了
WebElement element = driver.findElement(By.id("elementId"));
处理完框架内的元素后,如果需要与主内容交互,可以使用
switchTo().defaultContent()
方法切换回主内容。
// 切换回主内容
driver.switchTo().defaultContent();
如果框架内部还有嵌套框架,可以多次调用
switchTo().frame()
来逐层切换。
// 切换到外层框架
driver.switchTo().frame("outerFrame");

// 切换到内层框架
driver.switchTo().frame("innerFrame");

// 定位元素...
处理窗口(Window)
获取所有窗口句柄
当打开新的窗口或标签页时,可以通过
getWindowHandles()
方法获取所有窗口的句柄。
// 获取所有窗口句柄
Set<String> windowHandles = driver.getWindowHandles();
切换到特定窗口
通过窗口句柄,可以使用
switchTo().window()
方法切换到特定窗口。
// 假设我们要切换到第二个窗口
Iterator<String> iterator = windowHandles.iterator();
iterator.next(); // 跳过第一个窗口句柄
String newWindowHandle = iterator.next();

driver.switchTo().window(newWindowHandle);
关闭窗口
处理完特定窗口后,可以使用
close()
方法关闭它。
// 关闭当前窗口
driver.close();
注意事项
- 确保在测试或爬虫脚本中正确处理框架和窗口的切换,避免因为上下文错误导致的定位失败。
- 在处理完框架或窗口后,尽量恢复到初始状态,以便后续的测试或操作。
- 考虑到Web应用的动态性和不确定性,建议添加适当的异常处理机制,以应对可能出现的异常情况。
下拉框处理
selenium如何实现下拉框的按钮呢? 下面是一个html页面 :

<html>

<body>
  <select id="ShippingMethod" onchange="updateShipping(options[selectedIndex]);" name="ShippingMethod">
    <option value="12.51">UPS Next Day Air ==> $12.51</option>
    <option value="11.61">UPS Next Day Air Saver ==> $11.61</option>
    <option value="10.69">UPS 3 Day Select ==> $10.69</option>
    <option value="9.03">UPS 2nd Day Air ==> $9.03</option>
    <option value="8.34">UPS Ground ==> $8.34</option>
    <option value="9.25">USPS Priority Mail Insured ==> $9.25</option>
    <option value="7.45">USPS Priority Mail ==> $7.45</option>
    <option value="3.20" selected="">USPS First Class ==> $3.20</option>
  </select>
</body>

</html>
selenium代码:
    public static void page02() throws InterruptedException {
        ChromeOptions options = new ChromeOptions();
        options.addArguments("--remote-allow-origins=*");
        WebDriver webDriver = new ChromeDriver(options);
        webDriver.get("http://127.0.0.1:5500/test01.html");

        // 首先得获取下拉框元素
        WebElement selectElement = webDriver.findElement(By.cssSelector("#ShippingMethod"));

        // 构造下拉框对象
        Select select =  new Select(selectElement);

        // 下拉框对象提供了很多的用于操作下拉框的方法
        select.selectByIndex(0); // select标签从0开始
        // 当然也可以直接指定value值进行选择
        Thread.sleep(3000);
        select.selectByValue("7.45");
    }
通过构造一个Select对象, 对select元素进行封装, 然后这个Select对象提供了很多操作方法, 如上.
弹窗处理 alert 、confirm、prompt
- text 返回alert/confirm/prompt 中的文字信息
- accept 点击确认按钮
- dismiss 点击取消按钮,如果有的话
- send_keys 输入值,如果alert 没有对话框就不能用了,不然会报错
<html>

<head>
  <meta charset="UTF-8">
  <title></title>
  <script type="text/javascript">
    function disp_prompt() {
      var name = prompt("Please enter yourname", "")
      if (name != null && name != "") {
        document.write("Hello " + name + "!")
      }
    }
  </script>
</head>

<body>
  <input type="button" onclick="disp_prompt()" value="请点击" />
</body>

</html>

输入内容, 然后点击确认:

创建selenium代码操作alert对象
    public static void page03() throws InterruptedException {
        ChromeOptions options = new ChromeOptions();
        options.addArguments("--remote-allow-origins=*");
        WebDriver webDriver = new ChromeDriver(options);
        webDriver.get("http://127.0.0.1:5500/test01.html");

        // 首先找到这个元素:
        Thread.sleep(3000);
        WebElement input = webDriver.findElement(By.cssSelector("body > input[type=button]"));
        input.click();
        // alert取消
        Thread.sleep(3000);
        webDriver.switchTo().alert().dismiss();
        // alert弹窗中输入 大鹌鹑
        Thread.sleep(3000);
        input.click();
        webDriver.switchTo().alert().sendKeys("大鹌鹑");
        // alert弹窗确认
        Thread.sleep(3000);
        webDriver.switchTo().alert().accept();
    }
输出:

文件上传操作
    Selenium上传文件主要有两种方式,一种是使用input标签,另一种则是处理非input标签的上传。

    对于通过input标签实现的上传功能,你可以将其看作是一个输入框。在Selenium中,你可以通过
find_element_by_name
或
find_element
等方法定位到上传文件的元素,然后使用
send_keys()
方法指定本地文件路径,从而实现文件上传。
    public static void page04() {
        ChromeOptions options = new ChromeOptions();
        options.addArguments("--remote-allow-origins=*");
        WebDriver webDriver = new ChromeDriver(options);
        webDriver.get("http://127.0.0.1:5500/test01.html");

        WebElement input = webDriver.findElement(By.cssSelector("input"));

        // 直接sendkeys的文件路径
        input.sendKeys("C:\\Users\\L\\Pictures\\我的问题");
    }

截图
首先引入截图依赖:
        <dependency>
            <groupId>commons-io</groupId>
            <artifactId>commons-io</artifactId>
            <version>2.11.0</version>
        </dependency>
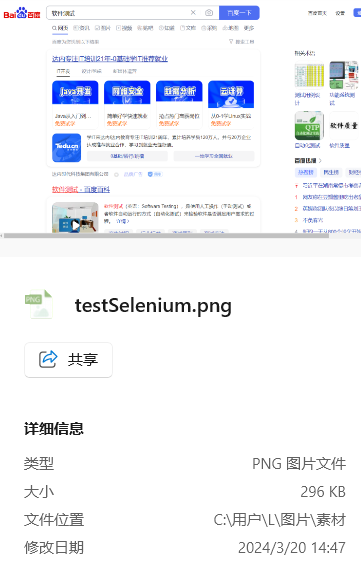
打开百度首页, 输入软件测试, 然后截图, 最后保存在:
"C:\\Users\\L\\Pictures\\素材\\testSelenium.png"中 ...
    public static void test10() throws InterruptedException, IOException {
        // 截图操作
        ChromeOptions options = new ChromeOptions();
        options.addArguments("--remote-allow-origins=*");
        WebDriver webDriver = new ChromeDriver(options);
        webDriver.get("https://www.baidu.com");

        // 百度输入框中搜索软件测试
        WebElement element = webDriver.findElement(By.cssSelector("#kw"));
        element.sendKeys("软件测试");
        webDriver.findElement(By.cssSelector("#su")).click();

        Thread.sleep(2000);

        // 截图操作, 使用webDriver进行截图, 但是需要进行强制类型转换, 然后将输出转换为文件类型
        File screenshotAs = ((TakesScreenshot) webDriver).getScreenshotAs(OutputType.FILE);

        // 保存
        FileUtils.copyFile(screenshotAs,new File("C:\\Users\\L\\Pictures\\素材\\testSelenium.png"));
    }
校验输出:

版权归原作者 niceffking 所有, 如有侵权,请联系我们删除。