
一、准备
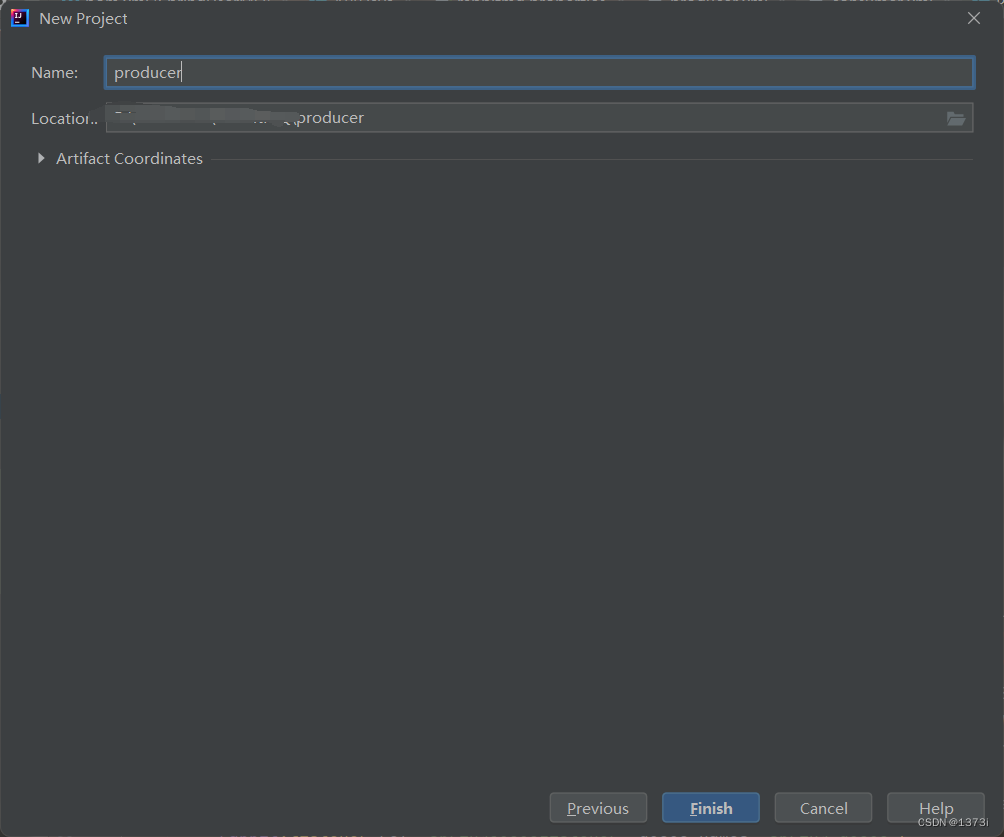
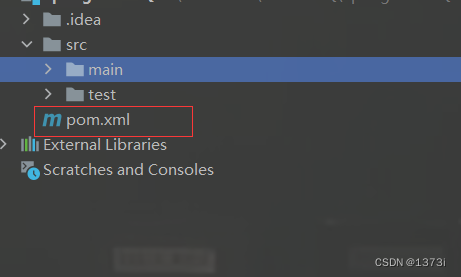
1、创建maven项目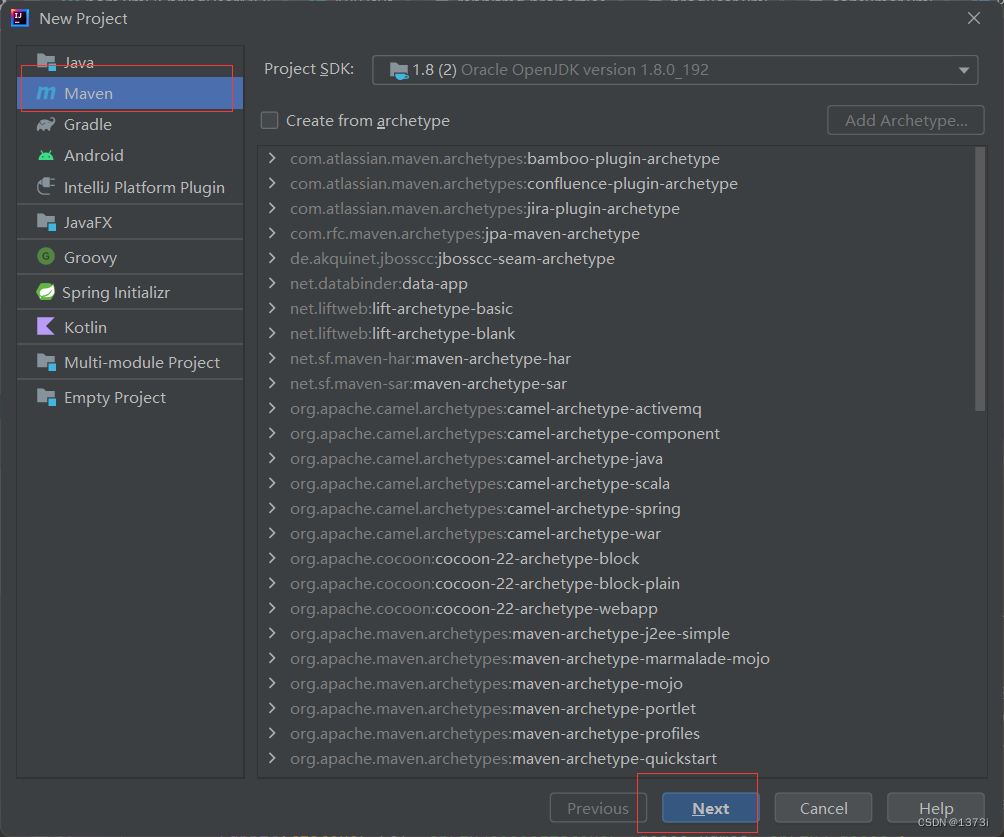

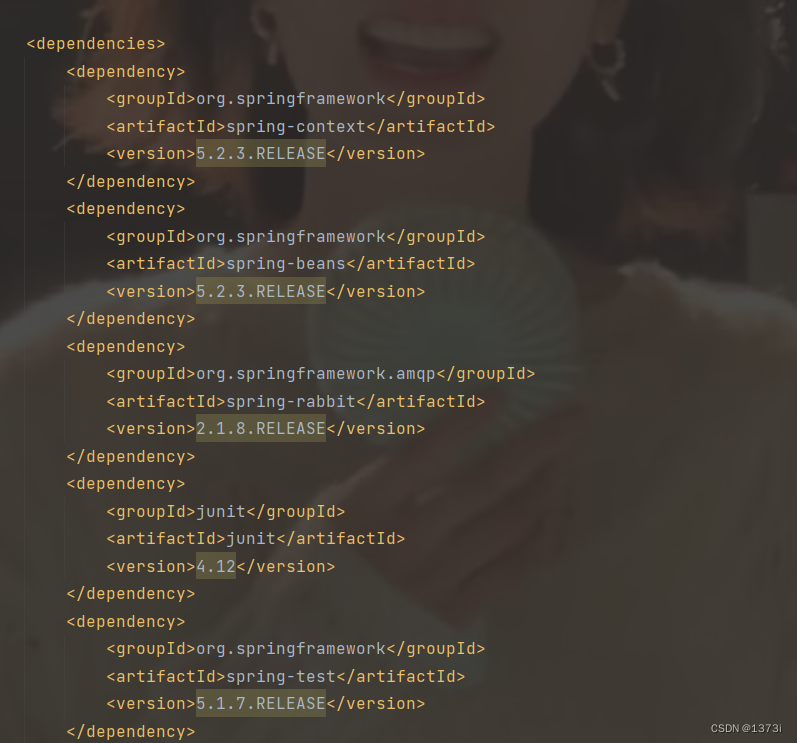
2、引入依赖
分别在两个项目的pom.xml文件里引入依赖
<dependencies>
        <dependency>
            <groupId>org.springframework</groupId>
            <artifactId>spring-context</artifactId>
            <version>5.2.3.RELEASE</version>
        </dependency>
        <dependency>
            <groupId>org.springframework</groupId>
            <artifactId>spring-beans</artifactId>
            <version>5.2.3.RELEASE</version>
        </dependency>
        <dependency>
            <groupId>org.springframework.amqp</groupId>
            <artifactId>spring-rabbit</artifactId>
            <version>2.1.8.RELEASE</version>
        </dependency>
        <dependency>
            <groupId>junit</groupId>
            <artifactId>junit</artifactId>
            <version>4.12</version>
        </dependency>
        <dependency>
            <groupId>org.springframework</groupId>
            <artifactId>spring-test</artifactId>
            <version>5.1.7.RELEASE</version>
        </dependency>
    </dependencies>
3、创建配置文件
1.RabbitMQ配置文件
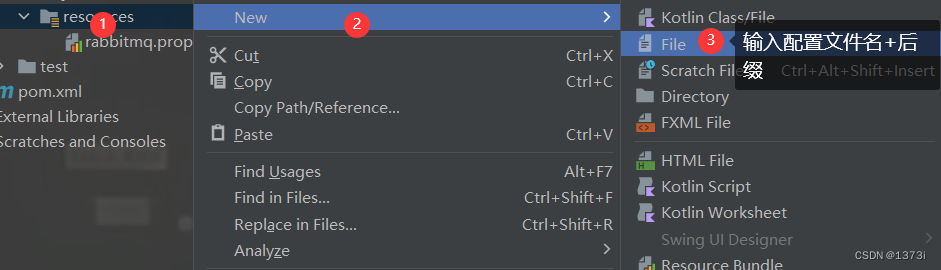
在两个项目的resources文件夹下创建RabbitMQ的配置文件后缀为yml或properties
创建好文件后将下面配置添加入文件
rabbitmq.host=127.0.0.1   #IP
rabbitmq.port=5672        #端口
rabbitmq.username=guest   #用户名
rabbitmq.password=guest   #密码
rabbitmq.virtual-host= /  #虚拟机名称
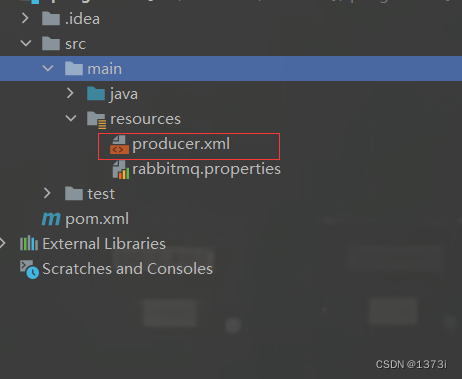
2.生产者项目配置文件
在生产者项目的resources目录下创建xml文件,该文件用于注入bean对象以及后续创建队列、交换机等
在该文件添加下面代码
<?xml version="1.0" encoding="UTF-8"?>
<beans xmlns="http://www.springframework.org/schema/beans"
       xmlns:xsi="http://www.w3.org/2001/XMLSchema-instance"
       xmlns:context="http://www.springframework.org/schema/context"
       xmlns:rabbit="http://www.springframework.org/schema/rabbit"
       xsi:schemaLocation="http://www.springframework.org/schema/beans
       http://www.springframework.org/schema/beans/spring-beans.xsd
       http://www.springframework.org/schema/context
       https://www.springframework.org/schema/context/spring-context.xsd
       http://www.springframework.org/schema/rabbit
       http://www.springframework.org/schema/rabbit/spring-rabbit.xsd">
    <!--设置读取连接RabbitMQ服务器的配置信息-->
    <context:property-placeholder location="classpath:properties/rabbitmq.properties"/>

    <!-- 创建rabbitmq connectionFactory -->
    <rabbit:connection-factory id="connectionFactory" host="${rabbitmq.host}"
                               port="${rabbitmq.port}"
                               username="${rabbitmq.username}"
                               password="${rabbitmq.password}"
                               virtual-host="${rabbitmq.virtual-host}"/>
    <rabbit:admin connection-factory="connectionFactory"/>


    <!--注入rabbitTemplate后续获取该对象发送消息-->
    <rabbit:template id="rabbitTemplate" connection-factory="connectionFactory"/>
</beans>
3.消费者项目配置文件
与生产者项目类似创建xml文件,在文件添加以下代码
<?xml version="1.0" encoding="UTF-8"?>
<beans xmlns="http://www.springframework.org/schema/beans"
xmlns:xsi="http://www.w3.org/2001/XMLSchema-instance"
xmlns:context="http://www.springframework.org/schema/context"
xmlns:rabbit="http://www.springframework.org/schema/rabbit"
xsi:schemaLocation="http://www.springframework.org/schema/beans
http://www.springframework.org/schema/beans/spring-beans.xsd
http://www.springframework.org/schema/context
https://www.springframework.org/schema/context/spring-context.xsd
http://www.springframework.org/schema/rabbit
http://www.springframework.org/schema/rabbit/spring-rabbit.xsd">
<!--加载配置文件-->
<context:property-placeholder location="classpath:properties/rabbitmq.properties"/>
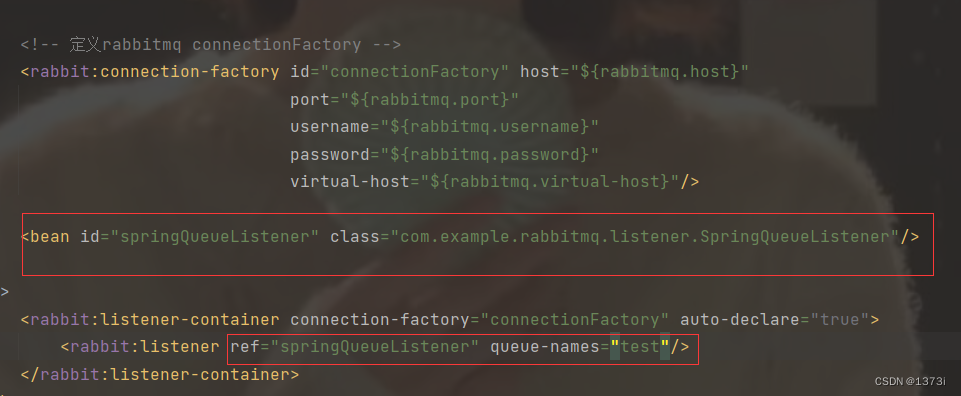
<!-- 定义rabbitmq connectionFactory -->
<rabbit:connection-factory id="connectionFactory" host="${rabbitmq.host}"
port="${rabbitmq.port}"
username="${rabbitmq.username}"
password="${rabbitmq.password}"
virtual-host="${rabbitmq.virtual-host}"/>
<rabbit:listener-container connection-factory="connectionFactory" auto-declare="true">
</rabbit:listener-container>
</beans>
二、生产者xml中文件创建队列
在生产者项目里我们创建了xml的配置文件,在该文件里我们可以通过标签去创建队列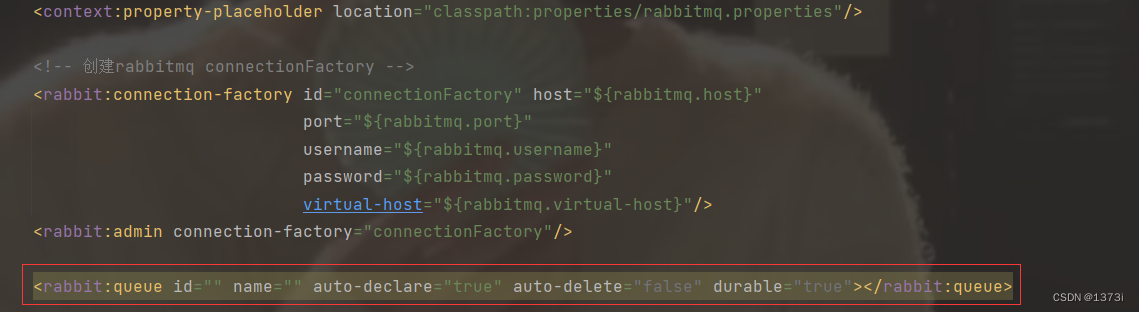
<rabbit:queue id="" name="" auto-declare="true" auto-delete="false" durable="true"></rabbit:queue>id 表示bean的名称
name 表示队列的名称
auto-declare 表示如果当服务器没有该队列时是否创建
durable 表示是否持久化到内存
三、生产者xml文件中创建交换机以及绑定队列
1、创建交换机
同样在生产者项目里我们之前创建的xml文件里同样我们也可以一个标签去创建交换机以及绑定队列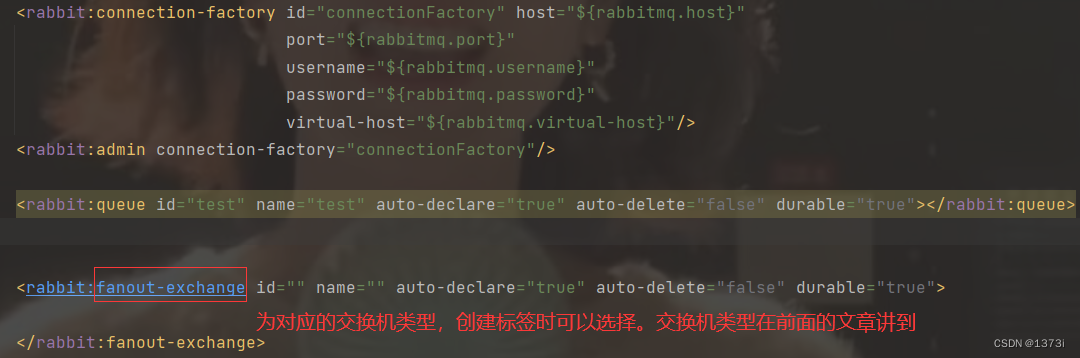
<rabbit:fanout-exchange id="" name="" auto-declare="true" auto-delete="false" durable="true">

</rabbit:fanout-exchange>
id 表示bean的名称
name 表示交换机的名称
auto-declare 表示如果当服务器没有该交换机时是否创建
durable 表示是否持久化到内存
2、绑定队列
我们在创建的交换机标签里可以嵌套标签进行绑定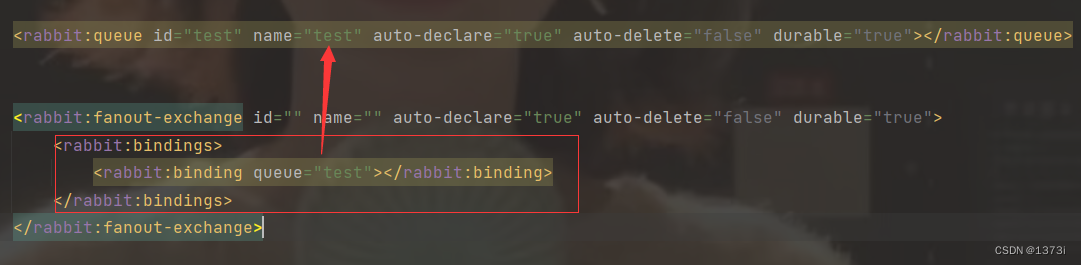
<rabbit:fanout-exchange id="" name="" auto-declare="true" auto-delete="false" durable="true">
    <rabbit:bindings>
        <rabbit:binding queue="test"></rabbit:binding>
    </rabbit:bindings>
</rabbit:fanout-exchange>
queue 表示绑定的队列名成
此处由于创建的交换机类型是fanout广播类型不需要去配置路由,如果创建的direct交换机不止需要配置队列名属性,还需要配置路由属性,如果是topic交换机则需要配置通配符
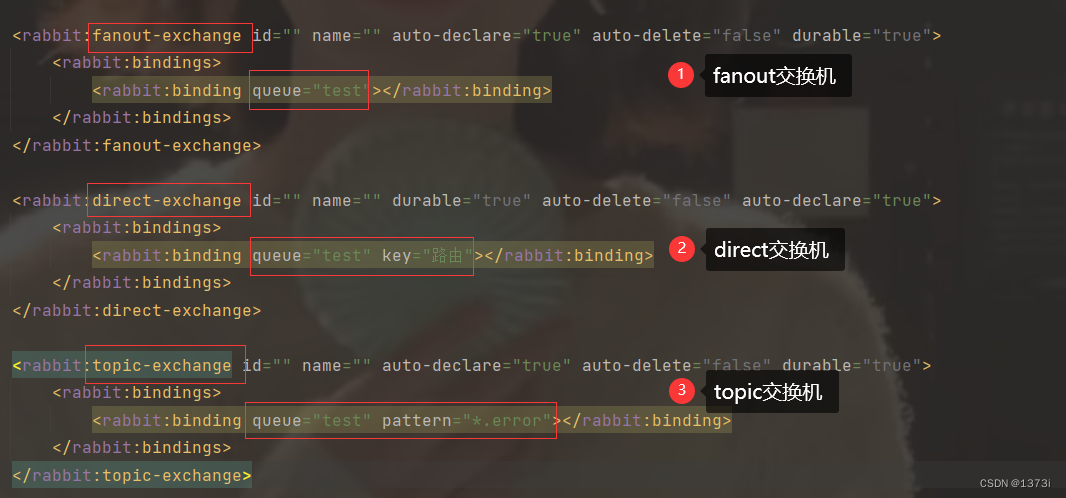
 <rabbit:queue id="test" name="test" auto-declare="true" auto-delete="false" durable="true"></rabbit:queue>

    <rabbit:fanout-exchange id="" name="" auto-declare="true" auto-delete="false" durable="true">
        <rabbit:bindings>
            <rabbit:binding queue="test"></rabbit:binding>
        </rabbit:bindings>
    </rabbit:fanout-exchange>

    <rabbit:direct-exchange id="" name="" durable="true" auto-delete="false" auto-declare="true">
        <rabbit:bindings>
            <rabbit:binding queue="test" key="路由"></rabbit:binding>
        </rabbit:bindings>
    </rabbit:direct-exchange>

    <rabbit:topic-exchange id="" name="" auto-declare="true" auto-delete="false" durable="true">
        <rabbit:bindings>
            <rabbit:binding queue="test" pattern="*.error"></rabbit:binding>
        </rabbit:bindings>
    </rabbit:topic-exchange>
四、消费者xml文件中创建队列消息监听器
同样在消费者创建的xml文件里我们路创建队列监听器容器来将不同队列的消息映射到不同的类
首先我们需要创建一个类实现MessageListener接口实现onMessage方法

然后将他注入spring容器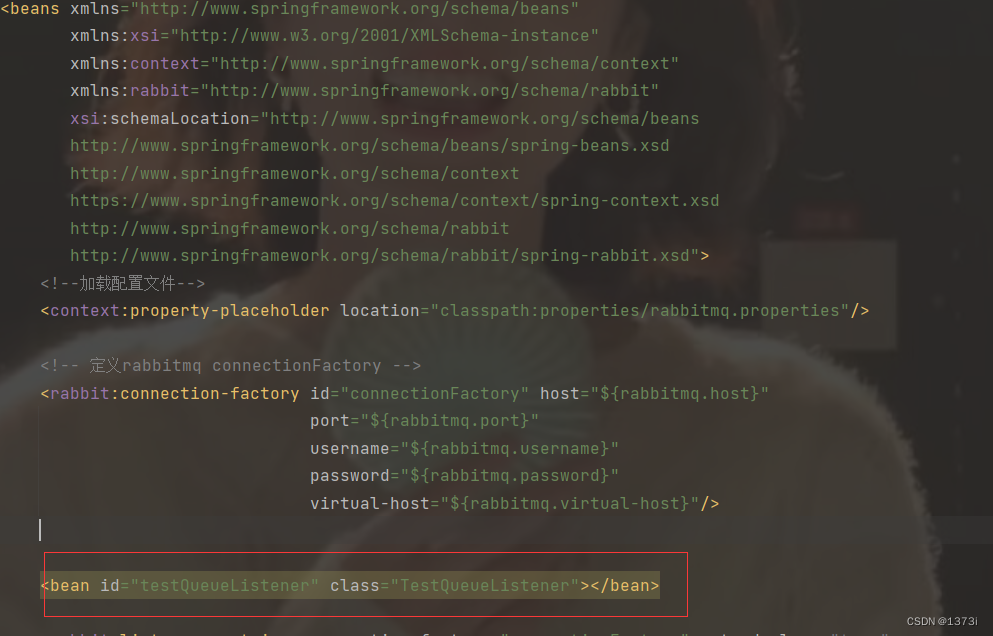
在xml里此时我们可以通过标签创建监听器
<rabbit:listener-container connection-factory="connectionFactory" auto-declare="true">
    <rabbit:listener ref="testQueueListener" queue-names="test"></rabbit:listener>
    <rabbit:listener ref="" queue-names=""></rabbit:listener>
    ………………
</rabbit:listener-container>
ref 表示之前我们定义实现了MessageListener接口的监听类在spring容器里的id
queues-names 表示该类要监听的队列

后续需要再进行添加,在该标签下可继续进行添加
在之前创建的类重写的方法里参数message.getBody()即可获得队列里消息
五、Spring实现RabbitMQ五大工作模式
五大工作模式在之前的文章提到,如果不了解可以查看【RabbitMQ】Rabbbit的六种工作模式以及代码实现_1373i的博客-CSDN博客https://blog.csdn.net/qq_61903414/article/details/130156097?spm=1001.2014.3001.5501
1、简单模式
1.生产者
我们先要在生产者xml配置文件里创建一个队列

然后在项目目录下创建一个测试类类加注解读取配置文件以及环境
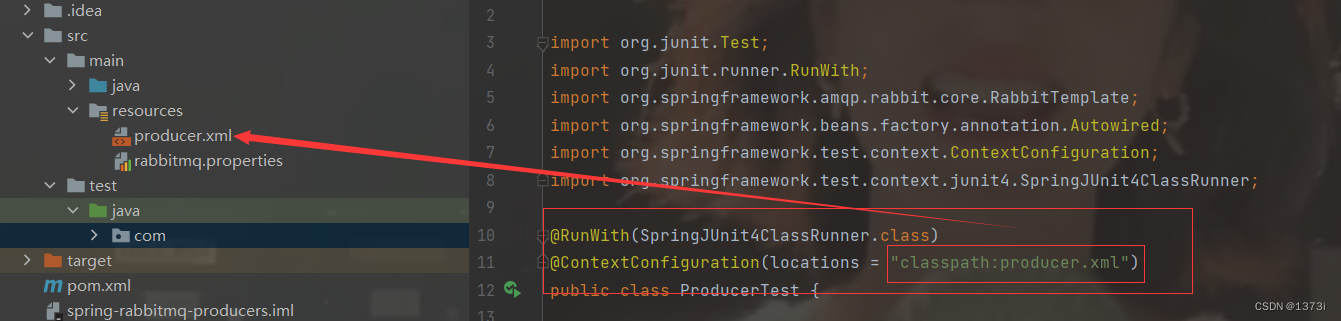
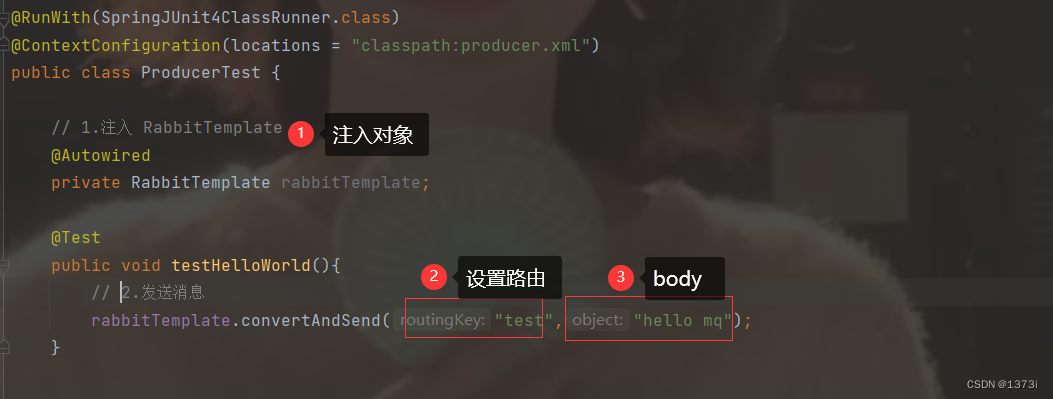
在类里注入RabbitTemplate对象,通过该对象的convertAndSend方法发送消息,由于我们使用的是简单模式,所以此处路由为队列名
package com.itheima;

import org.junit.Test;
import org.junit.runner.RunWith;
import org.springframework.amqp.rabbit.core.RabbitTemplate;
import org.springframework.beans.factory.annotation.Autowired;
import org.springframework.test.context.ContextConfiguration;
import org.springframework.test.context.junit4.SpringJUnit4ClassRunner;

@RunWith(SpringJUnit4ClassRunner.class)
@ContextConfiguration(locations = "classpath:producer.xml")
public class ProducerTest {

    // 1.注入 RabbitTemplate
    @Autowired
    private RabbitTemplate rabbitTemplate;

    @Test
    public void testHelloWorld(){
        // 2.发送消息
        rabbitTemplate.convertAndSend("test","hello mq");
    }
}
运行代码查看服务器
2.消费者
首先我们需要创建一个监听类实现MessageListener接口并重写onMessage方法

然后将这个类注入spring里,在xml里创建监听器容器将这个类与队列绑定去监听队列
然后创建一个测试类,与生产者相同加两个 注解,然后在测试方法里死循环的去监听队列

运行代码 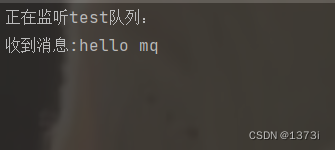

2、work queues工作队列模式
工作队列模式与上述相同,将生产者复制一份即可
1.生产者
@RunWith(SpringJUnit4ClassRunner.class)
@ContextConfiguration(locations = "classpath:producer.xml")
public class ProducerTest {

    // 1.注入 RabbitTemplate
    @Autowired
    private RabbitTemplate rabbitTemplate;

    @Test
    public void testHelloWorld(){
        // 2.发送消息
        rabbitTemplate.convertAndSend("test","hello mq");
    }
}
2.消费者
创建两个消费者类实现MessageListener接口重写onMessage方法然后将其注入Spring容器,在监听容器将队列与spring bean绑定即可
package com.example.rabbitmq.listener;

import org.springframework.amqp.core.Message;
import org.springframework.amqp.core.MessageListener;

public class SpringQueueListener1 implements MessageListener {
    @Override
    public void onMessage(Message message) {
        //打印消息
        System.out.println("收到消息:" + new String(message.getBody()));
    }
}
package com.example.rabbitmq.listener;

import org.springframework.amqp.core.Message;
import org.springframework.amqp.core.MessageListener;

public class SpringQueueListener2 implements MessageListener {
    @Override
    public void onMessage(Message message) {
        //打印消息
        System.out.println("收到消息:" + new String(message.getBody()));
    }
}
<bean id="springQueueListener1" class="com.example.rabbitmq.listener.SpringQueueListener1"/>
    <bean id="springQueueListener2" class="com.example.rabbitmq.listener.SpringQueueListener2"/>

    <rabbit:listener-container connection-factory="connectionFactory" auto-declare="true">
        <rabbit:listener ref="springQueueListener1" queue-names="test"></rabbit:listener>
        <rabbit:listener ref="springQueueListener2" queue-names="test"></rabbit:listener>
    </rabbit:listener-container>
3、pub/sub订阅模式
订阅模式与前两种不同,订阅模式需要使用到fanout类型的交换机,并且将队列与之绑定,他的生产者在xml文件里需要去创建两个队列与fanout类型的交换机并绑定,在发送消息时指定交换机名称即可,而消费者则与前者相同,只是需要修改指定监听的队列名
1.生产者
xml文件创建队列与交换机
 <rabbit:queue id="fQueue1" name="fQueue1" auto-declare="true" auto-delete="false" durable="true"></rabbit:queue>
    <rabbit:queue id="fQueue2" name="fQueue2" auto-declare="true" auto-delete="false" durable="true"></rabbit:queue>

    <rabbit:fanout-exchange id="fExchange" name="fExchange" auto-declare="true">
        <rabbit:bindings>
            <rabbit:binding queue="fQueue1"></rabbit:binding>
            <rabbit:binding queue="fQueue2"></rabbit:binding>
        </rabbit:bindings>
    </rabbit:fanout-exchange>
此时我们只需要在发送消息时指定交换机即可
@RunWith(SpringJUnit4ClassRunner.class)
@ContextConfiguration(locations = "classpath:producer.xml")
public class ProducerTest {

    // 1.注入 RabbitTemplate
    @Autowired
    private RabbitTemplate rabbitTemplate;

    @Test
    public void testHelloWorld(){
        // 2.发送消息
        rabbitTemplate.convertAndSend("test","hello mq");
    }

    @Test
    public void testFanout(){
        rabbitTemplate.convertAndSend("fExchange","","hello fanout");
    }
}
运行代码
2.消费者
消费者与前面消费者创建相同,只需修改对应的监听队列名即可
4、routing路由模式
路由模式与订阅模式相同都需要创建交换机,路由模式需要创建direct类型交换机,且在绑定队列时需要指定该队列的路由key
1.生产者
xml文件--创建交换机
 <rabbit:queue id="dQueue1" name="dQueue1" auto-declare="true"></rabbit:queue>
    <rabbit:queue id="dQueue2" name="dQueue2" auto-declare="true"></rabbit:queue>

    <rabbit:direct-exchange name="dExchange" id="dExchange" auto-declare="true">
        <rabbit:bindings>
            <rabbit:binding queue="dQueue1" key="q1"></rabbit:binding>
            <rabbit:binding queue="dQueue2" key="q2"></rabbit:binding>
        </rabbit:bindings>
    </rabbit:direct-exchange>
发送消息时需要指定交换机以及路由
@RunWith(SpringJUnit4ClassRunner.class)
@ContextConfiguration(locations = "classpath:producer.xml")
public class ProducerTest {

    // 1.注入 RabbitTemplate
    @Autowired
    private RabbitTemplate rabbitTemplate;

    @Test
    public void testHelloWorld(){
        // 2.发送消息
        rabbitTemplate.convertAndSend("test","hello mq");
    }

    @Test
    public void testFanout(){
        rabbitTemplate.convertAndSend("fExchange","","hello fanout");
    }

@Test
    public void testDirect(){
        //2.发送消息

        rabbitTemplate.convertAndSend("dExchange","q1","hello direct");
    }
}
运行代码查看控制台
2.消费者
消费者代码与前面相同,只需修改监听队列名即可
5、topics通配符模式
整体代码与路由模式类似,他需要创建topic类型交换机且配置通配符规则
1.生产者
xml文件创建交换机与队列
<rabbit:queue id="tQueue1" name="tQueue1" auto-declare="true"></rabbit:queue>
    <rabbit:queue id="tQueue2" name="tQueue2" auto-declare="true"></rabbit:queue>

    <rabbit:topic-exchange name="tExchange" id="tExchange" auto-declare="true">
        <rabbit:bindings>
            <rabbit:binding pattern="A.*" queue="tQueue1"></rabbit:binding>
            <rabbit:binding pattern="#.info" queue="tQueue2"></rabbit:binding>
        </rabbit:bindings>
    </rabbit:topic-exchange>
发送消息时需要填写匹配路由
@Test
    public void testTopic() {
        rabbitTemplate.convertAndSend("tExchange","A.ERROR","A系统的error错误");
    }
运行代码查看控制台
2.消费者
消费者代码与前面相同,依旧只需要修改监听队列名即可
版权归原作者 西瓜霜润喉片 所有, 如有侵权,请联系我们删除。