
🏍️作者简介:大家好,我是亦世凡华、渴望知识储备自己的一名在校大学生
🛵个人主页:亦世凡华、
🛺系列专栏:uni-app
🚲座右铭:人生亦可燃烧,亦可腐败,我愿燃烧,耗尽所有光芒。
👀引言
⚓经过web前端的学习,相信大家对于前端开发有了一定深入的了解,今天我开设了uni-app专栏,主要想从移动端开发方向进一步发展,而对于我来说写移动端博文的第二站就是uni-app开发,希望看到我文章的朋友能对你有所帮助。
分类页面
分类页面的页面布局需要分为左右布局,左边是导航菜单,右边是具体内容,在最顶部设置一个搜索框进行相关关键字的搜索,具体的实现过程如下:
导航菜单设置
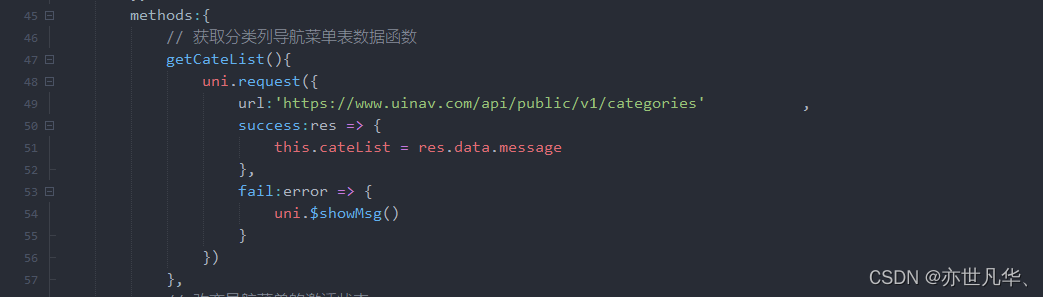
通过调用分类列表导航菜单数据接口,并将其转存到data中在页面中进行调用,如下:
因为导航菜单打算占据整个可用视口,这里需要我们调用uni-app给我们提供的API,如下:
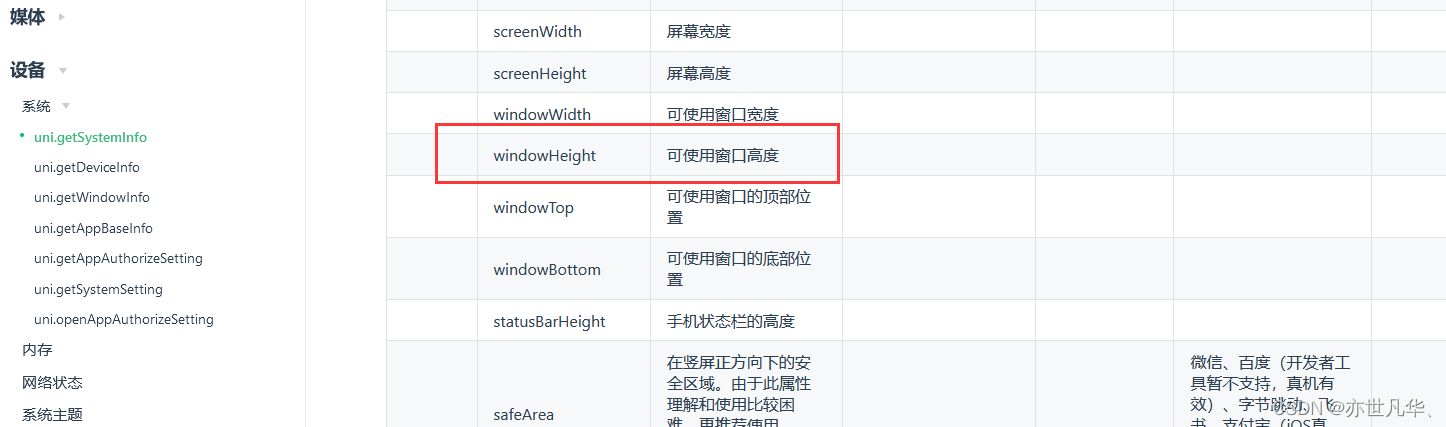
在页面刚渲染的时候进行调用这个API,如下:

接下来给菜单布局结构和样式,并设置当我们点击某个菜单时,给当前的菜单添加一个点击事件并给出相关样式,给出完整代码如下:
<template>
    <view class="scroll-view-container">
        <!-- 左侧的滚动视图区域 -->
        <scroll-view class="left-scroll-view" scroll-y :style="{height: wh + 'px'}" >
            <block v-for="(item,index) in cateList" :key="index">
                <view
                    :class="['left-scroll-view-item',index === active ? 'active' : '']"
                    @tap="activeChanged(index)"
                >
                    {{item.cat_name}}
                </view>
            </block>
        </scroll-view>
        <!-- 右侧的滚动视图区域 -->
        <scroll-view class="right-scroll-view" scroll-y :style="{height: wh + 'px'}" >
            <view class="left-scroll-view-item">zzz</view>
            <view class="left-scroll-view-item">zzz</view>
            <view class="left-scroll-view-item">zzz</view>
            <view class="left-scroll-view-item">zzz</view>
            <view class="left-scroll-view-item">zzz</view>
            <view class="left-scroll-view-item">zzz</view>
            <view class="left-scroll-view-item">zzz</view>
            <view class="left-scroll-view-item">zzz</view>
            <view class="left-scroll-view-item">zzz</view>
            <view class="left-scroll-view-item">zzz</view>
        </scroll-view>
    </view>
</template>

<script>
    export default {
        data() {
            return {
                wh:0, // 当前设备的可用高度
                cateList:[], // 分类列表数据
                active:0, // 默认的激活项
            };
        },
        onLoad() {
            const sysInfo = uni.getSystemInfoSync()
            this.wh = sysInfo.windowHeight
            // 调用分类列表数据函数
            this.getCateList()
        },
        methods:{
            // 获取分类列导航菜单表数据函数
            getCateList(){
                uni.request({
                    url:'https://www.uinav.com/api/public/v1/categories',
                    success:res => {
                        this.cateList = res.data.message
                    },
                    fail:error => {
                        uni.$showMsg()
                    }
                })
            },
            // 改变导航菜单的激活状态
            activeChanged(index){
                this.active = index
            }
        }
    }
</script>

<style lang="scss">
// 解决小程序和app滚动条的问题
/* #ifdef MP-WEIXIN || APP-PLUS */
    ::-webkit-scrollbar {
        display: none;
        width: 0 !important;
        height: 0 !important;
        -webkit-appearance: none;
        background: transparent;
        color: transparent;
      }
/* #endif */

// 解决H5 的问题
/* #ifdef H5 */
    uni-scroll-view .uni-scroll-view::-webkit-scrollbar {
        /* 隐藏滚动条,但依旧具备可以滚动的功能 */
        display: none;
        width: 0 !important;
        height: 0 !important;
        -webkit-appearance: none;
        background: transparent;
        color: transparent;
    }
/* #endif */
.scroll-view-container{
    display: flex;
    // 左侧导航区域
    .left-scroll-view{
        width: 120px;
        .left-scroll-view-item{
            background-color: #ececec;
            line-height: 60px;
            text-align: center;
            font-size: 15px;
            &.active{
                background-color: #FFFFFF;
                position: relative;
                &::before{
                    content: '';
                    display: block;
                    width: 3px;
                    height: 30px;
                    background-color: #C00000;
                    position: absolute;
                    top: 50%;
                    left: 0;
                    transform: translateY(-50%);
                }
            }
        }
    }
}
</style>
渲染左侧内容界面
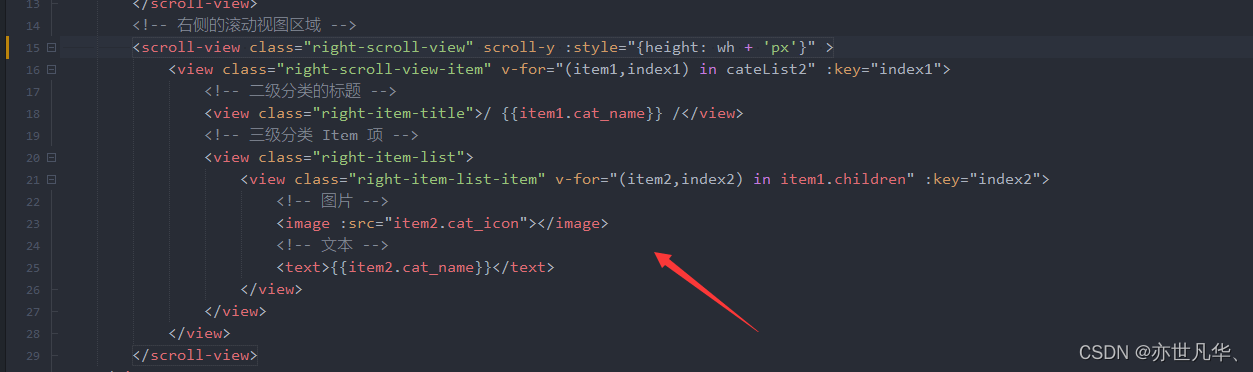
接下来实现左侧内容界面的样式布局页面的设置,在我们调用获取分类列表导航菜单的数据当中,存放着当前分类下的二级分类的数据,我们需要将其提起并转存到data当中,如下:

ok,接下来我们需要在设置导航菜单的点击事件中,根据索引,为导航菜单重新赋值 :

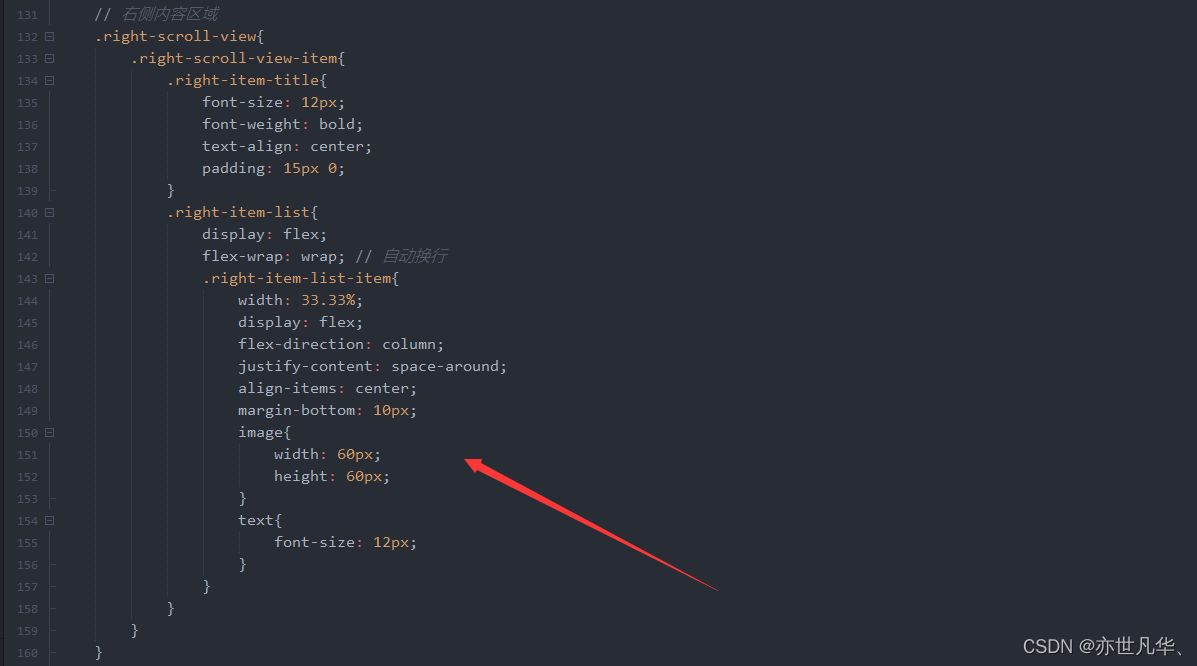
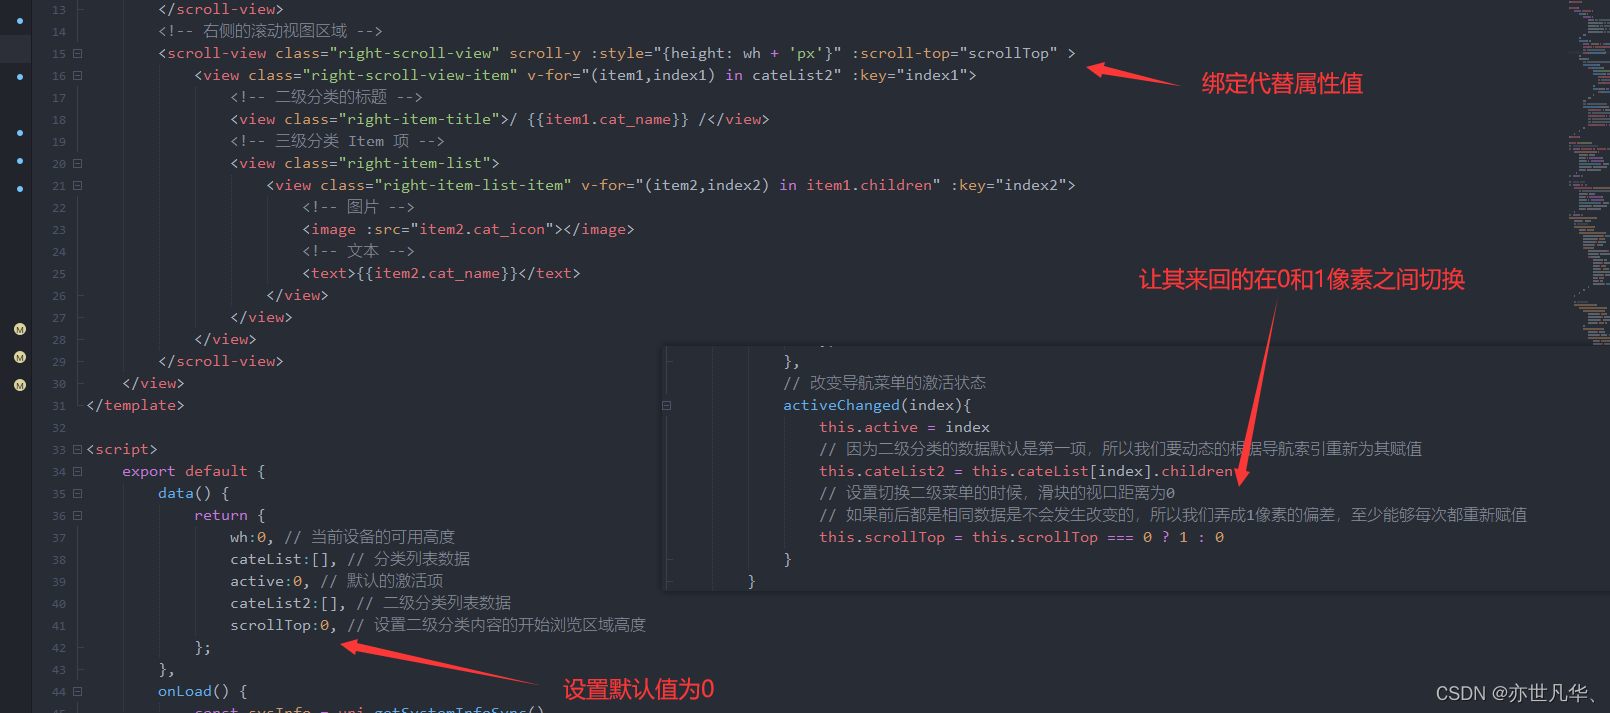
接下来开始渲染左侧内容区域的相关内容,给出的结构如下:
相关样式如下所示:
因为内容在滑动的过程中发生了滑动距离,当切换另一个界面时,滑动距离会保持原来的状态,这里的话可用 scroll-top 属性进行解决,方法如下:
具体结果如下所示:
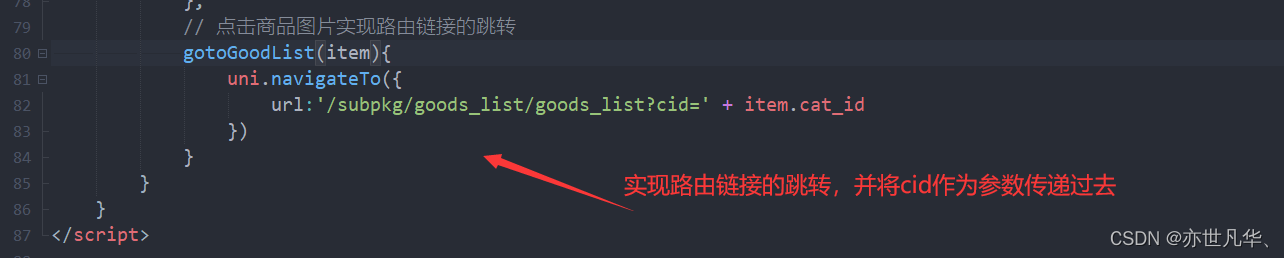
三级分类跳转到商品列表页面
接下来实现,当我们点击商品图片的时候,进行链接跳转到商品列表页面,如下:

具体实现效果如下:
搜索组件样式的实现
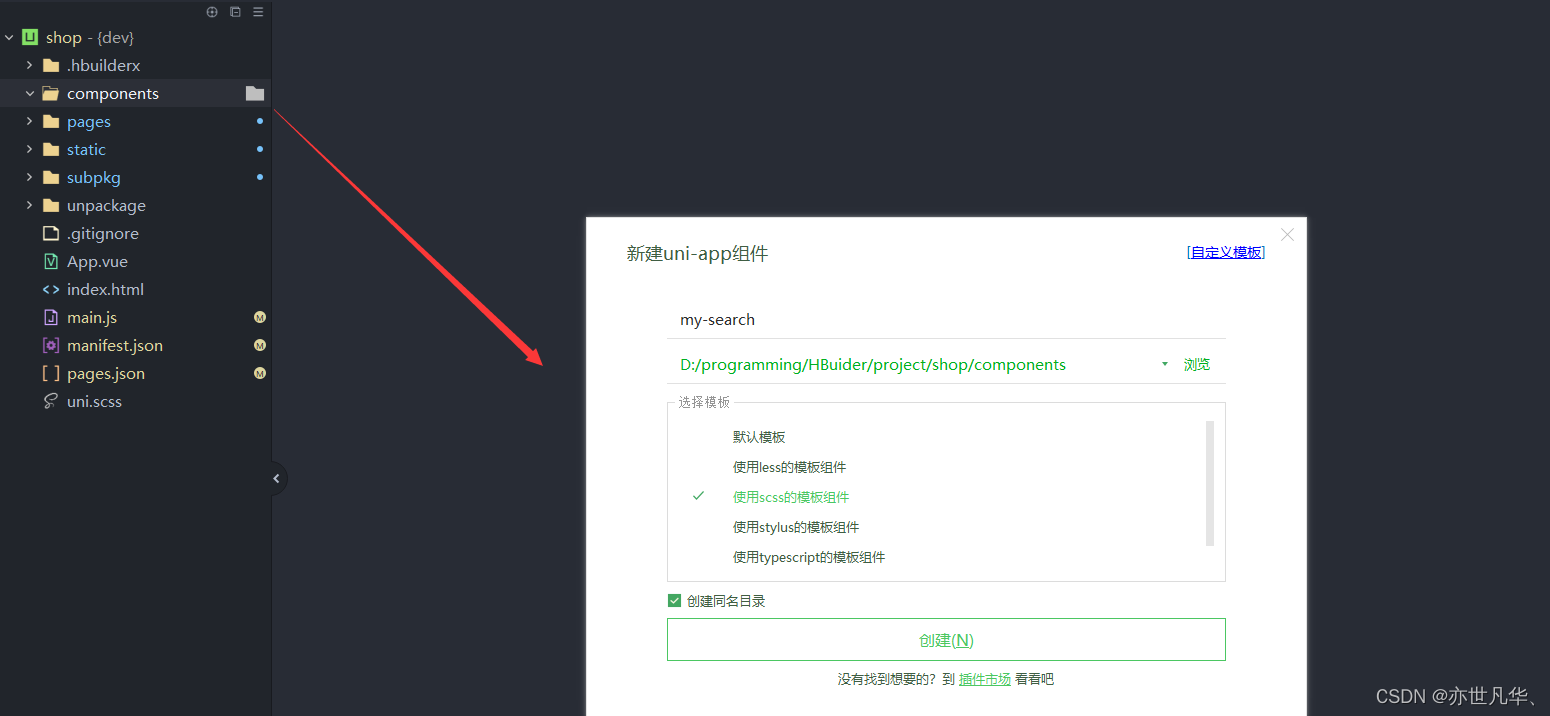
因为搜索功能的组件在首页和分类页面都需要用到,所以这里我将搜索功能封装成组件,在uni-app中约定俗成的要将组件都放置到components组件当中去,如下:
在项目根目录的 components 当中,鼠标右键,选择右键新建组件,填写组件信息之后,最后点击 创建按钮即可,如下:
接下来开始对搜索组件的内容进行相关编写,设置两个view进行包裹,外层弄颜色里层弄样式。样式的数据可以设置props进行动态的绑定数据,可以让用户根据传递的数值来动态渲染数据,具体编写如下:
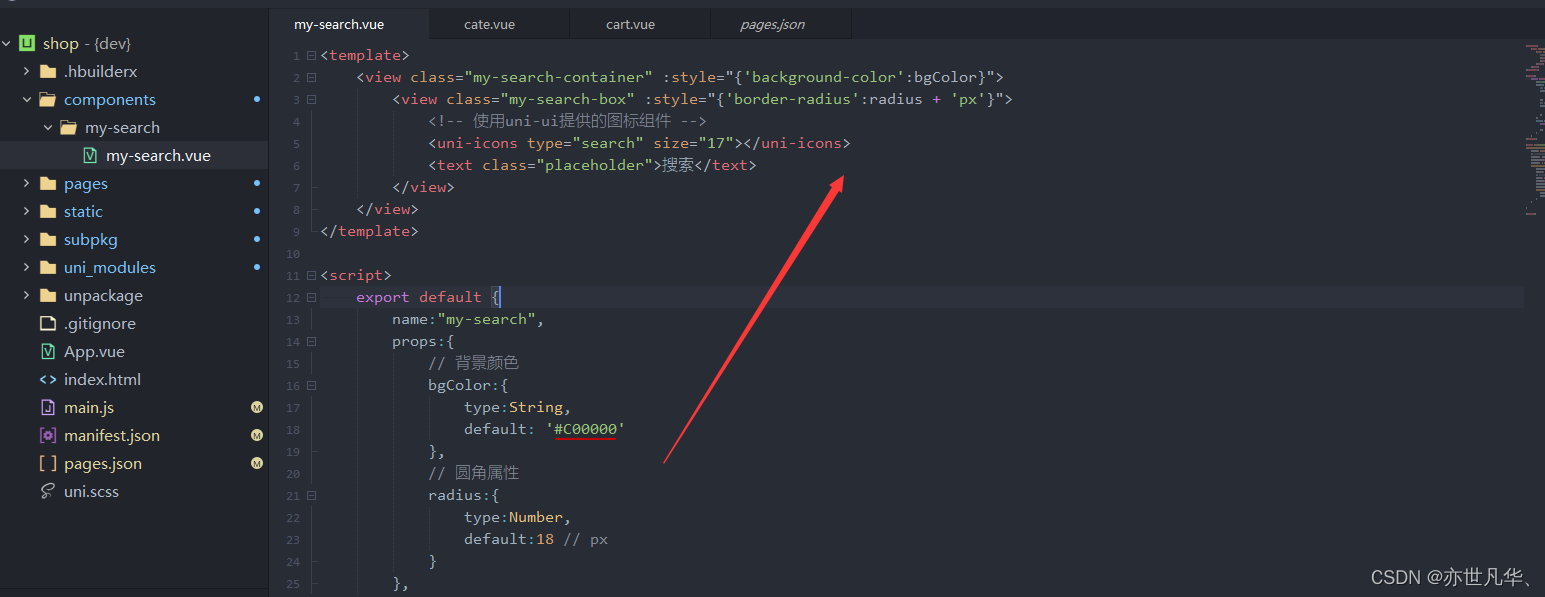
这里的 uni-icons 标签解释一下,这里使用的是uni-app官网给我们提供的扩展组件里面的样式:
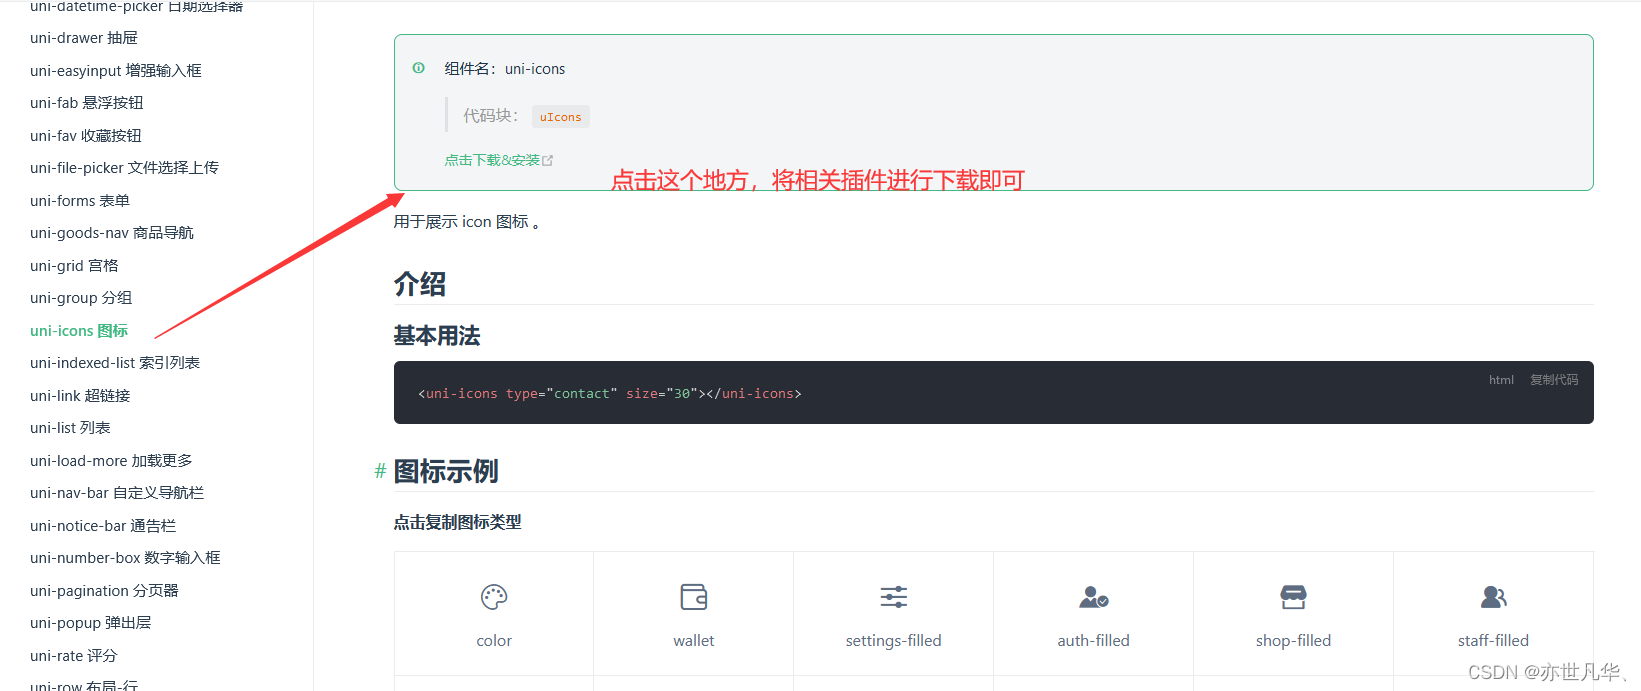
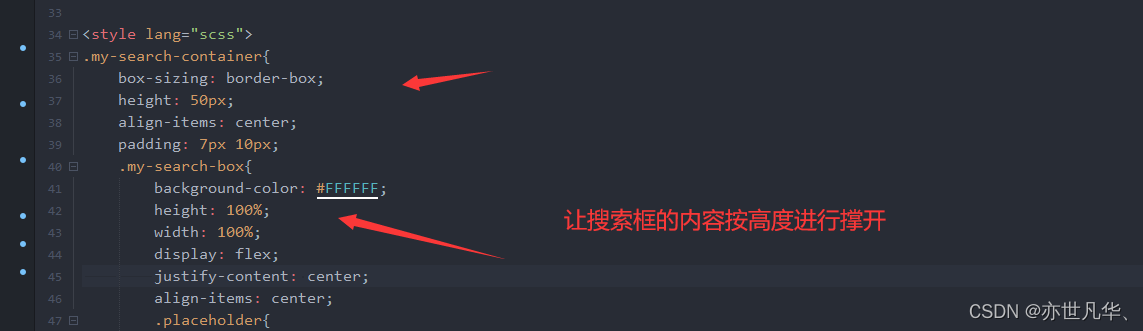
插件安装完成之后,按照基本用法的方式进行使用即可,相关样式可以根据自己的需求进行相关的修改即可,这里不再赘述,接下来给出搜索框的相关样式的编写,如下:
.my-search-container{
    height: 50px;
    align-items: center;
    padding: 0 10px;
    .my-search-box{
        background-color: #FFFFFF;
        height: 36px;
        width: 100%;
        display: flex;
        justify-content: center;
        align-items: center;
        .placeholder{
            font-size: 15px;
            margin-left: 5px;
        }
    }
}
因为搜索框本身的高度会挤占一部分可视化窗口,这里的话需要对原本分类界面的可视化距离进行一个修改,让其减去搜索框的高度,不然的话搜索框的随着屏幕的滑动而消失,如下:

ok解决完分类的页面路由,在首页我们同样需要使用搜索组件,这里的我采用的是固定定位进行解决,解决完成之后,发现样式有点丑,这里的话我将搜索组件的样式设置为IE模型,如下:
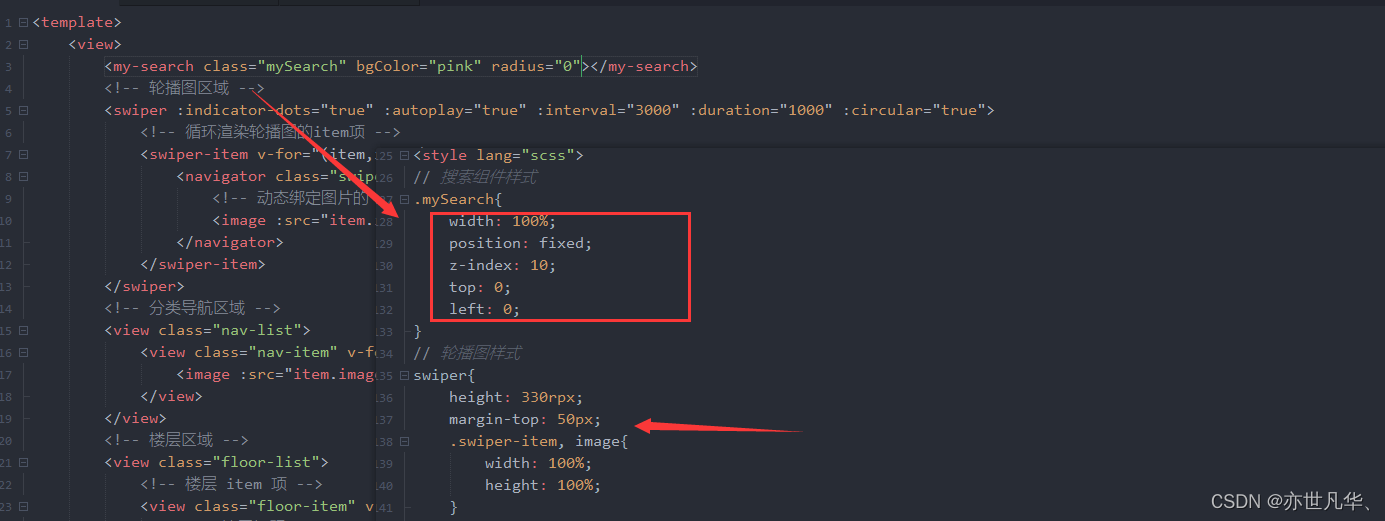
具体实现的效果如下:
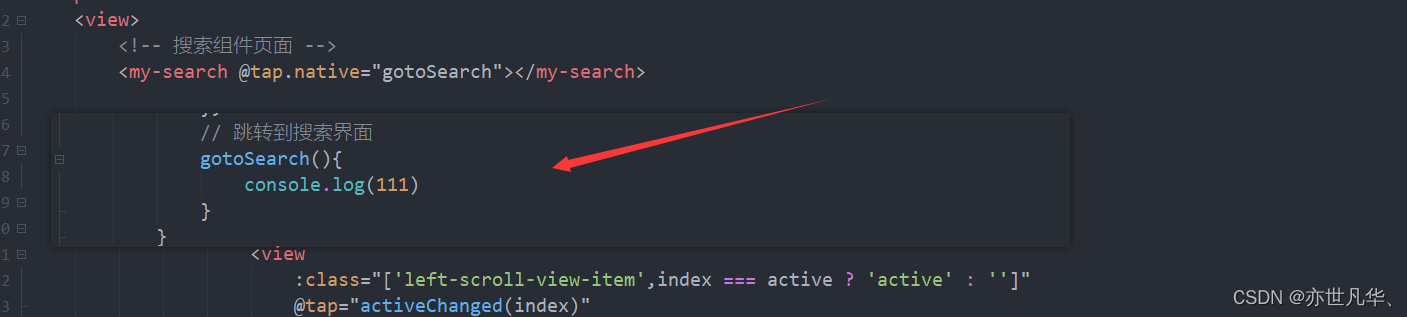
接下来实现当点击搜索组件时进行页面的跳转,跳转到一个单独的搜索界面,实现过程如下:
搜索功能的实现很简单,只需要在自定义组件的my-search组件中绑定点击事件,让其跳转到相关页面即可,然而在自定义组件中设置的点击事件,默认是传递自定义组件中的属性事件,为了让其变为原生的点击事件,需要借助uni-app的一个api:native如下:

接下来在分包的文件夹中新建search文件组件,当点击搜索组件时,跳转到搜索页面,如下:
搜索页面的功能实现
接下来实现搜索界面的功能,这里需要借用uni-app官方给我们提供的扩展组件,如下:
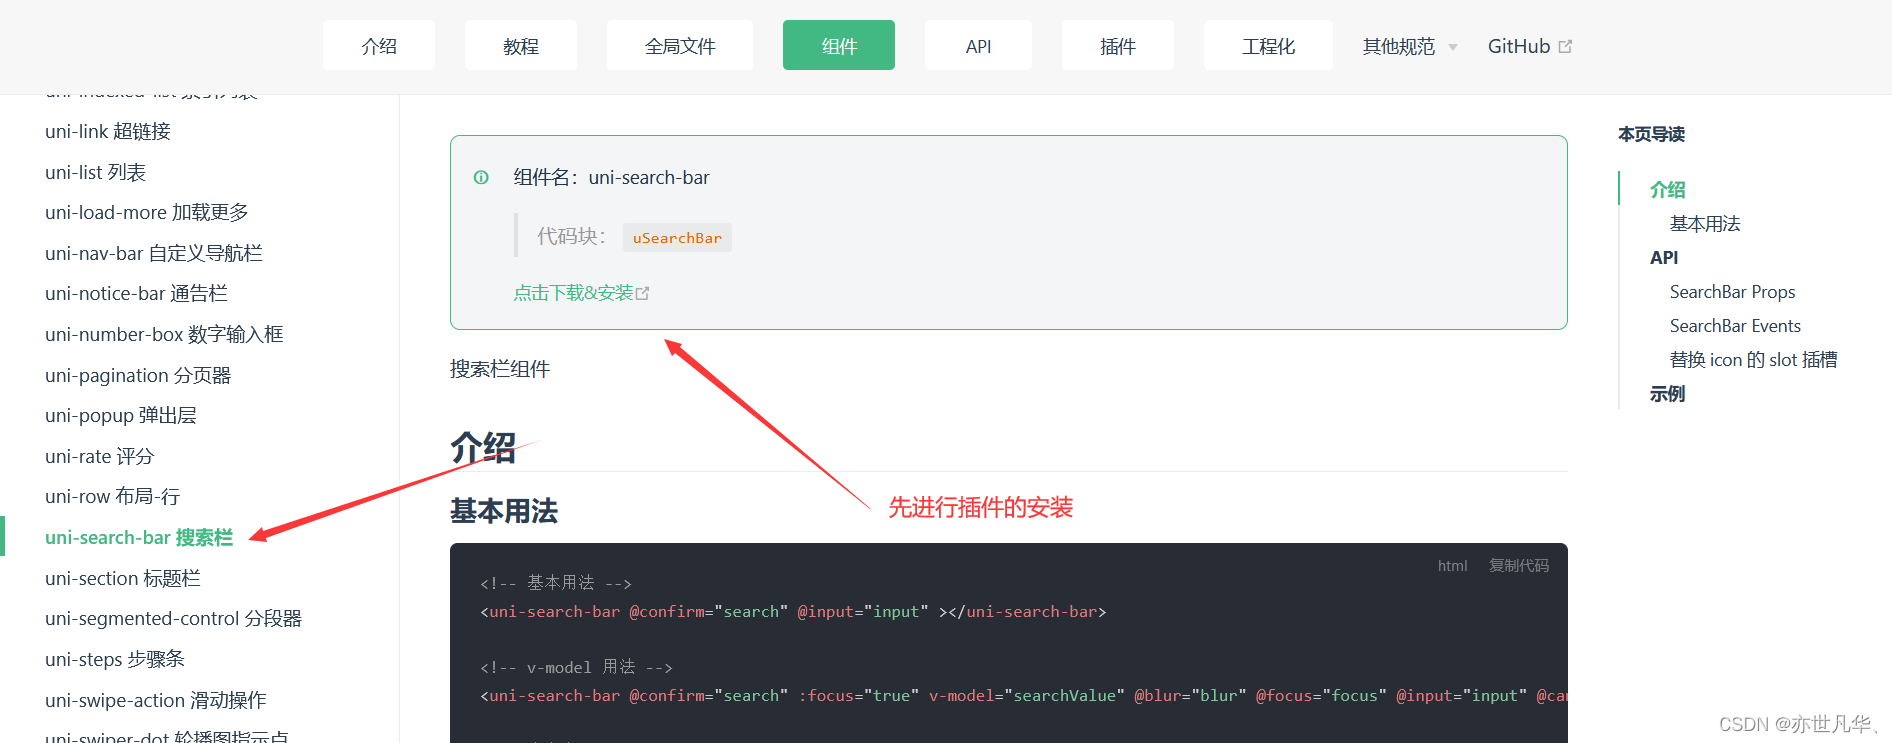
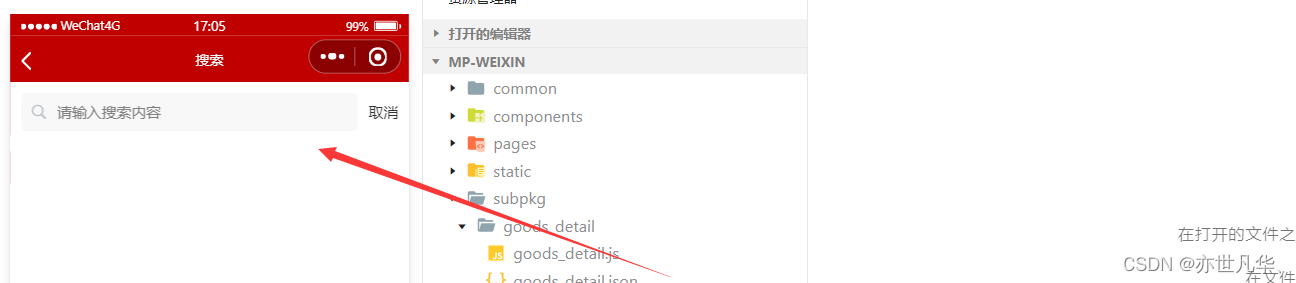
安装完插件直接引入一个基本用法的案例即可,得到的界面如下,说明我们引入插件成功:
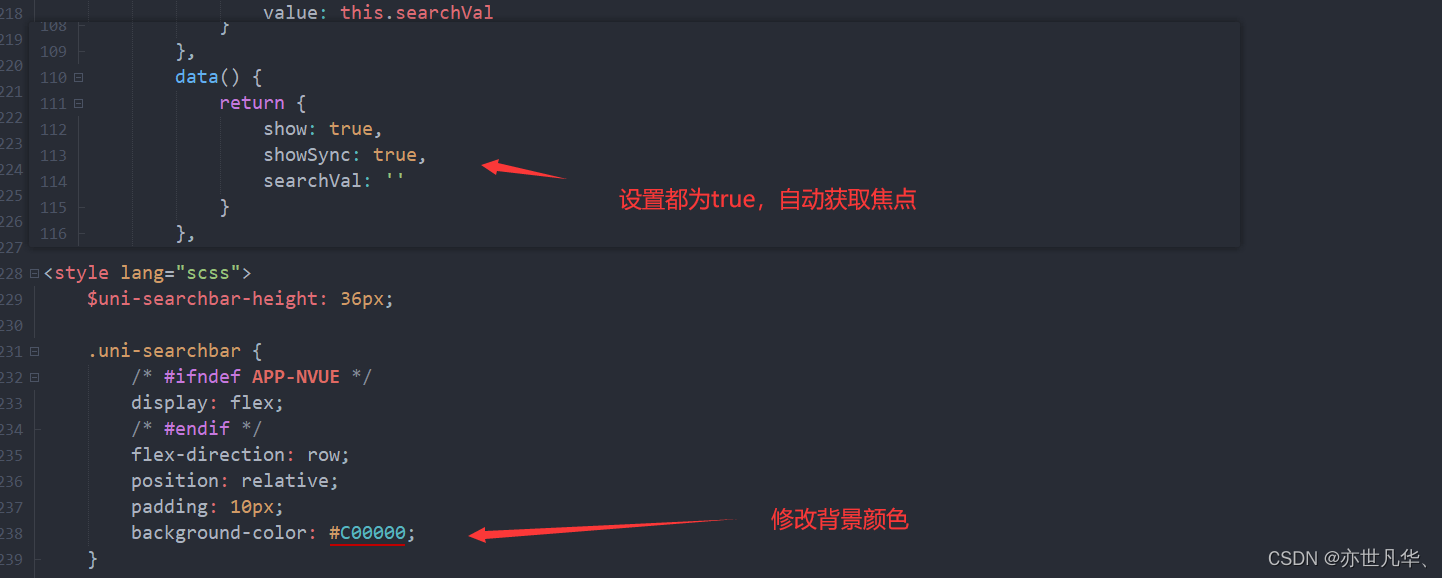
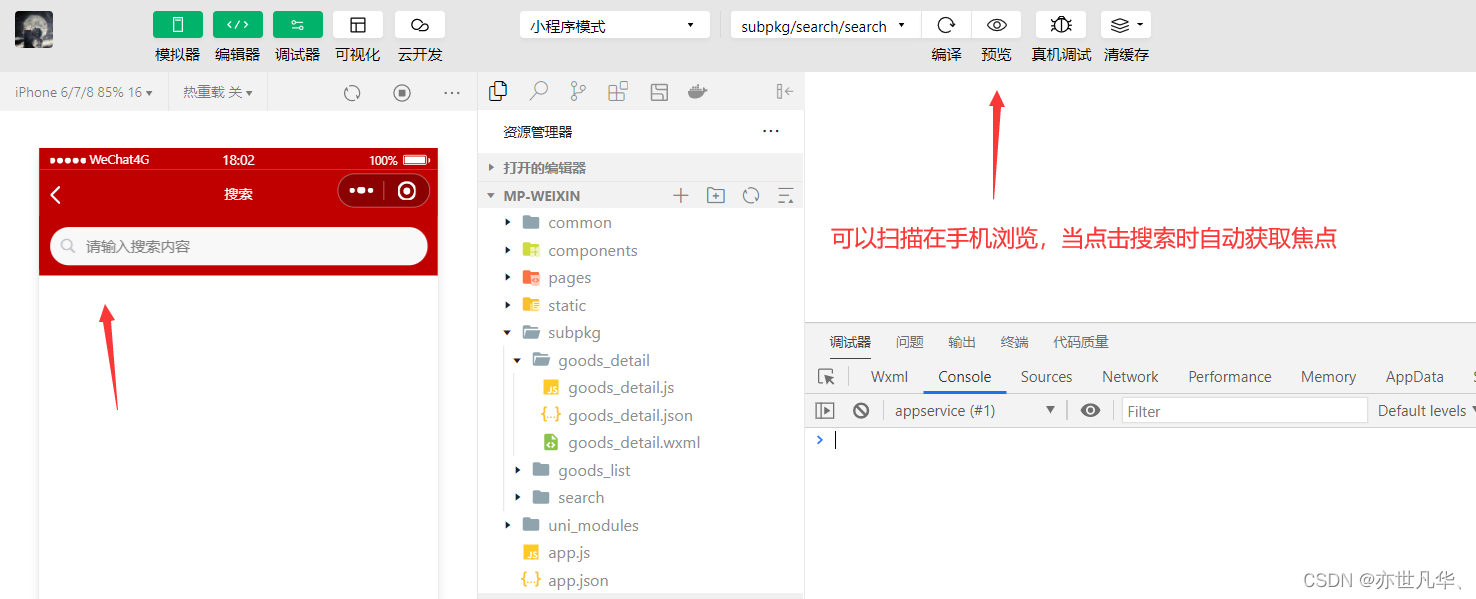
根据官网给我们提供的属性数据,我们可以根据自己的需求来进行相关的样式处理,如下:
背景颜色和当点击搜索组件跳入到搜索页面自动获取焦点的功能,可以在插件的源代码进行修改
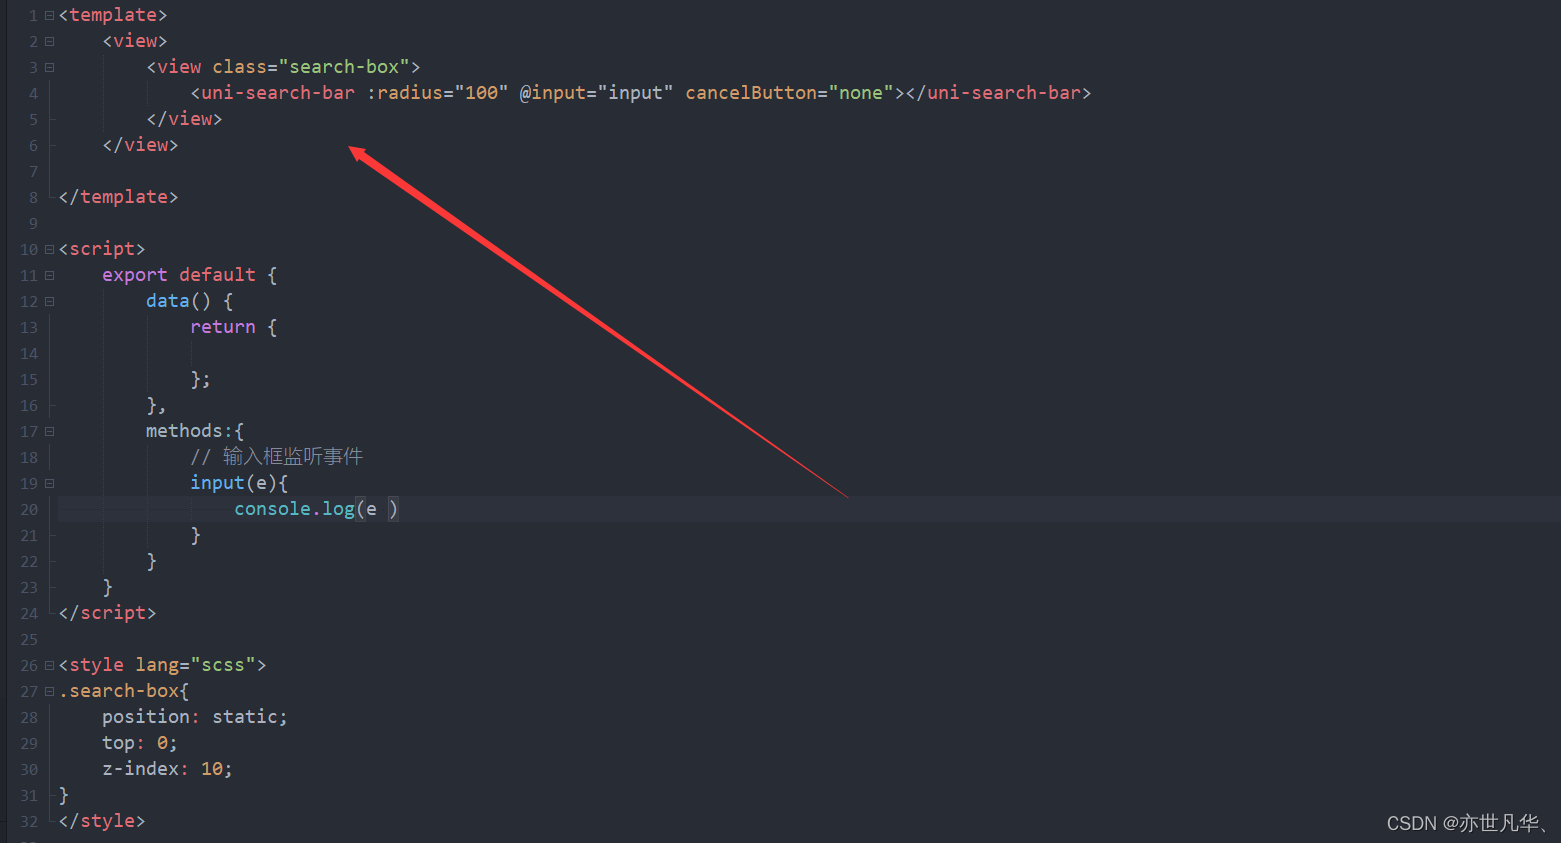
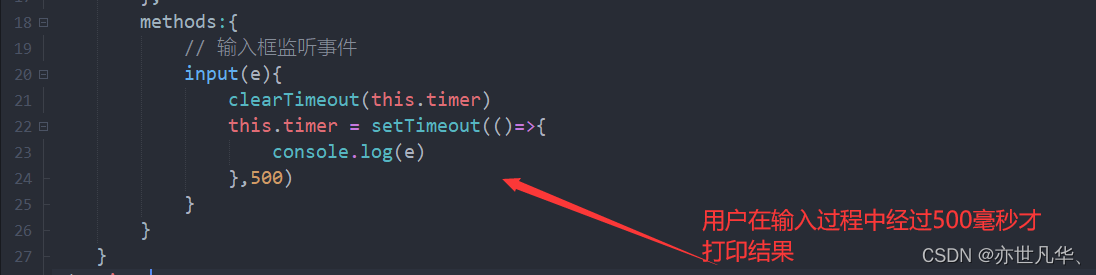
样式布局完成之后,我们需要对输入框进行防抖处理,避免用户在输入过程中每次都瞬间获取数据来消耗资源,如下:
接下来我们开始调用搜索内容的接口,并将数据存放到data中去,如下:

搜索页面数据处理
接下来将输入框输入的数据传递到后端,调用接口来获取相关数据,并将数据渲染到前端页面上,如下:
设置如下样式:
接下来处理搜索完成后的历史记录,给出完整代码如下:
<template>
<view>
<!-- 搜索输入框 -->
<view class="search-box">
<uni-search-bar :radius="100" @input="input" cancelButton="none"></uni-search-bar>
</view>
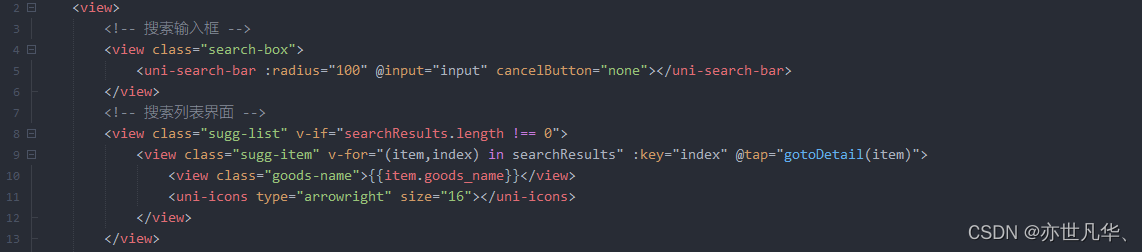
<!-- 搜索列表界面 -->
<view class="sugg-list" v-if="searchResults.length !== 0">
<view class="sugg-item" v-for="(item,index) in searchResults" :key="index" @tap="gotoDetail(item)">
<view class="goods-name">{{item.goods_name}}</view>
<uni-icons type="arrowright" size="16"></uni-icons>
</view>
</view>
<!-- 搜索历史 -->
<view class="history-box" v-else>
<!-- 标题区域 -->
<view class="history-title">
<text>搜索历史</text>
<uni-icons type="trash" size="17" @click="clean"></uni-icons>
</view>
<!-- 内容区域 -->
<view class="history-tag">
<!-- <uni-tag text="标签"></uni-tag> -->
<uni-tag :inverted="true" :text="item" v-for="(item,index) in historys" :key="index" @click="gotoGoodsList(item)"/>
</view>
</view>
</view>
</template>
<script>
export default {
data() {
return {
timer:null, // 延时器的id
keywords:'' ,// 搜索的关键词
searchResults:[], // 搜索的结果列表
historyList:[], // 搜索历史记录数据
};
},
onLoad() {
this.historyList = JSON.parse(uni.getStorageSync('keywords') || '[]')
},
computed: {
historys() {
// this.historyList = this.keywords
// 注意:由于数组是引用类型,所以不要直接基于原数组调用 reverse 方法,以免修改原数组中元素的顺序
// 而是应该新建一个内存无关的数组,再进行 reverse 反转
return [...this.historyList].reverse()
}
},
methods:{
// 输入框监听事件
input(e){
clearTimeout(this.timer)
this.timer = setTimeout(()=>{
this.keywords = e
this.getSearchList()
},500)
},
getSearchList(){
// 判断搜索关键词是否为空
if(this.keywords.length ===0 ){
this.searchResults = []
return
}
uni.request({
url:'https://www.uinav.com/api/public/v1/goods/qsearch',
data: {
query:this.keywords
},
success:res => {
this.searchResults = res.data.message
this.saveSearchHistory()
},
fail:error => {
uni.$showMsg()
}
})
},
// 跳转到详情页面
gotoDetail(item){
uni.navigateTo({
url:'/subpkg/goods_detail/goods_detail?goods_id=' + item.goods_id
})
},
saveSearchHistory(){
// 保存历史记录
this.historyList.push(this.keywords)
// 1. 将 Array 数组转化为 Set 对象
const set = new Set(this.historyList)
// 2. 调用 Set 对象的 delete 方法,移除对应的元素
set.delete(this.keywords)
// 3. 调用 Set 对象的 add 方法,向 Set 中添加元素
set.add(this.keywords)
// 4. 将 Set 对象转化为 Array 数组
this.historyList = Array.from(set)
// 调用 uni.setStorageSync(key, value) 将搜索历史记录持久化存储到本地
uni.setStorageSync('keywords', JSON.stringify(this.historyList))
},
// 清空历史记录
clean(){
this.historyList = []
uni.setStorageSync('keywords','[')
},
// 点击跳转到商品列表页面
gotoGoodsList(kw) {
uni.navigateTo({
url: '/subpkg/goods_list/goods_list?query=' + kw
})
}
}
}
</script>
<style lang="scss">
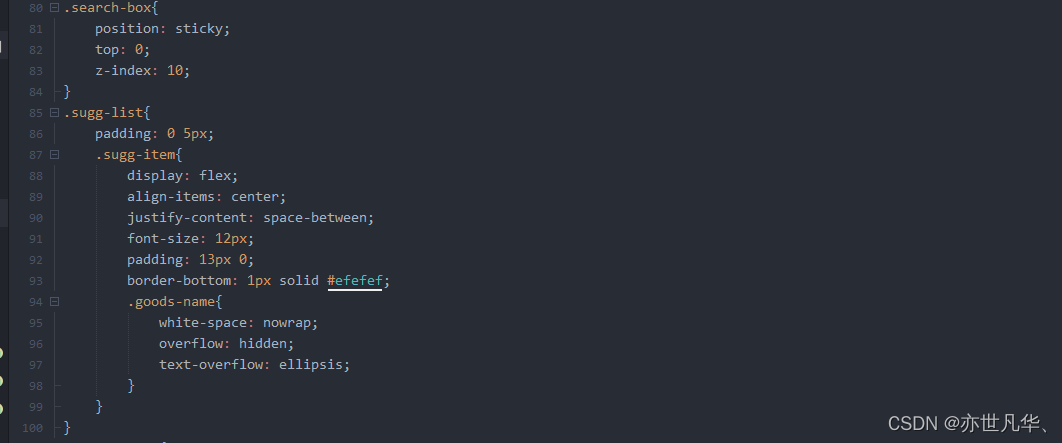
.search-box{
position: sticky;
top: 0;
z-index: 10;
}
.sugg-list{
padding: 0 5px;
.sugg-item{
display: flex;
align-items: center;
justify-content: space-between;
font-size: 12px;
padding: 13px 0;
border-bottom: 1px solid #efefef;
.goods-name{
white-space: nowrap;
overflow: hidden;
text-overflow: ellipsis;
}
}
}
.history-box{
padding: 0 5px;
.history-title{
display: flex;
justify-content: space-between;
height: 40px;
align-items: center;
font-size: 13px;
border-bottom: 1px solid #efefef;
}
.history-tag{
display: flex;
flex-wrap: wrap;
.uni-tag{
margin-top: 5px;
margin-right: 5px;
display: block;
text-align: center;
width: 20px;
}
}
}
</style>
版权归原作者 亦世凡华、 所有, 如有侵权,请联系我们删除。