
这里的需求前提是,在项目中进行某些操作前,需要在命令后对shell配置文件的进行修改(如ip、port),这个对于用户是不友好的,需要改为用户页面输入ip、port,后台自动去操作修改配置;那么这篇博客的由来就有了。

上面图片是AI创作,未经允许,不可商用哦!
目录
以下为实际工作简化后描述
实现功能描述
- 项目加载自定义变量
- 自定义变量替换shell模版内容
- 项目运行shell
功能实现拆解
针对上述功能描述,其实可以拆解为三步
- 实现项目加载自定义变量
- 实现替换shell模版内容
- 运行shell
项目加载自定义变量
这里有两种实现,
一种是项目加载自定义变量文件到系统变量中;
另一种是shell通过source .env环境变量方式加载。
项目加载自定义变量文件到系统变量中
这种方法的好处是项目中可以获取到自定义变量,如果项目代码需要获取自定义变量进行操作,可以考虑使用此方式
新增一个自定义变量文件(当然也可以在代码中固定写入变量直接加载到系统中,这样的缺点就是不灵活,如果有变动就需要改代码)
自定义变量文件如下
BASE_ROOT_DIR=/home
LICENSE_PATH=/home/LICENSE
PACKAGE_PATH=/home/test.tar.gz
java代码如下
/**
     * 加载自定义变量文件到系统变量中
     * @param configFile
     */publicstaticvoidloadProperties(String configFile){try{FileInputStream propFile =newFileInputStream(configFile);Properties p =newProperties(System.getProperties());
            p.load(propFile);System.setProperties(p);}catch(Exception e){
            e.printStackTrace();}}
调用loadProperties方法后,就可以通过
System.getProperty("key")
获取自定义的变量了
如获取BASE_ROOT_DIR:
System.getProperty("BASE_ROOT_DIR")
实操验证如下
自定义变量文件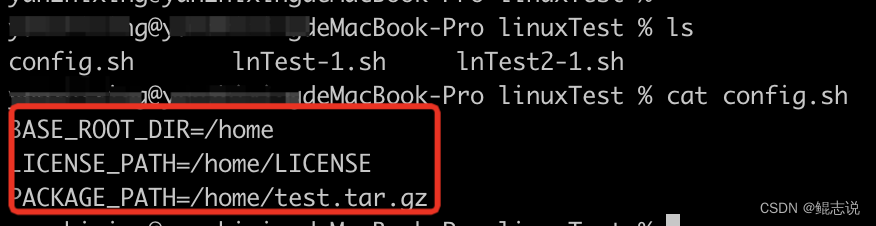
测试代码
importjava.io.FileInputStream;importjava.util.Properties;publicclassLoadProperties{publicstaticvoidmain(String[] args){String configFile ="/Users/kunzhi/Downloads/learn/linuxTest/config.sh";loadProperties(configFile);System.out.println("BASE_ROOT_DIR: "+System.getProperty("BASE_ROOT_DIR"));System.out.println("LICENSE_PATH: "+System.getProperty("LICENSE_PATH"));System.out.println("PACKAGE_PATH: "+System.getProperty("PACKAGE_PATH"));}publicstaticvoidloadProperties(String configFile){try{FileInputStream propFile =newFileInputStream(configFile);Properties p =newProperties(System.getProperties());
            p.load(propFile);System.setProperties(p);}catch(Exception e){
            e.printStackTrace();}}}
运行输出结果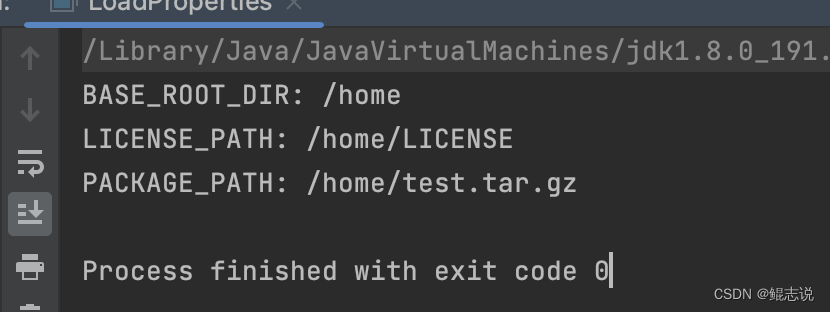
shell通过source .env环境变量文件方式加载
这种方法的好处是在shell执行时直接获取环境变量,不需要项目代码做多余的操作
- 新增一个.env环境变量文件(如test.env)
- 当在执行的shell文件中首行加入source命令(
source test.env)或者先在命令行执行命令source test.env后,执行shell文件
test.env环境变量文件如下
BASE_ROOT_DIR=/home
LICENSE_PATH=/home/LICENSE
PACKAGE_PATH=/home/test.tar.gz
shell模版文件如下
cd${DATASYS_BASE_ROOT_DIR}pwdecho"DATASYS_PACKAGE_PATH: ${DATASYS_PACKAGE_PATH}"echo"PACKAGE_PATH: ${PACKAGE_PATH}"echo"LICENSE_PATH: ${LICENSE_PATH}"
实操验证如下
创建shell模版文件 test.sh,并执行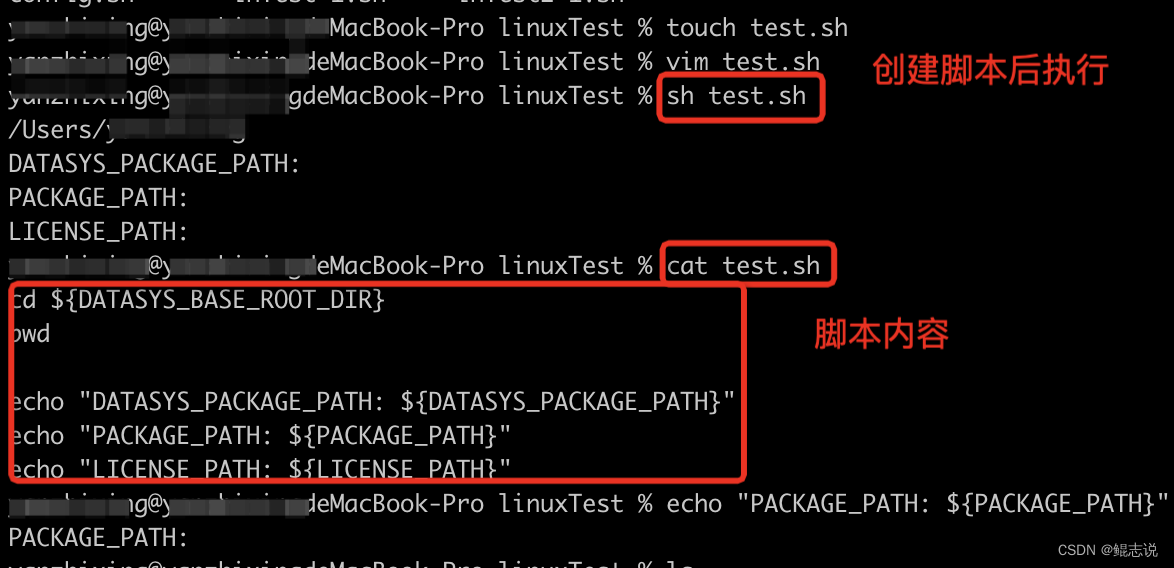
创建环境变量文件 test.env,并在test.sh文件首行加入命令:
source test.env

替换shell模版并运行
因为替换是否成功,只有通过运行结果才能有力证明,所以我们放在一起看
由于替换shell模版内容的具体操作受自定义变量加载方式影响,所以我们还是按照两种加载方式来看
项目加载自定义变量文件到系统变量中
如果是项目加载自定义变量文件到系统变量中,还需要项目获取变量并传入shell替换;
代码如下
importjava.io.FileInputStream;importjava.io.InputStreamReader;importjava.io.LineNumberReader;importjava.util.Properties;publicclassLoadProperties{publicstaticvoidmain(String[] args){String configFile ="/Users/kunzhi/Downloads/learn/linuxTest/config.sh";//加载自定义环境变量loadProperties(configFile);StringBASE_ROOT_DIR=System.getProperty("BASE_ROOT_DIR");StringLICENSE_PATH=System.getProperty("LICENSE_PATH");StringPACKAGE_PATH=System.getProperty("PACKAGE_PATH");System.out.println(BASE_ROOT_DIR+": "+System.getProperty("BASE_ROOT_DIR"));System.out.println(LICENSE_PATH+": "+System.getProperty("LICENSE_PATH"));System.out.println(PACKAGE_PATH+": "+System.getProperty("PACKAGE_PATH"));//需要传入shell模版替换的内容String[] evnp ={"BASE_ROOT_DIR="+BASE_ROOT_DIR,"LICENSE_PATH="+LICENSE_PATH,"PACKAGE_PATH="+PACKAGE_PATH};String shellFile ="/Users/kunzhi/Downloads/learn/linuxTest/test1.sh";//替换并运行shellreplaceAndRun(shellFile, evnp);}//加载自定义环境变量publicstaticvoidloadProperties(String configFile){try{FileInputStream propFile =newFileInputStream(configFile);Properties p =newProperties(System.getProperties());
            p.load(propFile);System.setProperties(p);}catch(Exception e){
            e.printStackTrace();}}//替换并运行shellprivatestaticvoidreplaceAndRun(String path,String[] evnp){try{Process process =Runtime.getRuntime().exec(newString[]{"/bin/sh","-c", path}, evnp,null);//只有process.waitFor() 结果为0,才说明执行成功了if(process.waitFor()!=0){thrownewException(String.valueOf(process.waitFor()));}InputStreamReader ir =newInputStreamReader(process.getInputStream());LineNumberReader input =newLineNumberReader(ir);String line;//输入shell中执行的每一行while((line = input.readLine())!=null){if(line.contains("ERROR")){thrownewException("ERROR");}System.out.println(line);}}catch(Exception e){System.out.println(e);}}}
运行结果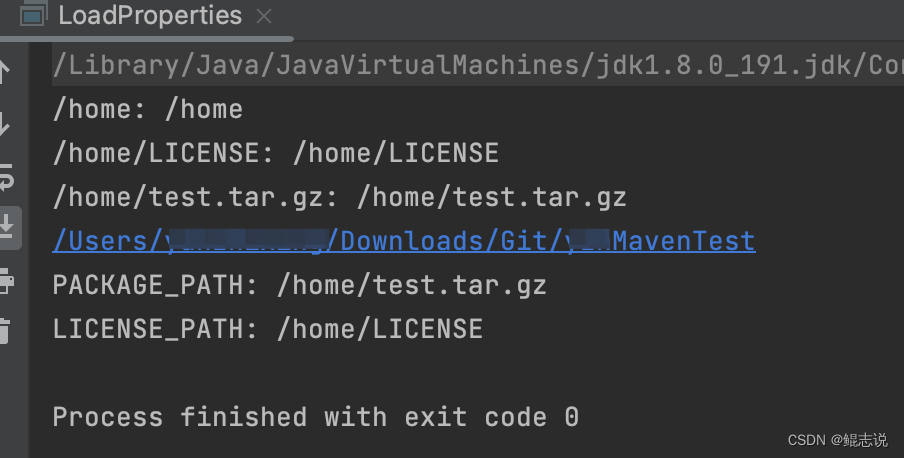
shell通过source .env环境变量文件方式加载
如果是shell通过source .env环境变量方式加载,在上一步实操演示可以看出,其实已经达到替换效果,直接执行shell文件即可了
代码如下
packagetest;importjava.io.FileInputStream;importjava.io.InputStreamReader;importjava.io.LineNumberReader;importjava.util.Properties;/**
 * @author yanZhiHang
 * @date 2023/2/26 17:06
 */publicclassLoadProperties{publicstaticvoidmain(String[] args){runShell(shellFile1);}privatestaticvoidrunShell(String path){try{Process process =Runtime.getRuntime().exec(newString[]{"/bin/sh","-c", path},null,null);if(process.waitFor()!=0){thrownewException(String.valueOf(process.waitFor()));}InputStreamReader ir =newInputStreamReader(process.getInputStream());LineNumberReader input =newLineNumberReader(ir);String line;while((line = input.readLine())!=null){if(line.contains("ERROR")){thrownewException("ERROR");}System.out.println(line);}}catch(Exception e){System.out.println(e);}}}
本文转载自: https://blog.csdn.net/m0_37482190/article/details/129227983
版权归原作者 鲲志说 所有, 如有侵权,请联系我们删除。
版权归原作者 鲲志说 所有, 如有侵权,请联系我们删除。