
------- 卡卡西最近怎么样 -------
🧡导读* *
*** 我们已经学会了很多 Tab 栏的写法,原生 JS 的写法,jQuery 的写法等等,学了面向对象后,我们就要学会用面向对象来实现我们 ES6 的第一个小案例------面向对象 Tab 切换栏,其中和以往不同的是,增加了添加 tab 栏,双击修改 Tab 栏等功能,其实它更像我们浏览器网页的顶部选项卡。***
------- 卡卡西最近怎么样 -------

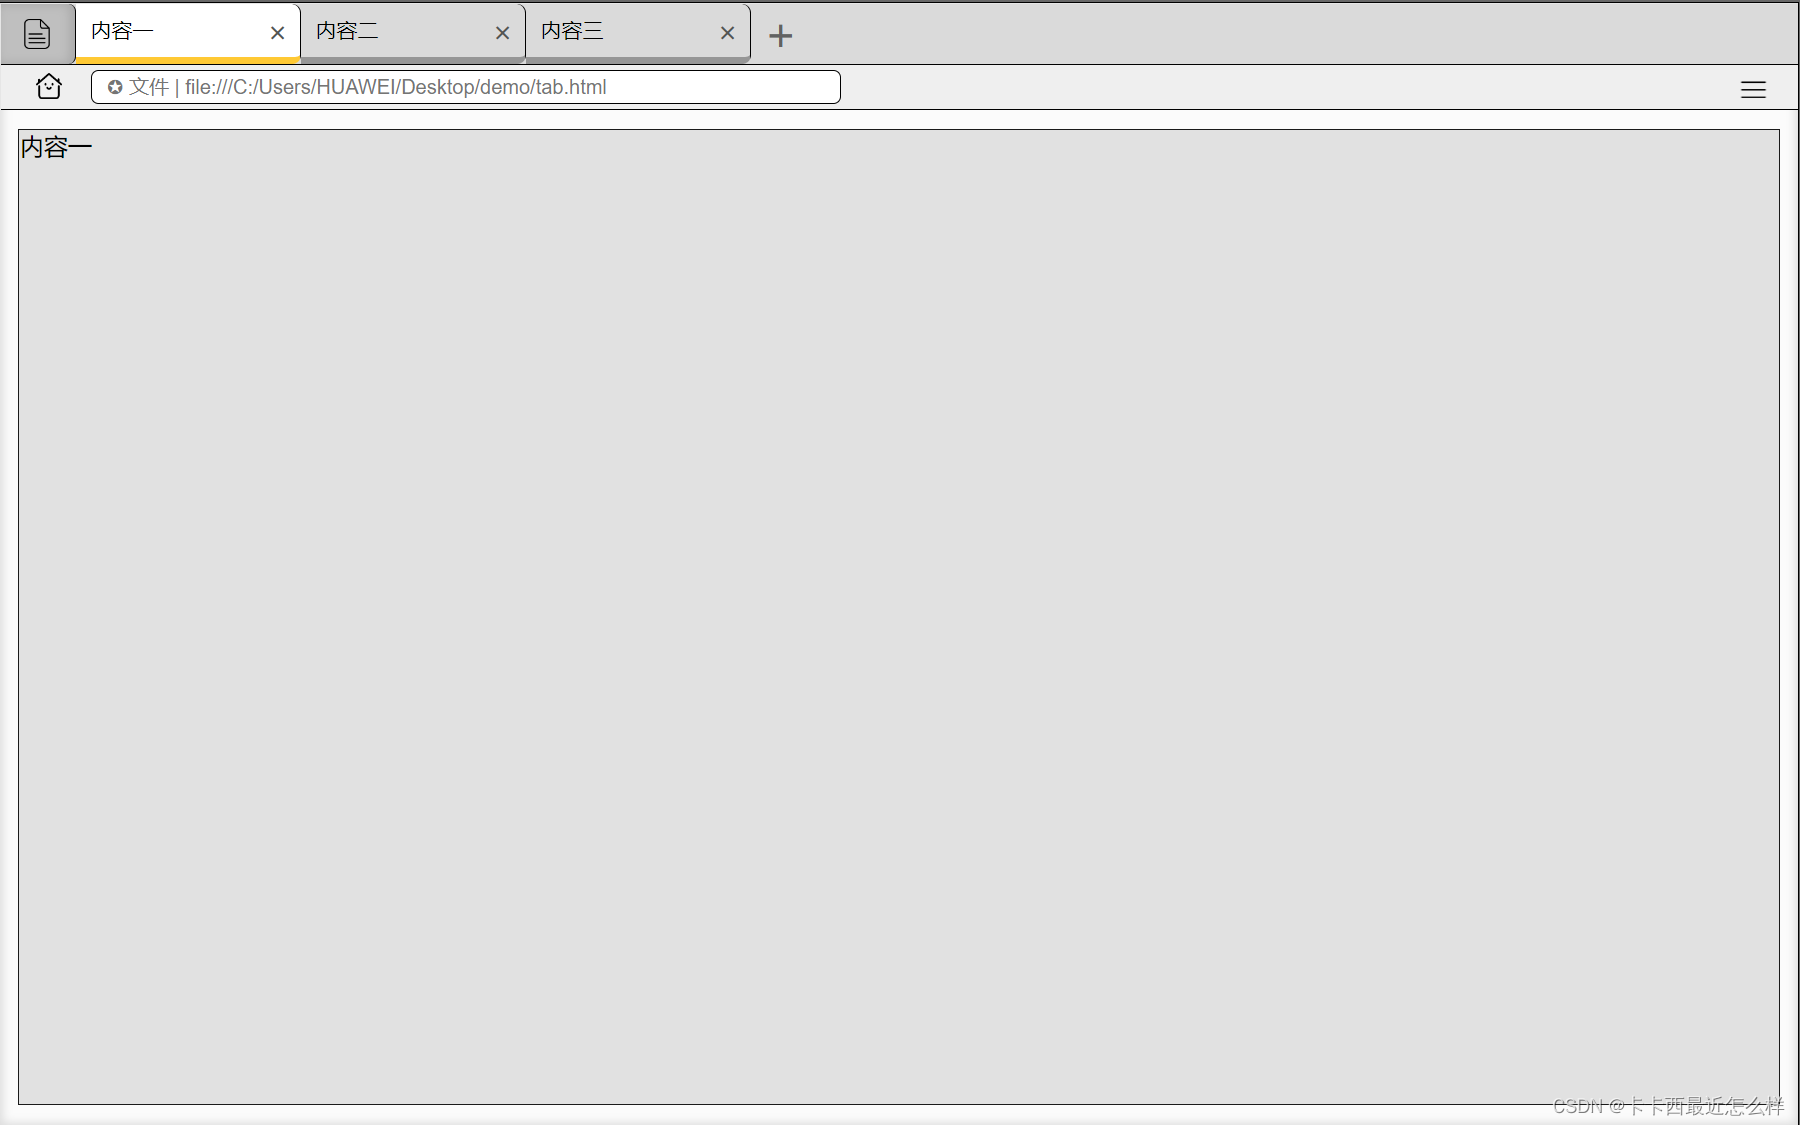
一:模拟浏览器网页效果
切换效果:点击tab栏可切换
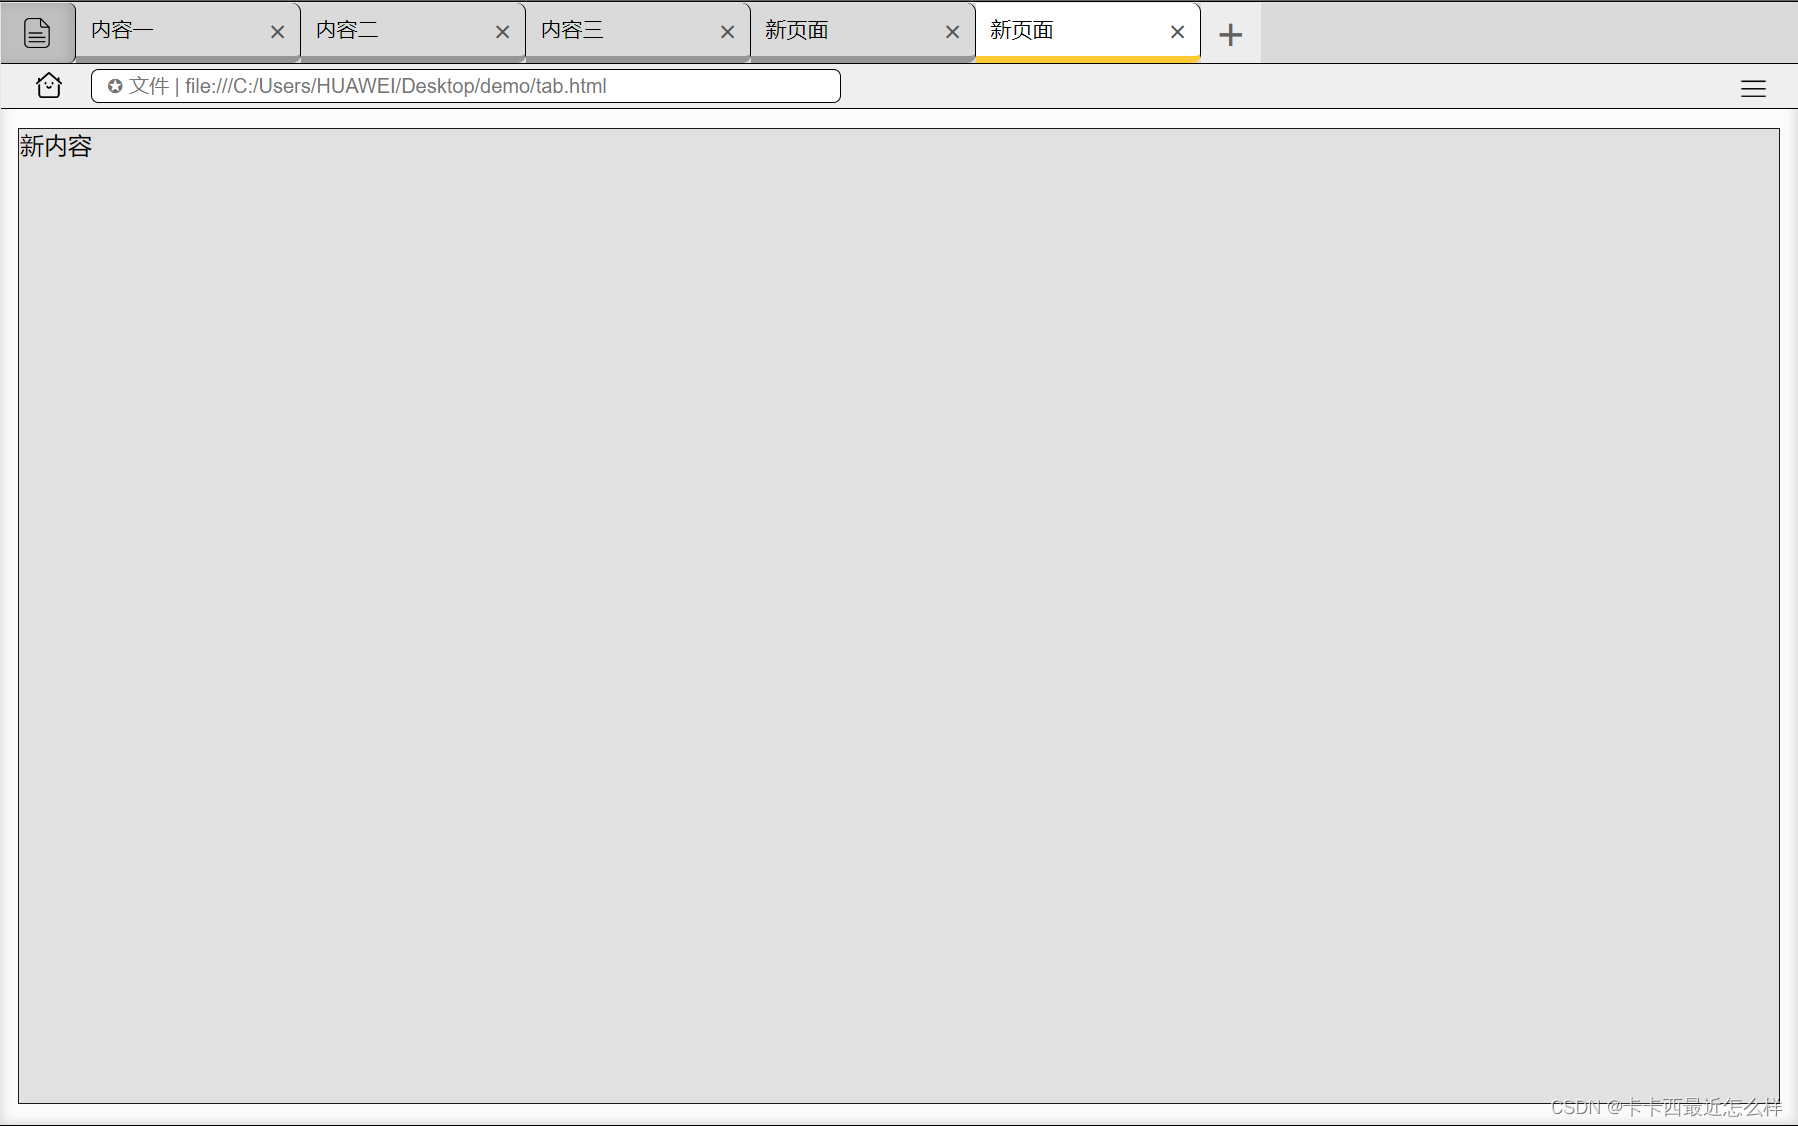
添加效果:点击右侧加号可以新增一个栏目
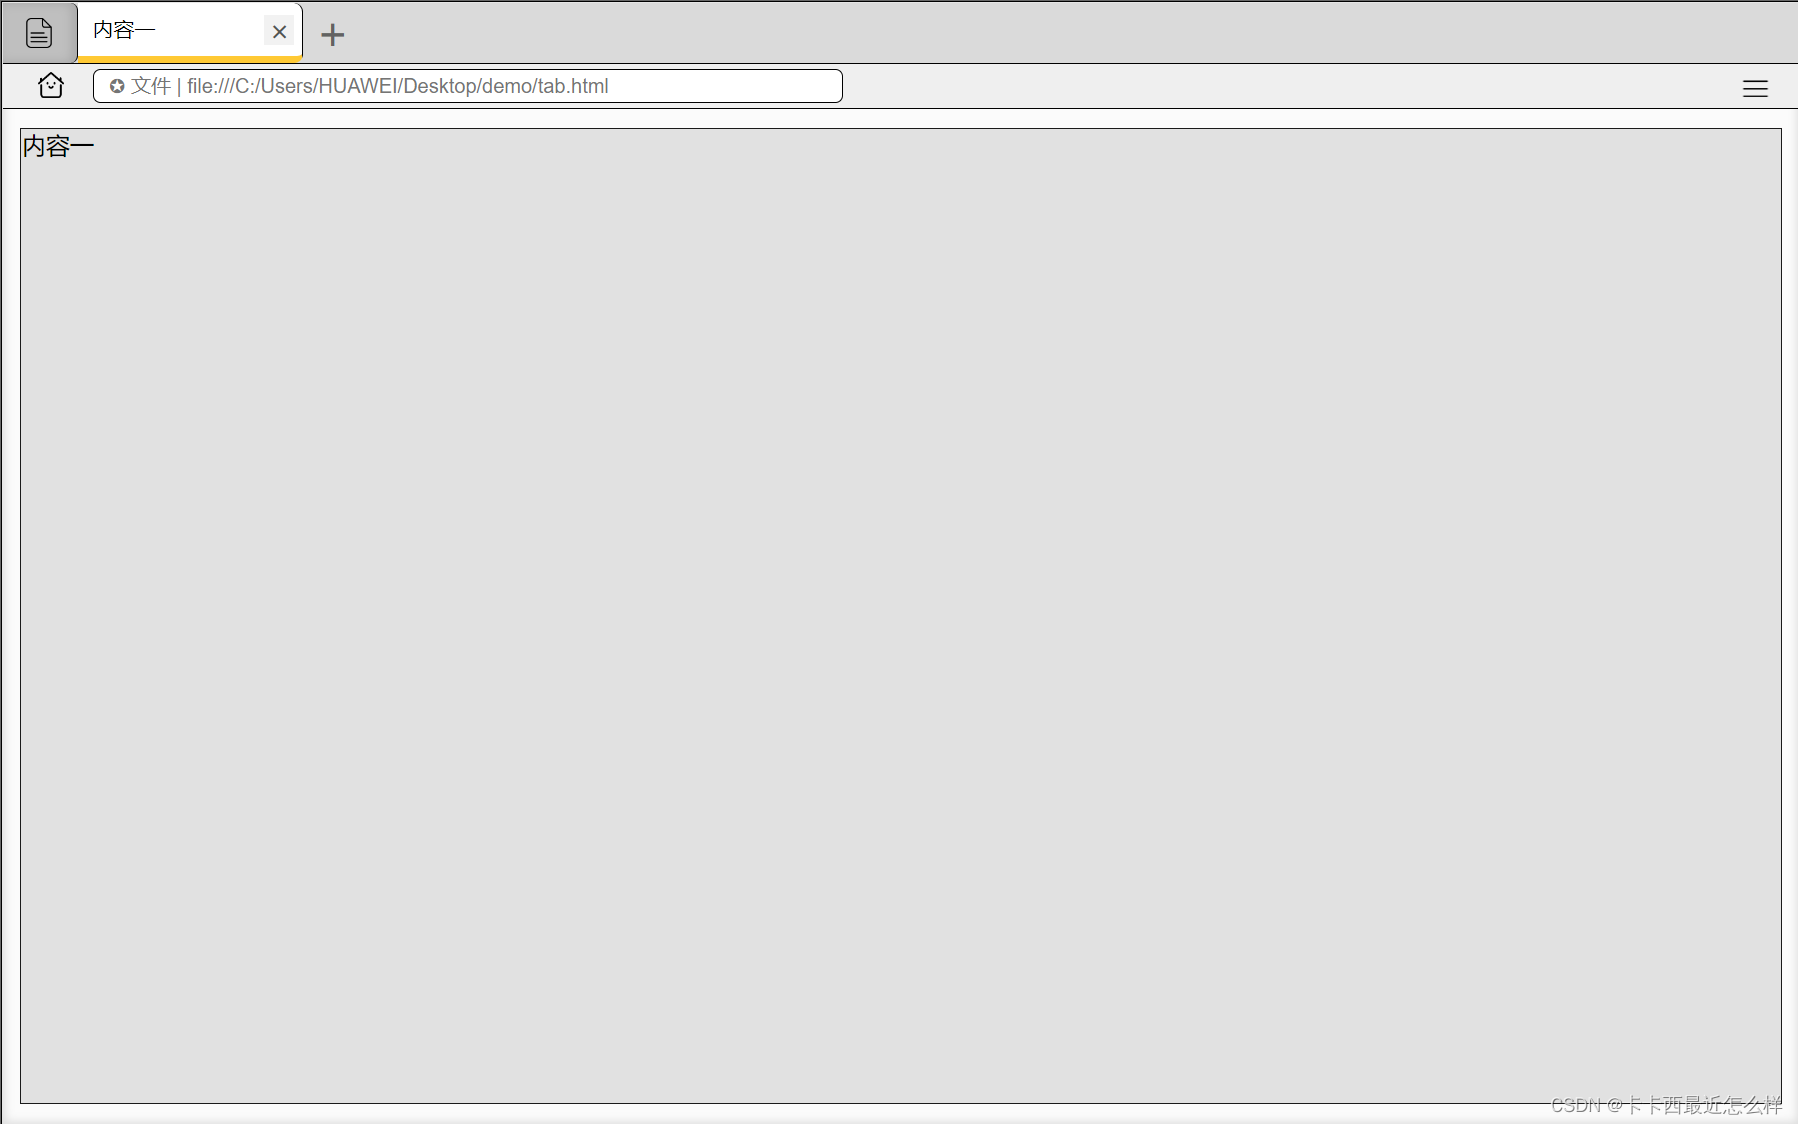
删除效果: 点击选项卡里右侧的叉号可以将该对应选项卡删除
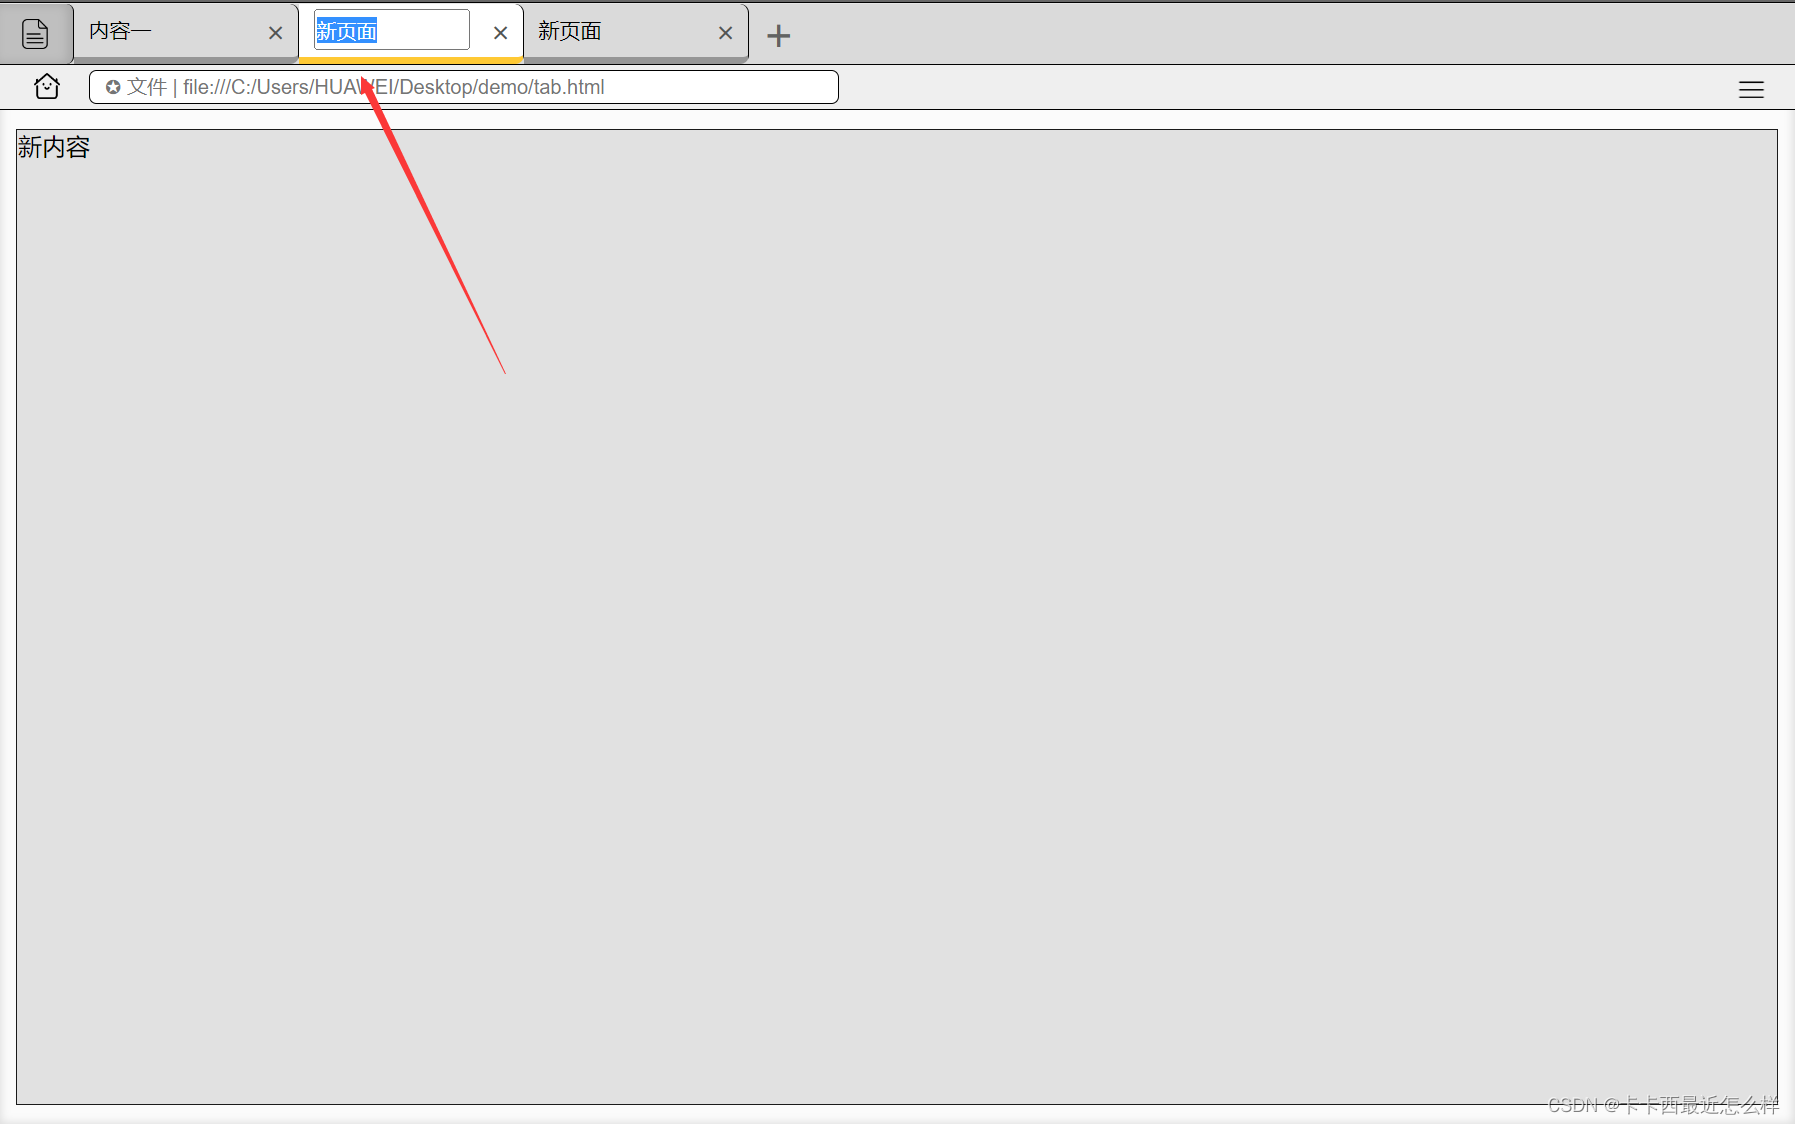
**修改内容: **双击选项卡内容或下方文本内容均可以修改内容
二:功能实现剖析
本案例使用了面向对象,所有的功能均封装在了类内的函数中
2.1 创建类并实例化对象
- 首先创建类,构造函数的传参为我们模拟浏览器的最外层大盒子的类名:**.out-box**,后续获取到任何内容,标签,都是通过这个传进来的类名来进阶获取,例如或许获取的 li,section,ul 等等
      class Tab{
           constructor(classname){}
      }
      new Tab('.out-box')
2.2 获取标签与绑定事件
- 我们注意到为什么除了构造函数里获取的元素,还单独写了个函数来获取呢,这是因为我们有删除与添加tab选项卡的功能,如果我们只在构造函数里写了一次的话,就会导致添加或删除选项卡后出现不可预知的错误,这个函数内只获取 li,section,remove,span文本等对应了增加删除等这些时刻在变化的标签
- init函数内为绑定元素,循环绑定了点击切换选项卡事件,双击修改选项卡事件 (dblclick)等等
- 一定要注意 this 的指向问题,constructor中的this指向的是实例化对象,函数中的this指向的是函数的调用者
- 还需要注意绑定事件时不要给函数加括号,否则会不经过事件触发直接调用
- 在遍历的过程中,会给 i 添加一个 index 属性
  constructor(classname){
                that=this;
                this.main=document.querySelector(classname);
                this.add=this.main.querySelector('.banner-add');
                this.banner_ul=this.main.querySelector('.banner-ul');
                this.text_box=this.main.querySelector('.text-box');
                this.init();
           }
           //获取li与section
           update_Nodes(){
               this.lis=this.main.querySelectorAll('li');
               this.sections=this.main.querySelectorAll('section');
               this.remove=this.main.querySelectorAll('.banner-close');
               this.spans=this.main.querySelectorAll('.neirong');
           }
           //初始化
           init(){
                this.update_Nodes();
                  for(var i=0;i<this.lis.length;i++){
                       this.lis[i].index=i;
                       this.lis[i].addEventListener('click',this.toggletab);
                       this.remove[i].addEventListener('click',this.closetab);
                       this.spans[i].addEventListener('dblclick',this.changetab_span);
                       this.sections[i].addEventListener('dblclick',this.changetab_section);
                  }
                  this.add.addEventListener('click',this.addtab);
           }
2.3 清除样式函数
- 由于我们在执行过程中必定要多次运用排他思想来清除样式,所以我们可以将清除的代码单独封装到一个清除函数中
- 此处的this指向的是函数调用者
- 实现过程如下:遍历获取到的所有的 li ,然后清除每个 li 和 section 的类名
clearclass(){
                for(var i=0;i<this.lis.length;i++){
                     this.lis[i].className='';
                     this.sections[i].className='';
                }
           }
2.4 切换选项卡
- that 代表的是构造函数里的 this,指向实例化的对象
- 此处的 this 指向的是切换函数的调用者,即绑定事件时的每一个被点击的 li,所以这个this 指向的是被触发的 li,及被触发的选项卡,于是给这个 this 添加类名,给 section 也同样添加类名(此类名内容为让其 display 变为 block 显示,默认为 none 隐藏)
- 需要注意的是 section 为什么是 that,不是 this 呢,因为此处的 this 代表 li,而我们需要的是构造函数内的 this,所以此处使用 that
 toggletab(){
                that.clearclass();
                this.className='li-current'
                that.sections[this.index].className='section-current'
           }
2.5 增加选项卡
- 我们拓展个增加元素的知识点:**insertAdjacentHTML()**,内部参数有 beforebegin(在父元素的前面添加),afterbegin(在父元素内部第一个添加),beforeend(在父元素内部最后一个位置添加),afterend(在父元素后面添加),最主要的是,这个方法可以直接添加字符串
- 实现过程我们先创建了两个元素,li 与 section,并添加了类名(因为想要新创建的选项卡直接显示),然后再使用上述该方法添加即可
- 对于最后又调用了一次 init 方法,我想大家就可以理解了,因为我们创建了元素之后,调用 init 可以重新获取以便我们的元素,重新再分别绑定各个事件,保证不会出错
 addtab(){
               that.clearclass();
                var li='<li class="li-current"><span class="neirong">新页面</span><span class="banner-close">×</span></li>';
                var text='<section class="section-current">新内容</section>'
                that.banner_ul.insertAdjacentHTML('beforeend',li);
                that.text_box.insertAdjacentHTML('beforeend',text);
                that.init();
           }
2.6 删除选项卡
- 由于我们的删除按钮在选项卡里面,所以我们点击叉号后会自发冒泡,冒泡到 li 时由于其也绑定了事件,会触发其显示,为了解决这一问题我们先解除冒泡 stopPropagation()
- 叉号没有 index 值,但是它父亲有啊,我们就把其对应的叉号拿到其父亲的 index,然后把这个索引值对应的 li 与 section 删除掉,删除自身我们可以使用 remove()
- 为了让关闭后让前一个元素显示,我们删除后让 index-- 然后让自减后 index 对应的 li 添加一个自动点击事件 click()
- 最后再调用 init 方法重新获取绑定元素事件
           closetab(event){
               event.stopPropagation()
                 var index=this.parentNode.index;
                 that.lis[index].remove();
                 that.sections[index].remove();
                 index--;
                 that.lis[index] && that.lis[index].click()
                 that.init();
           }
2.7 修改选项卡内容
- 修改的大致思路为:现将其原本内容拿来赋值给 str 变量,双击后将其 li 的内容改为一个输入框,输入框内容替换为 str 存放的内容,再调用方法 select(),让其输入框的内容全选起来,使用户输入任何内容都可以将原本内容替换掉
- 然后给 输入框绑定失焦的方法,失焦后将输入框的内容替换为文本即可
 //tab_span修改
           changetab_span(){
                   var str=this.innerHTML;
                   this.innerHTML='<input type="text" class="span-ipt">'
                   var input= this.children[0];
                   input.value=str;
                   input.select();
                   input.addEventListener('blur',function(){
                         this.parentNode.innerHTML=this.value;
                   })
                   input.addEventListener('keydown',function(event){
                          if(event.keyCode==13){
                              this.blur();
                          }
                   })
           }
           //tab_section修改
           changetab_section(){
               var str=this.innerHTML;
               this.innerHTML='<input type="text" class="section-ipt">'
               var input= this.children[0];
               input.value=str;
               input.select();
               input.addEventListener('blur',function(){
                     this.parentNode.innerHTML=this.value;
               })
               input.addEventListener('keydown',function(event){
                      if(event.keyCode==13){
                          this.blur();
                      }
               })
       }
三:完整代码
html代码:
<!DOCTYPE html>
<html lang="en">
<head>
    <meta charset="UTF-8">
    <meta http-equiv="X-UA-Compatible" content="IE=edge">
    <meta name="viewport" content="width=device-width, initial-scale=1.0">
    <title>tab栏切换案例</title>
    <link rel="stylesheet" href="./tab切换.css">
</head>
<body>
     <div class="out-box">
            <div class="banner-box">
                <div class="banner-left">
                    <img src="./img/积分说明.png" alt="说明" title="说明" class="banner-img-say">
                </div>
                <ul class="banner-ul">
                    <li class="li-current"><span class="neirong">内容一</span><span class="banner-close">×</span></li>
                    <li ><span class="neirong">内容二</span><span class="banner-close">×</span></li>
                    <li ><span class="neirong">内容三</span><span class="banner-close">×</span></li>

                </ul>
                <div class="banner-add">+</div>
            </div>
            <div class="src-box">
                <img src="./img/首页.png" alt="主菜单" title="主菜单" class="src-img-home">
                <img src="./img/更多.png" alt="更多" title="更多" class="src-img-more">
                   <input type="text" class="src" placeholder="✪ 文件 | file:///C:/Users/HUAWEI/Desktop/demo/tab.html" >
            </div>
            <div class="text-box">
                   <section class="section-current">内容一</section>
                   <section >内容二</section>
                   <section >内容三</section>
            </div>
     </div>
     <script src="./tab切换.js"></script>
</body>
</html>
css 代码:
*{
    margin: 0;
    padding: 0;
}
body{
    background-color: rgb(104, 104, 104);
}
.out-box{
    box-sizing: border-box;
    width: 1200px;
    height: 750px;
   border:1px solid black;
   margin: 40px auto;
   background-color: rgb(251, 251, 251);
   box-shadow: 0 0 6px 2px rgb(220, 220, 220) inset;
}
.banner-box{
     width: 1198px;
     height: 40px;
     border-bottom: 1px solid black;
     background-color: rgb(218, 218, 218);
}
.banner-left{
    float: left;
    box-sizing: border-box;
    position: relative;
    width: 50px;
    height: 40px;
    background-color: rgb(191, 191, 191);
    box-shadow: -3px 0 6px 1px rgb(171, 171, 171) inset;
    border-top-right-radius: 5px;
    border-bottom-right-radius: 5px;
    border-right: 1px solid black;
}
.banner-img-say{
    box-sizing: border-box;
    position: absolute;
    float: left;
    top: 10px;
    left: 14px;
    width: 20px;
    height: 20px;
}
.banner-ul{
    position: relative;
    float: left;
    box-sizing: border-box;
}
li{
    box-sizing: border-box;
    float: left;
    width: 150px;
    height: 40px;
    border-right: 1px solid black;
    list-style: none;
    border-top-right-radius: 6px;
    border-bottom-right-radius: 6px;
    border-bottom: 5px solid rgb(150, 150, 150);
    position: relative;
    cursor: pointer;
}
.li-current{
      background-color: rgb(255, 255, 255);
      border-bottom: 5px solid rgb(255, 201, 52);
}
.neirong{
    float: left;
    box-sizing: border-box;
    width: 100px;
    height: 35px;
    line-height: 35px;
    padding-left: 10px;
    font-size: 14px;
}
.banner-close{
    box-sizing: border-box;
    float:right;
    width: 20px;
    height: 20px;
    line-height: 20px;
    text-align: center;
    margin-top: 8px;
    margin-right: 5px;
    cursor: pointer;
    font-size: 19px;
    padding-left: 1px;
    color: rgb(85, 85, 85);
}
.banner-close:hover{
    background-color: rgb(242, 242, 242);
}
.banner-add{
    box-sizing: border-box;
    float: left;
    width: 40px;
    height: 40px;
   padding-left: 9px;
    line-height: 38px;
    font-size: 30px;
    color: rgb(98, 98, 98);
    cursor: pointer;
}
.banner-add:hover{
    background-color: rgb(237, 237, 237);
}
.src-box{
    box-sizing: border-box;
    position: relative;
     width: 1198px;
     height: 30px;
     border-bottom: 1px solid black;
     background-color: rgb(239, 239, 239);
}
.src-img-home{
    box-sizing: border-box;
    width: 20px;
    height: 20px;
    position: absolute;
    top: 4.1px;
    left:22px;
}
.src-img-more{
    box-sizing: border-box;
    width: 35px;
    height: 25px;
    position: absolute;
    top: 3.5px;
    right:12px;
}
.src{
    box-sizing: border-box;
    position: absolute;
    top: 3px;
    left: 60px;
    width: 500px;
    height: 23px;
    outline: none;
    background-color: rgb(255, 255, 255);
    border: 1px solid black;
    border-radius: 5px;
    line-height: 35px;
    padding-left: 10px;
    color:rgb(105, 105, 105)
}
.text-box{
    box-sizing: border-box;
   margin: 12.5px auto;
    width: 98%;
    height: 87%;
    background-color: rgb(212, 212, 212);
}
section{
    box-sizing: border-box;
    width: 100%;
    height: 100%;
    border:1px solid rgb(26, 26, 26);
    background-color: rgb(225, 225, 225);
    display: none;
}
.section-current{
     display: block;
}
.span-ipt{
    width: 100px;
    height: 23px;
    outline: none;
}
.section-ipt{
    margin: 5px;
    width: 200px;
    height: 30px;
    outline: none;
}
Java Script 代码:
document.addEventListener('DOMContentLoaded',function(){
      document.addEventListener('selectstart',function(event){
           event.preventDefault()
      })
      document.addEventListener('contextmenu',function(event){
            event.preventDefault()
      })
      var that;
      class Tab{
           constructor(classname){
                that=this;
                this.main=document.querySelector(classname);
                this.add=this.main.querySelector('.banner-add');
                this.banner_ul=this.main.querySelector('.banner-ul');
                this.text_box=this.main.querySelector('.text-box');
                this.init();
           }
           //获取li与section
           update_Nodes(){
               this.lis=this.main.querySelectorAll('li');
               this.sections=this.main.querySelectorAll('section');
               this.remove=this.main.querySelectorAll('.banner-close');
               this.spans=this.main.querySelectorAll('.neirong');
           }
           //初始化
           init(){
                this.update_Nodes();
                  for(var i=0;i<this.lis.length;i++){
                       this.lis[i].index=i;
                       this.lis[i].addEventListener('click',this.toggletab);
                       this.remove[i].addEventListener('click',this.closetab);
                       this.spans[i].addEventListener('dblclick',this.changetab_span);
                       this.sections[i].addEventListener('dblclick',this.changetab_section);
                  }
                  this.add.addEventListener('click',this.addtab);
           }
           //tab切换
           toggletab(){
                that.clearclass();
                this.className='li-current'
                that.sections[this.index].className='section-current'
           }
           //排他清除
           clearclass(){
                for(var i=0;i<this.lis.length;i++){
                     this.lis[i].className='';
                     this.sections[i].className='';
                }
           }
           //tab关闭
           closetab(event){
               event.stopPropagation()
                 var index=this.parentNode.index;
                 that.lis[index].remove();
                 that.sections[index].remove();
                 index--;
                 that.lis[index] && that.lis[index].click()
                 that.init();
           }
           //tab添加
           addtab(){
               that.clearclass();
                var li='<li class="li-current"><span class="neirong">新页面</span><span class="banner-close">×</span></li>';
                var text='<section class="section-current">新内容</section>'
                that.banner_ul.insertAdjacentHTML('beforeend',li);
                that.text_box.insertAdjacentHTML('beforeend',text);
                that.init();
           }
           //tab_span修改
           changetab_span(){
                   var str=this.innerHTML;
                   this.innerHTML='<input type="text" class="span-ipt">'
                   var input= this.children[0];
                   input.value=str;
                   input.select();
                   input.addEventListener('blur',function(){
                         this.parentNode.innerHTML=this.value;
                   })
                   input.addEventListener('keydown',function(event){
                          if(event.keyCode==13){
                              this.blur();
                          }
                   })
           }
           //tab_section修改
           changetab_section(){
               var str=this.innerHTML;
               this.innerHTML='<input type="text" class="section-ipt">'
               var input= this.children[0];
               input.value=str;
               input.select();
               input.addEventListener('blur',function(){
                     this.parentNode.innerHTML=this.value;
               })
               input.addEventListener('keydown',function(event){
                      if(event.keyCode==13){
                          this.blur();
                      }
               })
       }
      }
      new Tab('.out-box')
})
本文转载自: https://blog.csdn.net/weixin_52212950/article/details/125349004
版权归原作者 卡卡西最近怎么样 所有, 如有侵权,请联系我们删除。
版权归原作者 卡卡西最近怎么样 所有, 如有侵权,请联系我们删除。