
前言
前面讲了spring的创建,现在说说关于Bean和五大类注解
一、Bean是什么?
在 Java 语⾔中对象也叫做 Bean,所以后⾯咱们再遇到对象就以 Bean 著称。这篇文章还是以spring创建为主。
二、存储对象
2.1 俩种存储方式
需要在 spring-config 中添加⼀⾏ bean 注册内容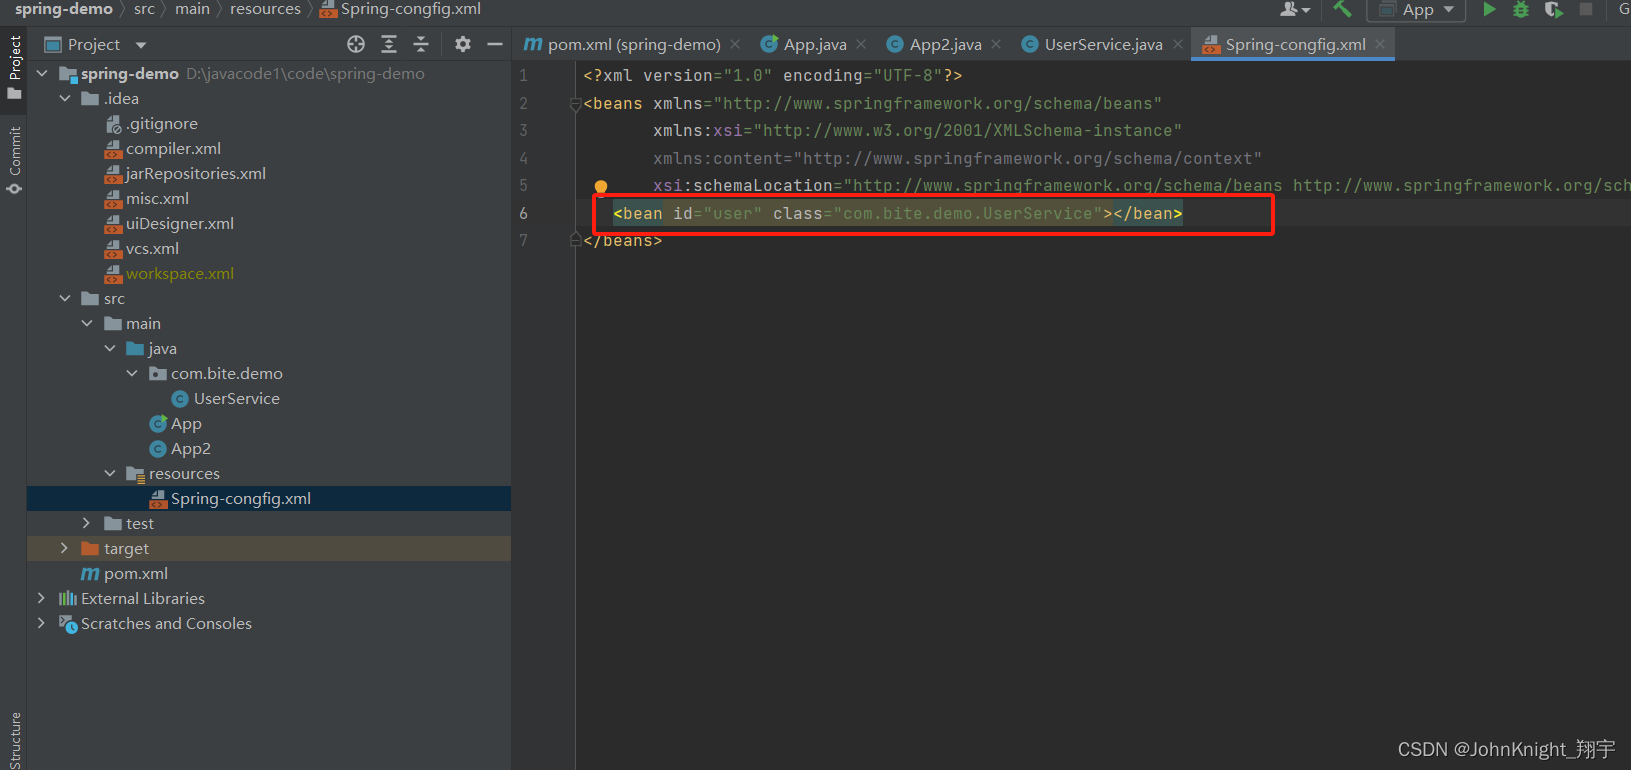
第二种是扫描路径,像我这样子直接扫描包

三.类注解:
@Controller:表示的是业务逻辑层;
@Servie:服务层;
@Repository:持久层;
@Component(组件存储);
@Configuration:配置层。
3.1 为什么要这么多类注解?
为什么需要怎么多的类注解也是相同的原因,就是让程序员看到类注解之后,就能直接了解当前类
的⽤途,
程序的⼯程分层,调⽤流程如下: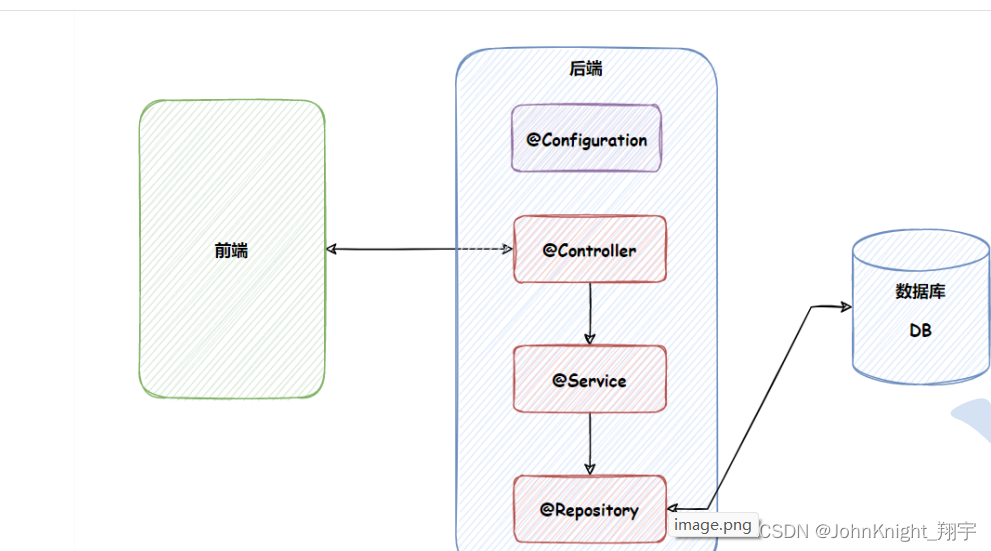
3.2类注解之间的联系:
查看源码发现,源码内部都有@Component,说明它们本身就是属于 @Component 的“⼦类”
3.3命名规则
通常我们 bean 使⽤的都是标准的⼤驼峰命名,⽽读取的时候⾸字⺟⼩写就可以获取到 bean 了
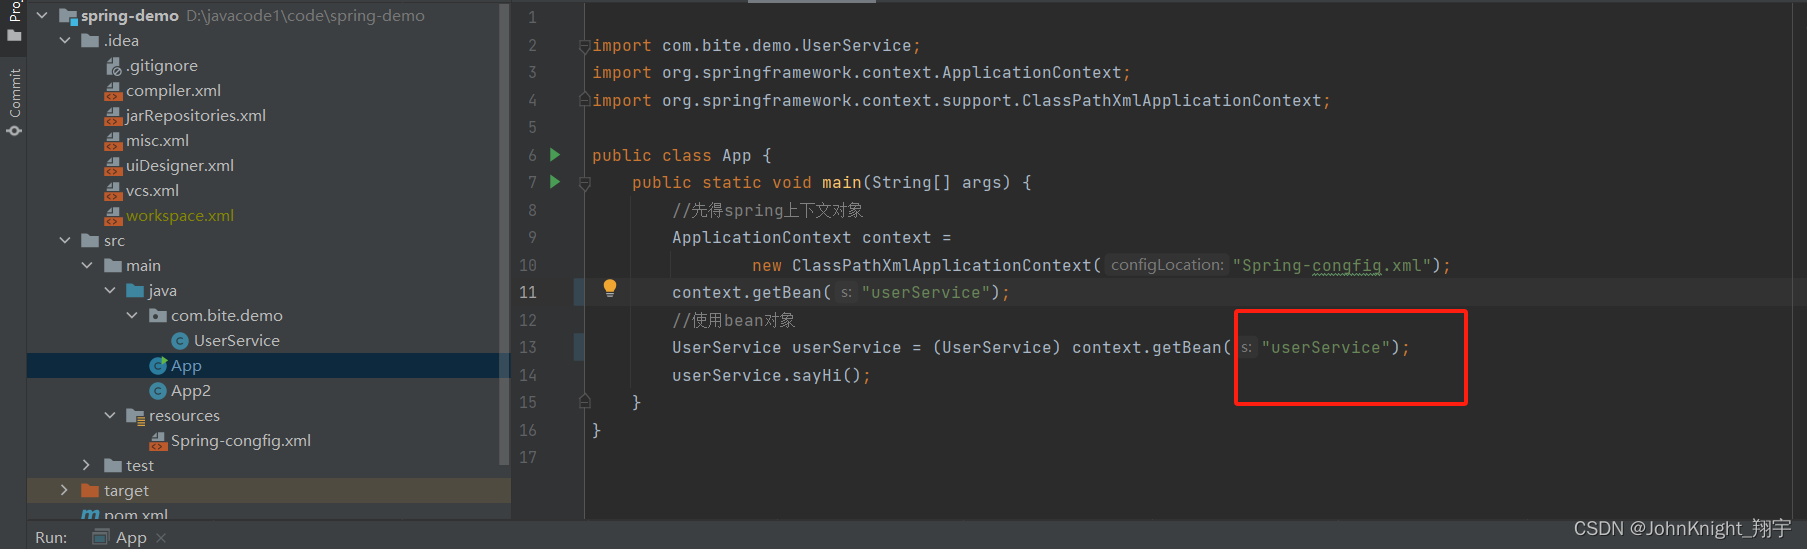
而Bean对象命名的规则是使⽤的是 JDK Introspector 中的 decapitalize ⽅法,大致意思是
如果第⼀个字⺟和第⼆个字⺟都为⼤写的情况,是把 bean 的⾸字⺟也⼤写存储了,否则就将⾸字⺟⼩写。
3.3.2不涉及强转类型写法: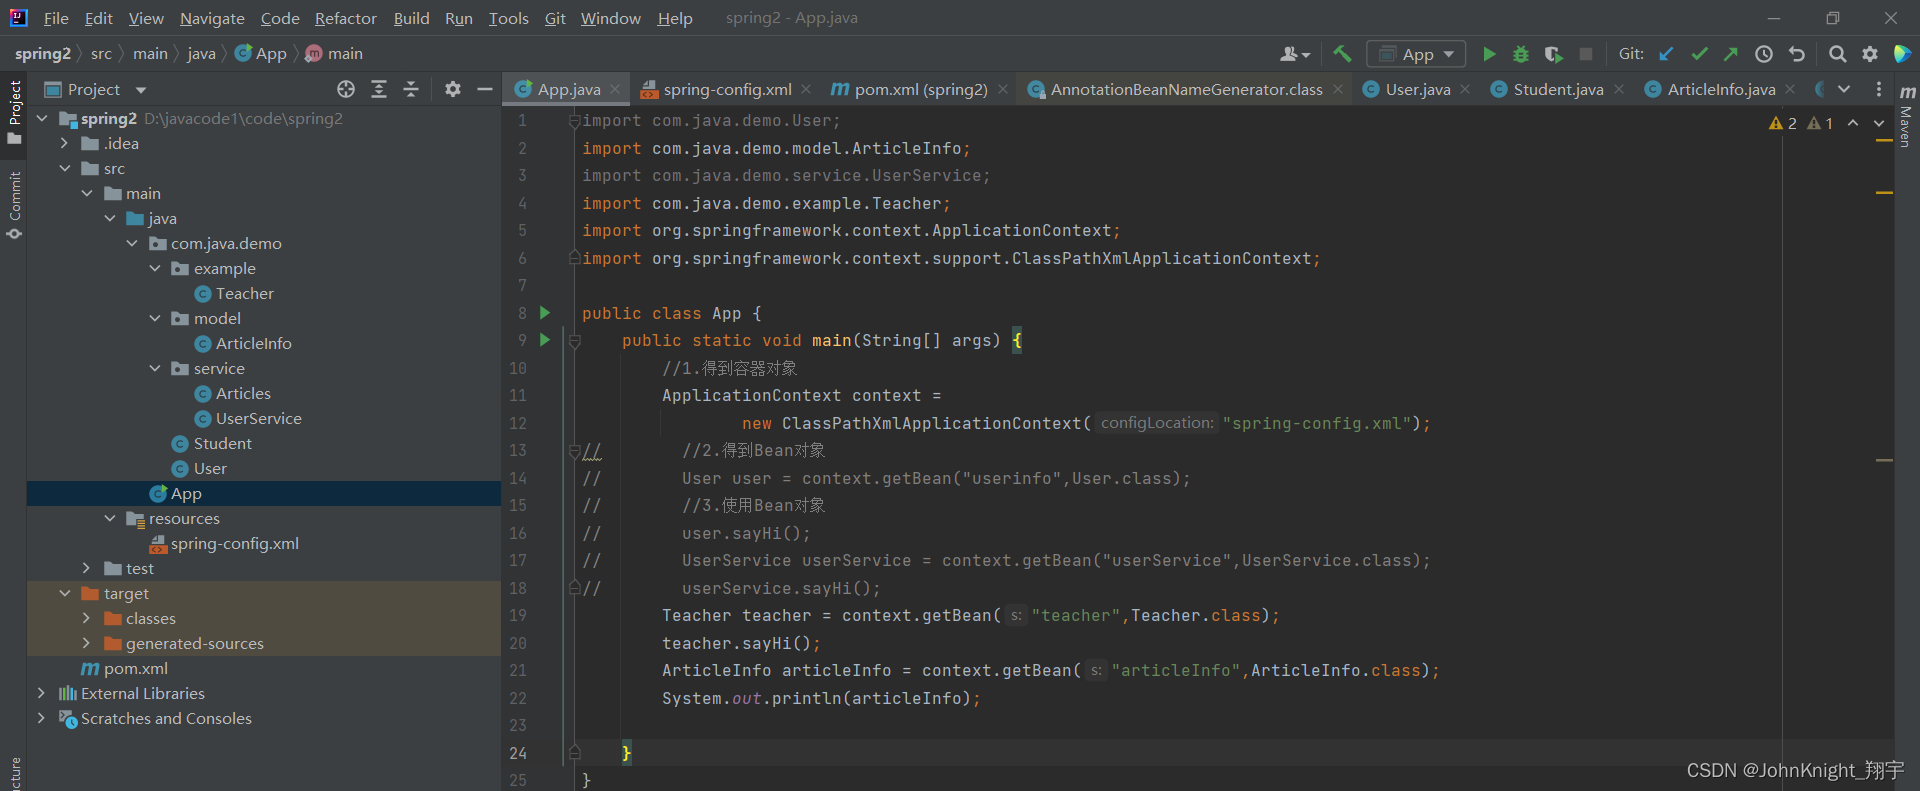
3.4方法注解@Bean
类注解是添加到某个类上的,⽽⽅法注解是放到某个⽅法上的,在 Spring 框架的设计中,⽅法注解 @Bean 要配合类注解才能将对象正常的存储到 Spring 容器中,一般是和***@Component搭配***一般来说只有在返回类型是一个对象的时候才用bean,否则可以不用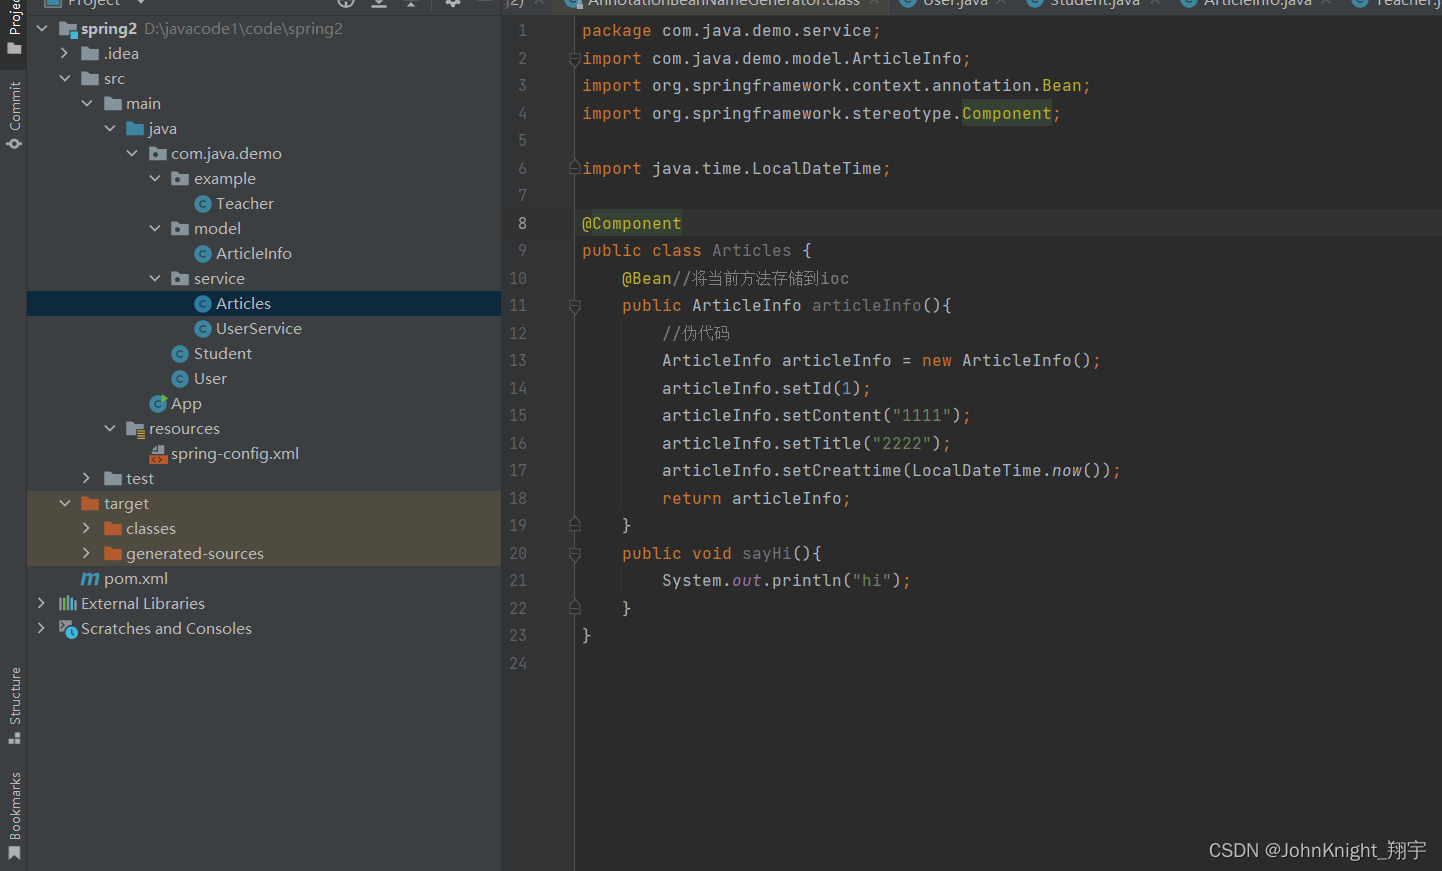
3.5重命名Bean
这个重命名的 name 其实是⼀个数组,⼀个 bean 可以有多个名字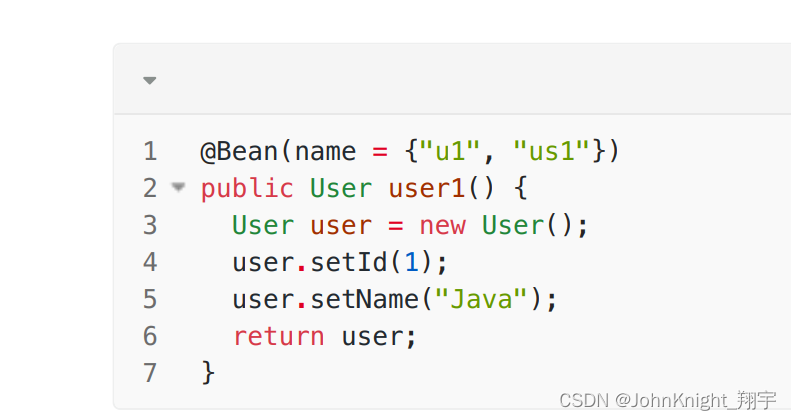
并且 name={} 可以省略,如下代码所示: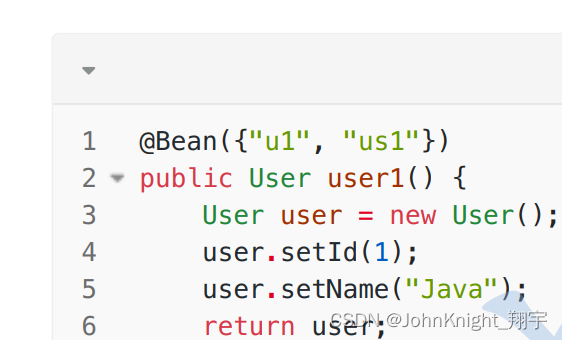
四.获取Bean对象
4.1属性注入
属性注⼊是使⽤ @Autowired 实现的,将 Service 类注⼊到 Controller 类中
packagecom.java.demo.dao;importorg.springframework.stereotype.Repository;@RepositorypublicclassUserRepository{publicintadd(){System.out.println("Do the UserRepository");return1;}}
packagecom.java.demo.Service;importcom.java.demo.dao.UserRepository;importorg.springframework.beans.factory.annotation.Autowired;importorg.springframework.stereotype.Service;@ServicepublicclassUserService{@Autowired//DI(依赖注入)privateUserRepository userRepository;//传统publicintadd(){System.out.println("do userservice");// UserRepository userRepository = new UserRepository();// return userRepository.add();// //spring 1.0// ApplicationContext context =// new ClassPathXmlApplicationContext("spring.config.demo");// UserRepository userRepository = context.getBean("userRepository",UserRepository.class);// return userRepository.add();return userRepository.add();}}
这其中被注解的分别是实例化一个对象和spring的写法,但其实我觉得@Autowired就是理解成了new了一个新对象,只不过写法更加简单。
4.2构造方法注入
publicinterfaceUserService{voidcreateUser(String username);}@ServicepublicclassUserServiceImplimplementsUserService{@OverridepublicvoidcreateUser(String username){// 实际创建用户的业务逻辑System.out.println("Creating user: "+ username);}}
importorg.springframework.beans.factory.annotation.Autowired;importorg.springframework.stereotype.Controller;importorg.springframework.web.bind.annotation.GetMapping;importorg.springframework.web.bind.annotation.RequestParam;@ControllerpublicclassUserController{privatefinalUserService userService;// 构造方法注入@AutowiredpublicUserController(UserService userService){this.userService = userService;}@GetMapping("/createUser")publicStringcreateUser(@RequestParamString username){// 调用 UserService 创建用户
        userService.createUser(username);// 返回视图名称(可以根据实际情况返回具体的视图)return"userCreated";}}
4.3setter注入
importorg.springframework.beans.factory.annotation.Autowired;importorg.springframework.stereotype.Controller;importorg.springframework.web.bind.annotation.GetMapping;importorg.springframework.web.bind.annotation.RequestParam;@ControllerpublicclassUserController{privateUserService userService;// 使用setter方法进行依赖注入@AutowiredpublicvoidsetUserService(UserService userService){this.userService = userService;}@GetMapping("/createUser")publicStringcreateUser(@RequestParamString username){// 调用 UserService 创建用户
        userService.createUser(username);// 返回视图名称(可以根据实际情况返回具体的视图)return"userCreated";}}
在这里,我们使用@Autowired注解在setUserService方法上,告诉Spring框架将UserService的实例注入到UserController中。
然后,你可以在Application类中调用main方法,以启动整个应用程序。这部分的代码和之前的例子类似,不再赘述。
使用setter注入的优势在于,它允许在运行时动态更改依赖。但是,在实践中,通常在构造方法注入和setter注入之间进行选择时,更推荐使用构造方法注入,因为它能够更好地确保依赖的完整性,并且使得类的状态在实例化之后就是不可变的。
我浅浅总结一下;构造方法注入可以多参数,不能为空,setter注入只能单个参数,并且可以为空
注意事项;
但是如果类中有多个构造⽅法,那么需要添加上 @Autowired 来明确指定到底使⽤哪个构造⽅法,否则程序会报错,单个构造方法可以不用
4.5 @Resource:另⼀种注⼊关键字
在进⾏类注⼊时,除了可以使⽤ @Autowired 关键字之外,我们还可以使⽤ @Resource 注入。
出身不同:
1.@Autowired 来⾃于 Spring,⽽ @Resource 来⾃于 JDK 的注解;
2.使⽤时设置的参数不同:相⽐于 @Autowired 来说,@Resource ⽀持更多的参数设置,例如
name 设置,根据名称获取 Bean。
3.@Autowired 可⽤于 Setter 注⼊、构造函数注⼊和属性注⼊,⽽ @Resource 只能⽤于 Setter 注
⼊和属性注⼊,不能⽤于构造函数注⼊。
而如果当我们的出现以下多个 Bean,返回同⼀对象类型时程序会报错: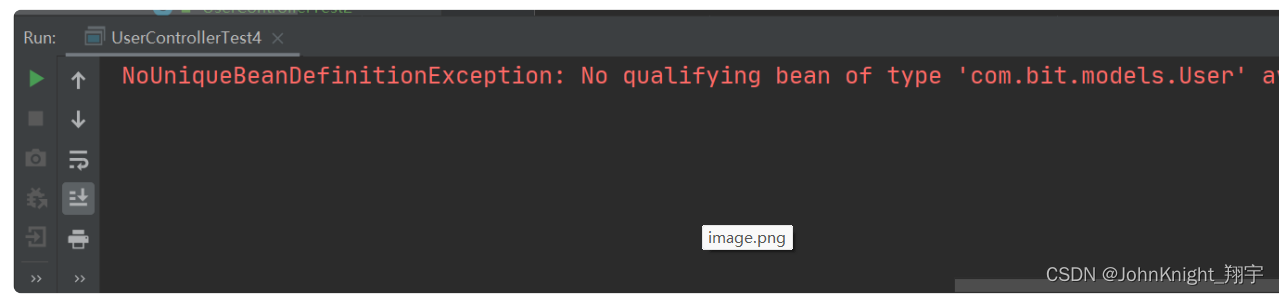
原因就是非唯一的bean
解决方法:
使⽤ @Resource(name=“user1”) 定义。
使⽤ @Qualifier 注解定义名称。
总结
今天blog就到这里了,希望三连+评论啊
版权归原作者 JohnKnight_翔宇 所有, 如有侵权,请联系我们删除。