一.搭建开发环境
1.创建一个空文件夹,在vscode中打开
2.开启package文件,因为需要用到npm包
**npm init -y **
3.创建bin文件夹,也就是程序运行最开始访问的文件夹
4.www.js创建服务器
//创建服务器
const http = require('http');

//将服务器回调函数引入
const serverHandler = require('../app')
    //端口
const PORT = 5000;

const server = http.createServer(serverHandler);

server.listen(PORT, () => {
    // 监听成功执行的回调
    console.log('server running at port 5000.....');
})
将回调函数单独抽离出来,放在根目录文件app.js
//写回到函数,将createServer中的回调函数抽离了出来,目的是更好的维护
const serverHandler = (req, res) => {
    //这里面是服务器的业务代码

    //1.设置返回的数据类型
    res.setHeader('Content-Type', 'application/json')

    //2.数据格式
    const responseData = {
        name: 'alva',
        age: 21
    }

    res.end(
        JSON.stringify(responseData)
    )
}

module.exports = serverHandler;
5.启动服务器
**5.1启动前,将package.json中的main属性修改成bin/www.js设置启动入口**
** 5.2安装工具 **
** npm install nodemon -D**
5.3修改
"scripts": {
** "dev": "nodemon bin/www.js"**
** },**
当服务器代码发生改变时重新运行最新的代码
** 5.4.启动服务器**
** npm run dev**
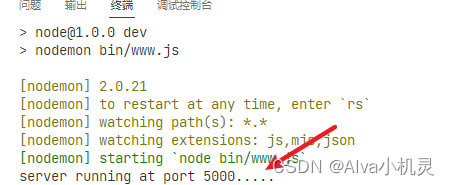
6.在浏览器输入 http://locsalhost:5000

以上开发环境就已经搭建好了
二.路由配置
1.根目录创建src下的routes文件夹,里面创建blog.js文件
//处理博客相关的路由,定义处理路由的逻辑
const handleBlogRoute = (req, res) => {
    const method = req.method;
    const url = req.url;
    const path = url.split('?')[0] //问号分割取前半段

    //如果请求如下就返回下面的结果,这个结果会保存到blogData
    if (method === 'GET' && path === '/api/blog/list') {
        return {
            message: '获取博客列表的接口'
        }
    }
}
module.exports = handleBlogRoute;
接着在服务器的业务代码中接收这个数据
 res.setHeader('Content-Type', 'application/json')
        //路由返回数据结果(将请求和响应传入)
    const blogData = handleBlogRoute(req, res)
    if (blogData) {
        //如果拿到了,就结束请求,返回一个响应
        res.end(

        )
    }
注意: 上面的代码中blogData是一个对象 ,但是服务器返回给浏览器的应该是字符串,所以应该进行转换
if (blogData) {
        //如果拿到了,就结束请求,返回一个响应
        res.end(
            JSON.stringify(blogData)
        );
        //响应之后,下面的代码不再执行,所以return一下
        return;
    }
**现在我们已经定义好了一个接口,就是 /api/blog/list**
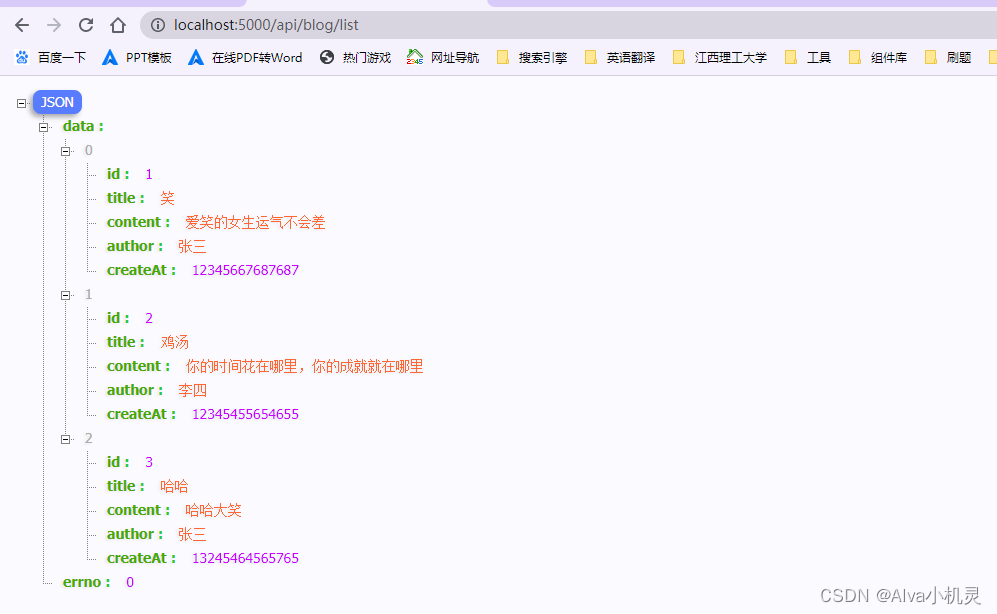
我们尝试在浏览器进行访问

前端拿到这样的字符串就可以进行解析渲染到页面上
2.定义多个接口
   if (method === 'GET' && path === '/api/blog/detail') {
        return {
            message: '获取博客详情的接口'
        }
    }
    if (method === 'POST' && path === '/api/blog/new') {
        return {
            message: '新建博客的接口'
        }
    }
    if (method === 'POST' && path === '/api/blog/update') {
        return {
            message: '更新博客的接口'
        }
    }
    if (method === 'POST' && path === '/api/blog/delete') {
        return {
            message: '删除博客的接口'
        }
    }
**2.2测试接口**
对于post请求的接口,由于请求体比较大,我们可以使用postman 或者apifox工具进行测试

3.处理错误请求
    if (blogData) {
        //如果拿到了,就结束请求,返回一个响应
        res.end(
            JSON.stringify(blogData)
        );
        //响应之后,下面的代码不再执行,所以return一下
        return;
    }

    //如果不是上面的路由,就会返回下面的结果
    res.writeHead(404, { 'Content-Type': 'text/plain' }); //无格式正文
    res.write('404 Not Found');
    res.end(); //终止响应

4.改造
这个handleBlogRoute只是关于博客的请求处理,如果我们还有别的路由请求需要处理可以进行如下操作
将下面的部分放到 服务器业务代码返回数据之前
    const url = req.url;
    const path = url.split('?')[0] //问号分割取前半段
放入后做改造
    const url = req.url;
    req.path = url.split('?')[0] //问号分割取前半段
在进行请求判断时,应该使用下面的写法
req.path==='/api/xxx'
三.响应数据格式优化
创建src目录下面的model文件夹,里面新建一个responseModel.js
class BaseModel {
    //构造函数
    constructor(data, message) {
        //数据可能是对象或者string,如果是string,直接message返回
        if (typeof data == 'string') {
            this.message = data
            data = null
            message = null
        }
        if (data) {
            this.data = data
        }
        if (message) {
            this.message = message
        }
    }
}

//根据基类,下面是成功与失败的模型

class SuccessModel extends BaseModel {
    constructor(data, message) {
        super(data, message)
        this.errno = 0;
    }
}

class ErrorModel extends BaseModel {
    constructor(data, message) {
        super(data, message)
        this.errno = -1;
    }
}

module.exports = {
    SuccessModel,
    ErrorModel
}
获取blog列表接口修改示例
**接口:**
/api/blog/list?author = zhansan&keyword=123
1.先拿到参数
 req.path = url.split('?')[0] //问号分割取前半段
        //解析query
    req.query = querystring.parse(url.split('?')[1]);
2.返回数据改造
  //如果请求如下就返回下面的结果,这个结果会保存到blogData
    if (method === 'GET' && req.path === '/api/blog/list') {

        const author = req.query.author || '';
        const keyword = req.query.keyword || '';
        const listData = getList(author, keyword); //根据参数获取数据
        return new SuccessModel(listData)
            // return {
            //     message: '获取博客列表的接口'
            // }
    }
3.src下创建controller包,新建一个blog.js文件
//博客相关的方法
const getList = (author, keyword) => {
    //从数据库里面拿数据
    //先做假数据
    return [{
            id: 1,
            title: '标题一',
            content: '内容一',
            author: '张三',
            createAt: 161055518935 //date.now()获取的时间戳
        },
        {
            id: 2,
            title: '标题二',
            content: '内容二',
            author: '李四',
            createAt: 161055535044 //date.now()获取的时间戳
        }
    ]
}

module.exports = {
    getList
}
4.测试

四.异步处理post请求数据
const querystring = require('querystring')
const handleBlogRoute = require('./src/routes/blog')

//处理post数据
const getPostData = (req) => {
        const promise = new Promise((resolve, reject) => {
            if (req.method !== 'POST') {
                resolve({})
                return;
            }
            if (req.headers['content-type'] !== 'application/json') {
                resolve({})
                return;
            }

            let postData = ''
                //返回的是数据段
            req.on('data', (chunk) => {
                postData += chunk.toString();
            })

            req.on('end', () => {
                if (!postData) {
                    resolve({})
                    return;
                }
                resolve(JSON.parse(postData))
            })
        })
        return promise;
    }
    //这里面是服务器的业务代码
const serverHandler = (req, res) => {
    //设置返回的数据类型(响应格式)
    res.setHeader('Content-Type', 'application/json')
        //获取path
    const url = req.url;
    req.path = url.split('?')[0] //问号分割取前半段
        //解析query
    req.query = querystring.parse(url.split('?')[1]);

    //下面的函数返回的是一个promise,这是一个异步的过程,意思是这个还没走完代码就会往下执行别的步骤,
    //这样可能会导致有些路由访问不到,因为数据还没处理完
    getPostData(req).then(
        (postData) => {
            req.body = postData
                //路由返回数据结果(将请求和响应传入)
            const blogData = handleBlogRoute(req, res)
            if (blogData) {
                //如果拿到了,就结束请求,返回一个响应
                res.end(
                    JSON.stringify(blogData)
                );
                //响应之后,下面的代码不再执行,所以return一下
                return;
            }
            //如果不是上面的路由,就会返回下面的结果
            res.writeHead(404, { 'Content-Type': 'text/plain' }); //无格式正文
            res.write('404 Not Found');
            res.end(); //终止响应
        }
    )
}

module.exports = serverHandler;

module.exports = serverHandler;
**例如更新博客的路由**
const handleBlogRoute = (req, res) => {
    const id = req.query.id
    const blogData = req.body
    const method = req.method;
    //如果请求如下就返回下面的结果,这个结果会保存到blogData
    if (method === 'POST' && req.path === '/api/blog/update') {

        const updatedBlogData = updatedBlog(blogData)
        if (updatedBlogData) {
            return new SuccessModel('更新博客成功')
        }
        // return {
        //     message: '更新博客的接口'
        // }
    }
}
上面的操作中,因为许多接口请求时都用到了id和数据,所以将它们提取出来
**方法**
//更新博客 blogData = {}是设置空对象,防止没有传
const updatedBlog = (id, blogData = {}) => {
    console.log('id', id);
    console.log('blogData', blogData);
    return true
}

五.使用MySQL
1.在数据库中新建一个数据库,并创建blogs表


2.nodejs连接mysql-一个测试demo
1.创建index.js

2.终端进入mysql-demo
** npm init -y**
** npm install mysql**
3.index.js实现连接数据库
const mysql = require('mysql')

//创建连接对象
const connection = mysql.createConnection({
    host: 'localhost',
    user: 'root',
    password: '123456',
    'port': 3306,
    database: 'myblog'
})

//开始连接
connection.connect();

//执行sql语句
const sql = `select * from blogs`

connection.query(sql, (err, result) => {
    if (err) {
        console.error('error', err)
        return;
    }
    console.log('result', result);
})

//关闭连接
connection.end()
** 4.终端输入node index.js**
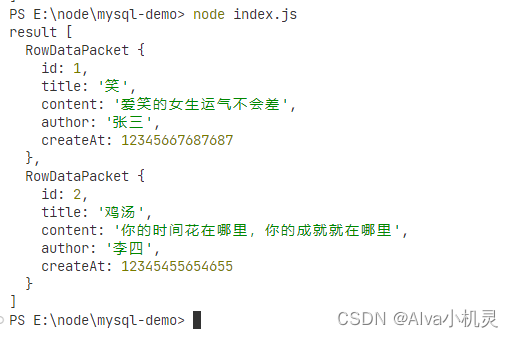
3.封装执行sql语句的工具函数
**src下面创建db文件夹,新建mysql.js文件**
** 终端输入 **
 PS E:\node> **npm install mysql**

**mysql.js**
const mysql = require('mysql')

//创建连接对象
const connection = mysql.createConnection({
    host: 'localhost',
    user: 'root',
    password: '123456',
    'port': 3306,
    database: 'myblog'
})

//开始连接
connection.connect();

//执行sql语句的函数
function execSQL(sql) {
    const promise = new Promise((resolve, reject) => {
        connection.query(sql, (err, result) => {
            if (err) {
                reject(err)
                return;
            }
            resolve(result)
        })
    })
    return promise;
}

module.exports = {
    execSQL
}
测试获取列表接口
 if (method === 'GET' && req.path === '/api/blog/list') {
        const sql = `select * from blogs`
        execSQL(sql).then(result => {
            console.log(result);
        })
        const author = req.query.author || '';
        const keyword = req.query.keyword || '';
        const listData = getList(author, keyword); //根据参数获取数据
        return new SuccessModel(listData)
            // return {
            //     message: '获取博客列表的接口'
            // }
    }
访问路由,控制台输出
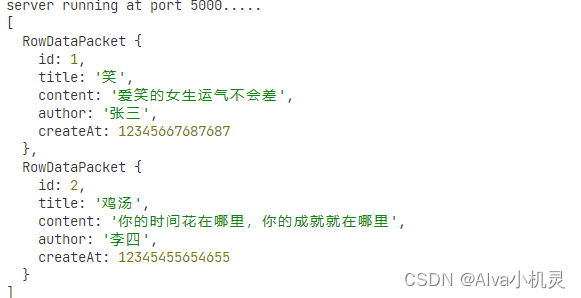
完善请求接口
const handleBlogRoute = (req, res) => {
    const id = req.query.id
    const blogData = req.body
    const method = req.method;
    //如果请求如下就返回下面的结果,这个结果会保存到blogData
    if (method === 'GET' && req.path === '/api/blog/list') {
        const author = req.query.author || '';
        const keyword = req.query.keyword || '';
        const listData = getList(author, keyword); //根据参数获取数据,这里返回的是一个promise对象
       return listData.then(listData => {
            return new SuccessModel(listData)
        })
    }
//博客相关的方法
const getList = (author, keyword) => {
  //从数据库里面拿数据(根据用户以及关键字)
    //由于我们要做拼接,改成let
    let sql = `select * from blogs where`
    if (author) {
        sql += ` author =  '${author}' `
    }
    if (keyword) {
        sql += `and title like '%${keyword}%' ` //模糊查询
    }
    return execSQL(sql)
}
接下来在app.js文件中使用了handleBlogRoute的地方修改返回结果代码
   req.body = postData
                //路由返回数据结果(将请求和响应传入)
            const blogData = handleBlogRoute(req, res)
            if (blogData) {
                //这是一个promise对象
                blogData.then(blogData => {
                        //如果拿到了,就结束请求,返回一个响应
                        res.end(
                            JSON.stringify(blogData)
                        );
                    })
                    //响应之后,下面的代码不再执行,所以return一下
                return;
            }


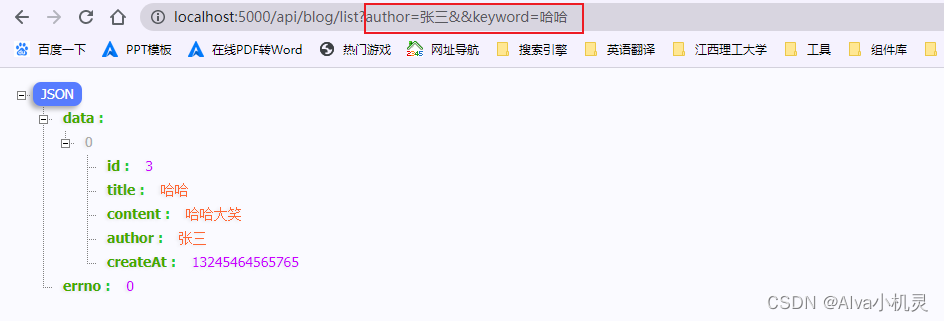
注意 如果我们没有输入参数,会报错,因为我们的sql语句中where后面没有内容,语句错误,为避免这样的问题,我们可以进行下面的小技巧
let sql = `select * from blogs where 1=1`
版权归原作者 亦菲小机灵 所有, 如有侵权,请联系我们删除。