
目录
一、回顾C语言文件操作
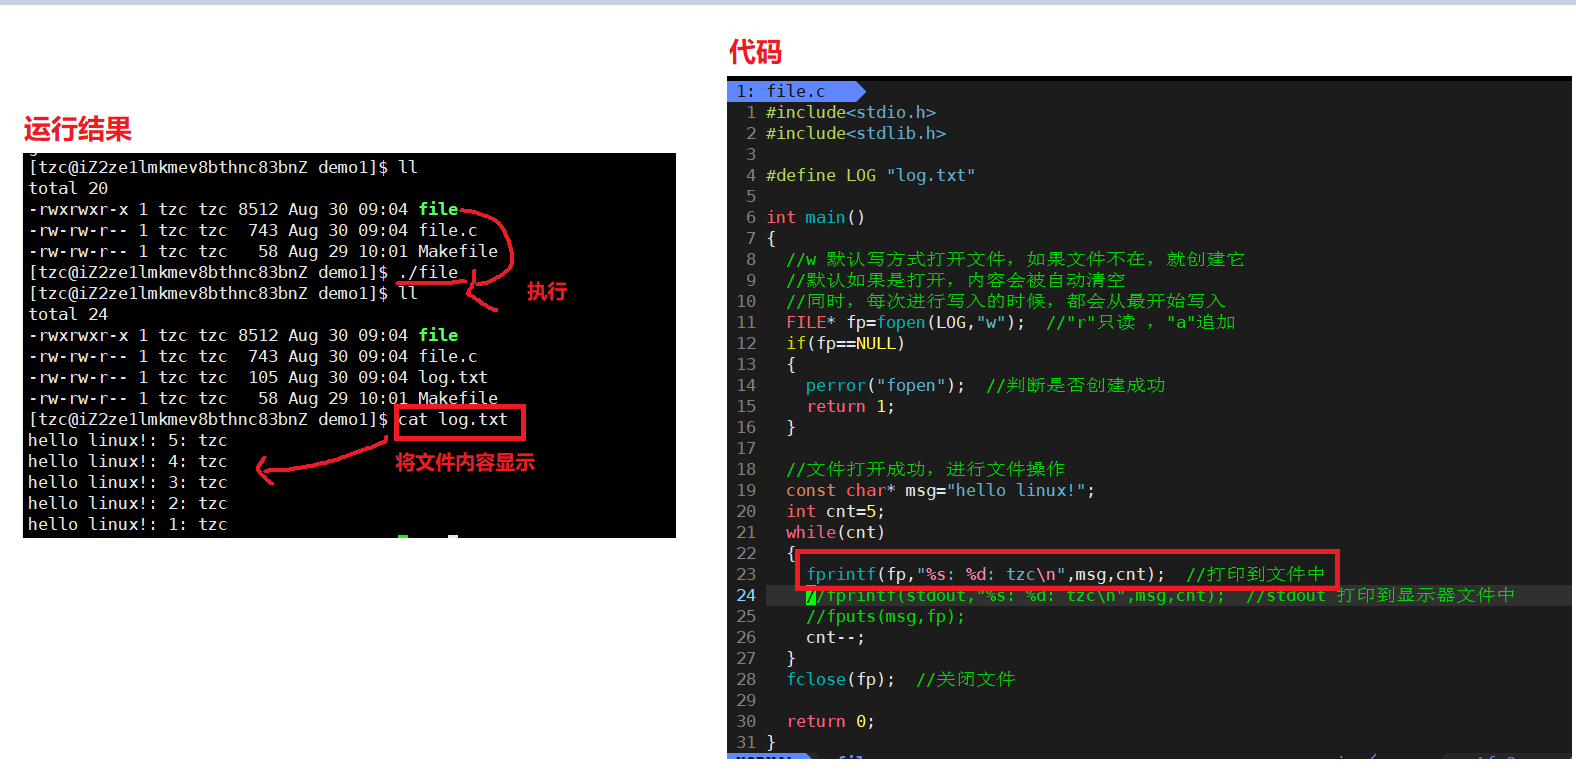
1 #include<stdio.h>2 #include<stdlib.h>34 #define LOG "log.txt"56intmain()7{8//w 默认写方式打开文件,如果文件不在,就创建它9//默认如果是打开,内容会被自动清空10//同时,每次进行写入的时候,都会从最开始写入11 FILE* fp=fopen(LOG,"w");//"r"只读 ,"a"追加12if(fp==NULL)13{14perror("fopen");//判断是否创建成功15return1;16}1718//文件打开成功,进行文件操作19constchar* msg="hello linux!";20int cnt=5;21while(cnt)22{23fprintf(fp,"%s: %d: tzc\n",msg,cnt);//打印到文件中 24//fprintf(stdout,"%s: %d: tzc\n",msg,cnt); //stdout 打印到显示器文件中 25//fputs(msg,fp);26 cnt--;27}28fclose(fp);//关闭文件2930return0;31}
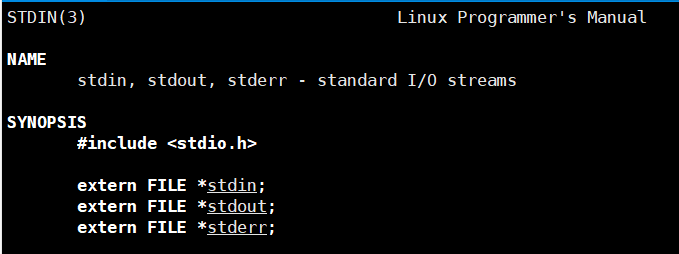
C语言有三个默认输入输出流,分别是 stdin,stdout,stderr.将他们分别称为:标准输入,标准输出,标准错误;他们分别对应 键盘、显示器、显示器。
代码
#include<stdio.h>intmain(){constchar* str ="hello wrold!\n";fputs(str,stdout);// 向标准输出中打印,即打印在显示器上fputs(str,stdout);fputs(str,stdout);}
运行结果
二、文件系统调用接口
1. open
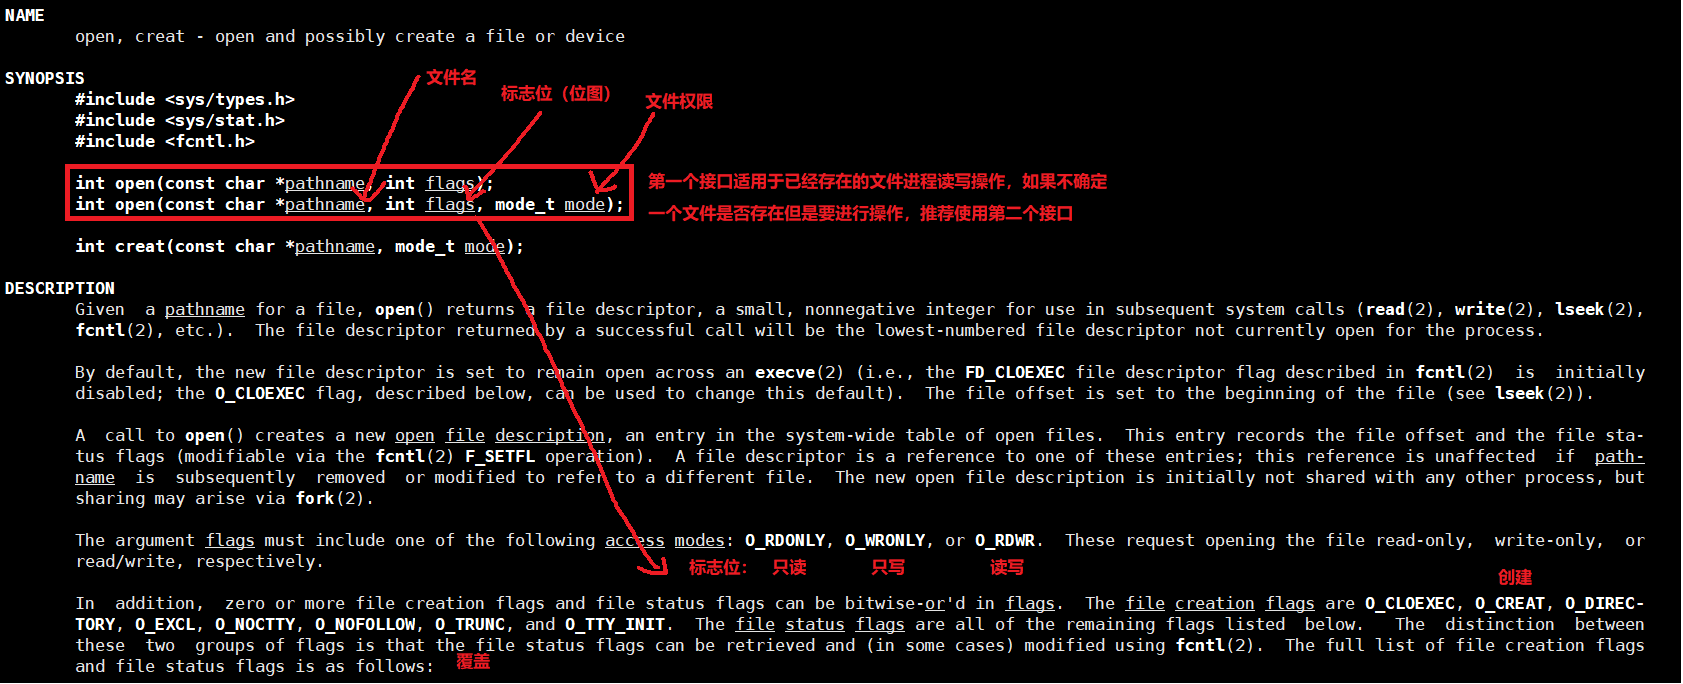
open打开文件后会返回一个文件描述符,用来后续进行文件操作
#include<stdio.h>#include<unistd.h>#include<sys/stat.h>#include<sys/types.h>#include<fcntl.h>intmain(){umask(0);// 防止umask码&设置权限,影响期望权限int fd =open("./log.txt",O_WRONLY|O_CREAT,0666);// 以只写方式打开,如果没有该文件就创建,权限为666if(fd<0)// 打开失败{perror("open");return1;}close(fd);return0;}
2.write
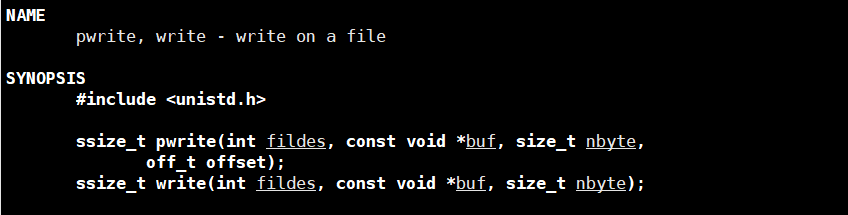
第一个参数是需要填写文件描述符,需要操作哪一个文件就将哪一个文件的文件描述符填到第一个参数,第二个参数是要写入的内容,第三个参数是写入的大小
返回值:返回值为实际写入文件数据大小。
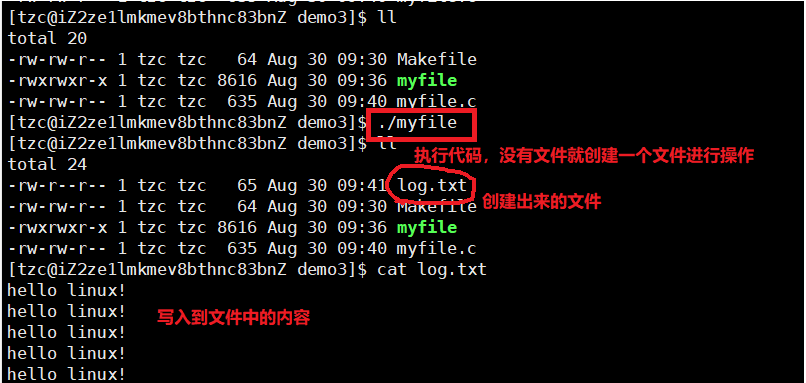
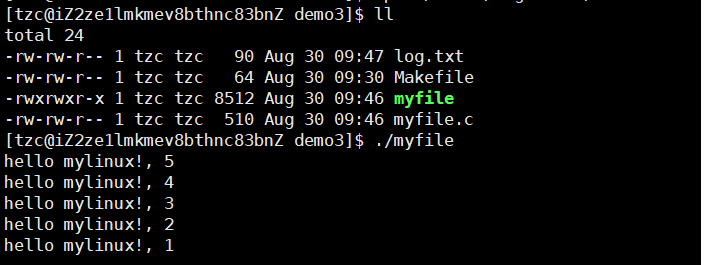
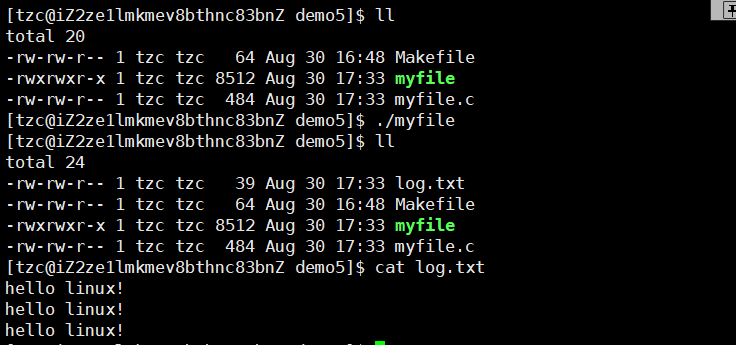
1 #include<stdio.h>2 #include<unistd.h>3 #include<sys/stat.h>4 #include<sys/types.h>5 #include<fcntl.h>6 #include<string.h>78intmain()9{10int fd =open("./log.txt",O_WRONLY|O_CREAT,0644);11if(fd<0)12{13perror("open");14return1;15}1617constchar* msg ="hello linux!\n";18int count =5;19while(count--)20{21char line[256];//缓存数组22snprintf(line,sizeof(line),"%s, %d\n",msg,count);//写入line 23write(fd, msg,strlen(msg));// 写入时不需要写入'\0',字符串以'\0'结束只是C语言的规定,文件中字符串不需要'\0'24}25close(fd);26return0;27}
3.read
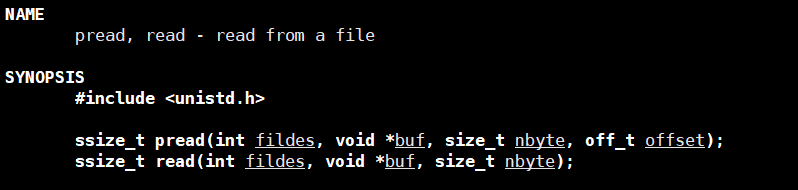
第一个参数是文件描述符,第二个参数是读取到哪个位置,第三个参数是读取多大
需要注意的是读取的时候直接全文进行读取,不会按行读取。
1 #include<stdio.h>2 #include<unistd.h>3 #include<sys/stat.h>4 #include<sys/types.h>5 #include<fcntl.h>6 #include<string.h>789intmain()10{11int fd =open("./log.txt",O_RDONLY);12if(fd<0)13{14perror("open");15return1;16}1718char buf[1024];19ssize_t s =read(fd, buf,sizeof(buf)-1);// 将文件内容读出,需将字符串末尾加'\0'20if(s>0)21{22 buf[s]=0;23printf("%s\n",buf);//将读取到的字符串打印出来24}25else26{27printf("read failed\n");28}29return0;30}
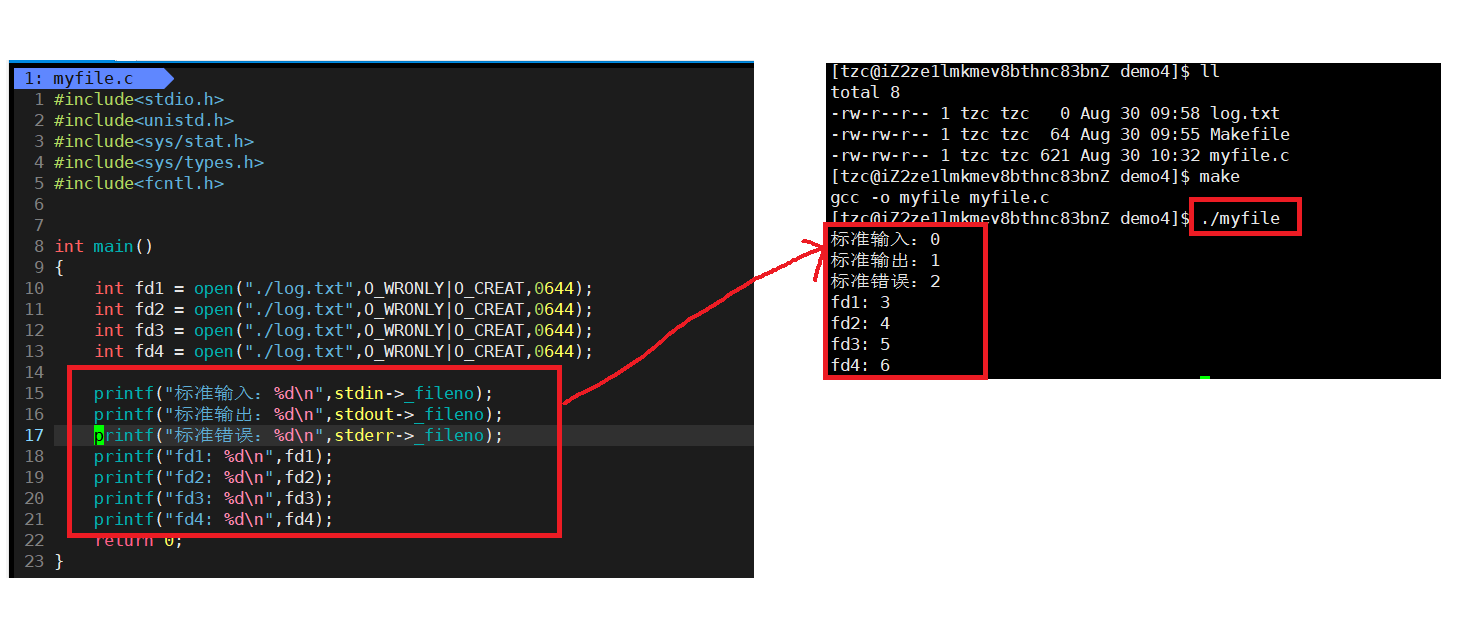
三、文件描述符
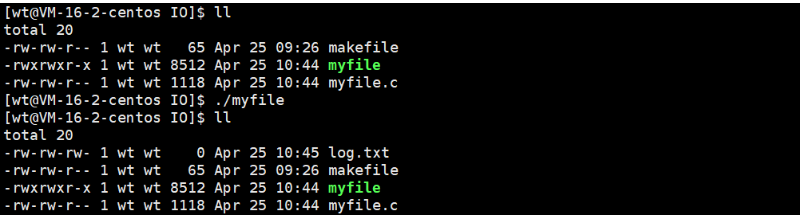
文件描述符就是调用系统接口open的返回值,打开成功返回该文件的文件描述符,打开失败返回-1。
#include<stdio.h>#include<unistd.h>#include<sys/stat.h>#include<sys/types.h>#include<fcntl.h>intmain(){int fd1 =open("./log.txt",O_WRONLY|O_CREAT,0644);int fd2 =open("./log.txt",O_WRONLY|O_CREAT,0644);int fd3 =open("./log.txt",O_WRONLY|O_CREAT,0644);int fd4 =open("./log.txt",O_WRONLY|O_CREAT,0644);printf("fd1: %d\n",fd1);printf("fd2: %d\n",fd2);printf("fd3: %d\n",fd3);printf("fd4: %d\n",fd4);return0;}

实际上文件描述符就是一个数组的下标,如何理解?
系统的标准输入,标准输出和标准错误占据了数组的前三个位置,所以我们进程在打开文件的时候,默认文件描述符就是从3开始。
如何验证?
四、重定向
1.输出重定向
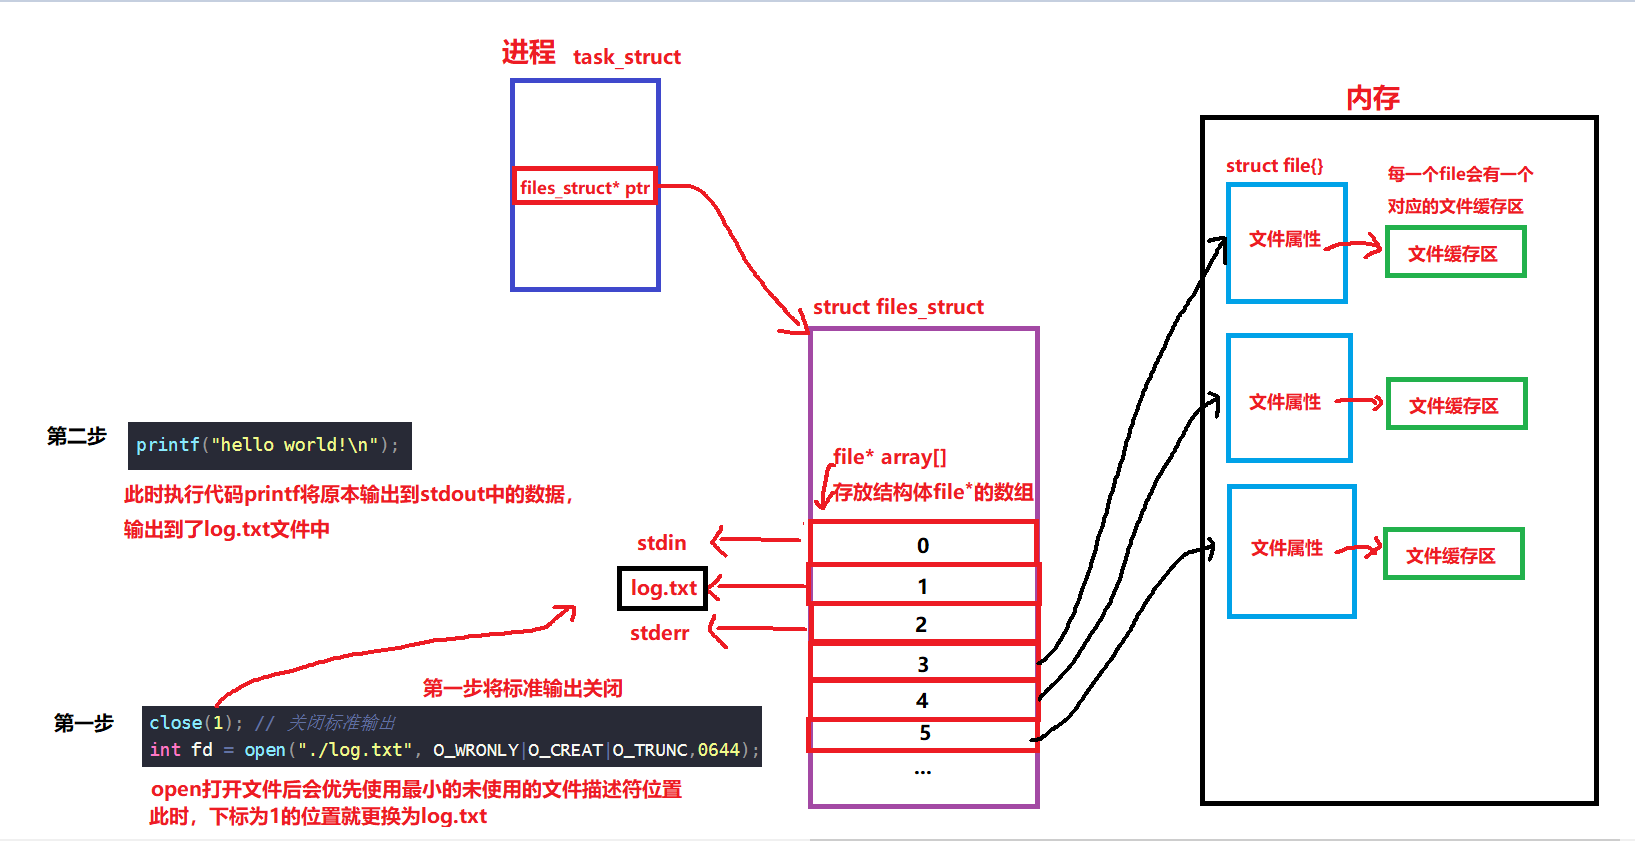
1 #include<stdio.h>2 #include<unistd.h>3 #include<sys/stat.h>4 #include<sys/types.h>5 #include<fcntl.h>6 #include<string.h>78intmain()9{10close(1);// 关闭标准输出11int fd =open("./log.txt", O_WRONLY|O_CREAT|O_TRUNC,0644);12// int fd = open("./log.txt", O_WRONLY|O_CREAT|O_APPEND,0644); // 追加重定向 只是换成append 13if(fd<0)14{15perror("open");16return1;17}1819int count =5;20while(count--)21{22printf("hello world!\n");23}2425return0;26}

原理:
2.输入重定向
1 #include<stdio.h>2 #include<unistd.h>3 #include<sys/stat.h>4 #include<sys/types.h>5 #include<fcntl.h>6 #include<string.h>78intmain()9{10close(0);// 关闭标准输入11int fd =open("./log.txt", O_RDONLY);12if(fd<0)13{14perror("open");15return1;16}1718int a,b;19scanf("%d %d",&a,&b);20printf("a=%d, b=%d\n",a,b);2122return0;23}
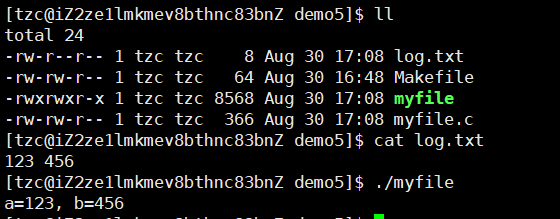
原理跟输出重定向相同,不过要关闭的是stdin
除了代码方式,我们可以通过指令方式进行重定向
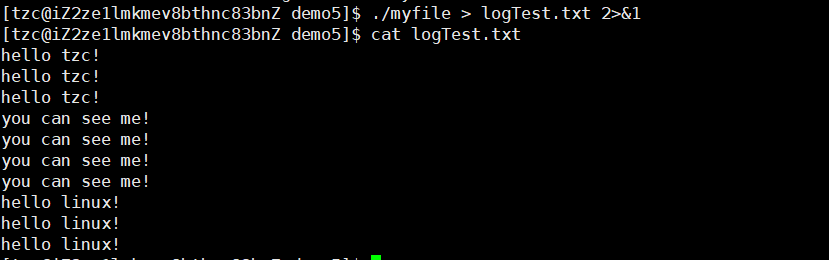
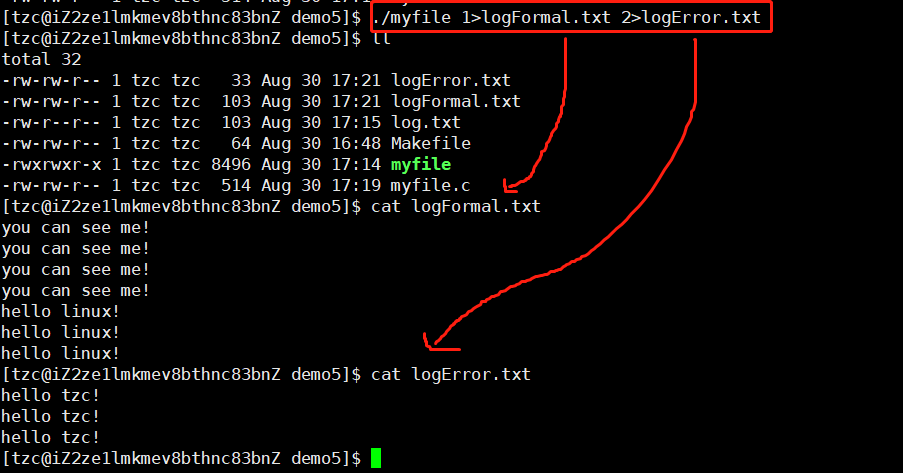
1 #include<stdio.h>2 #include<unistd.h>3 #include<sys/stat.h>4 #include<sys/types.h>5 #include<fcntl.h>6 #include<string.h>78intmain()9{10printf("you can see me!\n");11printf("you can see me!\n");12printf("you can see me!\n");13printf("you can see me!\n");1415fprintf(stdout,"hello linux!\n");16fprintf(stdout,"hello linux!\n");17fprintf(stdout,"hello linux!\n");1819fprintf(stderr,"hello tzc!\n");20fprintf(stderr,"hello tzc!\n");21fprintf(stderr,"hello tzc!\n");222324return0;25}
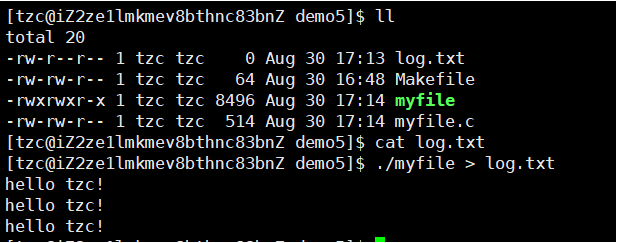
将原本输出到显示器文件中的数据重定向到log.txt中,重定向stdout的内容,所以stderr中的内容还是被打印到显示器文件中了
如果要对标准错误(stderr)的内容重定向到文件中可以另加修饰。
此时我们可以看到标准错误和标准输出都打印到同一个文件中。
也可以进行分开重定向
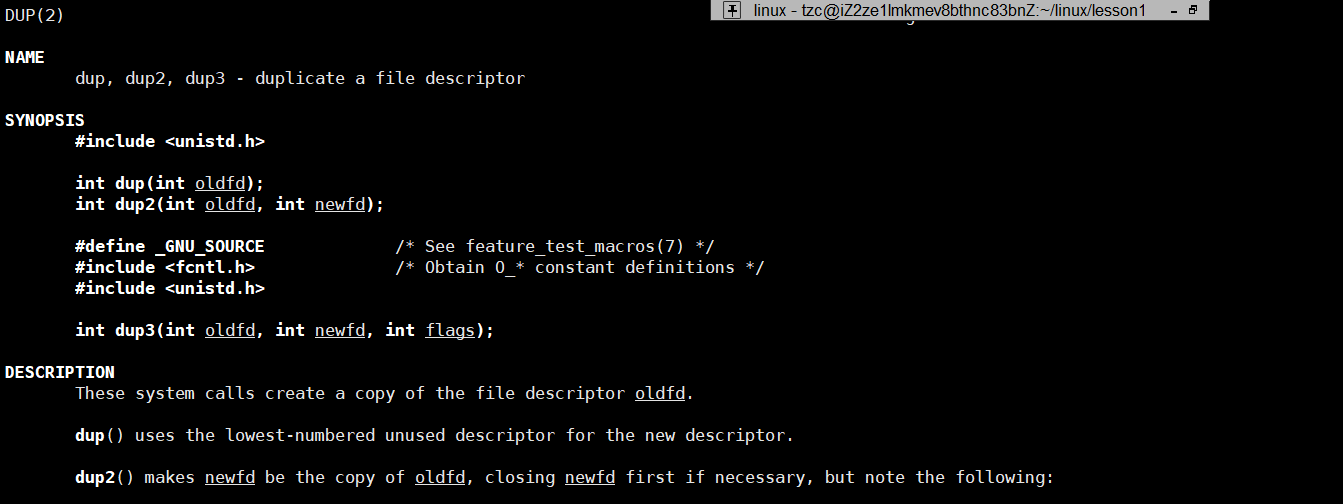
五、dup2
我们发现在对数据进行重定向的时候,操作比较复杂,系统提供了一个函数用来简化重定向操作
dup2有两个参数,oldfd和newfd,他的底层原理实际是将newfd的指针覆盖,换成指定oldfd位置的指针
使用:
1 #include<stdio.h>2 #include<unistd.h>3 #include<sys/stat.h>4 #include<sys/types.h>5 #include<fcntl.h>6 #include<string.h>78 #define LOG "log.txt"910intmain()11{12int fd=open(LOG,O_WRONLY|O_CREAT|O_TRUNC,0666);//打开文件13if(fd==-1)14{15perror("open");16return-1;17}1819dup2(fd,1);//将下标为1位置的内容覆盖为fd位置下标中内容2021printf("hello linux!\n");22printf("hello linux!\n");23printf("hello linux!\n");2425return0;26}
本文转载自: https://blog.csdn.net/Tianzhenchuan/article/details/132575269
版权归原作者 Insisting. 所有, 如有侵权,请联系我们删除。
版权归原作者 Insisting. 所有, 如有侵权,请联系我们删除。