Fabric介绍(推荐文章)
Hyperledger(超级账本)是Linux基金会旗下的项目,Fabric是Hyperledger项目里最早也是目前应用最广泛的区块链项目,最初由IBM开发,后来捐助给基金会。
- 是一个开源的企业级需要许可的分布式账本技术平台
- 是一个高度模块化和可配置架构(a,b,c)
- 支持不同组件的可插拔实现
- 智能合约支持多语言:go,java,node.js等
Hyperledger Caliper介绍(官方文档)
Hyperledger Caliper是一个通用的区块链性能测试框架,它允许用户使用自定义的用例测试不同的区块链解决方案,并得到一组性能测试结果。
Caliper目前支持以下区块链平台:
- Hyperledger Besu
- Hyperledger Burrow
- Ethereum
- Hyperledger Fabric
- FISCO BCOS
- Hyperledger Iroha
- Hyperledger Sawtooth
Caliper目前支持的性能指标包括:
- 交易/读吞吐量
- 交易/读延迟:最小、最大、平均、百分比
- 资源消耗:CPU、内存、网络IO…
安装nodejs
本测试需要docker、docker-compose、go、nodejs的环境,这里不进行安装介绍,只是简单介绍一下nodejs的安装。
这里我用到了下面这几个版本的node,具体使用哪一个看报错信息。但是每次安装了新的之后要重新构建安装node-gyp构建自动化工具。去node的bin目录里面看是否有node-gyp命令即可。

wget https://nodejs.org/dist/v16.15.0/node-v16.15.0-linux-x64.tar.xz
tar -xvf node-v16.15.0-linux-x64.tar.xz
sudovim /etc/profile
exportNODE_HOME=你自己的安装目录
exportPATH=$NODE_HOME/bin:$PATHsource /etc/profile
node -v

#安装node-gyp构建自动化工具sudonpminstall -g node-gyp
搭建Hyperledger caliper(官网)
测试之前是保证我们的区块链项目已经安装成功,前面的相关步骤已经完成。
大家也可以参照官网,较少的非常详细。
创建并初始化Fabric网络
cd test-network
./network.sh up createChannel
创建Caliper的工作区
在和network.sh同级的目录下创建caliper-workspace文件夹并创建三个子文件夹
mkdir -p caliper-workspace/{networks,benchmarks,workload}
初始化工作区
进入caliper-workspace目录执行命令
npm init -y
安装caliper-cli,这个会把用到的依赖下载到当前工作区的node_modules目录下
#版本要匹配,0.4对应fabric2.x,0.3对应fabric1.4npminstall --only=prod @hyperledger/[email protected]
注意事项:
linux为了安全起见,root用户执行npm命令的时候会被换成一个nobody的用户,而这个用户基本上是没有任何权限的,所以执行这个命令的时候可以自己用其他的用户登录,然后赋予其他用户操作我们的fabric工作区的权限。(参考文章)
#下面这个命令使这个文件夹所有用户都可以操作chmod -R 777 /home/workspace/
绑定终端SDK
npx caliper bind --caliper-bind-sut fabric:2.1
构建测试文件
构建测试工作的负载模块。
在workload文件夹下创建createAsset.js文件,创建测试账户命令,随机生成账户id并进行初始化调用。
'use strict';

const { WorkloadModuleBase }= require('@hyperledger/caliper-core');

class MyWorkload extends WorkloadModuleBase {constructor(){
        super();}

    async initializeWorkloadModule(workerIndex, totalWorkers, roundIndex, roundArguments, sutAdapter, sutContext){
        await super.initializeWorkloadModule(workerIndex, totalWorkers, roundIndex, roundArguments, sutAdapter, sutContext);}

    async submitTransaction(){
            const randomId = Math.random();
            const assetID =`${this.roundArguments.prefix}_${randomId}`;
            console.log(`Creating asset ${assetID}`);
            const request ={
                contractId: this.roundArguments.contractId,
                contractFunction: 'CreateAsset',
                invokerIdentity: '[email protected]',
                contractArguments: [assetID,'blue','20','500','500'],
                readOnly: false};

            await this.sutAdapter.sendRequests(request);}

    async cleanupWorkloadModule(){}}functioncreateWorkloadModule(){return new MyWorkload();}

module.exports.createWorkloadModule = createWorkloadModule;
在networks文件夹下创建一个名为networkConfig.json的文件.
这里说明一下,networkConfig.json的文件里面的path路径是自己的工程里面的文件对应的路径。
其他的名称和host里面的配置对应,要不修改的话都不进行修改。
{"version":"1.0",
    "name":"Caliper test",
    "caliper":{"blockchain":"fabric"},
    "clients":{"[email protected]":{"client":{"credentialStore":{"path":"/tmp/org1",
                    "cryptoStore":{"path":"/tmp/org1"}},
                "organization":"Org1",
                "clientPrivateKey":{"path":"/root/fabric/scripts/fabric-samples/test-network/organizations/peerOrganizations/org1.example.com/users/[email protected]/msp/keystore/priv_sk"},
                "clientSignedCert":{"path":"/root/fabric/scripts/fabric-samples/test-network/organizations/peerOrganizations/org1.example.com/users/[email protected]/msp/signcerts/[email protected]"},
                "connection":{"timeout":{"peer":{"endorser":"3000"}}}}}},
    "channels":{"mychannel":{"created": true,
        "orderers":["orderer.example.com"],
        "peers":{"peer0.org1.example.com":{}},
            "contracts":[{"id":"basic",
                    "version":"1.0"}]}},
    "organizations":{"Org1":{"mspid":"Org1MSP",
            "peers":["peer0.org1.example.com"]}},
    "orderers":{"orderer.example.com":{"url":"grpcs://orderer.example.com:7050",
       "tlsCACerts":{"path":"/root/fabric/scripts/fabric-samples/test-network/organizations/ordererOrganizations/example.com/orderers/orderer.example.com/msp/tlscacerts/tlsca.example.com-cert.pem"},
            "grpcOptions":{"ssl-target-name-override":"orderer.example.com"}}},

    "peers":{"peer0.org1.example.com":{"url":"grpcs://peer0.org1.example.com:7051",
            "tlsCACerts":{"path":"/root/fabric/scripts/fabric-samples/test-network/organizations/peerOrganizations/org1.example.com/peers/peer0.org1.example.com/tls/ca.crt"},
            "grpcOptions":{"ssl-target-name-override":"peer0.org1.example.com",
                "hostnameOverride":"peer0.org1.example.com"}}}}
构建基准的测试的配置文件
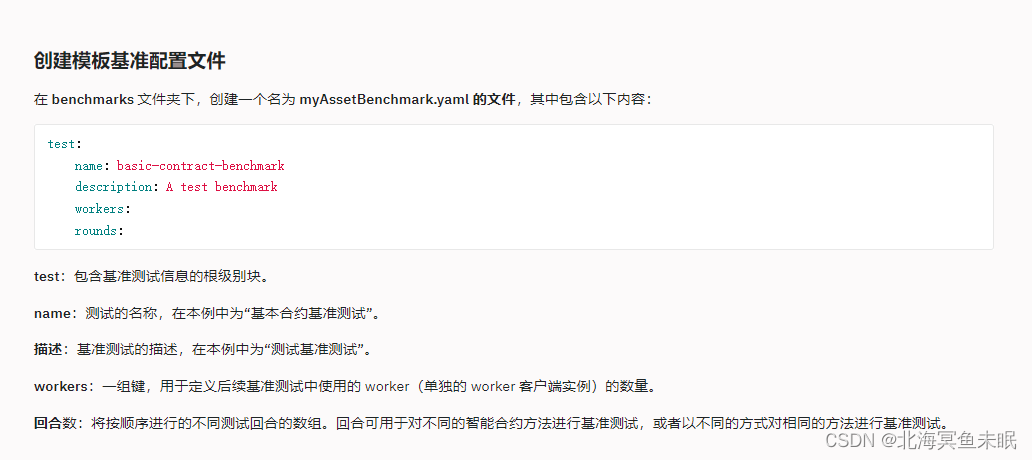
在benchmarks文件夹下创建一个名为myAssetBenchmark.yaml
基准配置文件定义基准轮次并引用定义的工作负载模块。它将指定生成负载时使用的测试工作人员的数量、测试轮次的数量、每轮的持续时间、每轮期间应用于事务负载的速率控制以及与监视器相关的选项。
在这个文件里面我们还可以配置测试的发送交易总量、发送的tps等信息。
- tps:交易发送速率
- txNumber:交易发送总量

test:
    #测试的名称
    name: basic-contract-benchmark
    #基本的描述信息
    description: test benchmark
    workers:
      type: local
      number: 5
    rounds:
      - label: createAsset-total20
        description: create asset benchmark
        #交易的发送总量
        txNumber: 20
        rateControl:
          type: fixed-rate
          opts:
              #交易发送的速率
            tps: 2
        workload:
        #这个配置我们刚才创建的js文件的路径
          module: workload/createAsset.js
          arguments:
            prefix: assetv1
            assets: 5
            contractId: basic
monitors:
  resource:
  - module: docker
    options:
      interval: 5
      containers:
      - all
配置host文件
vim /etc/hosts

#加入以下域名解析127.0.0.1 peer0.org1.example.com
127.0.0.1 peer0.org2.example.com
127.0.0.1 peer1.org1.example.com
127.0.0.1 peer1.org2.example.com
127.0.0.1 orderer.example.com
运行caplier进行性能测试
npx caliper launch manager --caliper-workspace ./ --caliper-networkconfig networks/networkConfig.json --caliper-benchconfig benchmarks/myAssetBenchmark.yaml --caliper-flow-only-test --caliper-fabric-gateway-enabled
运行完成之后会在目录下生成一个report.html文件
下按在这个report文件即可。
版权归原作者 北海冥鱼未眠 所有, 如有侵权,请联系我们删除。