
uni-app接口,全局方法封装
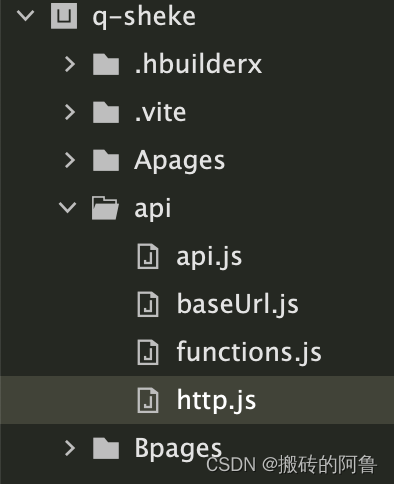
1.在根目录创建一个api文件,在api文件夹中创建api.js,baseUrl.js和http.js文件
- baseUrl.js文件代码
export default "https://XXXX.test03.qcw800.com/api/"
3.http.js文件代码
export function https(opts, data) {
    let httpDefaultOpts = {
        url: opts.url,
        data: data,
        method: opts.method,
        header: opts.method == 'get' ? {
            'X-Requested-With': 'XMLHttpRequest',
            "Accept": "application/json",
            "Content-Type": "application/json; charset=UTF-8"
        } : {
            'X-Requested-With': 'XMLHttpRequest',
            'Content-Type': 'application/x-www-form-urlencoded; charset=UTF-8'
        },
        dataType: 'json',

    }
    let token = uni.getStorageSync('token');
    if (token != undefined && token != null && token != '') {
        httpDefaultOpts.header.Authorization = 'Bearer ' + token;
    }

    let promise = new Promise(function(resolve, reject) {
        uni.request(httpDefaultOpts).then(
            (res) => {
                // console.log(res, '成功')
                if(res.statusCode == 401){
                    uni.clearStorageSync();
                }
                resolve(res)
            }
        ).catch(
            (response) => {
                // console.log(response, '失败')
                reject(response)
            }
        )
    })

    return promise

}
4.api.js文件代码
export const rootUrl="https://ssss.test03.qcw800.com";  //其他接口域名
export const baseUrl= rootUrl + "api/";
export const api = {
    // 获取验证码
    guest:{
        url: rootUrl + '/api/public/guest',
        method: 'GET'
    },
    // 登录
    login:{
        url: rootUrl + '/api/user/login',
        method: 'GET'
    }
}
5.在main.js文件中引入接口文件
import App from './App'

// #ifndef VUE3
import Vue from 'vue'
Vue.config.productionTip = false;  //设置为 false ,可以阻止 vue 在启动时生成生产提示
App.mpType = 'app'
const app = new Vue({
    ...App
})
app.$mount()
// #endif

// #ifdef VUE3
import {
    createSSRApp
} from 'vue'
import {
    toast,
    nav,
    checkMobile,
    onuploadFile
} from '@/api/functions.js'
import {
    api,
    rootUrl
} from '@/api/api.js' // API 链接
import {
    https
} from '@/api/http.js' // 请求方式中间件
import navigationBar from '@/components/navigationBar.vue'
import publicContext from '@/components/publicContext.vue'
export function createApp() {

    const app = createSSRApp(App)
    app.component('navigationBar', navigationBar);
    app.component('publicContext', publicContext);
    app.config.globalProperties.$toast = toast;
    app.config.globalProperties.$nav = nav;
    app.config.globalProperties.$add = add;
    app.config.globalProperties.$checkMobile = checkMobile;
    app.config.globalProperties.$isEmpty = isEmpty;
    app.config.globalProperties.$formatFloat = formatFloat;
    app.config.globalProperties.$api = api;
    app.config.globalProperties.$rootUrl = rootUrl;
    app.config.globalProperties.$http = https;
    app.config.globalProperties.$imgUrl = 'https://qianchao-sheke.oss-cn-hangzhou.aliyuncs.com/'
    return {
        app
    }
}
// #endif
6.接口请求
this.$http(this.$api.messageList,{
                    api_token:uni.getStorageSync('token'),
                    pageSize:10,
                    page:1
                }).then(res=>{
                    console.log(res,'返回参数');
                })
另外,封装的全局方法,上面第五步在main文件中已经引入,
export function toast(title){
    uni.showToast({
        icon:'none',
        title:title,
        position:'bottom',
    })
}

//校验手机格式
export function checkMobile(mobile){
    return RegExp(/^1[34578]\d{9}$/).test(mobile);
}

export function nav(url,type=0){

    if(type == 0){
        uni.navigateTo({
            url:url
        })
    }else if(type == 1){
        uni.switchTab({
            url:url
        })
    }else if(type == 3){
        uni.navigateBack({

        })
    }else if(type == 4){
        uni.redirectTo({
            url: url
        });
    }else if(type == 5){
        uni.reLaunch({
            url
        });
    }
}

// 上传图片
export function onuploadFile(){
    var _this = this;
    uni.chooseImage({
        count: 1, //默认9
        sizeType: ['original', 'compressed'],
        sourceType: ['album', 'camera'],
        success: (res) => {
            // console.log(res.tempFilePaths,'图片的本地文件路径列表',_this.$rootUrl);

            uni.uploadFile({
                url: _this.$rootUrl +'/api/public/upload',//上传图片的地址
                filePath: res.tempFilePaths[0],//这里是图片的本地文件路径列表(选择图片成功的时候可以拿到,在上边的success回调中res.tempFilePaths即可拿到)
                name: 'file',//上传的名字叫啥都行
                // headers: {
                //     accessToken:'' //可以设置你的请求头的token噢
                // },
                success(res) {
                    //上传成功的回调
                    // console.log('上传成功',res)
                    var data = JSON.parse(res.data);
                    return data.data[0];
                },
                fail(err){
                    console.log(err,'上传失败');
                },
                complete(result){
                    console.log(result,'上传结果');
                }
            })
        }
    });
}
vue3接口请求封装
1.在项目中安装axios
npm install --save axios vue-axios
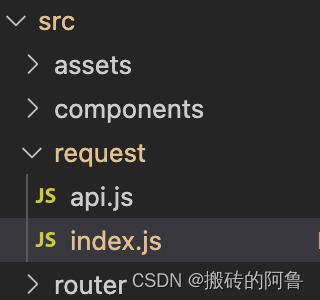
2.在src文件夹下创建request文件夹,及index.js和api.js文件
3.index.js文件代码
import axios from "axios";//创建一个axios的对象
import { useRouter } from "vue-router";
import { inject } from "vue";
//生成一个axios的实例
const http=axios.create({
    baseURL:"https://xxxx.test03.qcw800.com",// baseURL会在发送请求的时候拼接在url参数前面
    timeout:6000,//请求超时
});
// http.defaults.headers['api_token'] = localStorage.getItem('token') || '' //在请求头中传入token

http.interceptors.request.use(config => {
    // console.log(config,'请求拦截');

  return config;
}, err => {
  return Promise.reject(err)
})

//响应拦截器
http.interceptors.response.use(response => {

    //console.log(response,'响应拦截');
    return response;

  }, err => {

    return Promise.reject(err)
  })

export default http;//导出
4.api.js文件代码
//导入request.js
import request from "@/request/index";

//登录
export const login = (params) => request.get("/api/user/login",{params});

//获取个人信息
export const userDetail = (params) => request.get("/api/user/detail",{params});

//方法二 在api文件里出来异步请求
// export const getCategory=async()=>{
//     const res=await request.get(`/category/`);
//     return res.data;
// };
5.接口请求
<script>
import { defineComponent,onMounted } from 'vue'
import { userDetail } from '@/request/api'

export default defineComponent({
  setup() {
    onMounted(()=>{
      userDetail({api_token:localStorage.getItem('token')}).then(res=>{
            console.log(res,'个人信息');
        })
    })
  }
})

</script>
会了不!!

等会还有解决跨域问题,代理代码
const { defineConfig } = require('@vue/cli-service')
module.exports = defineConfig({
  transpileDependencies: true,
  devServer: {
    port: 8080, // 端口号
    open: false, //配置是否自动启动浏览器
    https: false,// https:{type:Boolean}是否启用https
    proxy: {
      // 代理
      "/api": {
        target: "https://xxxx.test03.qcw800.com",     //要代理访问的路径
        changeOrigin: true,//开启代理:在本地会创建一个虚拟服务端,然后发送请求的数据,并同时接收请求的数据,这样服务端和服务端进行数据的交互就不会有跨域问题
        ws: true,//是否启用websockets,用不到可设为false
        pathRewrite: {
          "^/api": ""//这里理解成用'/api'代替target里面的地址,比如我要调用'http://192.168.0.45:8088/user/getuserlist',直接写'/api/user/getuserlist'即可
        }
      }
    }
  },
})
本文转载自: https://blog.csdn.net/L_15737525552/article/details/128595362
版权归原作者 搬砖的阿鲁 所有, 如有侵权,请联系我们删除。
版权归原作者 搬砖的阿鲁 所有, 如有侵权,请联系我们删除。