一、案例说明
现有一电商网站数据文件,名为buyer_favorite1,记录了用户对商品的收藏数据,数据以“\t”键分割,数据内容及数据格式如下: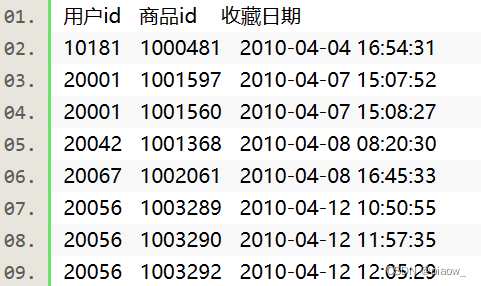
二、前置准备工作
项目环境说明
Linux Ubuntu 16.04

jdk-7u75-linux-x64

scala-2.10.4

kafka_2.10-0.8.2.2

spark-1.6.0-bin-hadoop2.6
开启hadoop集群,zookeeper服务,开启kafka服务。再另开启一个窗口,在/apps/kafka/bin目录下创建一个topic。
/apps/zookeeper/bin/zkServer.sh start
cd /apps/kafka
bin/kafka-server-start.sh config/server.properties &
cd /apps/kafka
bin/kafka-topics.sh \
--create \
--zookeeper localhost:2181 \
--replication-factor 1 \
--topic kafkasendspark \
--partitions 1
三、编写程序代码创建kafka的producer
1、新创一个文件folder命名为lib,并将jar包添加进来。(可以从我的博客主页资源里面下载)
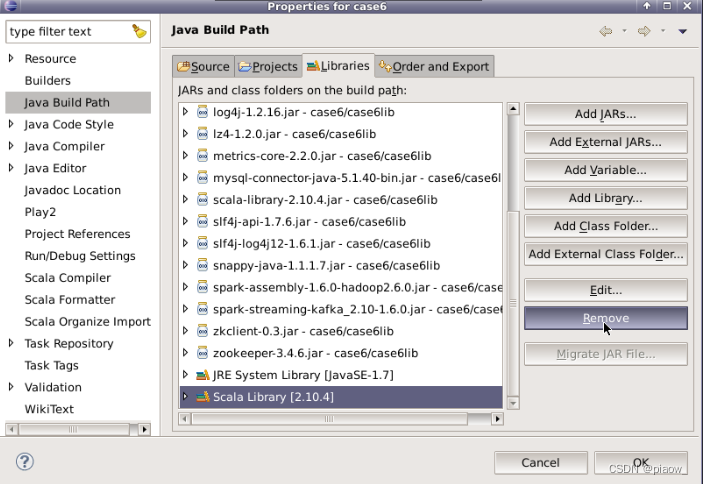
2、进入以下界面,移除Scala Library。
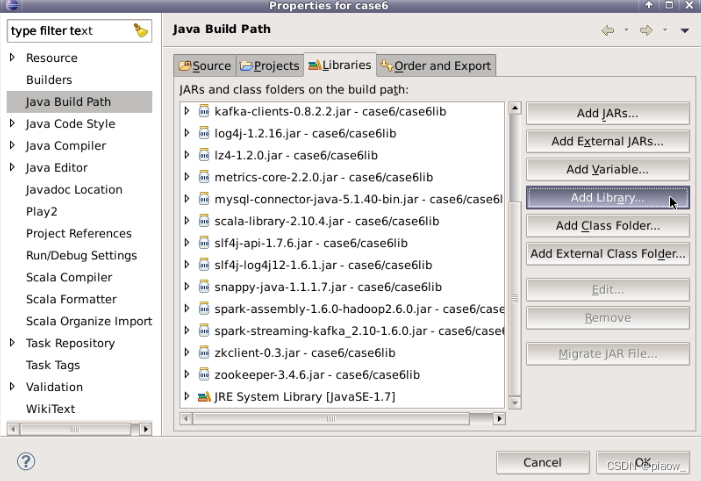
3、操作完成后,再点击Add Library选项
4、进入以下界面
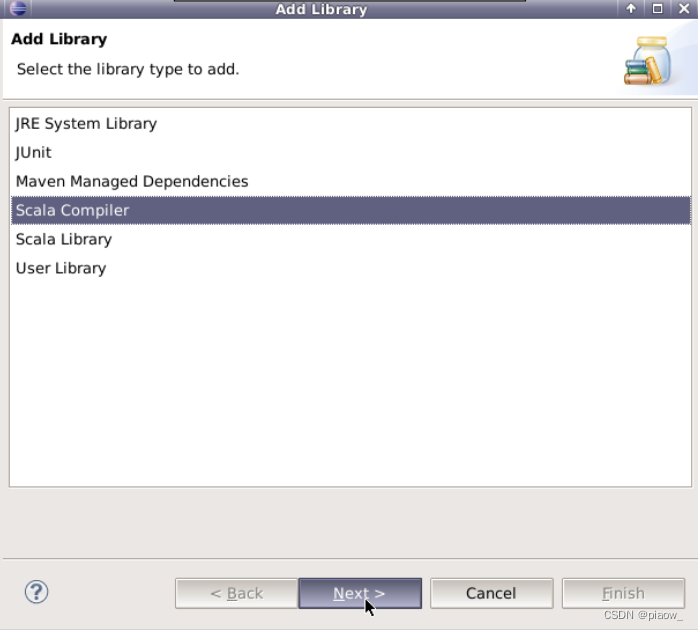
5、点击完成即可
6、最后创建如下项目结构的文件
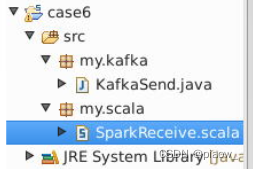
四、编写代码,运行程序
编写生产者代码
packagemy.kafka;importjava.io.BufferedReader;importjava.io.File;importjava.io.FileNotFoundException;importjava.io.FileReader;importjava.io.IOException;importjava.util.Properties;importkafka.javaapi.producer.Producer;importkafka.producer.KeyedMessage;importkafka.producer.ProducerConfig;publicclassKafkaSend{privatefinalProducer<String,String> producer;publicfinalstaticStringTOPIC="kafkasendspark";publicKafkaSend(){Properties props =newProperties();// 此处配置的是kafka的端口
        props.put("metadata.broker.list","localhost:9092");// 配置value的序列化类
        props.put("serializer.class","kafka.serializer.StringEncoder");// 配置key的序列化类
        props.put("key.serializer.class","kafka.serializer.StringEncoder");
        props.put("request.required.acks","-1");
        producer =newProducer<String,String>(newProducerConfig(props));}voidproduce(){int lineNo =1;File file =newFile("/data/case6/buyer_favorite1");BufferedReader reader =null;try{
            reader =newBufferedReader(newFileReader(file));String tempString =null;while((tempString = reader.readLine())!=null){String key =String.valueOf(lineNo);String data = tempString;
                producer.send(newKeyedMessage<String,String>(TOPIC, key, data));System.out.println(data);
                lineNo++;Thread.sleep(100);}}catch(FileNotFoundException e){System.err.println(e.getMessage());}catch(IOException e){System.err.println(e.getMessage());}catch(InterruptedException e){System.err.println(e.getMessage());}}publicstaticvoidmain(String[] args){System.out.println("start");newKafkaSend().produce();System.out.println("finish");}}
编写消费者代码
packagemy.scalaimportorg.apache.spark.SparkConf
importorg.apache.spark.streaming.StreamingContext
importorg.apache.spark.streaming.Seconds
importscala.collection.immutable.Map
importorg.apache.spark.streaming.kafka.KafkaUtils
importkafka.serializer.StringDecoder
importkafka.serializer.StringDecoder
object SparkReceive {def main(args: Array[String]){val sparkConf =new SparkConf().setAppName("countuser").setMaster("local")val ssc =new StreamingContext(sparkConf, Seconds(2))
    ssc.checkpoint("checkpoint")val topics = Set("kafkasendspark")val brokers ="localhost:9092"val zkQuorum ="localhost:2181"val kafkaParams = Map[String,String]("metadata.broker.list"-> brokers,"serializer.class"->"kafka.serializer.StringEncoder")val lines = KafkaUtils.createDirectStream[String,String,StringDecoder,StringDecoder](ssc, kafkaParams, topics)val addFunc =(currValues: Seq[Int], prevValueState: Option[Int])=>{//通过Spark内部的reduceByKey按key规约,然后这里传入某key当前批次的Seq/List,再计算当前批次的总和  val currentCount = currValues.sum
      // 已累加的值  val previousCount = prevValueState.getOrElse(0)// 返回累加后的结果,是一个Option[Int]类型
      Some(currentCount + previousCount)}val result=lines.map(line =>(line._2.split("\t"))).map( row =>(row(0),1)).updateStateByKey[Int](addFunc).print()

    ssc.start();
    ssc.awaitTermination()}}
五、运行程序
在Eclipse的SparkReceive类中右键并点击==>Run As==>Scala Application选项。
然后在KafkaSend类中:右键点击==>Run As==>Jave Application选项。
即可在控制窗口Console中查看输出结果为: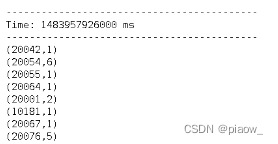
版权归原作者 piaow_ 所有, 如有侵权,请联系我们删除。