Ubuntu系统下配置ssh免密访问
一、基本信息
Ubuntu是linux系统,虽然他是支持界面化操作的,一般用来做服务器用,所以配置ssh可以比较安全的进行访问,也方便在其他地方访问服务器,轻松省事。
Ubuntu系统版本:
使用uname -a指令获取系统版本信息
zero@ubuntu:~$ uname-a
Linux ubuntu 5.15.0-79-generic #86-Ubuntu SMP Mon Jul 10 16:07:21 UTC 2023 x86_64 x86_64 x86_64 GNU/Linux
具体信息如下:
- 系统类型: Linux
- 主机名:ubuntu
- 内核版本:5.15.0-79-generic
- 编译时间:#86-Ubuntu SMP Mon Jul 10 16:07:21 UTC 2023
- 硬件架构:x86_64 x86_64 x86_64(处理器架构,操作系统类型,软件环境)
- 操作系统名称:GNU/Linux
二、ssh安装
2.1 查看是否已经安装ssh
直接输入ssh查看
zero@ubuntu:~$ ssh
usage: ssh[-46AaCfGgKkMNnqsTtVvXxYy][-B bind_interface][-b bind_address][-c cipher_spec][-D [bind_address:]port][-E log_file][-e escape_char][-F configfile][-I pkcs11][-i identity_file][-J [user@]host[:port]][-L address][-l login_name][-m mac_spec][-O ctl_cmd][-o option][-p port][-Q query_option][-R address][-S ctl_path][-W host:port][-w local_tun[:remote_tun]] destination [command [argument ...]]
有具体的信息就是已经安装了。
2.2 安装ssh
可以使用如下指令安装ssh
sudoapt-getinstall openssh-server
一般服务器是被访问的,所以只要安装openssh-server即可,如果要安装客户端,将安装的内容改成openssh-client即可。
2.3 查看ssh安装状态
安装完成后重新查看ssh安装状态
使用netstat查看状态
zero@ubuntu:~$ sudonetstat-tlnp|grep sshd
[sudo] password for zero:
tcp        000.0.0.0:22              0.0.0.0:*               LISTEN      2714/sshd: /usr/sbi
tcp6       00 :::22                   :::*                    LISTEN      2714/sshd: /usr/sbi
使用systemctl查看状态
zero@ubuntu:~$ sudo systemctl status ssh
● ssh.service - OpenBSD Secure Shell server
     Loaded: loaded (/lib/systemd/system/ssh.service; enabled; vendor preset: enabled)
     Active: active (running) since Sat 2023-08-26 15:01:13 UTC; 13min ago
       Docs: man:sshd(8)
             man:sshd_config(5)
   Main PID: 2714(sshd)
      Tasks: 1(limit: 4514)
     Memory: 4.0M
        CPU: 33ms
     CGroup: /system.slice/ssh.service
             └─2714 "sshd: /usr/sbin/sshd -D [listener] 0 of 10-100 startups"

Aug 2615:01:13 ubuntu systemd[1]: Starting OpenBSD Secure Shell server...
Aug 2615:01:13 ubuntu sshd[2714]: Server listening on 0.0.0.0 port 22.
Aug 2615:01:13 ubuntu sshd[2714]: Server listening on :: port 22.
Aug 2615:01:13 ubuntu systemd[1]: Started OpenBSD Secure Shell server.
Aug 2615:11:26 ubuntu sshd[2899]: Accepted password for zero from 192.168.159.1 port 51604 ssh2
Aug 2615:11:26 ubuntu sshd[2899]: pam_unix(sshd:session): session opened for user zero(uid=1000) by (uid=0)
三、启动、停止,及开机自启动
3.1 启动ssh
zero@ubuntu:~$ sudo systemctl start ssh#启动ssh服务
zero@ubuntu:~$ sudo systemctl status sshd    #查询状态
Unit sshd.service could not be found.
zero@ubuntu:~$ sudo systemctl status ssh
● ssh.service - OpenBSD Secure Shell server
     Loaded: loaded (/lib/systemd/system/ssh.service; disabled; vendor preset: enabled)
     Active: active (running) since Sat 2023-08-26 15:01:13 UTC; 27min ago
       Docs: man:sshd(8)
             man:sshd_config(5)
   Main PID: 2714(sshd)
      Tasks: 1(limit: 4514)
     Memory: 4.0M
        CPU: 33ms
     CGroup: /system.slice/ssh.service
             └─2714 "sshd: /usr/sbin/sshd -D [listener] 0 of 10-100 startups"

Aug 2615:01:13 ubuntu systemd[1]: Starting OpenBSD Secure Shell server...
Aug 2615:01:13 ubuntu sshd[2714]: Server listening on 0.0.0.0 port 22.
Aug 2615:01:13 ubuntu sshd[2714]: Server listening on :: port 22.
Aug 2615:01:13 ubuntu systemd[1]: Started OpenBSD Secure Shell server.
Aug 2615:11:26 ubuntu sshd[2899]: Accepted password for zero from 192.168.159.1 port 51604 ssh2
Aug 2615:11:26 ubuntu sshd[2899]: pam_unix(sshd:session): session opened for user zero(uid=1000) by (uid=0)
zero@ubuntu:~$ sudonetstat-tlnp|grep sshd    #查询状态
tcp        000.0.0.0:22              0.0.0.0:*               LISTEN      2714/sshd: /usr/sbi
tcp6       00 :::22                   :::*                    LISTEN      2714/sshd: /usr/sbi
3.2 关闭ssh
zero@ubuntu:~$ sudo systemctl stop ssh#关闭ssh服务
zero@ubuntu:~$ sudonetstat-tlnp|grep sshd        #关闭后查询不到网络状态
zero@ubuntu:~$ sudo systemctl status ssh#ssh状态已关闭
○ ssh.service - OpenBSD Secure Shell server
     Loaded: loaded (/lib/systemd/system/ssh.service; disabled; vendor preset: enabled)
     Active: inactive (dead) since Sat 2023-08-26 15:34:05 UTC; 11s ago
       Docs: man:sshd(8)
             man:sshd_config(5)
    Process: 2714ExecStart=/usr/sbin/sshd -D$SSHD_OPTS(code=exited, status=0/SUCCESS)
   Main PID: 2714(code=exited, status=0/SUCCESS)
        CPU: 35ms

Aug 2615:01:13 ubuntu systemd[1]: Starting OpenBSD Secure Shell server...
Aug 2615:01:13 ubuntu sshd[2714]: Server listening on 0.0.0.0 port 22.
Aug 2615:01:13 ubuntu sshd[2714]: Server listening on :: port 22.
Aug 2615:01:13 ubuntu systemd[1]: Started OpenBSD Secure Shell server.
Aug 2615:11:26 ubuntu sshd[2899]: Accepted password for zero from 192.168.159.1 port 51604 ssh2
Aug 2615:11:26 ubuntu sshd[2899]: pam_unix(sshd:session): session opened for user zero(uid=1000) by (uid=0)
Aug 2615:34:05 ubuntu systemd[1]: Stopping OpenBSD Secure Shell server...
Aug 2615:34:05 ubuntu systemd[1]: ssh.service: Deactivated successfully.
Aug 2615:34:05 ubuntu systemd[1]: Stopped OpenBSD Secure Shell server.
3.3 使用systemctl设置ssh服务自启动
zero@ubuntu:~$ sudo systemctl enablessh
Synchronizing state of ssh.service with SysV service script with /lib/systemd/systemd-sysv-install.
Executing: /lib/systemd/systemd-sysv-install enablessh

设置完成之后重启即可
3.4 使用systemctl关闭ssh开机启动
zero@ubuntu:~$ sudo systemctl disable ssh
Synchronizing state of ssh.service with SysV service script with /lib/systemd/systemd-sysv-install.
Executing: /lib/systemd/systemd-sysv-install disable ssh
Removed /etc/systemd/system/multi-user.target.wants/ssh.service.
Removed /etc/systemd/system/sshd.service.

四、配置通过密钥进行免密访问
部分操作说明可参考Windows下配置SSH实现免密访问和远程端口转发,本文直接进行操作。
4.1 生成密钥
zero@ubuntu:~$ sudo ssh-keygen            #此处直接使用默认设置生成rsa的密钥
Generating public/private rsa key pair.
Enter fileinwhich to save the key (/root/.ssh/id_rsa):    //不修改路径
Enter passphrase (empty for no passphrase):            #不设置密码,实际使用根据自己需要设置密码会比较安全
Enter same passphrase again:
Your identification has been saved in /root/.ssh/id_rsa
Your public key has been saved in /root/.ssh/id_rsa.pub
The key fingerprint is:
SHA256:elLfv9r5e4RLOSKnee6oJPBGmS6YGm3WcAuvXVAxBtg root@ubuntu
The key's randomart image is:
+---[RSA 3072]----+
|   o..+          ||. E. o         ||.||. o         ||  o + + S      o ||. O B o ...o =.||. * = O o .=.o + ||= o + =  o..o...||......++.=++|
+----[SHA256]-----+
注: 若要配置git访问服务器,此处密钥对可使用rsa格式的,git for windows默认识别rsa密钥。
4.2 通过ssh-agent管理私钥
zero@ubuntu:~$ ssh-agent            #启动服务SSH_AUTH_SOCK=/tmp/ssh-XXXXXXjkoDta/agent.3455;exportSSH_AUTH_SOCK;SSH_AGENT_PID=3456;export SSH_AGENT_PID;echo Agent pid 3456;

zero@ubuntu:~$ ssh-add /root/.ssh/id_rsa    # 没有使用agent启动bash直接调用ssh-add添加私钥会报错
Could not open a connection to your authentication agent.

zero@ubuntu:~$ sudo ssh-agent bash--login-i# 使用ssh-agent启动bash,注意需要添加sudo,添加root的密钥需要使用root权限。

root@ubuntu:/home/zero# ssh-add /root/.ssh/id_rsa        #将密钥添加到agent中
Identity added: /root/.ssh/id_rsa (root@ubuntu)
root@ubuntu:/home/zero# exit        # 退出当前bashlogout
zero@ubuntu:~$
ssh-add 参数:
- -D:删除ssh-agent中的所有密钥.
- -d:从ssh-agent中删除密钥
- -e pkcs11:删除PKCS#11共享库pkcs1提供的钥匙。
- -s pkcs11:添加PKCS#11共享库pkcs1提供的钥匙。
- -L:显示ssh-agent中的公钥
- -l:显示ssh-agent中的密钥
- -t life:对加载的密钥设置超时时间,超时ssh-agent将自动卸载密钥
- -X:对ssh-agent进行解锁
- -x:对ssh-agent进行加锁
4.3 管理公钥
服务器管理公钥,可以直接添加公钥文件中
zero@ubuntu:~$ cat /root/.ssh/id_ras.pub >> authorized_keys            # 直接拷贝汇报错,当我们要操作的公钥在root文件夹下时就需要root权限
cat: /root/.ssh/id_ras.pub: Permission denied

zero@ubuntu:~$ sudocat /root/.ssh/id_rsa.pub >> authorized_keys            # 添加sudo使用root权限操作
zero@ubuntu:~$            # 操作成功没有错误提示
4.4 通过scp将公钥拷贝到服务器
需要将公钥拷贝到要访问的服务器中。
PS C:\WINDOWS\system32>scp C:\Users\LJM\.ssh\id_rsa.pub [email protected]:.ssh/id_rsa_git.pub
[email protected]'s password:
id_rsa.pub                                                                            100%  567558.8KB/s   00:00
PS C:\WINDOWS\system32>

4.5 将公钥添加到公钥管理文件中
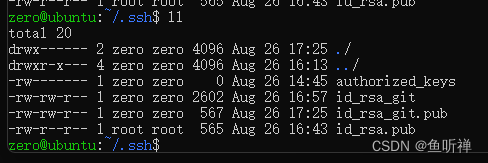
切换到.ssh文件夹中,然后将公钥添加到公钥管理文件中。
zero@ubuntu:~/.ssh$ ll
total 24
drwx------ 2 zero zero 4096 Aug 2617:25 ./
drwxr-x--- 4 zero zero 4096 Aug 2616:13 ../
-rw------- 1 zero zero  567 Aug 2617:28 authorized_keys
-rw-rw-r-- 1 zero zero 2602 Aug 2616:57 id_rsa_git
-rw-rw-r-- 1 zero zero  567 Aug 2617:25 id_rsa_git.pub
-rw-r--r-- 1 root root  565 Aug 2616:43 id_rsa.pub
zero@ubuntu:~/.ssh$ cat id_rsa_git.pub >> authorized_keys
4.6 享受ssh免密链接服务器
公钥和私钥添加管理后,对应的文件即可删除了。然后客户端就可以通过ssh免密访问服务器。
通常一般要访问的客户端保存私钥,服务端保存公钥。
五、创建多用户免密访问
5.1 使用useradd创建新用户
zero@ubuntu:~$ sudouseradd-ggit git_user        # 创建用户,并指定初始区组为git
zero@ubuntu:~$ id git_user                        # 查询用户基本信息uid=1001(git_user)gid=1001(git)groups=1001(git)

zero@ubuntu:/etc/ssh$ sudopasswd git_user        # 修改用户密码,不修改密码,可能后续ssh无法登录
New password:
Retype new password:
passwd: password updated successfully
5.2 将ssh的密钥文件拷贝到新用户的家目录中
zero@ubuntu:~$ sudo cp .ssh/authorized_keys /home/git_user/.ssh/authorized_keys
- 第一个目录是已经可以免密访问的账户,家目录下的密码存储文件,当前就在zero账户的家目录,故直接用相对路径。
- 第二个参数是新建用户的家目录下的.ssh文件,文件名保持一致,若修改文件名需要修改“/etc/ssh/sshd_config”文件的密码保存文件,将新的文件名添加到后面。

5.3 将配置文件的拥有者修改为新建用户和新建用户的初始群组
zero@ubuntu:~$ cd /  # 返回更目录# 修改git_user的家目录拥有着为git_user
zero@ubuntu:/$ sudochown-R git_user /home/git_user/.ssh/authorized_keys
[sudo] password for zero:
zero@ubuntu:/$ getfacl /home/git_user/.ssh/authorized_keys
getfacl: Removing leading '/' from absolute path names
# file: /home/git_user/.ssh/authorized_keys# owner: git_user# group: root
user::rw-
group::---
other::---

# 修改/home/git_user的拥有群组为git
zero@ubuntu:/$ sudochgrpgit /home/git_user/.ssh/authorized_keys
zero@ubuntu:/$ getfacl /home/git_user/.ssh/authorized_keys
getfacl: Removing leading '/' from absolute path names
# file: /home/git_user/.ssh/authorized_keys# owner: git_user# group: git
user::rw-
group::---
other::---
由于原来拷贝的密钥文件已经存在密钥,至此,有密钥的电脑即可实现使用新账号git_user进行免密访问了。
5.4 踩坑历程:
在测试配置其他用户也免密访问的过程中通过多次实验,首先在网上找解决方案,不过没有找到,网上基本只是讲了一个全新配置,没有此方面的案例,迫不得已自行摸索。
- 最开始,我将创建万用户后,直接访问,结果发现无法免密访问。就想着新建用户可能账号是权限问题,所以就想着将新建户和群组添加到ssh密钥管理文件的权限里。
- 首先将用户组添加到密钥管理文件,结果不止新建用户无法访问,原来的zero账户也无法访问了;
- 觉得可能是权限问题,所以又将该文件用户的和其他用户的权限改为“rw-”,也是一样;
- 在常务无法使用之后,尝试去除添加的新用户git_user,仍然无法使用;
- 最后将该文件的group权限改为“—”才能正常访问,即家目录下ssh要正常访问,authorized_keys的权限只能是拥有者,而且拥有群组的权限需要为“—”;
- 我又开始尝试,新建一个用户,然后将新建用户家目录和初始群组设置为可以免密访问的用户同目录和群组,结果原来的用户可以正常免密访问,但是新用户依然无法实现免密访问;
- 尝试将密钥文件authorized_keys的权限添加上新用户的,不过新用户依然无法实现免密访问。
- 最终,经过多番折腾,发现只能通过新建用户的家目录中添加配置文件,然后再行添加密钥即可实现免密访问,才是应该是家目录的特殊性导致的,毕竟家目录是针对单一用户设置的,理论上每一个用户都有一个家目录。
踩踩坑,记录以下。
版权归原作者 鱼听禅 所有, 如有侵权,请联系我们删除。