
今天来实现vue3-admin商品管理后台项目的登录页功能
首先在pages文件夹下面添加一个login.vue文件,里面先写入简单的template
<template><div>
        登录
    </div></template>
然后在router文件夹下面的Index.js里面编辑,仍然是引入页面配置路由,about页暂时没啥用,只是测试用的,所以就把它删了。
import{ createRouter, createWebHashHistory }from'vue-router'import Index from'~/pages/index.vue'import Login from'~/pages/login.vue'import NotFound from'~/pages/404.vue'const routes =[{// 根路由path:"/",component:Index
},{// 登录路由path:"/login",component:Login
},{//404路由 将匹配所有内容并将其放在 `$route.params.pathMatch` 下path:'/:pathMatch(.*)*',name:'NotFound',component: NotFound
}]const router =createRouter({history:createWebHashHistory(),
    routes
})exportdefault router
运行项目域名输入http://127.0.0.1:5173/#/login,可以看见成功了
然后开始正式编写登录页代码,因为要做响应式布局,所以优先使用element plus的layout布局。然后我直接给出login.vue做完布局后的代码:结合了windi css进行布局,注释写的很详细
<template><!-- el-row会将页面分为24份,用span进行值的设定 这里面的class是windi css里面的颜色快捷方式,以及设置min-height使其占满整个屏幕,--><el-row class="min-h-screen bg-indigo-500"><!-- 左边布局 class里面实现的主要是垂直水平居中 flex-col就是垂直方向--><el-col :span="16"class="flex items-center justify-center"><div><!--class里面的内容分别是:加粗,字体增大,字体加亮,与下面外间距1rem --><div class="font-bold text-5xl text-light-50 mb-4">欢迎光临</div><div class="text-gray-200 text-sm">此站是vue-admin的登录页面,作者是mzldustu</div></div></el-col><!-- 右边布局 --><el-col
      :span="8"class="bg-light-50 flex items-center justify-center flex-col"><!-- 加粗,字体3xl,颜色深灰色 --><h2 class="font-bold text-3xl text-gray-800">欢迎回来</h2><!-- flex布局,水平垂直居中,上下边距, 浅灰色,水平方向元素的间距 --><div class="flex items-center justify-center my-5 text-gray-300 space-x-2"><!-- 高度,宽度,浅灰色 --><span class="h-[1px] w-16 bg-gray-200"></span><span>账号密码登录</span><span class="h-[1px] w-16 bg-gray-200"></span></div><!-- 这里使用的是element plus里面的典型表单 --><!-- 表单宽度 --><el-form :model="form"class="w-[250px]"><!-- 用户名输入框 --><el-form-item><el-input v-model="form.username" placeholder="请输入用户名"/></el-form-item><!-- 密码输入框 --><el-form-item><el-input v-model="form.password" placeholder="请输入密码"/></el-form-item><!-- 按钮 --><el-form-item><!-- 圆角,宽度250px,颜色 --><el-button round color="#626aef"class="w-[250px]" type="primary" @click="onSubmit">登录</el-button></el-form-item></el-form></el-col></el-row></template><script setup>import{ reactive }from'vue'// do not use same name with refconst form =reactive({username:"",password:""})constonSubmit=()=>{
  console.log('submit!')}</script>
以上代码之后,login.vue的页面最终效果就是:
到此登录页的样式布局就写完了。
然后我们进行登录页的响应式处理以及输入框图标的引入:
直接上代码吧 ,注释写的很明白,图标用的是element plus里面的图标引入
<template><!-- el-row会将页面分为24份,用span进行值的设定 这里面的class是windi css里面的颜色快捷方式,以及设置min-height使其占满整个屏幕,--><el-row class="min-h-screen bg-indigo-500"><!-- 左边布局 class里面实现的主要是垂直水平居中 flex-col就是垂直方向--><!-- 因为要响应式布局,所以我们使用windi css里面类似媒体查询的一个功能 lg是>1200px的屏幕,md是>992px的屏幕--><el-col :lg="16":md="12"class="flex items-center justify-center"><div><!--class里面的内容分别是:加粗,字体增大,字体加亮,与下面外间距1rem --><div class="font-bold text-5xl text-light-50 mb-4">欢迎光临</div><div class="text-gray-200 text-sm">此站是vue-admin的登录页面,作者是mzldustu</div></div></el-col><!-- 右边布局 --><el-col :lg="8":md="12"class="bg-light-50 flex items-center justify-center flex-col"><!-- 加粗,字体3xl,颜色深灰色 --><h2 class="font-bold text-3xl text-gray-800">欢迎回来</h2><!-- flex布局,水平垂直居中,上下边距, 浅灰色,水平方向元素的间距 --><div class="flex items-center justify-center my-5 text-gray-300 space-x-2"><!-- 高度,宽度,浅灰色 --><span class="h-[1px] w-16 bg-gray-200"></span><span>账号密码登录</span><span class="h-[1px] w-16 bg-gray-200"></span></div><!-- 这里使用的是element plus里面的典型表单 --><!-- 表单宽度 --><el-form :model="form"class="w-[250px]"><!-- 用户名输入框 --><el-form-item><el-input v-model="form.username" placeholder="请输入用户名"><!-- 插槽引入user图标 --><template #prefix><el-icon><User /></el-icon></template></el-input></el-form-item><!-- 密码输入框 --><el-form-item><el-input v-model="form.password" placeholder="请输入密码"><!-- 插槽引入lock图标 --><template #prefix><el-icon><Lock /></el-icon></template></el-input></el-form-item><!-- 按钮 --><el-form-item><!-- 圆角,宽度250px,颜色 --><el-button round color="#626aef"class="w-[250px]" type="primary" @click="onSubmit">登录</el-button></el-form-item></el-form></el-col></el-row></template><script setup>import{ reactive }from'vue'// 引入图标import{ User,Lock }from'@element-plus/icons-vue'// do not use same name with refconst form =reactive({username:"",password:""})constonSubmit=()=>{
  console.log('submit!')}</script>
用windi css 的@apply抽离样式代码
很简单其实,直接看代码就行
<template><el-row class="login-container"><el-col :lg="16":md="12"class="left"><div><div>欢迎光临</div><div>此站是vue-admin的登录页面,作者是mzldustu</div></div></el-col><!-- 右边布局 --><el-col :lg="8":md="12"class="right"><h2 class="title">欢迎回来</h2><div><span class="line"></span><span>账号密码登录</span><span class="line"></span></div><!-- 这里使用的是element plus里面的典型表单 --><!-- 表单宽度 --><el-form :model="form"class="w-[250px]"><!-- 用户名输入框 --><el-form-item><el-input v-model="form.username" placeholder="请输入用户名"><!-- 插槽引入user图标 --><template #prefix><el-icon><User /></el-icon></template></el-input></el-form-item><!-- 密码输入框 --><el-form-item><el-input v-model="form.password" placeholder="请输入密码"><!-- 插槽引入lock图标 --><template #prefix><el-icon><Lock /></el-icon></template></el-input></el-form-item><!-- 按钮 --><el-form-item><!-- 圆角,宽度250px,颜色 --><el-button round color="#626aef"class="w-[250px]" type="primary" @click="onSubmit">登录</el-button></el-form-item></el-form></el-col></el-row></template><script setup>import{ reactive }from'vue'// 引入图标import{ User,Lock }from'@element-plus/icons-vue'// do not use same name with refconst form =reactive({username:"",password:""})constonSubmit=()=>{
  console.log('submit!')}</script><style scoped>.login-container{/*el-row会将页面分为24份,用span进行值的设定 这里面的class是windi css里面的颜色快捷方式,以及设置min-height使其占满整个屏幕 */
    @apply min-h-screen bg-indigo-500;}/* <!-- 左边布局 class里面实现的主要是垂直水平居中 flex-col就是垂直方向-->
    <!-- 因为要响应式布局,所以我们使用windi css里面类似媒体查询的一个功能 lg是>1200px的屏幕,md是>992px的屏幕--> */.login-container .left,.login-container .right{
    @apply flex items-center justify-center;}.login-container .right{
    @apply bg-light-50 flex-col;}/* class里面的内容分别是:加粗,字体增大,字体加亮,与下面外间距1rem */.left>div>div:first-child{
    @apply font-bold text-5xl text-light-50 mb-4;}.left>div>div:last-child{
    @apply text-gray-200 text-sm;}/* 加粗,字体3xl,颜色深灰色 */.right .title{
    @apply font-bold text-3xl text-gray-800;}/* flex布局,水平垂直居中,上下边距,浅灰色,水平方向元素的间距 */.right>div{
    @apply flex items-center justify-center my-5 text-gray-300 space-x-2;}/* 高度,宽度,浅灰色 */.right .line{
    @apply h-[1px] w-16 bg-gray-200;}</style>
到这里就抽离的差不多了。
然后实现登录表单验证处理:
login.vue的代码:
<template><el-row class="login-container"><el-col :lg="16":md="12"class="left"><div><div>欢迎光临</div><div>此站是vue-admin的登录页面,作者是mzldustu</div></div></el-col><!-- 右边布局 --><el-col :lg="8":md="12"class="right"><h2 class="title">欢迎回来</h2><div><span class="line"></span><span>账号密码登录</span><span class="line"></span></div><!-- 这里使用的是element plus里面的典型表单 --><!-- 表单宽度 --><!-- 引入element里的rules ,定义一个ref--><el-form ref="formRef":rules="rules":model="form"class="w-[250px]"><!-- 用户名输入框 --><el-form-item prop="username"><el-input v-model="form.username" placeholder="请输入用户名"><!-- 插槽引入user图标 --><template #prefix><el-icon><User /></el-icon></template></el-input></el-form-item><!-- 密码输入框 --><el-form-item prop="password"><!-- type设为password就是非明文存储,show-password就是后面的小眼睛,可以点击显示不显示密码 --><el-input type="password" v-model="form.password" placeholder="请输入密码" show-password><!-- 插槽引入lock图标 --><template #prefix><el-icon><Lock /></el-icon></template></el-input></el-form-item><!-- 按钮 --><el-form-item><!-- 圆角,宽度250px,颜色 --><el-button round color="#626aef"class="w-[250px]" type="primary" @click="onSubmit">登录</el-button></el-form-item></el-form></el-col></el-row></template><script setup>import{ reactive, ref }from'vue'// 引入图标import{ User,Lock }from'@element-plus/icons-vue'// do not use same name with refconst form =reactive({username:"",password:""})// 表单验证rules,要在前面指定propconst rules ={username:[// 书写验证规则{required:true,message:'用户名不能为空',// 失去焦点的时候触发trigger:'blur'},{min:4,max:8,message:'用户名长度必须是4-8个字符',trigger:'blur'},],password:[{required:true,message:'密码不能为空',// 失去焦点的时候触发trigger:'blur'},]}// setup里拿到el-form节点const formRef =ref(null)constonSubmit=()=>{
  formRef.value.validate((valid)=>{// 会输出true或者false// console.log(valid)if(!valid){returnfalse}
    console.log(验证通过)})}</script><style scoped>.login-container{/*el-row会将页面分为24份,用span进行值的设定 这里面的class是windi css里面的颜色快捷方式,以及设置min-height使其占满整个屏幕 */
    @apply min-h-screen bg-indigo-500;}/* <!-- 左边布局 class里面实现的主要是垂直水平居中 flex-col就是垂直方向-->
    <!-- 因为要响应式布局,所以我们使用windi css里面类似媒体查询的一个功能 lg是>1200px的屏幕,md是>992px的屏幕--> */.login-container .left,.login-container .right{
    @apply flex items-center justify-center;}.login-container .right{
    @apply bg-light-50 flex-col;}/* class里面的内容分别是:加粗,字体增大,字体加亮,与下面外间距1rem */.left>div>div:first-child{
    @apply font-bold text-5xl text-light-50 mb-4;}.left>div>div:last-child{
    @apply text-gray-200 text-sm;}/* 加粗,字体3xl,颜色深灰色 */.right .title{
    @apply font-bold text-3xl text-gray-800;}/* flex布局,水平垂直居中,上下边距,浅灰色,水平方向元素的间距 */.right>div{
    @apply flex items-center justify-center my-5 text-gray-300 space-x-2;}/* 高度,宽度,浅灰色 */.right .line{
    @apply h-[1px] w-16 bg-gray-200;}</style>
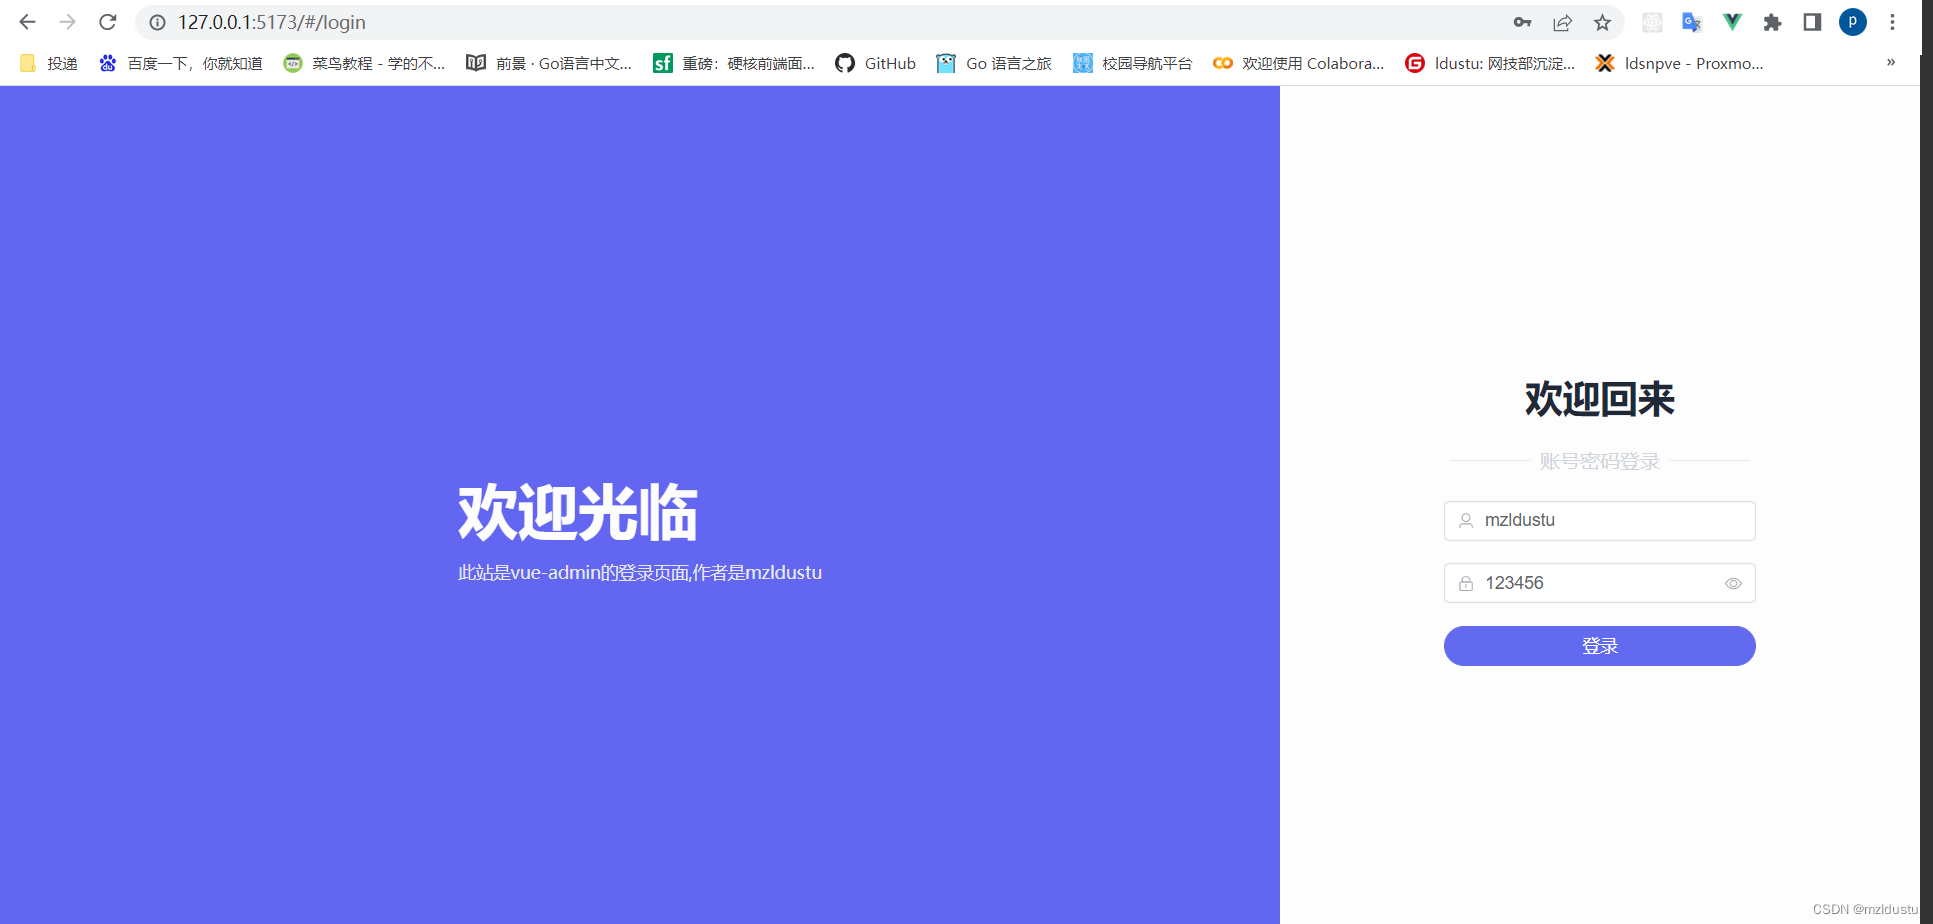
目前达成的效果: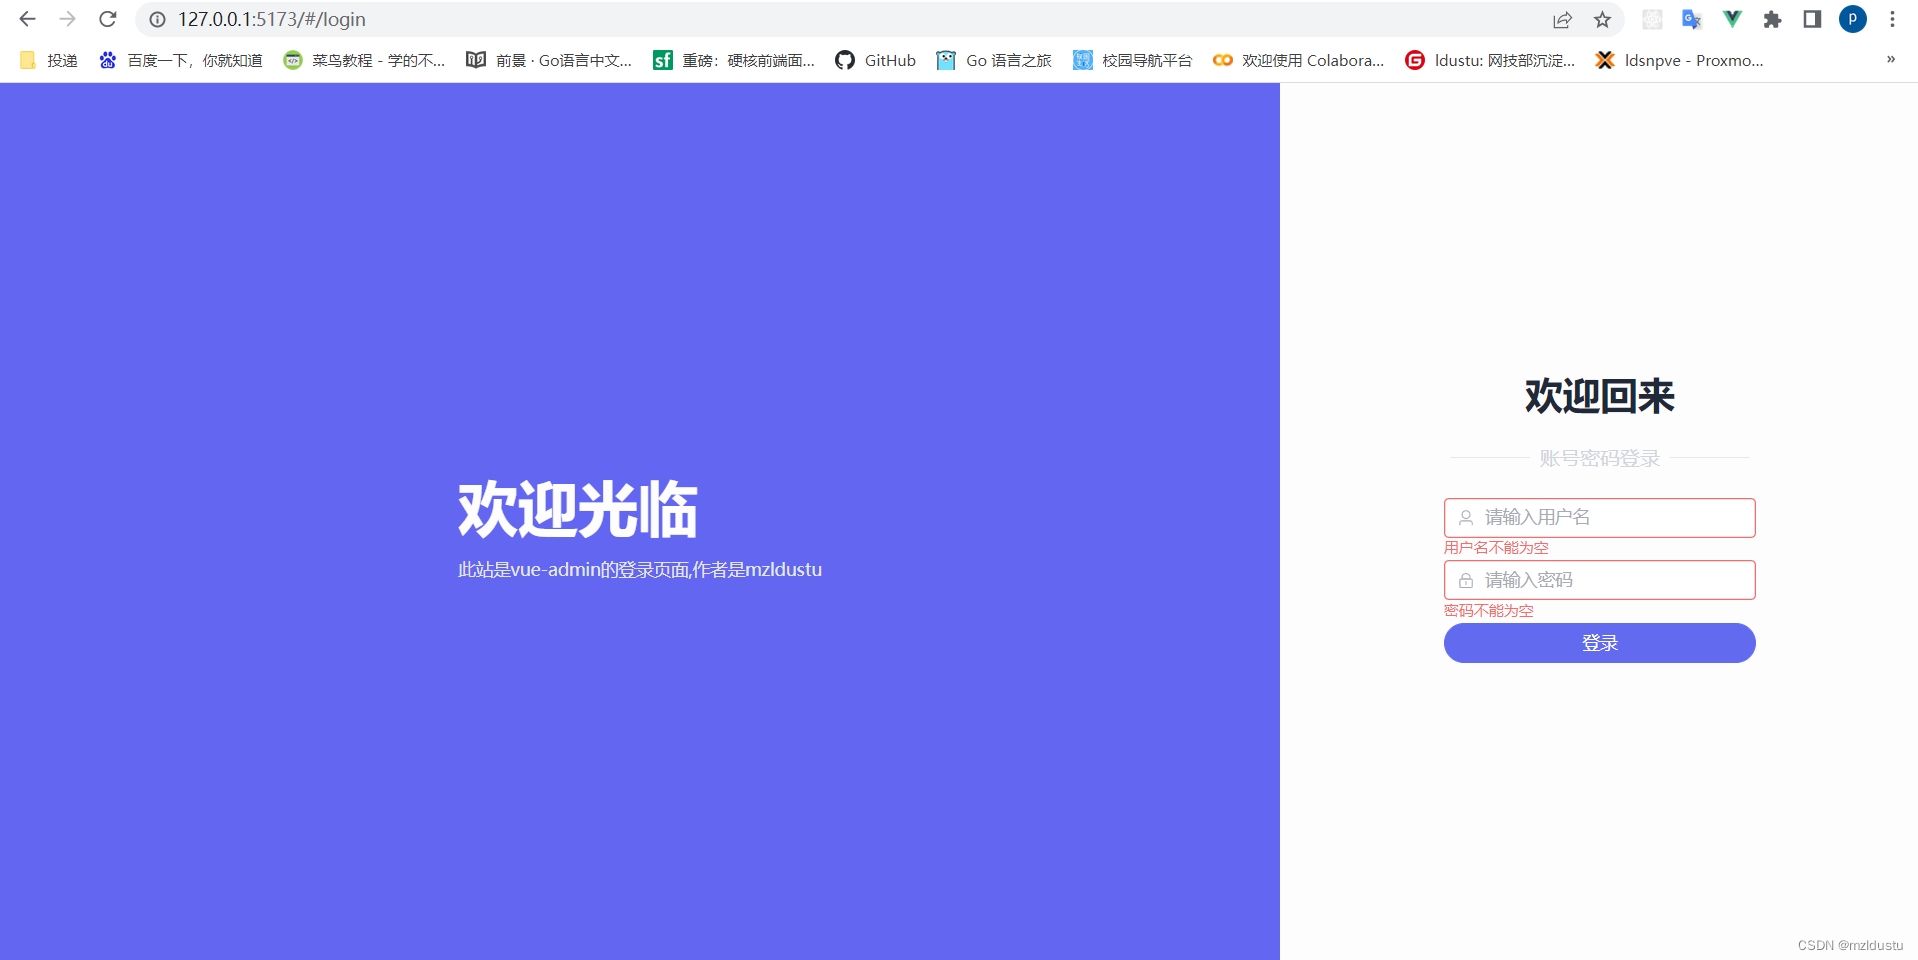
接着我们引入axios请求库和登录接口交互:
项目api接口文档
首先在src目录下创建一个axios.js,然后写上以下内容
import axios from"axios"const service = axios.create({baseURL:"/api"})exportdefault service
编辑vite.config.js,处理一下跨域问题
import{ defineConfig }from'vite'import vue from'@vitejs/plugin-vue'import WindiCSS from'vite-plugin-windicss'import path from"path"// https://vitejs.dev/config/exportdefaultdefineConfig({resolve:{alias:{"~":path.resolve(__dirname,"src")}},server:{proxy:{//api代替了这个接口域名'/api':{target:'http://ceshi13.dishait.cn',changeOrigin:true,rewrite:(path)=> path.replace(/^\/api/,'')},}},plugins:[vue(),WindiCSS()]})
在src目录下创建一个api目录,api目录里面创建manager.js,写入login的接口
import axios from'~/axios'// 登录exportfunctionLogin(username,password){return axios.post("/admin/login",{
        username,
        password
    })}
然后在login.vue里面处理一下登录提示信息:
<template><el-row class="login-container"><el-col :lg="16":md="12"class="left"><div><div>欢迎光临</div><div>此站是vue-admin的登录页面,作者是mzldustu</div></div></el-col><!-- 右边布局 --><el-col :lg="8":md="12"class="right"><h2 class="title">欢迎回来</h2><div><span class="line"></span><span>账号密码登录</span><span class="line"></span></div><!-- 这里使用的是element plus里面的典型表单 --><!-- 表单宽度 --><!-- 引入element里的rules ,定义一个ref--><el-form ref="formRef":rules="rules":model="form"class="w-[250px]"><!-- 用户名输入框 --><el-form-item prop="username"><el-input v-model="form.username" placeholder="请输入用户名"><!-- 插槽引入user图标 --><template #prefix><el-icon><User /></el-icon></template></el-input></el-form-item><!-- 密码输入框 --><el-form-item prop="password"><!-- type设为password就是非明文存储,show-password就是后面的小眼睛,可以点击显示不显示密码 --><el-input type="password" v-model="form.password" placeholder="请输入密码" show-password><!-- 插槽引入lock图标 --><template #prefix><el-icon><Lock /></el-icon></template></el-input></el-form-item><!-- 按钮 --><el-form-item><!-- 圆角,宽度250px,颜色 --><el-button round color="#626aef"class="w-[250px]" type="primary" @click="onSubmit">登录</el-button></el-form-item></el-form></el-col></el-row></template><script setup>import{ reactive, ref }from'vue'// 引入图标import{ User,Lock }from'@element-plus/icons-vue'// 引入登录方法import{ Login }from'~/api/manager'// 引入通知import{ ElNotification }from'element-plus'// 引入useRouter方便跳转import{ useRouter }from'vue-router'// 拿到useRouter,才方便后面调用它的push方法const router =useRouter()// do not use same name with refconst form =reactive({username:"",password:""})// 表单验证rules,要在前面指定propconst rules ={username:[// 书写验证规则{required:true,message:'用户名不能为空',// 失去焦点的时候触发trigger:'blur'},{min:4,max:8,message:'用户名长度必须是4-8个字符',trigger:'blur'},],password:[{required:true,message:'密码不能为空',// 失去焦点的时候触发trigger:'blur'},]}// setup里拿到el-form节点const formRef =ref(null)constonSubmit=()=>{
  formRef.value.validate((valid)=>{// 会输出true或者false// console.log(valid)if(!valid){returnfalse}// console.log(验证通过)// 参数验证通过后调用login方法// 通过前面的form拿到username和passwordLogin(form.username,form.password).then(res=>{// 拿到响应成功结果
      console.log(res.data.data);// 提示成功,存储用户token和用户相关信息,然后跳转到后台首页ElNotification({message:"登录成功",type:'success',// 三秒后关闭duration:3000})// 跳转到后台首页
      router.push("/")}).catch(err=>{// 拿到报错具体信息ElNotification({message: err.response.data.msg ||"请求失败",type:'error',// 三秒后关闭duration:3000})})})}</script><style scoped>.login-container{/*el-row会将页面分为24份,用span进行值的设定 这里面的class是windi css里面的颜色快捷方式,以及设置min-height使其占满整个屏幕 */
    @apply min-h-screen bg-indigo-500;}/* <!-- 左边布局 class里面实现的主要是垂直水平居中 flex-col就是垂直方向-->
    <!-- 因为要响应式布局,所以我们使用windi css里面类似媒体查询的一个功能 lg是>1200px的屏幕,md是>992px的屏幕--> */.login-container .left,.login-container .right{
    @apply flex items-center justify-center;}.login-container .right{
    @apply bg-light-50 flex-col;}/* class里面的内容分别是:加粗,字体增大,字体加亮,与下面外间距1rem */.left>div>div:first-child{
    @apply font-bold text-5xl text-light-50 mb-4;}.left>div>div:last-child{
    @apply text-gray-200 text-sm;}/* 加粗,字体3xl,颜色深灰色 */.right .title{
    @apply font-bold text-3xl text-gray-800;}/* flex布局,水平垂直居中,上下边距,浅灰色,水平方向元素的间距 */.right>div{
    @apply flex items-center justify-center my-5 text-gray-300 space-x-2;}/* 高度,宽度,浅灰色 */.right .line{
    @apply h-[1px] w-16 bg-gray-200;}</style>
其中注释写的很详细,就不细说了,看注释就能明白
用户名或者密码错误时,都会弹框提示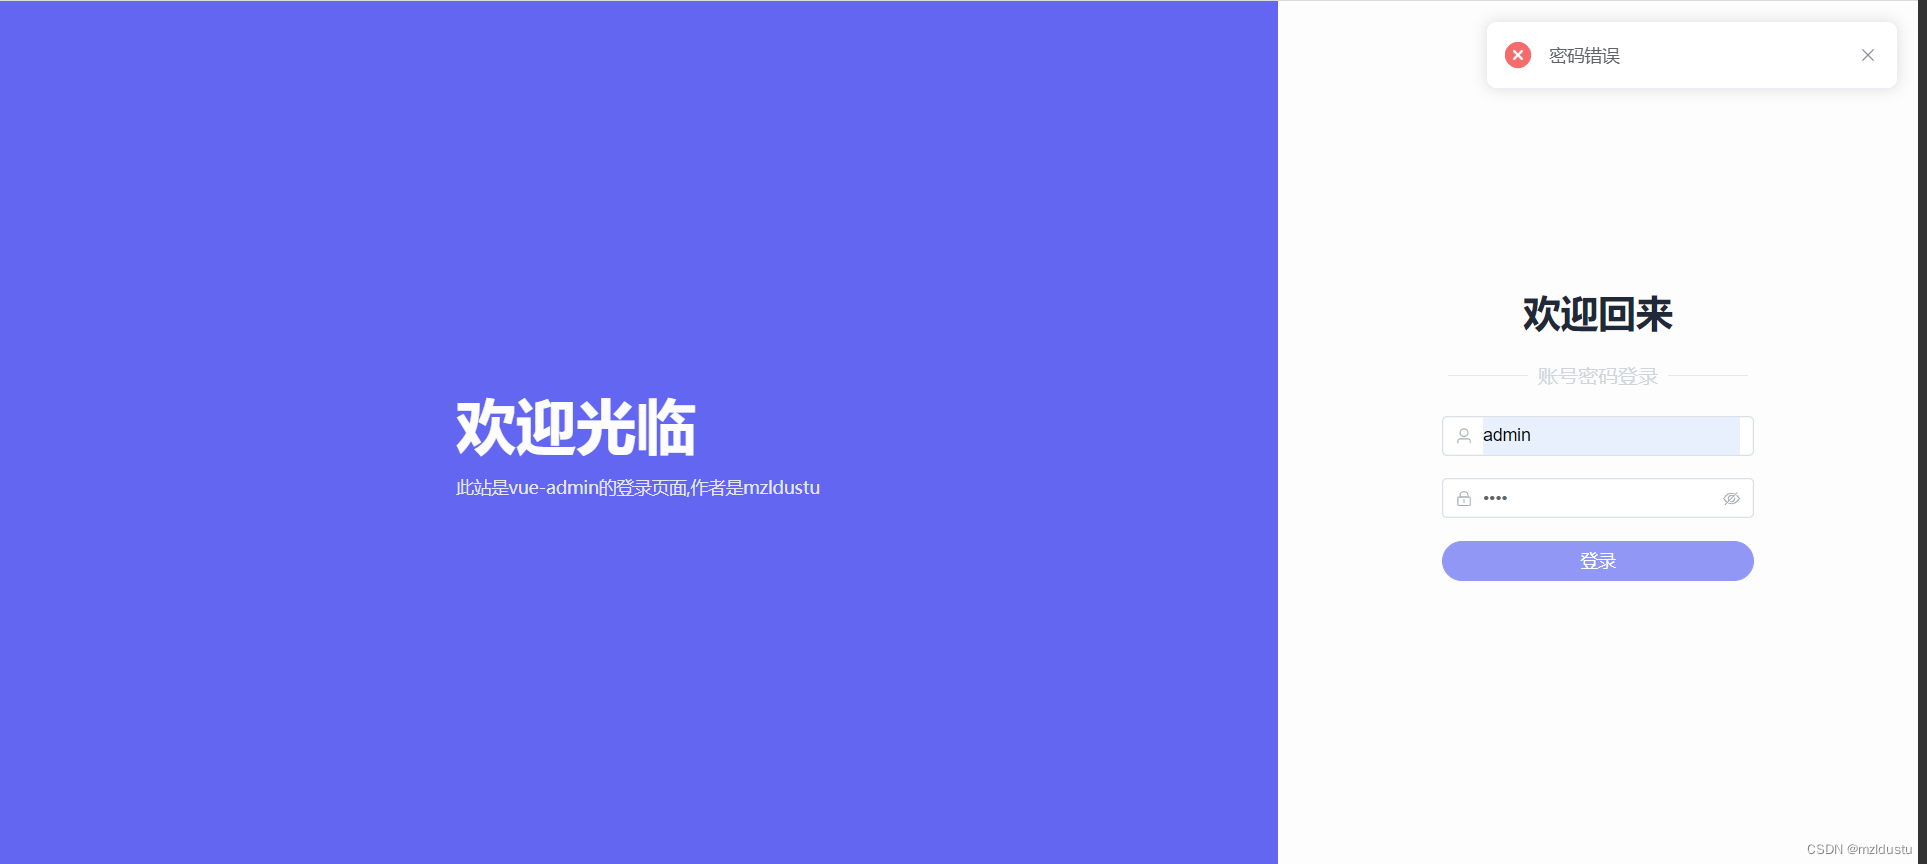
登录成功时会提示成功并且跳转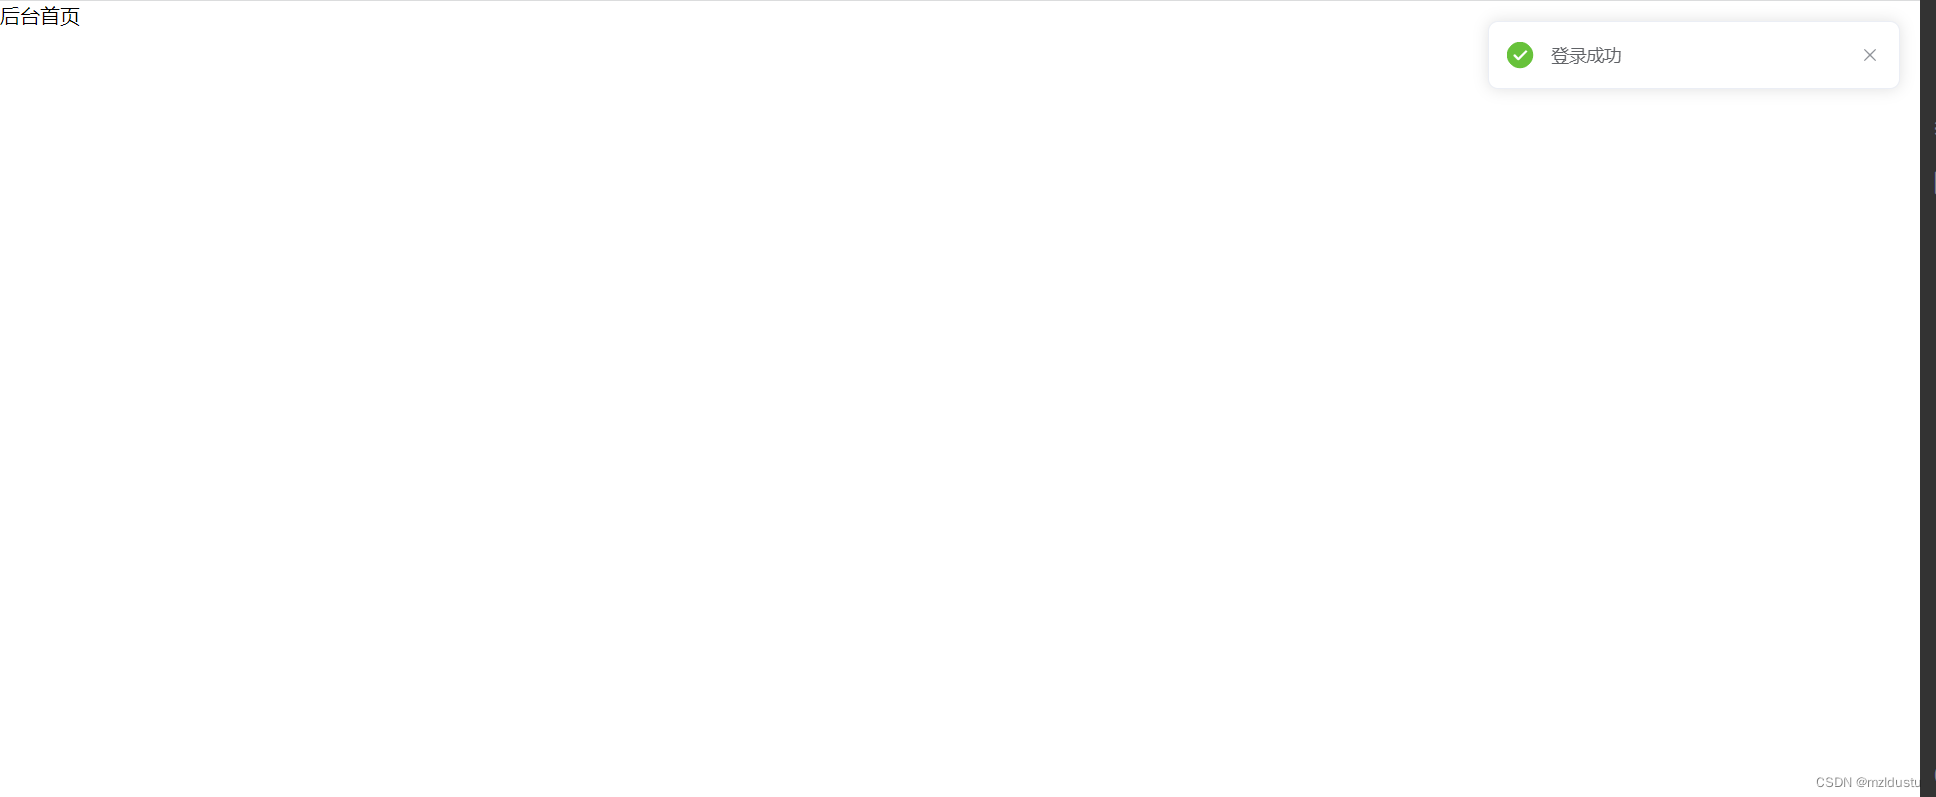
快12点了,今天先到这,明天接着肝!
第二天了,继续肝xdm
引入cookie存储用户的token
只有用户有token才能被认定为登陆状态,我们这里使用cookie存储token
我们先来了解一个vueuse工具库,把一些不支持响应式的api转换成响应式,大大提高开发效率
vueuse工具库文档地址
我们使用其中的useCookies
先安装
npm i universal-cookie
npm i @vueuse/integrations
然后在login.vue的登录成功后面加上了cookie
<template><el-row class="login-container"><el-col :lg="16":md="12"class="left"><div><div>欢迎光临</div><div>此站是vue-admin的登录页面,作者是mzldustu</div></div></el-col><!-- 右边布局 --><el-col :lg="8":md="12"class="right"><h2 class="title">欢迎回来</h2><div><span class="line"></span><span>账号密码登录</span><span class="line"></span></div><!-- 这里使用的是element plus里面的典型表单 --><!-- 表单宽度 --><!-- 引入element里的rules ,定义一个ref--><el-form ref="formRef":rules="rules":model="form"class="w-[250px]"><!-- 用户名输入框 --><el-form-item prop="username"><el-input v-model="form.username" placeholder="请输入用户名"><!-- 插槽引入user图标 --><template #prefix><el-icon><User /></el-icon></template></el-input></el-form-item><!-- 密码输入框 --><el-form-item prop="password"><!-- type设为password就是非明文存储,show-password就是后面的小眼睛,可以点击显示不显示密码 --><el-input type="password" v-model="form.password" placeholder="请输入密码" show-password><!-- 插槽引入lock图标 --><template #prefix><el-icon><Lock /></el-icon></template></el-input></el-form-item><!-- 按钮 --><el-form-item><!-- 圆角,宽度250px,颜色 --><el-button round color="#626aef"class="w-[250px]" type="primary" @click="onSubmit">登录</el-button></el-form-item></el-form></el-col></el-row></template><script setup>import{ reactive, ref }from'vue'// 引入图标import{ User,Lock }from'@element-plus/icons-vue'// 引入登录方法import{ Login }from'~/api/manager'// 引入通知import{ ElNotification }from'element-plus'// 引入useRouter方便跳转import{ useRouter }from'vue-router'// 引入usevue里面的useCookie方法import{ useCookies }from'@vueuse/integrations/useCookies'// 拿到useRouter,才方便后面调用它的push方法const router =useRouter()// do not use same name with refconst form =reactive({username:"",password:""})// 表单验证rules,要在前面指定propconst rules ={username:[// 书写验证规则{required:true,message:'用户名不能为空',// 失去焦点的时候触发trigger:'blur'},{min:4,max:8,message:'用户名长度必须是4-8个字符',trigger:'blur'},],password:[{required:true,message:'密码不能为空',// 失去焦点的时候触发trigger:'blur'},]}// setup里拿到el-form节点const formRef =ref(null)constonSubmit=()=>{
  formRef.value.validate((valid)=>{// 会输出true或者false// console.log(valid)if(!valid){returnfalse}// console.log(验证通过)// 参数验证通过后调用login方法// 通过前面的form拿到username和passwordLogin(form.username,form.password).then(res=>{// 拿到响应成功结果
      console.log(res.data.data);// 提示成功,存储用户token和用户相关信息,然后跳转到后台首页ElNotification({message:"登录成功",type:'success',// 三秒后关闭duration:3000})// 登录成功存储用户cookie,用cookie变量接收const cookie =useCookies()
      cookie.set("admin-token", res.data.data.token)// 跳转到后台首页
      router.push("/")}).catch(err=>{// 拿到报错具体信息ElNotification({message: err.response.data.msg ||"请求失败",type:'error',// 三秒后关闭duration:3000})})})}</script><style scoped>.login-container{/*el-row会将页面分为24份,用span进行值的设定 这里面的class是windi css里面的颜色快捷方式,以及设置min-height使其占满整个屏幕 */
    @apply min-h-screen bg-indigo-500;}/* <!-- 左边布局 class里面实现的主要是垂直水平居中 flex-col就是垂直方向-->
    <!-- 因为要响应式布局,所以我们使用windi css里面类似媒体查询的一个功能 lg是>1200px的屏幕,md是>992px的屏幕--> */.login-container .left,.login-container .right{
    @apply flex items-center justify-center;}.login-container .right{
    @apply bg-light-50 flex-col;}/* class里面的内容分别是:加粗,字体增大,字体加亮,与下面外间距1rem */.left>div>div:first-child{
    @apply font-bold text-5xl text-light-50 mb-4;}.left>div>div:last-child{
    @apply text-gray-200 text-sm;}/* 加粗,字体3xl,颜色深灰色 */.right .title{
    @apply font-bold text-3xl text-gray-800;}/* flex布局,水平垂直居中,上下边距,浅灰色,水平方向元素的间距 */.right>div{
    @apply flex items-center justify-center my-5 text-gray-300 space-x-2;}/* 高度,宽度,浅灰色 */.right .line{
    @apply h-[1px] w-16 bg-gray-200;}</style>
打开控制台的application选项,查看,现在是没有cookie的,如果你有,就delete一下,然后
然后点击登录之后,跳转到首页,然后你再看的时候,就会发现已经有一个cookie了,这时候就代表cookie设置成功了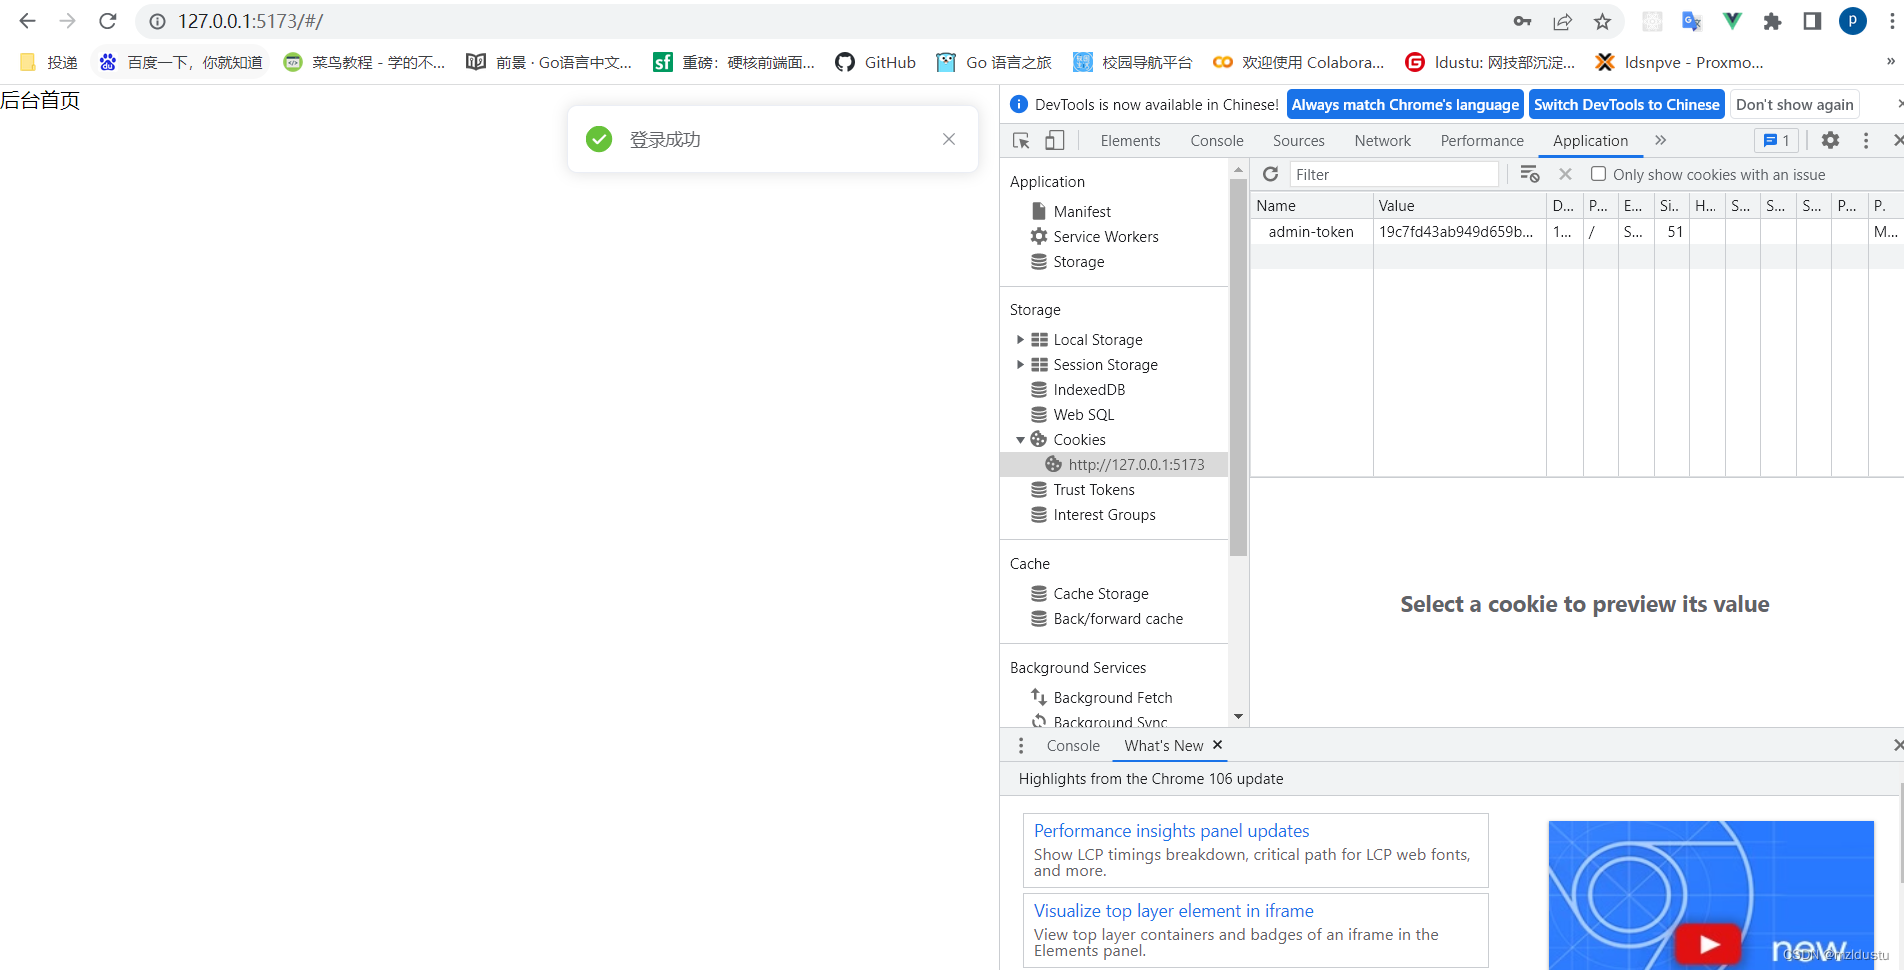
我们来继续写请求拦截器和响应拦截器:
在axios官网找到拦截器
axios拦截器
响应拦截器,这里使用响应拦截器处理响应成功和响应失败
改了这里: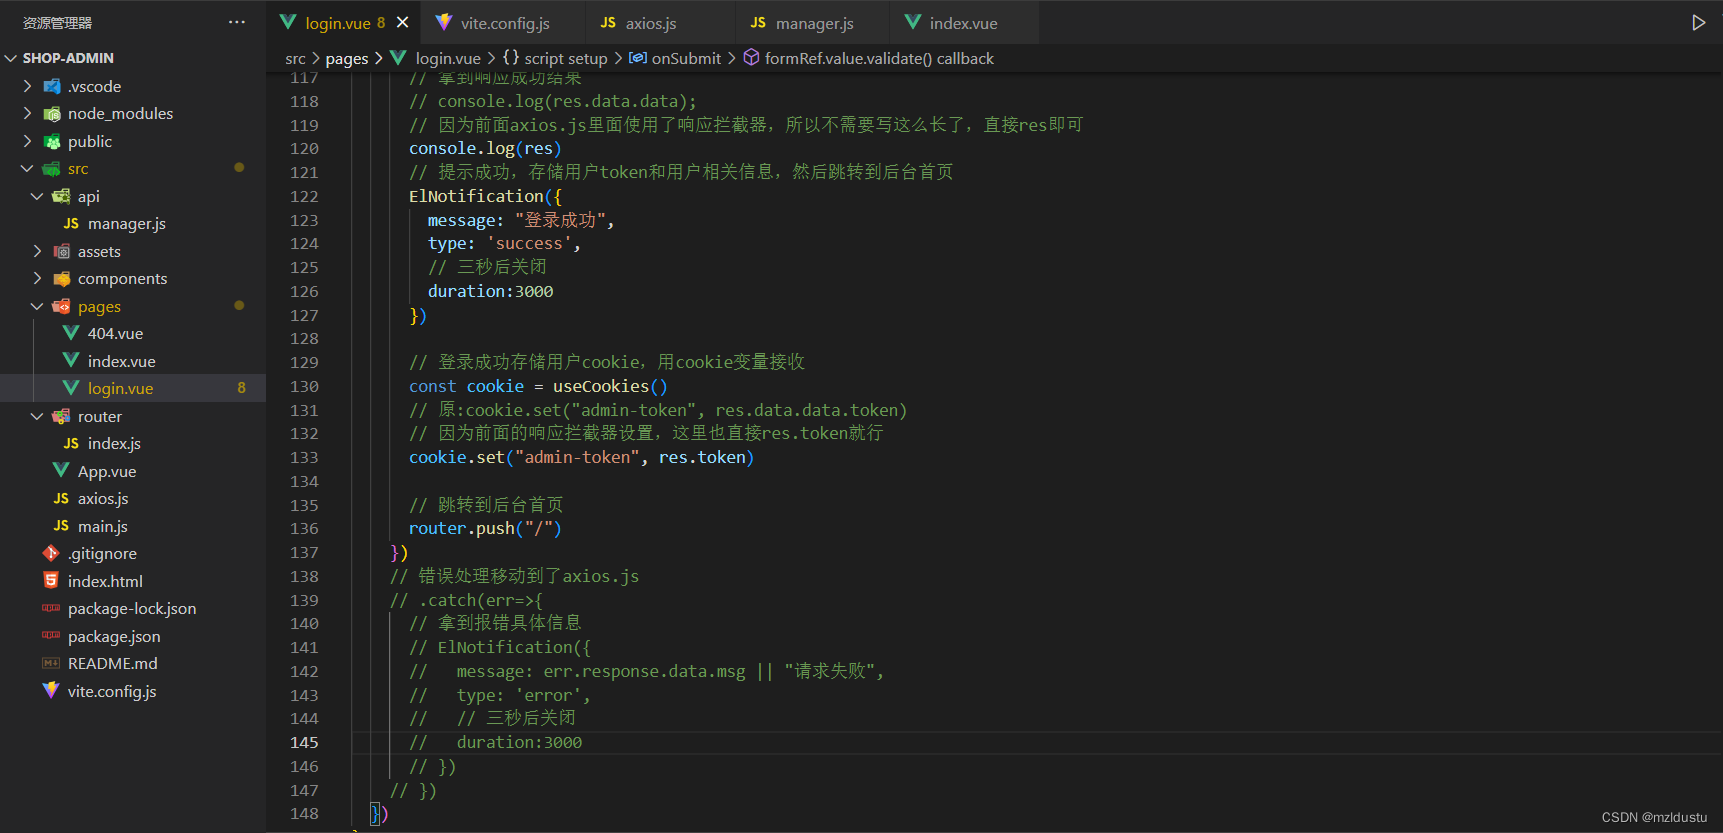
然后这些内容都在axios.js里统一处理了,目前axios.js文件内容:
import axios from"axios"// 引入通知组件import{ ElNotification }from'element-plus'const service = axios.create({baseURL:"/api"})// 添加请求拦截器
service.interceptors.request.use(function(config){// 在发送请求之前做些什么return config;},function(error){// 对请求错误做些什么return Promise.reject(error);});// 添加响应拦截器
service.interceptors.response.use(function(response){// 2xx 范围内的状态码都会触发该函数。// 对响应数据做点什么// 这里之后login.vue里面就不需要res.data.data了,直接res就行return response.data.data;},function(error){// 超出 2xx 范围的状态码都会触发该函数。// 对响应错误做点什么// 错误处理ElNotification({message: error.response.data.msg ||"请求失败",type:'error',// 三秒后关闭duration:3000})return Promise.reject(error);});exportdefault service
然后我们发现功能仍然能正常使用。
响应拦截器应用就结束了。
继续来写请求拦截器:
这里是直接在axios.js里面写了请求拦截器,目的是在header添加token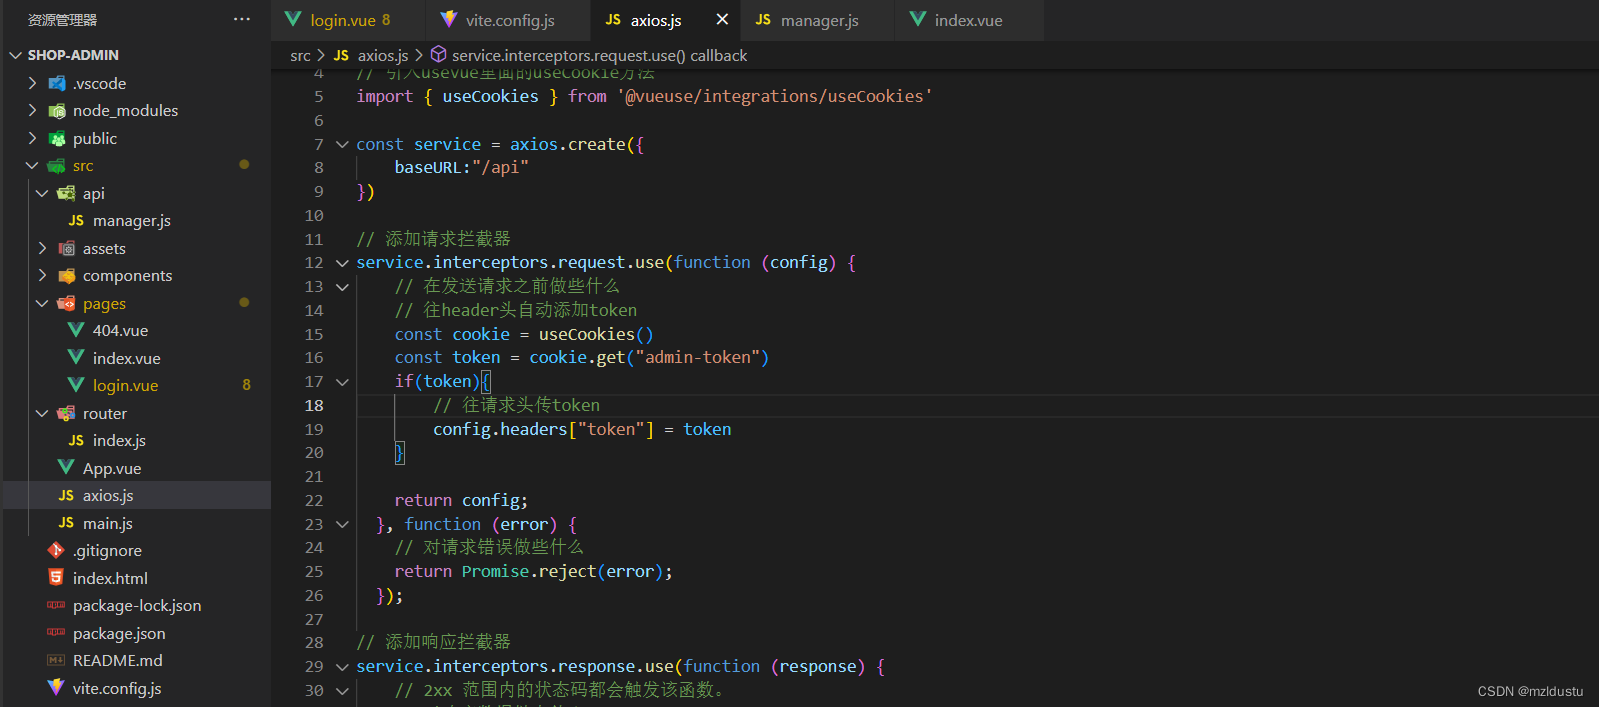
此时axios.js的文件:
import axios from"axios"// 引入通知组件import{ ElNotification }from'element-plus'// 引入usevue里面的useCookie方法import{ useCookies }from'@vueuse/integrations/useCookies'const service = axios.create({baseURL:"/api"})// 添加请求拦截器
service.interceptors.request.use(function(config){// 在发送请求之前做些什么// 往header头自动添加tokenconst cookie =useCookies()const token = cookie.get("admin-token")if(token){// 往请求头传token
        config.headers["token"]= token
    }return config;},function(error){// 对请求错误做些什么return Promise.reject(error);});// 添加响应拦截器
service.interceptors.response.use(function(response){// 2xx 范围内的状态码都会触发该函数。// 对响应数据做点什么// 这里之后login.vue里面就不需要res.data.data了,直接res就行return response.data.data;},function(error){// 超出 2xx 范围的状态码都会触发该函数。// 对响应错误做点什么// 错误处理ElNotification({message: error.response.data.msg ||"请求失败",type:'error',// 三秒后关闭duration:3000})return Promise.reject(error);});exportdefault service
这样他就会自动在header里面添加token
然后我们来写获取登录用户信息的功能:
先在manager.js里面写这个接口方法:
import axios from'~/axios'// 登录exportfunctionlogin(username,password){return axios.post("/admin/login",{
        username,
        password
    })}// 获取登录用户信息// 因为前面的请求拦截器已经自动添加了token,所以这里不用刻意传值了exportfunctiongetinfo(){return axios.post("/admin/getinfo")}
然后在login.vue里面引入getinfo方法并使用
目前的login.vue代码:
<template><el-row class="login-container"><el-col :lg="16":md="12"class="left"><div><div>欢迎光临</div><div>此站是vue-admin的登录页面,作者是mzldustu</div></div></el-col><!-- 右边布局 --><el-col :lg="8":md="12"class="right"><h2 class="title">欢迎回来</h2><div><span class="line"></span><span>账号密码登录</span><span class="line"></span></div><!-- 这里使用的是element plus里面的典型表单 --><!-- 表单宽度 --><!-- 引入element里的rules ,定义一个ref--><el-form ref="formRef":rules="rules":model="form"class="w-[250px]"><!-- 用户名输入框 --><el-form-item prop="username"><el-input v-model="form.username" placeholder="请输入用户名"><!-- 插槽引入user图标 --><template #prefix><el-icon><User /></el-icon></template></el-input></el-form-item><!-- 密码输入框 --><el-form-item prop="password"><!-- type设为password就是非明文存储,show-password就是后面的小眼睛,可以点击显示不显示密码 --><el-input type="password" v-model="form.password" placeholder="请输入密码" show-password><!-- 插槽引入lock图标 --><template #prefix><el-icon><Lock /></el-icon></template></el-input></el-form-item><!-- 按钮 --><el-form-item><!-- 圆角,宽度250px,颜色 --><el-button round color="#626aef"class="w-[250px]" type="primary" @click="onSubmit">登录</el-button></el-form-item></el-form></el-col></el-row></template><script setup>import{ reactive, ref }from'vue'// 引入图标import{ User,Lock }from'@element-plus/icons-vue'// 引入登录方法import{ login, getinfo }from'~/api/manager'// 引入通知组件import{ ElNotification }from'element-plus'// 引入useRouter方便跳转import{ useRouter }from'vue-router'// 引入usevue里面的useCookie方法import{ useCookies }from'@vueuse/integrations/useCookies'// 拿到useRouter,才方便后面调用它的push方法const router =useRouter()// do not use same name with refconst form =reactive({username:"",password:""})// 表单验证rules,要在前面指定propconst rules ={username:[// 书写验证规则{required:true,message:'用户名不能为空',// 失去焦点的时候触发trigger:'blur'},{min:4,max:8,message:'用户名长度必须是4-8个字符',trigger:'blur'},],password:[{required:true,message:'密码不能为空',// 失去焦点的时候触发trigger:'blur'},]}// setup里拿到el-form节点const formRef =ref(null)constonSubmit=()=>{
  formRef.value.validate((valid)=>{// 会输出true或者false// console.log(valid)if(!valid){returnfalse}// console.log(验证通过)// 参数验证通过后调用login方法// 通过前面的form拿到username和passwordlogin(form.username,form.password).then(res=>{// 拿到响应成功结果// console.log(res.data.data);// 因为前面axios.js里面使用了响应拦截器,所以不需要写这么长了,直接res即可
      console.log(res)// 提示成功,存储用户token和用户相关信息,然后跳转到后台首页ElNotification({message:"登录成功",type:'success',// 三秒后关闭duration:3000})// 登录成功存储用户cookie,用cookie变量接收const cookie =useCookies()// 原:cookie.set("admin-token", res.data.data.token)// 因为前面的响应拦截器设置,这里也直接res.token就行
      cookie.set("admin-token", res.token)// 存储完成后获取用户信息getinfo().then(res2=>{
        console.log(res2)})// 跳转到后台首页
      router.push("/")})// 错误处理移动到了axios.js// .catch(err=>{// 拿到报错具体信息// ElNotification({//   message: err.response.data.msg || "请求失败",//   type: 'error',//   // 三秒后关闭//   duration:3000// })// })})}</script><style scoped>.login-container{/*el-row会将页面分为24份,用span进行值的设定 这里面的class是windi css里面的颜色快捷方式,以及设置min-height使其占满整个屏幕 */
    @apply min-h-screen bg-indigo-500;}/* <!-- 左边布局 class里面实现的主要是垂直水平居中 flex-col就是垂直方向-->
    <!-- 因为要响应式布局,所以我们使用windi css里面类似媒体查询的一个功能 lg是>1200px的屏幕,md是>992px的屏幕--> */.login-container .left,.login-container .right{
    @apply flex items-center justify-center;}.login-container .right{
    @apply bg-light-50 flex-col;}/* class里面的内容分别是:加粗,字体增大,字体加亮,与下面外间距1rem */.left>div>div:first-child{
    @apply font-bold text-5xl text-light-50 mb-4;}.left>div>div:last-child{
    @apply text-gray-200 text-sm;}/* 加粗,字体3xl,颜色深灰色 */.right .title{
    @apply font-bold text-3xl text-gray-800;}/* flex布局,水平垂直居中,上下边距,浅灰色,水平方向元素的间距 */.right>div{
    @apply flex items-center justify-center my-5 text-gray-300 space-x-2;}/* 高度,宽度,浅灰色 */.right .line{
    @apply h-[1px] w-16 bg-gray-200;}</style>
然后我们再来做一个小功能,用户点击登录之后如果响应时间较长,那么在登录按钮加上一个点击之后loading的功能,防止用户重复点击
login.vue里面:


目前实现的效果:点击登录之后就有了一个加载按钮,此时用户也不能点击登录按钮了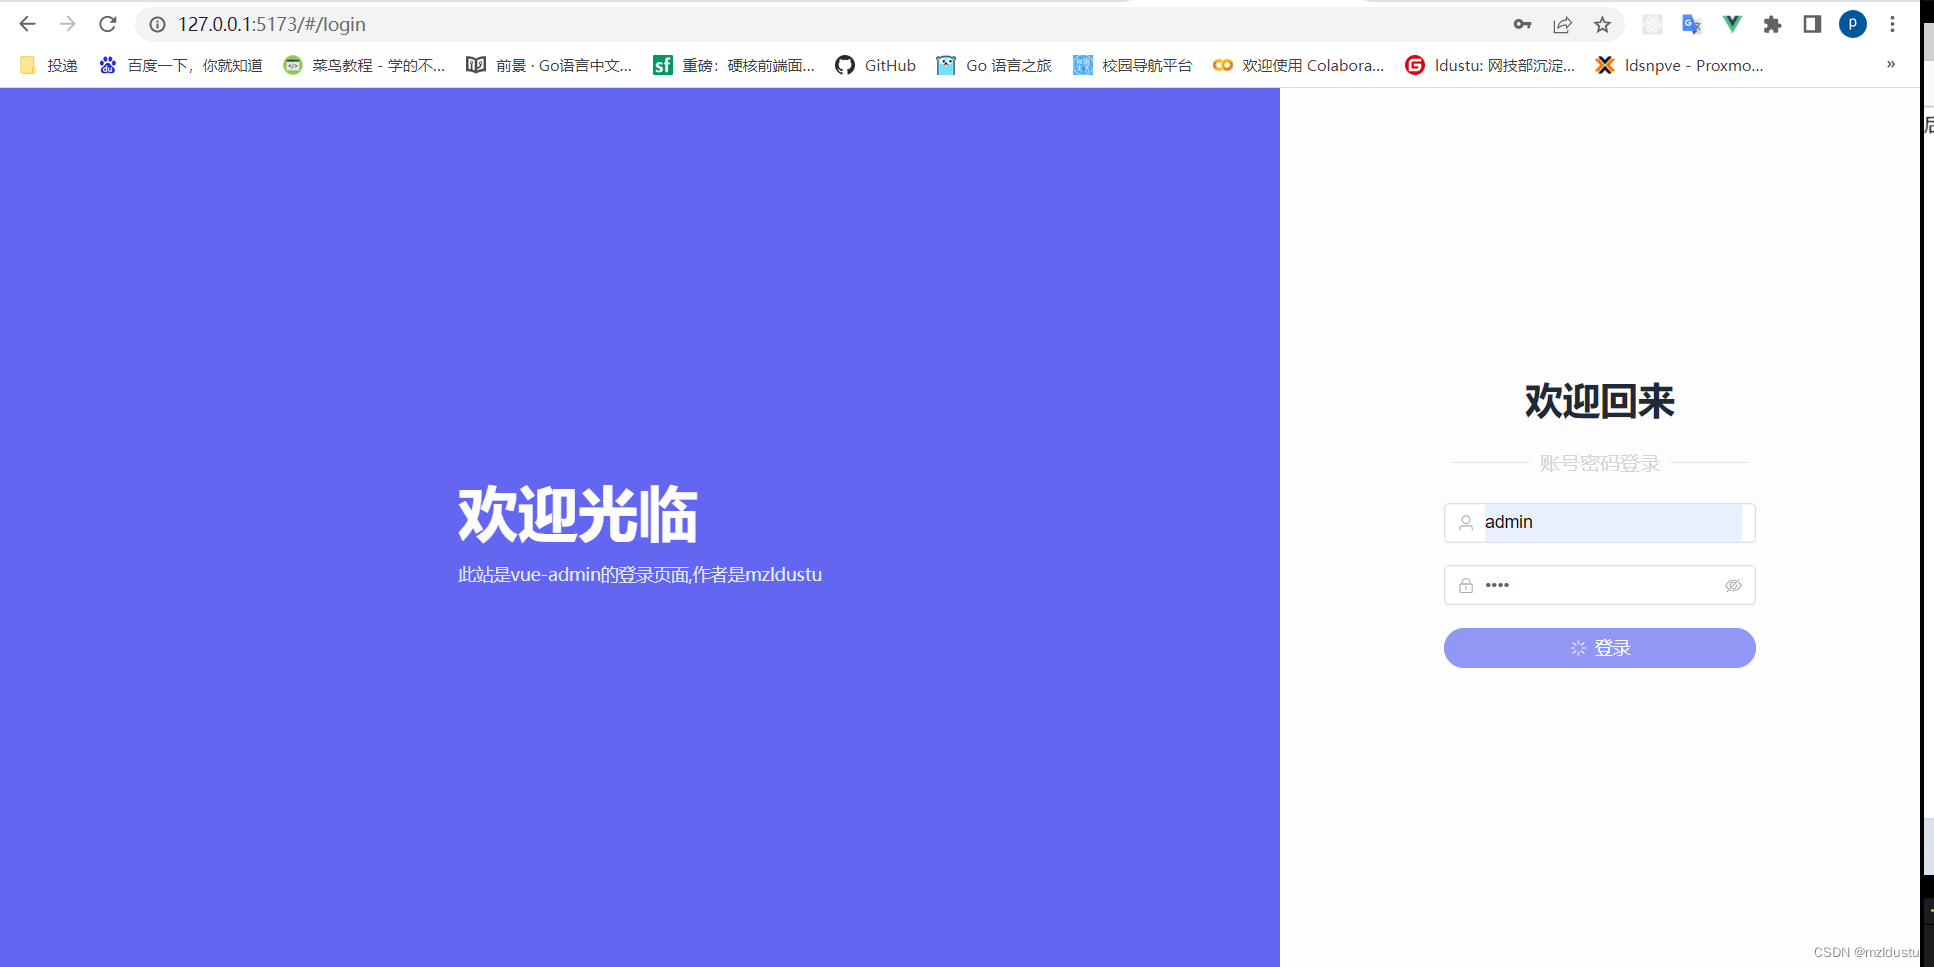
至此,这个小功能也做完了。
此时的login.vue文件:
<template><el-row class="login-container"><el-col :lg="16":md="12"class="left"><div><div>欢迎光临</div><div>此站是vue-admin的登录页面,作者是mzldustu</div></div></el-col><!-- 右边布局 --><el-col :lg="8":md="12"class="right"><h2 class="title">欢迎回来</h2><div><span class="line"></span><span>账号密码登录</span><span class="line"></span></div><!-- 这里使用的是element plus里面的典型表单 --><!-- 表单宽度 --><!-- 引入element里的rules ,定义一个ref--><el-form ref="formRef":rules="rules":model="form"class="w-[250px]"><!-- 用户名输入框 --><el-form-item prop="username"><el-input v-model="form.username" placeholder="请输入用户名"><!-- 插槽引入user图标 --><template #prefix><el-icon><User /></el-icon></template></el-input></el-form-item><!-- 密码输入框 --><el-form-item prop="password"><!-- type设为password就是非明文存储,show-password就是后面的小眼睛,可以点击显示不显示密码 --><el-input type="password" v-model="form.password" placeholder="请输入密码" show-password><!-- 插槽引入lock图标 --><template #prefix><el-icon><Lock /></el-icon></template></el-input></el-form-item><!-- 按钮 --><el-form-item><!-- 圆角,宽度250px,颜色 --><!-- 加一个loading状态,正常状态下是false,改变之后就是true--><el-button round color="#626aef"class="w-[250px]" type="primary" @click="onSubmit":loading="loading">登录</el-button></el-form-item></el-form></el-col></el-row></template><script setup>import{ reactive, ref }from'vue'// 引入图标import{ User,Lock }from'@element-plus/icons-vue'// 引入登录方法import{ login, getinfo }from'~/api/manager'// 引入通知组件import{ ElNotification }from'element-plus'// 引入useRouter方便跳转import{ useRouter }from'vue-router'// 引入usevue里面的useCookie方法import{ useCookies }from'@vueuse/integrations/useCookies'// 拿到useRouter,才方便后面调用它的push方法const router =useRouter()// do not use same name with refconst form =reactive({username:"",password:""})// 表单验证rules,要在前面指定propconst rules ={username:[// 书写验证规则{required:true,message:'用户名不能为空',// 失去焦点的时候触发trigger:'blur'},{min:4,max:8,message:'用户名长度必须是4-8个字符',trigger:'blur'},],password:[{required:true,message:'密码不能为空',// 失去焦点的时候触发trigger:'blur'},]}// setup里拿到el-form节点const formRef =ref(null)// 定义一个loading,默认让它为false,不显示const loading =ref(false)constonSubmit=()=>{
  formRef.value.validate((valid)=>{// 会输出true或者false// console.log(valid)if(!valid){returnfalse}// 在请求之前将loading状态设为true
    loading.value =true// console.log(验证通过)// 参数验证通过后调用login方法// 通过前面的form拿到username和passwordlogin(form.username,form.password).then(res=>{// 拿到响应成功结果// console.log(res.data.data);// 因为前面axios.js里面使用了响应拦截器,所以不需要写这么长了,直接res即可
      console.log(res)// 提示成功,存储用户token和用户相关信息,然后跳转到后台首页ElNotification({message:"登录成功",type:'success',// 三秒后关闭duration:3000})// 登录成功存储用户cookie,用cookie变量接收const cookie =useCookies()// 原:cookie.set("admin-token", res.data.data.token)// 因为前面的响应拦截器设置,这里也直接res.token就行
      cookie.set("admin-token", res.token)// 存储完成后获取用户信息getinfo().then(res2=>{
        console.log(res2)})// 跳转到后台首页
      router.push("/")}).finally(()=>{// 登录成功之后loading设置为false
      loading.value =false})// 错误处理移动到了axios.js// .catch(err=>{// 拿到报错具体信息// ElNotification({//   message: err.response.data.msg || "请求失败",//   type: 'error',//   // 三秒后关闭//   duration:3000// })// })})}</script><style scoped>.login-container{/*el-row会将页面分为24份,用span进行值的设定 这里面的class是windi css里面的颜色快捷方式,以及设置min-height使其占满整个屏幕 */
    @apply min-h-screen bg-indigo-500;}/* <!-- 左边布局 class里面实现的主要是垂直水平居中 flex-col就是垂直方向-->
    <!-- 因为要响应式布局,所以我们使用windi css里面类似媒体查询的一个功能 lg是>1200px的屏幕,md是>992px的屏幕--> */.login-container .left,.login-container .right{
    @apply flex items-center justify-center;}.login-container .right{
    @apply bg-light-50 flex-col;}/* class里面的内容分别是:加粗,字体增大,字体加亮,与下面外间距1rem */.left>div>div:first-child{
    @apply font-bold text-5xl text-light-50 mb-4;}.left>div>div:last-child{
    @apply text-gray-200 text-sm;}/* 加粗,字体3xl,颜色深灰色 */.right .title{
    @apply font-bold text-3xl text-gray-800;}/* flex布局,水平垂直居中,上下边距,浅灰色,水平方向元素的间距 */.right>div{
    @apply flex items-center justify-center my-5 text-gray-300 space-x-2;}/* 高度,宽度,浅灰色 */.right .line{
    @apply h-[1px] w-16 bg-gray-200;}</style>
接着我们来实现常用工具类的封装(简化代码):
1.封装cookie
在src目录下面新建一个composables的目录,新建一个auth.js
// 引入usevue里面的useCookie方法import{ useCookies }from'@vueuse/integrations/useCookies'// 定义token统一的值const Tokenkey ="admin-token"const cookie =useCookies()// 获取tokenexportfunctiongetToken(){return cookie.get(Tokenkey)}// 设置tokenexportfunctionsetToken(token){return cookie.set(Tokenkey,token)}// 清除tokenexportfunctionremoveToken(){return cookie.remove(Tokenkey)}
然后就去login.vue里面和axios.js里面用到了setToken和getToken的地方进行优化
目前login.vue代码:
<template><el-row class="login-container"><el-col :lg="16":md="12"class="left"><div><div>欢迎光临</div><div>此站是vue-admin的登录页面,作者是mzldustu</div></div></el-col><!-- 右边布局 --><el-col :lg="8":md="12"class="right"><h2 class="title">欢迎回来</h2><div><span class="line"></span><span>账号密码登录</span><span class="line"></span></div><!-- 这里使用的是element plus里面的典型表单 --><!-- 表单宽度 --><!-- 引入element里的rules ,定义一个ref--><el-form ref="formRef":rules="rules":model="form"class="w-[250px]"><!-- 用户名输入框 --><el-form-item prop="username"><el-input v-model="form.username" placeholder="请输入用户名"><!-- 插槽引入user图标 --><template #prefix><el-icon><User /></el-icon></template></el-input></el-form-item><!-- 密码输入框 --><el-form-item prop="password"><!-- type设为password就是非明文存储,show-password就是后面的小眼睛,可以点击显示不显示密码 --><el-input type="password" v-model="form.password" placeholder="请输入密码" show-password><!-- 插槽引入lock图标 --><template #prefix><el-icon><Lock /></el-icon></template></el-input></el-form-item><!-- 按钮 --><el-form-item><!-- 圆角,宽度250px,颜色 --><!-- 加一个loading状态,正常状态下是false,改变之后就是true--><el-button round color="#626aef"class="w-[250px]" type="primary" @click="onSubmit":loading="loading">登录</el-button></el-form-item></el-form></el-col></el-row></template><script setup>import{ reactive, ref }from'vue'// 引入图标import{ User,Lock }from'@element-plus/icons-vue'// 引入登录方法import{ login, getinfo }from'~/api/manager'// 引入通知组件import{ ElNotification }from'element-plus'// 引入useRouter方便跳转import{ useRouter }from'vue-router'// 引入usevue里面的useCookie方法// import { useCookies } from '@vueuse/integrations/useCookies'// 引入auth.js里面的各种cookie方法,上面的那条引入就不需要了import{
  setToken
}from'~/composables/auth'// 拿到useRouter,才方便后面调用它的push方法const router =useRouter()// do not use same name with refconst form =reactive({username:"",password:""})// 表单验证rules,要在前面指定propconst rules ={username:[// 书写验证规则{required:true,message:'用户名不能为空',// 失去焦点的时候触发trigger:'blur'},{min:4,max:8,message:'用户名长度必须是4-8个字符',trigger:'blur'},],password:[{required:true,message:'密码不能为空',// 失去焦点的时候触发trigger:'blur'},]}// setup里拿到el-form节点const formRef =ref(null)// 定义一个loading,默认让它为false,不显示const loading =ref(false)constonSubmit=()=>{
  formRef.value.validate((valid)=>{// 会输出true或者false// console.log(valid)if(!valid){returnfalse}// 在请求之前将loading状态设为true
    loading.value =true// console.log(验证通过)// 参数验证通过后调用login方法// 通过前面的form拿到username和passwordlogin(form.username,form.password).then(res=>{// 拿到响应成功结果// console.log(res.data.data);// 因为前面axios.js里面使用了响应拦截器,所以不需要写这么长了,直接res即可
      console.log(res)// 提示成功,存储用户token和用户相关信息,然后跳转到后台首页ElNotification({message:"登录成功",type:'success',// 三秒后关闭duration:3000})// 登录成功存储用户cookie,用cookie变量接收// const cookie = useCookies()// 原:cookie.set("admin-token", res.data.data.token)// 因为前面的响应拦截器设置,这里也直接res.token就行// cookie.set("admin-token", res.token)// 这里经过auth.js里面的方法进行再次简化setToken(res.token)// 存储完成后获取用户信息getinfo().then(res2=>{
        console.log(res2)})// 跳转到后台首页
      router.push("/")}).finally(()=>{// 登录成功之后loading设置为false
      loading.value =false})// 错误处理移动到了axios.js// .catch(err=>{// 拿到报错具体信息// ElNotification({//   message: err.response.data.msg || "请求失败",//   type: 'error',//   // 三秒后关闭//   duration:3000// })// })})}</script><style scoped>.login-container{/*el-row会将页面分为24份,用span进行值的设定 这里面的class是windi css里面的颜色快捷方式,以及设置min-height使其占满整个屏幕 */
    @apply min-h-screen bg-indigo-500;}/* <!-- 左边布局 class里面实现的主要是垂直水平居中 flex-col就是垂直方向-->
    <!-- 因为要响应式布局,所以我们使用windi css里面类似媒体查询的一个功能 lg是>1200px的屏幕,md是>992px的屏幕--> */.login-container .left,.login-container .right{
    @apply flex items-center justify-center;}.login-container .right{
    @apply bg-light-50 flex-col;}/* class里面的内容分别是:加粗,字体增大,字体加亮,与下面外间距1rem */.left>div>div:first-child{
    @apply font-bold text-5xl text-light-50 mb-4;}.left>div>div:last-child{
    @apply text-gray-200 text-sm;}/* 加粗,字体3xl,颜色深灰色 */.right .title{
    @apply font-bold text-3xl text-gray-800;}/* flex布局,水平垂直居中,上下边距,浅灰色,水平方向元素的间距 */.right>div{
    @apply flex items-center justify-center my-5 text-gray-300 space-x-2;}/* 高度,宽度,浅灰色 */.right .line{
    @apply h-[1px] w-16 bg-gray-200;}</style>
axios.js现在的代码:
import axios from"axios"// 引入通知组件import{ ElNotification }from'element-plus'// 引入usevue里面的useCookie方法// import { useCookies } from '@vueuse/integrations/useCookies'// 这里引入auth里面的getToken方法,所以上面那条引入也不需要了import{ getToken }from'~/composables/auth'const service = axios.create({baseURL:"/api"})// 添加请求拦截器
service.interceptors.request.use(function(config){// 在发送请求之前做些什么// 往header头自动添加token// 因为上面import了getToken方法,所以下面两行不需要了,直接getToken()即可// const cookie = useCookies()// const token = cookie.get("admin-token")const token =getToken()if(token){// 往请求头传token
        config.headers["token"]= token
    }return config;},function(error){// 对请求错误做些什么return Promise.reject(error);});// 添加响应拦截器
service.interceptors.response.use(function(response){// 2xx 范围内的状态码都会触发该函数。// 对响应数据做点什么// 这里之后login.vue里面就不需要res.data.data了,直接res就行return response.data.data;},function(error){// 超出 2xx 范围的状态码都会触发该函数。// 对响应错误做点什么// 错误处理ElNotification({message: error.response.data.msg ||"请求失败",type:'error',// 三秒后关闭duration:3000})return Promise.reject(error);});exportdefault service
2.然后我们来封装提示:
在上面的composables文件夹再创建一个util.js
// 引入通知组件import{ ElNotification }from'element-plus'// 消息提示统一方法// dangerouslyUseHTMLString表示是否将 message 属性作为 HTML 片段渲染出来exportfunctiontoast(message, type ="success", dangerouslyUseHTMLString =false){ElNotification({
        message,
        type,// 三秒后关闭duration:3000,
        dangerouslyUseHTMLString
    })}
axios.js里面

login.vue里面

至此我们的cookie封装和消息功能封装就完成了。
此时axios.js的代码:
import axios from"axios"// 引入通知组件// import { ElNotification } from 'element-plus'// 因为util.js里面已经写了toast方法,所以就不用上面的引入了import{ toast }from'~/composables/util'// 引入usevue里面的useCookie方法// import { useCookies } from '@vueuse/integrations/useCookies'// 这里引入auth里面的getToken方法,所以上面那条引入也不需要了import{ getToken }from'~/composables/auth'const service = axios.create({baseURL:"/api"})// 添加请求拦截器
service.interceptors.request.use(function(config){// 在发送请求之前做些什么// 往header头自动添加token// 因为上面import了getToken方法,所以下面两行不需要了,直接getToken()即可// const cookie = useCookies()// const token = cookie.get("admin-token")const token =getToken()if(token){// 往请求头传token
        config.headers["token"]= token
    }return config;},function(error){// 对请求错误做些什么return Promise.reject(error);});// 添加响应拦截器
service.interceptors.response.use(function(response){// 2xx 范围内的状态码都会触发该函数。// 对响应数据做点什么// 这里之后login.vue里面就不需要res.data.data了,直接res就行return response.data.data;},function(error){// 超出 2xx 范围的状态码都会触发该函数。// 对响应错误做点什么// 错误处理// 因为util的toast实现了消息的封装,所以直接像下面这样写就行toast(error.response.data.msg ||"请求失败","error")// ElNotification({//     message: error.response.data.msg || "请求失败",//     type: 'error',//     // 三秒后关闭//     duration:3000// })return Promise.reject(error);});exportdefault service
login.vue的代码:
<template><el-row class="login-container"><el-col :lg="16":md="12"class="left"><div><div>欢迎光临</div><div>此站是vue-admin的登录页面,作者是mzldustu</div></div></el-col><!-- 右边布局 --><el-col :lg="8":md="12"class="right"><h2 class="title">欢迎回来</h2><div><span class="line"></span><span>账号密码登录</span><span class="line"></span></div><!-- 这里使用的是element plus里面的典型表单 --><!-- 表单宽度 --><!-- 引入element里的rules ,定义一个ref--><el-form ref="formRef":rules="rules":model="form"class="w-[250px]"><!-- 用户名输入框 --><el-form-item prop="username"><el-input v-model="form.username" placeholder="请输入用户名"><!-- 插槽引入user图标 --><template #prefix><el-icon><User /></el-icon></template></el-input></el-form-item><!-- 密码输入框 --><el-form-item prop="password"><!-- type设为password就是非明文存储,show-password就是后面的小眼睛,可以点击显示不显示密码 --><el-input type="password" v-model="form.password" placeholder="请输入密码" show-password><!-- 插槽引入lock图标 --><template #prefix><el-icon><Lock /></el-icon></template></el-input></el-form-item><!-- 按钮 --><el-form-item><!-- 圆角,宽度250px,颜色 --><!-- 加一个loading状态,正常状态下是false,改变之后就是true--><el-button round color="#626aef"class="w-[250px]" type="primary" @click="onSubmit":loading="loading">登录</el-button></el-form-item></el-form></el-col></el-row></template><script setup>import{ reactive, ref }from'vue'// 引入图标import{ User,Lock }from'@element-plus/icons-vue'// 引入登录方法import{ login, getinfo }from'~/api/manager'// 引入通知组件// import { ElNotification } from 'element-plus'// 因为util里面写了toast方法,所以就不用上面的引用了import{ toast }from'~/composables/util'// 引入useRouter方便跳转import{ useRouter }from'vue-router'// 引入usevue里面的useCookie方法// import { useCookies } from '@vueuse/integrations/useCookies'// 引入auth.js里面的各种cookie方法,上面的那条引入就不需要了import{
  setToken
}from'~/composables/auth'// 拿到useRouter,才方便后面调用它的push方法const router =useRouter()// do not use same name with refconst form =reactive({username:"",password:""})// 表单验证rules,要在前面指定propconst rules ={username:[// 书写验证规则{required:true,message:'用户名不能为空',// 失去焦点的时候触发trigger:'blur'},{min:4,max:8,message:'用户名长度必须是4-8个字符',trigger:'blur'},],password:[{required:true,message:'密码不能为空',// 失去焦点的时候触发trigger:'blur'},]}// setup里拿到el-form节点const formRef =ref(null)// 定义一个loading,默认让它为false,不显示const loading =ref(false)constonSubmit=()=>{
  formRef.value.validate((valid)=>{// 会输出true或者false// console.log(valid)if(!valid){returnfalse}// 在请求之前将loading状态设为true
    loading.value =true// console.log(验证通过)// 参数验证通过后调用login方法// 通过前面的form拿到username和passwordlogin(form.username,form.password).then(res=>{// 拿到响应成功结果// console.log(res.data.data);// 因为前面axios.js里面使用了响应拦截器,所以不需要写这么长了,直接res即可
      console.log(res)// 提示成功,存储用户token和用户相关信息,然后跳转到后台首页// ElNotification({//   message: "登录成功",//   type: 'success',//   // 三秒后关闭//   duration:3000// })// 因为util里面实现了toast方法,所以就不用再写相关代码了,直接登陆成功即可toast("登录成功")// 登录成功存储用户cookie,用cookie变量接收// const cookie = useCookies()// 原:cookie.set("admin-token", res.data.data.token)// 因为前面的响应拦截器设置,这里也直接res.token就行// cookie.set("admin-token", res.token)// 这里经过auth.js里面的方法进行再次简化setToken(res.token)// 存储完成后获取用户信息getinfo().then(res2=>{
        console.log(res2)})// 跳转到后台首页
      router.push("/")}).finally(()=>{// 登录成功之后loading设置为false
      loading.value =false})// 错误处理移动到了axios.js// .catch(err=>{// 拿到报错具体信息// ElNotification({//   message: err.response.data.msg || "请求失败",//   type: 'error',//   // 三秒后关闭//   duration:3000// })// })})}</script><style scoped>.login-container{/*el-row会将页面分为24份,用span进行值的设定 这里面的class是windi css里面的颜色快捷方式,以及设置min-height使其占满整个屏幕 */
    @apply min-h-screen bg-indigo-500;}/* <!-- 左边布局 class里面实现的主要是垂直水平居中 flex-col就是垂直方向-->
    <!-- 因为要响应式布局,所以我们使用windi css里面类似媒体查询的一个功能 lg是>1200px的屏幕,md是>992px的屏幕--> */.login-container .left,.login-container .right{
    @apply flex items-center justify-center;}.login-container .right{
    @apply bg-light-50 flex-col;}/* class里面的内容分别是:加粗,字体增大,字体加亮,与下面外间距1rem */.left>div>div:first-child{
    @apply font-bold text-5xl text-light-50 mb-4;}.left>div>div:last-child{
    @apply text-gray-200 text-sm;}/* 加粗,字体3xl,颜色深灰色 */.right .title{
    @apply font-bold text-3xl text-gray-800;}/* flex布局,水平垂直居中,上下边距,浅灰色,水平方向元素的间距 */.right>div{
    @apply flex items-center justify-center my-5 text-gray-300 space-x-2;}/* 高度,宽度,浅灰色 */.right .line{
    @apply h-[1px] w-16 bg-gray-200;}</style>
而运行项目我们发现我们的功能仍然是没问题的,至此,封装就写完了。
然后我们来引入vuex状态管理用户信息
我们使用的是vuex4
先安装:
npminstall vuex@next --save
然后在src文件夹下面创建store文件夹,创建index.js文件编辑代码:
import{ createStore }from'vuex'// 创建一个新的 store 实例// 管理用户相关信息const store =createStore({state(){return{// 用户信息存储在stateuser:{}}},// 修改用户信息mutations:{// 记录用户信息SET_USERINFO(state,user){// 通过state.user拿到上面的空对象
            state.user = user
        }}})exportdefault store
然后在main.js里面引入并app.use()
import{ createApp }from'vue'import App from'./App.vue'import ElementPlus from'element-plus'import'element-plus/dist/index.css'import router from'./router'// 引入storeimport store from'./store'//引入注册所有图标import*as ElementPlusIconsVue from'@element-plus/icons-vue'const app =createApp(App)

app.use(store)

app.use(router)

app.use(ElementPlus)// 引入图标for(const[key, component]of Object.entries(ElementPlusIconsVue)){
    app.component(key, component)}import'virtual:windi.css'

app.mount('#app')
然后在login.vue里面引入并获取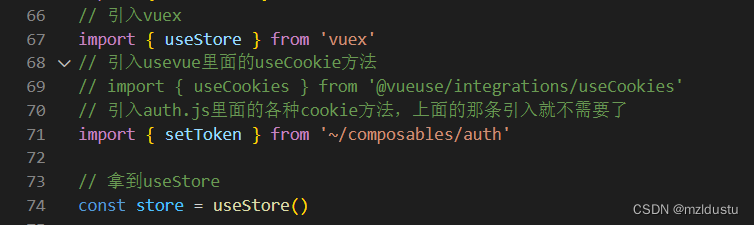
然后将登录成功信息res2传给state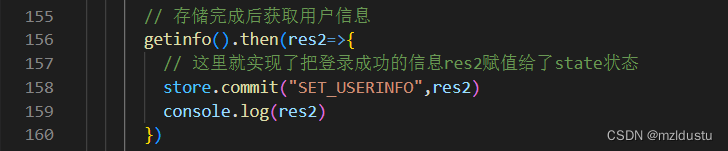
然后为了验证,我们打开index.vue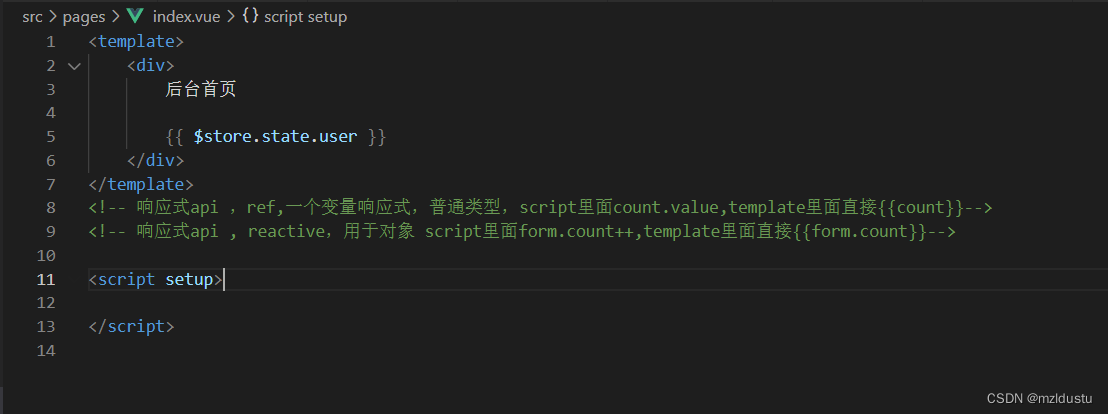
加上一行
{{ $store.state.user }}
然后运行项目,首先首页,你发现大括号里什么都没有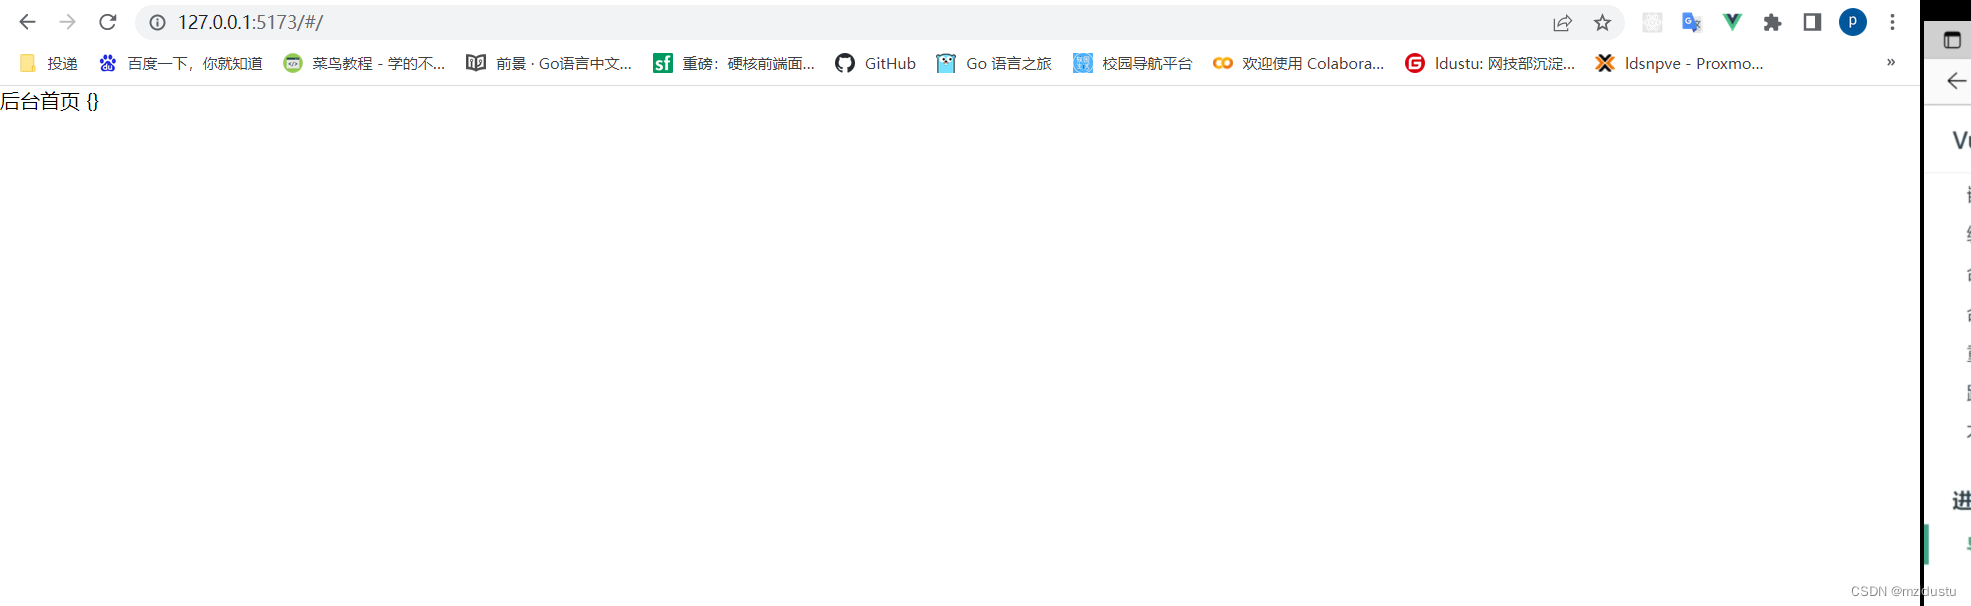
然后再去登录,跳转之后你会发现数据全部拿到了,说明我们vuex存储获取用户数据成功了。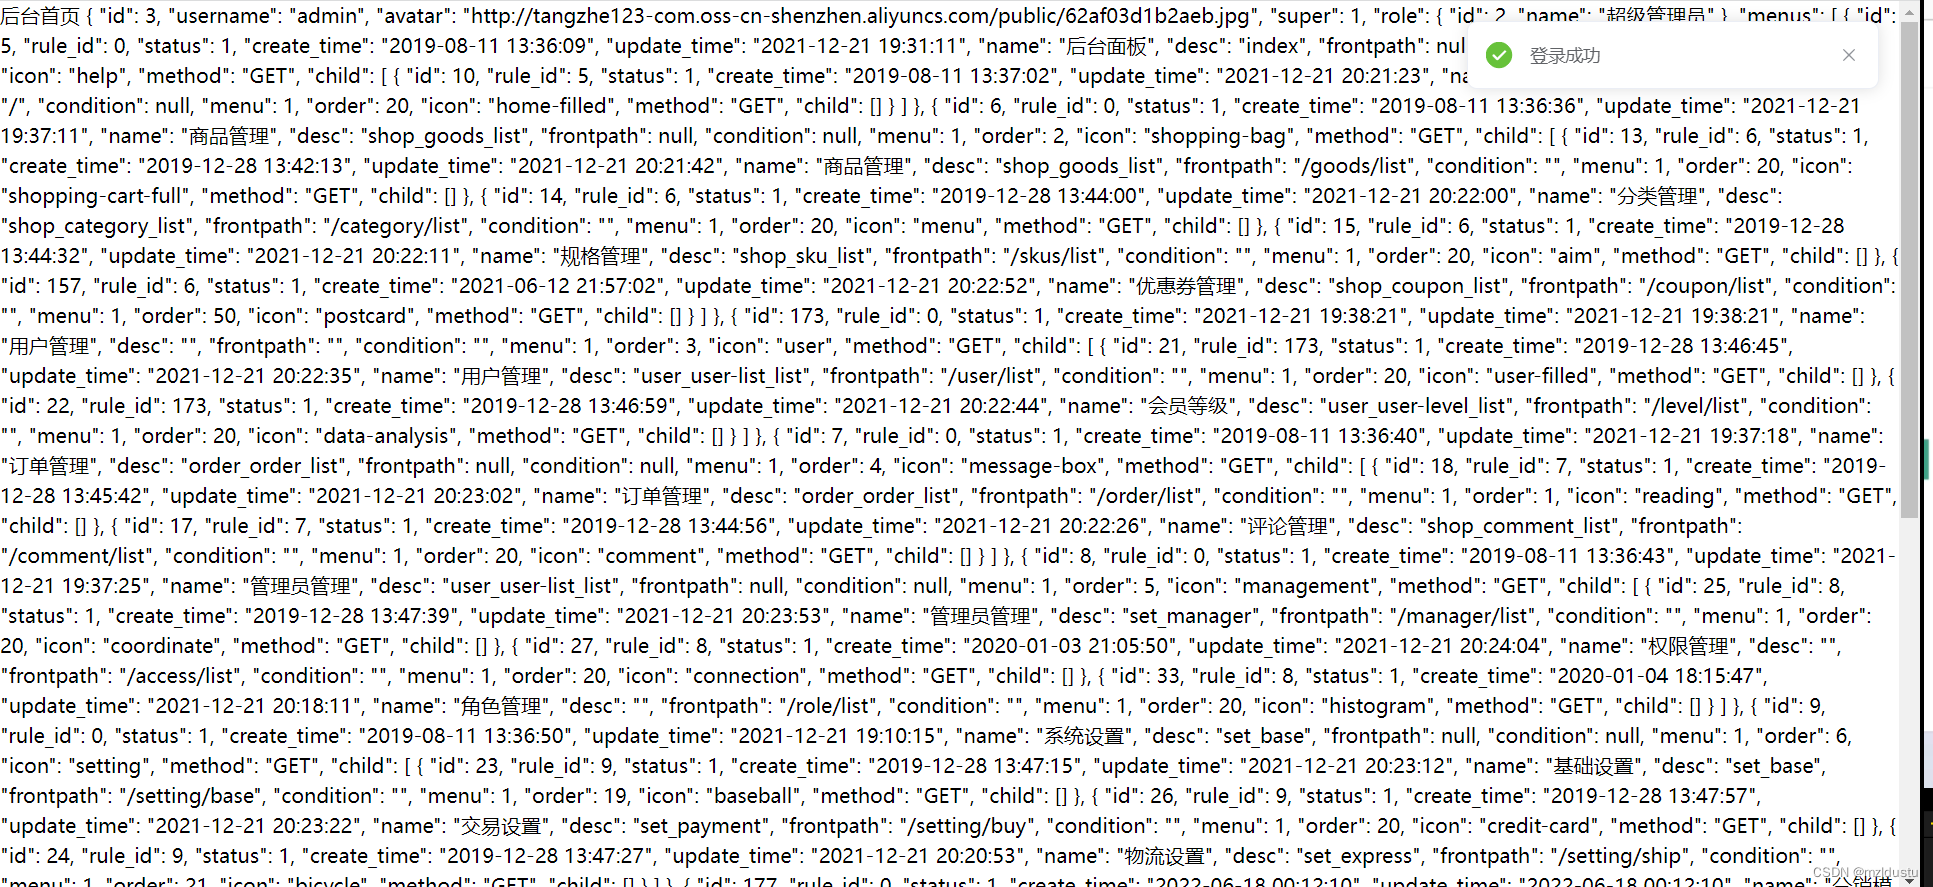
至此,vuex状态管理用户信息就完成了。
接着我们来实现全局路由守卫实现拦截实现登陆验证:
路由守卫实现的功能就是如果你没有登录,就无法进入某个页面,比如这里没有登录,就不能进入主页index.vue
我们在src下面创建permission.js处理权限验证相关的东西
main.js里面导入一下
import "./permission"
permission.js:
import router from"~/router"import{ getToken }from"~/composables/auth"import{ toast }from"~/composables/util"// 全局前置守卫// to是即将到达的页面路径,from表示从哪个路径来
router.beforeEach((to, from, next)=>{// console.log("全局前置守卫");// 拿一下tokenconst token =getToken()// 如果没有token而且不是在登录页,那么强制跳转回登录页if(!token && to.path !="/login"){toast("请先登录","error")returnnext({path:"/login"})}// 防止重复登录的判断if(token && to.path =="/login"){toast("请勿重复登录","error")returnnext({path:from.path ? from.path :"/"})}next()})
在这之后,如果没有登录会强制你到登录页登录,如果已经登录,那么你重复登陆它会提醒你不要重复登陆。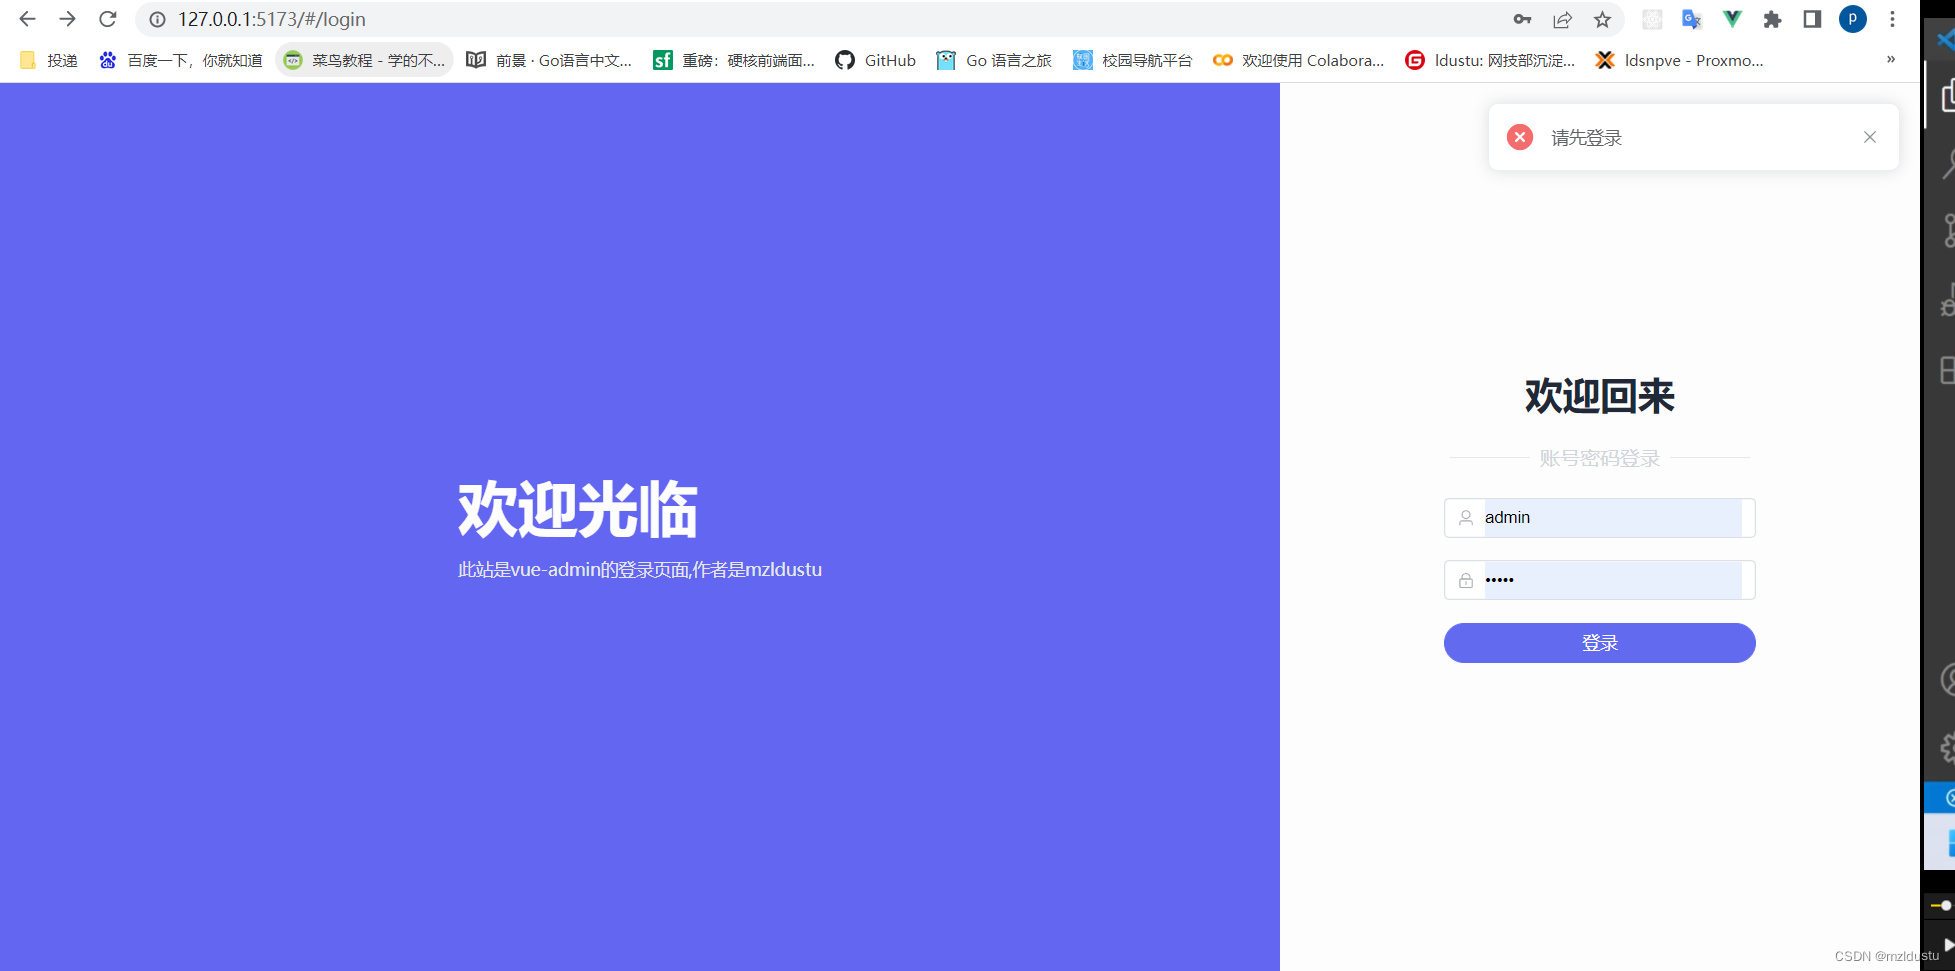

接着我们继续完善登录功能:
1.解决首页获取到用户信息之后刷新信息消失的问题
在store里面写action,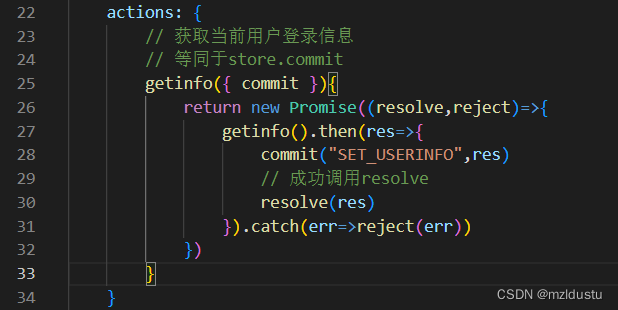
login.vue里面这一块就迁移了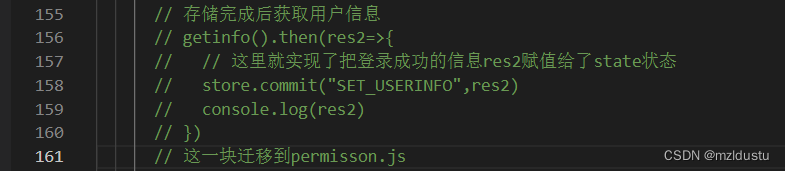
在permisson.js里面:
import router from"~/router"import{ getToken }from"~/composables/auth"import{ toast }from"~/composables/util"import store from"./store"// 全局前置守卫// to是即将到达的页面路径,from表示从哪个路径来
router.beforeEach(async(to, from, next)=>{// console.log("全局前置守卫");// 拿一下tokenconst token =getToken()// 如果没有token而且不是在登录页,那么强制跳转回登录页if(!token && to.path !="/login"){toast("请先登录","error")returnnext({path:"/login"})}// 防止重复登录的判断if(token && to.path =="/login"){toast("请勿重复登录","error")returnnext({path:from.path ? from.path :"/"})}// 如果用户登录了就自动获取用户登录信息,并存储在vuex里,这样它就会自动异步帮我们获取用户信息,刷新也没事if(token){await store.dispatch("getinfo")}next()})
搞了一个async await的异步操作,然后它会自动异步帮你获取用户的信息。
然后刷新主页用户信息就不会被清空了,这里就解决了刷新用户信息会丢失的问题。
2.对登录相关方法进行抽离
action里面加一个login进行抽离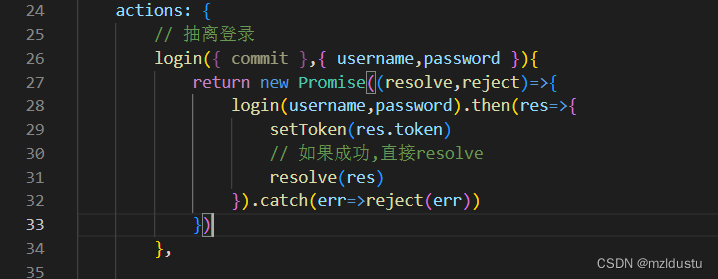
然后login.vue里面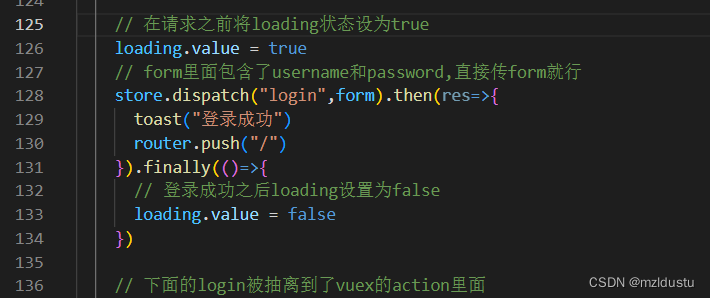
这样就完成了抽离
3.接着我们实现按回车就登录的功能
在login.vue里面引入两个生命周期
然后直接写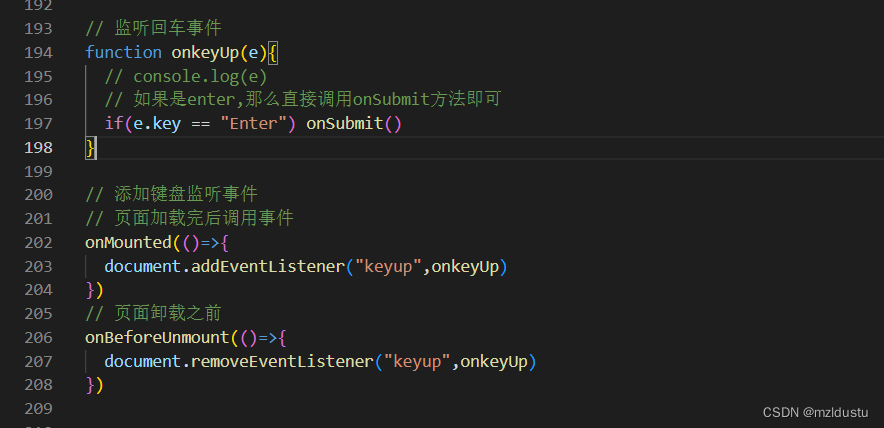
这时候就实现了回车登录事件。
至此,登录功能完善完成。
然后我们来实现退出登录功能:
使用的是element里面的message box消息弹出框里面的确认消息,因为会在多处使用,所以我们将它封装成一个公共的方法。
首先manager.js编辑写一个logout方法:
import axios from'~/axios'// 登录exportfunctionlogin(username,password){return axios.post("/admin/login",{
        username,
        password
    })}// 获取登录用户信息// 因为前面的请求拦截器已经自动添加了token,所以这里不用刻意传值了exportfunctiongetinfo(){return axios.post("/admin/getinfo")}// 退出登录// 请求栏已经有了,所以不用传任何参数exportfunctionlogout(){return axios.post("/admin/logout")}
然后在index.vue里面写一个handleLogout方法
<template><div>
        后台首页

        {{ $store.state.user.username }}<el-button @click="handleLogout">退出登录</el-button></div></template><!-- 响应式api ,ref,一个变量响应式,普通类型,script里面count.value,template里面直接{{count}}--><!-- 响应式api , reactive,用于对象 script里面form.count++,template里面直接{{form.count}}--><script setup>// 退出接口import{ logout }from"~/api/manager"// 提示框import{ showModal, toast }from"~/composables/util"// 方便页面跳转import{ useRouter }from"vue-router"// 引入useStoreimport{ useStore }from'vuex'const router =useRouter()const store =useStore()functionhandleLogout(){showModal("是否要退出登录?").then(res=>{
            console.log("退出登录");logout().finally(()=>{// 移出cookie里的token// 清除当前用户状态 vuex里的user// 上面的两步已经在store里面实现了

                store.dispatch("logout")// 跳转回登录页
                router.push("/login")// 提示退出登录成功toast("退出登录成功")})})}</script>
在store里面实现user的清空,即清除token,以及清除state里面的user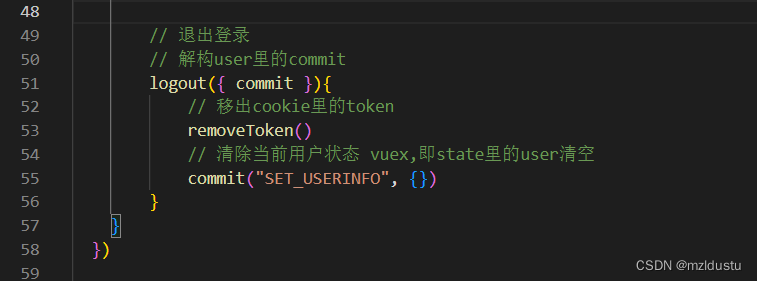
目前store的index.js代码:
import{ createStore }from'vuex'// 引入方法import{ login, getinfo }from'~/api/manager'// 引入auth.js里面的各种cookie方法,上面的那条引入就不需要了import{ setToken, removeToken }from'~/composables/auth'import{ logout }from'../api/manager'// 创建一个新的 store 实例// 管理用户相关信息const store =createStore({state(){return{// 用户信息存储在stateuser:{}}},// 修改用户信息mutations:{// 记录用户信息SET_USERINFO(state,user){// 通过state.user拿到上面的空对象
            state.user = user
        }},actions:{// 抽离登录login({ commit },{ username,password }){returnnewPromise((resolve,reject)=>{login(username,password).then(res=>{setToken(res.token)// 如果成功,直接resolveresolve(res)}).catch(err=>reject(err))})},// 获取当前用户登录信息// 等同于store.commitgetinfo({ commit }){returnnewPromise((resolve,reject)=>{getinfo().then(res=>{commit("SET_USERINFO",res)// 成功调用resolveresolve(res)}).catch(err=>reject(err))})},// 退出登录// 解构user里的commitlogout({ commit }){// 移出cookie里的tokenremoveToken()// 清除当前用户状态 vuex,即state里的user清空commit("SET_USERINFO",{})}}})exportdefault store
在这里我们再看看功能: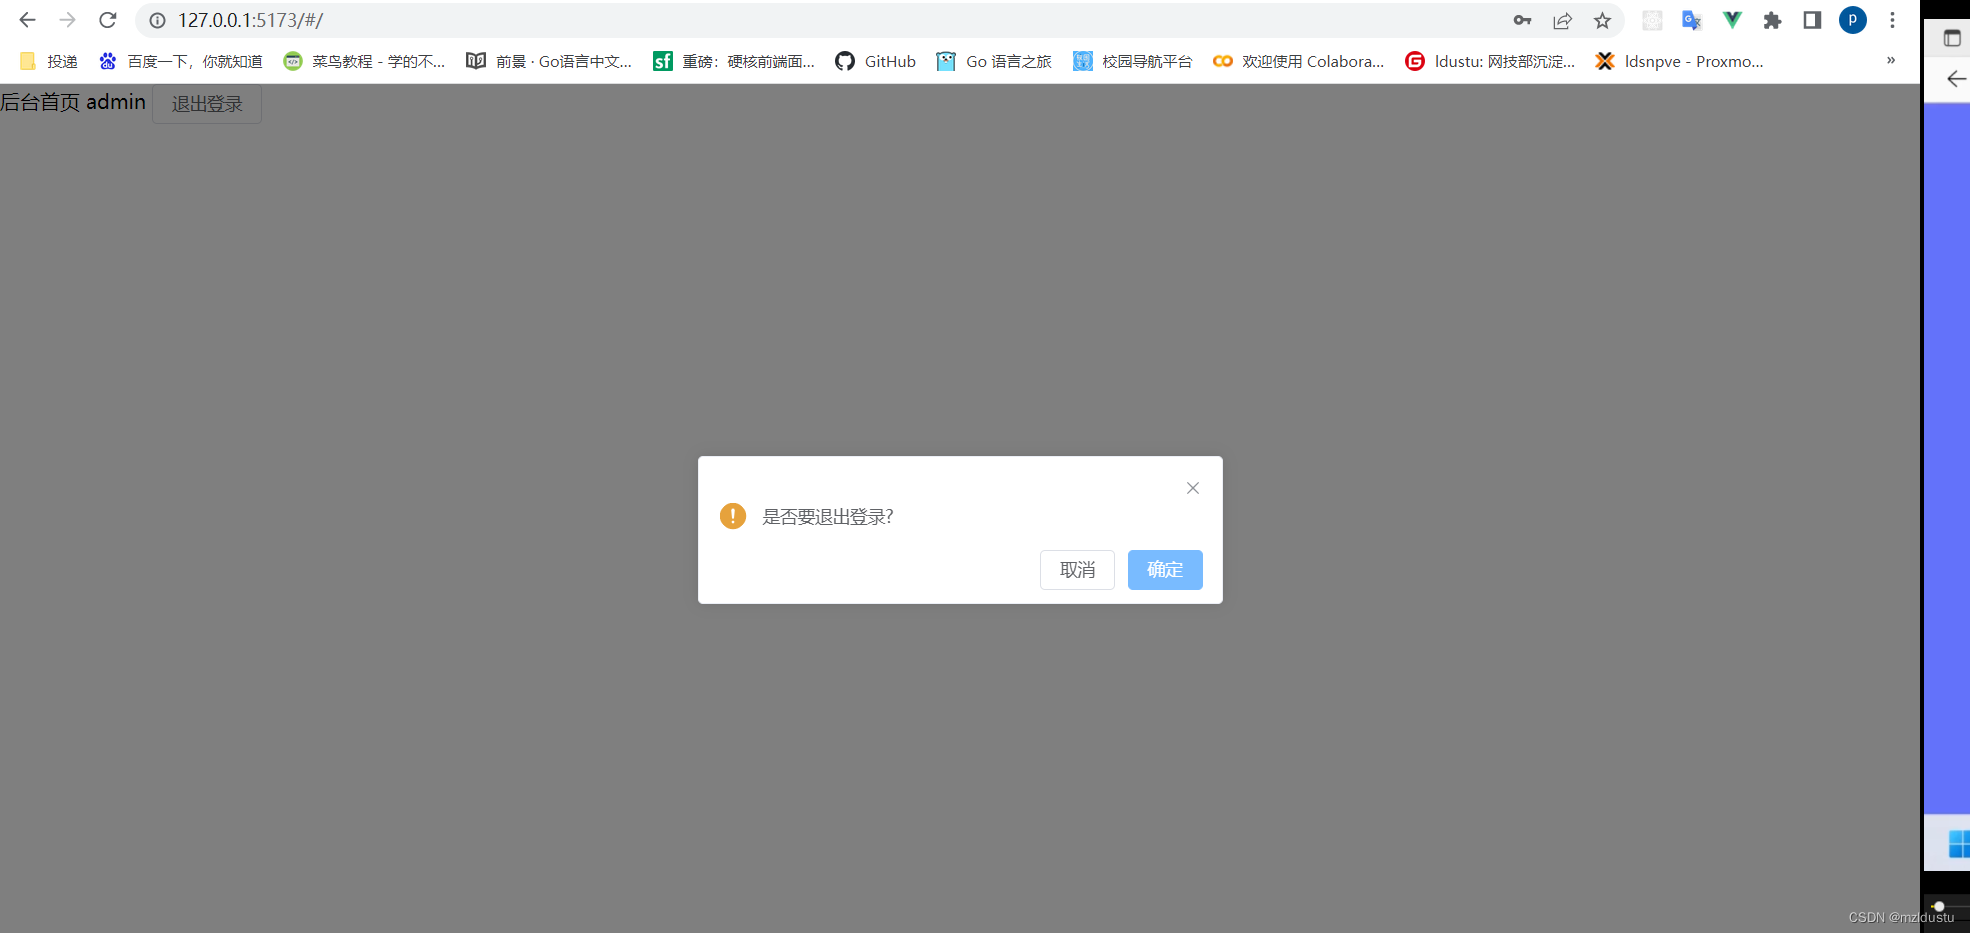
点击确认之后
到这里就完成了退出登录
然后我们进行全局loading进度条的实现:
我们这里要用到一个第三方库,nprogress
地址
安装
npm i nprogress
先在util.js里面写上关闭和开启nprogress方法
// 引入通知组件import{ ElNotification, ElMessageBox }from'element-plus'// 引入loading插件import nProgress from'nprogress'// 消息提示统一方法// dangerouslyUseHTMLString表示是否将 message 属性作为 HTML 片段渲染出来exportfunctiontoast(message, type ="success", dangerouslyUseHTMLString =false){ElNotification({
        message,
        type,// 三秒后关闭duration:3000,
        dangerouslyUseHTMLString
    })}// 消息提示框exportfunctionshowModal(content ="提示内容", type ="warning", title =""){return ElMessageBox.confirm(
        content,
        title,{confirmButtonText:'确定',cancelButtonText:'取消',
          type,})}// 显示全屏loadingexportfunctionshowFullLoading(){
    nProgress.start()}// 隐藏全屏loadingexportfunctionhideFullLoading(){
    nProgress.done()}
默认进度条是浅蓝色,但是有点和界面颜色相同,所以在App.vue里面写样式,改成浅灰色
关闭就在permission.js里面,前置路由守卫引用,后置路由守卫退出。
import router from"~/router"import{ getToken }from"~/composables/auth"import{ toast, showFullLoading, hideFullLoading }from"~/composables/util"import store from"./store"// 全局前置守卫,路由变化就会触发守卫// to是即将到达的页面路径,from表示从哪个路径来
router.beforeEach(async(to, from, next)=>{// 显示loadingshowFullLoading()// console.log("全局前置守卫");// 拿一下tokenconst token =getToken()// 如果没有token而且不是在登录页,那么强制跳转回登录页if(!token && to.path !="/login"){toast("请先登录","error")returnnext({path:"/login"})}// 防止重复登录的判断if(token && to.path =="/login"){toast("请勿重复登录","error")returnnext({path:from.path ? from.path :"/"})}// 如果用户登录了就自动获取用户登录信息,并存储在vuex里,这样它就会自动异步帮我们获取用户信息,刷新也没事if(token){await store.dispatch("getinfo")}next()})// 全局后置守卫// 调用关闭进度条方法
router.afterEach((to,from)=>hideFullLoading())
这里没办法截图,因为太快了。自己试试吧。
接着写动态页面标题实现:
切换路由的时候会改变页面的title标题:
首先在router文件夹下的index.js的每个路由加上meta:{ title: }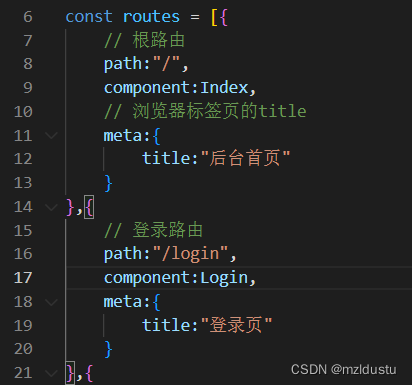
然后在permisson.js里面的全局路由前置守卫进行处理
至此,我们的登录功能就做完了,还是挺全的。涉及到了表单验证,cookie存储,axios交互,请求拦截器和响应拦截器,工具库的封装,vuex的状态管理,全局路由守卫,退出登录,全局loading,动态页面标题。门道很多的,所以网上那些5分钟写完登陆注册功能什么成分不用说了吧,那都是小打小闹。
版权归原作者 mzldustu 所有, 如有侵权,请联系我们删除。