Android studio端
参考文章:
如何简单地利用BITMAP为中介储存图片到数据库中
android开发实现头像上传功能
先实现前端
- 先添加Tiny框架的依赖
implementation ‘com.zxy.android:tiny:0.1.0’
- 然后创建dialog的xml文件dialog_select_photo
<?xml version="1.0" encoding="utf-8"?>
<LinearLayout xmlns:android="http://schemas.android.com/apk/res/android"
    xmlns:app="http://schemas.android.com/apk/res-auto"
    xmlns:tools="http://schemas.android.com/tools"
    android:layout_width="match_parent"
    android:layout_height="match_parent">

    <LinearLayout
        android:layout_width="match_parent"
        android:layout_height="match_parent"
        android:orientation="vertical">

        <TextView
            android:id="@+id/photograph"
            android:layout_width="match_parent"
            android:layout_height="52dp"
            android:text="paizhao" />

        <TextView
            android:id="@+id/photo"
            android:layout_width="match_parent"
            android:layout_height="61dp"
            android:text="xiangce" />

        <TextView
            android:id="@+id/cancel"
            android:layout_width="match_parent"
            android:layout_height="65dp"
            android:text="cancel" />
    </LinearLayout>
</LinearLayout>
- 然后创建一个空白的activity,在该activity的xml里添加一个按钮(btn_test)和一个ImagView(image)
- 然后是activity里的代码,有些依赖可能会报错,重新导入一下就行
package com.example.academymanageapp;

import androidx.appcompat.app.AppCompatActivity;
import androidx.core.app.ActivityCompat;
import androidx.core.content.ContextCompat;
import androidx.core.content.FileProvider;

import android.app.AlertDialog;

import android.Manifest;
import android.app.Activity;
import android.content.Intent;
import android.content.pm.PackageManager;
import android.graphics.Bitmap;
import android.net.Uri;
import android.os.Build;
import android.os.Bundle;
import android.os.Environment;
import android.provider.MediaStore;
import android.util.Base64;
import android.view.LayoutInflater;
import android.view.View;
import android.widget.Button;
import android.widget.ImageView;
import android.widget.TextView;
import android.widget.Toast;

import com.zxy.tiny.Tiny;
import com.zxy.tiny.callback.FileWithBitmapCallback;

import java.io.ByteArrayOutputStream;
import java.io.File;
import java.io.IOException;

public class PictureActivity extends AppCompatActivity implements View.OnClickListener {

//调取系统摄像头的请求码
private static final int MY_ADD_CASE_CALL_PHONE = 6;
    //打开相册的请求码
    private static final int MY_ADD_CASE_CALL_PHONE2 = 7;
    private AlertDialog.Builder builder;
    private AlertDialog dialog;
    private LayoutInflater inflater;
    private ImageView imageView;
    private View layout;
    private TextView takePhotoTV;
    private TextView choosePhotoTV;
    private TextView cancelTV;
    private Button test;

    public  static String pictureString; //获取的转成string类型的图片

    @Override
    public void onCreate(Bundle savedInstanceState) {
        super.onCreate(savedInstanceState);
        setContentView(R.layout.activity_test);
        imageView = findViewById(R.id.image);
        test = findViewById(R.id.btn_test);
        test.setOnClickListener(new View.OnClickListener() {
            @Override
            public void onClick(View view) {
                UpdatePhoto(view);
            }
        });
    }
    /*
    初始化控件方法
     */
    public void viewInit() {

        builder = new AlertDialog.Builder(this);//创建对话框
        inflater = getLayoutInflater();
        layout = inflater.inflate(R.layout.dialog_select_photo, null);//获取自定义布局
        builder.setView(layout);//设置对话框的布局
        dialog = builder.create();//生成最终的对话框
        dialog.show();//显示对话框

        takePhotoTV = layout.findViewById(R.id.photograph);
        choosePhotoTV = layout.findViewById(R.id.photo);
        cancelTV = layout.findViewById(R.id.cancel);
        //设置监听
        takePhotoTV.setOnClickListener(this);
        choosePhotoTV.setOnClickListener(this);
        cancelTV.setOnClickListener(this);
    }

    /**
     * 修改头像按钮执行方法
     * @param view
     */
    public void UpdatePhoto(View view) {
        viewInit();
    }

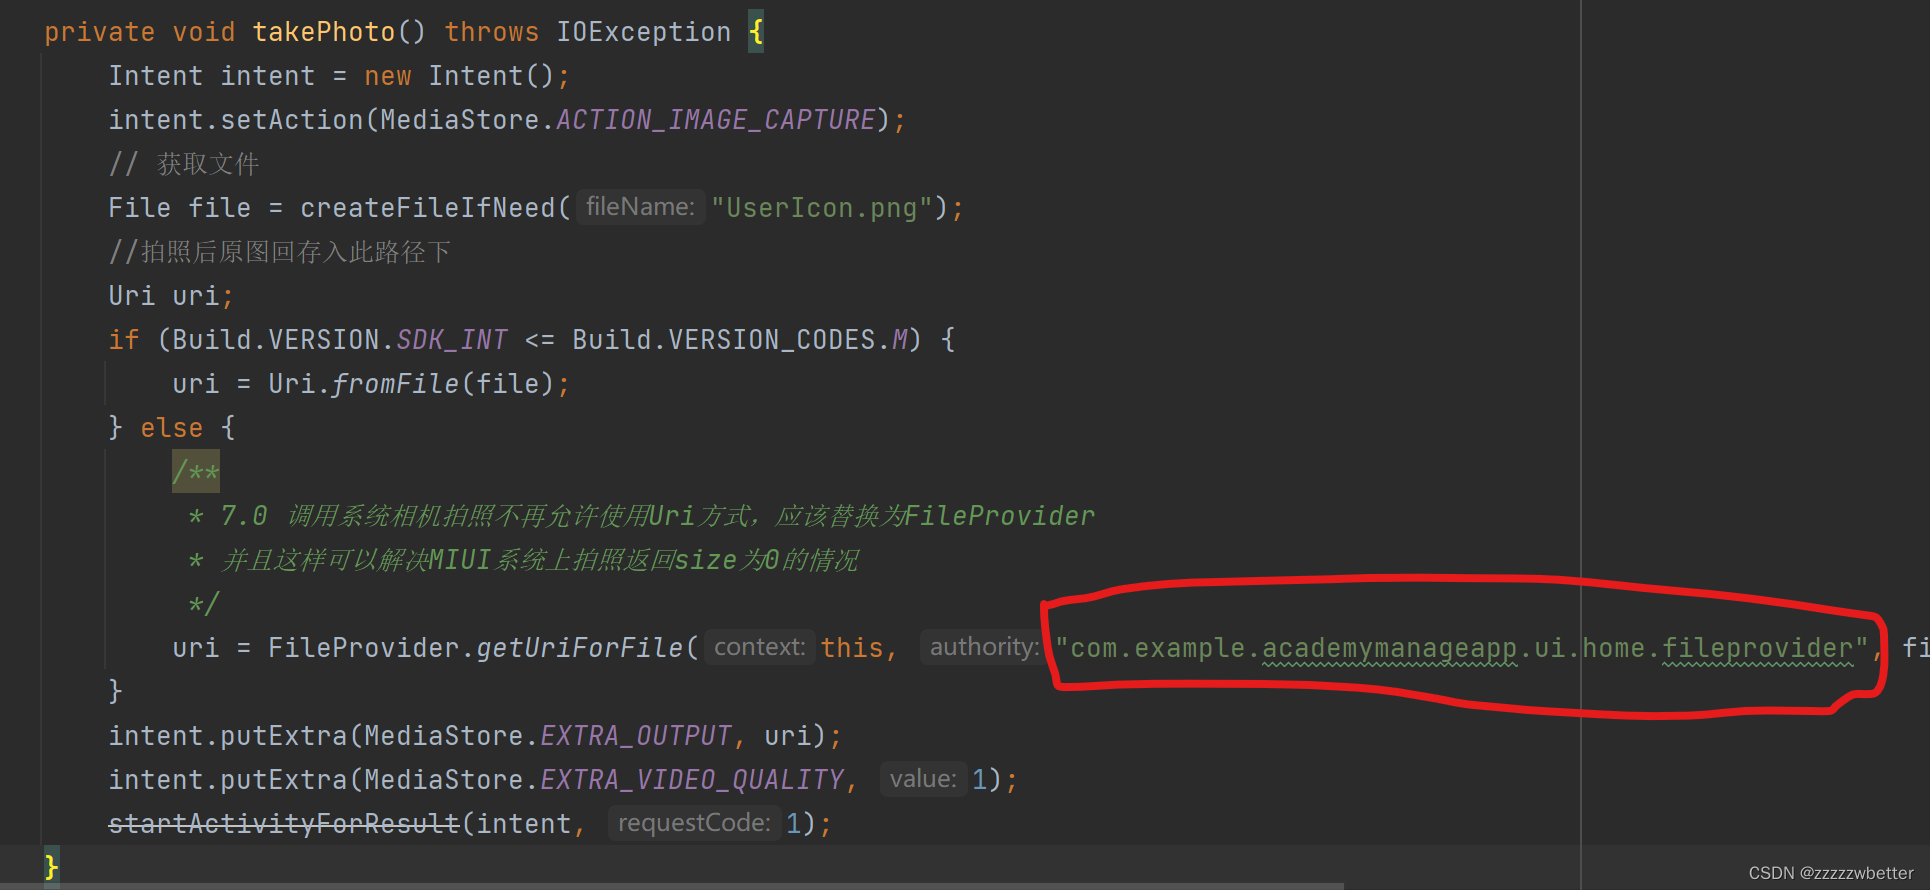
    private void takePhoto() throws IOException {
        Intent intent = new Intent();
        intent.setAction(MediaStore.ACTION_IMAGE_CAPTURE);
        // 获取文件
        File file = createFileIfNeed("UserIcon.png");
        //拍照后原图回存入此路径下
        Uri uri;
        if (Build.VERSION.SDK_INT <= Build.VERSION_CODES.M) {
            uri = Uri.fromFile(file);
        } else {
            /**
             * 7.0 调用系统相机拍照不再允许使用Uri方式,应该替换为FileProvider
             * 并且这样可以解决MIUI系统上拍照返回size为0的情况
             */
            uri = FileProvider.getUriForFile(this, "com.example.bobo.getphotodemo.fileprovider", file);
        }
        intent.putExtra(MediaStore.EXTRA_OUTPUT, uri);
        intent.putExtra(MediaStore.EXTRA_VIDEO_QUALITY, 1);
        startActivityForResult(intent, 1);
    }

    // 在sd卡中创建一保存图片(原图和缩略图共用的)文件夹
    private File createFileIfNeed(String fileName) throws IOException {
        String fileA = Environment.getExternalStoragePublicDirectory(Environment.DIRECTORY_PICTURES).getAbsolutePath() + "/nbinpic";
        File fileJA = new File(fileA);
        if (!fileJA.exists()) {
            fileJA.mkdirs();
        }
        File file = new File(fileA, fileName);
        if (!file.exists()) {
            file.createNewFile();
        }
        return file;
    }

    /**
     * 打开相册
     */
    private void choosePhoto() {
        //这是打开系统默认的相册(就是你系统怎么分类,就怎么显示,首先展示分类列表)
        Intent picture = new Intent(Intent.ACTION_PICK, MediaStore.Images.Media.EXTERNAL_CONTENT_URI);
        startActivityForResult(picture, 2);
    }

    /**
     * 申请权限回调方法
     *
     * @param requestCode
     * @param permissions
     * @param grantResults
     */
    @Override
    public void onRequestPermissionsResult(int requestCode, String[] permissions, int[] grantResults) {

        if (requestCode == MY_ADD_CASE_CALL_PHONE) {
            if (grantResults[0] == PackageManager.PERMISSION_GRANTED) {
                try {
                    takePhoto();
                } catch (IOException e) {
                    e.printStackTrace();
                }
            } else {
                Toast.makeText(this,"拒绝了你的请求",Toast.LENGTH_SHORT).show();
                //"权限拒绝");
                // TODO: 2018/12/4 这里可以给用户一个提示,请求权限被拒绝了
            }
        }

        if (requestCode == MY_ADD_CASE_CALL_PHONE2) {
            if (grantResults[0] == PackageManager.PERMISSION_GRANTED) {
                choosePhoto();
            } else {
                //"权限拒绝");
                // TODO: 2018/12/4 这里可以给用户一个提示,请求权限被拒绝了
            }
        }
        super.onRequestPermissionsResult(requestCode, permissions, grantResults);
    }

    /**
     * startActivityForResult执行后的回调方法,接收返回的图片
     * @param requestCode
     * @param resultCode
     * @param data
     */
    @Override
    protected void onActivityResult(int requestCode, int resultCode, Intent data) {
        super.onActivityResult(requestCode, resultCode, data);
        if (requestCode == 1 && resultCode != Activity.RESULT_CANCELED) {

            String state = Environment.getExternalStorageState();
            if (!state.equals(Environment.MEDIA_MOUNTED)) return;
            // 把原图显示到界面上
            Tiny.FileCompressOptions options = new Tiny.FileCompressOptions();
            Tiny.getInstance().source(readpic()).asFile().withOptions(options).compress(new FileWithBitmapCallback() {
                @Override
                public void callback(boolean isSuccess, Bitmap bitmap, String outfile, Throwable t) {
                    saveImageToServer(bitmap, outfile);//显示图片到imgView上
                }
            });
        } else if (requestCode == 2 && resultCode == Activity.RESULT_OK
                && null != data) {
            try {
                Uri selectedImage = data.getData();//获取路径
                Tiny.FileCompressOptions options = new Tiny.FileCompressOptions();
                Tiny.getInstance().source(selectedImage).asFile().withOptions(options).compress(new FileWithBitmapCallback() {
                    @Override
                    public void callback(boolean isSuccess, Bitmap bitmap, String outfile, Throwable t) {
                        saveImageToServer(bitmap, outfile);
                    }
                });
            } catch (Exception e) {
                //"上传失败");
            }
        }
    }

    /**
     * 从保存原图的地址读取图片
     */
    private String readpic() {
        String filePath = Environment.getExternalStoragePublicDirectory(Environment.DIRECTORY_PICTURES).getAbsolutePath() + "/nbinpic/" + "UserIcon.png";
        return filePath;
    }

    private String saveImageToServer(final Bitmap bitmap, String outfile) {
//        File file = new File(outfile);
        // TODO: 2018/12/4  这里就可以将图片文件 file 上传到服务器,上传成功后可以将bitmap设置给你对应的图片展示
        if (bitmap!=null){
            ByteArrayOutputStream stream = new ByteArrayOutputStream();
            bitmap.compress(Bitmap.CompressFormat.PNG,100,stream);
            byte[] bytes = stream.toByteArray();
            pictureString = Base64.encodeToString(bytes,Base64.DEFAULT);
//            System.out.println("----------"+pictureString+"----=--===--");
        }
 //       System.out.println(file);
        imageView.setImageBitmap(bitmap);
        return pictureString;
    }

    @Override
    public void onClick(View view) {
        switch (view.getId()){
            case R.id.photograph:
                //"点击了照相";
                //  6.0之后动态申请权限 摄像头调取权限,SD卡写入权限
                //判断是否拥有权限,true则动态申请
                if (ContextCompat.checkSelfPermission(PictureActivity.this, Manifest.permission.CAMERA) != PackageManager.PERMISSION_GRANTED
                        && ContextCompat.checkSelfPermission(PictureActivity.this, Manifest.permission.WRITE_EXTERNAL_STORAGE) != PackageManager.PERMISSION_GRANTED) {
                    ActivityCompat.requestPermissions(PictureActivity.this,
                            new String[]{Manifest.permission.CAMERA, Manifest.permission.WRITE_EXTERNAL_STORAGE},
                            MY_ADD_CASE_CALL_PHONE);
                } else {
                    try {
                        //有权限,去打开摄像头
                        takePhoto();
                    } catch (IOException e) {
                        e.printStackTrace();
                    }
                }
                dialog.dismiss();
                break;
            case R.id.photo:
                //"点击了相册";
                //  6.0之后动态申请权限 SD卡写入权限
                if (ContextCompat.checkSelfPermission(PictureActivity.this,
                        Manifest.permission.WRITE_EXTERNAL_STORAGE)
                        != PackageManager.PERMISSION_GRANTED) {
                    ActivityCompat.requestPermissions(PictureActivity.this,
                            new String[]{Manifest.permission.WRITE_EXTERNAL_STORAGE},
                            MY_ADD_CASE_CALL_PHONE2);

                } else {
                    //打开相册
                    choosePhoto();
                }
                dialog.dismiss();
                break;
            case R.id.cancel:
                dialog.dismiss();//关闭对话框
                break;
            default:break;
        }
    }

    @Override
    public void onPointerCaptureChanged(boolean hasCapture) {
        super.onPointerCaptureChanged(hasCapture);
    }
}
数据库部分
因为采用的办法是将bitmap转成String再存到数据库里,此时的String很长,如果数据库里的类型用varchar的话会报错,说数据太长,这时候只需将varchar换成text/longtext就行。(在实体类里申明picture时还是用string)
读取的时候,从数据库里读String,将String转成bitmap形式就行
补充:
刚才在尝试使用相机模式的时候,发现报错:Couldn’t find meta-data for provider with authority com.example.bobo.getphotodemo.fileprovider
解决办法:
在AndroidManifest.xml文件里添加:
<provider
            android:name="androidx.core.content.FileProvider"
            android:authorities="com.example.academymanageapp.ui.home.fileprovider"//这一栏的包名可以直接复制使用相机的activity最上面一行的包名
            android:exported="false"
            android:grantUriPermissions="true"
            >
            <meta-data
                android:name="android.support.FILE_PROVIDER_PATHS"
                android:resource="@xml/file_paths" />
        </provider>
然后创建xml/file_paths:
<?xml version="1.0" encoding="utf-8"?>
<resources xmlns:android="http://schemas.android.com/apk/res/android">
    <paths>
        <files-path
            name="files"
            path="." />
        <cache-path
            name="cache"
            path="." />
        <external-path
            name="camera_photos"
            path="." />
        <external-files-path
            name="external_file_path"
            path="." />
        <!--代表app 外部存储区域根目录下的文件 Context.getExternalCacheDir目录下的目录-->
        <external-cache-path
            name="external_cache_path"
            path="." />
        <external-path
            name="beta_external_path"
            path="." />
        <external-path
            name="beta_external_files_path"
            path="." />
        <!--配置root-path。这样子可以读取到sd卡和一些应用分身的目录,否则微信分身保存的图片,就会导致 java.lang.IllegalArgumentException: Failed to find configured root that contains /storage/emulated/999/tencent/MicroMsg/WeiXin/export1544062754693.jpg,在小米6的手机上微信分身有这个crash,华为没有
-->
        <root-path
            name="root_path"
            path="." />
    </paths>
</resources><!--<root-path/> :代表设备的根目录new File("/")-->
    <!--<files-path/> : 代表context.getFilesDir()-->
    <!--<cache-path/> : 代表context.getCacheDir()-->
    <!--<external-path/> : 代表Environment.getExternalStorageDirectory()-->
    <!--<external-files-path/> : 代表context.getExternalFilesDirs()-->
    <!--<external-cache-path/> : 代表getExternalCacheDirs()-->
    <!--path节点支持name和path两个属性,配置了path属性就相当于在相应路径下子目录,-->
    <!--https://www.jianshu.com/p/6463cfea9d7f-->
同时把url里的包名也修改对
然后就可以了
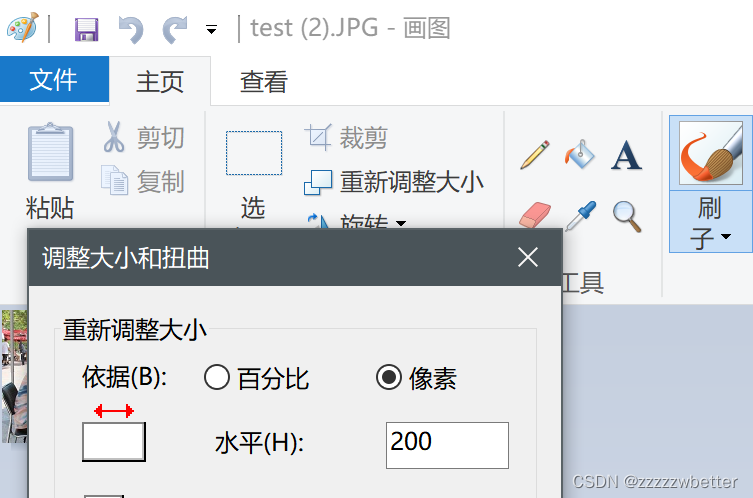
ps:用虚拟机测试的时候,尝试了几种办法,都没能成功地向相册里导入图片,但是我又需要照片显示到前端,于是换了个思路,将图片压缩后(使用编辑->重新调整大小->像素)再通过在线转码网站,将图片转成base64码后存进数据库里。
插入两个我觉得还蛮好用的网站:
在线图片压缩 - docsmall 在线图片压缩工具,在线图片压缩软件
将 JPG 编码为 Base64 | 免费在线将 JPG 转换为 Base64!
再补充
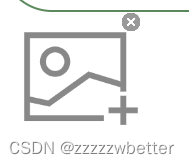
做到后面发现还应该给图片添加一个删除功能,效果图如下图:
即添加一个右上角的按钮,实现点击删除
实现:一开始以为要用浮动按钮,不然按钮(ImageButton)会被挡住,后来发现并不会。所以,只需要在图片按钮的右上角加一个imageButton就行。
然后点击删除弹出一个确认窗口,代码:
 //点击删除按钮删除图片
        deletePic.setOnClickListener(new View.OnClickListener() {
            @Override
            public void onClick(View view) {
                AlertDialog.Builder builder = new AlertDialog.Builder(AddActivity.this);
                builder.setTitle("确定要删除这张图片吗?")
                        .setPositiveButton("确定", new DialogInterface.OnClickListener() {
                            @RequiresApi(api = Build.VERSION_CODES.S)
                            @Override
                            public void onClick(DialogInterface dialogInterface, int i) {
                                //直接将存进数据库的东西变为null就行
                                pictureString = null;
                                //不加这一句的话,会变成空白
                                imageView.setImageDrawable(getResources().getDrawable(R.drawable.add_picture));
                            }
                        }).setNegativeButton("取消", new DialogInterface.OnClickListener() {
                    @Override
                    public void onClick(DialogInterface dialogInterface, int i) {
                        dialogInterface.dismiss();
                    }
                }).create();
                builder.show();
            }
        });
一开始遇到的问题,点击删除后,存进数据库的时候仍有数据,后来发现是因为使用setImageDrawable(null)函数可以将imagView显示的地方清空,但不能清空已获得的数据。思考一番,发现直接令存进数据库的pictureString为空就行。
第二个问题是,使用set函数使imagView处变成空再变成icon后,发现再次添加图片icon不会消失,后来发现不能使用set函数,应该用替换函数imageView.setImageDrawable(getResources().getDrawable(R.drawable.add_picture))。
再次补充
使头像呈圆形的方法:
- 方法一:使用CycleView 先添加依赖:
implementation 'de.hdodenhof:circleimageview:3.0.0'然后在布局文件里使用
    <de.hdodenhof.circleimageview.CircleImageView
        android:id="@+id/iv_avatar"
        android:layout_width="100dp"
        android:layout_height="100dp"
        app:layout_marginTopPercent="8%"
        android:layout_gravity="center_horizontal"
        android:src="@drawable/avatar"/>
注意这里使用的是src不是srcCompact也不是background,后两者不能正常显示图片
- 方法二:引用自定义样式的xml文件 创建自定义样式xml文件:(添加在drawable目录下)
<?xml version="1.0" encoding="utf-8"?>
<layer-list xmlns:android="http://schemas.android.com/apk/res/android">
    <!-- 图层1(oval) -->
    <!-- left,top,right,bottom定义为-10,是为了扩大oval,达到覆盖四角的效果 -->
    <item android:left="-10dp" android:top="-10dp" android:right="-10dp" android:bottom="-10dp">
        <shape
            android:shape="oval">
            <!-- oval_inner[内部] -->
            <solid android:color="#F00" />
            <!-- oval_outer[边线] ,使用时改成父控件颜色即可-->
            <stroke
                android:width="10dp"
                android:color="#fafafa" /><!--这里与头像后背景色一致-->
            <!-- oval_inner_size[大小(除去边线)] ,也是最终裸露出来的圆形图像区域-->
            <size
                android:height="50dp"
                android:width="50dp" />
            <!-- 使oval_inner透明,裸露出将来设置的背景图片 -->
            <gradient android:centerColor="#0000" />
        </shape>
    </item>
</layer-list>
然后在自定义xml里:
            android:background="@drawable/avatar"
            app:srcCompat="@drawable/circle_images"
备注:如果使用第一种方法,在代码里使用setImageDrawable可能不好使,这时候换成setBackgroundResource(引用样式)和setBackgroundDrawable(设置默认头像)就好。
版权归原作者 zzzzzwbetter 所有, 如有侵权,请联系我们删除。