文章目录
概要
内容主要包括部署前端项目,nginx安装配置,以及后端项目的打包
1、脚手架安装
vue init webpack
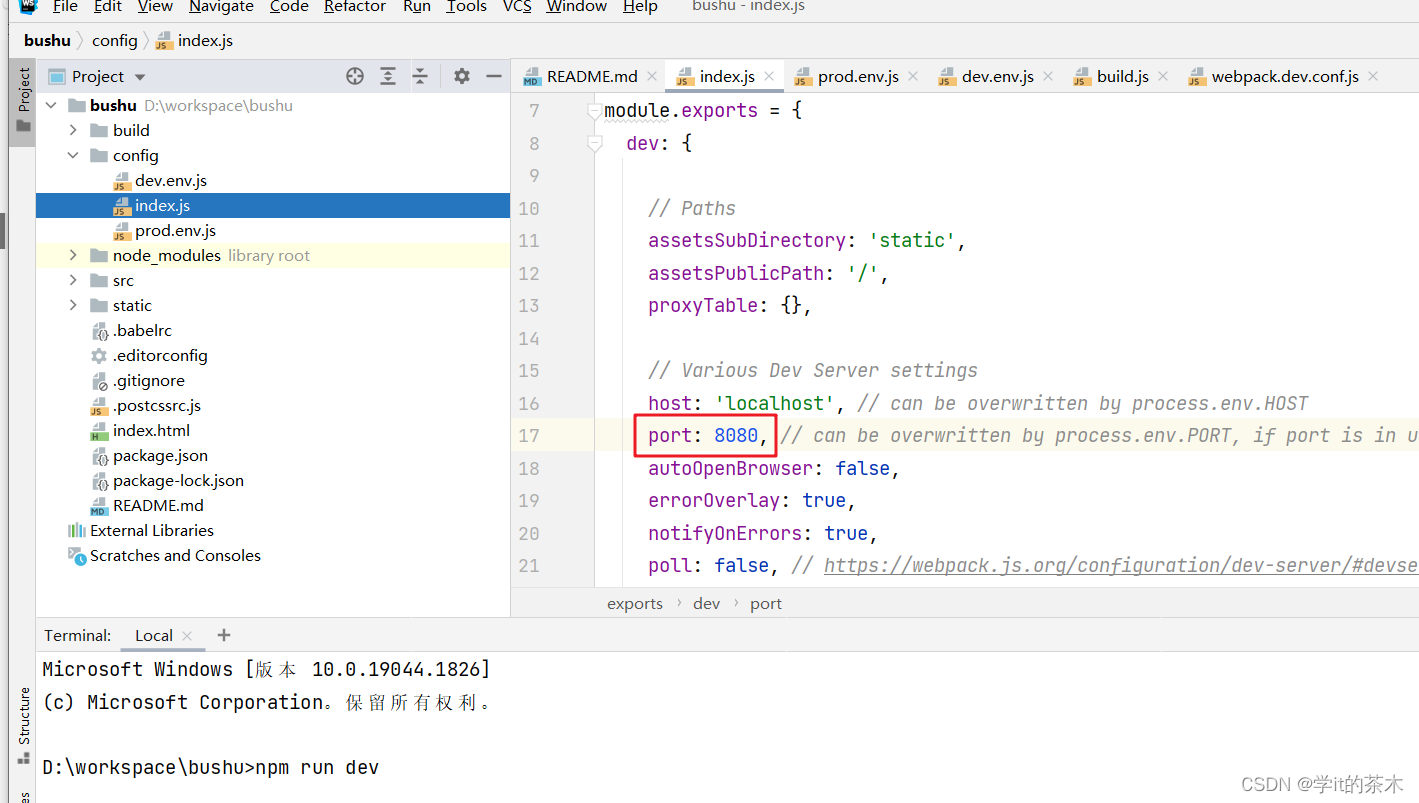
项目运行(默认端口8080)
npm run dev
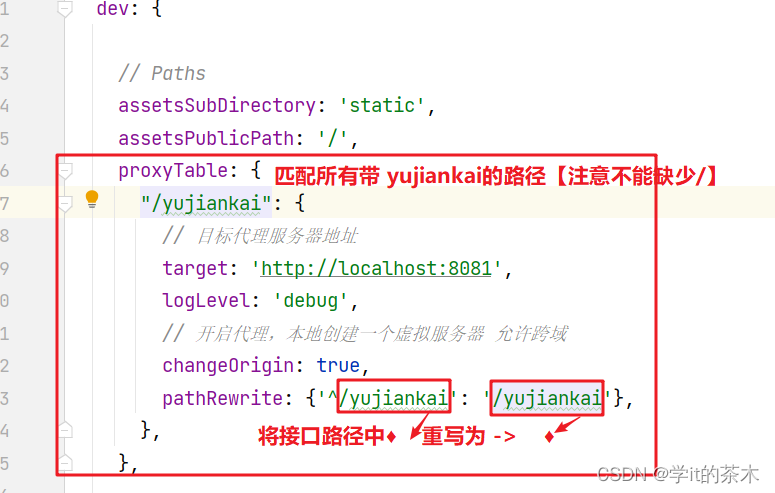
如果前后端分离项目,发出axiox请求实现跨域时,需要配置proxy代理
/**
 *  例如这个前端微服务项目访问后端接口时需要带/teacher 路径,而后端服务普遍是/member路径[前端通过端口号来区分后端项目,不能说给这个后端服务请求路径上添加上/tercher]
 *  这个时候,可通过配置proxy代理,在实现跨域的功能外,实现路径重写
 *  如下 后端有个接口如/member/query/getTeacherList
 *  前端通过访问
 *  http://localhost:9500/teacher/member/query/getTeacherList
 *  代理到 http://localhost:8081/member/query/getTeacherList
 */proxyTable:{"/teacher":{// 目标代理服务器地址target:'http://localhost:8081',logLevel:'debug',// 开启代理,本地创建一个虚拟服务器 允许跨域changeOrigin:true,pathRewrite:{'^/teacher':'/'},},},host:'localhost',port:9500,
2、项目打包部署
- 前端项目打包
npm run build
部署:将生成的dist文件夹拷贝至linux文件目录 如**/etc/dist**【配置nginx要用到】
- 后端项目打包【生成的jar包文件在target目录下】
前提条件:pom配置打包工具
<build><plugins><plugin><groupId>org.springframework.boot</groupId><artifactId>spring-boot-maven-plugin</artifactId><configuration><fork>true</fork></configuration></plugin></plugins></build>
① 通过mvn命令打包
mvn clean install -Dmaven.test.skip=true
-Dmaven.test.skip=true #跳过test模块编译和打包 避免打包出错#或者
mvn clean install -DskipTests
- DskipTests #不执行测试用例,但编译测试用例类生成相应的class文件至target/test-classes下
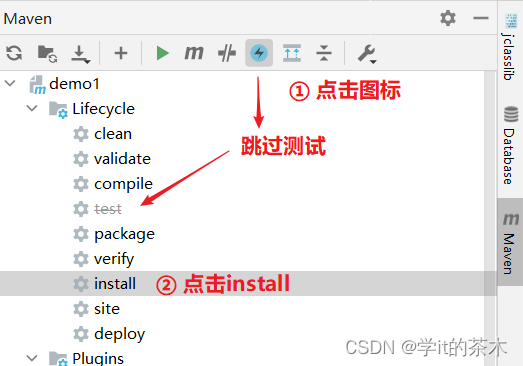
② 通过idea配置打包(最简单)
- ③ pom配置 打包跳过测试【测试模块正常编译】- 配置pom
<build><plugins><!-- maven 打包时跳过测试 --><plugin><groupId>org.apache.maven.plugins</groupId><artifactId>maven-surefire-plugin</artifactId><configuration><skip>true</skip></configuration></plugin></plugins></build>- 点击install按钮【可见上图】#上述控制台会输出[INFO] --- maven-surefire-plugin:3.0.0-M7:test (default-test) @ demo1 ---[INFO] Tests are skipped. #test跳过成功部署:将jar包拷贝至linux服务器上,运行cd jar包路径 java -jar jar包名称 2>&1&#后台运行
3、配置nginx
- 安装nginx
su rootyum install nginx#查看nginx是否安装成功nginx -v - 配置nginxnginx相关文件位置如下:
/usr/sbin/nginx:主程序/etc/nginx:配置文件所在路径/usr/share/nginx:静态文件所在路径/var/log/nginx:日志文件所在路径# 可通过whereis nginx命令查看:nginx: /usr/sbin/nginx /usr/lib64/nginx /etc/nginx /usr/share/nginx /usr/share/man/man3/nginx.3pm.gz /usr/share/man/man8/nginx.8.gz``````vim /etc/nginx/nginx.conf #修改以下内容``````server { listen 9000;#监听端口 server_name localhost;# Load configuration files for the default server block. include /etc/nginx/default.d/*.conf; location / { root /etc/dist;#前端文件放置的文件路径 index /index.html;#访问路径下的文件入口}#请求转发配置 location ~/yujiankai/{#匹配所有带有yujiankai的路径 proxy_pass http://服务器ip地址:8001;#转发服务器ip及端口} error_page 404 /40x.html;1 location = /40x.html { root html;} error_page 500502503504 /50x.html; location = /50x.html { root html;}}- 重启nginxnginx -t // 检验配置是否正确nginx -s reload // 重新加载修改的配置service nginx restart // 重新启动 - 访问nginx监听端口9000
服务器ip地址:9000 #跳转/etc/dist/index.html
【额外】利用docker安装nginx
前提:
docker pull nginx #拉去镜像docker run --name=mynginx -p 9000:80 -d nginx #启动nginxdockerexec -it mynginx /bin/bash #进入nginx容器cd /etc/nginx #进入配置文件目录#docker容器可看作微型linux系统,剩余操作类似上述操作
docker run参数说明
--name 容器名称
-p 挂载端口 服务器9000挂载到容器的80端口(nginx默认端口)
-d 后台运行
注意:配置端口时,记得网关放行
END
版权归原作者 学it的茶木 所有, 如有侵权,请联系我们删除。