

@作者 : SYFStrive

@博客首页 : HomePage
📜: 微信小程序
📌:个人社区(欢迎大佬们加入) 👉:社区链接🔗
📌:觉得文章不错可以点点关注 👉:专栏连接🔗
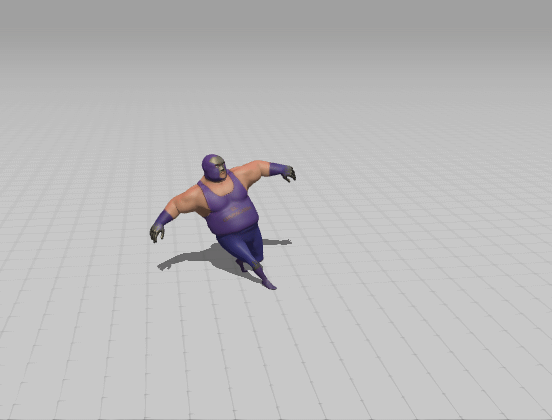
💃:感谢支持,学累了可以先看小段由小胖给大家带来的街舞😀
👉
微信小程序(🔥)


目录
数据、方法和属性
1、 data 数据
组件模板渲染的私有数据如 👇
/**
 * 组件的方法列表
 */methods:{addCount(){this.setData({count:this.data.count+1})this._TiShi()},_TiShi(){
        wx.showToast({title:'count是'+this.data.count
        })}},
2、methods 方法
在小程序组件中,事件处理函数和自定义方法需要定义到 methods 节点中,
示例代码如 👇
/**
 * 组件的方法列表
 */methods:{addCount(){this.setData({count:this.data.count+1})this._TiShi()},_TiShi(){
        wx.showToast({title:'count是'+this.data.count
        })}},
3、properties 属性
在小程序组件中,properties 是组件的对外属性,用来接收外界传递到组件中的数据。
示例代码如 👇
WXML<text1 max="5"></text1>//默认值是15 这里设置最大值为5,覆盖了最大值COMPONENT<view>添加的值为:{{count}}</view><button bindtap="addCount">点击按钮</button>JS/**
 * 组件的属性列表
 */properties:{max:{type:Number,value:15}},/**
 * 组件的方法列表
 */methods:{addCount(){if(this.data.count>=this.properties.max)return;this.setData({count:this.data.count+1})this._TiShi()},//提示框_TiShi(){
        wx.showToast({title:'count是'+this.data.count
        })}},
4、 data 和 properties 的区别
在小程序的组件中,properties 属性和 data 数据的用法相同,它们都是可读可写的 区别如 👇
- data 更倾向于存储组件的私有数据
- properties 更倾向于存储外界传递到组件中的数据
测试两者是否相等如 👇
/**
 * 组件的属性列表
 */properties:{max:{type:Number,value:15}},/**
 * 组件的初始数据
 */data:{count:1},proData(){
    console.log(this.data.max);
    console.log(this.data.count);
    console.log(this.data===this.properties);}
5、使用 setData 修改 properties 的值
由于 data 数据和 properties 属性在本质上没有任何区别,因此 properties 属性的值也可以用于页面渲染,或使用 setData 为 properties 中的属性重新赋值
示例代码如 👇
properties:{max:{type:Number,value:15
  }},
methods:{addCount(){if(this.data.count>=this.properties.max) return;this.setData({count:this.data.count+1,max:this.properties.max+1
      })},}
数据监听器
1、什么是数据监听器
数据监听器用于监听和响应任何属性和数据字段的变化,从而执行特定的操作。它的作用类似于 vue 中的watch 侦听器。在小程序组件中
数据监听器的基本语法格式如 👇
'字段A','字段B':function(A值,B值){}
2、监听对象属性的变化
数据监听器支持监听对象中单个或多个属性的变化
代码实习
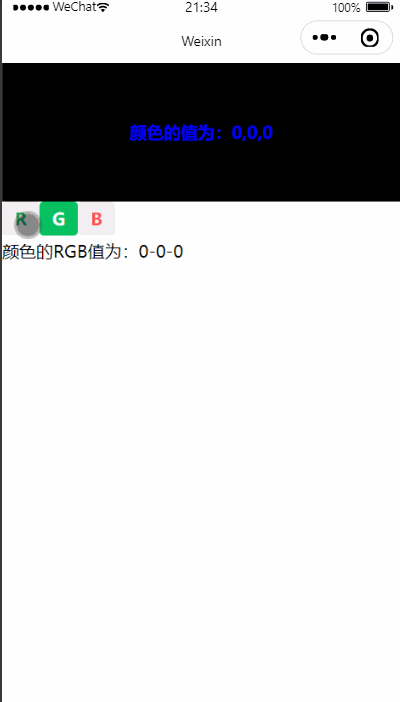
WXML-------------
<view class="ColorBox" style="background-color: rgb({{funllColor}});">颜色的值为:{{funllColor}}</view>

<button size="mini" bindtap="RValue" type="default">R</button>
<button size="mini" bindtap="GValue" type="primary">G</button>
<button size="mini" bindtap="BValue" type="warn">B</button>

<view>
颜色的RGB值为:{{rgbValue.r}}-{{rgbValue.g}}-{{rgbValue.b}}</view>

WXSS-------------
<view class="ColorBox" style="background-color: rgb({{funllColor}});">颜色的值为:{{funllColor}}</view>

<button size="mini" bindtap="RValue" type="default">R</button>
<button size="mini" bindtap="GValue" type="primary">G</button>
<button size="mini" bindtap="BValue" type="warn">B</button>

<view>
颜色的RGB值为:{{rgbValue.r}}-{{rgbValue.g}}-{{rgbValue.b}}</view>

WXJS-------------
// components/text1/text1.js
Component({/**
   * 组件的属性列表
   */properties:{},/**
   * 组件的初始数据
   */data:{rgbValue:{r:0,g:0,b:0
      },funllColor:'0,0,0'},

  observers:{"rgbValue.r, rgbValue.g,rgbValue.b":function(r,g,b){this.setData({funllColor:`${r},${g},${b}`
      })}},/**
   * 组件的方法列表
   */methods:{RValue(){this.setData({"rgbValue.r":this.data.rgbValue.g+5 >255 ? 255: this.data.rgbValue.r+5
      })},

  GValue(){this.setData({"rgbValue.g":this.data.rgbValue.g+5 >255 ? 255: this.data.rgbValue.g+5
    })},
  BValue(){this.setData({"rgbValue.b":this.data.rgbValue.b+5>255 ? 255: this.data.rgbValue.b+5
    })},}})
如 👇
最后
本文到这里就结束了,大佬们的支持是我持续更新的最大动力,希望这篇文章能帮到大家💪相关专栏连接🔗

下篇文章再见ヾ( ̄▽ ̄)ByeBye
本文转载自: https://blog.csdn.net/m0_61490399/article/details/127041037
版权归原作者 SYFStrive 所有, 如有侵权,请联系我们删除。
版权归原作者 SYFStrive 所有, 如有侵权,请联系我们删除。