
文章目录

⭐前言
大家好,我是yma16,本文分享关于vue3 + fastapi 实现选择目录文件上传到服务器指定位置。
vue3系列相关文章:
前端vue2、vue3去掉url路由“ # ”号——nginx配置
csdn新星计划vue3+ts+antd赛道——利用inscode搭建vue3(ts)+antd前端模板
认识vite_vue3 初始化项目到打包
python_selenuim获取csdn新星赛道选手所在城市用echarts地图显示
python系列文章:
python爬虫_基本数据类型
python爬虫_函数的使用
python爬虫_requests的使用
python爬虫_selenuim可视化质量分
python爬虫_django+vue3可视化csdn用户质量分
python爬虫_正则表达式获取天气预报并用echarts折线图显示
python爬虫_requests获取bilibili锻刀村系列的字幕并用分词划分可视化词云图展示
python爬虫_selenuim登录个人markdown博客站点
python爬虫_requests获取小黄人表情保存到文件夹
python_selenuim获取csdn新星赛道选手所在城市用echarts地图显示
💖 技术栈选择
前端:vue3 + ts + antd
后端:python + fastapi
vue3优势
Vue3相比较于Vue2有以下几个优势:
- 更快的渲染速度:Vue3通过重新设计响应式系统和虚拟DOM,可以实现更快的渲染速度。在内存使用和性能方面,Vue3比Vue2更加高效。
- 更好的TypeScript支持:Vue3更好地支持TypeScript,TypeScript在Vue3中的使用更加直接、正式、稳定,并且类型推导更加准确。
- 更好的组件化开发:Vue3可以更方便地编写组件,将模板、脚本和样式分离开来,使得代码更加易读易维护。
- 更好的开发体验:Vue3增加了很多新的特性,如Composition API、Teleport、Suspense等,这些特性使得开发过程更加简单、便捷、灵活。
- 更多的生态支持:随着Vue3的面世,越来越多的插件和库开始支持Vue3,例如Vue Router、Vuex等,这些生态工具的发展将有助于Vue3的快速发展。
fastapi优势
FastAPI的优势主要体现在以下几个方面:
- 高性能:FastAPI使用异步编程模型,使用基于事件循环的异步处理请求,可以轻松处理大量的并发请求,提高服务器性能。
- 简单易用的API开发:FastAPI能够自动生成API文档,因此开发者可以通过它来快速地编写API,而不必花费大量时间去编写文档。
- 高可靠性:FastAPI 自动进行类型检查,能够避免类型错误引起的运行时错误,提高了API的稳定性。
- 支持原生Python语法:FastAPI可以使用Python原生语法来编写代码,不需要学习新的语言,可以更方便地使用Python的生态系统。
- 兼容多种前端框架:FastAPI 可以与多种前端框架配合使用,包括React、Angular、Vue.js等,提供了更大的开发自由度。
- 广泛的社区支持:FastAPI社区非常活跃,拥有大量的开发者和用户,提供了丰富的资源和支持。
⭐前端页面搭建
布局:
上下结构
上方为选择目录
下方为选择文件夹
实现效果图如下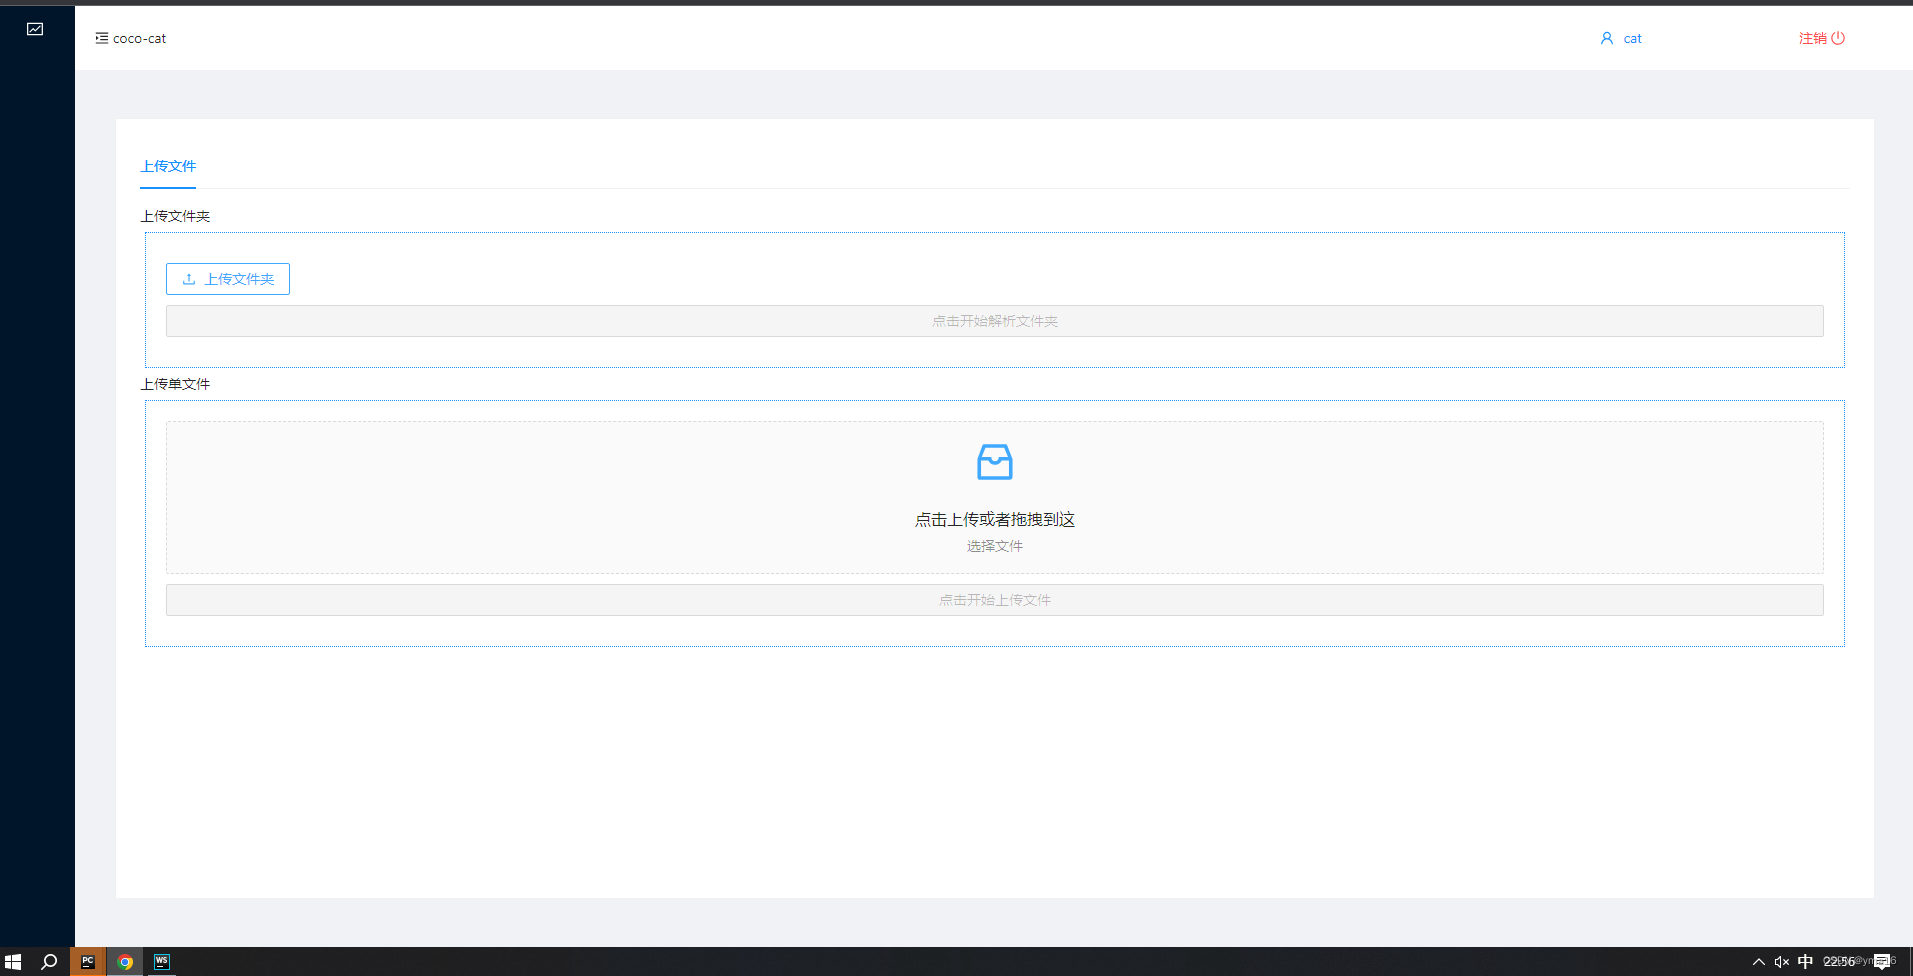
vue3 语法糖代码实现
<scriptlang="ts"setup>import{ ref,reactive,computed }from'vue';import{ InboxOutlined }from'@ant-design/icons-vue';import{ message }from'ant-design-vue';import{ uploadFile,uploadUrl }from"../../service/gpt/index";import{ UploadOutlined }from'@ant-design/icons-vue';conststate:any=reactive({fileList:[],loading:false,text:'',dirList:[],dirPath:'',customFile:null,activeKey:'1',movieUrl:''});constupUrl=async()=>{
    state.loading=truetry{const res=awaituploadUrl({url:state.movieUrl
        })
        console.log('res',res)}catch(e){
        message.error(JSON.stringify(e))}finally{setTimeout(()=>{
            state.loading=false},200)}}constremove=(e:any)=>{
  console.log('drop file',e);
    state.fileList=[]}constremoveDir=(e:any)=>{
    state.dirList=state.dirList.filter((file:any)=>file.uid!==e.uid)}constcustomRequesHandle=(e:any)=>{
    console.log(e,'custom')}constbeforeUpload=(file:any)=>{
    console.log('file before',file)
    state.fileList=[file]returnfalse;};constbeforeUploadDir=(file:any)=>{
    state.dirList.push(file)returnfalse;};constuploadSingleFile=async()=>{
    state.loading=true
    console.log(typeof state.fileList[0],'file 类型')try{const formData=newFormData();
        formData.append('file',state.fileList[0])const res=awaituploadFile(formData)
        console.log('res',res)}catch(e){
        message.error(JSON.stringify(e))}finally{setTimeout(()=>{
            state.loading=false},200)}}const upBtnDisabled=computed(()=>{return state.fileList.length===0})constchange=(e:any)=>{
    console.log('change e',e)}constupDir=async()=>{if(state.dirList.length===0){return message.warning('请选择文件夹!')}
    state.loading=trueconstparamsData:any={dirList:state.dirList,dirPath:state.dirPath,}try{
        state.dirList.forEach(async(file:any)=>{try{const formData=newFormData();
                formData.append('file',file)const res=awaituploadFile(formData)
                console.log('res',res)}catch(r){
                message.error(JSON.stringify(r))}})}catch(e){
        message.error(JSON.stringify(e))}finally{setTimeout(()=>{
            state.loading=false},200)}}constpreviewDirFile=async(file:any)=>{returnnewPromise(resolve=>resolve(false))}</script><template><div><a-spin:spinning="state.loading"tip="upload..."><divclass="header-tools"></div><a-tabsv-model:activeKey="state.activeKey"><a-tab-panekey="1"tab="上传文件"><div>
                        上传文件夹
                       <divstyle="margin: 5px;border: 1px dotted #1890ff;padding: 20px"><divstyle="margin: 10px 0;max-height: 200px;overflow: auto"><a-upload:before-upload="beforeUploadDir"v-model:file-list="state.dirList"list-type="picture"@remove="removeDir"directory><a-button><upload-outlined></upload-outlined>
                                       上传文件夹
                                   </a-button></a-upload><div></div></div><divstyle="margin:10px 0"><a-buttontype="primary"block@click="upDir":disabled="state.dirList.length===0">点击开始解析文件夹</a-button></div></div>

                        上传单文件
                        <divstyle="margin: 5px;border: 1px dotted #1890ff;padding: 20px"><div><a-upload-dragger:file-list="state.fileList"list-type="picture":multiple="false":before-upload="beforeUpload"@remove="remove"@change="change"><pclass="ant-upload-drag-icon"><inbox-outlined></inbox-outlined></p><pclass="ant-upload-text">点击上传或者拖拽到这</p><pclass="ant-upload-hint">
                                    选择文件
                                </p></a-upload-dragger></div><divstyle="margin:10px 0"><a-buttontype="primary"block@click="uploadSingleFile":disabled="upBtnDisabled">点击开始上传文件</a-button></div></div></div></a-tab-pane></a-tabs></a-spin></div></template><style>.header-tools{text-align: center;font-size: 24px;font-weight: bold;}.content-box{}.des{margin:20px 0;}</style>
💖 调整请求content-type传递formData
axios封装
import axios from"axios";// 实例constcreateInstance=(baseURL:string)=>{return axios.create({baseURL:baseURL,timeout:10000,headers:{'X-Custom-Header':'yma16'}})};// @ts-ignoreconsthttp:any=createInstance('');// 添加请求拦截器
http.interceptors.request.use(function(config:any){// 在发送请求之前做些什么return config;},function(error:any){// 对请求错误做些什么return Promise.reject(error);});// 添加响应拦截器
http.interceptors.response.use(function(response:any){// 2xx 范围内的状态码都会触发该函数。// 对响应数据做点什么return response;},function(error:any){// 超出 2xx 范围的状态码都会触发该函数。// 对响应错误做点什么return Promise.reject(error);});// 文件上传constcreateUploadInstance=(baseURL:string)=>{return axios.create({baseURL:baseURL,timeout:10000,headers:{"Content-Type":"multipart/form-data"}})};// @ts-ignoreconstuploadHttp:any=createUploadInstance('');// 添加请求拦截器
uploadHttp.interceptors.request.use(function(config:any){// 在发送请求之前做些什么return config;},function(error:any){// 对请求错误做些什么return Promise.reject(error);});// 添加响应拦截器
uploadHttp.interceptors.response.use(function(response:any){// 2xx 范围内的状态码都会触发该函数。// 对响应数据做点什么return response;},function(error:any){// 超出 2xx 范围的状态码都会触发该函数。// 对响应错误做点什么return Promise.reject(error);});export{http,uploadHttp};
service对接后端
import{uploadHttp}from"../../http/index";exportconstuploadFile:any=(formData: any)=>{return uploadHttp.post("/api/uploadFile/action", formData);};
⭐后端接口实现
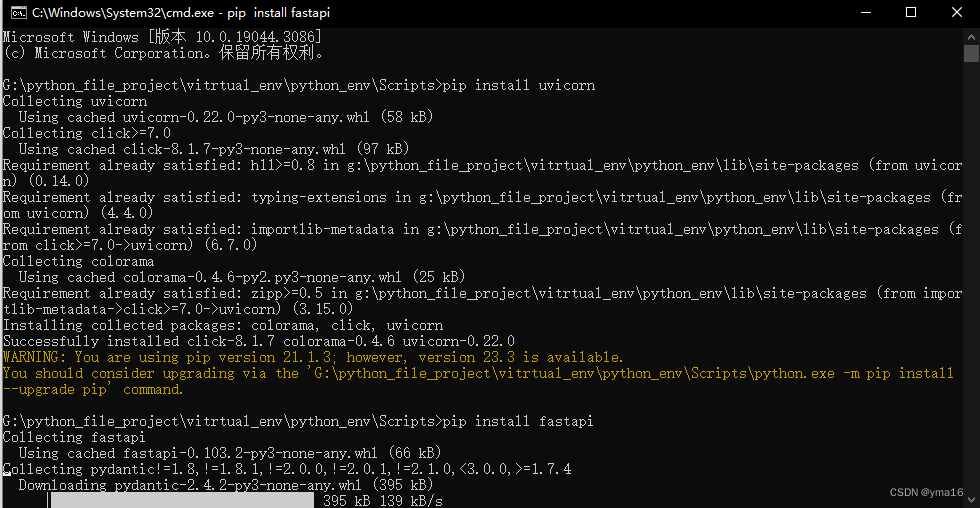
安装环境
pip install uvicorn
pip install fastapi
pip install python-multipart
上传单个文件接口实现:
from fastapi import FastAPI, status, File, Form, UploadFile
from fastapi import FastAPI, status, File, Form, UploadFile
from fastapi.middleware.cors import CORSMiddleware
import os

app = FastAPI()# 跨域配置
origins =["http://localhost:3000",]
app.add_middleware(
    CORSMiddleware,
    allow_origins=origins,
    allow_credentials=True,
    allow_methods=["*"],
    allow_headers=["*"],)@app.get("/api")asyncdefroot():return{"data":"fast api!"}# 上传文件@app.post("/api/uploadFile/action")asyncdefcreate_file(file:UploadFile
):
    writeBytes('./media',file)return{'code':200,"msg":'success'}# 将file写入dirs目录文件defwriteBytes(dirs,file):
    bytesFile=file.file.read()
    filename=file.filename
    ifnot os.path.exists(dirs):
        os.makedirs(dirs)withopen(dirs+'/'+ filename,"wb")as f:
        f.write(bytesFile)
uvicorn运行fastapi
uvicorn server.main:app --reload--port7777
💖 swagger文档测试接口
swagger文档地址:
http://ip:port/docs
上传成功!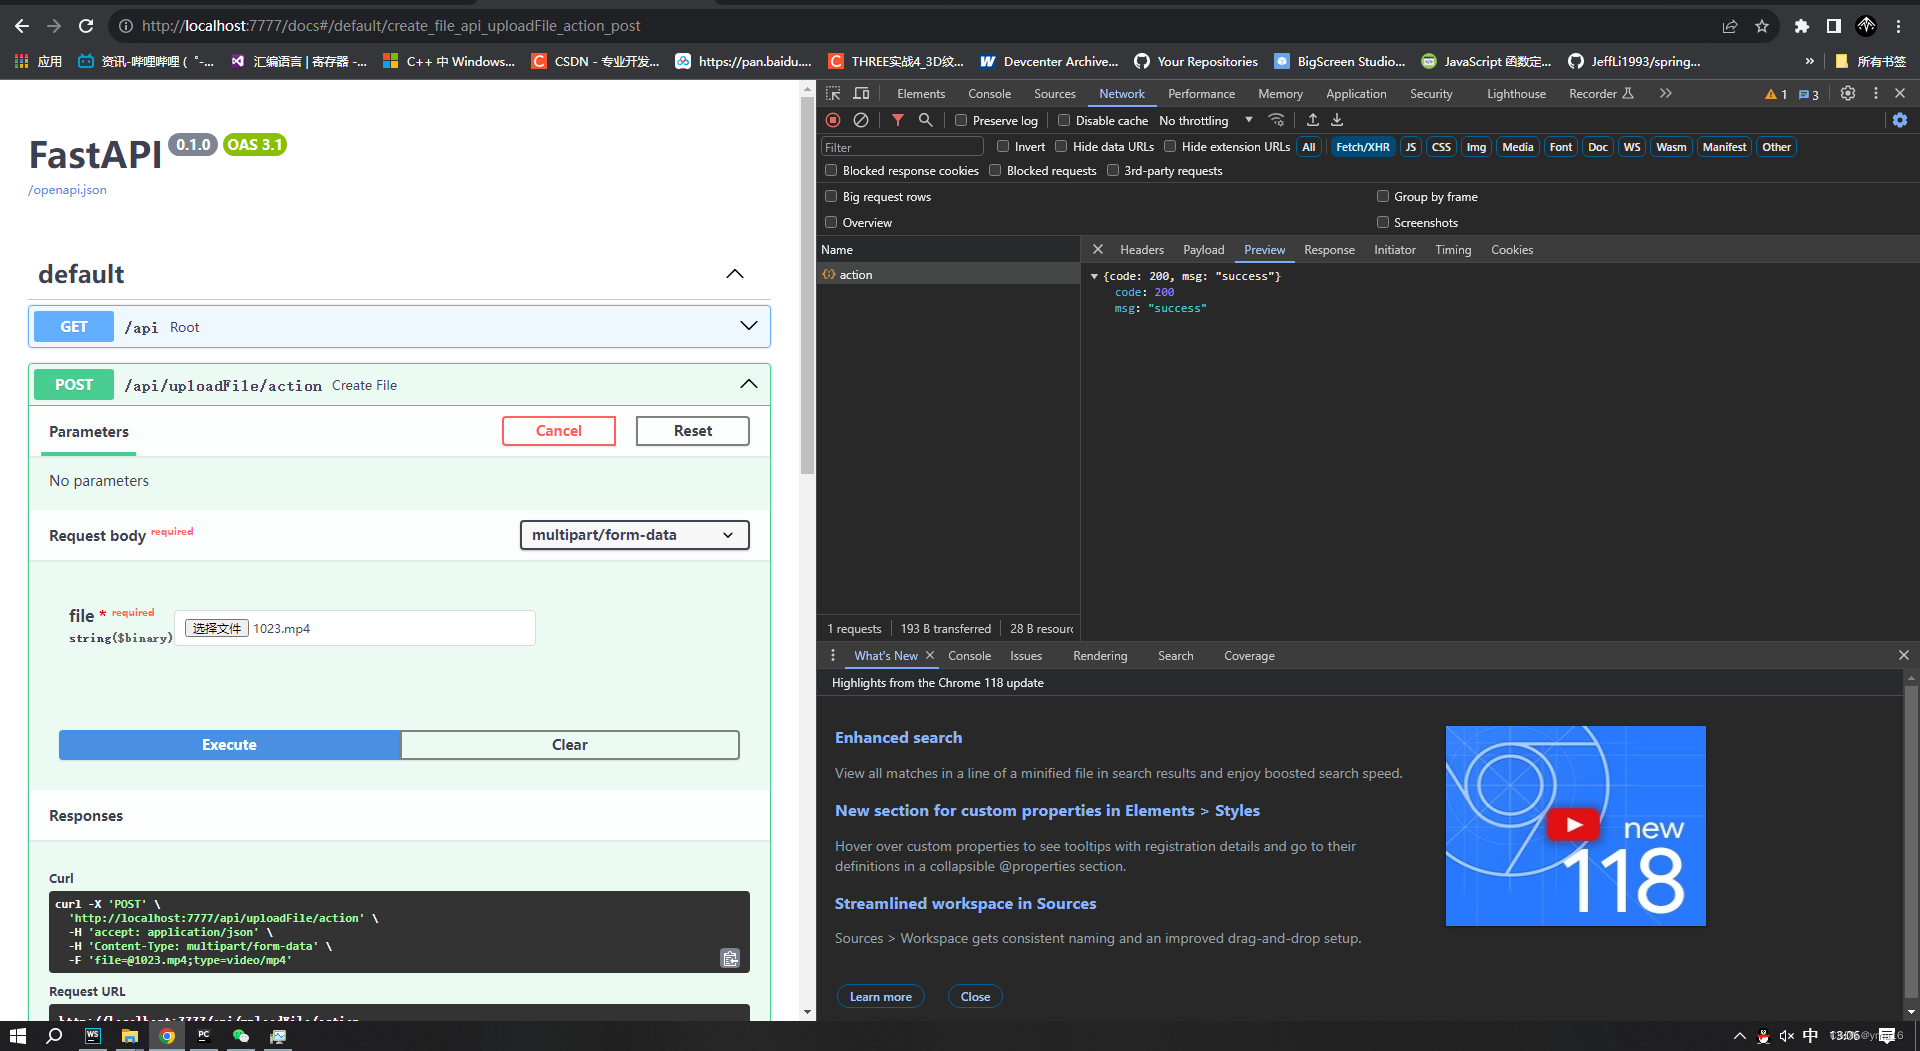
⭐前后端实现效果
💖 上传单个文件

💖 上传目录文件

上传目录文件的接口实现:
- file为二进制文件
- dir为目录名称
- name为完整的文件名称
# 上传目录文件@app.post("/api/uploadDirFile/action")asyncdefuploadDirFile(file:UploadFile,dir:str=Form(),
    name:str=Form()):print(dir,'dir_____________')
    writeBytes('./media/'+dir,name,file)return{'code':200,"msg":'success'}# 将二进制数据写入目录文件defwriteBytes(dirs,name,file):
    bytesFile=file.file.read()
    filename=name
    ifnot os.path.exists(dirs):
        os.makedirs(dirs)withopen(dirs+'/'+ filename,"wb")as f:
        f.write(bytesFile)
⭐总结
文件上传注意事项
前端:
- 请求头配置
headers: {"Content-Type": "multipart/form-data"} - 参数传递使用
new FormData()
后端:
- 接受参数使用 Uploadfile格式
- 解析文件内容名称包括类型按格式写入文件
multipart/form-data
multipart/form-data 是一种常用的 HTTP 请求方法,通常用于上传文件或大量数据。它将请求的数据分成多个部分(part),每一部分使用一个 boundary 分隔符来分开,每个部分包含一个头部和一个内容体,头部描述了该部分的属性,如数据类型、数据编码等。在 HTTP 消息体中,每个部分之间必须以 “–boundary\r\n” 开始,以 “–boundary–\r\n” 结束,即在结尾处添加额外的 “–” 标记。在客户端使用该方法请求时,需要明确指定请求头中的 Content-Type 为 multipart/form-data。服务端接收到该请求后,需要解析出每个部分中的请求数据。
⭐结束
本文分享到这结束,如有错误或者不足之处欢迎指出!
👍 点赞,是我创作的动力!
⭐️ 收藏,是我努力的方向!
✏️ 评论,是我进步的财富!
💖 感谢你的阅读!
版权归原作者 yma16 所有, 如有侵权,请联系我们删除。