
本文将介绍如何使用 Flower 构建现有机器学习工作的联邦学习版本。我们将使用 PyTorch 在 CIFAR-10 数据集上训练卷积神经网络,然后将展示如何修改训练代码以联邦的方式运行训练。

什么是联邦学习?
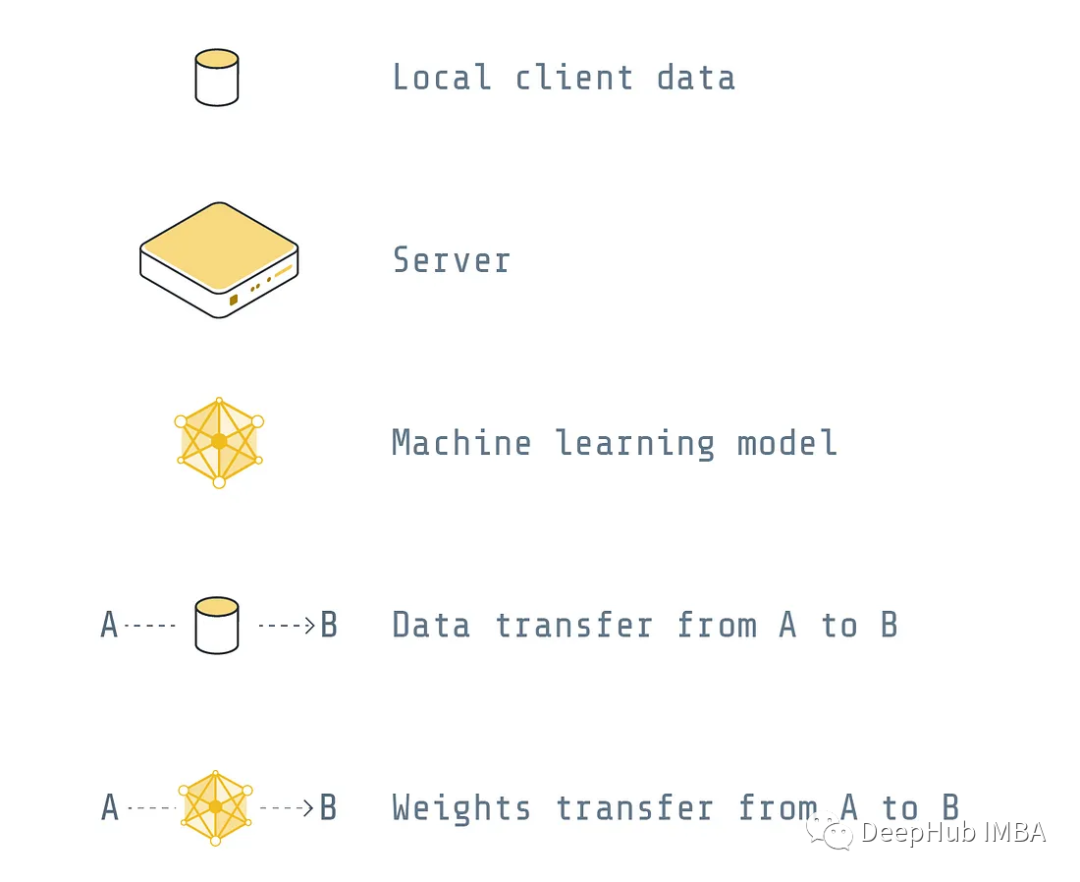
我们将在这篇文章中区分两种主要方法:集中式和联邦式(本文的图例表示如下)
集中式
每个设备都会将其数据发送到全局服务器,然后服务器将使用它来训练全局模型。训练完成后服务器将经过训练的全局模型发送到设备。
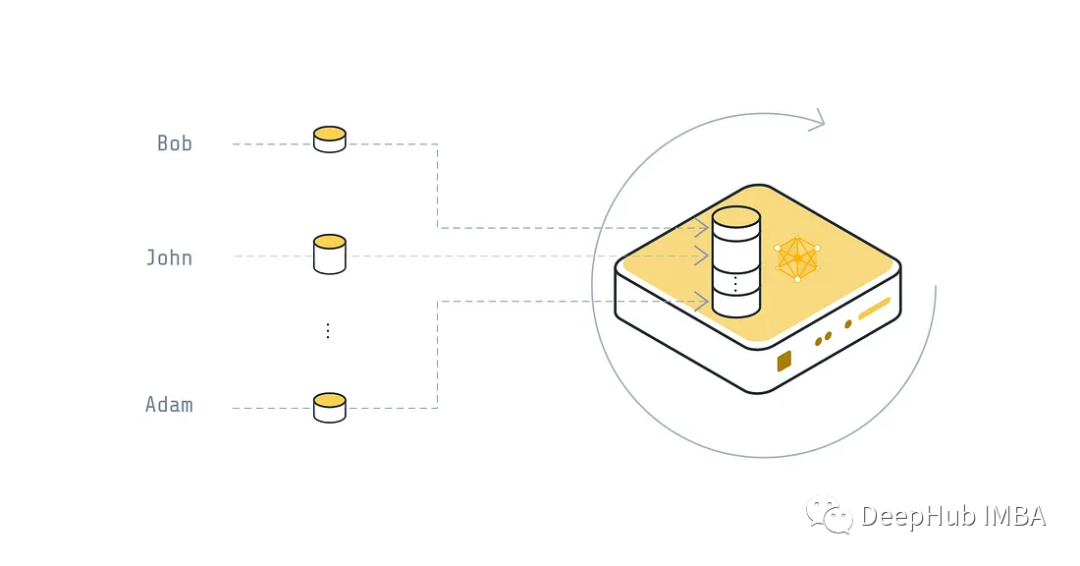
这并不是我们所说的联邦学习的解决方案,传输了数据,会带来很多问题
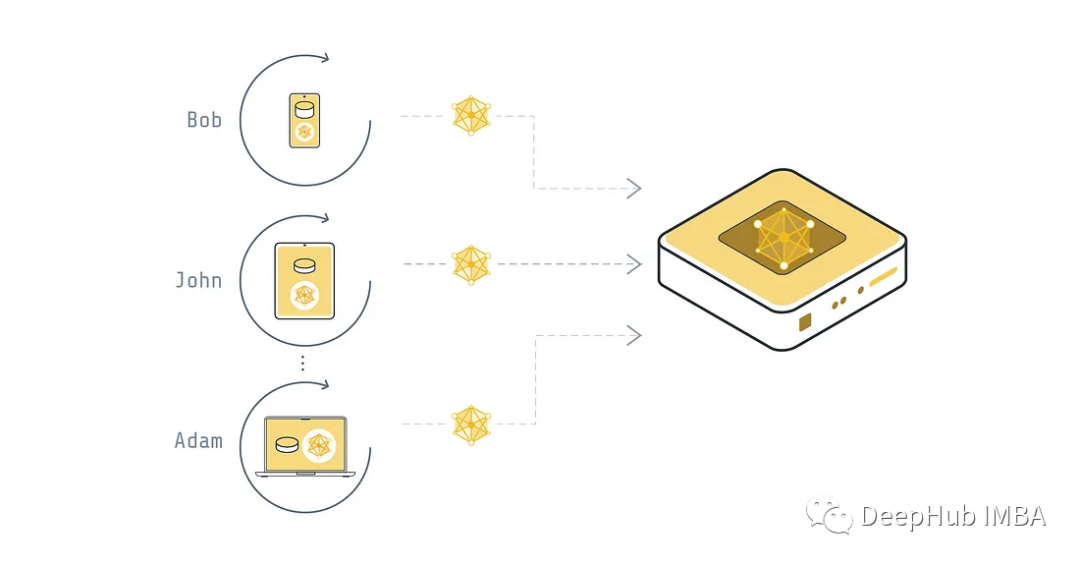
联邦式
每个设备都不会与服务器共享数据,而是将数据保存在本地并用它来训练模型。模型的权重会被发送到全局服务器,然后全局服务器会将收到的所有权重聚合到一个全局模型中,服务器最终将经过训练的全局模型发送到设备。这种方式是一般形式的联邦学习,它的主要优点是保护用户的隐私,避免数据泄露。
我们先完成集中式训练代码,因为该训练模式基本上与传统的PyTorch 训练相同,然后再将其改为联邦学习的方式。
集中式 PyTorch 训练
让我们创建一个名为 cifar.py 的新文件,其中包含在 CIFAR-10 上进行传统(集中式)训练所需的所有组件。首先,需要导入所有的包(例如 torch 和 torchvision)。我们现在没有导入任何用于联邦学习的包。可以稍后再进行导入。
 fromtypingimportTuple, Dict
 importtorch
 importtorch.nnasnn
 importtorch.nn.functionalasF
 importtorchvision
 importtorchvision.transformsastransforms
 fromtorchimportTensor
 fromtorchvision.datasetsimportCIFAR10
模型架构(一个非常简单的卷积神经网络)在 Net() 类中定义。
 classNet(nn.Module):
     def__init__(self) ->None:
         super(Net, self).__init__()
         self.conv1=nn.Conv2d(3, 6, 5)
         self.pool=nn.MaxPool2d(2, 2)
         self.conv2=nn.Conv2d(6, 16, 5)
         self.fc1=nn.Linear(16*5*5, 120)
         self.fc2=nn.Linear(120, 84)
         self.fc3=nn.Linear(84, 10)
     defforward(self, x: Tensor) ->Tensor:
         x=self.pool(F.relu(self.conv1(x)))
         x=self.pool(F.relu(self.conv2(x)))
         x=x.view(-1, 16*5*5)
         x=F.relu(self.fc1(x))
         x=F.relu(self.fc2(x))
         x=self.fc3(x)
         returnx
load_data() 函数加载 CIFAR-10 训练和测试集。转换在加载后规范化了数据。
 DATA_ROOT="~/data/cifar-10"

 defload_data() ->Tuple[
     torch.utils.data.DataLoader,
     torch.utils.data.DataLoader,
     Dict
 ]:
     """Load CIFAR-10 (training and test set)."""
     transform=transforms.Compose(
         [transforms.ToTensor(),
          transforms.Normalize(
               (0.5, 0.5, 0.5),
               (0.5, 0.5, 0.5)
          )
         ]
     )
     trainset=CIFAR10(DATA_ROOT,
                        train=True,
                        download=True,
                        transform=transform)
     trainloader=torch.utils.data.DataLoader(trainset,
                                               batch_size=32,
                                               shuffle=True)
     testset=CIFAR10(DATA_ROOT,
                       train=False,
                       download=True,
                       transform=transform)
     testloader=torch.utils.data.DataLoader(testset,
                                              batch_size=32,
                                              shuffle=False)
     num_examples= {"trainset" : len(trainset), "testset" : len(testset)}
     returntrainloader, testloader, num_examples
我们现在需要定义训练函数 train(),它循环遍历训练集、计算损失、反向传播,然后对每批训练执行一个优化步骤。
模型的评估在函数 test() 中定义。该函数遍历所有测试样本并根据测试数据集测量模型的损失。
 deftrain(
     net: Net,
     trainloader: torch.utils.data.DataLoader,
     epochs: int,
     device: torch.device,
 ) ->None:
     """Train the network."""
     # Define loss and optimizer
     criterion=nn.CrossEntropyLoss()
     optimizer=torch.optim.SGD(net.parameters(), lr=0.001, momentum=0.9)
     print(f"Training {epochs} epoch(s) w/ {len(trainloader)} batches each")
     # Train the network
     forepochinrange(epochs):  # loop over the dataset multiple times
         running_loss=0.0
         fori, datainenumerate(trainloader, 0):
             images, labels=data[0].to(device), data[1].to(device)
             # zero the parameter gradients
             optimizer.zero_grad()
             # forward + backward + optimize
             outputs=net(images)
             loss=criterion(outputs, labels)
             loss.backward()
             optimizer.step()
             # print statistics
             running_loss+=loss.item()
             ifi%100==99:  # print every 100 mini-batches
                 print("[%d, %5d] loss: %.3f"% (epoch+1,
                                                 i+1,
                                                 running_loss/2000))
                 running_loss=0.0
 deftest(
     net: Net,
     testloader: torch.utils.data.DataLoader,
     device: torch.device,
 ) ->Tuple[float, float]:
     """Validate the network on the entire test set."""
     criterion=nn.CrossEntropyLoss()
     correct=0
     total=0
     loss=0.0
     withtorch.no_grad():
         fordataintestloader:
             images, labels=data[0].to(device), data[1].to(device)
             outputs=net(images)
             loss+=criterion(outputs, labels).item()
             _, predicted=torch.max(outputs.data, 1)
             total+=labels.size(0)
             correct+= (predicted==labels).sum().item()
     accuracy=correct/total
     returnloss, accuracy
定义了数据加载、模型架构、训练和评估后,我们可以将所有内容放在一起并在 CIFAR-10 上训练我们的 CNN。
 defmain():
     DEVICE=torch.device("cuda:0"iftorch.cuda.is_available() else"cpu")
     print("Centralized PyTorch training")
     print("Load data")
     trainloader, testloader, _=load_data()
     print("Start training")
     net=Net().to(DEVICE)
     train(net=net, trainloader=trainloader, epochs=2, device=DEVICE)
     print("Evaluate model")
     loss, accuracy=test(net=net, testloader=testloader, device=DEVICE)
     print("Loss: ", loss)
     print("Accuracy: ", accuracy)

 if__name__=="__main__":
     main()
现在就可以直接运行了:
python3 cifar.py
到目前为止,如果你以前使用过 PyTorch,这一切看起来应该相当熟悉。下面开始进入正题,我们开始构建一个简单的联邦学习系统,该系统由一个服务器和两个客户端组成。
PyTorch的联邦学习
我们已经在单个数据集 (CIFAR-10) 上训练了模型, 我们称之为集中学习。这种集中学习的概念是我们以前常用的方式。通常,如果你想以联邦学习的方式运行,则必须更改大部分代码并从头开始设置所有内容。但是,这里有一个包 Flower,它可以将预先存在的代码以联邦学习运行(当然需要少量的修改)。
既然是联邦学习,我们必须有服务器,然后 cifar.py 代码也需要连接到服务器的客户端。服务器向客户端发送模型参数。客户端运行训练并更新参数。更新后的参数被发送回服务器,服务器对所有接收到的参数更新进行平均,这就是联邦学习的一个简单的流程。

我们这个例子是由一台服务器和两个客户端组成。我们先设置server.py。服务端需要导入Flower包flwr,然后使用 start_server 函数启动服务器并告诉它执行三轮联邦学习。
 importflwrasfl

 if__name__=="__main__":
     fl.server.start_server(
         server_address="0.0.0.0:8080",
         config=fl.server.ServerConfig(num_rounds=3)
      )
然后就可以启动服务器了:
python3 server.py
我们还要在 client.py 中定义客户端逻辑,主要就是将之前在 cifar.py 中定义的集中训练的代码进行整合:
 fromcollectionsimportOrderedDict
 fromtypingimportDict, List, Tuple
 importnumpyasnp
 importtorch
 importcifar
 importflwrasfl

 DEVICE: str=torch.device("cuda:0"iftorch.cuda.is_available() else"cpu")
Flower 客户端需要实现 flwr.client.Client 或 flwr.client.NumPyClient 类。这里的实现将基于 flwr.client.NumPyClient,我们将其称为 CifarClient。因为我们使用了 NumPy ,而PyTorch 或 TensorFlow/Keras)都是直接是吃NumPy的互操作,所以使用NumPyClient 比 Client 更容易。
完成我们的CifarClient需要实现四个方法,两个获取/设置模型参数的方法,一个训练模型的方法,一个测试模型的方法:
1、set_parameters
这个方法有2个作用:
- 在从服务器接收的本地模型上设置模型参数
- 遍历作为 NumPy ndarray 接收的模型参数列表
2、get_parameters
获取模型参数并将它们作为 NumPy ndarray 的列表返回(这是 flwr.client.NumPyClient 所需要的)
3、fit
一看就知道,这是训练本地模型的方法,它有3个作用:
- 使用从服务器接收到的参数更新本地模型的参数
- 在本地训练集上训练模型
- 训练本地模型,并将权重上传服务器
4、evaluate
验证模型的方法:
- 从服务器接收到的参数更新本地模型的参数
- 在本地测试集上评估更新后的模型
- 将本地损失和准确率等指标返回给服务器
我们先前在 cifar.py 中定义的函数 train() 和 test()可以作为 fit 和 evaluate 使用。所以在这里真正要做的是通过我们的 NumPyClient 类告诉 Flower 已经定义的哪些函数,剩下的两个方法实现起来也不复杂:
 classCifarClient(fl.client.NumPyClient):
     """Flower client implementing CIFAR-10 image classification using
     PyTorch."""
     def__init__(
         self,
         model: cifar.Net,
         trainloader: torch.utils.data.DataLoader,
         testloader: torch.utils.data.DataLoader,
         num_examples: Dict,
     ) ->None:
         self.model=model
         self.trainloader=trainloader
         self.testloader=testloader
         self.num_examples=num_examples

     defget_parameters(self, config) ->List[np.ndarray]:
         # Return model parameters as a list of NumPy ndarrays
         return [val.cpu().numpy() for_, valinself.model.state_dict().items()]

     defset_parameters(self, parameters: List[np.ndarray]) ->None:
         # Set model parameters from a list of NumPy ndarrays
         params_dict=zip(self.model.state_dict().keys(), parameters)
         state_dict=OrderedDict({k: torch.tensor(v) fork, vinparams_dict})
         self.model.load_state_dict(state_dict, strict=True)

     deffit(
         self, parameters: List[np.ndarray], config: Dict[str, str]
     ) ->Tuple[List[np.ndarray], int, Dict]:
         # Set model parameters, train model, return updated model parameters
         self.set_parameters(parameters)
         cifar.train(self.model, self.trainloader, epochs=1, device=DEVICE)
         returnself.get_parameters(config={}), self.num_examples["trainset"], {}

     defevaluate(
         self, parameters: List[np.ndarray], config: Dict[str, str]
     ) ->Tuple[float, int, Dict]:
         # Set model parameters, evaluate model on local test dataset, return result
         self.set_parameters(parameters)
         loss, accuracy=cifar.test(self.model, self.testloader, device=DEVICE)
         returnfloat(loss), self.num_examples["testset"], {"accuracy": float(accuracy)}
最后我们要定义一个函数来加载模型和数据,创建并启动这个CifarClient客户端。
 defmain() ->None:
     """Load data, start CifarClient."""
     # Load model and data
     model=cifar.Net()
     model.to(DEVICE)
     trainloader, testloader, num_examples=cifar.load_data()
     # Start client
     client=CifarClient(model, trainloader, testloader, num_examples)
     fl.client.start_numpy_client(server_address="0.0.0.0:8080", client)

 if__name__=="__main__":
     main()
这样就完成了。现在可以打开两个额外的终端窗口并运行(因为我们要演示2个客户端的联邦学习)
python3 client.py
在每个窗口中(请确保前面的服务器正在运行)可以看到你的PyTorch 项目在两个客户端上进行训练了。
总结
本文介绍了如何使用Flower将我们原有pytorch代码改造为联邦学习的方式进行训练,完整的代码可以在这里找到:
https://github.com/adap/flower/tree/main/examples/pytorch_from_centralized_to_federated
作者:Charles Beauville