QT GUI编程
统一声明:
博客转载 声 明 : 本博客部分内容来源于网络、书籍、及各类手册。
内容宗旨为方便查询、总结备份、开源分享。
部分转载内容均有注明出处,如有侵权请联系博客告知并删除,谢谢!
百度云盘提取码:统一提取码:ziyu
Qt编程(★★★★★推荐) 最新更新+强化+个人网站:http://www.baiziqing.cn/index.php/archives/26/
一、QT基础
1.1、QT简介
1.1.1. 什么是QT
- 一堆C++/python类库(GUI类,network,。。。。。。)
- 免费开源
1.1.2、QT特点:
- 优良的跨平台特性: Qt支持下列操作系统: Windows、 Linux、 Solaris、Sun0sS、 FreebSD、BSD/S、SCO、AIX、0S390、QNX、 android等等
- 面向对象 -QT的良好封装机制使得Qt的模块化程度非常高,可重用性较
- 丰富的API Qt包括多达500个以上的C++
- 大量的开发文档 Network/XML/Open GL/Database/webkit/
1.2、QT应用范围
KDE
ava
Google earth
0pera浏览器
Skype网络电话
QCad
Adobe Photoshop Album
CGAL计算几何库
…
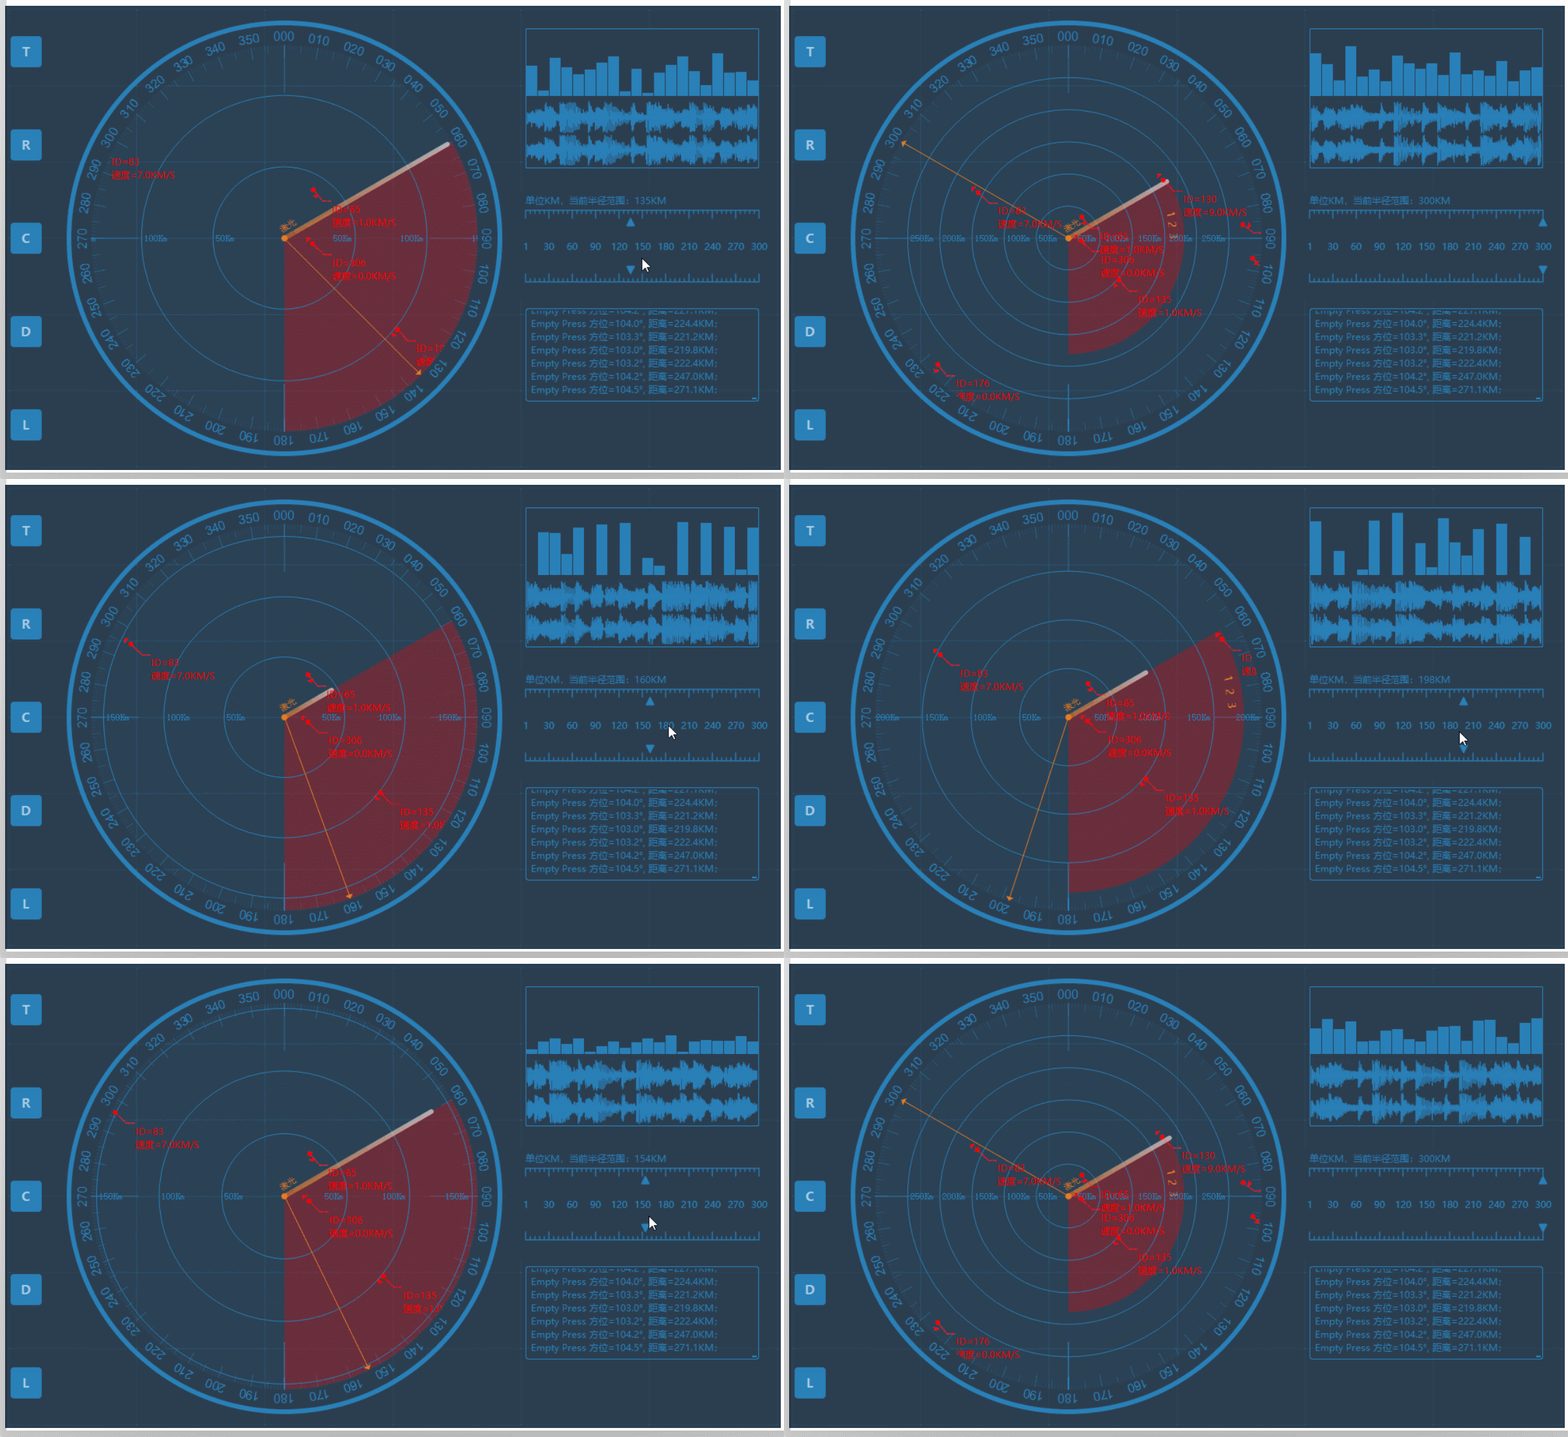
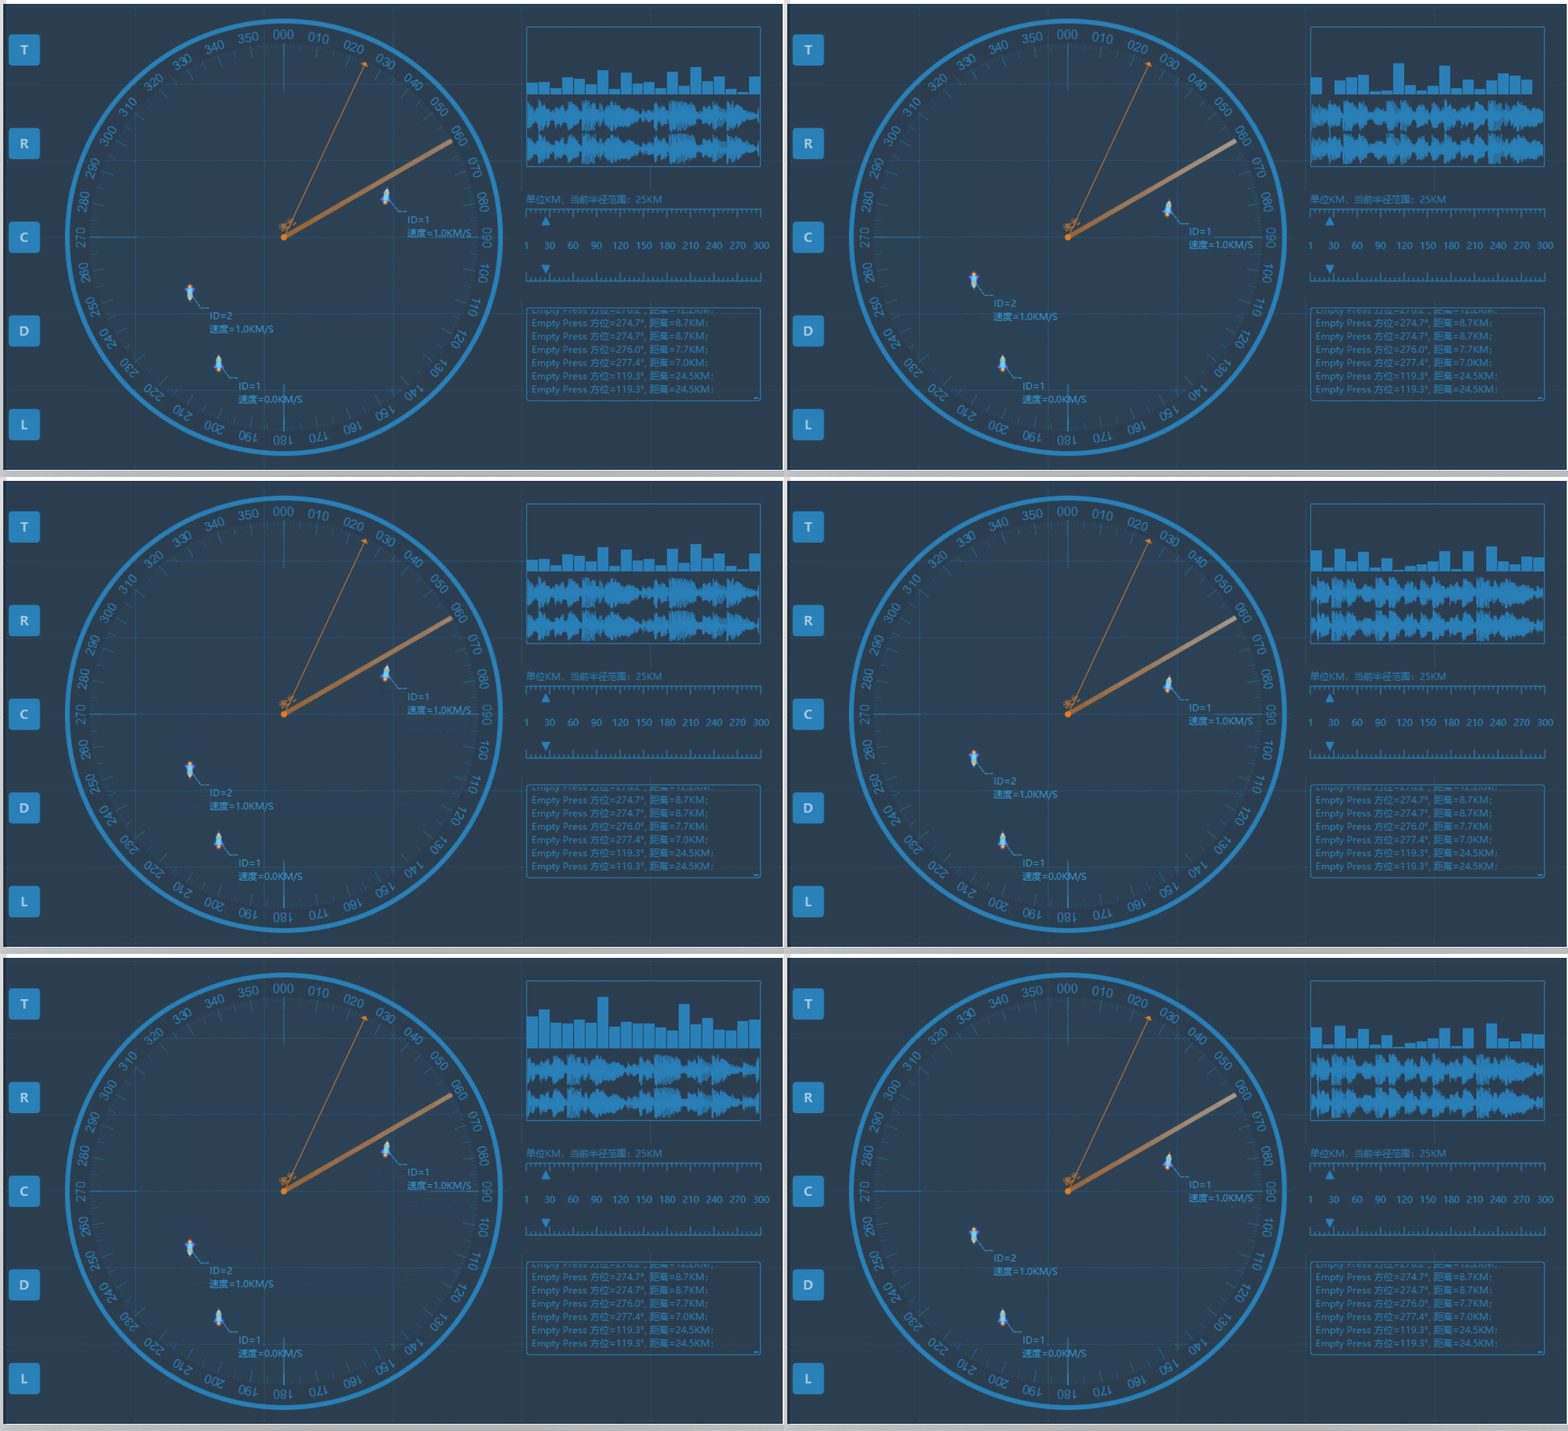
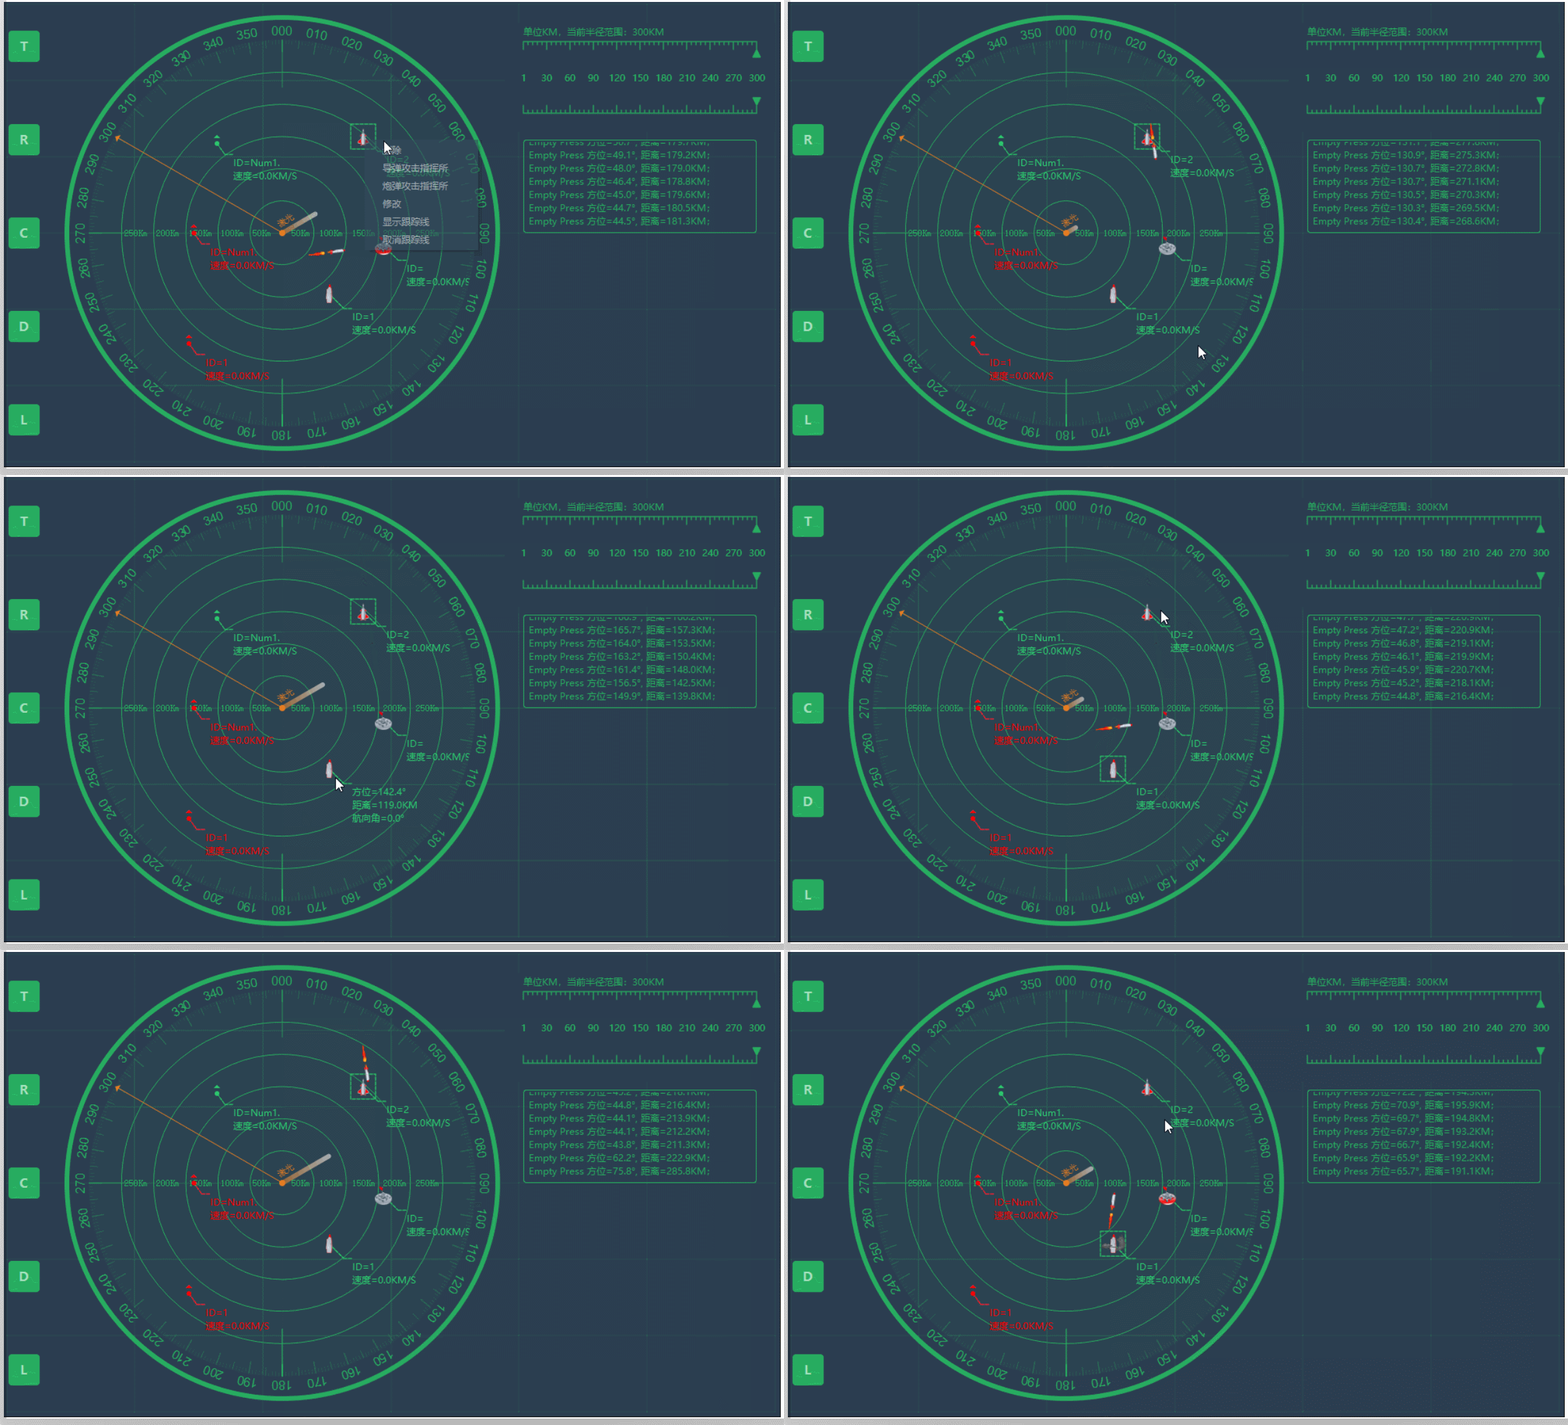
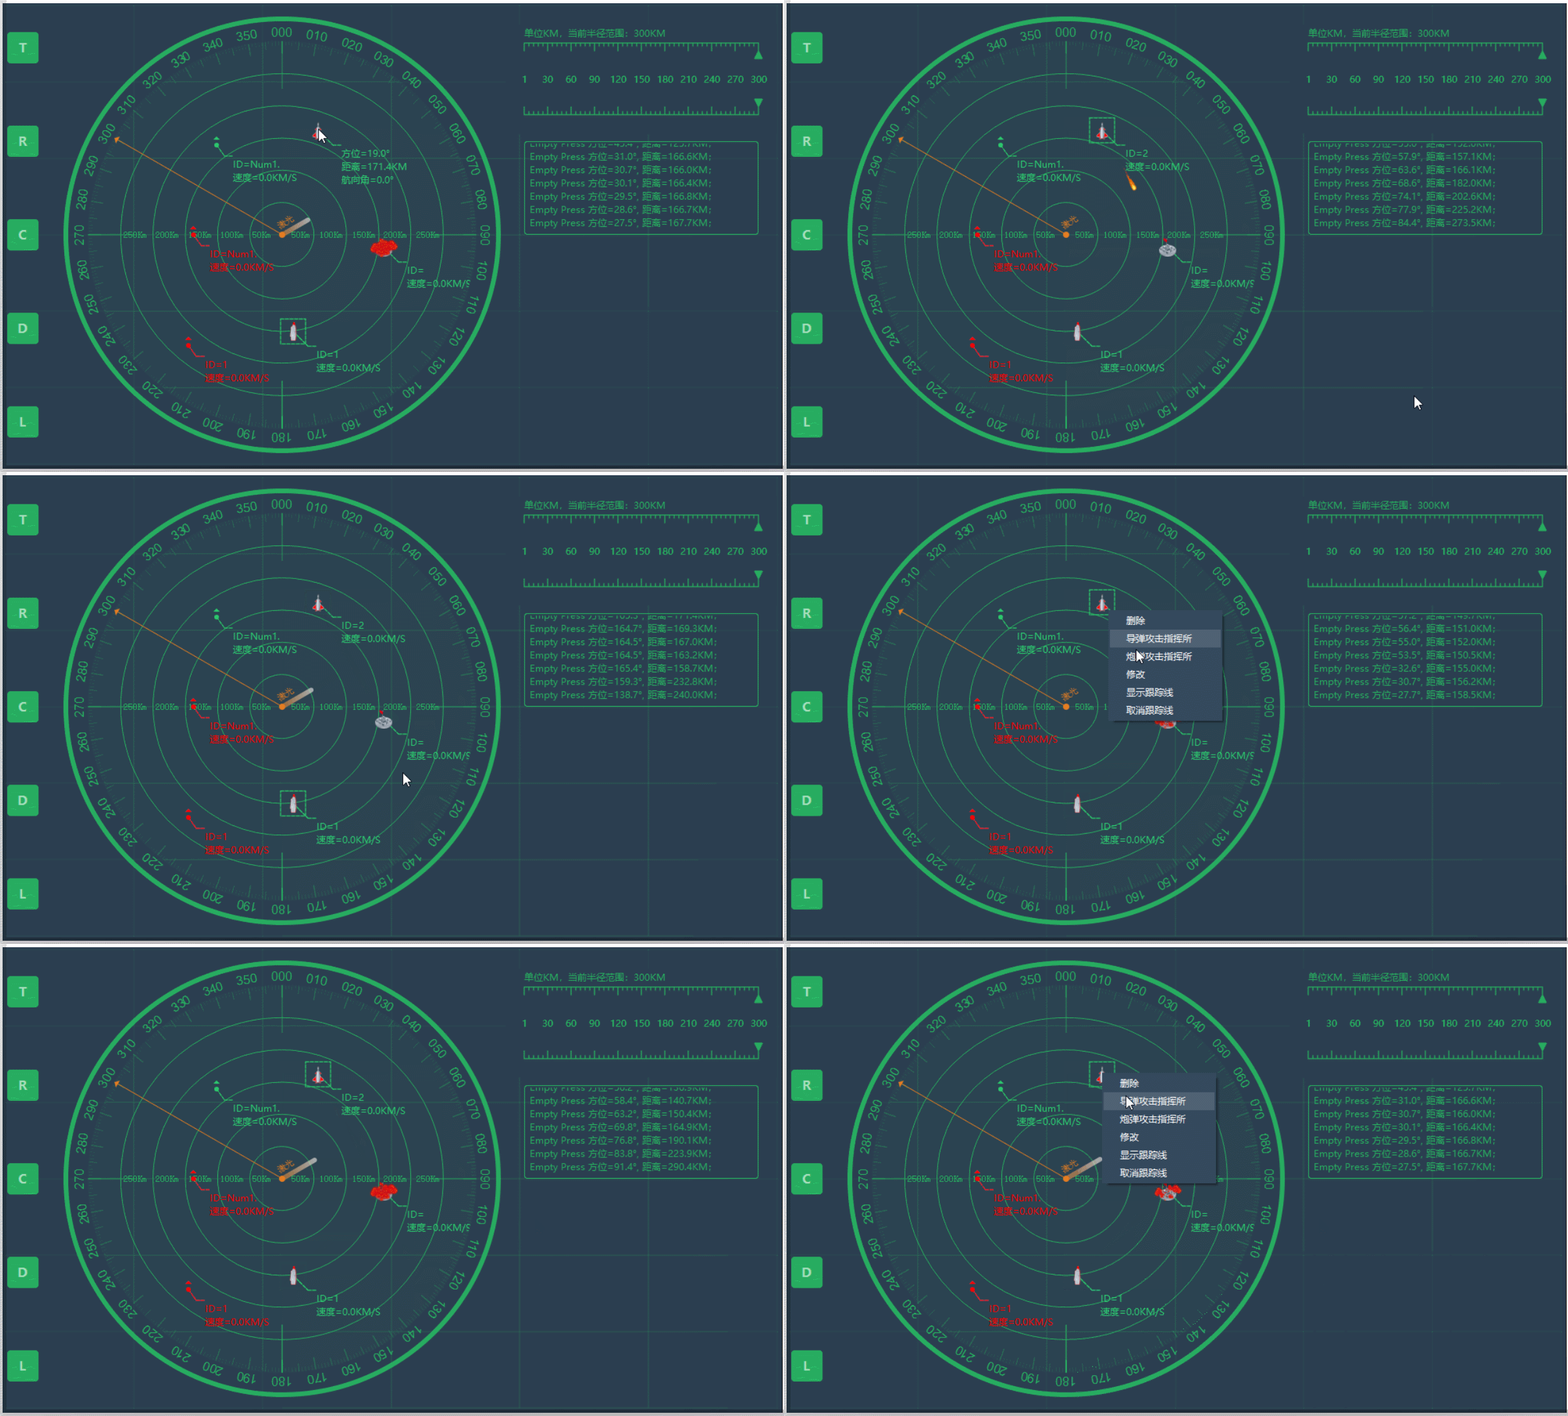
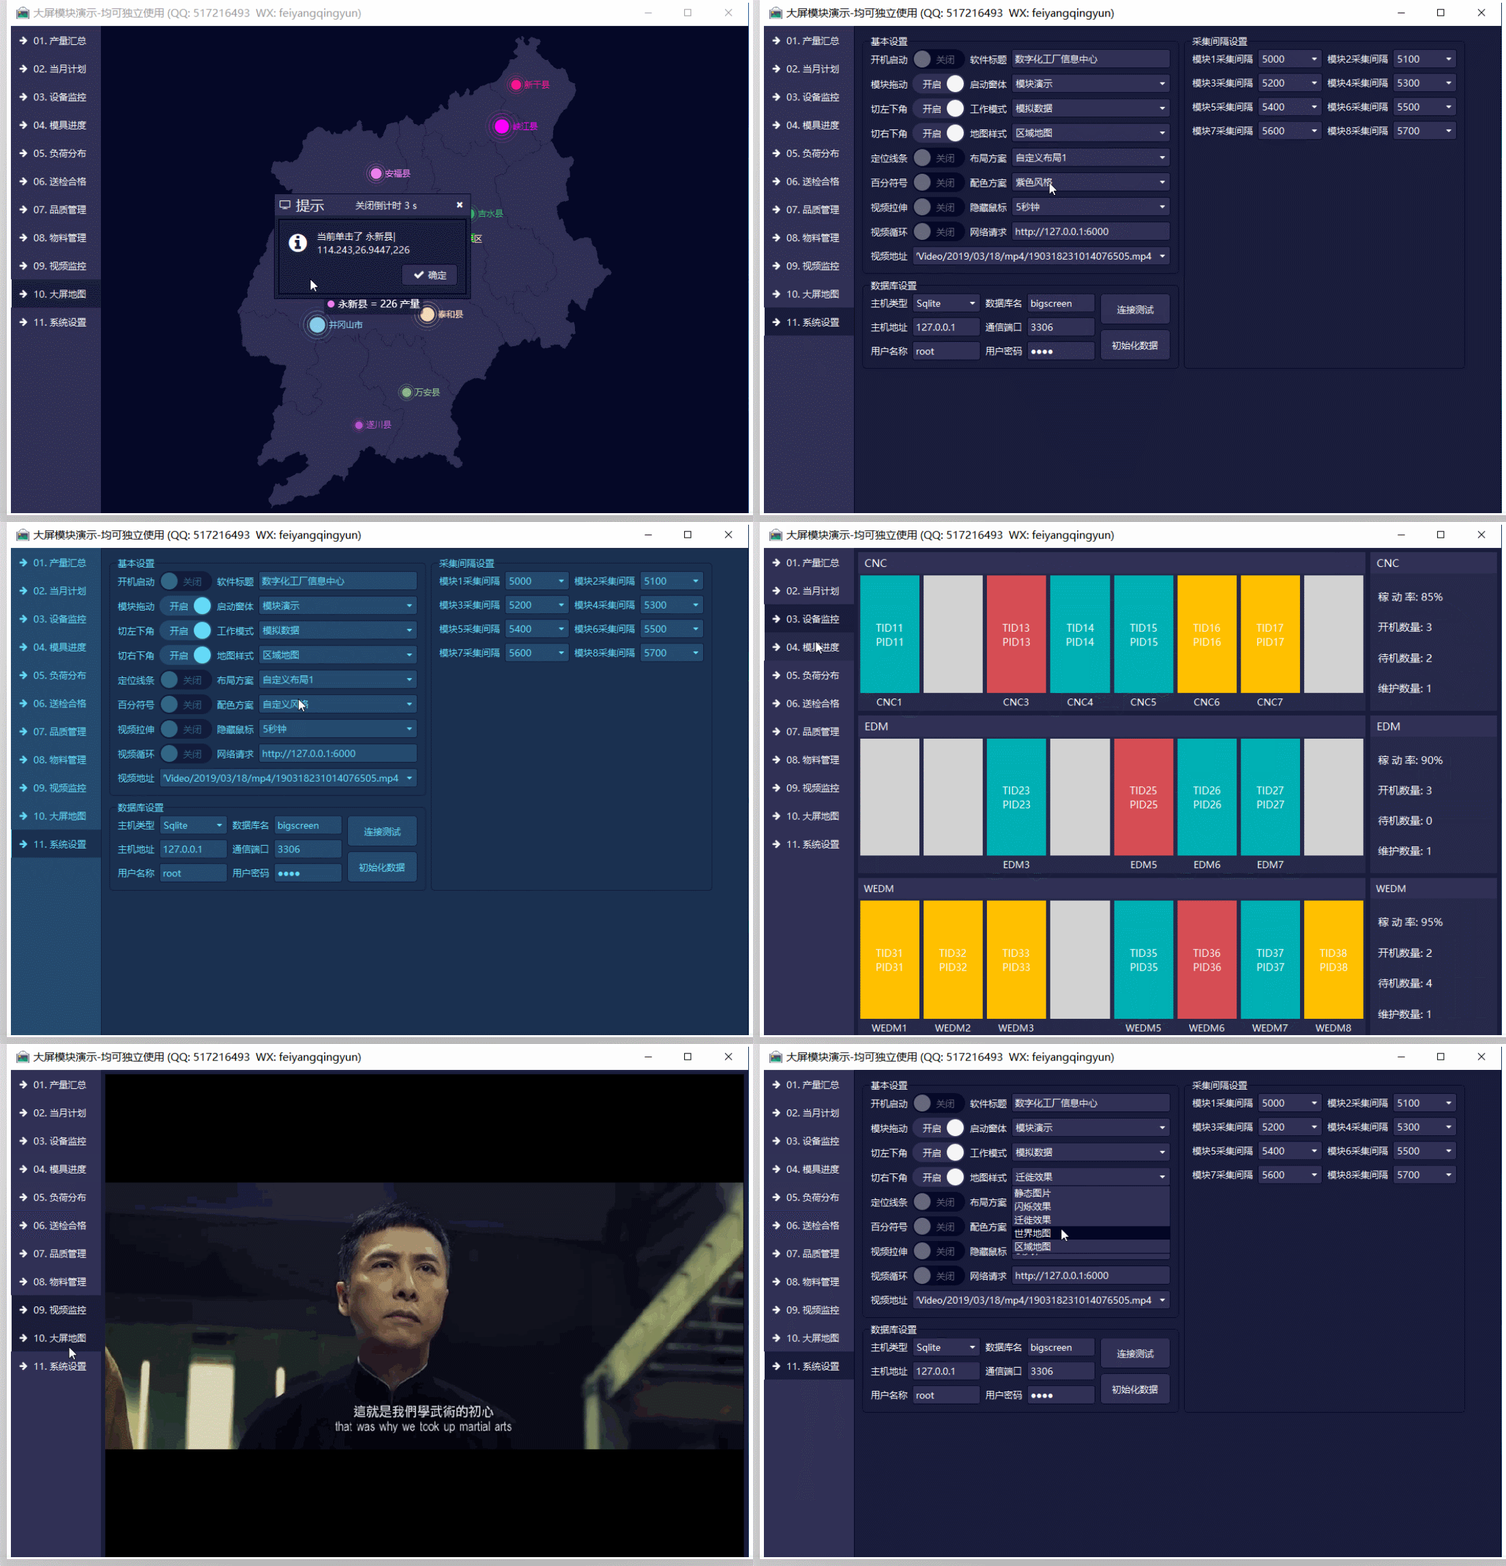
下面展示qt部分应用领域,转至博主feiyangqingyun,如有侵权,请联系博主删除,谢谢!
雷达模拟仿真工具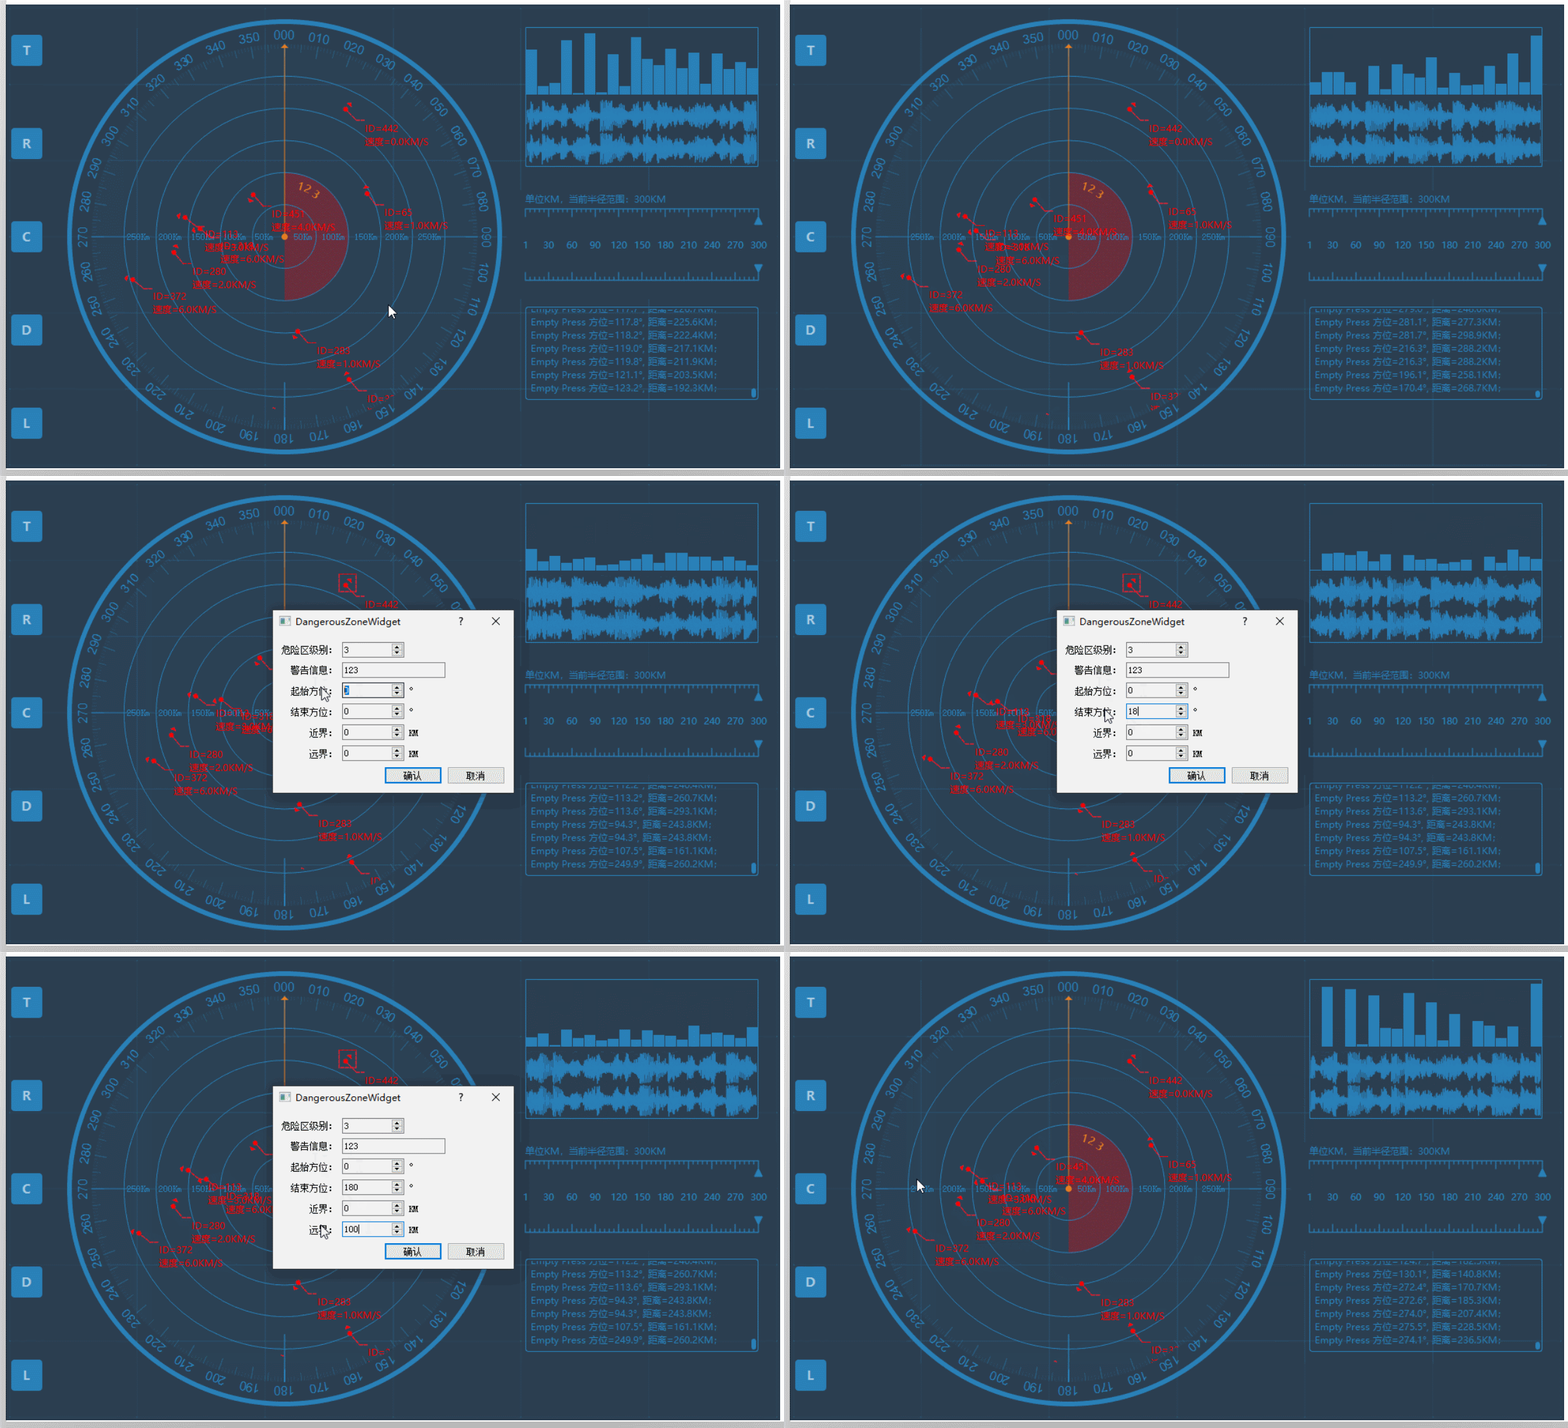
数字化工厂信息

视频监控系统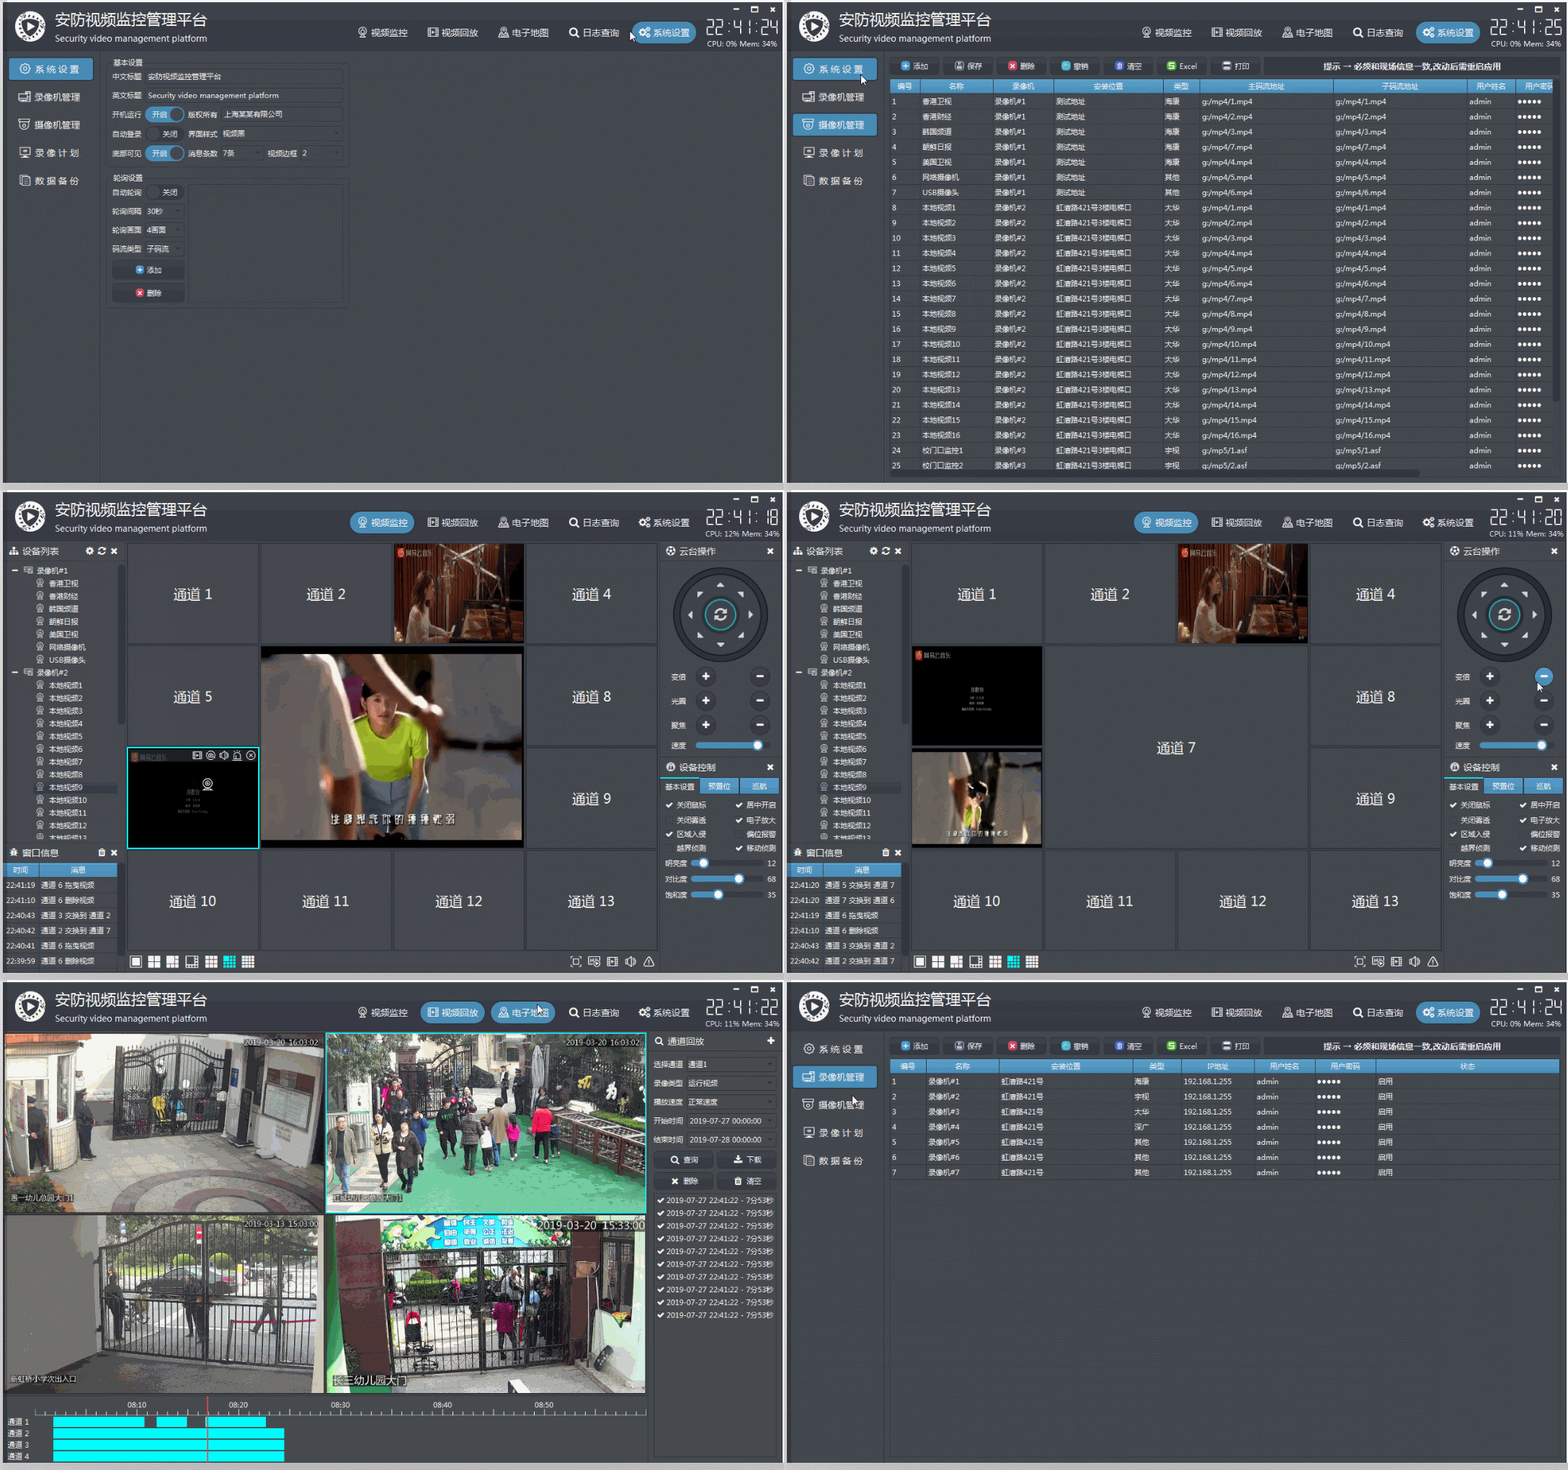
人脸识别综合应用(在线+离线+嵌入式)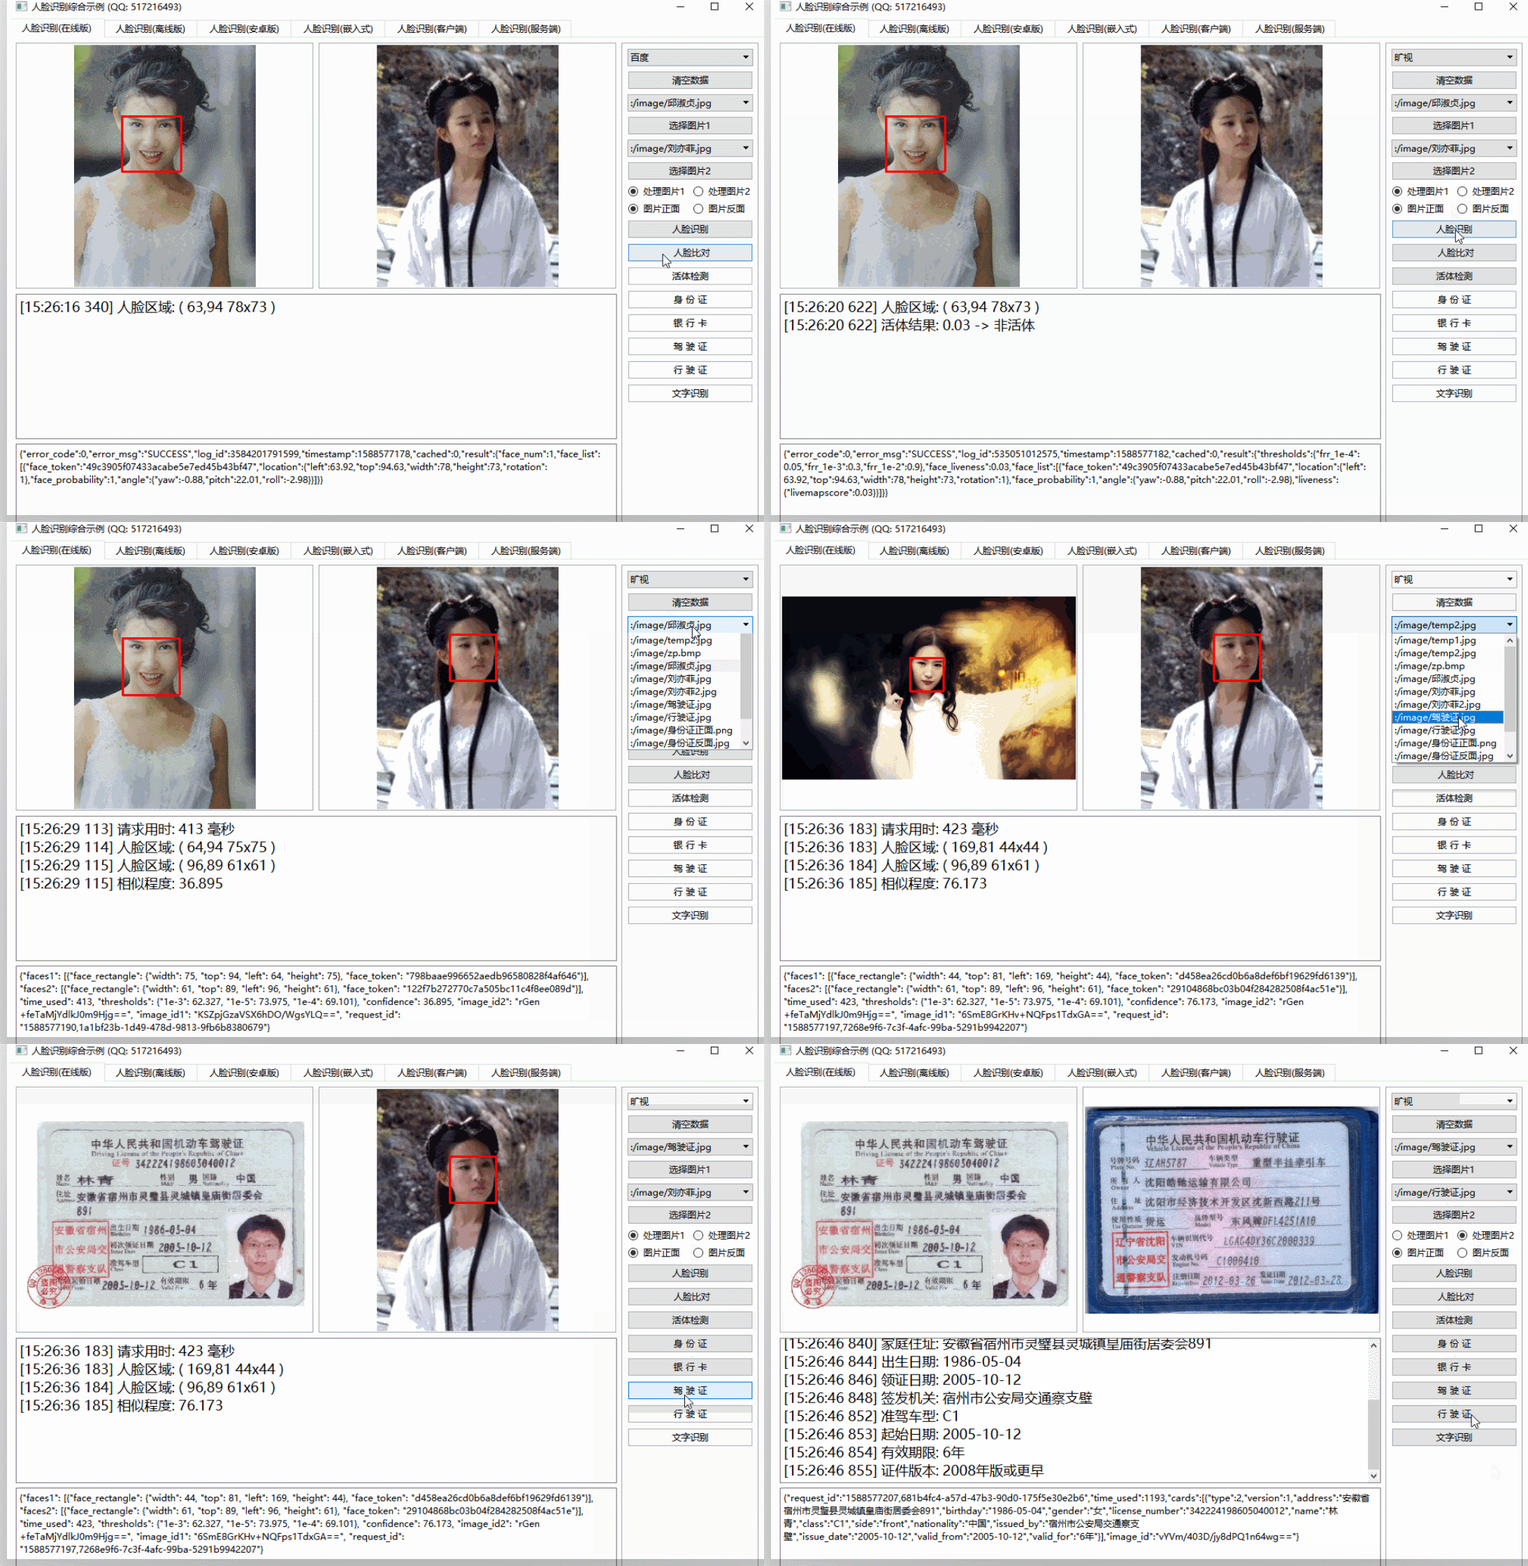
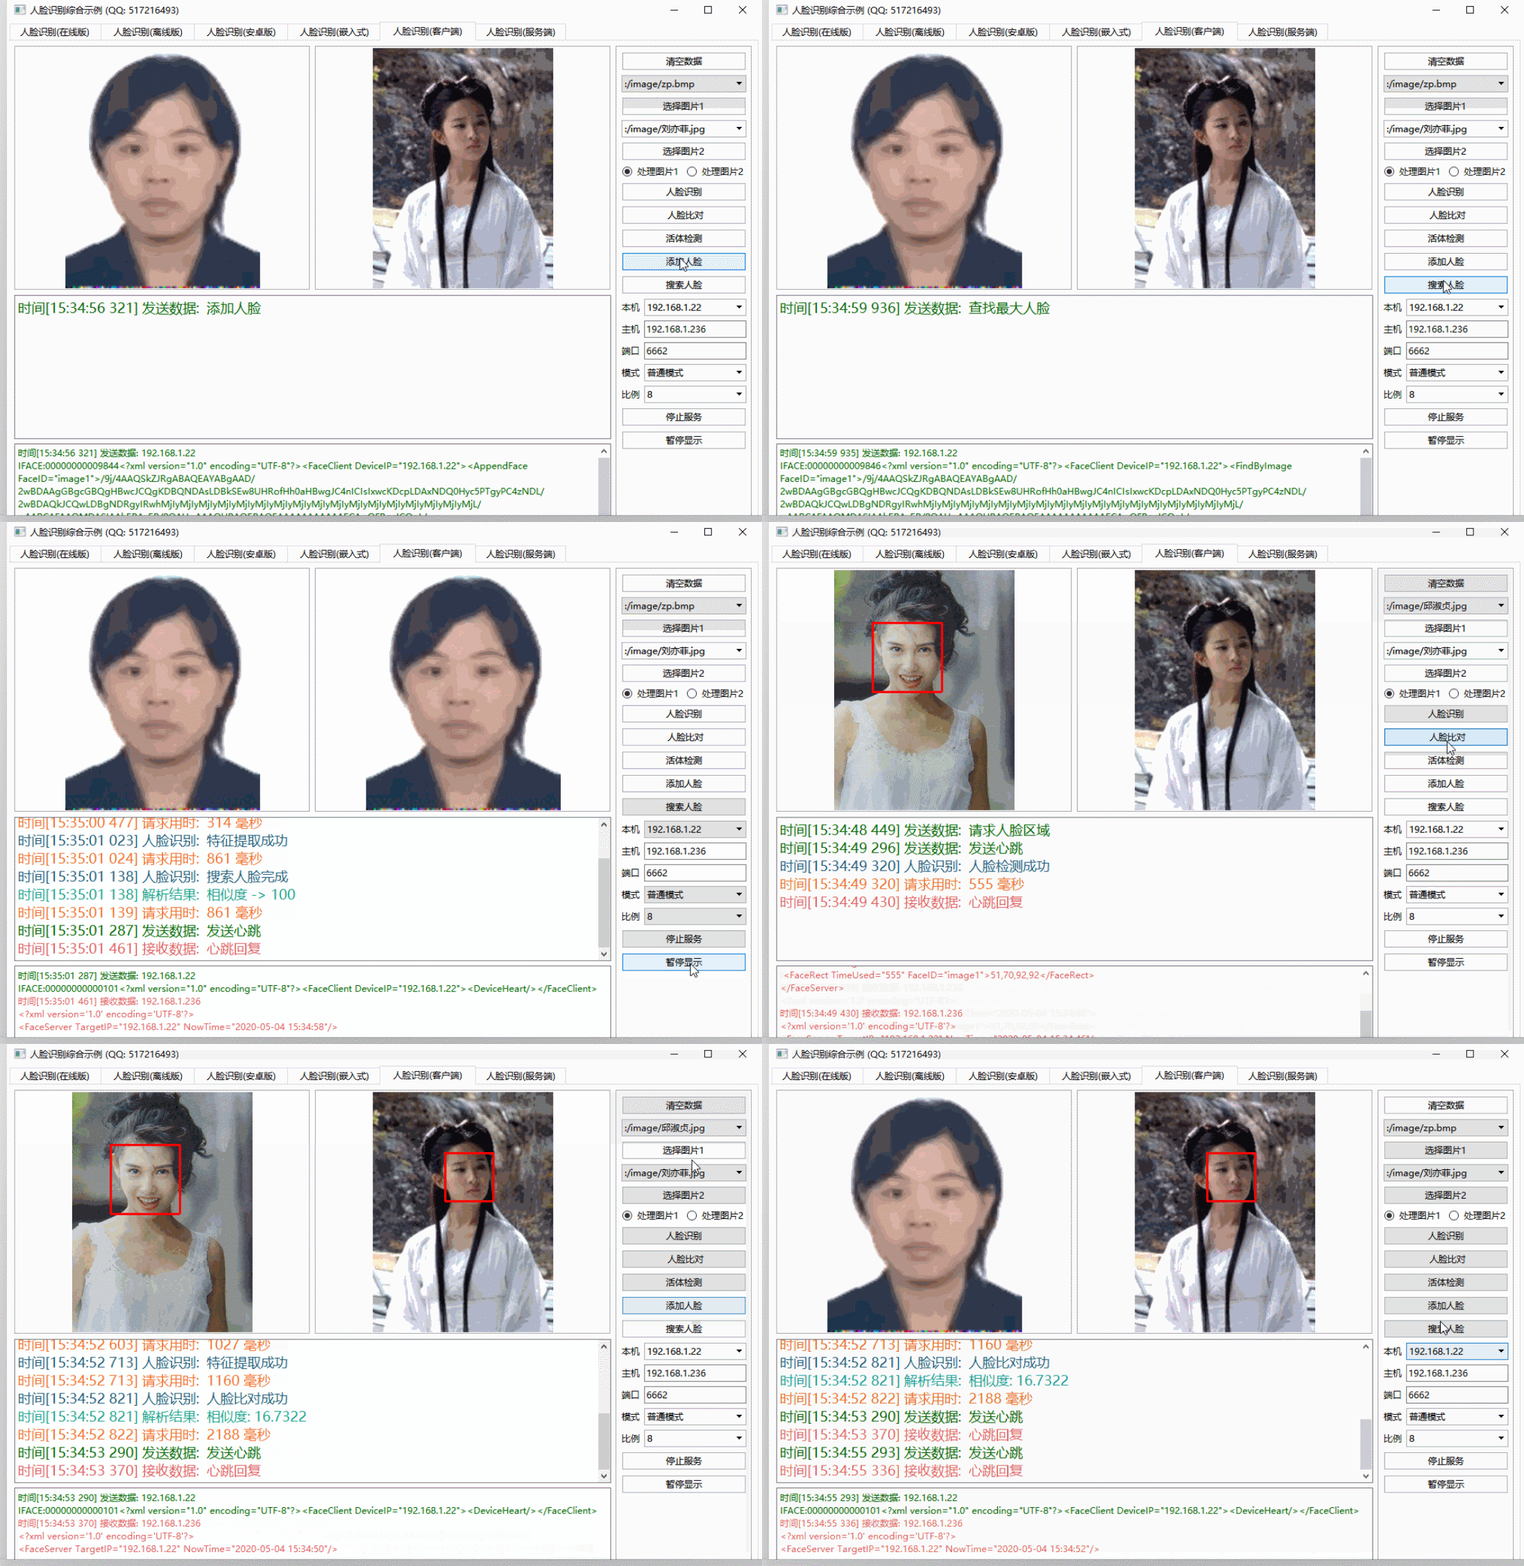
地图综合应用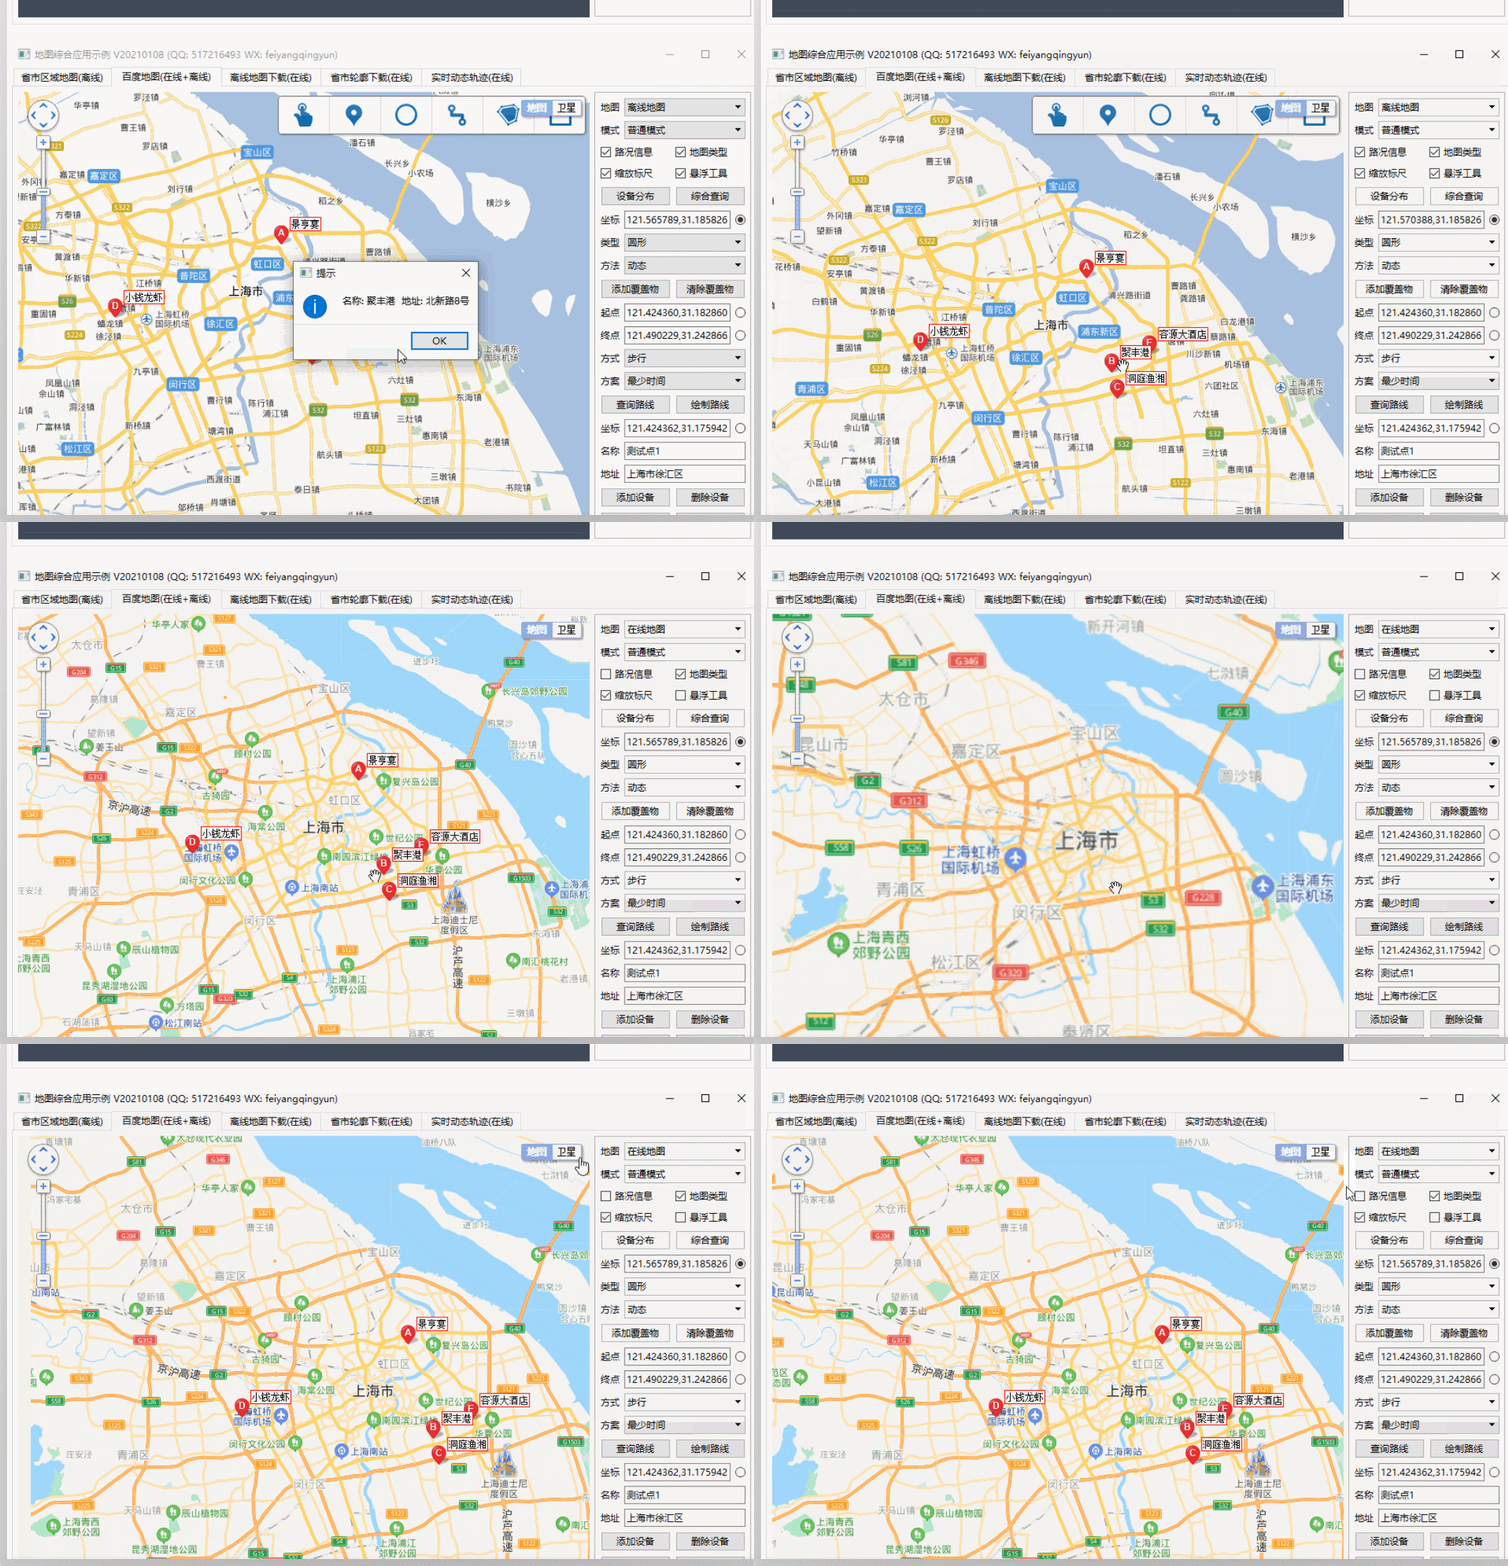
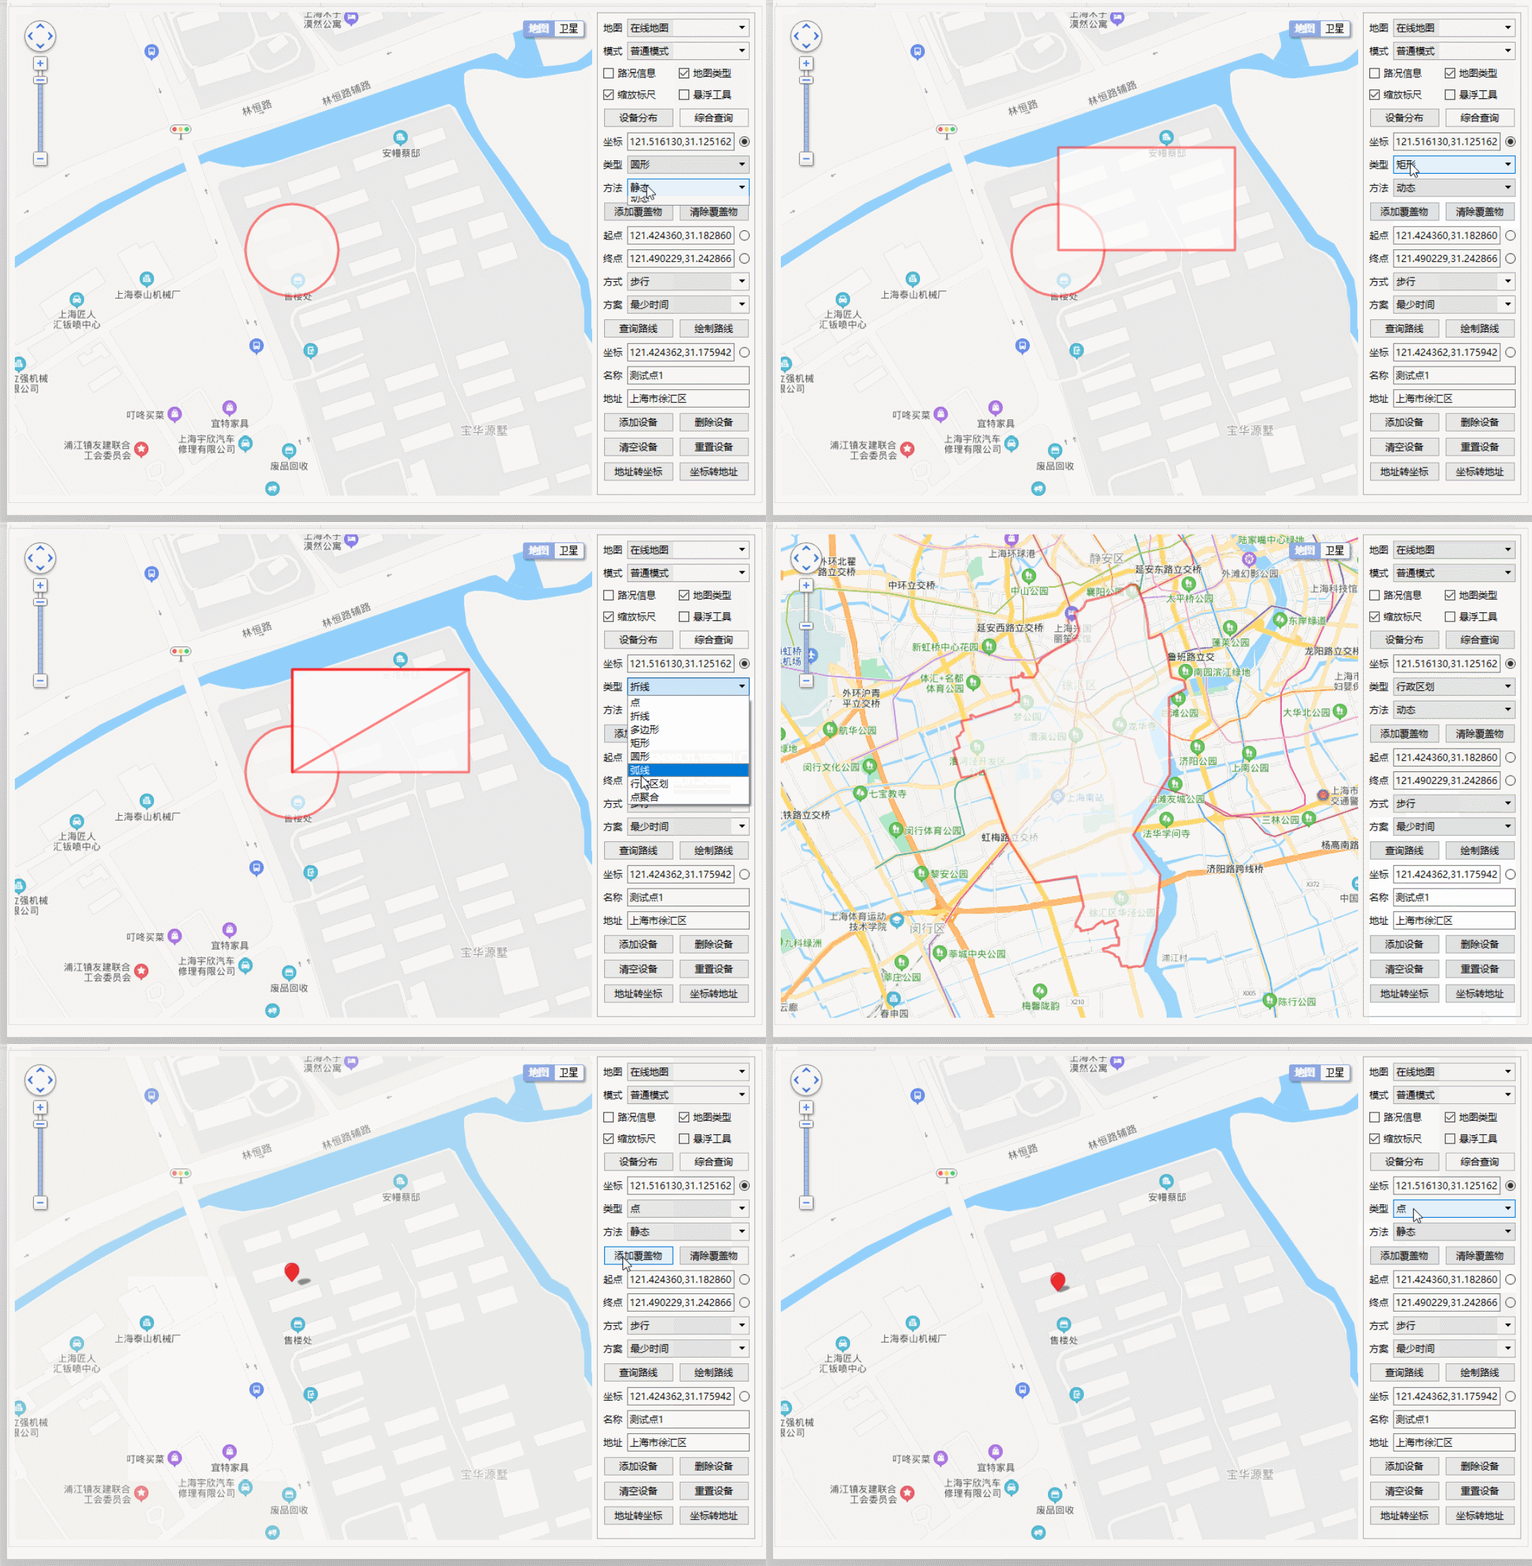
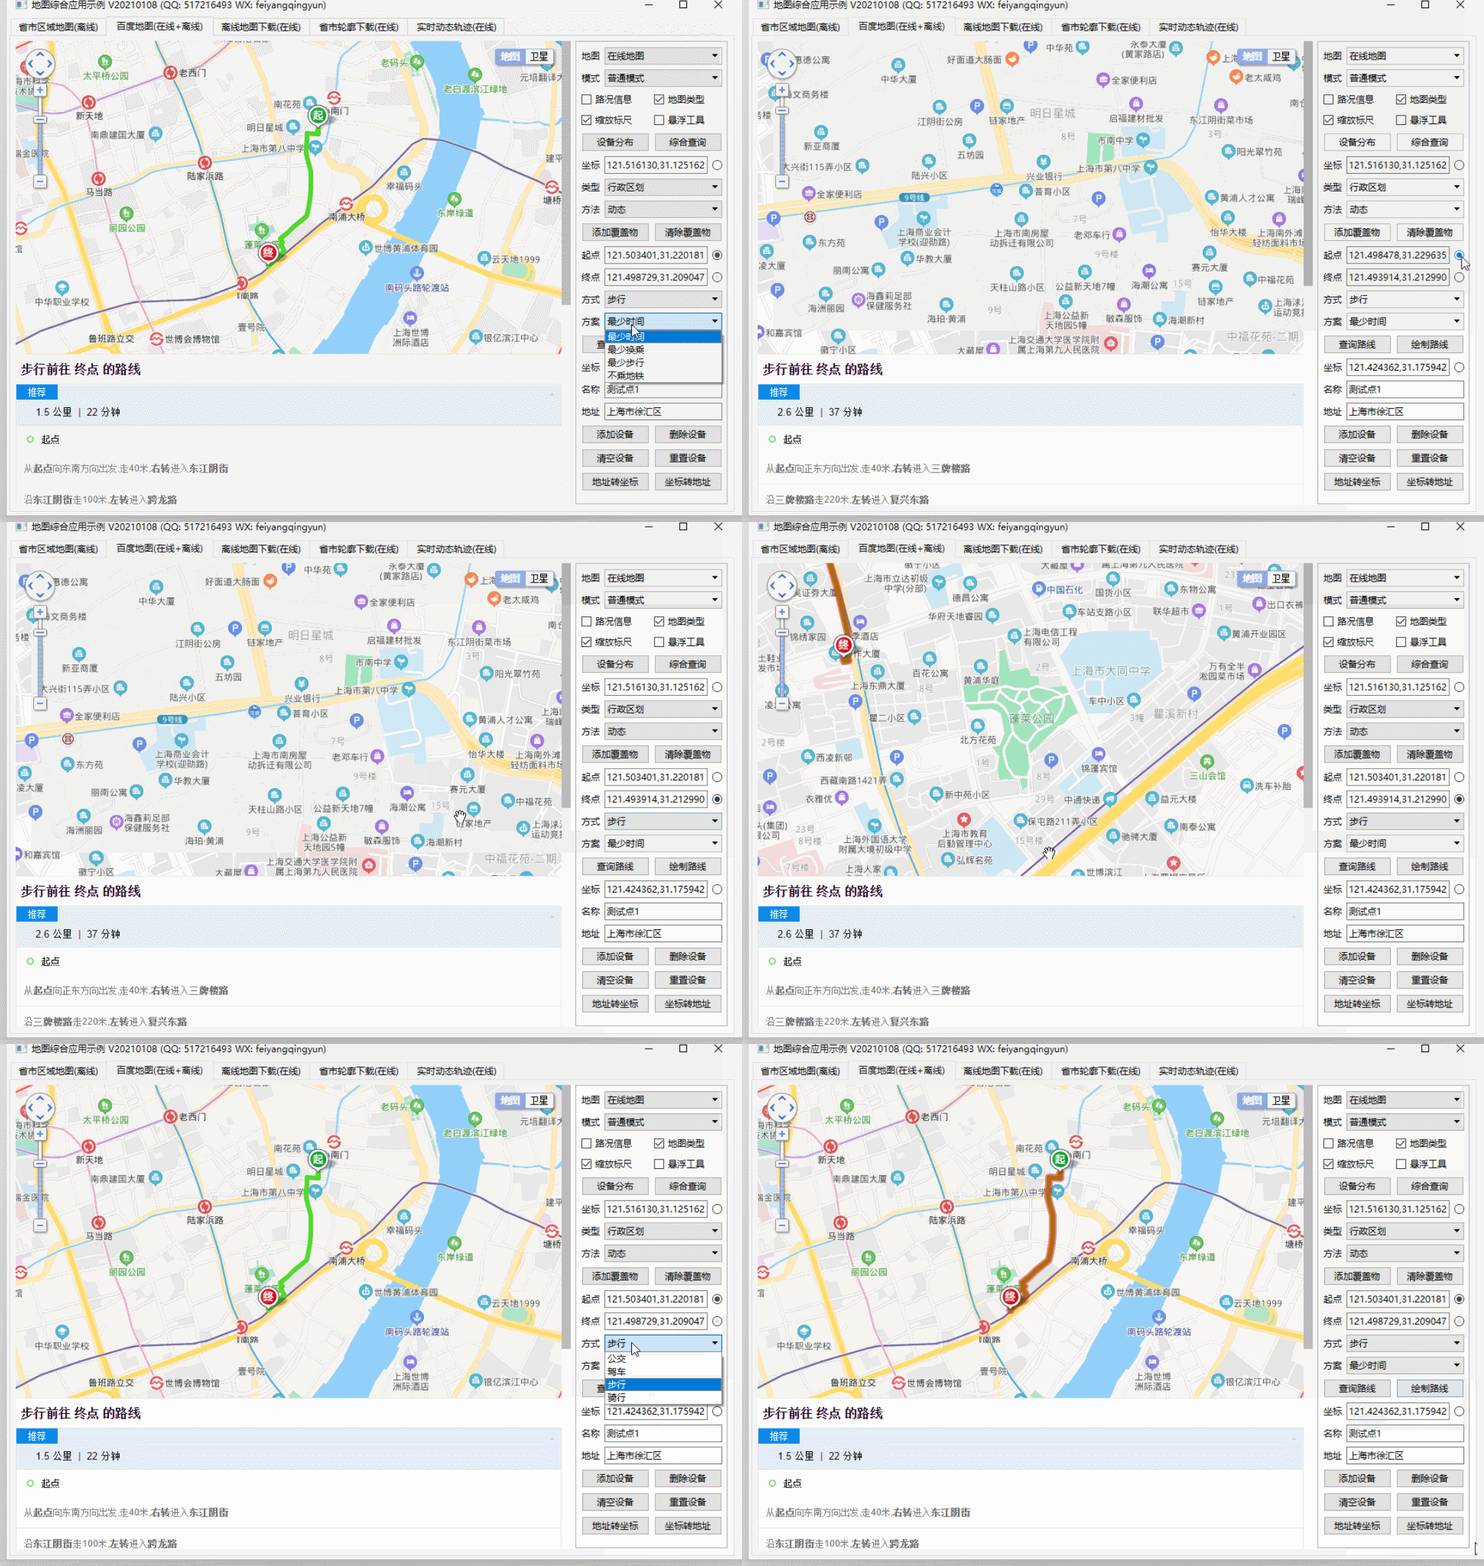
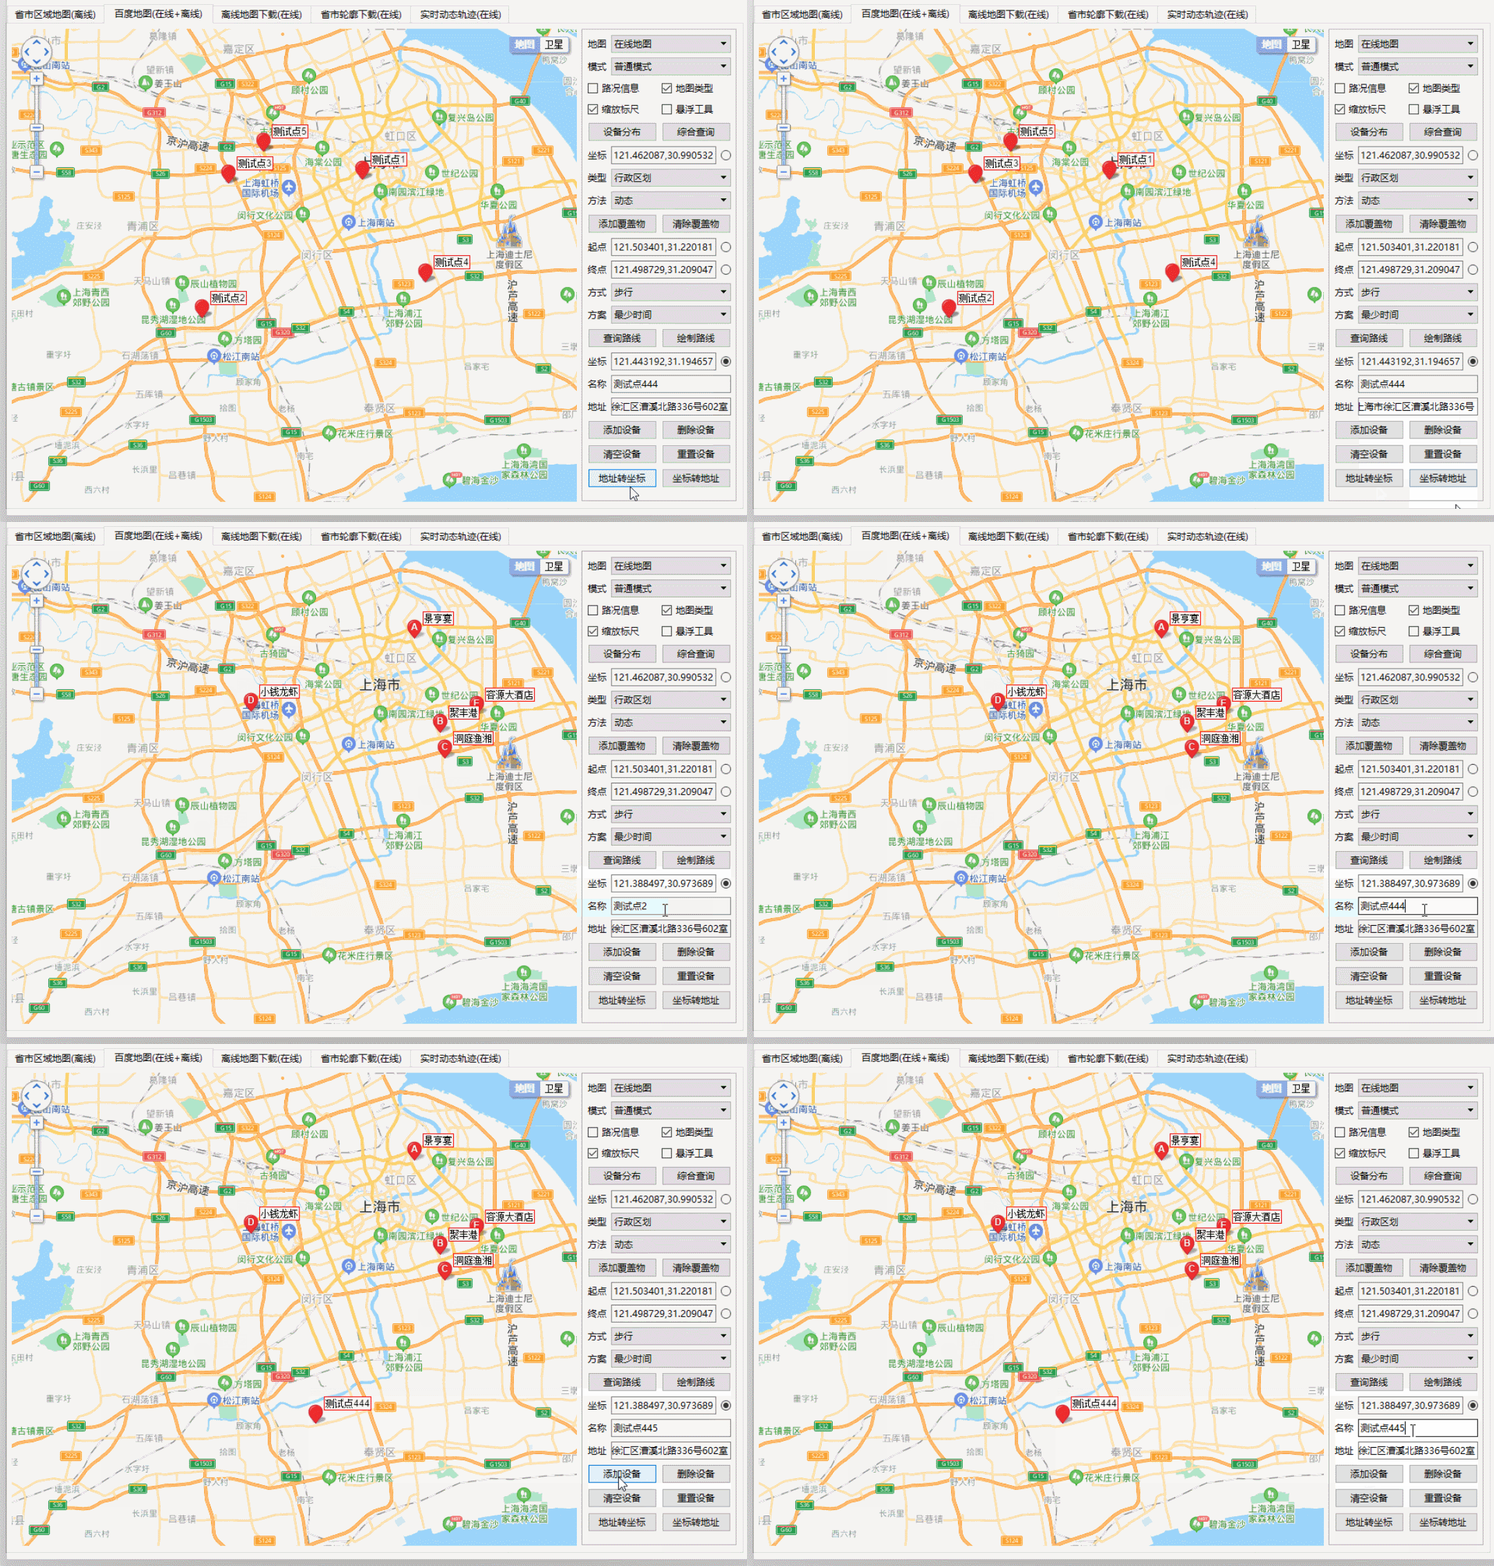
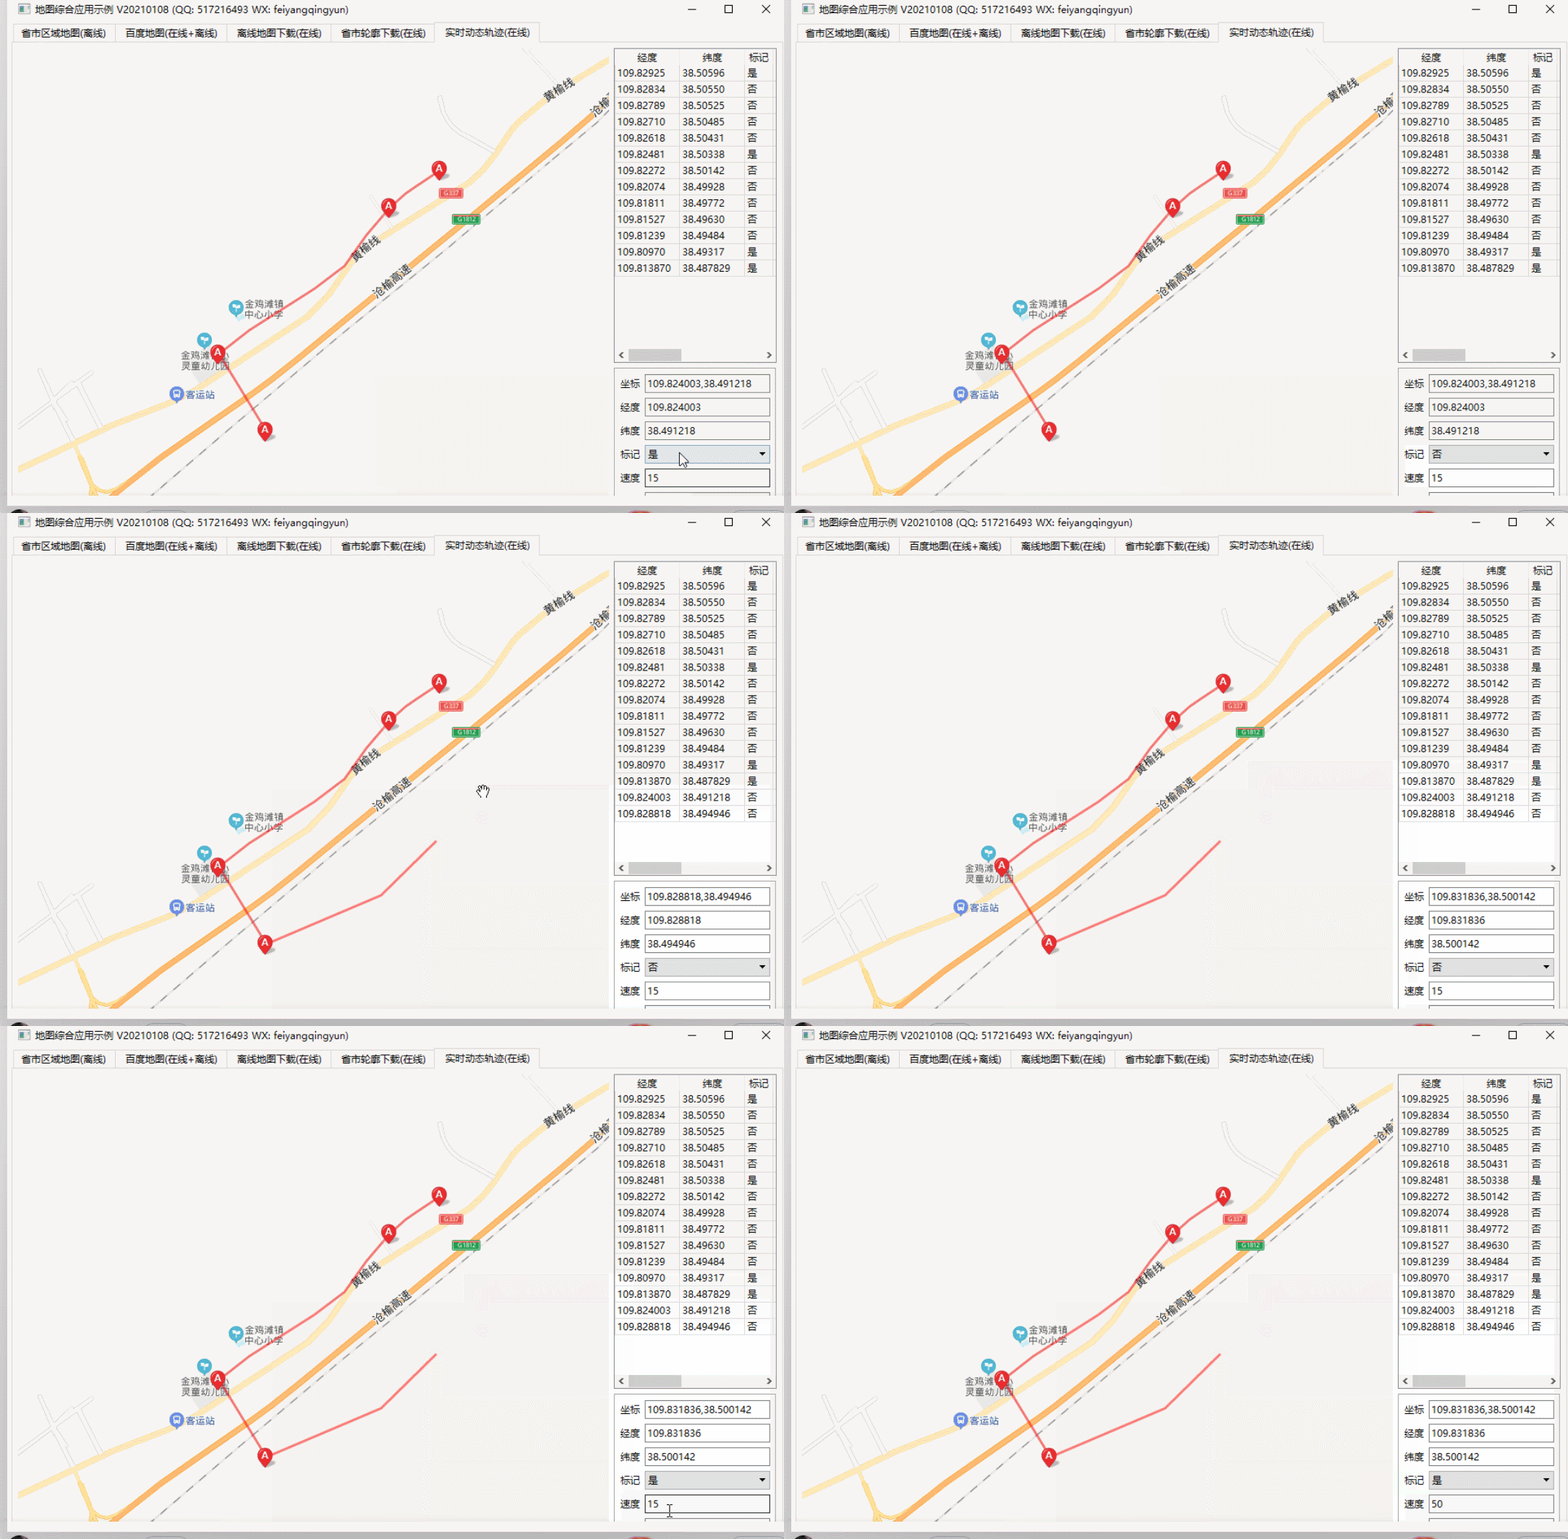
气体安全管理系统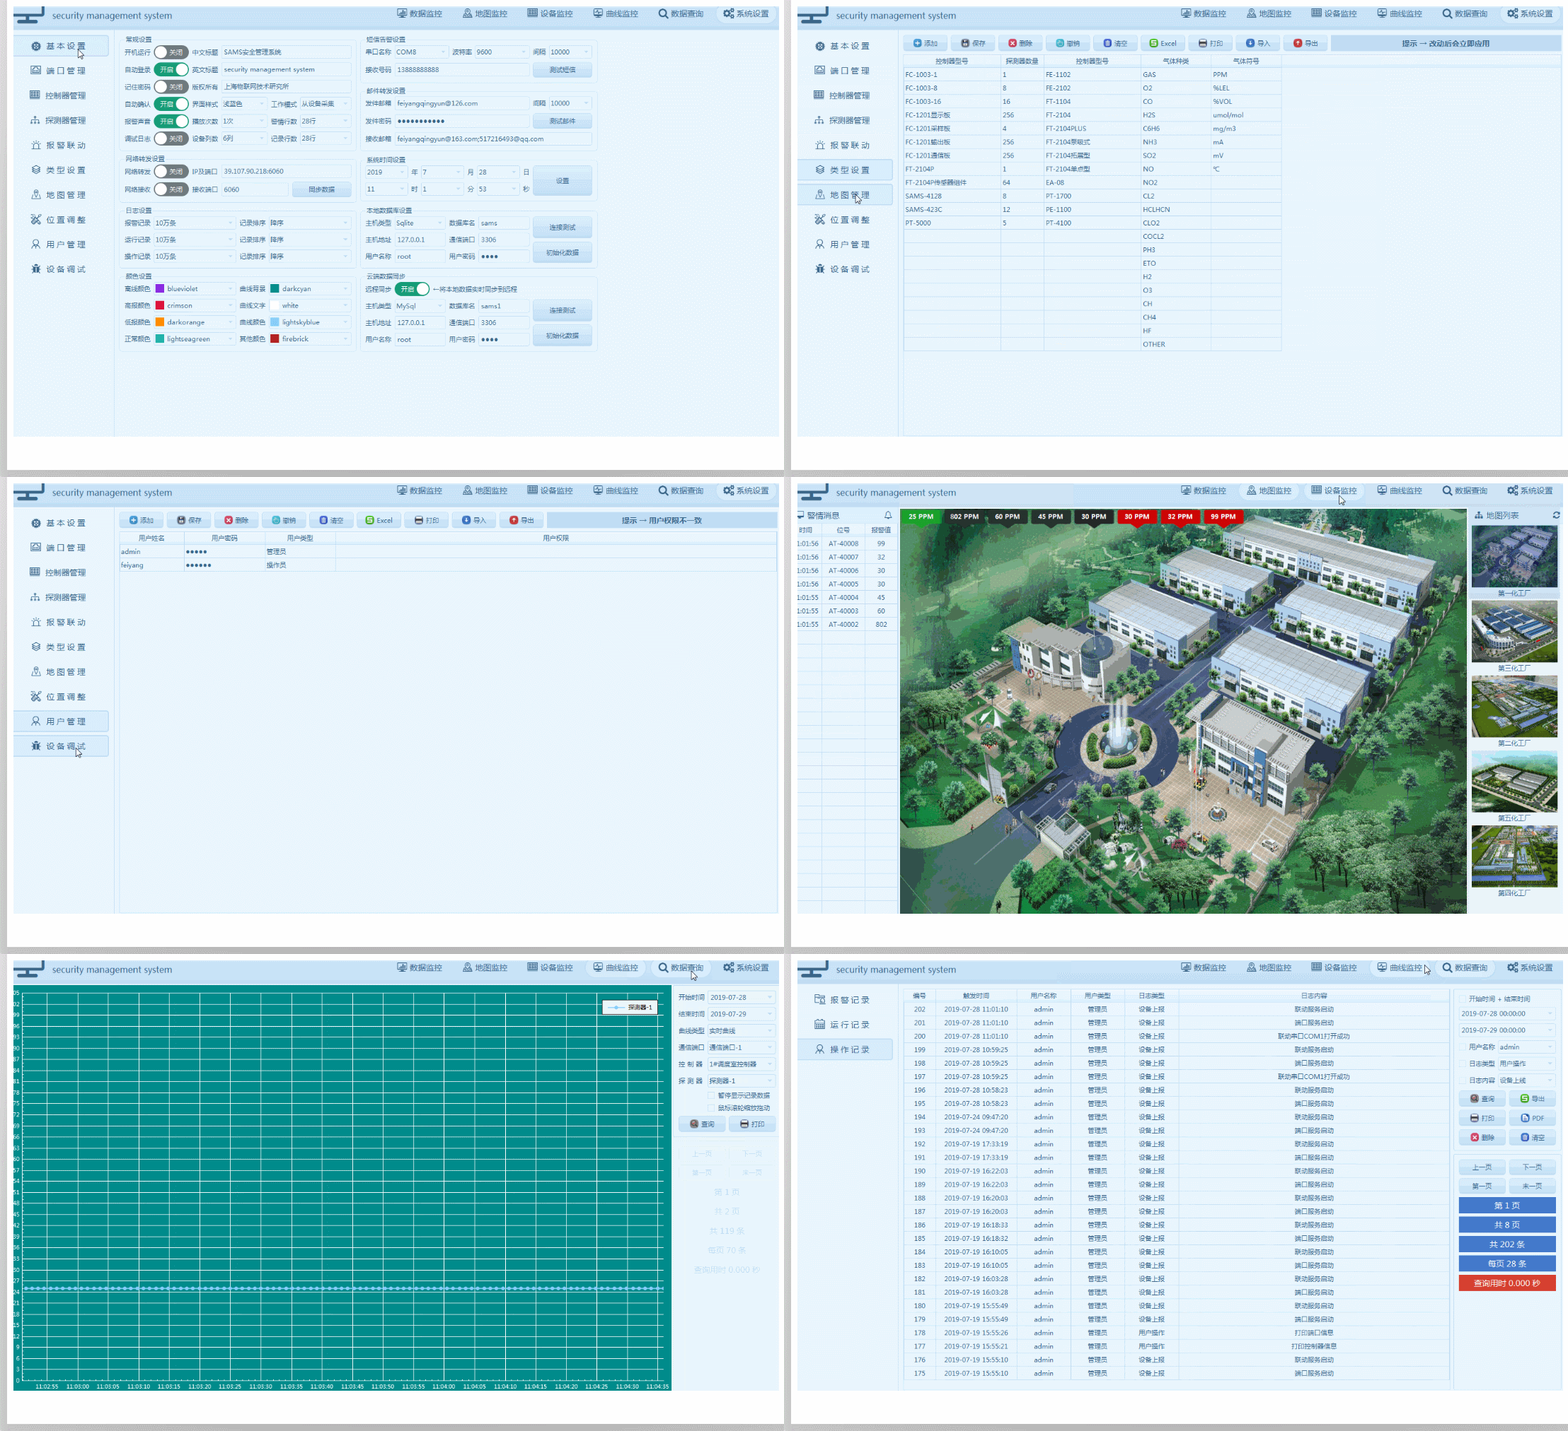
Onvif搜索和云台控制工具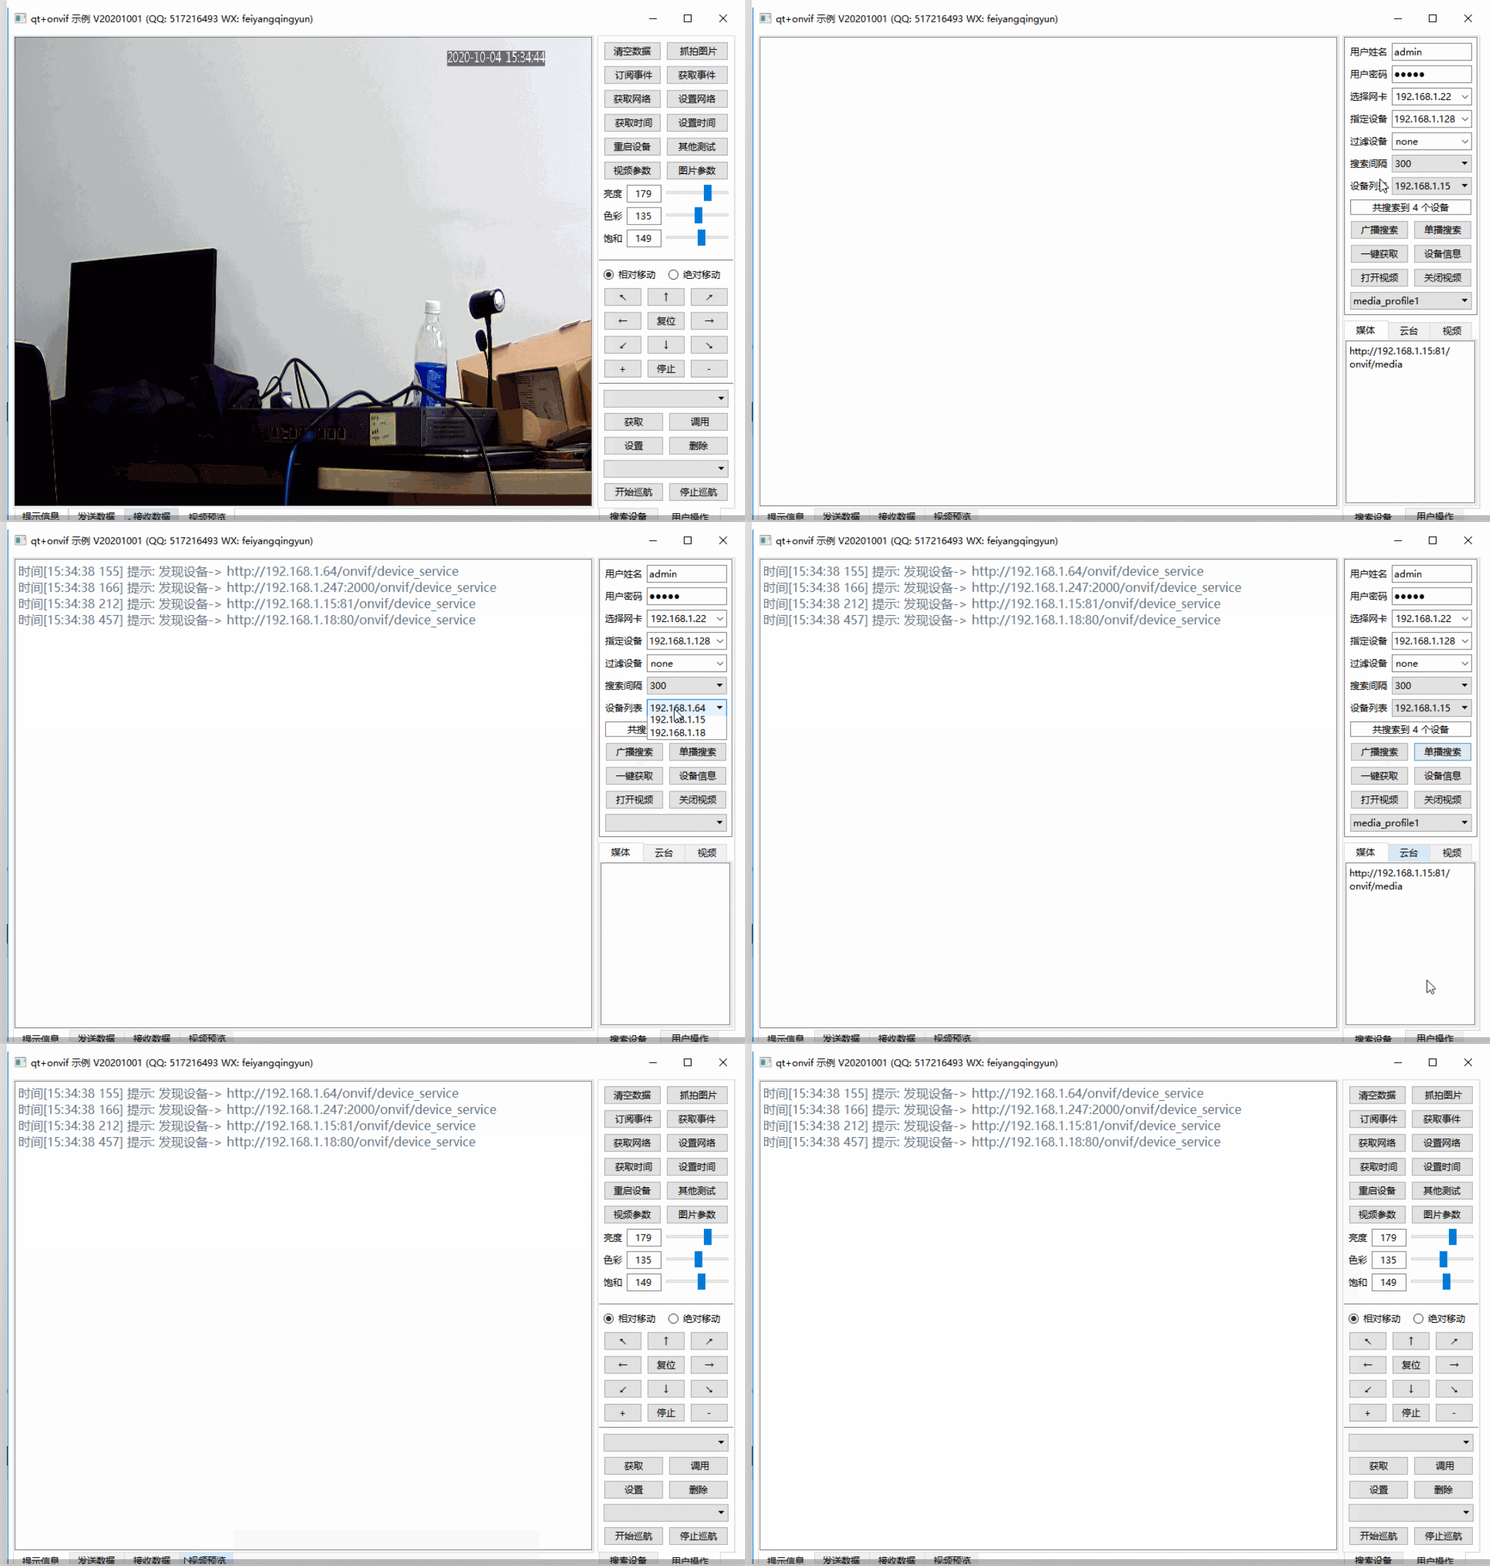
。。。
1.3、开发环境
- 可视化工具: Qt Designer、 Qt Assistant.、 Qt Linguist、 Qt Creator
- 命令行程序: update、 release、 qmake、uic、moc
- Qt SDK开发包
- Qvfd
1.4、QT软件下载安装教程
1.4.1、QT软件下载
QT版本官方下载地址: http://download.qt.io/archive/qt/
百度云盘分享下载链接: https://pan.baidu.com/s/1T-csDlc0B_C4EY7BYP-3mA 提取码:zllk
阿里云盘分享下载链接: https://www.aliyundrive.com/s/F8Zw2Qdf6yK
1.4.2、QT软件安装
安装Linux-windows版本可参考链接:https://blog.csdn.net/qq_23473839/article/details/80523318
- 详细windows版本安装教程如下:

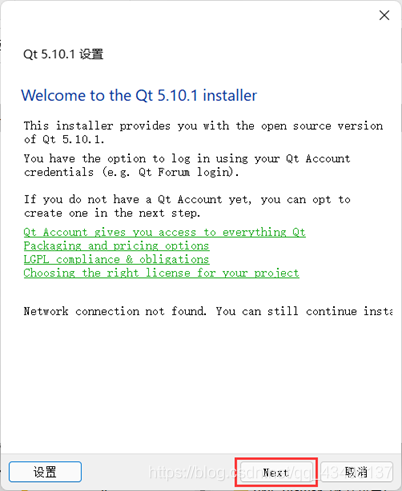


QT软件安装完毕!
1.5、QT内存管理
1.5.1、使用new和 delete时,内存在堆中分配。
堆内存空间必须通过 delete完全释放,以防止内存泄漏。只要不 delete,分配在堆上的对象可以一直存活下去。
栈是系统自动分配管理的,局部变量就是来自于栈区,只要超出了作用域的栈区数据就会被自动回收。
1.6、第一个QT程序
1.6.1、创建工程


三种基础模板(QWidget/ QDialog/ QMainWindow)
三种基础模板区别可参考链接:https://www.pianshen.com/article/20181654761/


工程创建完毕!
1.6.2、第一个程序
#include<QPushButton>//调用按钮头文件/*选择组合*/
QPushButton *bt;//这里构造一个指针
可参考设置RGB颜色对照表:https://bj.96weixin.com/tools/rgb

this->setFixedSize(640,480);//设置页面
bt =newQPushButton("登录",this);//构造一个按钮对象
bt->setGeometry(300,400,100,50);//设置按钮坐标//bt->setStyleSheet("QPushButton{color:blue;};");               //设置风格;设置字体颜色蓝色//bt->setStyleSheet("QPushButton{background-color:blue;};");    //设置风格;设置登录框背景显示蓝色
bt->setStyleSheet("QPushButton{background-color:#63B8FF;};");//设置风格;设置登录可以根据颜色码表设置颜色蓝色
第一个程序示例代码链接:
是untitled1文件夹:https://pan.baidu.com/s/1_sonChu0NyJhtJkmEsRSKQ
提取码:u4uy
1.7、打印跟踪


1.8、QT工程示例
1.8.1、基础模板(QWidget/QDialog/QMainWindow)
1.8.2、流程1.申明界面上的元素;2.构造所需的控件;3.排版;4.前后台挂接
1.8.3、细节:
(1) 排版
- 垂直QVBoxLayout
- 水平QHBoxLayout
- 网格(二维数组)QGridLayout
(2) 信号与槽
- public slots: 申明槽函数
- Connect(发信号的对象, 信号, 接收信号的对象, 槽函数);
编程示例1:
显示对话框
#include<QPushButton>//调用按钮头文件#include<QLineEdit>//行编辑器/*选择组合*/
QPushButton *bt;//这里构造一个指针
QLineEdit *le;//行编辑器

#include"QVBoxLayout"//排版的垂直类//1. 在堆区真正的将对象申请出来
bt =newQPushButton("登录",this);//构造一个按钮对象
le =new QLineEdit;//构造一个对话框//2. 做必要的排版
QVBoxLayout *vbox =new QVBoxLayout;//垂直布局
vbox->addWidget(le);//行编辑框
vbox->addWidget(bt);//按钮this->setLayout(vbox);//显示当前主界面
编程示例1-2代码链接:
在untitled2文件夹:https://pan.baidu.com/s/1_sonChu0NyJhtJkmEsRSKQ
提取码:u4uy
编程示例2:
读:点击按钮电脑自动播报语音
#include<QPushButton>//调用按钮头文件#include<QLineEdit>//行编辑器#include<QDebug>//打印跟踪#include<QTextToSpeech>//说话的类;需要在pro加入语言转换类:texttospeech/*读*/public slots://申明此函数为槽函数(能被信号激发);QT c++语法voidxxx(){
    x->say("你好");//说话的类,语言输出你好qDebug()<<"xxxxxxxxxxxx";//显示打印xxxxxxxxxxxx}/*选择组合*/
QPushButton *bt;//这里构造一个指针
QLineEdit *le;//行编辑器

QTextToSpeech *x;//说话的类

QT += core gui texttospeech

#include"QVBoxLayout"//排版的垂直类//1. 在堆区真正的将对象申请出来
bt =newQPushButton("读",this);//构造一个按钮对象
le =new QLineEdit;//构造一个对话框

 x =new QTextToSpeech;//构造一个说话的类//2. 做必要的排版
QVBoxLayout *vbox =new QVBoxLayout;//垂直布局
vbox->addWidget(le);//行编辑框
vbox->addWidget(bt);//按钮this->setLayout(vbox);//显示当前主界面//3. 前后台挂接(连接信号与曹)connect(bt,SIGNAL(clicked(bool)),this,SLOT(xxx()));//按钮连接的信号;如果按钮按下了那么下面xxx应该点击执行

x->say(le->text());//说话的类,编辑框中的文字
编程示例1-2代码链接:
在untitled2文件夹:https://pan.baidu.com/s/1_sonChu0NyJhtJkmEsRSKQ
提取码:u4uy
编程示例3:
水平布局 || 网格状布局
#include<QHBoxLayout>//排版 水平布局

QHBoxLayout *hbox =new QHBoxLayout;//水平布局
hbox->addWidget(le);//行编辑框
hbox->addWidget(bt);//按钮this->setLayout(hbox);//显示当前主界面

#include<QGridLayout>//排版 网格状布局

QGridLayout *gbox =new QGridLayout;//网格状布局
gbox->addWidget(le,0,0,1,2);//行编辑框
gbox->addWidget(bt,1,1,1,1);//按钮setLayout(gbox);
编程示例3代码链接:
在untitled3文件夹:https://pan.baidu.com/s/1_sonChu0NyJhtJkmEsRSKQ
提取码:u4uy
编程示:多个按钮控制


//提取发信号的对象
QPushButton *xbt =static_cast<QPushButton *>(sender());qDebug()<<xbt->text();
编程示例:多个按钮控制链接:
在untitled3文件夹:https://pan.baidu.com/s/1_sonChu0NyJhtJkmEsRSKQ
提取码:u4uy
1.9、QT 图形编程
1.9.1、建立工程:


1.9.2、工程实现:


QT += core gui texttospeech

#include<QTextToSpeech>//说话的类;需要在pro加入语言转换类:texttospeech

QTextToSpeech *x;//说话的类

x =new QTextToSpeech;//构造一个说话的类

x->say("吃饭了嘛");//说出一句话


x->say(ui->lineEdit->text());//提取框中文字语音播报

QT图形编程示例代码链接:
在untitled4文件夹:https://pan.baidu.com/s/1_sonChu0NyJhtJkmEsRSKQ
提取码:u4uy
1.10、信号与槽
1.10.1、信号与槽
- 信号和槽机制是Qt的一个主要特征,是Qt与其它工具包最不相同的部分
- 回调( callback)是一个函数指针,当一个事件发生时被调用,任何函数都可以被安排作为回调
- 信号和槽的方式更加动态
- Qt采用信号和槽实现对象部件之间的通信。
1.10.2、信号与槽:信号
- 当信号被发射时,QT代码将回调与其相连接的槽函数
- 信号将由元对象处理moc自动翻译成C++代码
- 信号的声明不在cpp文件中,而在头文件中
1.10.3、信号与槽:槽函数
- 槽函数是普通的C++成员函数,可以被正常调用
- 槽函数可以有返回值,也可以没有
- 槽函数的访问权限三种: public slots、 private slots和 protected slots。槽函数的存取权限决定了谁能够与其相关联
1.10.4、信号与槽:连接
1.10.5、信号与槽:发送信号
- signa}-般是在事件处理时候Qt发出,如果需要程序自己触发信号,则使用emit。
- 使用语法如下 emit signal
1.10.6、信号与槽:取消连接
1.11、QT实现心仪的计算器
示例1: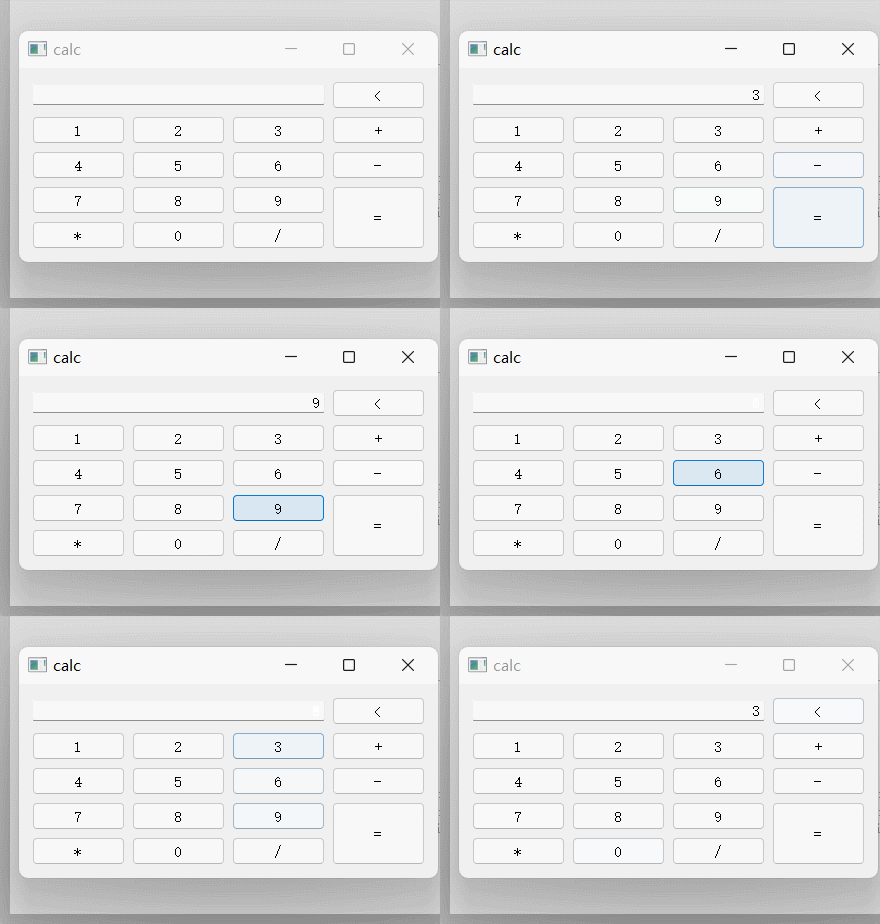
实现心仪的计算器代码链接:
在实现心仪计算器示例1文件夹:https://pan.baidu.com/s/1bFNXYteY4hFqZlTTgdjkrA
提取码:rmm8
示例2:
实现心仪的计算器代码链接:
在实现心仪计算器示例2文件夹:https://pan.baidu.com/s/1bFNXYteY4hFqZlTTgdjkrA
提取码:rmm8
1.12、将QT文件单独提取出来自由使用


QT加载库程序 + 自己文件名
windeployqt.exe untitled4.exe

由于本方法打包程序文件较大,我们需要的是单独的.exe运行程序,详情见本文末尾 8.4、应用程序打包
二、窗口部件
2.1、常用类介绍

2.2、对话框(qt组合部件)
- 文件对话框( QFile Dialog)
- 消息对话框( QMessageBox)
- 输入对话框( QInputDialog)
- 颜色对话框( QColorDialog)
- 字体对话框( QFontDialog)
源码地址文件名Dialog链接:https://pan.baidu.com/s/1NOilm4D4UfOwGQwR9TH0ow
取件码:9iy1
界面:
#include<QPushButton>#include<QTextEdit>#include<QErrorMessage>//QColorDialog, QErrorMessage, QFileDialog, QFontDialog, QInputDialog, QMessageBox, QProgressDialog
QPushButton *bt_filename;
QPushButton *bt_getcolor;
QPushButton *bt_getfont;
QPushButton *bt_getinput;
QPushButton *bt_message;
QPushButton *bt_error;
QPushButton *bt_progress;

QTextEdit *te_test;

#include"widget.h"#include<QVBoxLayout>#include<QHBoxLayout>#include<QFileDialog>#include<QColorDialog>#include<QFontDialog>#include<QInputDialog>#include<QErrorMessage>#include<QMessageBox>#include<QProgressDialog>

bt_filename =newQPushButton("获取文件名");
bt_getcolor =newQPushButton("获取颜色");
bt_getfont =newQPushButton("获取字体");
bt_getinput =newQPushButton("获取输入");
bt_error =newQPushButton("错误弹框");
bt_message =newQPushButton("消息弹框");
bt_progress =newQPushButton("进度条对话框");

te_test =new QTextEdit;

QVBoxLayout *vbox =new QVBoxLayout;
vbox->addWidget(bt_filename);
vbox->addWidget(bt_getcolor);
vbox->addWidget(bt_getfont);
vbox->addWidget(bt_getinput);
vbox->addWidget(bt_error);
vbox->addWidget(bt_message);
vbox->addWidget(bt_progress);

QHBoxLayout *hbox =new QHBoxLayout;
hbox->addLayout(vbox);
hbox->addWidget(te_test);setLayout(hbox);

2.2.1、文件对话框( QFileDialog)


//文件对话框示例connect(bt_filename,&QPushButton::clicked,[&](){//提取单个文件名的对话框//        QString filename =  QFileDialog::getOpenFileName();//        te_test->append(filename);//提取多个文件名的对话框
     QStringList filenames =QFileDialog::getOpenFileNames(this,"打开图片",".","Images (*.png *.xpm *.jpg)");for(int i=0; i<filenames.length(); i++)
         te_test->append(filenames[i]);});
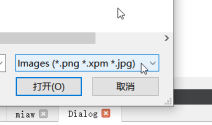
2.2.2、颜色对话框( QColor Dialog)
//颜色对话框示例connect(bt_getcolor,&QPushButton::clicked,[&](){
        QColor color =QColorDialog::getColor();
        te_test->setTextColor(color);});

2.2.3、字体对话框( QFontDialog)
//字体对话框示例connect(bt_getfont,&QPushButton::clicked,[&](){bool ok;
     QFont font =QFontDialog::getFont(&ok);if(ok)//用户选择了字体
         te_test->setCurrentFont(font);});

2.2.4、输入对话框( QInputDialog)
//输入对话框示例connect(bt_getinput,&QPushButton::clicked,[&](){
    QString str =QInputDialog::getText(this,"xxxx","yyyy");
    te_test->setText(str);});
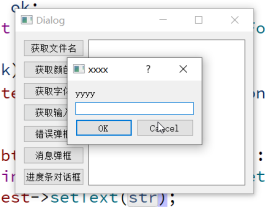
2.2.5、消息对话框( QMessageBox)
//消息弹窗示例connect(bt_message,&QPushButton::clicked,[&](){QMessageBox::warning(this,"xxxx","yyyyyyy", QMessageBox::Open, QMessageBox::Apply);});
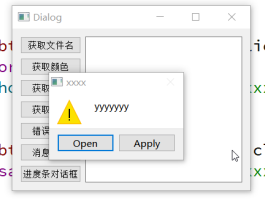
2.2.6、错误消息对话框( QErrorMessage)
//错误弹窗示例connect(bt_error,&QPushButton::clicked,[&](){
    QErrorMessage *x;
    x->showMessage("xxxxxxxxxxxxxxxxxxx");});

2.2.7、进度条( QProgressDialog)
//进度条对话框示例connect(bt_progress,&QPushButton::clicked,[&](){
    QProgressDialog x;
    x.setValue(88);
    x.exec();});

2.3、QT的内置部件
(1) 排版类
(2) 常见按钮
//普通按钮
QPushButton *bt_test;
//工具栏按钮
QToolButton *bt_tool;
//单选按钮
QRadioButton *bt_radio1, *bt_radio2;
//复选按钮
QCheckBox *bt_check1, *bt_check2;
(3) 输出部件
//标签(文字提示, 图片显示,动画显示。。。)
QLabel *lb_text;
QLabel *lb_pix;
QLabel *lb_gif;
//文本浏览器(解释html)
QTextBrowser *tb_test;
//日历
QCalendarWidget *cl_test;
//七段数码管
QLCDNumber *lcd_test;
//进度条
QProgressBar *pbr_test;
(4) 输入部件类
//行编辑框
QLineEdit *le_test;
QCheckBox *ck_test;
//组合框
QComboBox *cmb_test;
//字体选择下拉框
QFontComboBox *fcb_test;
//文本编辑框
QTextEdit *te_test;
//自旋框
QSpinBox *sp_test;
QLCDNumber *lcd_test;
//旋钮
QDial *dl_test;
//滚动条
QScrollBar *sbr_test;
//滑动杆儿
QSlider *sd_test;
2.3.1、排版类
水平布局 || 网格状布局
#include<QHBoxLayout>//排版 水平布局

QHBoxLayout *hbox =new QHBoxLayout;//水平布局
hbox->addWidget(le);//行编辑框
hbox->addWidget(bt);//按钮this->setLayout(hbox);//显示当前主界面

#include<QGridLayout>//排版 网格状布局

QGridLayout *gbox =new QGridLayout;//网格状布局
gbox->addWidget(le,0,0,1,2);//行编辑框
gbox->addWidget(bt,1,1,1,1);//按钮setLayout(gbox);
Qt之格栅布局(QGridLayout)参考链接:https://www.cnblogs.com/ranson7zop/p/7462265.html
2.3.2、常见按钮
实现按钮链接_文件名:buttons:https://pan.baidu.com/s/1vDEm5QuXe2R360GXtRWqsg
提取码:14td
普通按钮

#include<QPushButton>//普通按钮
QPushButton *bt_test;


照片放在:build-output-Desktop_Qt_5_10_1_MinGW_32bit-Debug 路径,就不需要声明路径了。
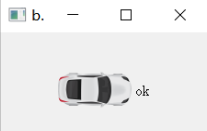
#include<QVBoxLayout>//普通按钮示例
bt_test =newQPushButton("ok");
bt_test->setMinimumSize(200,100);//设置最小尺寸
bt_test->setFlat(true);//设置无边框
bt_test->setIconSize(QSize(80,80));//设置按钮图标大小
bt_test->setIcon(QIcon("car.png"));//设置按钮图标//垂直布局
QVBoxLayout *vbox =new QVBoxLayout;
vbox->addWidget(bt_test);setLayout(vbox);
工具按钮

#include<QToolButton>//工具栏按钮
QToolButton *bt_tool;

//工具按钮示例
bt_tool =new QToolButton;
bt_tool->setIcon(QIcon("car.png"));//设置按钮图标
bt_tool->setShortcut(QKeySequence(Qt::CTRL + Qt::Key_M));//绑定快捷键//垂直布局
QVBoxLayout *vbox =new QVBoxLayout;
vbox->addWidget(bt_tool);setLayout(vbox);


#include<QDebug>

bt_tool->setShortcut(QKeySequence(Qt::CTRL + Qt::Key_M));//绑定快捷键connect(bt_tool,SIGNAL(clicked(bool)),this,SLOT(textbutton()));

voidtextbutton();

connect(bt_tool,SIGNAL(clicked(bool)),this,SLOT(textbutton()));//槽函数对信号的参数感兴趣connect(bt_check1,SIGNAL(clicked(bool)),this,SLOT(check_pushed(bool)));voidWidget::textbutton(){qDebug()<<"xxxxxxxxxxxxxxxx";}

单选按钮

#include<QRadioButton>//单选按钮
QRadioButton *bt_radio1,*bt_radio2;

//单选按钮示例
bt_radio2 =newQRadioButton("可以左转");
bt_radio1 =newQRadioButton("可以右转");

QVBoxLayout *vbox =new QVBoxLayout;
vbox->addWidget(bt_check1);
vbox->addWidget(bt_check2);setLayout(vbox);

复选按钮

#include<QCheckBox>//复选按钮
QCheckBox *bt_check1,*bt_check2;

//多选按钮示例
bt_check1 =newQCheckBox("显示密码");
bt_check2 =newQCheckBox("自动登录");//垂直布局
QVBoxLayout *vbox =new QVBoxLayout;
vbox->addWidget(bt_check1);
vbox->addWidget(bt_check2);setLayout(vbox);

lamda表达式(无名函数)
connect(bt_tool,&QToolButton::clicked,[&](){//lamda表达式(无名函数)qDebug()<<"yyyyyyyyyyyyyyyyyy";});

复选按钮-判断点击上还是没点击上
voidcheck_pushed(bool);

//槽函数对信号的参数感兴趣connect(bt_check1,SIGNAL(clicked(bool)),this,SLOT(check_pushed(bool)));}voidWidget::check_pushed(bool x){qDebug()<<"mmmmmmmmmmmmmmmmm"<<x;}

2.3.3、输入部件类
实现输入部件类链接_文件名:input:https://pan.baidu.com/s/1vDEm5QuXe2R360GXtRWqsg
提取码:14td
行编辑框


#include<QLineEdit>#include<QCheckBox>//行编辑框
QLineEdit *le_test;
QCheckBox *ck_test;

#include<QVBoxLayout>//行编辑框使用示例
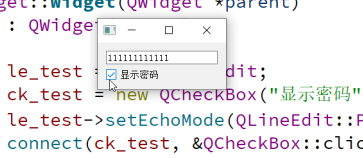
le_test =new QLineEdit;
ck_test =newQCheckBox("显示密码");
le_test->setEchoMode(QLineEdit::Password);connect(ck_test,&QCheckBox::clicked,[&](bool x){
        le_test->setEchoMode(x?QLineEdit::Normal:QLineEdit::Password);});//布局
QVBoxLayout *vbox =new QVBoxLayout;
vbox->addWidget(le_test);
vbox->addWidget(ck_test);setLayout(vbox);
组合框

#include<QCheckBox>//组合框
QComboBox *cmb_test;

#include<QDebug>//组合框/下拉框使用示例
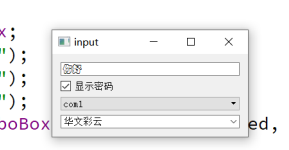
cmb_test =new QComboBox;
cmb_test->addItem("com1");
cmb_test->addItem("com2");
cmb_test->addItem("com3");connect(cmb_test,&QComboBox::currentTextChanged,[&](QString x){qDebug()<<x;});

字体选择框


#include<QFontComboBox>//字体选择下拉框
QFontComboBox *fcb_test;

//文本编辑框(多行输入)使用示例
te_test =new QTextEdit;//字体输入框使用示例
fcb_test =new QFontComboBox;connect(fcb_test,&QFontComboBox::currentFontChanged,[&](QFont x){
    le_test->setFont(x);//设置字体//te_test->setFont(x);          //设置字体
    te_test->setCurrentFont(x);//设置选中文字的字体});

vbox->addWidget(te_test);
文本编辑框

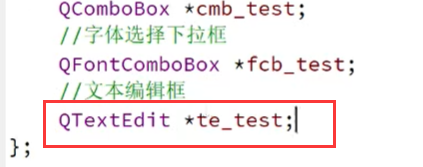
#include<QTextEdit>//文本编辑框
QTextEdit *te_test;


//文本编辑框(多行输入)使用示例
te_test =new QTextEdit;//字体输入框使用示例
fcb_test =new QFontComboBox;connect(fcb_test,&QFontComboBox::currentFontChanged,[&](QFont x){
    le_test->setFont(x);//设置字体//te_test->setFont(x);          //设置字体
    te_test->setCurrentFont(x);//设置选中文字的字体});

自旋框


#include<QSpinBox>#include<QLCDNumber>//自旋框
QSpinBox *sp_test;
QLCDNumber *lcd_test;

lcd_test =new QLCDNumber;
lcd_test->setMinimumHeight(50);connect(sp_test,SIGNAL(valueChanged(int)), lcd_test,SLOT(display(int)));

vbox->addWidget(lcd_test);

设置范围
sp_test->setRange(20,100);//设置取值范围
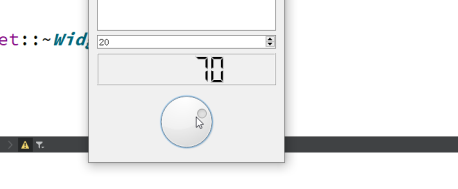
旋扭


#include<QDial>//旋钮
QDial *dl_test;


//旋钮使用示例
dl_test =new QDial;connect(dl_test,SIGNAL(valueChanged(int)), lcd_test,SLOT(display(int)));

vbox->addWidget(dl_test);
滚动条


#include<QScrollBar>//滚动条
QScrollBar *sbr_test;


//滚动条使用示例
sbr_test =new QScrollBar;
sbr_test->setOrientation(Qt::Horizontal);//设置水平方向connect(sbr_test,SIGNAL(valueChanged(int)), lcd_test,SLOT(display(int)));

vbox->addWidget(sbr_test);

滑动杆


#include<QSlider>//滑动杆儿
QSlider *sd_test;

//滑动杆儿使用示例
sd_test =new QSlider;
sd_test->setOrientation(Qt::Horizontal);//设置水平方向connect(sd_test,SIGNAL(valueChanged(int)), lcd_test,SLOT(display(int)));

vbox->addWidget(sd_test);

2.3.4、输出部件类
实现输入部件类链接_文件名:output:https://pan.baidu.com/s/1vDEm5QuXe2R360GXtRWqsg
提取码:14td
标签-显示文字-照片
#include<QLabel>//标签(文字提示, 图片显示,动画显示。。。)
QLabel *lb_text;
QLabel *lb_pix;
QLabel *lb_gif;

//标签显示文字示例
lb_text =newQLabel("我是文字");
lb_text->setAlignment(Qt::AlignCenter);//设置对齐方式//标签显示图片示例
lb_pix =newQLabel("我是图片");
lb_pix->setScaledContents(true);//设置标签自动缩放上面的图片
lb_pix->setPixmap(QPixmap("1.jpg"));//标签显示图片
lb_pix->setFixedSize(200,120);//布局
QVBoxLayout *vbox1 =new QVBoxLayout;
vbox1->addWidget(lb_text);
vbox1->addWidget(lb_pix);setLayout(vbox1);

标签-显示动画
需要一张gif动图

#include<QMovie>//标签显示动画示例
lb_gif =new QLabel;
lb_gif->setFixedSize(200,120);
lb_gif->setScaledContents(true);
lb_gif->setAlignment(Qt::AlignCenter);
QMovie *m =newQMovie("1.gif");//标签显示动画
lb_gif->setMovie(m);
m->start();

vbox1->addWidget(lb_gif);


文本浏览器

#include<QTextBrowser>//文本浏览器(解释html5)
QTextBrowser *tb_test;


//文本浏览器显示html文本
tb_test =new QTextBrowser;
tb_test->setHtml("<!DOCTYPE html>\
                 <html>\
                 <head>\
                 <meta charset=\"utf-8\">\
                 <title>菜鸟教程(runoob.com)</title>\
                 </head>\
                 <body>\
                     <h1>我的第一个标题</h1>\
                     <p>我的第一个段落。</p>\
                 </body>\
                 </html>");

vbox1->addWidget(tb_test);


lb_pix->setFixedSize(200,120);

lb_gif->setFixedSize(200,120);
lb_gif->setScaledContents(true);

图形视图框架
日历


#include<QCalendarWidget>//日历
QCalendarWidget *cl_test;

cl_test =new QCalendarWidget;

vbox->addwidget(cl_test);


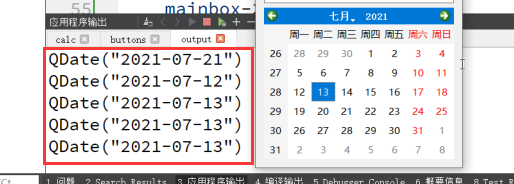
#include<QDate>#include<QDebug>//日历示例
cl_test =new QCalendarWidget ;connect(cl_test,&QCalendarWidget::clicked,[&](QDate x){qDebug()<< x;
     lcd_test->display(x.toString());});

vbox2->addWidget(cl_test);
七段数码管

#include<QLCDNumber>//七段数码管
QLCDNumber *lcd_test;


//7段数码管显示示例
lcd_test =new QLCDNumber;
lcd_test->setDigitCount(20);
lcd_test->setMinimumSize(400,100);
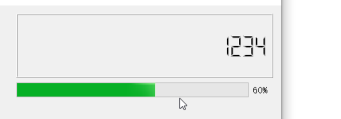
lcd_test->display(1234);//日历示例
cl_test =new QCalendarWidget ;connect(cl_test,&QCalendarWidget::clicked,[&](QDate x){qDebug()<< x;
     lcd_test->display(x.toString());});

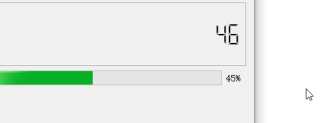
进度条


#include<QProgressBar>//进度条
QProgressBar *pbr_test;


//进度条示例
pbr_test =new QProgressBar;//pbr_test->setValue(60);

vbox2->addWidget(pbr_test);
定时器类 QTimer

#include<QTimer>//定时器

QTimer *t =new QTimer;//定时器类connect(t,&QTimer::timeout,[&](){//捕获定时器timeout信号staticint x =0;
    pbr_schedule->setValue(x++);//在进度条上显示一个数据
    lcd_time->display(x);//在7段数码管上显示一个数据});
t->start(100);//开启定时器(周期性的产生timeout信号)
2.3.5、QT组合部件
QColorDialog, QErrorMessage, QFileDialog, QFontDialog, QInputDialog, QMessageBox, QProgressDialog, and QWizard。
2.3.6、容器类
源码地址文件名containor 链接:https://pan.baidu.com/s/1NOilm4D4UfOwGQwR9TH0ow
取件码:9iy1
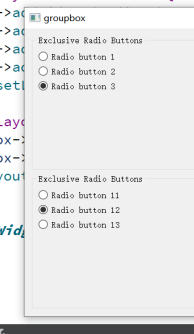
==容器类GroupBox-组合框 ==

#include<QGroupBox>

QGroupBox *gb1;
QGroupBox *gb2;


#include<QRadioButton>//容器#include<QVBoxLayout>//排版的垂直类//第一个容器
QGroupBox *gb1 =newQGroupBox(tr("Exclusive Radio Buttons"));
QRadioButton *radio1 =newQRadioButton(tr("&Radio button 1"));
QRadioButton *radio2 =newQRadioButton(tr("R&adio button 2"));
QRadioButton *radio3 =newQRadioButton(tr("Ra&dio button 3"));
radio1->setChecked(true);
QVBoxLayout *vbox =new QVBoxLayout;
vbox->addWidget(radio1);
vbox->addWidget(radio2);
vbox->addWidget(radio3);
vbox->addStretch(1);
gb1->setLayout(vbox);//第二个容器
QGroupBox *gb2 =newQGroupBox(tr("Exclusive Radio Buttons"));
QRadioButton *radio11 =newQRadioButton(tr("&Radio button 11"));
QRadioButton *radio12 =newQRadioButton(tr("R&adio button 12"));
QRadioButton *radio13 =newQRadioButton(tr("Ra&dio button 13"));
radio11->setChecked(true);

QVBoxLayout *vbox1 =new QVBoxLayout;
vbox1->addWidget(radio11);
vbox1->addWidget(radio12);
vbox1->addWidget(radio13);
vbox1->addStretch(1);
gb2->setLayout(vbox1);
Scroll Area-滚动窗口容器
//widget.h#ifndefWIDGET_H#defineWIDGET_H#include<QWidget>#include<QLabel>classWidget:publicQWidget{
    Q_OBJECT

public:Widget(QWidget *parent =0);~Widget();

    QLabel *lb_pix;};#endif// WIDGET_H
//widget.cpp#include"widget.h"#include<QLabel>#include<QVBoxLayout>#include<QScrollArea>Widget::Widget(QWidget *parent):QWidget(parent){
    lb_pix =new QLabel;

    lb_pix->setPixmap(QPixmap("1.jpg"));//    lb_pix->setFixedSize(640, 480);

    QScrollArea *sl =new QScrollArea;//滚动区域容器
    sl->setFixedSize(640,480);
    sl->setWidget(lb_pix);//将其他对象放入此容器

    QVBoxLayout *vbox =new QVBoxLayout;
    vbox->addWidget(sl);setLayout(vbox);}Widget::~Widget(){}

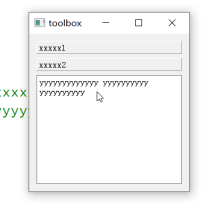
Tool Box-工具箱
//widget.h#ifndefWIDGET_H#defineWIDGET_H#include<QWidget>#include<QTextEdit>classWidget:publicQWidget{
    Q_OBJECT

public:Widget(QWidget *parent =0);~Widget();

    QTextEdit *te_test1;
    QTextEdit *te_test2;};#endif// WIDGET_H
//widget.cpp#include"widget.h"#include<QToolBox>#include<QVBoxLayout>Widget::Widget(QWidget *parent):QWidget(parent){
    te_test1 =newQTextEdit("xxxxxxxxxxxxxxxxx\nxxxxxxxxxx\nxxxx");
    te_test2 =newQTextEdit("yyyyyyyyyyyyy\nyyyyyyyyyy\nyyyyyyyyyy");

    QToolBox *tb =new QToolBox;
    tb->addItem(te_test1,"xxxxx1");
    tb->addItem(te_test2,"xxxxx2");

    QVBoxLayout *vbox =new QVBoxLayout;
    vbox->addWidget(tb);setLayout(vbox);}Widget::~Widget(){}
TabWidget-选项卡-分页显示
//widget.h#ifndefWIDGET_H#defineWIDGET_H#include<QWidget>#include<QTextEdit>classWidget:publicQWidget{
    Q_OBJECT

public:Widget(QWidget *parent =0);~Widget();

    QTextEdit *te_test1;
    QTextEdit *te_test2;};#endif// WIDGET_H
//widget.cpp#include"widget.h"#include<QTabWidget>#include<QVBoxLayout>#include<QDebug>Widget::Widget(QWidget *parent):QWidget(parent){
    te_test1 =newQTextEdit("xxxxxxxxxxxxxxxxx\nxxxxxxxxxx\nxxxx");
    te_test2 =newQTextEdit("yyyyyyyyyyyyy\nyyyyyyyyyy\nyyyyyyyyyy");

    QTabWidget *tb =new QTabWidget;
    tb->setTabsClosable(true);
    tb->addTab(te_test1,"1.c");
    tb->addTab(te_test2,"2.c");connect(tb,&QTabWidget::tabCloseRequested,[&](int x){qDebug()<<"xxx"<<x;});

    QVBoxLayout *vbox =new QVBoxLayout;
    vbox->addWidget(tb);setLayout(vbox);}Widget::~Widget(){}

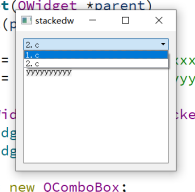
QStackedWidget-堆栈窗口类
//widget.h#ifndefWIDGET_H#defineWIDGET_H#include<QWidget>#include<QTextEdit>#include<QComboBox>classWidget:publicQWidget{
    Q_OBJECT

public:Widget(QWidget *parent =0);~Widget();

    QTextEdit *te_test1;
    QTextEdit *te_test2;

    QComboBox *cb_test;};#endif// WIDGET_H
//widget.cpp#include"widget.h"#include<QStackedWidget>#include<QVBoxLayout>Widget::Widget(QWidget *parent):QWidget(parent){
    te_test1 =newQTextEdit("xxxxxxxxxxxxxxxxx\nxxxxxxxxxx\nxxxx");
    te_test2 =newQTextEdit("yyyyyyyyyyyyy\nyyyyyyyyyy\nyyyyyyyyyy");

    QStackedWidget *tb =new QStackedWidget;
    tb->addWidget(te_test1);
    tb->addWidget(te_test2);

    cb_test =new QComboBox;
    cb_test->addItem("1.c");
    cb_test->addItem("2.c");connect(cb_test,SIGNAL(activated(int)), tb,SLOT(setCurrentIndex(int)));

    QVBoxLayout *vbox =new QVBoxLayout;
    vbox->addWidget(cb_test);
    vbox->addWidget(tb);setLayout(vbox);}Widget::~Widget(){}
MdiArea-多媒体窗口
//widget.h#ifndefWIDGET_H#defineWIDGET_H#include<QWidget>#include<QTextEdit>classWidget:publicQWidget{
    Q_OBJECT

public:Widget(QWidget *parent =0);~Widget();

    QTextEdit *te_test1;
    QTextEdit *te_test2;};#endif// WIDGET_H
//widget.cpp#include"widget.h"#include<QMdiArea>#include<QVBoxLayout>Widget::Widget(QWidget *parent):QWidget(parent){
    te_test1 =newQTextEdit("xxxxxxxxxxxxxxxxx\nxxxxxxxxxx\nxxxx");
    te_test2 =newQTextEdit("yyyyyyyyyyyyy\nyyyyyyyyyy\nyyyyyyyyyy");

    QMdiArea *mdi =new QMdiArea;
    mdi->addSubWindow(te_test1);
    mdi->addSubWindow(te_test2);

    QVBoxLayout *vbox =new QVBoxLayout;
    vbox->addWidget(mdi);setLayout(vbox);}Widget::~Widget(){}

2.3.7、练习-qq登录界面、图片浏览器/抽奖系统、实现串口助手。

图片浏览器/抽奖系统
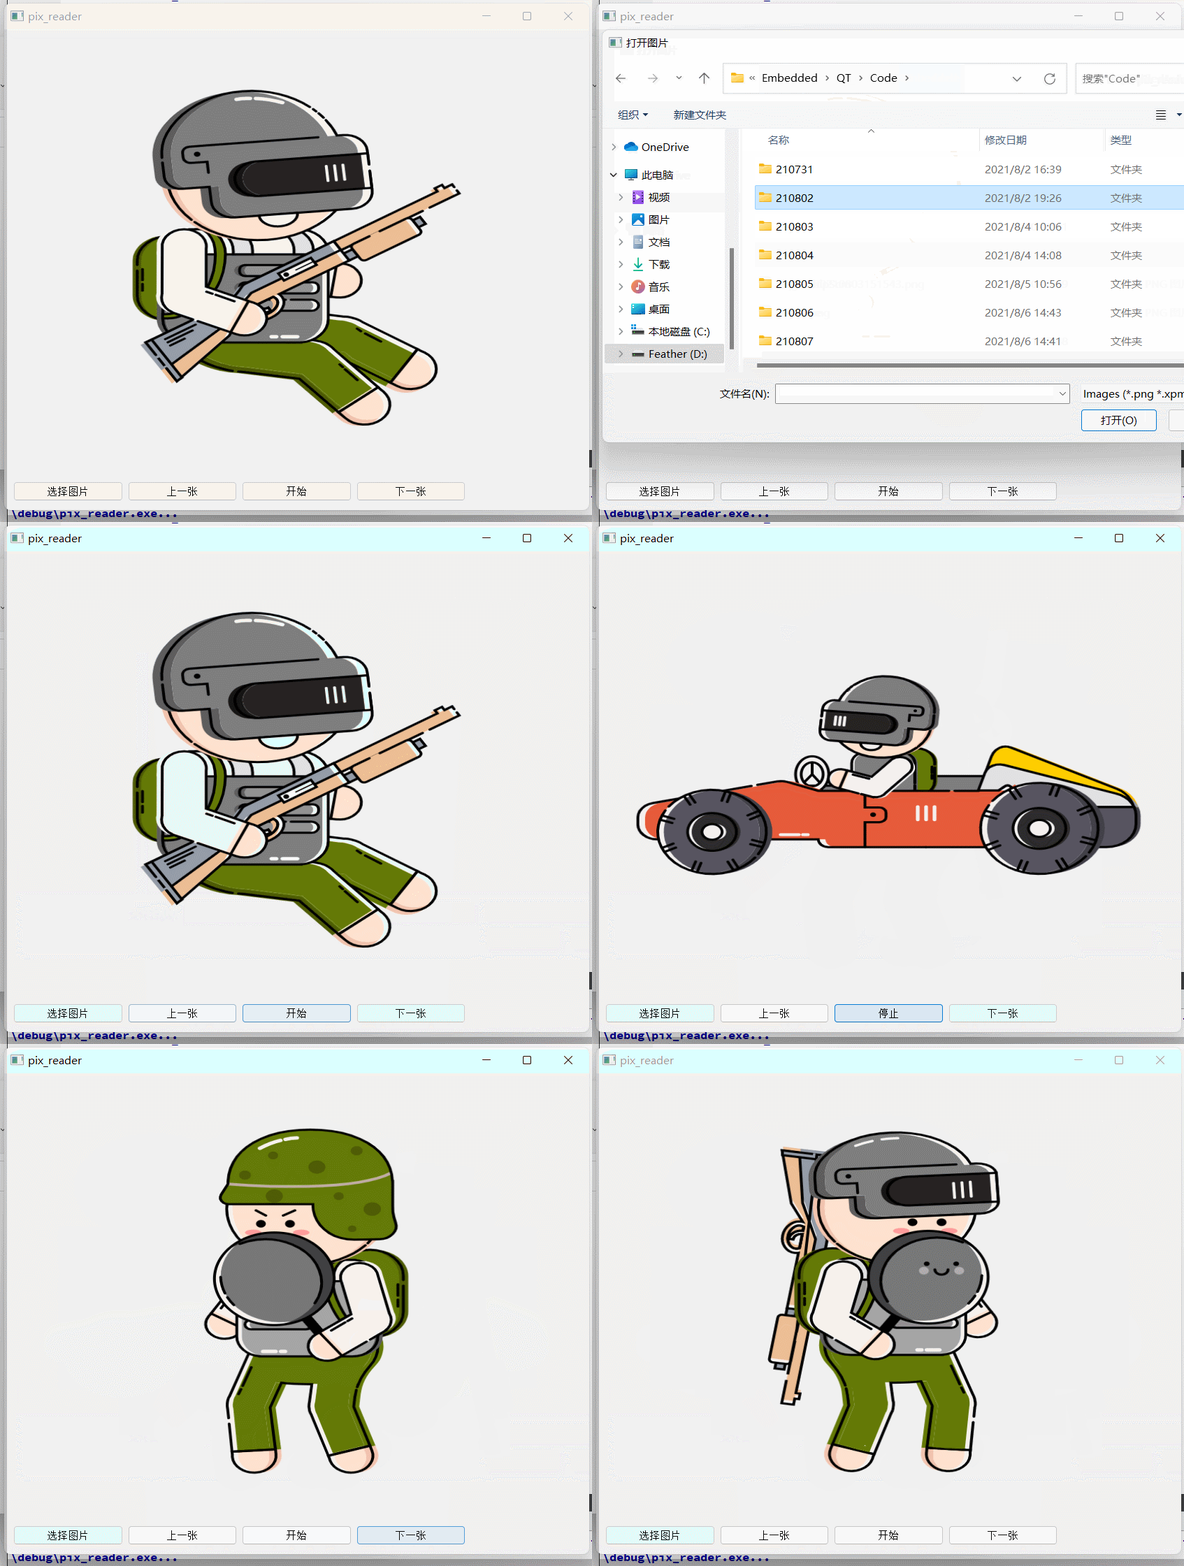
图片浏览器/抽奖系统对应文件:pix_reader.rar 链接:https://pan.baidu.com/s/1X-OROiiBIdhICkIWPc6tFA
提取码:dvp0

2.4、实现一个简易的考试系统


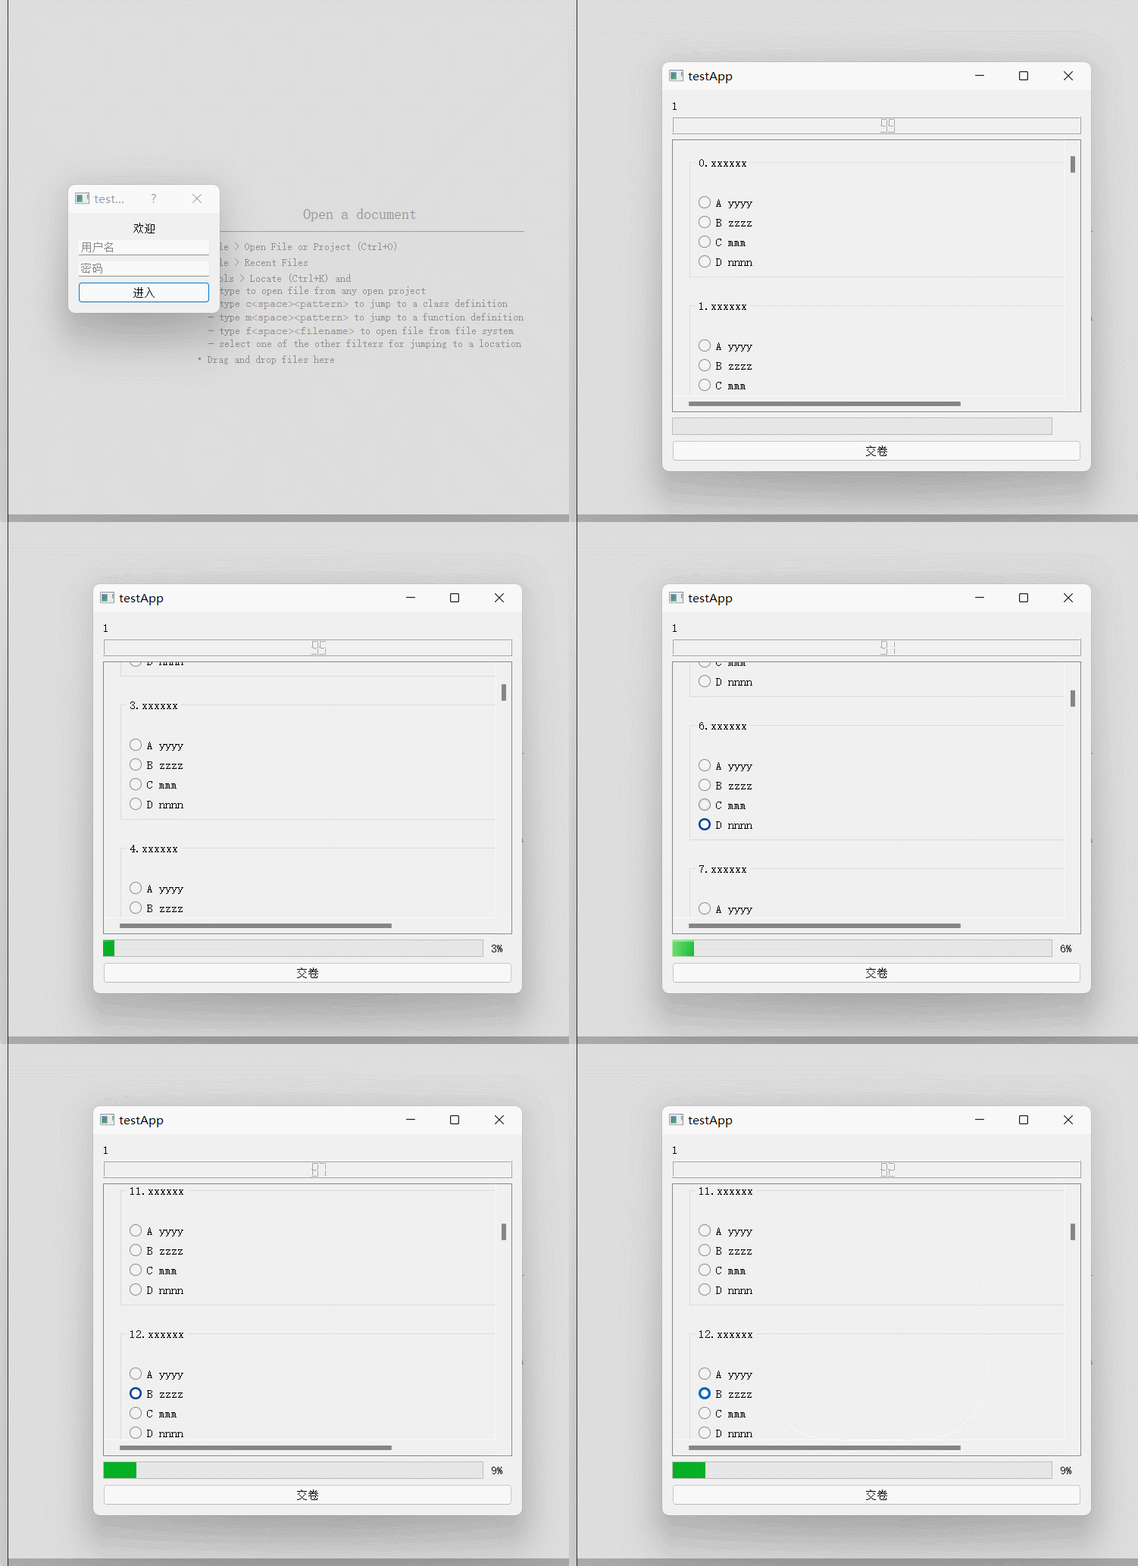
简易版,界面待优化。
实现一个简易的考试系统代码链接:https://pan.baidu.com/s/1QAme6p-QHSCmN-e3nuw2rg
提取码:b2k9
三、主窗口
3.1、基础窗口部件( QWidget)
- 基础窗口部件主要用于自定义窗 QWidge堤提供一个基础窗口,窗口并没有任何图形部件。通过指定图形部件的父对象来把图形部件放上基础窗口,或是通过自动布局工具把图形部件放上基 础窗口。
3.2、布局管理器
布局管理器主要常用的三个类: QHBoXLayout、 QVBoxLayout、 QGridLayout
- QHBOXLayout:水平布局
- QVBoxLayout:垂直布局
- QGrid Layout:网格布
3.3、主窗口( QMain Window)
QMain Window类提供了一个典型应用程序的主窗口框架,对于小屏幕设备使用Q图形设计器定义标准 Qwidget模板比使用主窗口类更好一些典型模板包含有菜单栏 QMenuBar,工具栏 TOolbAr和状态栏 STatus Bar。
3.3.1、创建工程
QMain Window示例代码链接:https://pan.baidu.com/s/1w99gg-lmuxaywJP1byFDTA
提取码:7vkv
3.4、菜单

QAction *actopen =newQAction("打开");
actopen->setIcon(QIcon(":/img/open.png"));
actopen->setShortcut(QKeySequence("Ctrl+O"));

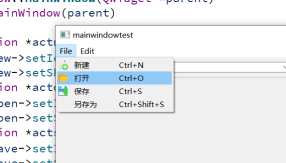
QMenu *fileMenu =menuBar()->addMenu("&File");
fileMenu->addAction(actnew);
fileMenu->addAction(actopen);
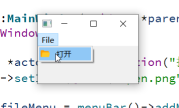
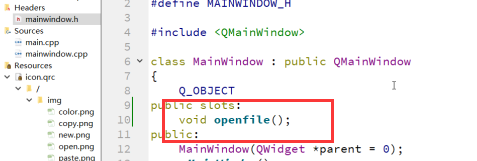

voidopenfile();#include<QFileDialog>connect(actopen,SIGNAL(triggered(bool)),this,SLOT(openfile()));voidMainWindow::openfile(){QFileDialog::getOpenFileName();}

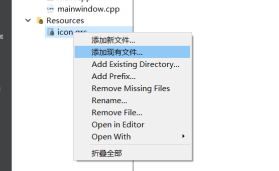
资源文件的添加
先自己创建一个文件夹用于保存照片路径
qt界面 右键 添加新文件
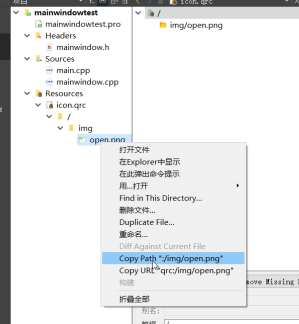

actnew->setIcon(QIcon(":/img/new.png"));
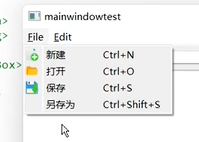
文本编辑器
QAction *actnew =newQAction("新建");
actnew->setIcon(QIcon(":/img/new.png"));
actnew->setShortcut(QKeySequence("Ctrl+N"));
QAction *actopen =newQAction("打开");
actopen->setIcon(QIcon(":/img/open.png"));
actopen->setShortcut(QKeySequence("Ctrl+O"));
QAction *actsave =newQAction("保存");
actsave->setIcon(QIcon(":/img/save.png"));
actsave->setShortcut(QKeySequence("Ctrl+S"));
QAction *actsaveas =newQAction("另存为");
actsaveas->setIcon(QIcon(":/img/saveas.png"));
actsaveas->setShortcut(QKeySequence("Ctrl+Shift+S"));// 实现文件菜单
QMenu *fileMenu =menuBar()->addMenu("&File");
fileMenu->addAction(actnew);
fileMenu->addAction(actopen);
fileMenu->addAction(actsave);
fileMenu->addAction(actsaveas);

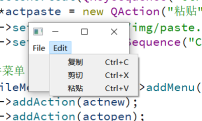
QAction *actcopy =newQAction("复制");
actcopy->setIcon(QIcon(":/img/copy.png"));
actcopy->setShortcut(QKeySequence("Ctrl+C"));
QAction *actcut =newQAction("剪切");
actcut->setIcon(QIcon(":/img/cut.png"));
actcut->setShortcut(QKeySequence("Ctrl+X"));
QAction *actpaste =newQAction("粘贴");
actpaste->setIcon(QIcon(":/img/paste.png"));
actpaste->setShortcut(QKeySequence("Ctrl+V"));

QMenu *editMenu =menuBar()->addMenu("&Edit");
editMenu->addAction(actcopy);
editMenu->addAction(actcut);
editMenu->addAction(actpaste);
3.5、工具栏


#include<QToolBar>#include<QFontComboBox>// 添加工具栏
QToolBar *filetool =addToolBar("文件");
filetool->addAction(actnew);
filetool->addAction(actopen);
QToolBar *edittool =addToolBar("编辑");
edittool->addAction(actcopy);
edittool->addAction(actpaste);
QToolBar *settool =addToolBar("设置");
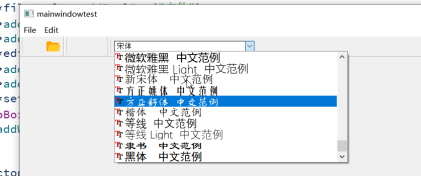
QFontComboBox *fc =new QFontComboBox;
settool->addWidget(fc);connect(actopen,SIGNAL(triggered(bool)),this,SLOT(openfile()));


#include<QToolBar>#include<QFontComboBox>

QToolBar *settool =addToolBar("设置");
QFontComboBox *fc =new QFontComboBox;
settool->addWidget(fc);
添加照片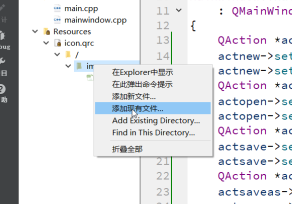
3.6、状态栏
中央部件

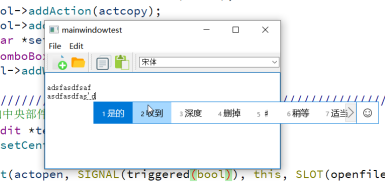
#include<QTextEdit>// 添加中央部件
te =new QTextEdit;
te->setMinimumSize(640,480);this->setCentralWidget(te);connect(actopen,SIGNAL(triggered(bool)),this,SLOT(openfile()));
状态栏

#include<QLabel>// 添加状态栏
QLabel *lb =newQLabel("1.txt");this->statusBar()->addWidget(lb);connect(actopen,SIGNAL(triggered(bool)),this,SLOT(openfile()));

操作文件
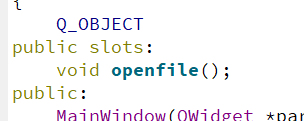
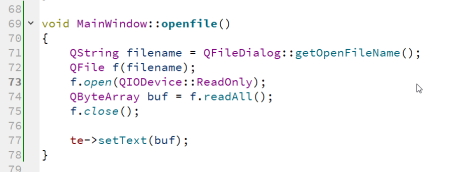
#include<QFile>voidopenfile();voidMainWindow::openfile(){
    QString filename =QFileDialog::getOpenFileName();
    QFile f(filename);
    f.open(QIODevice::ReadOnly);
    QByteArray buf = f.readAll();
    f.close();

    te->setText(buf);}

3.7、动作
一般的,菜单项和工具栏按钮,往往执行一样的功能,所以Qt设讠 ACtion来管理其共有的显示图标、提示信息、热键、槽函数,等等。
3.8、补充练习:QMain Window

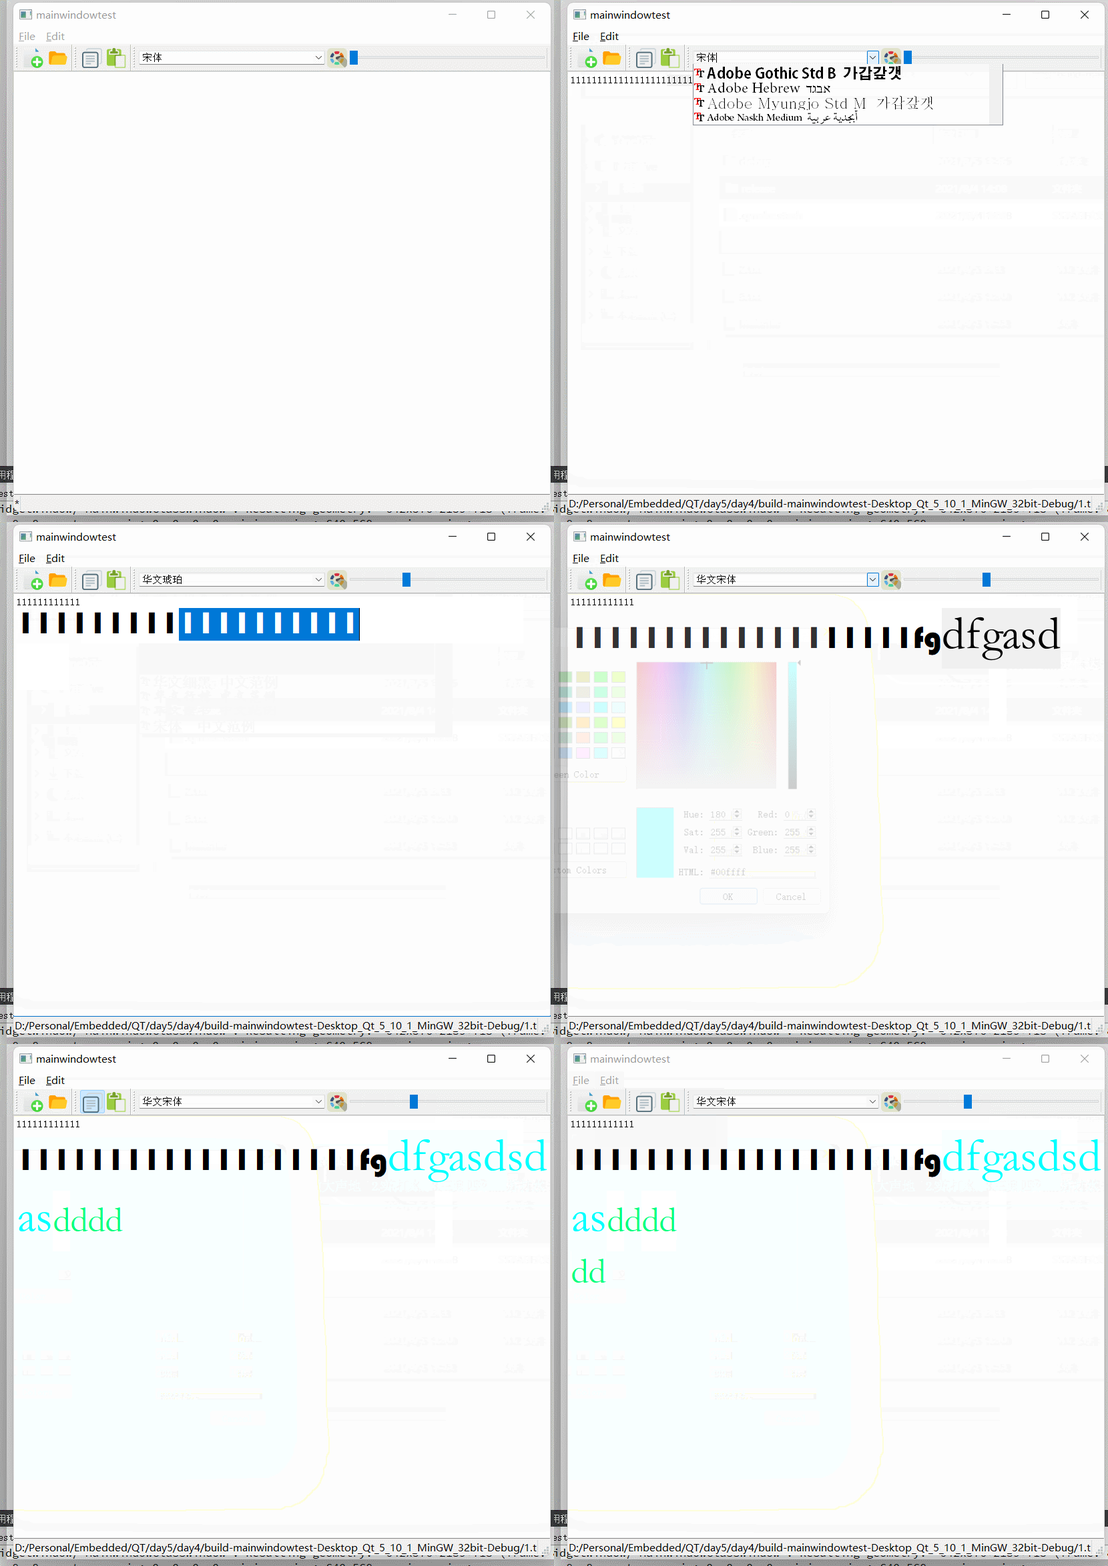
练习:QMain Window 代码链接:https://pan.baidu.com/s/1YrqnFoYerSH2k8mWSnaG-Q
提取码:ziyu
四、事件及图形系统
4.1、事件处理
Qt的事件由窗口系统或是Q自身产生,用于响应各种需要处理的事务。
- 特定事件处理器
- QObject对象事件处理器
- 事件过滤器
发送事件
处理事件
定时事件
4.1事件及图形代码文件名:event_test 链接:https://pan.baidu.com/s/1wyp-89-8HvHXOefqE5_ACg
提取码:ziyu
处理鼠标事件
public://处理鼠标事件的虚函数---------------------------------//鼠标点击事件voidmousePressEvent(QMouseEvent *event);


#include"QMouseEvent"//鼠标点击voidWidget::mousePressEvent(QMouseEvent *event){qDebug()<<"mouse pos"<< event->pos();qDebug()<<"mouse button"<< event->button();//按键,左键1,右键2,中键4}

//处理鼠标事件的虚函数---------------------------------//鼠标点击事件voidmousePressEvent(QMouseEvent *event);//鼠标双击voidmouseDoubleClickEvent(QMouseEvent *event);//鼠标释放voidmouseReleaseEvent(QMouseEvent *event);//鼠标移动事件voidmouseMoveEvent(QMouseEvent *event);


//使能鼠标事件追踪(不需长按鼠标键)//this->setMouseTracking(true);//处理鼠标事件的虚函数---------------------------------//鼠标双击voidWidget::mouseDoubleClickEvent(QMouseEvent *event){qDebug()<<"mouse double"<< event->pos();//打印:mouse double}//鼠标释放voidWidget::mouseReleaseEvent(QMouseEvent *event){qDebug()<<"mouse release"<< event->pos();}//鼠标移动事件voidWidget::mouseMoveEvent(QMouseEvent *event){qDebug()<<"mouse move:"<< event->pos();//左右键都可以}
滚轮事件

//滚轮事件-----------------------------------------------voidwheelEvent(QWheelEvent *event);#include"QWheelEvent"//滚轮事件-----------------------------------------------voidWidget::wheelEvent(QWheelEvent *event){qDebug()<< event->angleDelta();}
键盘事件

//键盘事件-----------------------------------------------voidkeyPressEvent(QKeyEvent *event);voidkeyReleaseEvent(QKeyEvent *event);#include"QKeyEvent"//键盘事件-----------------------------------------------voidWidget::keyPressEvent(QKeyEvent *event){qDebug()<< event->key();}voidWidget::keyReleaseEvent(QKeyEvent *event){qDebug()<< event->key();}
窗口关闭事件

//窗口关闭事件voidcloseEvent(QCloseEvent *event);voidWidget::closeEvent(QCloseEvent *event){qDebug()<<"xxxxxxxxxxxxxxxxxxx";}
4.2、2D绘图基础
Qt的2D绘图系统主要是由于三个基本的类构成: QPainter、 QPaintEngine、 QPaintDevice。
绘图事件

//绘图事件voidpaintEvent(QPaintEvent *event);voidWidget::paintEvent(QPaintEvent *event){qDebug()<<"ddddddddddddddddddddd"<<pos<<posend;}
画点

#include<QPainter>

QPoint pos;
QPoint posend;


voidWidget::mousePressEvent(QMouseEvent *event){
    pos = event->pos();//    update(); //手动激发一次界面重绘事件paintEventqDebug()<<"mouse press: "<<event->pos();qDebug()<<"mouse button: "<<event->button();}//用户想要的绘制
QPainter p(this);//请出一个画家在this(当前面板)上画
QPen pen;
pen.setWidth(10);
p.setPen(pen);//给画家一支笔
p.drawPoint(pos);//画点qDebug()<<"ddddddddddddddddddddd"<<pos<<posend;

画线
p.drawLine(QPoint(0,0), pos);


QPoint posend;


voidWidget::mousePressEvent(QMouseEvent *event){
    pos = event->pos();//    update(); //手动激发一次界面重绘事件paintEventqDebug()<<"mouse press: "<<event->pos();qDebug()<<"mouse button: "<<event->button()}voidWidget::mouseMoveEvent(QMouseEvent *event){
    posend = event->pos();update();qDebug()<<"mouse move:"<<event->pos();}

p.drawLine(pos, posend);qDebug()<<"ddddddddddddddddddddd"<<pos<<posend;

画椭圆
p.drawEllipse(posend,100,100);


p.drawLine(posend,QPoint(posend.x()+200, posend.y()));

画矩形
p.drawRect(posend.x(), posend.y(),300,200);

画刷子
QBrush brush;
brush.setColor(Qt::red);
brush.setStyle(Qt::DiagCrossPattern);
p.setBrush(brush);//给画家一个刷子

画照片
p.drawPixmap(posend.x(), posend.y(),100,100,QPixmap("C:\\Users\\29507\\Desktop\\car.png"));

4.3、坐标系统
画家动作
QPainter p(this);
p.translate(100,100);//移动画家
p.scale(0.5,0.5);//缩放作画
p.drawEllipse(QPoint(0,0),100,100);//相对画家的坐标
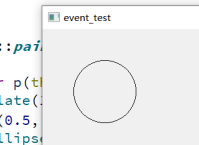

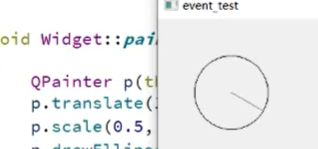
时钟
#include<QTimer>

angle =0;
QTimer *t =new QTimer;connect(t,&QTimer::timeout,[&](){
   angle+=6;update();});
t->start(100);//时间

#if1//理解坐标系+画家的移动、缩放、旋转
QPainter p(this);
p.translate(100,100);//移动画家
p.scale(0.5,0.5);//缩放作画
p.drawEllipse(QPoint(0,0),100,100);//相对画家的坐标
p.rotate(angle);
p.drawLine(QPoint(0,0),QPoint(100,0));//相对画家的坐标
p.drawText(150,0,"hello");#endif
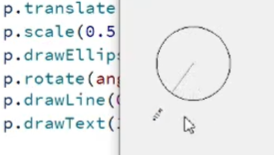
4.1事件及图形代码文件名:event_test 链接:https://pan.baidu.com/s/1wyp-89-8HvHXOefqE5_ACg
提取码:ziyu
双缓冲绘图
双缓冲绘图代码文件名:doubleBuff 链接:https://pan.baidu.com/s/1wyp-89-8HvHXOefqE5_ACg
提取码:ziyu


按空格保存


照片保存在:build-doubleBuff-Desktop_Qt_5_10_1_MinGW_32bit-Debug 路径


画矩形

#ifndefWIDGET_H#defineWIDGET_H#include<QWidget>classWidget:publicQWidget{
    Q_OBJECT

public:Widget(QWidget *parent =0);~Widget();voidpaintEvent(QPaintEvent *event);voidmousePressEvent(QMouseEvent *event);voidmouseMoveEvent(QMouseEvent *event);voidmouseReleaseEvent(QMouseEvent *event);voidkeyPressEvent(QKeyEvent *event);

    QPoint posstart;
    QPoint posend;

    QPixmap *pix;bool ismoving;};#endif// WIDGET_H
#include"widget.h"#include<QMouseEvent>#include<QPainter>Widget::Widget(QWidget *parent):QWidget(parent){
    pix =newQPixmap(640,480);
    pix->fill();

    ismoving =true;}voidWidget::paintEvent(QPaintEvent *event){
    QPainter p2(this);
    p2.drawPixmap(0,0,640,480,*pix);//p2.drawLine(posstart, posend);
    p2.drawRect(QRect(posstart, posend));

    QPainter p1(pix);if(!ismoving){//p1.drawLine(posstart, posend);
        p1.drawRect(QRect(posstart, posend));}}voidWidget::mousePressEvent(QMouseEvent *event){
    posstart = event->pos();}voidWidget::mouseMoveEvent(QMouseEvent *event){
    posend = event->pos();
    ismoving =true;update();}voidWidget::mouseReleaseEvent(QMouseEvent *event){
    ismoving =false;update();}voidWidget::keyPressEvent(QKeyEvent *event){
    pix->save("1.jpg");}Widget::~Widget(){}
双缓冲绘图代码文件名:doubleBuff 链接:https://pan.baidu.com/s/1wyp-89-8HvHXOefqE5_ACg
提取码:ziyu
模仿一个按钮出来
模仿一个按钮事列代码文件名:mybutton链接:https://pan.baidu.com/s/1wyp-89-8HvHXOefqE5_ACg
提取码:ziyu


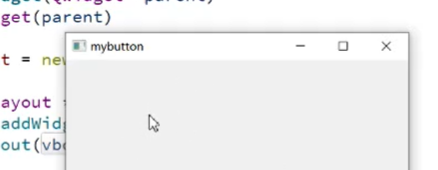



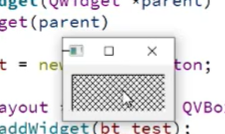



点击按钮关闭
文件代码:
#ifndefMYPUSHBUTTON_H#defineMYPUSHBUTTON_H#include<QWidget>//设计一个自己的按钮classmyPushButton:publicQWidget{
    Q_OBJECT
public:explicitmyPushButton(QString text, QWidget *parent =nullptr);voidmousePressEvent(QMouseEvent *event);voidmouseReleaseEvent(QMouseEvent *event);voidpaintEvent(QPaintEvent *event);

signals:voidclicked();private:bool drawblack;//是否画背景(模拟点击动作)
    QString textt;};#endif// MYPUSHBUTTON_H

#ifndefWIDGET_H#defineWIDGET_H#include<QWidget>#include"mypushbutton.h"classWidget:publicQWidget{
    Q_OBJECT

public:Widget(QWidget *parent =0);~Widget();

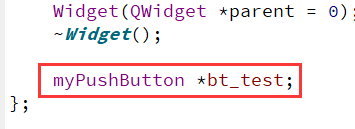
    myPushButton *bt_test;};#endif// WIDGET_H
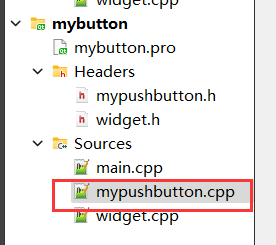
#include"mypushbutton.h"#include<QPainter>#include<QDebug>

myPushButton::myPushButton(QString text, QWidget *parent):QWidget(parent),textt(text){
    drawblack =false;setMinimumSize(100,50);}void myPushButton::mousePressEvent(QMouseEvent *event){qDebug()<<"ppppppppppppppppp";//调试
    drawblack =true;update();
    emit clicked();}void myPushButton::mouseReleaseEvent(QMouseEvent *event){
    drawblack =false;update();}void myPushButton::paintEvent(QPaintEvent *event){
    QPainter p(this);if(drawblack){qDebug()<<"dddddddddddd";//调试
        QBrush brush;
        brush.setColor(Qt::black);
        brush.setStyle(Qt::DiagCrossPattern);
        p.setBrush(brush);//给画家一个刷子
        p.drawRect(0,0,width(),height());}qDebug()<< textt;
    p.setPen(Qt::red);
    p.drawText(width()/2,height()/2, textt);}
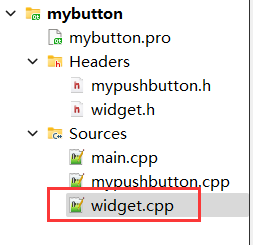
#include"widget.h"#include<QVBoxLayout>Widget::Widget(QWidget *parent):QWidget(parent){//使用自己的按钮
    bt_test =newmyPushButton("OK");

    QVBoxLayout *vbox =new QVBoxLayout;
    vbox->addWidget(bt_test);setLayout(vbox);connect(bt_test,&myPushButton::clicked,[&](){close();});}Widget::~Widget(){}
模仿一个按钮事列代码文件名:mybutton链接:https://pan.baidu.com/s/1wyp-89-8HvHXOefqE5_ACg
提取码:ziyu
4.4、Graphics View(图形视图)
Graphics View支持同 QPainter-样的几何变换:缩放、平移、旋转、扭转等等功能。也可以通过 QMatrix完成几何变换的值设置。
4.5、事件过滤
事件过滤传统处理方式
事件过滤传统处理方式textZoom链接:https://pan.baidu.com/s/1TbWztC0ZAru5qKBbMiF5PA
提取码:ziyu

#ifndefWIDGET_H#defineWIDGET_H#include<QWidget>#include"mytextedit.h"classWidget:publicQWidget{
    Q_OBJECT

public:Widget(QWidget *parent =0);~Widget();

    myTextEdit *te;};#endif// WIDGET_H

#include"widget.h"#include<QVBoxLayout>Widget::Widget(QWidget *parent):QWidget(parent){
    te =new myTextEdit;

    QVBoxLayout *vbox =new QVBoxLayout;
    vbox->addWidget(te);setLayout(vbox);}Widget::~Widget(){}


#ifndefMYTEXTEDIT_H#defineMYTEXTEDIT_H#include<QTextEdit>#include<QDebug>#include<QWheelEvent>classmyTextEdit:publicQTextEdit{public:myTextEdit();voidwheelEvent(QWheelEvent *e){qDebug()<<e->delta();if(e->delta()>0)this->setFontPointSize(size++);else{
           size -=1;if(0== size)
               size =1;this->setFontPointSize(size);}}int size;};#endif// MYTEXTEDIT_H

#include"mytextedit.h"

myTextEdit::myTextEdit(){
    size =1;}
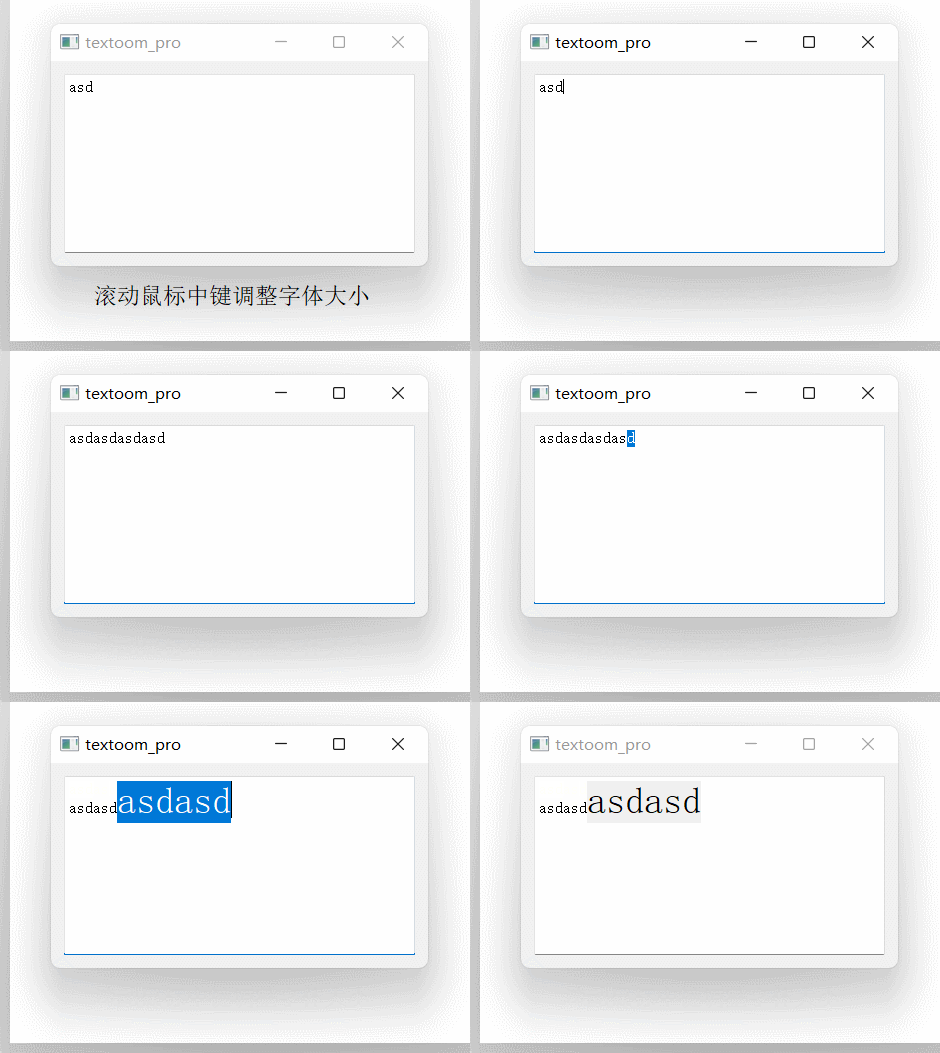
事件过滤
事件过滤代码文件名textoom_pro链接:https://pan.baidu.com/s/1TbWztC0ZAru5qKBbMiF5PA
提取码:ziyu

#ifndefWIDGET_H#defineWIDGET_H#include<QWidget>#include<QTextEdit>#include<QDebug>#include<QEvent>#include<QWheelEvent>classWidget:publicQWidget{
    Q_OBJECT

public://专门处理过滤出来的事件(别人的事件)booleventFilter(QObject *watched, QEvent *event){if(watched == te)//专门处理来自于文本编辑框的事件{if(event->type()== QEvent::Wheel)//滚轮事件{
                QWheelEvent *e =static_cast<QWheelEvent *>( event);if(e->delta()>0)
                    te->setFontPointSize(size++);else{
                    size -=1;if(0== size)
                        size =1;
                    te->setFontPointSize(size);}returntrue;}}returnfalse;}Widget(QWidget *parent =0);~Widget();

     QTextEdit *te;int size;};#endif// WIDGET_H

#include"widget.h"#include<QVBoxLayout>Widget::Widget(QWidget *parent):QWidget(parent){
    size =1;

    te =new QTextEdit;//将事件交给其他的对象!!!!!!!
    te->installEventFilter(this);//te将自己的事件先交给this处理

    QVBoxLayout *vbox =new QVBoxLayout;
    vbox->addWidget(te);setLayout(vbox);}Widget::~Widget(){}
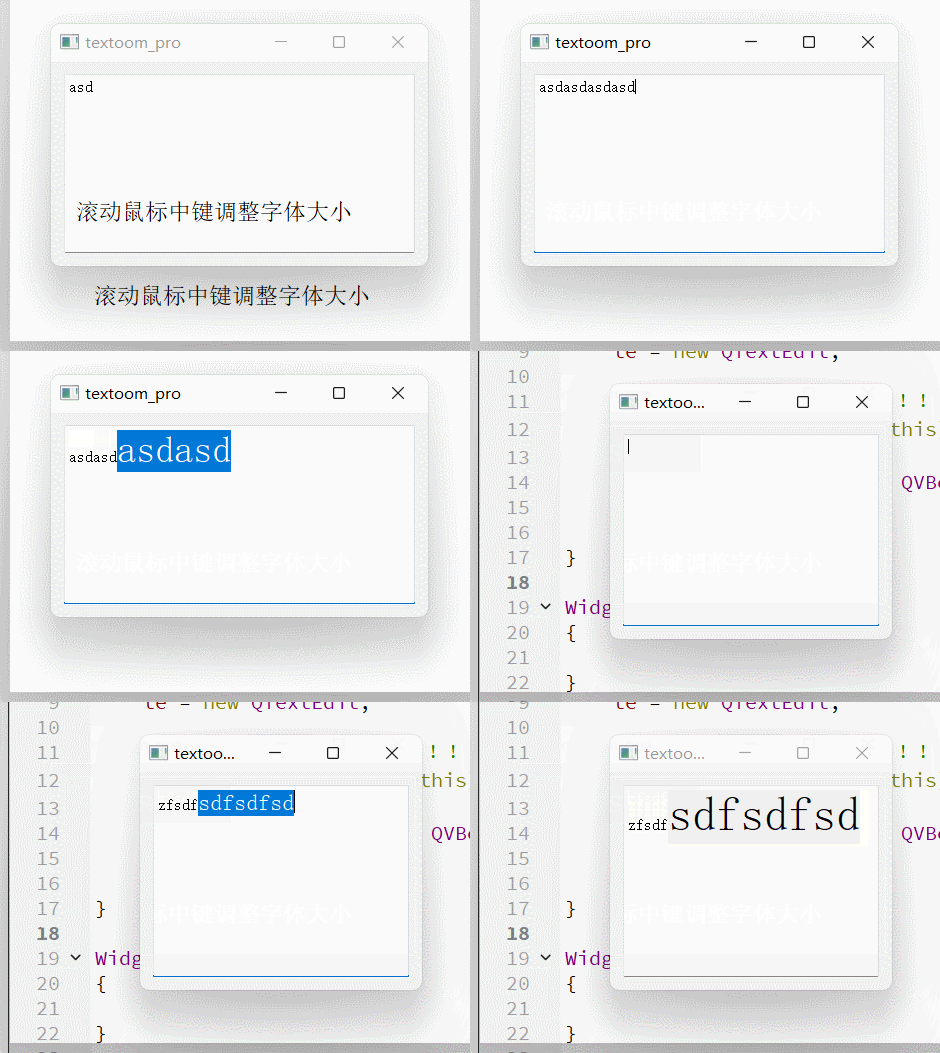
4.6、练习自制一个表盘、画图工具。

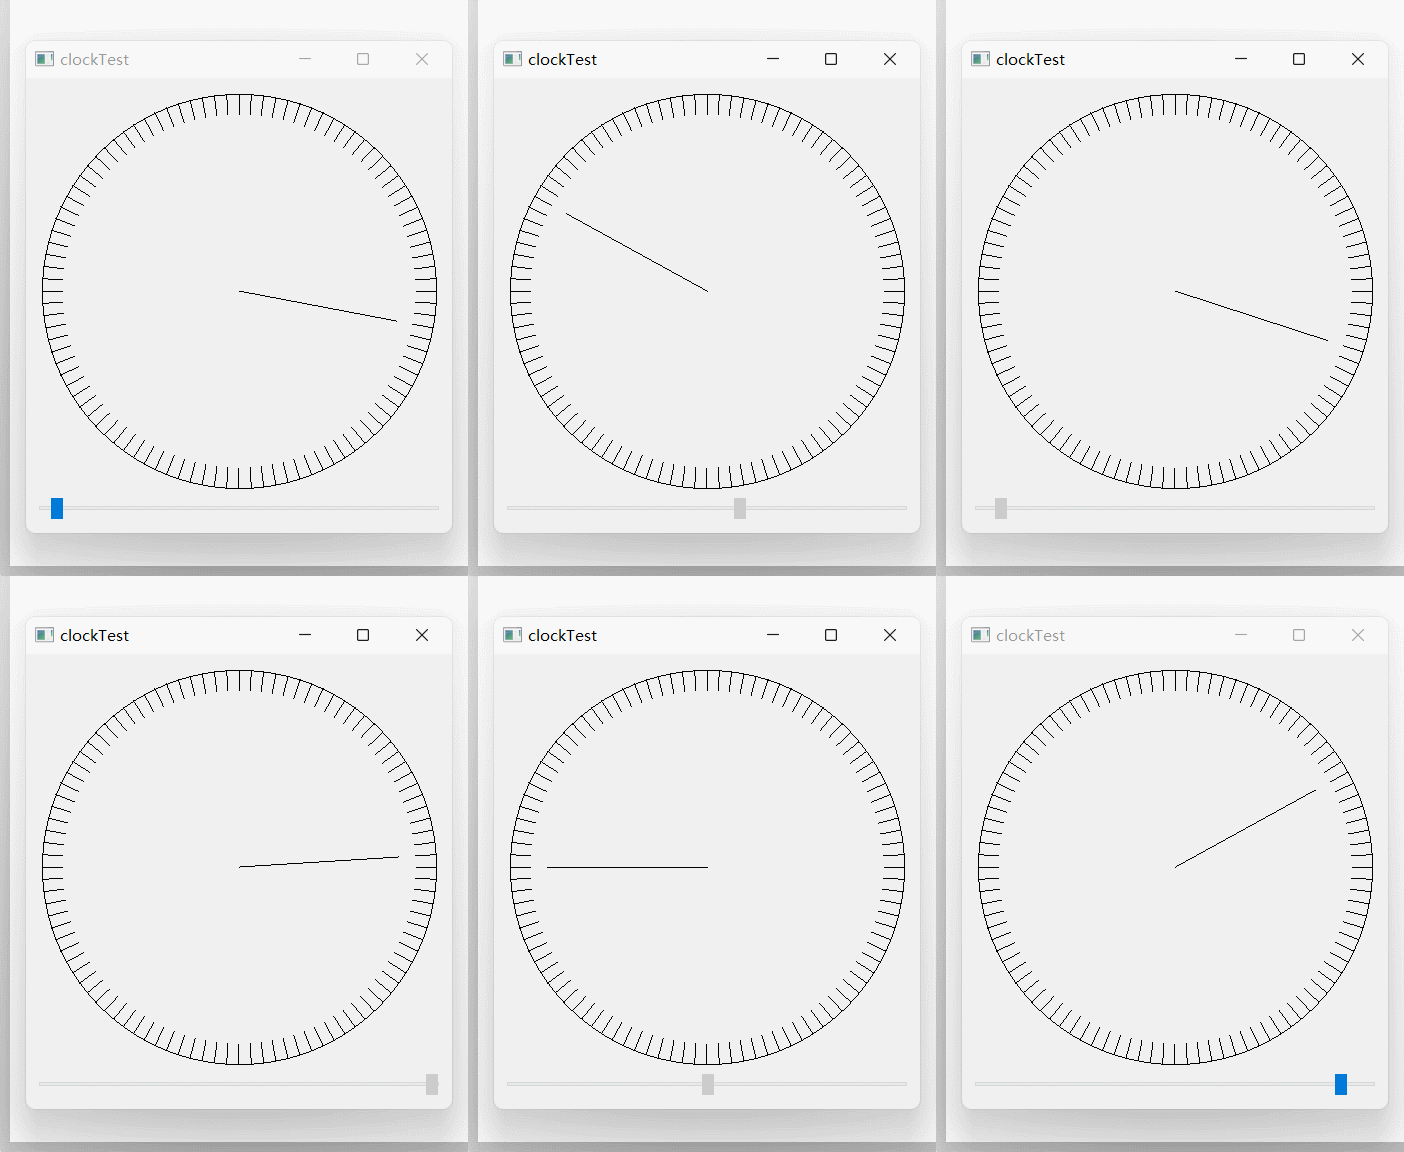
自制一个表盘代码链接:https://pan.baidu.com/s/1EcrlF9igClUsiBtdgVoppw
提取码:ziyu

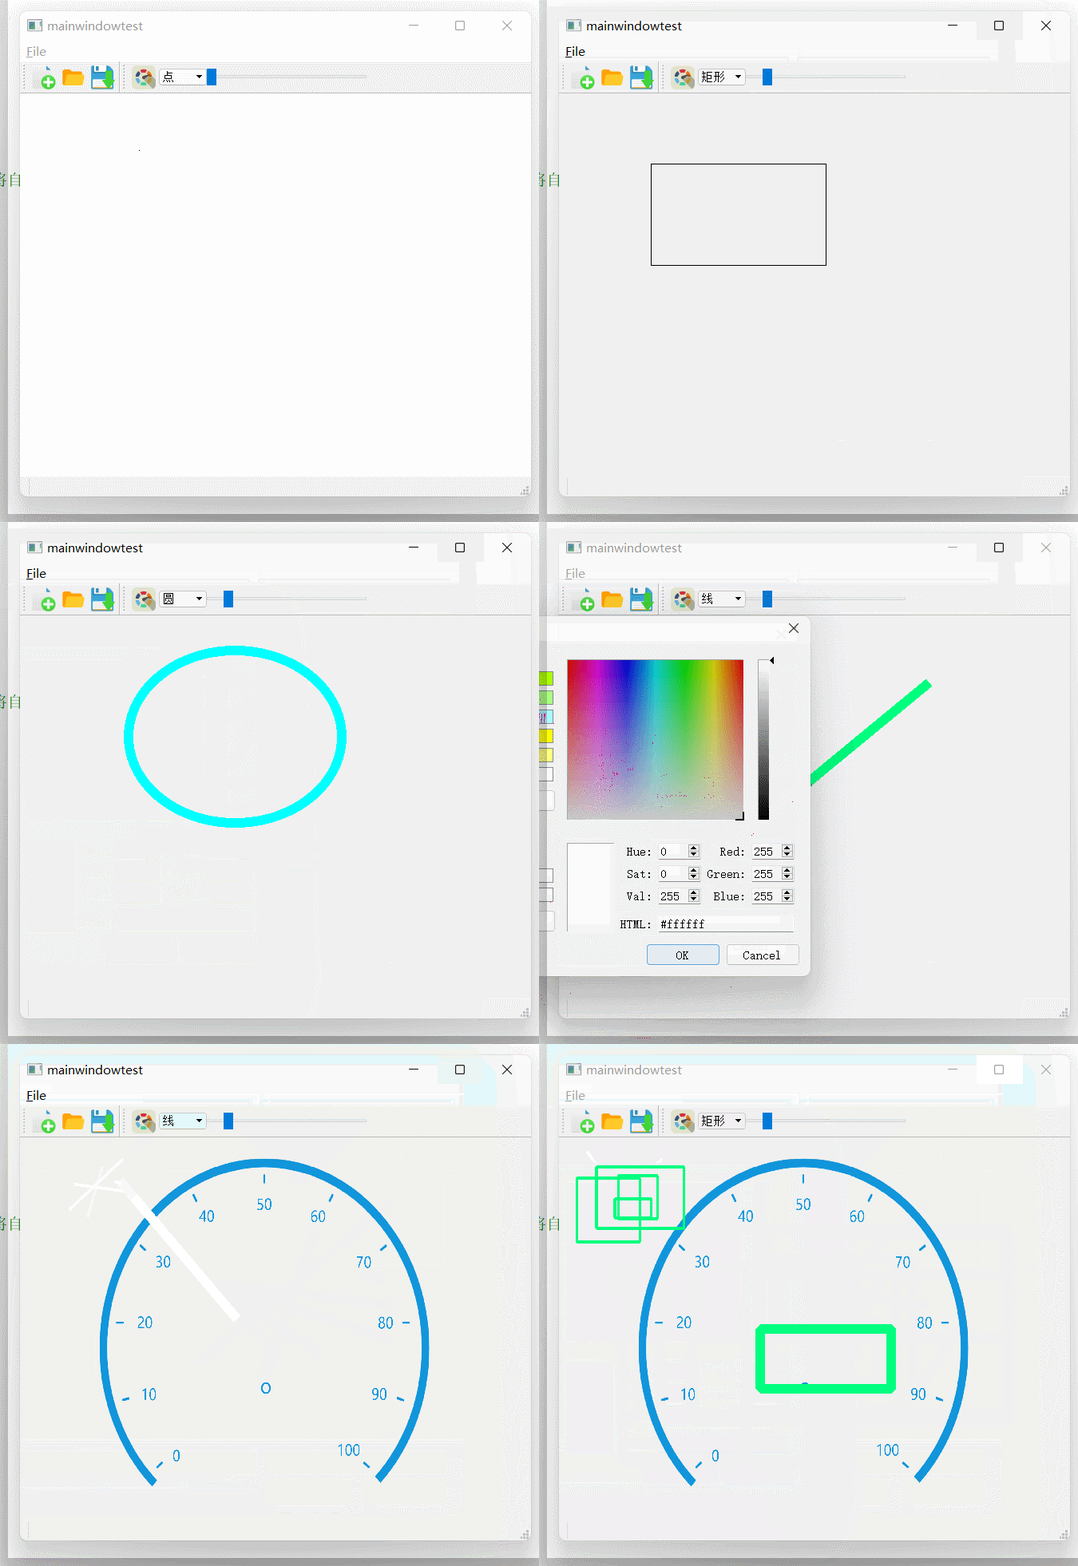
画图工具代码链接:https://pan.baidu.com/s/1LixaVNtv5KjJaEc4iw89lA
提取码:ziyu
五、文件处理
5.1、QFiIe

5.1.1、文件加密工具案例
新建文件


项目案例


voidon_view_clicked();voidon_encode_clicked();voidon_exit_clicked();

    Ui::Widget *ui;
    QString filename;

#include"widget.h"#include"ui_widget.h"#include<QFileDialog>#include<QFile>voidWidget::on_view_clicked(){//ui->progressBar->setValue(0);
    filename =QFileDialog::getOpenFileName();
    ui->lineEdit->setText(filename);}


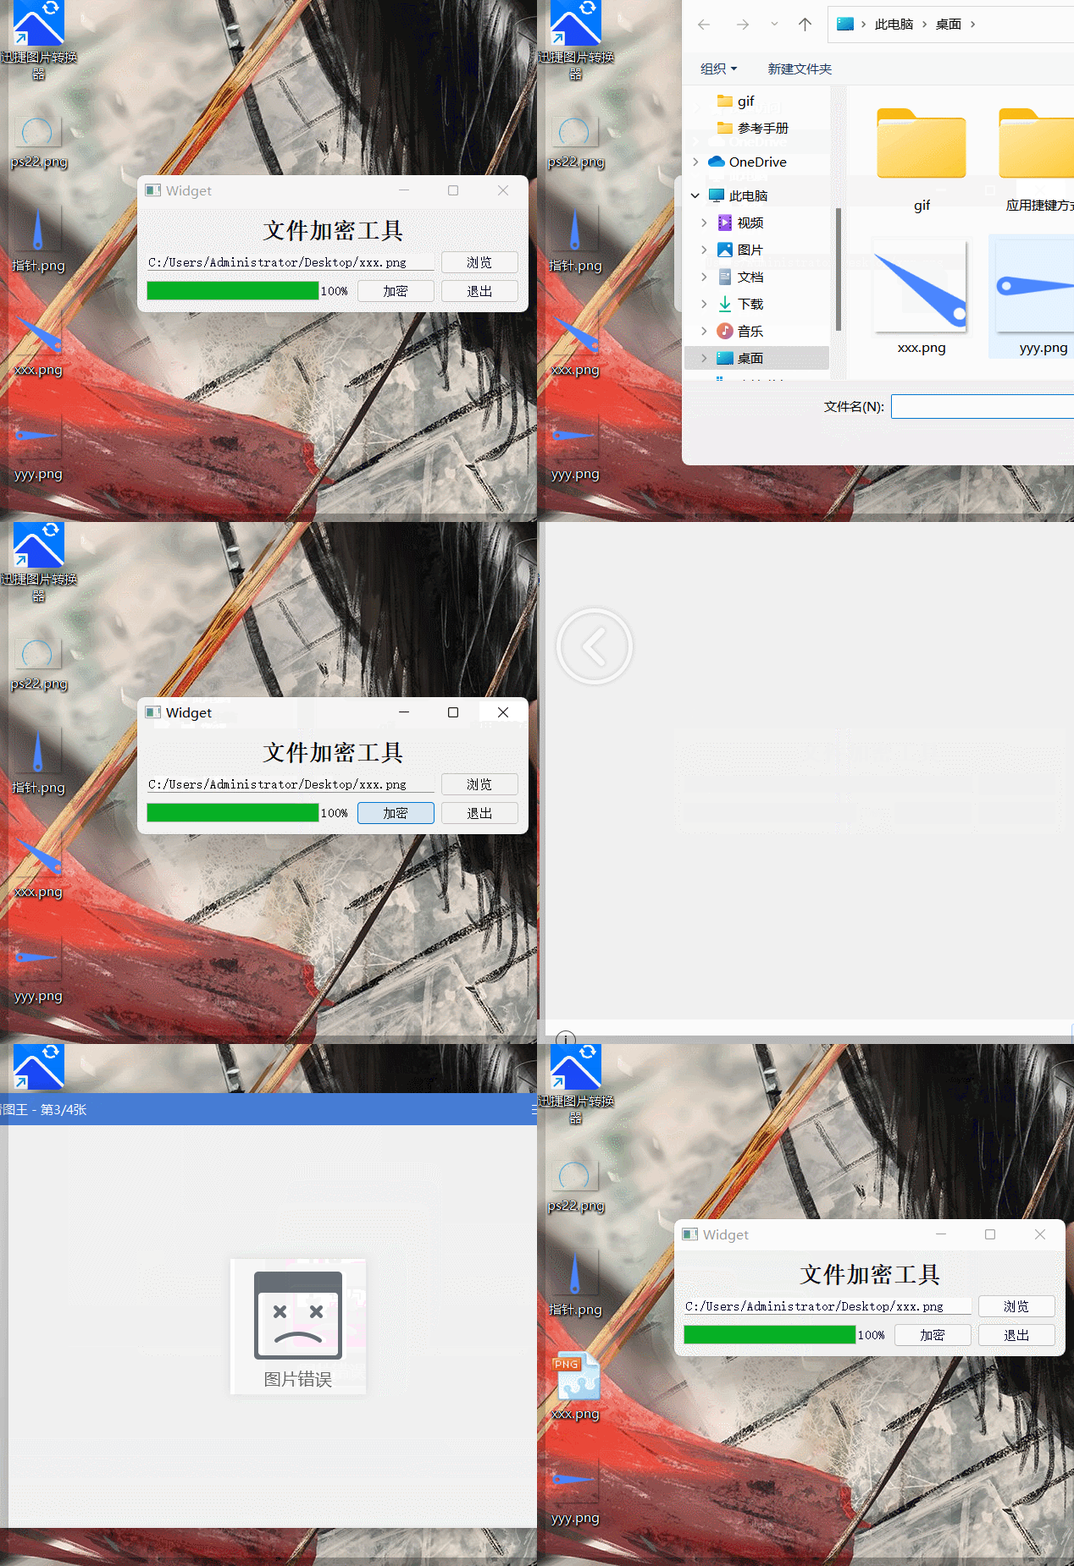
文件加密工具案例链接地址:https://pan.baidu.com/s/1Ij9mb-5x0sQNT46ODWvmTQ
提取码:ziyu
5.2、读写方式
在 linux系统下,一切皆是文件,当打开的是设备对象时候,就会存在阻塞读写方式
- 阻塞
- 非阻塞
- 超时
详情可参考博主链接:https://www.cnblogs.com/flowingwind/p/8336159.html
5.3、文本流

Qt文本流和数据详情可参考博主链接:https://www.cnblogs.com/hjxzjp/p/12339751.html
5.4、数据流
QData Stream用于处理 QIODevice和 QByteArray管理的数据流。
Qt文本流和数据详情可参考博主链接:https://www.cnblogs.com/hjxzjp/p/12339751.html
5.5、临时文件

5.6、目录

5.7、文件信息

5.8、文件监测

六、线程及同步互斥
6.1、线程 QThread


6.1.1、线程案例:
(1)新建文件


(2)项目案例 - qt一个线程

#ifndefWIDGET_H#defineWIDGET_H#include<QWidget>namespace Ui {classWidget;}classWidget:publicQWidget{
    Q_OBJECT

public:explicitWidget(QWidget *parent =0);~Widget();voidwork();private slots:voidon_pushButton_clicked();private:
    Ui::Widget *ui;};#endif// WIDGET_H


#include"ui_widget.h"voidWidget::work(){//耗时任务一for(int i=0; i<=100; i++){int x =2000000;while(x--);
        ui->progressBar->setValue(i);}//耗时任务二for(int i=0; i<=100; i++){int x =4000000;while(x--);
        ui->progressBar_2->setValue(i);}//耗时任务三for(int i=0; i<=100; i++){int x =5000000;while(x--);
        ui->progressBar_3->setValue(i);}}Widget::~Widget(){delete ui;}voidWidget::on_pushButton_clicked(){//    work();}
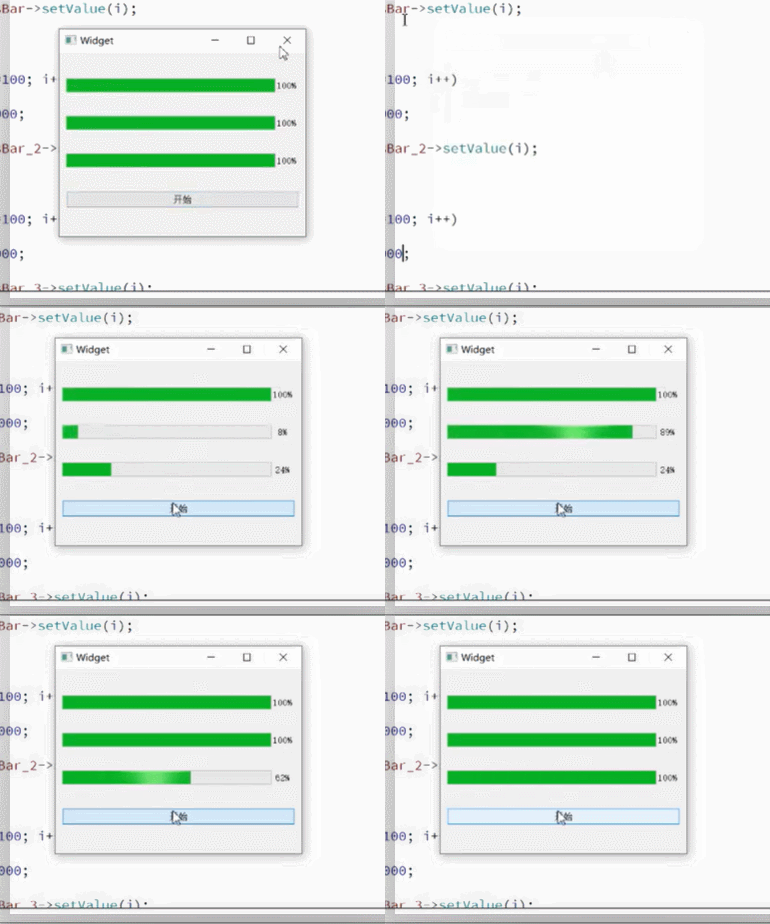
(3)项目案例 - 多线程程序设计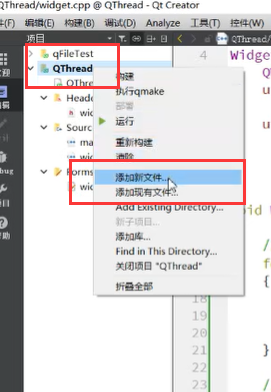


#ifndefMYTASK_H#defineMYTASK_H#include<QThread>classmyTask:publicQThread{
    Q_OBJECT
signals:voidprogress(int);//进度public:myTask(int delay);//线程工作函数需要用户重写!!!!voidrun(){//耗时任务for(int i=0; i<=100; i++){int x = time;while(x--);
                emit progress(i);}}int time;//模拟耗时};#endif// MYTASK_H

#include"mytask.h"

myTask::myTask(int delay):time(delay){}


#include"widget.h"#include"ui_widget.h"#include"mytask.h"Widget::Widget(QWidget *parent):QWidget(parent),ui(new Ui::Widget){
    ui->setupUi(this);//创建线程
    myTask *t1 =newmyTask(20000000);
    myTask *t2 =newmyTask(50000000);
    myTask *t3 =newmyTask(10000000);connect(t1,SIGNAL(progress(int)), ui->progressBar,SLOT(setValue(int)));connect(t2,SIGNAL(progress(int)), ui->progressBar_2,SLOT(setValue(int)));connect(t3,SIGNAL(progress(int)), ui->progressBar_3,SLOT(setValue(int)));//启动线程
    t1->start();
    t2->start();
    t3->start();}Widget::~Widget(){delete ui;}
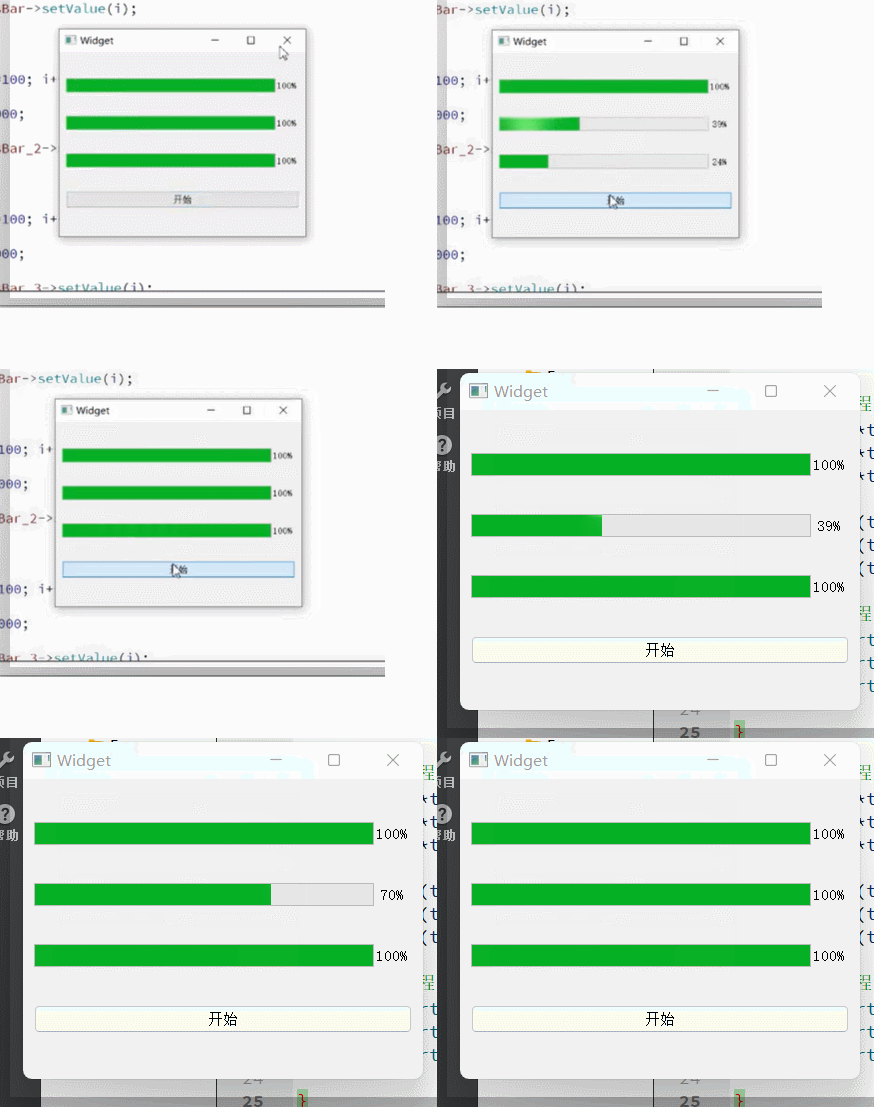
QT多线程案例链接地址:https://pan.baidu.com/s/1FTN_onqboDz9tOSpHXzGoQ
提取码:ziyu
6.2、线程同步互斥

6.2.1、互斥锁 MUtex、 QMutexLocker
(1)新建文件


(2)创建第1个线程


#include<QCoreApplication>#include"printarrthread.h"#include"reversarrthread.h"#include<QMutex>intmain(int argc,char*argv[]){
    QCoreApplication a(argc, argv);char arr[]="123456789";
    QMutex lock;

    printArrThread t(arr,&lock);
    t.start();

    reversArrThread t1(arr,&lock);
    t1.start();return a.exec();}

#ifndefPRINTARRTHREAD_H#definePRINTARRTHREAD_H/*线程*/#include<QThread>#include<QDebug>#include<QMutex>classprintArrThread:publicQThread{
    Q_OBJECT
public:printArrThread(char*arr, QMutex *lock);voidrun()//打印{while(1){
            l->lock();qDebug()<<t;

            l->unlock();}}char*t;
    QMutex *l;};#endif// PRINTARRTHREAD_H

#include"printarrthread.h"

printArrThread::printArrThread(char*arr, QMutex *lock):t(arr),l(lock){}
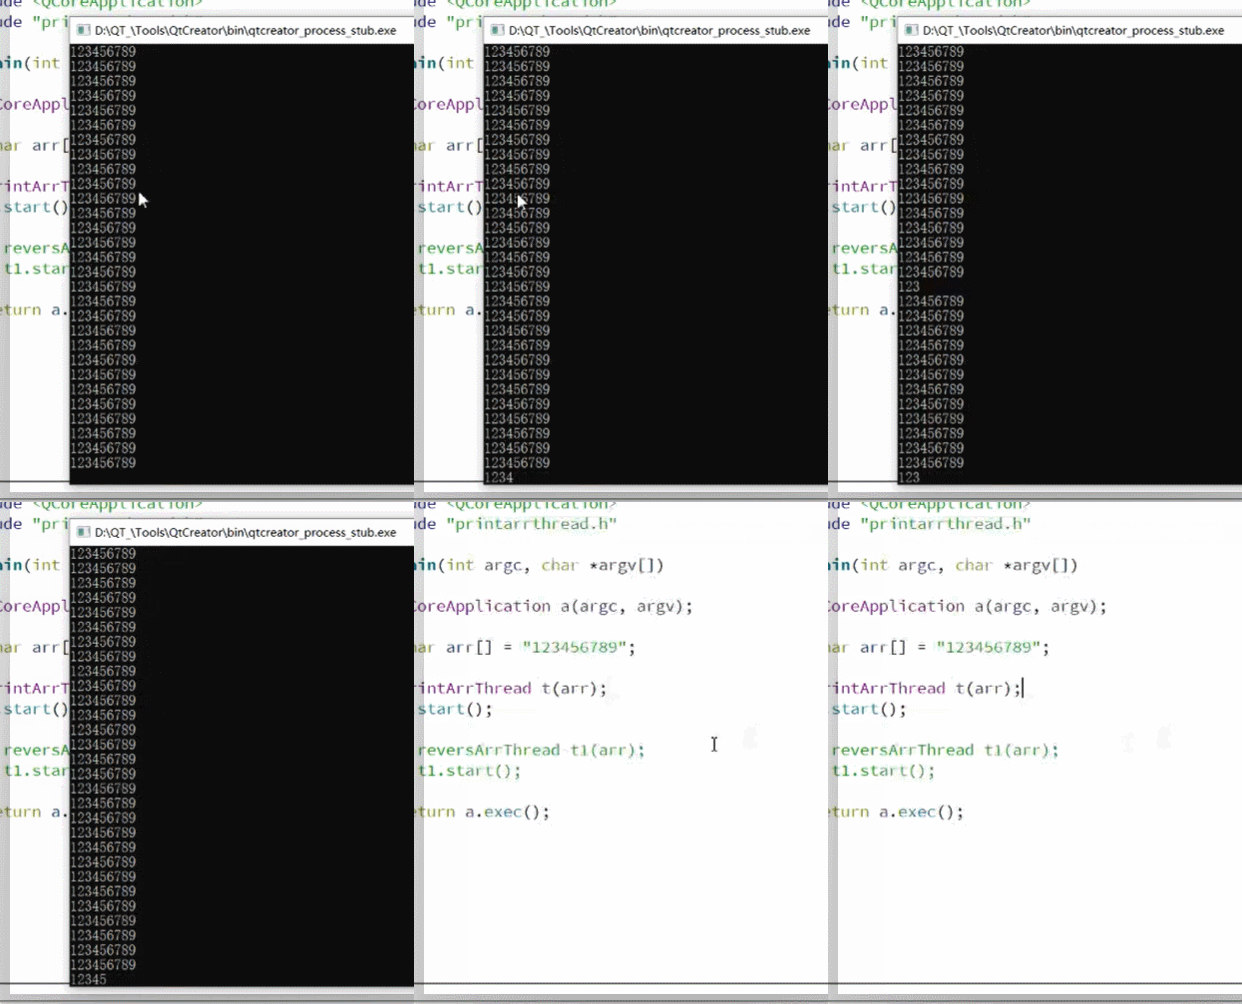
(2)创建第2个线程


#include<QCoreApplication>#include"printarrthread.h"#include"reversarrthread.h"#include<QMutex>intmain(int argc,char*argv[]){
    QCoreApplication a(argc, argv);char arr[]="123456789";
    QMutex lock;

    printArrThread t(arr,&lock);
    t.start();

    reversArrThread t1(arr,&lock);
    t1.start();return a.exec();}

#ifndefREVERSARRTHREAD_H#defineREVERSARRTHREAD_H/*倒序的线程*/#include<QThread>#include<QMutex>classreversArrThread:publicQThread{public:reversArrThread(char*arr, QMutex *lock);voidrun(){while(1){
            l->lock();for(int i=0; i<9/2; i++){
                 t[i]^= t[9-i-1];
                 t[9-i-1]^= t[i];
                 t[i]^= t[9-i-1];}
             l->unlock();sleep(1);}}char*t;
    QMutex *l;};#endif// REVERSARRTHREAD_H

#include"reversarrthread.h"

reversArrThread::reversArrThread(char*arr, QMutex *lock):t(arr),l(lock){}
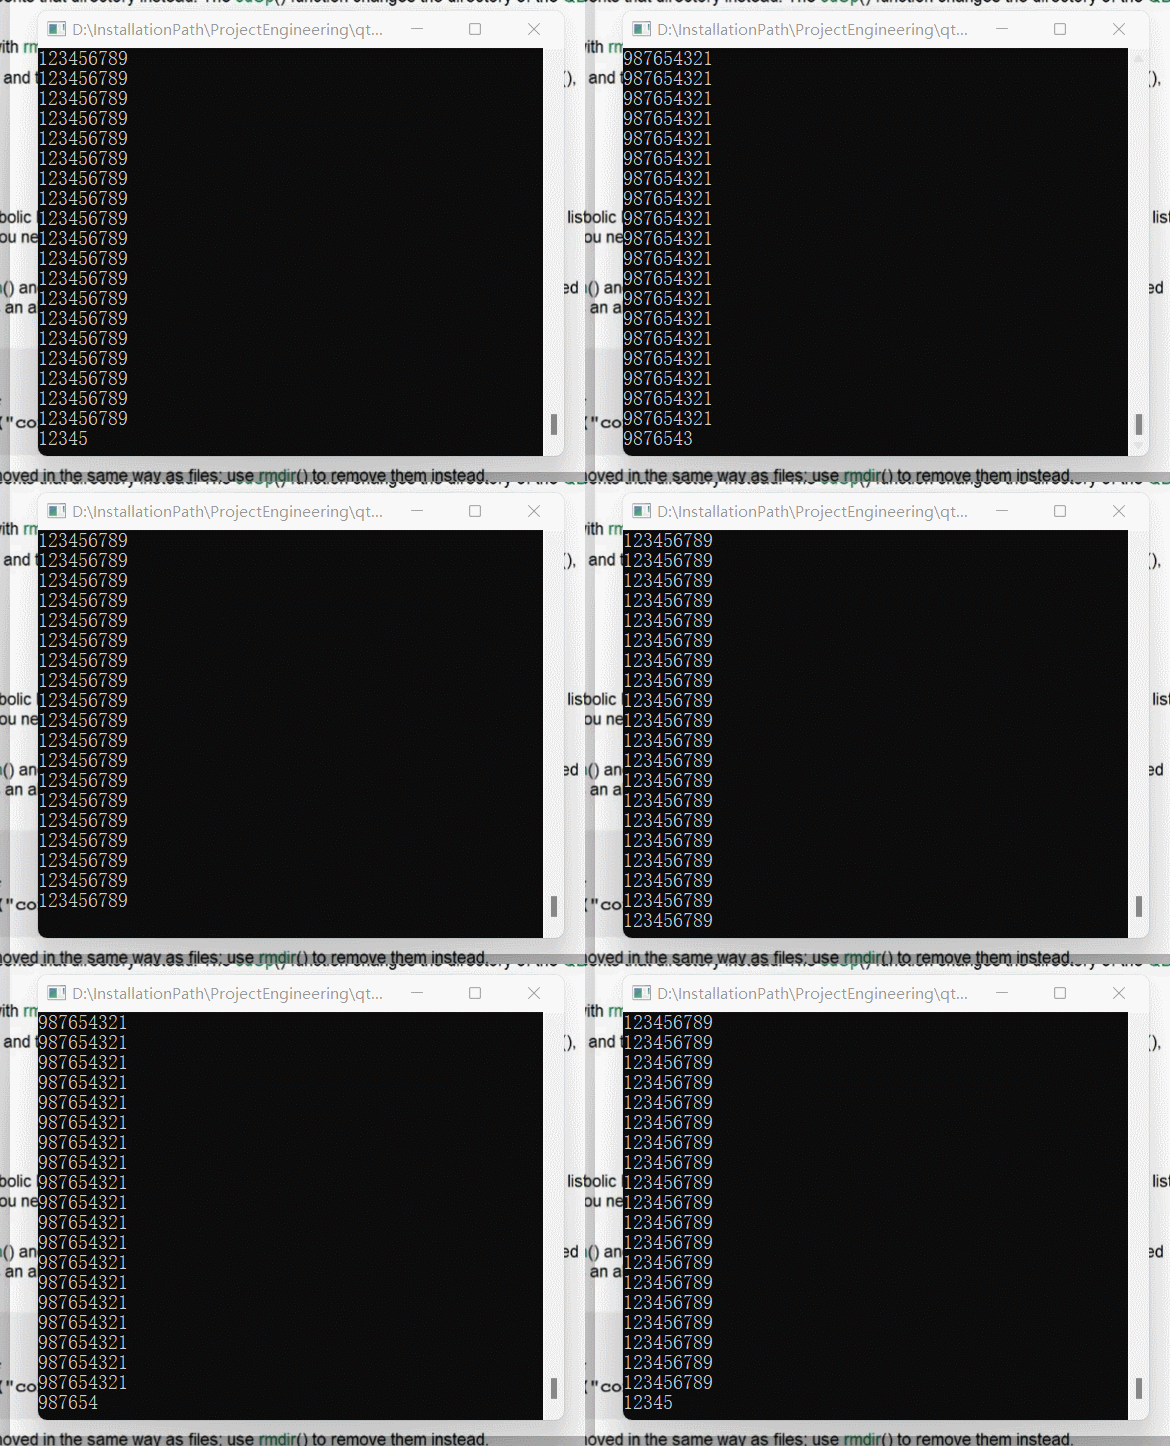
QT互斥锁案例链接地址:https://pan.baidu.com/s/1XPk4yyW6LTAJ_gjlR8n67g
提取码:ziyu
6.2.2、读写锁 QReadWriteLock
Qt的读写锁QReadWriteLock参考链接:https://www.fearlazy.com/index.php/post/99.html
6.2.3、条件变量 QWait Condition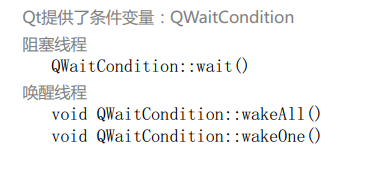
QWaitCondition 条件变量参考链接:https://blog.csdn.net/Amnes1a/article/details/70226207
6.2.4、信号量 SEmaphore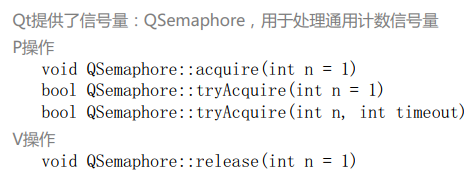
信号量 SEmaphore参考链接:https://www.cnblogs.com/venow/archive/2012/10/15/2724943.html
6.3、线程同步
6.3.1、QT线程同步案例
(1)新建文件


(2)同步实现

#include<QCoreApplication>#include"printarrthread.h"#include"reversarrthread.h"#include<QSemaphore>intmain(int argc,char*argv[]){
    QCoreApplication a(argc, argv);char arr[]="123456789";
    QSemaphore sem;

    printArrThread t(arr,&sem);
    t.start();

    reversArrThread t1(arr,&sem);
    t1.start();return a.exec();}

#ifndefPRINTARRTHREAD_H#definePRINTARRTHREAD_H#include<QThread>#include<QDebug>#include<QSemaphore>classprintArrThread:publicQThread{
    Q_OBJECT
public:printArrThread(char*arr, QSemaphore *sem);voidrun(){while(1){
            s->acquire();//qDebug()<<t;printf("%s\n", t);fflush(stdout);}}char*t;
    QSemaphore *s;};#endif// PRINTARRTHREAD_H

#include"printarrthread.h"

printArrThread::printArrThread(char*arr, QSemaphore *sem):t(arr),s(sem){}

#ifndefREVERSARRTHREAD_H#defineREVERSARRTHREAD_H#include<QThread>#include<QMutex>#include<QSemaphore>classreversArrThread:publicQThread{public:reversArrThread(char*arr, QSemaphore *sem);voidrun(){while(1){for(int i=0; i<9/2; i++){
                t[i]^= t[9-i-1];
                t[9-i-1]^= t[i];
                t[i]^= t[9-i-1];}sleep(1);
             s->release();}}char*t;
    QSemaphore *s;};#endif// REVERSARRTHREAD_H

#include"reversarrthread.h"

reversArrThread::reversArrThread(char*arr, QSemaphore *sem):t(arr),s(sem){}
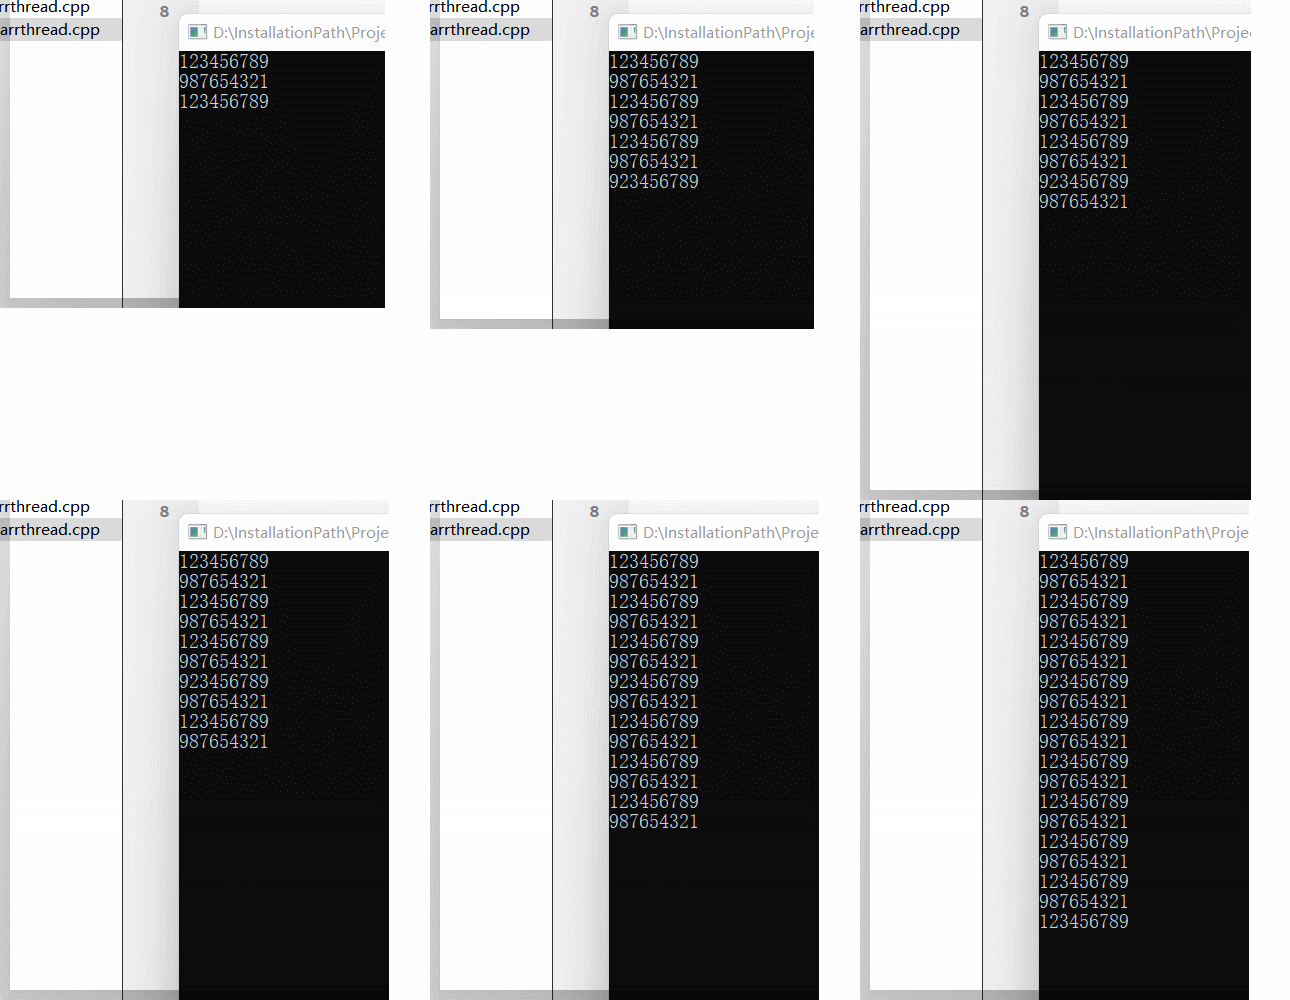
QT线程同步案例代码链接地址:https://pan.baidu.com/s/1FjXuqsgPLZet8TH8WREVcA
提取码:ziyu
七、进程与进程间的通信
7.1、进程 Qprocess

Qt 进程 QProcess
如有侵权请联系博主删除!
可参考博主链接:https://blog.csdn.net/chy555chy/article/details/53119551
7.2、共享内存( Shared Memory)

共享内存(Shared Memory)介绍
如有侵权请联系博主删除!
可参考博主链接:https://blog.csdn.net/WAN_EXE/article/details/56484664
7.3、Qt网络编程

Qt网络编程例子:https://blog.csdn.net/m0_37357063/article/details/80744011
7.3.1、qt实现客户端
(1)新建文件


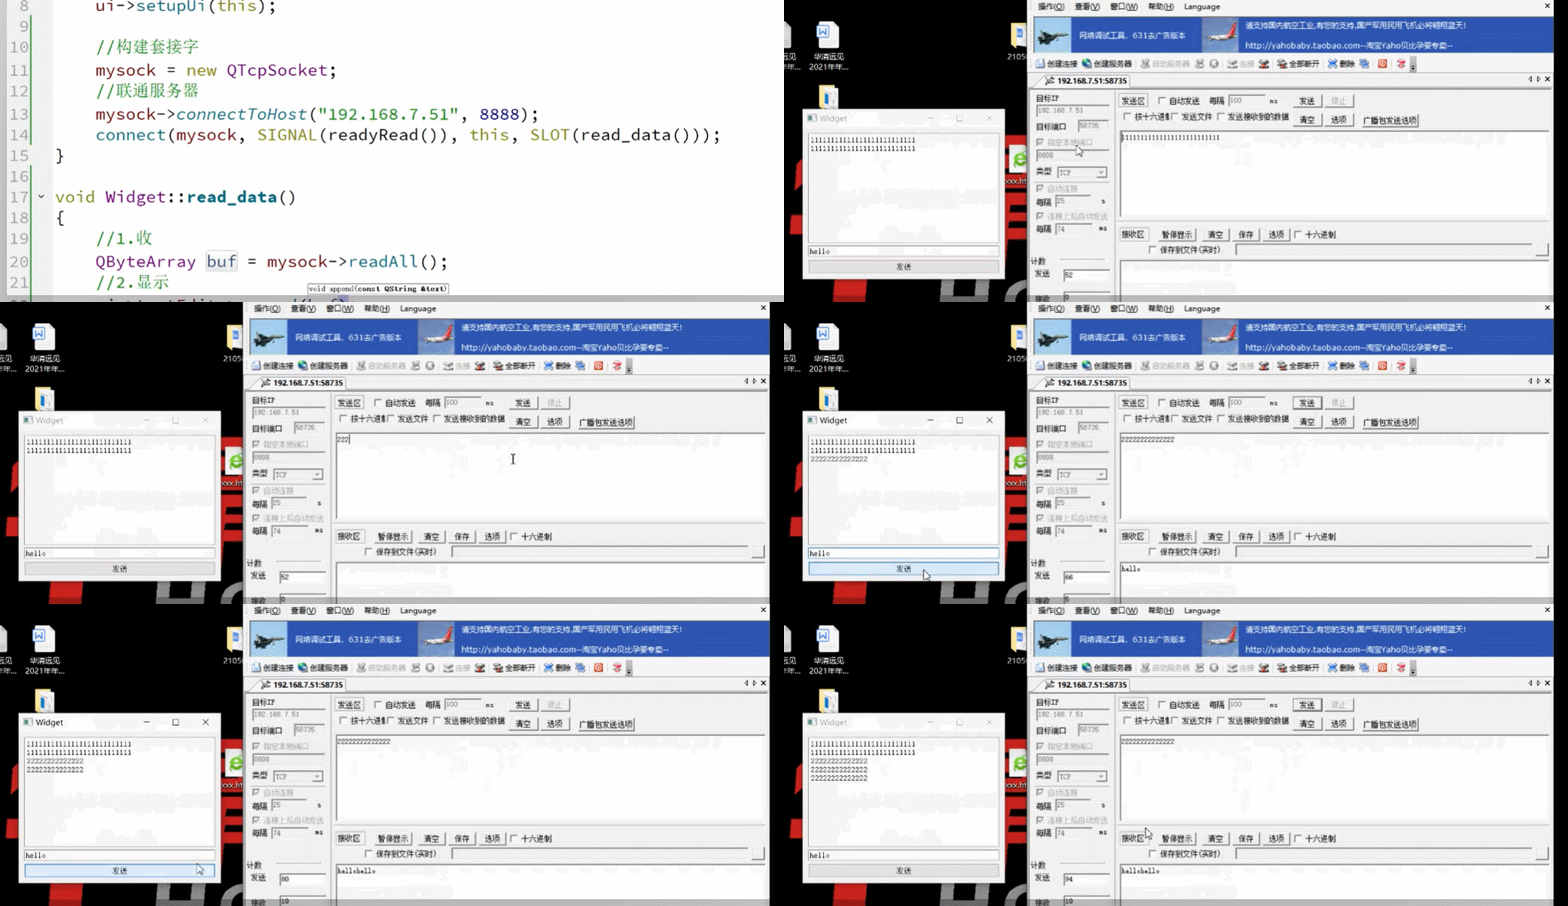
(2)客户端实现

QT += core gui network

#ifndefWIDGET_H#defineWIDGET_H#include<QWidget>#include<QTcpSocket>namespace Ui {classWidget;}classWidget:publicQWidget{
    Q_OBJECT

public:explicitWidget(QWidget *parent =0);~Widget();private slots:voidread_data();voidon_pushButton_clicked();private:
    Ui::Widget *ui;

    QTcpSocket *mysock;};#endif// WIDGET_H

#include"widget.h"#include<QApplication>intmain(int argc,char*argv[]){
    QApplication a(argc, argv);
    Widget w;
    w.show();return a.exec();}

#include"widget.h"#include"ui_widget.h"Widget::Widget(QWidget *parent):QWidget(parent),ui(new Ui::Widget){
    ui->setupUi(this);//构建套接字
    mysock =new QTcpSocket;//连通服务器
    mysock->connectToHost("192.168.7.109",8888);//连接服务器ip地址connect(mysock,SIGNAL(readyRead()),this,SLOT(read_data()));//返回信号}voidWidget::read_data()//接收函数{//1.收
    QByteArray buf = mysock->readAll();//2.显示
    ui->textEdit->append(buf);}Widget::~Widget(){delete ui;}voidWidget::on_pushButton_clicked()//按钮{//1.提取待发送文字
    QString str = ui->lineEdit->text();//2.发送至服务器
    mysock->write(str.toStdString().c_str());}
qt实现客户端代码链接地址:https://pan.baidu.com/s/1c5et4bRr1DbBfzL9JPYIRw
提取码:ziyu
7.3.2、qt实现服务器端
(1)新建文件


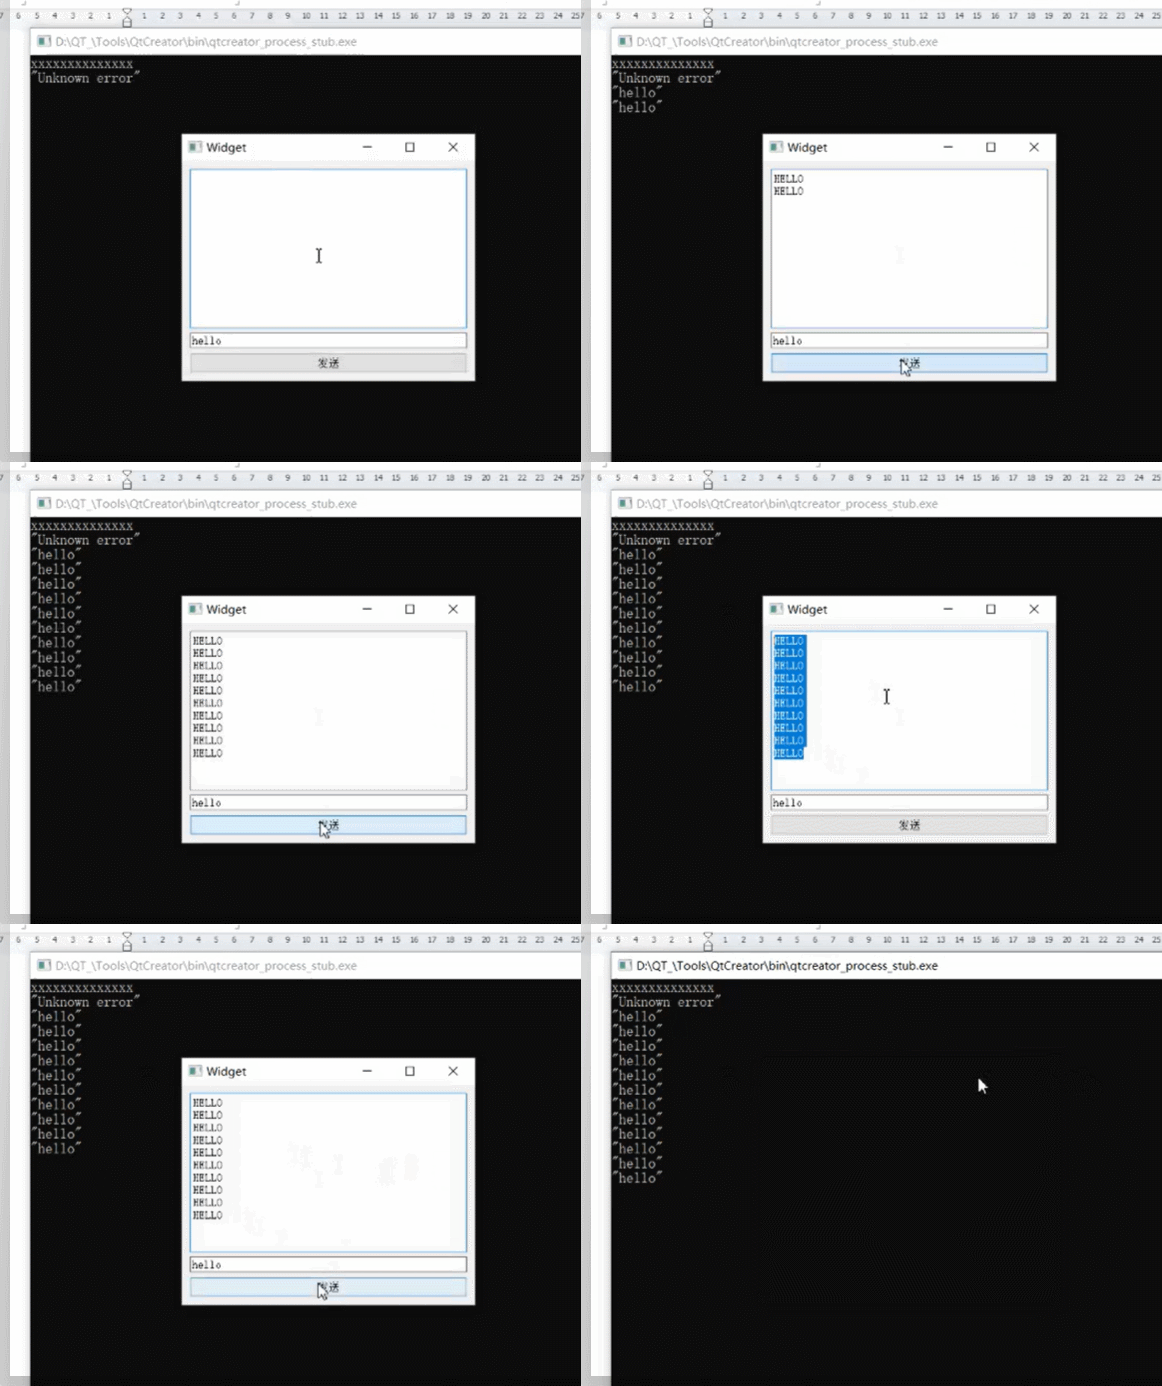
(2)实现服务器端
10:00
7.4、QTcpSocket


Qt-网络编程之QTCPSocket和QTCPServer(实现简易网络调试助手)
如有侵权请联系博主删除!
可参考博主链接:https://www.cnblogs.com/lifexy/p/11317662.html
7.5、QUdpSocket
数据报套接字是一种没有连接不可靠网络通讯接口
QUdpSocket-Qt使用Udp通讯实现服务端和客户端
如有侵权请联系博主删除!
可参考博主链接:https://blog.csdn.net/pingis58/article/details/82977335
7.6、Qt数据库编程 QSqlDatabase


QT 的数据库操作(QSqlDatabase、QSqlQuery)可参考链接:https://blog.csdn.net/Zzhouzhou237/article/details/79459320
八、补充必备
8.1、国际化
Qt 加载翻译文件基本方法推荐链接:https://blog.csdn.net/weixin_38293850/article/details/89680575
8.2、应用程序图标


RC_ICONS = mycless.ico
QT 设置程序图标可参考1: https://blog.csdn.net/weixin_38293850/article/details/88420242
QT 设置程序图标可参考2: https://blog.csdn.net/xiezhongyuan07/article/details/79320523
👎 error: [Makefile.Debug:72: debug/QtIcon_resource_res.o] Error 1 原因与彻底解决方案_转载:https://blog.csdn.net/weixin_42126427/article/details/106686824
推荐在线制作ico图标,ico图标转换工具:https://www.bitbug.net/
8.3、QSS
【QT】QSS美化——基础知识:https://blog.csdn.net/qq_40602000/article/details/104652131
8.4、应用程序打包


在终端里面,【ctrl】+【insert】相当于复制,【shift】+【insert】相当于粘贴,在其他操作系统的终端一样试用,例如linux
QT加载库程序 + 自己文件名
windeployqt.exe untitled4.exe

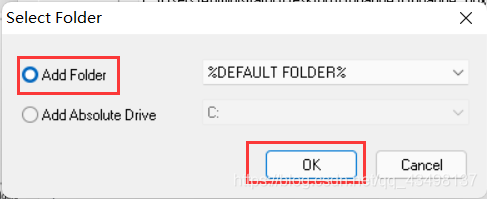
这时候我们需要一个大包软件将多个文件打包成一个可执行的应用程序!
Enigma Virtual Box是一款免费的单文件封包工具,他可以一个应用程序的多个文件打包成一个可执行的应用程序:https://blog.csdn.net/qq_28368039/article/details/115482209
百度云盘Enigma Virtual Box分享链接:https://pan.baidu.com/s/1uvddkRywzW3gxCPnqebtEA
提取码:ziyu




8.5、实现一个五子棋
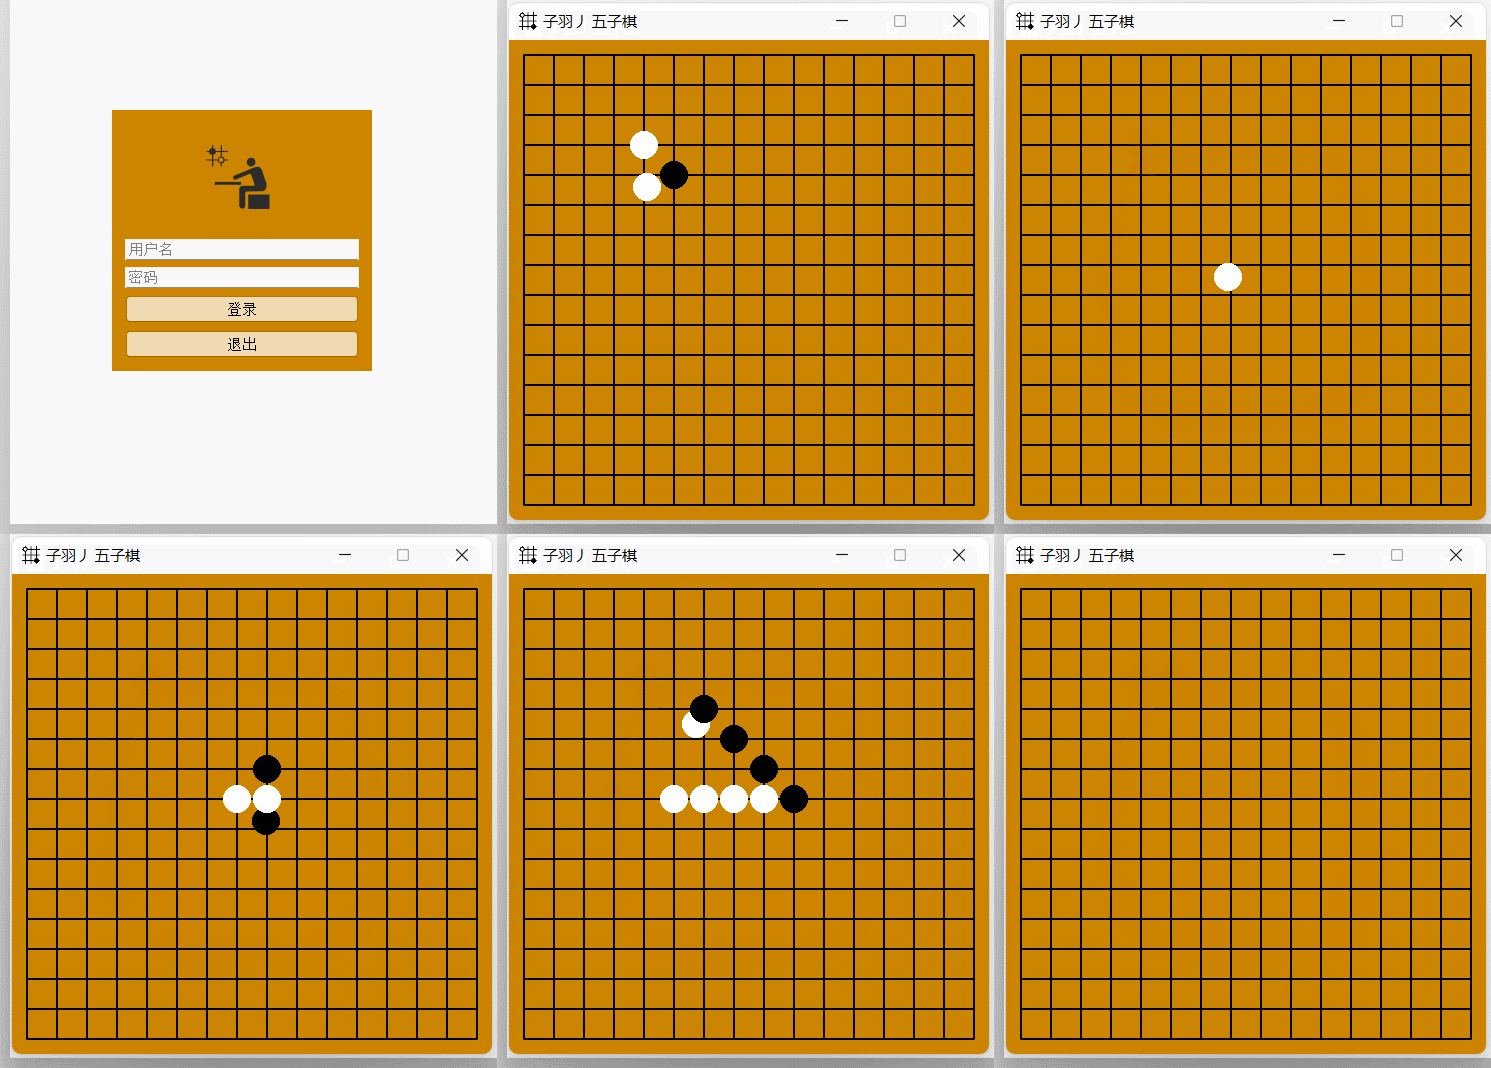
五子棋源代码链接:https://pan.baidu.com/s/1LJkVEoVhq2rmg9nNYRpvdA
提取码:ziyu
九、QT编写项目作品大全!
Qt编写项目作品大全推荐链接:https://zhuanlan.zhihu.com/p/75489053
Qt项目视频展示bilbil推荐链接:https://www.bilibili.com/video/BV1Hr4y1T7y1?p=4
跳转:上一篇、C++编程!
跳转:上一篇、C++编程!
跳转:下一篇、ARM体系结构!
下一篇、ARM体系结构!
跳转:开头
版权归原作者 子羽丿 所有, 如有侵权,请联系我们删除。