
Vue3.2(21年8月10日)相比于Vue3新增了语法糖,减少了代码冗余
Vue3相比于Vue2,在虚拟DOM,编译, 数据代理,打包构建封面进行了优化
Vue3使用组合式API, 适合大型项目, 去除了this
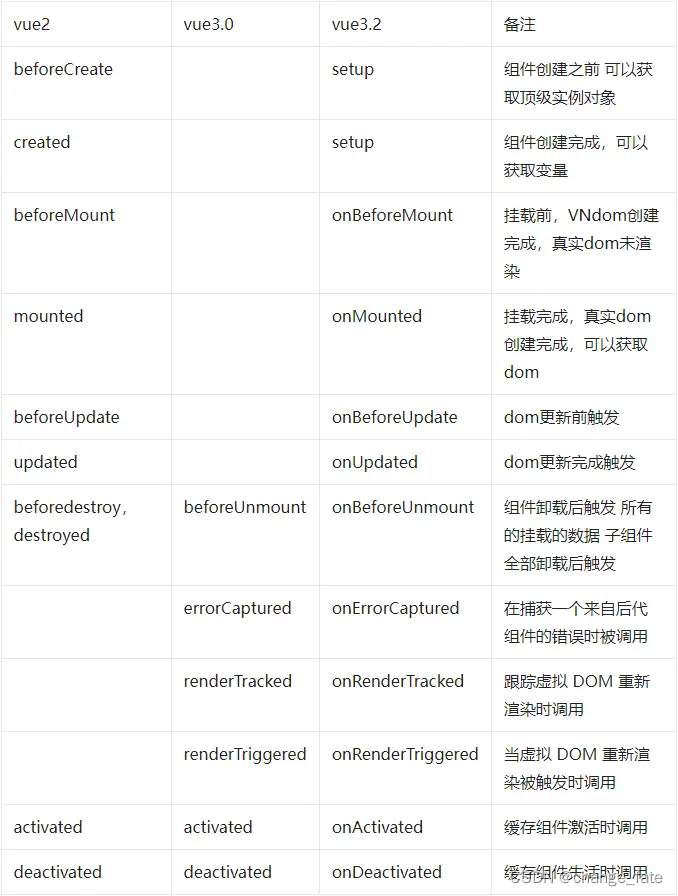
vue2的
beforeCreate
和
created
被新增的setup生命周期替代
vue3 使用插件: volar
配置用户代码片段可以快速输入vue3 模板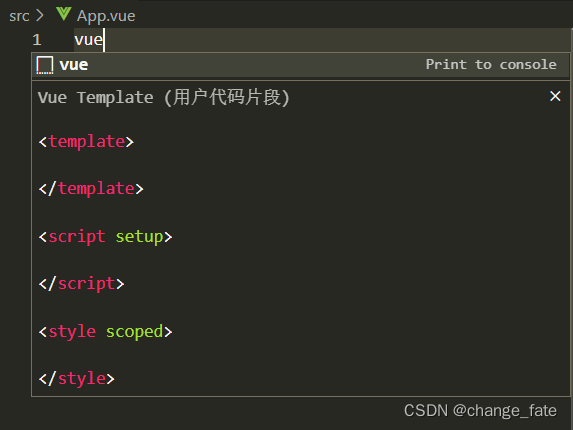
1. css支持v-bind 指令:
<template><div class="box">{{color}}</div></template><script setup>import{ref}from'vue'let color =ref('red')</script><style scoped>.box {width: 100px;height: 50px;
  background-color: v-bind(color);}</style>
2. setup语法糖
vue3.0的变量需要return出来才可以在template中使用, 写法冗余
vue3.2 在script标签中添加setup解决问题
组件只需要引入,不需要注册,属性方法不需要返回,不需要写setup函数,不需要写export default
3. data定义
3.1 直接定义无响应式
let name = ‘zhangsan’
3.2 ref定义基本数据类型
在script标签内,需要用 name.value 修改和获取值
可以接受基本类型、也可以是复杂类型(比如对象,数组)。建议处理基本类型数据。
基本类型的数据:响应式依然是靠Object.defineProperty()的get与set完成的。
<template><div>{{name}}</div><button @click="setName">set</button></template><script setup>import{ref}from'vue'let name =ref('zhangsan')constsetName=()=>{
    name.value ='lisi'}</script><style scoped></style>
3.3 reactive 定义引用数据类型
reactive支持引用类型, 直接
变量.属性
使用和修改
<template><div>{{user.name}}</div><div>{{user.money}}</div><button @click="setItem">set</button></template><script setup>import{reactive}from'vue'let user =reactive({name:'zhangsan',money:1000})constsetItem=()=>{
    user.money =1500
    user.gupiao =100}</script><style scoped></style>
4. methods方法定义
在template中 :
<button @click='addMoney'>加钱</button>
在script中:
const money =ref(1000)constaddMoney=()=>{
  money.value ++}
5. computed计算属性
获得一个新的属性
<template><div>{{nameString}}</div><div>{{user.money}}</div><button @click="setItem">set</button></template><script setup>import{reactive, computed}from'vue'let user =reactive({name:'zhangsan',money:1000})const nameString =computed(()=>{return'我的名字是'+ user.name
  })</script><style scoped></style>
6 watch使用:
监听响应式数据的变化
watch(数据源, 执行函数,[配置参数])// 配置的参数:立即执行, 深度监听{immediate:true,deep:true}
6.1 监听基本数据类型 单一数据源
<script setup>import{ref, watch}from'vue'let name =ref('zhnagsan')//直接监听属性watch(name,(newVal,oldVal)=>{
    console.log('变量发生了改变...',newVal, oldVal);})
6.2 监听引用数据类型 单一数据源
<template><div>{{user.name}}</div><div>{{user.money}}</div><button @click="setItem">set</button></template><script setup>import{reactive, watch}from'vue'let user =reactive({name:'zhangsan',money:1000})// 监听方法返回的属性watch(()=> user.money,(newVal, oldVal)=>{
    console.log('user money 变了: ', newVal, oldVal)})constsetItem=()=>{
    user.money =1500}</script>
6.2 监听引用数据类型 多数据源[深度监听]
<template><div>{{user.name}}</div><div>{{user.money}}</div><div>{{user.hobby.study}}</div><button @click="setItem">set</button></template><script setup>import{reactive, watch}from'vue'let user =reactive({name:'zhangsan',money:1000,hobby:{study:'语文'}})// 深度监听 {deep:true}watch(()=> user.hobby.study,(newVal, oldVal)=>{
    console.log('user money 变了: ', newVal, oldVal)},{deep:true})constsetItem=()=>{
    user.hobby.study ='数学'}</script>
7. 生命周期
import{ onMounted }from'vue'onMounted(()=>{
  console.log(document.querySelector('.box'))// 可以获取DOM})
7.1 ref获取元素
<template><div ref="box"><button>Hehe</button></div></template><script setup>import{ ref, onMounted }from"vue";const box =ref(null);onMounted(()=>{
    console.log(box.value);});
8 组件使用
- 创建 components/Son.vue
- 在App.vue 中导入子组件
- Vue3.2 在导入子组件时,自动注册该组件
- 组件名格式: 大驼峰写法
子组件Son.vue
<template><div>Son compoment</div></template><script setup></script>
父组件
<template><Son/></template><script setup>import Son from'./components/Son.vue'</script>
全局组件:
main.js
app.component('ComponentB', ComponentB)
<ComponentA/>
9.组件通信
9.1 父传子 defineProps
子组件Son.vue
<template><div>Son compoment</div><div>{{name}}</div><div>{{like}}</div></template><script setup>const props =defineProps({name:{type: String,default:""},like:{type: Array,default:()=>[]}})</script>
父组件
<template><Son name="小灰灰":like="like"/></template><script setup>import Son from'./components/Son.vue'let like =["红太狼","灰太狼"]</script>
9.2 子传父 defineEmits
子组件
<template><button @click="sendData">传递数据</button></template><script setup>// 自定义事件const emit =defineEmits(['send'])// 事件执行函数constsendData=()=>{emit('send','子组件的数据')}</script>
父组件
<template><Son @send="getData"/></template><script setup>import Son from'./components/Son.vue'constgetData=(data)=>{
  console.log('父组件获取到: ', data)}</script>
- 条件渲染
<template><div v-if="type === 'A'">A</div><div v-else-if="type === 'B'">B</div><div v-else>
    Not A/B</div></template><script setup>let type ='B'</script>
- 列表渲染
<template><li v-for="item in items">{{ item.message }}</li></template><script setup>import{ref}from'vue'let items =ref([{message:'m1'},{message:'m2'},{message:'m3'}])setTimeout(()=>{
  items.value.push({message:'m4'})},2000)</script>
- 事件处理
<button @click="say">Say bye</button>// 传递参数<button @click="say('bye')">Say bye</button>
事件修饰符:
.stop .prevent .self .capture .once .passive
<!-- 单击事件将停止传递 --><a @click.stop="doThis"></a>
- 表单输入绑定(用于、、)
<input v-model="text"><input type="radio" v-model="pick":value="first"/><input type="radio" v-model="pick":value="second"/>
- 插槽slot 实现 可以用在不同的地方渲染各异的内容,但同时还保证都具有相同的样式。
使用
<FancyButton>
  Click me! <!-- 插槽内容 -->
</FancyButton>
组件:
<button class="fancy-btn">
  <slot></slot> <!-- 插槽出口 -->
</button>
元素是插槽, 父元素插槽内容将在slot处渲染
渲染之后的DOM:
<buttonclass="fancy-btn">Click me!</button>
另一中js的方式理解:将内容传递给子元素, 子元素包裹时候生成DOM,返回给父元素
// 父元素传入插槽内容FancyButton('Click me!')// FancyButton 在自己的模板中渲染插槽内容functionFancyButton(slotContent){return`<button class="fancy-btn">
      ${slotContent}
    </button>`}
子组件
<template>
  <li v-for="item in items">
    <slot></slot>
  </li>

  <button class="fancy-btn">
    <slot></slot> <!-- 插槽出口 -->
  </button>
</template>

<script setup>
import {ref} from 'vue'
let items = ref([
  {message: 'm1'},
  {message: 'm2'},
  {message: 'm3'}
])

</script>
父组件
<Son>ABC</Son>
- Teleport: 组件传送到DOM节点
<Teleport>是一个内置组件,它可以将一个组件内部的一部分模板“传送”到父组件的外的其他DOM 结构外层的位置去。
如下传送到了body元素上
<template><div><button @click="open = true">Open Modal</button><Teleport to="body"><div v-if="open"class="modal"><p>Hello from the modal!</p><button @click="open = false">Close</button></div></Teleport></div></template><script setup>import{ ref }from'vue'const open =ref(false)</script><style scoped>.modal {position: fixed;
  z-index:999;top:20%;left:50%;width: 300px;
  margin-left:-150px;border: 2px red solid;}</style>
// 传送到id为
teleport-target
的DOM元素上:
<Teleport to="#teleport-target"></Teleport>
- 模板引用 通过ref获取DOM元素
<template><div ref="divRef">divRef</div></template><script>import{ onMounted, ref }from'vue'const divRef =ref(null)onMounted(()=>{// 挂载后才可以获取DOM元素
    console.log('[long] divRef: ', divRef.value)})</script>
- 条件渲染 17.1 条件渲染 v-if
<div v-if="type==='A'">A</div><div v-else-if="type==='B'">B</div><div v-else>C</div>
多元素条件渲染:使用
<template>
包装器元素
<template v-if="ok"><p>P1</p><p>P2</p></template>
17.2 条件渲染 v-show
v-if
不保留DOM元素,切换开销更高
v-show
保留DOM元素,设置display属性,不支持template包装器元素,初始渲染开销高
17.3 不推荐使用
v-if
和
v-for
同时使用, 同时使用时
v-if
首先执行
- 列表渲染
v-for
const items =ref([{message:'F1'},{message:'F2'}])<li v-for="(item, index ) in items">{{ item.message }}-{{ index }}</li>
item 是迭代项别名
使用template渲染多个元素
<ul><template v-for="item in items"><li>{{ item.msg }}</li><li class="divider" role="presentation"></li></template></ul>
版权归原作者 change_fate 所有, 如有侵权,请联系我们删除。