一、前置准备
安装部署环境:
操作系统:centos7.9
k8s版本:kubernetes 1.27
1.1 基础设置
1、更新centos源
sed-e's|^mirrorlist=|#mirrorlist=|g'\-e's|^#baseurl=http://mirror.centos.org/centos|baseurl=https://mirrors.ustc.edu.cn/centos|g'\-i.bak\
    /etc/yum.repos.d/CentOS-Base.repo
yum -y update
2、防火墙设置
关闭防火墙dnsmap networkmanager swap selinux
setenforce 0
systemctl disable firewalld --now
systemctl disable dnsmasp --now
systemctl disable NetworkManager --now
swapoff -a&&sysctl-wvm.swappiness=0&&sed-i"/swap/d" /etc/fstab
sed-i's/SELINUX=enforcing/SELINUX=disabled/g' /etc/selinux/config
3、设置时区和时间同步
ln-sf /usr/share/zoneinfo/Asia/Shanghai /etc/localtime
echo'Asia/Shanghai'> /etc/timezone
yum -yinstall chrony
systemctl enable chronyd --now
4、设置ulimit的值
ulimit-SHn65535# open file值, 可以用ulimit -a 查看
5、设置主机名
根据实际情况修改, 这里举个例子
hostnamectl set-hostname k8s-master
hostnamectl set-hostname k8s-node1
hostnamectl set-hostname k8s-node2
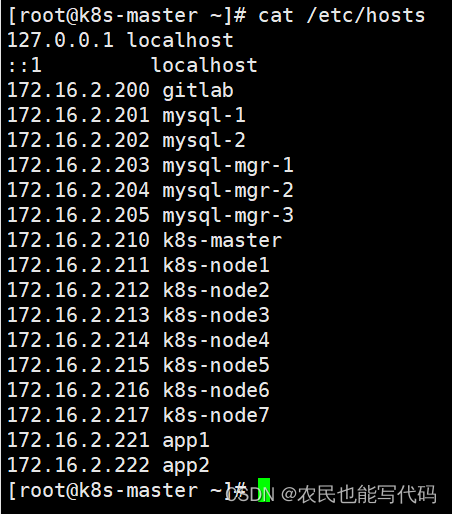
添加hosts,便于主机通信,根据实际情况修改, 这里举个例子
cat>> /etc/hosts <<EOF
IP0 k8s-master
IP1 k8s-nnode1
IP2 k8s-nnode2
EOF

6、生成和分发ssh密钥和公钥
#密钥生成
ssh-keygen -t rsa
#密钥分发foriin 节点1名 节点2名 节点3名 ... ;do  ssh-copy-id -i .ssh/id_rsa.pub $i;done
7、更新系统
yum -y clean all
yum -y makecache
yum -y update
1.2 安装常用软件
1、yum 安装
yum -yinstallwget jq psmisc vim net-tools gcc curl bash-completion
本地安装,通过下载rpm文件到本地进行安装,比如手动更新内核
wget xxxx.rpm
yum -y localinstall xxxx.rpm
修改内核启动顺序,根据实际修改, 一般不需要手动操作(不推荐),这里只做记录
grub2-set-default 0
grub2-mkconfig -o /etc/grub2.cfg
grubby --args="user_namespace.enable=1" --update-kernel="$(grubby --default-kernel)"rebootuname-a
2、关闭IPV6
vi /etc/sysctl.conf

net.ipv6.conf.all.disable_ipv6=1net.ipv6.conf.default.disable_ipv6=1
3、设置路由转发
让无内网IP主机能够访问外网
echo"net.ipv4.ip_forward=1">> /etc/sysctl.conf
sysctl-p#重载配置生效cat /proc/sys/net/ipv4/ip_forward #验证
iptables -t nat -A POSTROUTING -s172.16.0.0/16 -j MASQUERADE #设置路由
步骤:
- 找到专有网络的路由表
- 添加自定义路由条目
- 下一条类型 ECS实例
- 选择能上网 的ECS实例
二、安装kubernetes
2.1 环境检查及设置
1、检查交换分区,selinux,时间同步
free-m# 查看swap
getenforce # selinux
systemctl status chronyd #时间同步
2、添加kubernetes源
cat<<EOF> /etc/yum.repos.d/kubernetes.repo
[kubernetes]
name=Kubernetes
baseurl=https://mirrors.aliyun.com/kubernetes/yum/repos/kubernetes-el7-x86_64/
enabled=1
gpgcheck=0
repo_gpgcheck=0
gpgkey=https://mirrors.aliyun.com/kubernetes/yum/doc/yum-key.gpg https://mirrors.aliyun.com/kubernetes/yum/doc/rpm-package-key.gpg
EOF
2.2 安装kube组件
安装kubeadm kubectl kubelet
yum install-y kubelet kubeadm kubectl
systemctl enable kubelet --now

yum -yinstall yum-utils device-mapper-persistent-data lvm2
yum-config-manager --add-repo http://mirrors.aliyun.com/docker-ce/linux/centos/docker-ce.repo
yum -yinstall containerd
systemctl enable containerd  --now
2.3 网络设置
1、将桥接的IPv4流量传递到iptables的链
cat> /etc/sysctl.d/k8s.conf <<EOF
net.bridge.bridge-nf-call-ip6tables = 1
net.bridge.bridge-nf-call-iptables = 1
EOFsysctl--system
2、内核网络配置
cat<<EOF|sudotee /etc/modules-load.d/k8s.conf
br_netfilter
EOFcat>> /etc/sysctl.d/k8s.conf <<EOF
net.ipv4.ip_forward = 1
net.bridge.bridge-nf-call-ip6tables=1
net.bridge.bridge-nf-call-iptables=1
net.ipv6.conf.all.disable_ipv6=1
net.ipv6.conf.default.disable_ipv6=1
net.ipv6.conf.lo.disable_ipv6=1
net.ipv6.conf.all.forwarding=1

fs.may_detach_mounts=1
vm.overcommit_memory=1
vm.panic_on_oom=0
fs.inotify.max_user_watches=89100
fs.file-max=52706963
fs.nr_open=52706963

net.ipv4.tcp_keepalive_time=600
net.ipv4.tcp_keepalive_probes=3
net.ipv4.tcp_keepalive_intvl=15
net.ipv4.tcp_max_tw_buckets=36000
net.ipv4.tcp_tw_reuse=1
net.ipv4.tcp_max_orphans=327680
net.ipv4.tcp_orphan_retries=3
net.ipv4.tcp_syncookies=1
net.ipv4.tcp_max_syn_backlog=16384
net.ipv4.ip_conntrack_max=65536
net.ipv4.tcp_max_syn_backlog=16384
net.ipv4.tcp_timestamps=0
net.core.somaxconn=16384
EOF

modprobe br_netfilter
sysctl--system
3、ipvs配置
cat> /etc/sysconfig/modules/ipvs.modules <<EOF
#!/bin/bash
modprobe -- ip_vs
modprobe -- ip_vs_rr
modprobe -- ip_vs_wrr
modprobe -- ip_vs_sh
modprobe -- nf_conntrack
modprobe -- ip_tables
modprobe -- ip_set
modprobe -- xt_set
modprobe -- ipt_set
modprobe -- ipt_rpfilter
modprobe -- ipt_REJECT
modprobe -- ipip
EOFchmod755 /etc/sysconfig/modules/ipvs.modules
bash /etc/sysconfig/modules/ipvs.modules

lsmod |grep-e ip_vs -e nf_conntrack_ipv

yum -yinstall ipset ipvsadm sysstat conntrack libseccomp
三、创建kubernetes集群
3.1 指定containerd
1、containerd 生成配置文件
containerd config default > /etc/containerd/config.toml
2、配置containerd加速,在mirrors下添加
vim /etc/containerd/config.toml
[plugins."io.containerd.grpc.v1.cri".registry.mirrors."docker.io"]
          endpoint =["https://docker.mirrors.ustc.edu.cn"][plugins."io.containerd.grpc.v1.cri".registry.mirrors."registry.k8s.io"]
          endpoint =["https://registry.lank8s.cn"]

3、指定containerd 运行时
echo> /etc/crictl.yaml
cat>> /etc/crictl.yaml <<EOF
runtime-endpoint: "unix:///run/containerd/containerd.sock"
timeout: 0
debug: false
EOF
systemctl restart containerd
3.2 安装docker
1、docker安装 (按需安装,非必须)
在需要的时候安装, k8s使用cotainerd, docker不是必须安装
yum list docker-ce.x86_64 --showduplicates|sort-r
yum -yinstall docker-ce
2、docker加速
也可以用其他加速地址
tee /etc/docker/daemon.json <<-'EOF'
{
    "registry-mirrors": [ "https://docker.mirrors.ustc.edu.cn" ]
}
EOF
四、kubernetes集群初始化
4.1 初始化配置
1、生成配置文件
kubeadm config print init-defaults > kubeadm.yaml
2、对配置文件根据实际情况修改
vim kubeadm.yaml
apiVersion: kubeadm.k8s.io/v1beta3
bootstrapTokens:
- groups:
  - system:bootstrappers:kubeadm:default-node-token
  token: abcdef.0123456789abcdef
  ttl: 24h0m0s
  usages:
  - signing
  - authentication
kind: InitConfiguration
localAPIEndpoint:
  advertiseAddress: 172.16.1.100  #设置为节点IP,也就是master的IP
  bindPort: 6443
nodeRegistration:
  criSocket: unix:///var/run/containerd/containerd.sock
  imagePullPolicy: IfNotPresent
  name: k8s-master #当前master的hostname
  taints: null
---
apiServer:
  timeoutForControlPlane: 4m0s
apiVersion: kubeadm.k8s.io/v1beta3
certificatesDir: /etc/kubernetes/pki
clusterName: kubernetes
controllerManager: {}
dns: {}
etcd:
  local:
    dataDir: /var/lib/etcd
imageRepository: registry.cn-hangzhou.aliyuncs.com/google_containers #加速地址
kind: ClusterConfiguration
kubernetesVersion: 1.27.0 #根据安装的kubeadm版本设置
networking:
  dnsDomain: cluster.local
  serviceSubnet: 10.96.0.0/12 #子网地址
  pod-network-cidr: 10.244.0.0/16
scheduler: {}
4.2 初始化集群
1、初始化
#推荐
kubeadm init --config kubeadm.yaml
2、初始化集群方法二
systemctl restart containerd
kubeadm init \
--apiserver-advertise-address=172.16.2.210 \
--kubernetes-version v1.27.0 \
--service-cidr=10.96.0.0/12 \
--pod-network-cidr=10.244.0.0/16 \
--ignore-preflight-errors=all
初始化失败后清理文件
kubeadm reset all -f
3、master创建后执行(成功后会有提示)
mkdir-p$HOME/.kube
 sudocp-i /etc/kubernetes/admin.conf $HOME/.kube/config
 sudochown$(id-u):$(id-g)$HOME/.kube/config
 exportKUBECONFIG=/etc/kubernetes/admin.conf
4、node节点 加入集群(hash串根据master提示)
kubeadm join172.16.62.113:6443 --token abcdef.0123456789abcdef \
        --discovery-token-ca-cert-hash sha256:bd2a53f1280d5c7bfc881b81ded58c8a604e8567386ac39617807a717a948fb4
5、获取hash串
如果hash串过期或丢失,可在master上执行如下命令获取hash串
kubeadm token create --print-join-command
6、配置网络插件
kubectl apply -f https://raw.githubusercontent.com/coreos/flannel/master/Documentation/kube-flannel.yml
kubectl apply -f https://www.hao.kim/soft/kube-flannel.yml
7、设置网络模式为ipvs
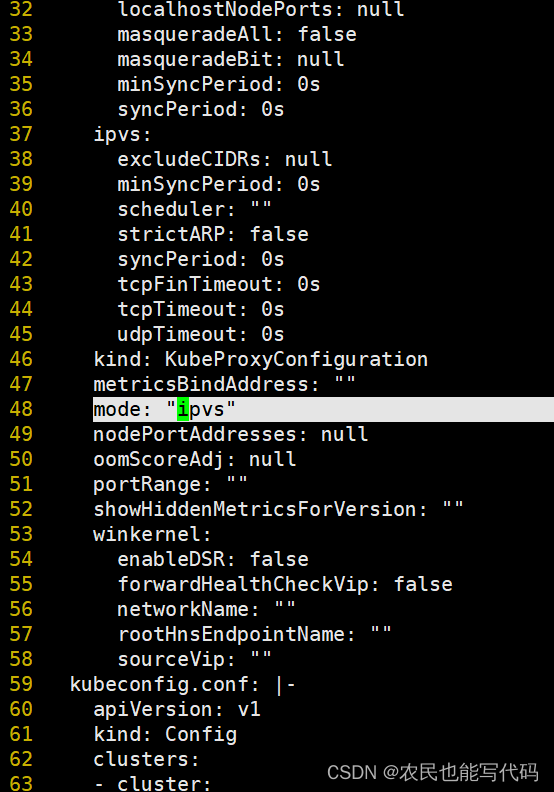
修改ConfigMap的kube-system/kube-proxy中的config.conf,把 mode: “” 改为mode: “ipvs” 保存退出即可
kubectl edit cm kube-proxy -n kube-system

8、重启网络插件
kubectl get pod -n kube-system |grep kube-proxy |awk'{system("kubectl delete pod "$1" -n kube-system")}'
错误提示
COREDNS 报错,一直在创建中
Warning FailedCreatePodSandBox 84s (x17 over 4m58s) kubelet (combined from similar events): Failed to create pod sandbox: rpc error: code = Unknown desc = failed to setup network for sandbox "72138aac229724616c75d31ca541e964cbf3019560b8b722ce327f4f4d702551": plugin type="flannel" failed (add): loadFlannelSubnetEnv failed: open /run/flannel/subnet.env: no such file or directory
9、检查flannel配置
FLANNEL_NETWORK=10.244.0.0/16
FLANNEL_SUBNET=10.244.0.1/24
FLANNEL_MTU=1450FLANNEL_IPMASQ=true
flannel一直处于CrashLoopBackOff状态
vim /etc/kubernetes/manifests/kube-controller-manager.yaml
    - --allocate-node-cidrs=true
    - --cluster-cidr=10.244.0.0/16
systemctl restart kubelet
10、检查ipvs模式
查看是否开启了ipvs模式
kubectl -n kube-system logs kube-proxy-6bprf

11、iptables放行端口,比如开启30080端口
iptables -A INPUT -p tcp -m tcp --dport30080-j ACCEPT
12、安装命令自动补齐
yum -yinstall bash-completion

cat>> /etc/bashrc <<EOF
source <(kubeadm completion bash)
source <(kubectl completion bash)
source <(crictl  completion bash)
EOFsource /etc/bashrc
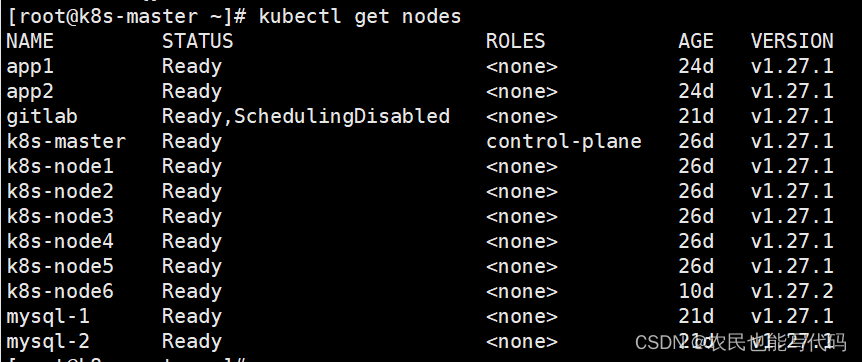
至此,kubernetes已经安装完毕, 可以通过下面命令查看
kubectl get nodes

版权归原作者 西攻城狮北 所有, 如有侵权,请联系我们删除。