
什么是torchrun
torchrun 是 PyTorch 提供的一个命令行工具,用于启动分布式训练,可以是单节点多GPU,也可以多卡多机。它是 torch.distributed.launch 工具的继任者,也就是之前常用的
python -m torch.distributed.launch
启动命令。
从 PyTorch 1.9 版本开始,torchrun引入,等同于
torch.distributed.run
好处不需要使用python -m启动,可以直接torchrun 执行器在 lib/python3.8/site-packages/torch/distributed/run.py下,并且提供了更灵活的配置选项,比如自动检测系统中的 GPU 数量并据此启动相应数量的进程,无需手动指定。
解决方案
现在我创建一个sh脚本里面命令:
#!/bin/bash
export NCCL_P2P_DISABLE=1
export NCCL_IB_DISABLE=1
export CUDA_DEVICE_MAX_CONNECTIONS=6
export CUDA_VISIBLE_DEVICES="1,3"DIR=`pwd`

GPUS_PER_NODE=2
NNODES=1
NODE_RANK=0
MASTER_ADDR=localhost
MASTER_PORT=6001

MODEL="/xx/Qwen-7B-Chat"# Set the path if you do not want to load from huggingface directlyDATA="trans_chinese_alpaca_data.json"

OMP_NUM_THREADS=2 torchrun --nproc_per_node $GPUS_PER_NODE\
    --nnodes 1\
    --node_rank 0\
    --master_addr localhost\
    --master_port 6001\
     /home/ph/LLM/Qwen-14B-main/finetune.py \
    --model_name_or_path $MODEL \
    --data_path $DATA \
    --fp16 True \
    --output_dir output_qwen \
    --num_train_epochs 5 \
    --per_device_train_batch_size 2 \
    --per_device_eval_batch_size 1 \
    --gradient_accumulation_steps 8 \
    --evaluation_strategy "no" \
    --save_strategy "steps" \
    --save_steps 1000 \
    --save_total_limit 10 \
    --learning_rate 1e-5 \
    --weight_decay 0.1 \
    --adam_beta2 0.95 \
    --warmup_ratio 0.01 \
    --lr_scheduler_type "cosine" \
    --logging_steps 1 \
    --report_to "none" \
    --model_max_length 2048 \
    --lazy_preprocess True \
    --use_lora \
    --q_lora \
    --gradient_checkpointing \
    --deepspeed finetune/ds_config_zero2.json
这里OMP_NUM_THREADS=2通过环境变量来控制线程数,用于编译器在多处理器系统上实现多线程并行性。
- –nproc_per_node: 2卡
- –nnodes: 1台机器
- –node_rank: 主机器node0
- –master_addr: master机器内网IP(公网IP应该也行)
- –master_port:绑定的端口号
接下来点击创建launch.json: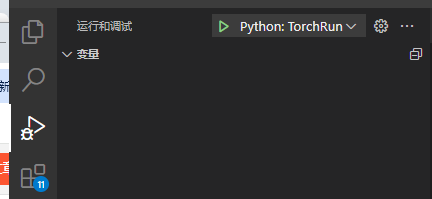
如下设置:
{// 使用 IntelliSense 了解相关属性。
    // 悬停以查看现有属性的描述。
    // 欲了解更多信息,请访问: https://go.microsoft.com/fwlink/?linkid=830387
    "version": "0.2.0","configurations": [{"name": "Python: TorchRun","type": "python","request": "launch",//"program": "${file}",# /home/ph/anaconda3/envs/alpaca-lora/lib/python3.8/site-packages/torch/distributed/run.py"console": "integratedTerminal","module": "torch.distributed.run","justMyCode": true,"env": {"NCCL_P2P_DISABLE": "1","NCCL_IB_DISABLE": "1","CUDA_DEVICE_MAX_CONNECTIONS": "2","CUDA_VISIBLE_DEVICES": "1,3"},"args": ["--nnodes","1","--nproc_per_node","2","--node_rank","0","--master-addr","localhost","--master-port","6001","/home/ph/LLM/Qwen-14B-main/finetune.py","--learning_rate","1e-3","--model_name_or_path","/home/ph/LLM/Qwen-14B-main/Qwen-14B-Chat","--data_path","/home/ph/LLM/alpaca-lora-main/trans_chinese_alpaca_data.json","--fp16","True","--output_dir","output_qwen","--num_train_epochs","5","--per_device_train_batch_size","2","--per_device_eval_batch_size","1","--gradient_accumulation_steps","8","--evaluation_strategy","no","--save_strategy","steps","--save_steps","1000","--save_total_limit","10","--learning_rate","1e-5","--weight_decay","0.1","--adam_beta2","0.95","--warmup_ratio","0.01","--lr_scheduler_type","cosine","--logging_steps","1","--report_to","none","--model_max_length","2048","--lazy_preprocess","True","--use_lora","--q_lora","--gradient_checkpointing","--deepspeed","finetune/ds_config_zero2.json"],}]}
最主要的是
"module": "torch.distributed.run"
,然后就可以顺利点击调试了。
本文转载自: https://blog.csdn.net/ph12345687/article/details/136299953
版权归原作者 牵制有心碎 所有, 如有侵权,请联系我们删除。
版权归原作者 牵制有心碎 所有, 如有侵权,请联系我们删除。