
背景
之前用过了微前端框架 qiankun 并剖析了其原理,今天我们来试试另一个同样厉害的微前端框架无界,本文只是讲如何使用,原理部分后面再更新。
无界支持多种项目的接入,如 react、vue 等
普通项目
如果你项目是 react、vue 可以直接用 wujie-vue2、wujie-vue3、wujie-react,但是这些也是基于下面的内容封装的,所以建议看一下,我后面都会讲到
1、安装
npm i wujie -Simport{ bus, setupApp, preloadApp, startApp, destroyApp }from"wujie";
2、初始化(非必须)
在项目入口处设置子应用的参数,更多参数请看 这里
setupApp({name:"唯一id",// 子应用地址url:"//localhost:9001",// 子应用将被挂载在该容器上 HTMLElement | stringel:"#app1"})
为什么这一步是非必须的,因为接下来的预加载和启动都是和这一步的参数想同,但是如果你这一步有设置,那么接下来只需要设置这一步的 name 就好。
3、预加载
preloadApp({name:"唯一id"});
4、启动子应用
startApp({name:"唯一id"});
子应用将会在第 2 步设置的容器中启动。
vue项目
1、下载
# vue2 框架npm i wujie-vue2 -S
# vue3 框架npm i wujie-vue3 -S
2、初始化
// vue2import WujieVue from"wujie-vue2";// vue3import WujieVue from"wujie-vue3";const{ bus, setupApp, preloadApp, destroyApp }= WujieVue;

Vue.use(WujieVue);// 这里如果设置了,底3步可以直接通过name值来使用,setupApp({name:"app1",url:"//localhost:9001/",...lifecycles,});
3、启动子项目
<WujieVue width="100%" height="100%" name="app1"></WujieVue>
原理
可以看到 wujie-vue 也只是简单的对基本操作进行了封装。
import Vue from"vue";import{ bus, setupApp, preloadApp, startApp, destroyApp }from"wujie";import{ createApp, h, defineComponent }from"vue";const vue3Flag =!!createApp;const wujieVueOptions ={name:"WujieVue",props:{width:{type: String,default:""},height:{type: String,default:""},name:{type: String,default:""},loading:{type: HTMLElement,default:undefined},url:{type: String,default:""},sync:{type: Boolean,default:false},prefix:{type: Object,default:undefined},alive:{type: Boolean,default:false},props:{type: Object,default:undefined},replace:{type: Function,default:undefined},fetch:{type: Function,default:undefined},fiber:{type: Boolean,default:true},degrade:{type: Boolean,default:false},plugins:{type: Array,default:null},beforeLoad:{type: Function,default:null},beforeMount:{type: Function,default:null},afterMount:{type: Function,default:null},beforeUnmount:{type: Function,default:null},afterUnmount:{type: Function,default:null},activated:{type: Function,default:null},deactivated:{type: Function,default:null},loadError:{type: Function,default:null}},data(){return{destroy:null,startAppQueue: Promise.resolve(),};},mounted(){
    bus.$onAll(this.handleEmit);this.execStartApp();this.$watch(()=>this.name +this.url,()=>this.execStartApp());},methods:{handleEmit(event,...args){this.$emit(event,...args);},execStartApp(){this.startAppQueue =this.startAppQueue.then(async()=>{try{this.destroy =awaitstartApp({name:this.name,url:this.url,el:this.$refs.wujie,loading:this.loading,alive:this.alive,fetch:this.fetch,props:this.props,replace:this.replace,sync:this.sync,prefix:this.prefix,fiber:this.fiber,degrade:this.degrade,plugins:this.plugins,beforeLoad:this.beforeLoad,beforeMount:this.beforeMount,afterMount:this.afterMount,beforeUnmount:this.beforeUnmount,afterUnmount:this.afterUnmount,activated:this.activated,deactivated:this.deactivated,loadError:this.loadError
          });}catch(error){
          console.log(error);}});},},beforeDestroy(){
    bus.$offAll(this.handleEmit);},render(c){const createElement = vue3Flag ? h : c;returncreateElement("div",{style:{width:this.height,height:this.height,},ref:"wujie",});},};const WujieVue = vue3Flag ?defineComponent(wujieVueOptions): Vue.extend(wujieVueOptions);

WujieVue.setupApp = setupApp;
WujieVue.preloadApp = preloadApp;
WujieVue.bus = bus;
WujieVue.destroyApp = destroyApp;
WujieVue.install=function(Vue){
  Vue.component("WujieVue", WujieVue);};exportdefault WujieVue;
React项目
基本和 vue 相同
效果
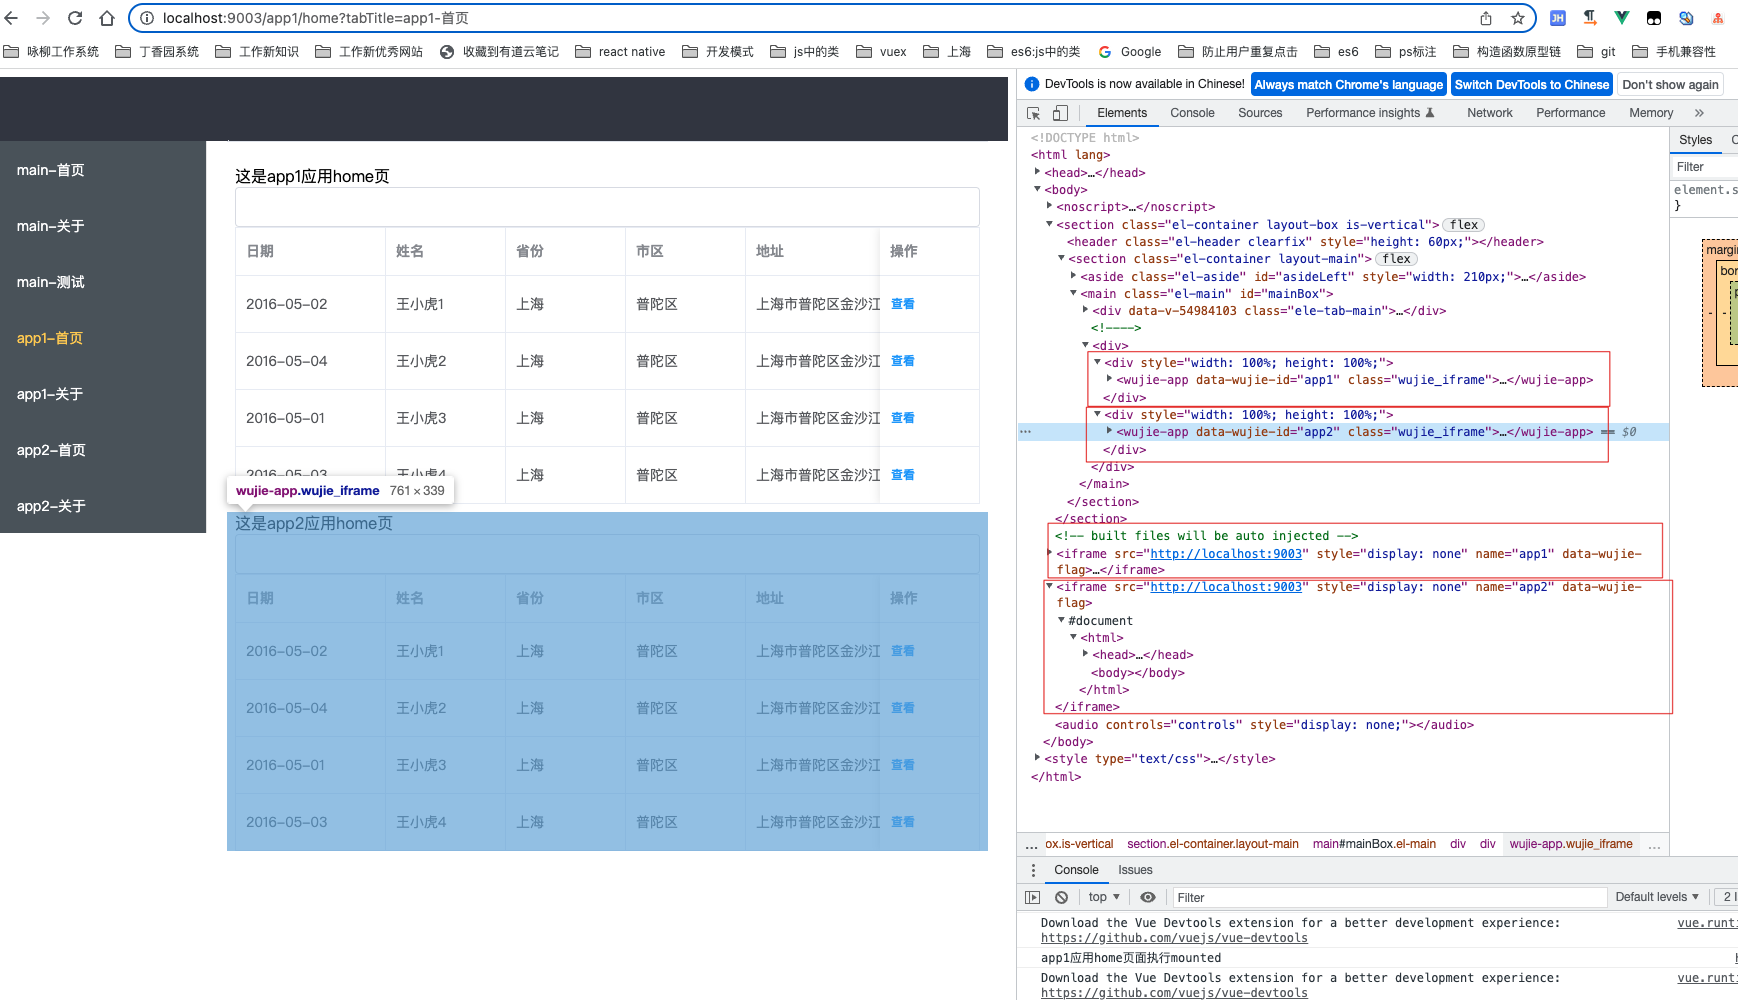
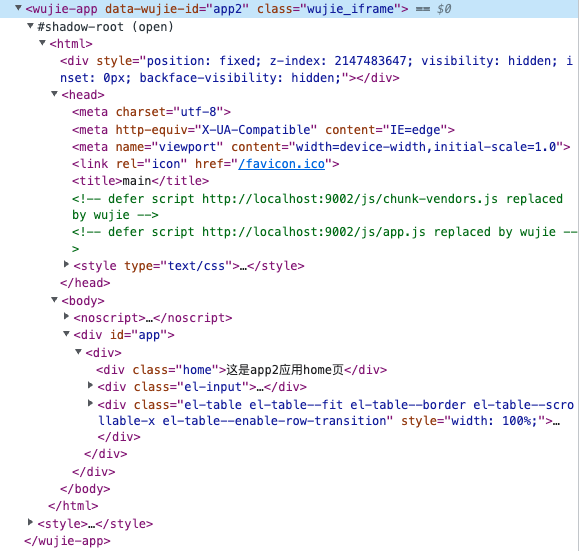
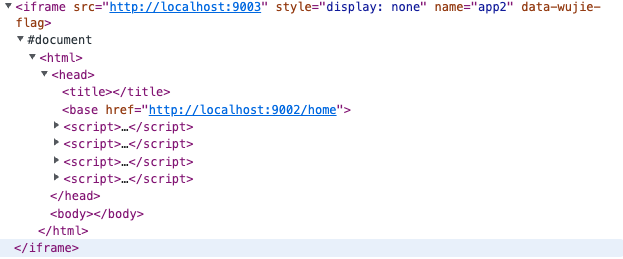
可以看到,我在这个页面加载了两个子应用,在 dom 上的表现形式为 web component 的形态,而 js 部分则是用 iframe 来加载的。
总结
看下来比 qiankun 的接入方式简单了许多,后续使用我会在记录
本文转载自: https://blog.csdn.net/weixin_43972437/article/details/129736520
版权归原作者 Lvan的前端笔记 所有, 如有侵权,请联系我们删除。
版权归原作者 Lvan的前端笔记 所有, 如有侵权,请联系我们删除。