
一、实例需求 ⌛
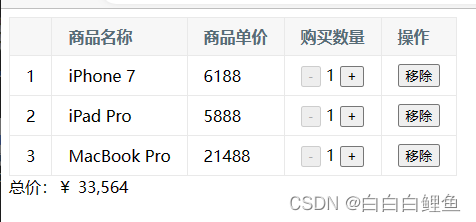
购物车需要展示一个已加入购物车的商品列表,包含商品名称、商品单价、购买数量和操作 等信息,还需要实时显示购买的总价。其中购买数量可以增加或减少,每类商品还可以从购物车中移除。最终实现的效果大致如图所示。
基础版
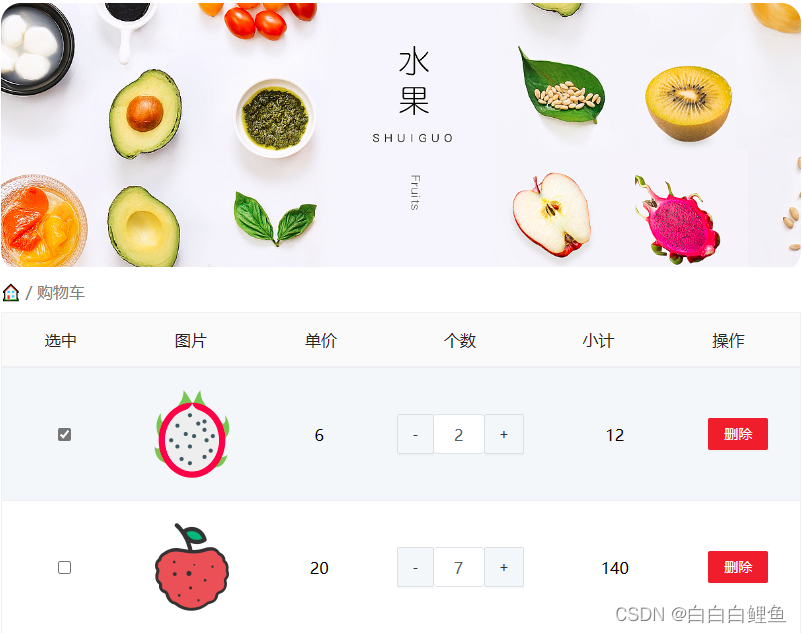
**plus版 **

二、代码实现 ☕
先在 index.html 中引入 Vue.js 和相关资源,创建一个根元素来挂载 Vue 实例:
<!DOCTYPE html>
<html>
<head>
    <meta charset="utf-8">
    <title>购物车示例</title>
    <link rel="stylesheet" type="text/css" href="style.css">
</head>
<body>
<div id="app" v-cloak>

</div>
<script src="https://unpkg.com/vue/dist/vue.min.js"></script>
<script src="index.js"></script>
</body>
</html>
    注意,这里将 vue.min.js 和 index.js 文件写在的最底部,如果写在里,Vue 实例 将无法创建,因为此时 DOM 还没有被解析完成,除非通过异步或在事件 DOMContentLoaded(IE 是 onreadystatechange)触发时再创建 Vue 实例,这有点像 jQuery 的$(document).ready()方法。

    本例需要用到 Vue.js 的 computed、methods 等选项,在 index.js 中先初始化实例:
var app = new Vue({
 el: '#app',
 data: {

 },
 computed: {

 },
 methods: {

 }
});
我们需要的数据比较简单,只有一个列表,里面包含了商品名称、单价、购买数量。在实际 业务中,这个列表应该是通过 Ajax 从服务端动态获取的,这里只做示例,所以直接写入在 data 选 项内,另外每个商品还应该有一个全局唯一的 id。我们在 data 内写入列表 list:
data: {
        list: [
            {
                id: 1,
                name: 'iPhone 7',
                price: 6188,
                count: 1
            },
            {
                id: 2,
                name: 'iPad Pro',
                price: 5888,
                count: 1
            },
            {
                id: 3,
                name: 'MacBook Pro',
                price: 21488,
                count: 1
            }
        ]
    }
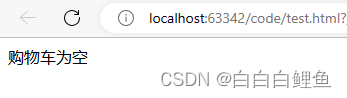
数据构建好后,可以在 index.html 中展示列表了,毫无疑问,肯定会用到 v-for,不过在此之 前,我们先做一些小的优化。因为每个商品都是可以从购物车移除的,所以当列表为空时,在页面 中显示一个“购物车为空”的提示更为友好,我们可以通过判断数组 list 的长度来实现该功能:
<div id="app" v-cloak>
 <template v-if="list.length">
 </template>
 <div v-else>购物车为空</div>
</div>
<template>里的代码分两部分,一部分是商品列表信息,我们用表格 table 来展现;另一部分就是带有千位分隔符的商品总价(每隔三位数加进一个逗号)。这部分代码如下:
<template v-if="list.length">
    <table>
        <thead>
        <tr>
            <th></th>
            <th>商品名称</th>
            <th>商品单价</th>
            <th>购买数量</th>
            <th>操作</th>
        </tr>
        </thead>
        <tbody>
        </tbody>
    </table>
    <div>总价:¥ {{ totalPrice }}</div>
</template>
总价 totalPrice 是依赖于商品列表而动态变化的,所以我们用计算属性来实现,顺便将结果转换为带有“千位分隔符”的数字,在 index.js 的 computed 选项内写入:
    computed: {
        totalPrice: function () {
            let total = 0;
            for (let i = 0; i < this.list.length; i++) {
                let item = this.list[i];
                total += item.price * item.count;
            }

            return total.toString().replace(/\B(?=(\d{3})+$)/g,',');
        }
    }
这段代码中的
return total.toString().replace(/\B(?=(\d{3})+$)/g,',');
是将总价
total
转换为字符串,并在每三个数字之间添加逗号,以便更好地显示金额。这是通过正则表达式
\B(?=(\d{3})+$)
和
.replace()
方法来实现的。
具体来说,
\B(?=(\d{3})+$)
是一个正则表达式,
\B
表示非单词边界,
(?=(\d{3})+$)
表示匹配后面跟着的三个数字的连续重复,且这三个数字一直到字符串结尾。这个正则表达式的作用是找到每三个数字的位置。
.replace()
方法接受两个参数,第一个参数是要替换的内容(匹配到的每三个数字),第二个参数是用于替换的内容(在匹配到的每三个数字之间插入逗号)。所以,这段代码的作用是将总价转换为带有逗号分隔的字符串形式,例如:"1,000,000"。
最后就剩下商品列表的渲染和相关的几个操作了。先在内把数组 list 用 v-for 指令循环出来:
<tbody>
<tr v-for="(item, index) in list">
    <td>{{ index + 1 }}</td>
    <td>{{ item.name }}</td>
    <td>{{ item.price }}</td>
    <td>
        <button
                @click="handleReduce(index)"
                :disabled="item.count === 1">-</button>
        {{ item.count }}
        <button @click="handleAdd(index)">+</button>
    </td>
    <td>
        <button @click="handleRemove(index)">移除</button>
    </td>
</tr>
</tbody>
商品序号、名称、单价、数量都是直接使用插值来完成的,在第 4 列的两个按钮用 于增/减购买数量,分别绑定了两个方法 handleReduce 和 handleAdd,参数都是当前商品在数组 list 中的索引。很多时候,一个元素上会同时使用多个特性(尤其是在组件中使用 props 传递数据时), 写在一行代码较长,不便阅读,所以建议特性过多时,将每个特性都单独写为一行,比如第一个中使用了 v-bind 和 v-on 两个指令(这里都用的语法糖写法)。每件商品购买数量最少是 1 件,所以当 count 为 1 时,不允许再继续减少,所以这里给动态绑定了 disabled 特性来禁用按钮 。
在 index.js 中继续完成剩余的 3 个方法:
methods: {
        handleReduce: function (index) {
            if (this.list[index].count === 1) return;
            this.list[index].count--;
        },
        handleAdd: function (index) {
            this.list[index].count++;
        },
        handleRemove: function (index) {
            this.list.splice(index, 1);
        }
    }
这 3 个方法都是直接对数组 list 的操作,没有太复杂的逻辑。需要说明的是,虽然在 button 上已经绑定了 disabled 特性,但是在 handleReduce 方法内又判断了一遍,这是因为在某些时候,可能不一定会用 button 元素,也可能是 div、span 等,给它们增加 disabled 是没有任何作用的,所以安全起见,在业务逻辑中再判断一次,避免因修改 HTML 模板后出现 bug。
以下是完整代码
HTML:
<!DOCTYPE html>
<html>
<head>
    <meta charset="utf-8">
    <title>购物车示例</title>
    <link rel="stylesheet" type="text/css" href="style.css">
</head>
<body>
<div id="app" v-cloak>
    <template v-if="list.length">
        <table>
            <thead>
            <tr>
                <th></th>
                <th>商品名称</th>
                <th>商品单价</th>
                <th>购买数量</th>
                <th>操作</th>
            </tr>
            </thead>
            <tbody>
            <tr v-for="(item, index) in list">
                <td>{{ index + 1 }}</td>
                <td>{{ item.name }}</td>
                <td>{{ item.price }}</td>
                <td>
                    <button
                            @click="handleReduce(index)"
                            :disabled="item.count === 1">-</button>
                    {{ item.count }}
                    <button @click="handleAdd(index)">+</button>
                </td>
                <td>
                    <button @click="handleRemove(index)">移除</button>
                </td>
            </tr>
            </tbody>
        </table>
        <div>总价:¥ {{ totalPrice }}</div>
    </template>
    <div v-else>购物车为空</div>
</div>
<!-- 引入的是开发版本包 - 包含完整的注释和警告 -->
<script src="https://cdn.jsdelivr.net/npm/[email protected]/dist/vue.js"></script>
<script src="index.js"></script>
</body>
</html>
JS:
let app = new Vue({
    el: '#app',
    data: {
        list: [
            {
                id: 1,
                name: 'iPhone 7',
                price: 6188,
                count: 1
            },
            {
                id: 2,
                name: 'iPad Pro',
                price: 5888,
                count: 1
            },
            {
                id: 3,
                name: 'MacBook Pro',
                price: 21488,
                count: 1
            }
        ]
    },
    computed: {
        totalPrice: function () {
            let total = 0;
            for (let i = 0; i < this.list.length; i++) {
                let item = this.list[i];
                total += item.price * item.count;
            }

            return total.toString().replace(/\B(?=(\d{3})+$)/g,',');
        }
    },
    methods: {
        handleReduce: function (index) {
            if (this.list[index].count === 1) return;
            this.list[index].count--;
        },
        handleAdd: function (index) {
            this.list[index].count++;
        },
        handleRemove: function (index) {
            this.list.splice(index, 1);
        }
    }
});
CSS:
[v-cloak] {
display: none;
}
/*全局样式添加手型样式:*/
* {
cursor: pointer;
}
table{
border: 1px solid #e9e9e9;
border-collapse: collapse;
border-spacing: 0;
empty-cells: show;
}
th, td{
padding: 8px 16px;
border: 1px solid #e9e9e9;
text-align: left;
}
th{
background: #f7f7f7;
color: #5c6b77;
font-weight: 600;
white-space: nowrap;
}
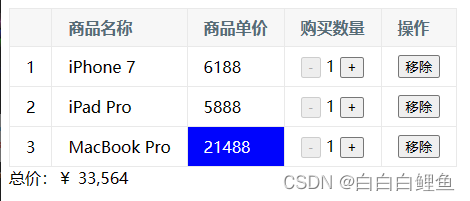
/*鼠标悬停时背景颜色变蓝:
这将使表头(th元素)和表格单元格(td元素)在鼠标悬停时背景颜色变为蓝色,
文字颜色变为白色。将上述代码添加到您的CSS文件或<style>标签中,然后将其
链接到HTML文件即可实现样式的改变。请注意,为了确保这些样式优先生效,可能
需要调整样式的优先级或使用!important修饰符。*/
th:hover,
td:hover {
background-color: blue;
color: white;
}
** plus版本代码实现**
<!DOCTYPE html>
<html lang="en">
<head>
<meta charset="UTF-8" />
<meta http-equiv="X-UA-Compatible" content="IE=edge" />
<meta name="viewport" content="width=device-width, initial-scale=1.0" />
<link rel="stylesheet" href="./css/inputnumber.css" />
<link rel="stylesheet" href="./css/index.css" />
<title>购物车</title>
</head>
<body>
<div class="app-container" id="app">
<!-- 顶部banner -->
<div class="banner-box"><img src="http://autumnfish.cn/static/fruit.jpg" alt="" /></div>
<!-- 面包屑 -->
<div class="breadcrumb">
<span>🏠</span>
/
<span>购物车</span>
</div>
<!-- 购物车主体 -->
<div class="main" v-if="fruitList.length > 0">
<div class="table">
<!-- 头部 -->
<div class="thead">
<div class="tr">
<div class="th">选中</div>
<div class="th th-pic">图片</div>
<div class="th">单价</div>
<div class="th num-th">个数</div>
<div class="th">小计</div>
<div class="th">操作</div>
</div>
</div>
<!-- 身体 -->
<div class="tbody">
<div v-for="(item, index) in fruitList" :key="item.id" class="tr" :class="{ active: item.isChecked }">
<div class="td"><input type="checkbox" v-model="item.isChecked" /></div>
<div class="td"><img :src="item.icon" alt="" /></div>
<div class="td">{{ item.price }}</div>
<div class="td">
<div class="my-input-number">
<button :disabled="item.num <= 1" class="decrease" @click="sub(item.id)"> - </button>
<span class="my-input__inner">{{ item.num }}</span>
<button class="increase" @click="add(item.id)"> + </button>
</div>
</div>
<div class="td">{{ item.num * item.price }}</div>
<div class="td"><button @click="del(item.id)">删除</button></div>
</div>
</div>
</div>
<!-- 底部 -->
<div class="bottom">
<!-- 全选 -->
<label class="check-all">
<input type="checkbox" v-model="isAll"/>
全选
</label>
<div class="right-box">
<!-- 所有商品总价 -->
<span class="price-box">总价 : ¥ <span class="price">{{ totalPrice }}</span></span>
<!-- 结算按钮 -->
<button class="pay">结算( {{ totalCount }} )</button>
</div>
</div>
</div>
<!-- 空车 -->
<div class="empty" v-else>🛒空空如也</div>
</div>
<script src="https://cdn.jsdelivr.net/npm/vue@2/dist/vue.js"></script>
<script>
const defaultArr = [
{
id: 1,
icon: 'http://autumnfish.cn/static/火龙果.png',
isChecked: true,
num: 2,
price: 6,
},
{
id: 2,
icon: 'http://autumnfish.cn/static/荔枝.png',
isChecked: false,
num: 7,
price: 20,
},
{
id: 3,
icon: 'http://autumnfish.cn/static/榴莲.png',
isChecked: false,
num: 3,
price: 40,
},
{
id: 4,
icon: 'http://autumnfish.cn/static/鸭梨.png',
isChecked: true,
num: 10,
price: 3,
},
{
id: 5,
icon: 'http://autumnfish.cn/static/樱桃.png',
isChecked: false,
num: 20,
price: 34,
},
]
const app = new Vue({
el: '#app',
data: {
// 水果列表
fruitList: JSON.parse(localStorage.getItem('list')) || defaultArr,
},
computed: {
// 默认计算属性:只能获取不能设置,要设置需要写完整写法
// isAll () {
// // 必须所有的小选框都选中,全选按钮才选中 → every
// return this.fruitList.every(item => item.isChecked)
// }
// 完整写法 = get + set
isAll: {
get () {
return this.fruitList.every(item => item.isChecked)
},
set (value) {
// 基于拿到的布尔值,要让所有的小选框 同步状态
this.fruitList.forEach(item => item.isChecked = value)
}
},
// 统计选中的总数 reduce
totalCount () {
return this.fruitList.reduce((sum, item) => {
if (item.isChecked) {
// 选中 → 需要累加
return sum + item.num
} else {
// 没选中 → 不需要累加
return sum
}
}, 0)
},
// 总计选中的总价 num * price
totalPrice () {
return this.fruitList.reduce((sum, item) => {
if (item.isChecked) {
return sum + item.num * item.price
} else {
return sum
}
}, 0)
}
},
methods: {
del (id) {
this.fruitList = this.fruitList.filter(item => item.id !== id)
},
add (id) {
// 1. 根据 id 找到数组中的对应项 → find
const fruit = this.fruitList.find(item => item.id === id)
// 2. 操作 num 数量
fruit.num++
},
sub (id) {
// 1. 根据 id 找到数组中的对应项 → find
const fruit = this.fruitList.find(item => item.id === id)
// 2. 操作 num 数量
fruit.num--
}
},
watch: {
fruitList: {
deep: true,
handler (newValue) {
// 需要将变化后的 newValue 存入本地 (转JSON)
localStorage.setItem('list', JSON.stringify(newValue))
}
}
}
})
</script>
</body>
</html>
.app-container {
  padding-bottom: 300px;
  width: 800px;
  margin: 0 auto;
}
@media screen and (max-width: 800px) {
  .app-container {
    width: 600px;
  }
}
.app-container .banner-box {
  border-radius: 20px;
  overflow: hidden;
  margin-bottom: 10px;
}
.app-container .banner-box img {
  width: 100%;
}
.app-container .nav-box {
  background: #ddedec;
  height: 60px;
  border-radius: 10px;
  padding-left: 20px;
  display: flex;
  align-items: center;
}
.app-container .nav-box .my-nav {
  display: inline-block;
  background: #5fca71;
  border-radius: 5px;
  width: 90px;
  height: 35px;
  color: white;
  text-align: center;
  line-height: 35px;
  margin-right: 10px;
}

.breadcrumb {
  font-size: 16px;
  color: gray;
}
.table {
  width: 100%;
  text-align: left;
  border-radius: 2px 2px 0 0;
  border-collapse: separate;
  border-spacing: 0;
}
.th {
  color: rgba(0, 0, 0, 0.85);
  font-weight: 500;
  text-align: left;
  background: #fafafa;
  border-bottom: 1px solid #f0f0f0;
  transition: background 0.3s ease;
}
.th.num-th {
  flex: 1.5;
}
.th {
  text-align: center;
}
.th:nth-child(4),
.th:nth-child(5),
.th:nth-child(6),
.th:nth-child(7) {
  text-align: center;
}
.th.th-pic {
  flex: 1.3;
}
.th:nth-child(6) {
  flex: 1.3;
}

.th,
.td {
  position: relative;
  padding: 16px 16px;
  overflow-wrap: break-word;
  flex: 1;
}
.pick-td {
  font-size: 14px;
}
.main,
.empty {
  border: 1px solid #f0f0f0;
  margin-top: 10px;
}
.tr {
  display: flex;
  cursor: pointer;
  border-bottom: 1px solid #ebeef5;
}
.tr.active {
  background-color: #f5f7fa;
}
.td {
  display: flex;
  justify-content: center;
  align-items: center;
}

.table img {
  width: 100px;
  height: 100px;
}

button {
  outline: 0;
  box-shadow: none;
  color: #fff;
  background: #d9363e;
  border-color: #d9363e;
  color: #fff;
  background: #d9363e;
  border-color: #d9363e;
  line-height: 1.5715;
  position: relative;
  display: inline-block;
  font-weight: 400;
  white-space: nowrap;
  text-align: center;
  background-image: none;
  border: 1px solid transparent;
  box-shadow: 0 2px 0 rgb(0 0 0 / 2%);
  cursor: pointer;
  transition: all 0.3s cubic-bezier(0.645, 0.045, 0.355, 1);
  -webkit-user-select: none;
  -moz-user-select: none;
  -ms-user-select: none;
  user-select: none;
  touch-action: manipulation;
  height: 32px;
  padding: 4px 15px;
  font-size: 14px;
  border-radius: 2px;
}
button.pay {
  background-color: #3f85ed;
  margin-left: 20px;
}

.bottom {
  height: 60px;
  display: flex;
  align-items: center;
  justify-content: space-between;
  padding-right: 20px;
  border: 1px solid #f0f0f0;
  border-top: none;
  padding-left: 20px;
}
.right-box {
  display: flex;
  align-items: center;
}
.check-all {
  cursor: pointer;
}
.price {
  color: hotpink;
  font-size: 30px;
  font-weight: 700;
}
.price-box {
  display: flex;
  align-items: center;
}
.empty {
  padding: 20px;
  text-align: center;
  font-size: 30px;
  color: #909399;
}
.my-input-number {
  display: flex;
}
.my-input-number button {
  height: 40px;
  color: #333;
  border: 1px solid #dcdfe6;
  background-color: #f5f7fa;
}
.my-input-number button:disabled {
  cursor: not-allowed!important;
}
.my-input-number .my-input__inner {
  height: 40px;
  width: 50px;
  padding: 0;
  border: none;
  border-top: 1px solid #dcdfe6;
  border-bottom: 1px solid #dcdfe6;
}
.my-input-number {
  position: relative;
  display: inline-block;
  width: 140px;
  line-height: 38px;
}
.my-input-number span {
  -moz-user-select: none;
  -webkit-user-select: none;
  -ms-user-select: none;
}
.my-input-number .my-input {
  display: block;
  position: relative;
  font-size: 14px;
  width: 100%;
}
.my-input-number .my-input__inner {
  -webkit-appearance: none;
  background-color: #fff;
  background-image: none;
  border-radius: 4px;
  border: 1px solid #dcdfe6;
  box-sizing: border-box;
  color: #606266;
  display: inline-block;
  font-size: inherit;
  height: 40px;
  line-height: 40px;
  outline: none;
  padding: 0 15px;
  transition: border-color 0.2s cubic-bezier(0.645, 0.045, 0.355, 1);
  width: 100%;
  padding-left: 50px;
  padding-right: 50px;
  text-align: center;
}
.my-input-number .my-input-number__decrease,
.my-input-number .my-input-number__increase {
  position: absolute;
  z-index: 1;
  top: 1px;
  width: 40px;
  height: auto;
  text-align: center;
  background: #f5f7fa;
  color: #606266;
  cursor: pointer;
  font-size: 13px;
}
.my-input-number .my-input-number__decrease {
  left: 1px;
  border-radius: 4px 0 0 4px;
  border-right: 1px solid #dcdfe6;
}
.my-input-number .my-input-number__increase {
  right: 1px;
  border-radius: 0 4px 4px 0;
  border-left: 1px solid #dcdfe6;
}
.my-input-number .my-input-number__decrease.is-disabled,
.my-input-number .my-input-number__increase.is-disabled {
  color: #c0c4cc;
  cursor: not-allowed;
}
三、基础版代码优化 ⛳
增加后端接口和前后端交互功能
如果要是Get请求:
let app = new Vue({
    el: '#app',
    data: {
        list: []
    },
    computed: {
        totalPrice: function () {
            let total = 0;
            for (let i = 0; i < this.list.length; i++) {
                let item = this.list[i];
                total += item.price * item.count;
            }

            return total.toString().replace(/\B(?=(\d{3})+$)/g,',');
        }
    },
    methods: {

        handleReduce: function (index) {
            if (this.list[index].count === 1) return;
            this.list[index].count--;
        },
        handleAdd: function (index) {
            this.list[index].count++;
        },
        handleRemove: function (index) {
            this.list.splice(index, 1);
        },
        fetchData: function () {
            // 调用后端接口获取数据
            fetch('/api/products')
                .then(response => response.json())
                .then(data => {
                    this.list = data;
                })
                .catch(error => {
                    console.log(error);
                });
        }
    },
    created: function () {
        this.fetchData();
    }
});
后端 controller:
package com.example.demo.controller;

import com.example.demo.Product;
import org.springframework.web.bind.annotation.GetMapping;
import org.springframework.web.bind.annotation.RequestMapping;
import org.springframework.web.bind.annotation.RequestParam;
import org.springframework.web.bind.annotation.RestController;
import javax.servlet.http.HttpServletResponse;
import java.io.IOException;
import java.net.URISyntaxException;
import java.util.ArrayList;
import java.util.Arrays;
import java.util.List;

@RestController
@RequestMapping("/api/products")
public class ProductController {

    @GetMapping
    public List<Product> getProducts() {

        // 在此处编写获取购物车商品数据的逻辑,可以从数据库或其他数据源获取数据
        List<Product> productList = new ArrayList<>();

        // 示例数据
        productList.add(new Product(1, "iPhone 7", 6188, 1));
        System.out.println(Arrays.toString(productList.toArray()));
        productList.add(new Product(2, "iPad Pro", 5888, 1));
        System.out.println(Arrays.toString(productList.toArray()));
        productList.add(new Product(3, "MacBook Pro", 21488, 1));
        System.out.println(Arrays.toString(productList.toArray()));

        return productList;
    }
}
package com.example.demo;

import lombok.Data;

@Data
public class Product {
    private int id;
    private String name;
    private double price;
    private int count;

    public Product(int id, String name, double price, int count) {
        this.id = id;
        this.name = name;
        this.price = price;
        this.count = count;
    }
}
如果要是Post请求:
let app = new Vue({
    el: '#app', // 绑定 Vue 实例到页面中的元素 id 为 "app" 的元素上
    data: {
        list: [] // 初始化数据,用于存储购物车商品列表
    },
    computed: {
        totalPrice: function () { // 计算属性,用于计算购物车中所有商品的总价
            let total = 0;
            for (let i = 0; i < this.list.length; i++) {
                let item = this.list[i];
                total += item.price * item.count;
            }

            return total.toString().replace(/\B(?=(\d{3})+$)/g,','); // 将总价格式化为千位分隔符的字符串形式返回
        }
    },
    methods: {
        handleReduce: function (index) { // 减少商品数量的方法
            if (this.list[index].count === 1) return; // 如果商品数量已经是 1,则不再减少
            this.list[index].count--; // 将商品数量减一
        },
        handleAdd: function (index) { // 增加商品数量的方法
            this.list[index].count++; // 将商品数量加一
        },
        handleRemove: function (index) { // 移除商品的方法
            this.list.splice(index, 1); // 从商品列表中移除指定索引位置的商品
        },
        fetchData: function () { // 从后端获取数据的方法
            // 调用后端接口获取数据,这里使用了 fetch API 发送异步请求
            fetch('/api/products', {
                method: 'POST' // 将请求方法改为 POST
            })
                .then(response => response.json()) // 解析响应的 JSON 数据
                .then(data => {
                    this.list = data; // 将返回的商品数据赋值给列表数据
                })
                .catch(error => {
                    console.log(error); // 打印错误信息
                });
        }
    },
    created: function () { // Vue 实例创建时执行的钩子函数
        this.fetchData(); // 在实例创建时调用 fetchData 方法获取数据
    }
});
后端 controller
package com.example.demo.controller;

import com.example.demo.Product;
import org.springframework.web.bind.annotation.*;
import javax.servlet.http.HttpServletResponse;
import java.io.IOException;
import java.net.URISyntaxException;
import java.util.ArrayList;
import java.util.Arrays;
import java.util.List;

@RestController
@RequestMapping("/api/products")
public class ProductController {

    @PostMapping // 将GetMapping改为PostMapping
    public List<Product> getProducts() {
        // 在此处编写获取购物车商品数据的逻辑,可以从数据库或其他数据源获取数据
        List<Product> productList = new ArrayList<>();
        // 示例数据
        productList.add(new Product(1, "iPhone 7", 6188, 1));
        productList.add(new Product(2, "iPad Pro", 5888, 1));
        productList.add(new Product(3, "MacBook Pro", 21488, 1));
        return productList;
    }
}
上述代码,实现了以下功能:
使用 Vue.js 框架创建了一个 Vue 实例,并将其绑定到页面中的元素 id 为 "app" 的元素上。
定义了
data对象,其中包含一个名为list的空数组,用于存储购物车中的商品列表。定义了一个计算属性
totalPrice,用于计算购物车中所有商品的总价。根据list数组中每个商品的单价和数量进行累加,最后将结果格式化为千位分隔符的字符串形式。定义了一些方法,包括:
handleReduce:减少商品数量的方法,将指定索引位置的商品数量减一。handleAdd:增加商品数量的方法,将指定索引位置的商品数量加一。handleRemove:移除商品的方法,从商品列表中移除指定索引位置的商品。fetchData:从后端接口获取数据的方法。使用了fetchAPI 发送异步请求,在请求中将请求方法改为 POST,然后解析响应的 JSON 数据,并将返回的商品数据赋值给list数组。使用
created钩子函数,在 Vue 实例创建时调用fetchData方法,完成页面加载时的数据初始化。总体来说,这段代码实现了一个简单的购物车应用,可以展示购物车中的商品列表、计算总价、增加或减少商品数量,并且可以从后端接口获取商品数据进行显示。
版权归原作者 白白白鲤鱼 所有, 如有侵权,请联系我们删除。