
上期我们介绍了openGauss数据库操作系统参数检查、健康状态检查、数据库性能检查,本期继续介绍日志检查和清理、最大连接数设置、表和索引的例行维护相关内容。
日志检查
4.1 实验介绍
4.1.1 关于本实验
数据库运行时,某些操作在执行过程中可能会出现错误,数据库依然能够运行。但是此时数据库中的数据可能已经发生不一致的情况。建议检查openGauss运行日志,及时发现隐患。
当openGauss发生故障时,使用 gs_collector 此工具收集OS信息、日志信息以及配置文件等信息,来定位问题。
本实验主要是先手工设置收集配置信息,然后通过gs_collector工具调整用配置来收集相关日志信息。
4.1.2 实验目的
掌握gs_collector工具的基本使用;
4.2 通过gs_collector工具来收集日志信息
表4-1 gs_collector内容收集对照表
TypeNameContent描述SystemHardWareInfo、RunTimeInfo收集现在操作系统的状态信息。HardWareInfo:Cpu(cat /proc/cpuinfo)、内存(cat /proc/meminfo)、磁盘(df -h)。RunTimeInfo:topStatus(ps ux)、ioStat(iostat -xm 2 3)网络状态(cat /proc/net/dev)、内存使用情况(free -m)Database具体列表见表4-2收集系统视图或者系统表的内容。LogDBnode、ClusterManager收集DBnode的pg_log和gs_profile,收集ClusterManager的日志信息包括:om、gs_ctl、gs_guc、gs_initdbConfigDBnode收集DBnode的配置信息:postgresql.conf、gaussdb.state、pg_hba.conf、pg_control、pg_replslot、pg_ident.confGstackDBnode利用gstack命令得到DBnode的当前堆栈信息。CoreDumpgaussdb gs_ctl通过时间筛选gaussdb进程的core文件。注意:关于Core的配置和方式请按照如下要求:在/proc/sys/kernel/core_pattern文件中添加core文件的格式:/gauss/corefile/core-%e-%p-%t。XLogDBnode通过时间筛选收集xlog。Plan收集计划复现信息:用户输入表示收集所有数据库上的计划复现信息。用户输入具体的数据库名称表示收集指定数据库上的计划复现信息。
表4-2 gs_collector工具支持收集的系统表和视图列表
ClassView NameOSgs_os_run_info、pg_os_threadsSession/Threadgs_session_stat、gs_session_time、gs_session_cpu_statistics、gs_session_memory_statistics、gs_session_memory_context、gs_session_memory、gs_session_memory_detail、pg_stat_activity、gs_thread_memory_contextWLMgs_cluster_resource_info、 pg_total_user_resource_info、 pg_total_user_resource_info_oid、gs_wlm_rebuild_user_resource_pool、 gs_wlm_resource_pool、gs_wlm_workload_records、 pg_wlm_statistics、 pg_app_workloadgroup_mappingQuery-AP Operatorgs_wlm_operator_info、gs_wlm_operator_history、 gs_wlm_operator_statisticsQuery-APgs_wlm_session_info_all、gs_wlm_session_history、 gs_wlm_session_info、gs_wlm_user_session_info、 gs_wlm_session_statistics、pg_session_iostat、 pg_session_wlmstatCache I/Opg_statio_all_indexes、 pg_statio_all_sequences、 pg_statio_all_tables、 pg_statio_sys_indexes、pg_statio_sys_sequences、 pg_statio_sys_tables、 pg_statio_user_indexes、pg_statio_user_sequences、pg_statio_user_tables、 gs_stat_db_cu、 gs_stat_session_cuMemorypg_total_memory_detail、pg_shared_memory_detail、 gs_total_memory_detailFilegs_file_stat、gs_redo_stat、 pg_stat_bad_blockObjectpg_stat_user_tables、pg_stat_user_indexes、 pg_stat_sys_tables、pg_stat_sys_indexes、pg_stat_all_tables、pg_stat_all_indexes、 pg_stat_database、pg_stat_database_conflicts、 pg_stat_xact_all_tables、pg_stat_xact_sys_tables、pg_stat_xact_user_tables、 pg_stat_xact_user_functionsLockpg_locksUtilitypg_stat_replication、pg_replication_slots、pg_stat_bgwriterTransactionpg_running_xacts、 pg_prepared_xactsWaitspg_thread_wait_status
步骤 1设置收集配置文件。
[omm@ecs-e1b3 ~]$ pwd
/home/omm
[omm@ecs-e1b3 ~]$ vi collector.json
在用vi collector.json创建配置文件后,输入”i”进入INSERT模式,并将以下文本内容添加至配置文件中,具体如下:
{"Collect":[{"TypeName":"System", "Content":"RunTimeInfo, HardWareInfo","Interval":"0", "Count":"1"},
                {"TypeName":"Log", "Content":"Coordinator,DataNode,Gtm,ClusterManager", "Interval":"0", "Count":"1"},
                {"TypeName":"Database", "Content":"pg_locks,pg_stat_activity,pg_thread_wait_status","Interval":"0", "Count":"1"},
                {"TypeName":"Config", "Content":"Coordinator,DataNode,Gtm", "Interval":"0", "Count":"1"}]}
内容添加好后,按下“Esc”键,然后输入 :wq 进行保存文件退出。
配置文件中
利用TypeName指定需要收集的信息类型;
利用Content指定每一类信息的具体内容;
利用Count指定此类信息收集的次数;
利用Interval指定收集间隔,单位为秒;
TypeName和Content不允许缺失或者内容为空;
Interval和Count可以不指定,如果没有指定Count,则默认收集一次;
如果没有指定Interval则表示间隔为0秒,Interval和Count的值不能小于0;
如果不指定则使用默认的配置文件;
可以根据gs_collector内容收集对照表进行个性化定制配置;
配置文件格式采用json格式。
步骤 2确定数据库服务是否启动。
[omm@ecs-e1b3 ~]$ gs_om -t status;
-----------------------------------------------------------------------
cluster_state   : Unavailable
redistributing  : No
-----------------------------------------------------------------------
cluster_state : Normal 表示已启动,可以正常使用。如果状态为Unavailable表示不可用
为了实验继续进行,请先启动数据库服务。
启动数据库服务(如果数据库服务是正常状态,此步骤可以不执行)。
[omm@ecs-e1b3 ~]$ gs_om -t start;
Starting cluster.
==================================================================================
Successfully started.
步骤 3收集OS信息及日志信息。
begin-time、end-time的值根据自己实际想收集的时间来设置。
[omm@ecs-e1b3 ~]$ gs_collector --begin-time="20200720 23:00" --end-time="20200729 20:00"  -C /home/omm/collector.json
Successfully parsed the configuration file.
create Dir.
Successfully create dir.
do system check interval 0: count 1
Collecting OS information.
Failed to collect OS information.
do database check interval 0: count 1
Collecting catalog statistics.
Successfully collected catalog statistics.
do log check interval 0: count 1
Collecting Log files.
Successfully collected Log files.
do Config check 0:1
Collecting Config files.
Successfully collected Config files.
Collecting files.
Successfully collected files.
All results are stored in /opt/huawei/wisequery/omm_mppdb/collector_20200727_094932.tar.gz.
收集完后,所有的结果存放在/opt/huawei/wisequery/omm_mppdb/collector_20200727_094932.tar.gz包中,请注意自己生成的文件包名称,因为每次的文件包名不一样。
步骤 4查看日志信息。
先进入日志包所在的目录,然后将日志包进行解压。
[omm@ecs-e1b3 omm_mppdb]$ cd /opt/huawei/wisequery/omm_mppdb/
[omm@ecs-e1b3 omm_mppdb]$ ll
total 48K
-rw------- 1 omm dbgrp 46K Jul 27 09:49 collector_20200727_094932.tar.gz
[omm@ecs-e1b3 omm_mppdb]$ tar -zxvf collector_20200727_094932.tar.gz
collector_20200727_094932/
collector_20200727_094932/ecs-e1b3.tar.gz
collector_20200727_094932/Summary.log
collector_20200727_094932/Detail.log
接下来,进入解压后的文件夹collector_20200727_094932,并对ecs-e1b3.tar.gz包进一步解压。
[omm@ecs-e1b3 omm_mppdb]$ cd collector_20200727_094932
[omm@ecs-e1b3 collector_20200727_094932]$ ll
total 24K
-rw-------. 1 omm dbgrp  16K Feb  715:16 db1.tar.gz
-rw-------. 1 omm dbgrp 2.7K Feb  715:16 Detail.log
-rw-------. 1 omm dbgrp 1.1K Feb  715:16 Summary.log
[omm@ecs-e1b3 collector_20200727_094932]$ tar -zxvf db1.tar.gz
ecs-e1b3/
ecs-e1b3/logfiles/
ecs-e1b3/logfiles/log_20200727_094935975042.tar.gz
ecs-e1b3/planSimulatorfiles/
ecs-e1b3/catalogfiles/
ecs-e1b3/catalogfiles/dn_6001_pg_thread_wait_status_20200727_094935303146.csv
ecs-e1b3/catalogfiles/gs_clean_20200727_094935470508.txt
…………………………
ecs-e1b3/systemfiles/
ecs-e1b3/systemfiles/OS_information_20200727_094933424734.txt
ecs-e1b3/systemfiles/database_system_info_20200727_094933446671.txt
[omm@ecs-e1b3 collector_20200727_094932]$
在解压的db1(指的是服务器名,各自的不一样,请注意观察)下有各种定制收集的日志类型目录如下:
[omm@ecs-e1b3 collector_20200727_094932]$ cd db1
[omm@ecs-e1b3 ecs-e1b3]$ ll
total 32K
drwx------ 2 omm dbgrp 4.0K Jul 27 09:49 catalogfiles
drwx------ 2 omm dbgrp 4.0K Jul 27 09:49 configfiles
drwx------ 2 omm dbgrp 4.0K Jul 27 09:49 coreDumpfiles
drwx------ 2 omm dbgrp 4.0K Jul 27 09:49 gstackfiles
drwx------ 2 omm dbgrp 4.0K Jul 27 09:49 logfiles
drwx------ 2 omm dbgrp 4.0K Jul 27 09:49 planSimulatorfiles
drwx------ 2 omm dbgrp 4.0K Jul 27 09:49 systemfiles
drwx------ 2 omm dbgrp 4.0K Jul 27 09:49 xlogfiles
[omm@ecs-e1b3 ecs-e1b3]$ cd catalogfiles/
[omm@ecs-e1b3 catalogfiles]$ ll
total 16K
-rw------- 1 omm dbgrp  389 Jul 27 09:49 dn_6001_pg_locks_20200727_094934961507.csv
-rw------- 1 omm dbgrp 1.4K Jul 27 09:49 dn_6001_pg_stat_activity_20200727_094935134988.csv
-rw------- 1 omm dbgrp  878 Jul 27 09:49 dn_6001_pg_thread_wait_status_20200727_094935303146.csv
-rw------- 1 omm dbgrp  281 Jul 27 09:49 gs_clean_20200727_094935470508.txt
步骤 5下载收集后的日志文件。
根据自己需要比如可以通过WinSCP或者XFTP等SSH工具将日志文件下载至自己本地电脑。
使用root用户和密码登录数据库服务器(主机名为ecs的弹性公网IP):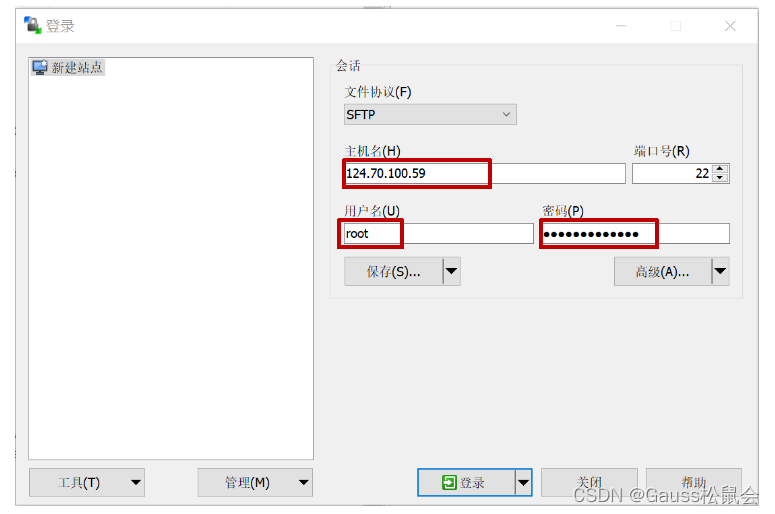
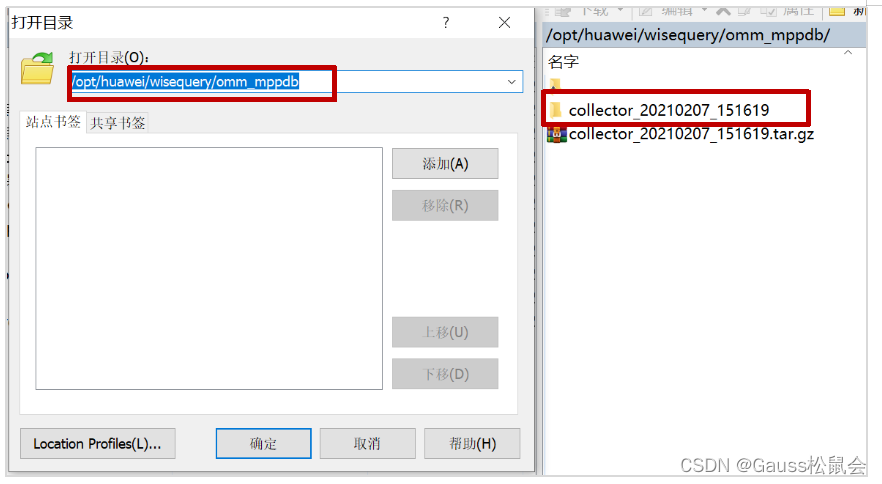
点击“打开目录/书签”,输入目录路径“/opt/huawei/wisequery/omm_mppdb/”,点击确定后进入此目录: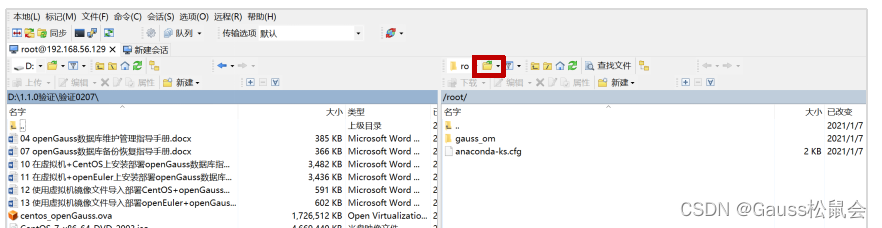
逐层查找到“catalogfiles”文件夹,点击选中文件夹,然后点击“下载”,下载到Windows对应文件夹下: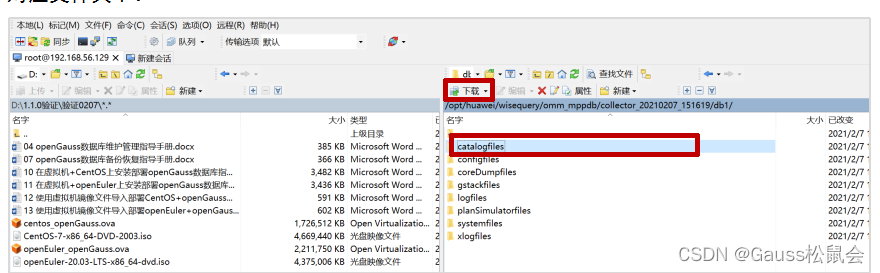
查看下载后的文件夹内容:
图4-2日志文件下载
5.最大连接数设置
5.1 实验介绍
5.1.1 关于本实验
当应用程序与数据库的连接数超过最大值,则新的连接无法建立。建议对连接数进行监控,及时释放空闲的连接或者增加最大连接数。
本实验主要是讲如何来设置数据库最大连接个数。
5.1.2 实验目的
掌握对数据库最大连接数的设置方法。
5.2 场景设置及操作步骤
步骤 1用root用户登录装有openGauss数据库服务的操作系统然后用 su - omm命令切换至omm用户环境,登录后信息如下。
Welcome to 4.19.90-2003.4.0.0036.oe1.aarch64
System information as of time:     Mon Jul 2711:22:46 CST 2020
System load:     0.03
Processes:     154
Memory used:     2.3%
Swap used:     0.0%
Usage On:     14%
IP address:     192.168.0.12
Users online:     3[root@ecs-e1b3 ~]# su - omm
Last login: Mon Jul 27 09:23:44 CST 2020 on pts/0
Welcome to 4.19.90-2003.4.0.0036.oe1.aarch64
System information as of time:     Mon Jul 2711:23:37 CST 2020
System load:     0.01
Processes:     156
Memory used:     2.4%
Swap used:     0.0%
Usage On:     14%
IP address:     192.168.0.12
Users online:     3
步骤 2确认openGauss数据库服务是否启动
[omm@ecs-e1b3 ~]$ gs_om -t status;
-----------------------------------------------------------------------
cluster_name    : dbCluster
cluster_state   : Normal
redistributing  : No
-----------------------------------------------------------------------
cluster_state : Normal 表示已启动,可以正常使用。如果状态为非Normal表示不可用
为了实验场景设置,如果数据库服务没有启动,请执行步gs_om -t start 命令启动服务。
步骤 3登录数据库
使用gsql客户端以管理员用户身份连接postgres数据库,假设端口号为26000。
[omm@ecs-e1b3 ~]$ gsql -d postgres -p 26000 -r
gsql ((openGauss 1.1.0 build 38a9312a) compiled at 2020-05-27 14:57:08 commit 472 last mr 549)
Non-SSL connection (SSL connection is recommended when requiring high-security)
Type "help"for help.

postgres=#
步骤 4查看当前数据库已使用的连接数
postgres=# select count(1) from pg_stat_activity;
 count
-------10(1row)
10表示当前有10个应用已连接到数据库。
步骤 5查看数据库设置的最大连接数。
postgres=# SHOW max_connections;
 max_connections
-----------------5000(1row)
5000 表示数据库设置的最大连接个数为5000。如果当前数据库已使用的连接数快接近于最大连接数时,运维人员先要果断的增加最大连接数以防系统新的连接无法建立。
步骤 6调整最大连接数参数
参数修改方式一:
先 \q 退出数据库,然后在omm 用户环境下通过gs_guc工具来增大参数值,如下:
[omm@ecs-e1b3 ~]$ gs_guc reload -I all -c "max_connections= 6000";
expected instance path: [/gaussdb/data/db1/postgresql.conf]
gs_guc reload: max_connections=6000: [/gaussdb/data/db1/postgresql.conf]
server signaled
Total instances: 1. Failed instances: 0.
Success to perform gs_guc!
参数修改方式二:
也可以用alter system set 语句来设置此参数,如下:
[omm@ecs-e1b3 ~]$ gsql -d postgres -p 26000 -r
gsql ((openGauss 1.1.0 build 38a9312a) compiled at 2020-05-27 14:57:08 commit 472 last mr 549)
Non-SSL connection (SSL connection is recommended when requiring high-security)
Type "help"for help.

postgres=# alter system set max_connections=6000;
NOTICE:  please restart the database for the POSTMASTER level parameter to take effect.
ALTER SYSTEM SET
postgres=#\q
步骤 7重启数据库
gs_om -t stop先关闭数据库,然后用gs_om -t start再启动数据库
[omm@ecs-e1b3 ~]$ gs_om -t stop;
Stopping cluster.
=========================================
Successfully stopped cluster.
=========================================
End stop cluster.
[omm@ecs-e1b3 ~]$ gs_om -t start;
Starting cluster.
==================================================================================
Successfully started.
步骤 8验证参数设置是否成功
使用gsql客户端以管理员用户身份连接postgres数据库,然后查看参数值。
[omm@ecs-e1b3 ~]$ gsql -d postgres -p 26000 -r
gsql ((openGauss 1.1.0 build 38a9312a) compiled at 2020-05-27 14:57:08 commit 472 last mr 549)
Non-SSL connection (SSL connection is recommended when requiring high-security)
Type "help"for help.

postgres=# SHOW max_connections;
 max_connections
-----------------
 6000(1 row)
这里显示max_connections 为 6000,说明前面参数的修改已经生效。
步骤 9退出数据库
postgres=#\q
最大连接数设置实验结束。
6.例行表、索引的维护
6.1 实验介绍
6.1.1 关于本实验
为了保证数据库的有效运行,数据库必须在插入/删除操作后,基于客户场景,定期做VACUUM FULL和ANALYZE,更新统计信息,以便获得更优的性能;
- VACUUM FULL可回收已更新或已删除的数据所占据的磁盘空间,同时将小数据文件合并;
- VACUUM对每个表维护了一个可视化映射来跟踪包含对别的活动事务可见的数组的页。一个普通的索引扫描首先通过可视化映射来获取对应的数组,来检查是否对当前事务可见。若无法获取,再通过堆数组抓取的方式来检查。因此更新表的可视化映射,可加速唯一索引扫描;
- ANALYZE可收集与数据库中表内容相关的统计信息。统计结果存储在系统表PG_STATISTIC中。查询优化器会使用这些统计数据,生成最有效的执行计划。
- 数据库经过多次删除操作后,索引页面上的索引键将被删除,造成索引膨胀。例行重建索引,可有效的提高查询效率。 本实验主要是通过使用VACUUM、VACUUM FULL FULL来收缩表,用ANALYZE来收集表的统计信息以及对表上的索引进行重建。
6.1.2 实验目的
掌握VACUUM、VACUUM FULL FULL、ANALYZE基本的使用及如何重建索引;
6.2 场景设置及操作步骤
步骤 1用root用户登录装有openGauss数据库服务的操作系统然后用 su - omm命令切换至omm用户环境,登录后信息如下。
Welcome to 4.19.90-2003.4.0.0036.oe1.aarch64
System information as of time:     Tue Jul 2716:21:11 CST 2020
System load:     0.01
Processes:     109
Memory used:     6.7%
Swap used:     0.0%
Usage On:     15%
IP address:     192.168.0.96
Users online:     1[root@ecs-e1b3 ~]# su - omm
Last login: Fri Jul  2716:22:11 CST 2020 on pts/0
Welcome to 4.19.90-2003.4.0.0036.oe1.aarch64
System information as of time:     Tue Jul 2716:21:11 CST 2020
System load:     0.01
Processes:     111
Memory used:     7.0%
Swap used:     0.0%
Usage On:     15%
IP address:     192.168.0.96
Users online:     1[omm@ecs-e1b3 ~]$
步骤 2启动服务器后,然后使用gsql客户端以管理员用户身份连接postgres数据库,假设端口号为26000。
启动数据库服务。
[omm@ecs-e1b3 ~]$ gs_om -t start;
Starting cluster.
==================================================================================
Successfully started.
连接postgres数据库。
[omm@ecs-e1b3 ~]$ gsql -d postgres -p 26000 -r
gsql ((openGauss 1.1.0 build 38a9312a) compiled at 2020-05-27 14:56:08 commit 472 last mr 549)
Non-SSL connection (SSL connection is recommended when requiring high-security)
Type "help"for help.

postgres=#
步骤 3创建student表。
postgres=# drop table student;
postgres=# CREATE TABLE student(       std_id INTNOTNULL,
         std_name VARCHAR(20)NOTNULL,
         std_sex VARCHAR(6),
         std_birth DATE,
         std_in DATENOTNULL,
         std_address VARCHAR(100));CREATETABLE
步骤 4表数据插入。
INSERTINTO student(std_id,std_name,std_sex,std_birth,std_in,std_address)VALUES(1,'张一','男','1993-01-01','2011-09-01','江苏省南京市雨花台区');INSERTINTO student(std_id,std_name,std_sex,std_birth,std_in,std_address)VALUES(2,'张二','男','1993-01-02','2011-09-01','江苏省南京市雨花台区');INSERTINTO student(std_id,std_name,std_sex,std_birth,std_in,std_address)VALUES(3,'张三','男','1993-01-03','2011-09-01','江苏省南京市雨花台区');INSERTINTO student(std_id,std_name,std_sex,std_birth,std_in,std_address)VALUES(4,'张四','男','1993-01-04','2011-09-01','江苏省南京市雨花台区');INSERTINTO student(std_id,std_name,std_sex,std_birth,std_in,std_address)VALUES(5,'张五','男','1993-01-05','2011-09-01','江苏省南京市雨花台区');INSERTINTO student(std_id,std_name,std_sex,std_birth,std_in,std_address)VALUES(6,'张六','男','1993-01-06','2011-09-01','江苏省南京市雨花台区');INSERTINTO student(std_id,std_name,std_sex,std_birth,std_in,std_address)VALUES(7,'张七','男','1993-01-07','2011-09-01','江苏省南京市雨花台区');INSERTINTO student(std_id,std_name,std_sex,std_birth,std_in,std_address)VALUES(8,'张八','男','1993-01-08','2011-09-01','江苏省南京市雨花台区');INSERTINTO student(std_id,std_name,std_sex,std_birth,std_in,std_address)VALUES(9,'张九','男','1993-01-09','2011-09-01','江苏省南京市雨花台区');INSERTINTO student(std_id,std_name,std_sex,std_birth,std_in,std_address)VALUES(10,'李一','男','1993-01-10','2011-09-01','江苏省南京市雨花台区');INSERTINTO student(std_id,std_name,std_sex,std_birth,std_in,std_address)VALUES(11,'李二','男','1993-01-11','2011-09-01','江苏省南京市雨花台区');INSERTINTO student(std_id,std_name,std_sex,std_birth,std_in,std_address)VALUES(12,'李三','男','1993-01-12','2011-09-01','江苏省南京市雨花台区');INSERTINTO student(std_id,std_name,std_sex,std_birth,std_in,std_address)VALUES(13,'李四','男','1993-01-13','2011-09-01','江苏省南京市雨花台区');INSERTINTO student(std_id,std_name,std_sex,std_birth,std_in,std_address)VALUES(14,'李五','男','1993-01-14','2011-09-01','江苏省南京市雨花台区');INSERTINTO student(std_id,std_name,std_sex,std_birth,std_in,std_address)VALUES(15,'李六','男','1993-01-15','2011-09-01','江苏省南京市雨花台区');INSERTINTO student(std_id,std_name,std_sex,std_birth,std_in,std_address)VALUES(16,'李七','男','1993-01-16','2011-09-01','江苏省南京市雨花台区');INSERTINTO student(std_id,std_name,std_sex,std_birth,std_in,std_address)VALUES(17,'李八','男','1993-01-17','2011-09-01','江苏省南京市雨花台区');INSERTINTO student(std_id,std_name,std_sex,std_birth,std_in,std_address)VALUES(18,'李九','男','1993-01-18','2011-09-01','江苏省南京市雨花台区');INSERTINTO student(std_id,std_name,std_sex,std_birth,std_in,std_address)VALUES(19,'王一','男','1993-01-19','2011-09-01','江苏省南京市雨花台区');INSERTINTO student(std_id,std_name,std_sex,std_birth,std_in,std_address)VALUES(20,'王二','男','1993-01-20','2011-09-01','江苏省南京市雨花台区');INSERTINTO student(std_id,std_name,std_sex,std_birth,std_in,std_address)VALUES(21,'王三','男','1993-01-21','2011-09-01','江苏省南京市雨花台区');INSERTINTO student(std_id,std_name,std_sex,std_birth,std_in,std_address)VALUES(22,'王四','男','1993-01-22','2011-09-01','江苏省南京市雨花台区');INSERTINTO student(std_id,std_name,std_sex,std_birth,std_in,std_address)VALUES(23,'王五','男','1993-01-23','2011-09-01','江苏省南京市雨花台区');INSERTINTO student(std_id,std_name,std_sex,std_birth,std_in,std_address)VALUES(24,'王六','男','1993-01-24','2011-09-01','江苏省南京市雨花台区');INSERTINTO student(std_id,std_name,std_sex,std_birth,std_in,std_address)VALUES(25,'王七','男','1993-01-25','2011-09-01','江苏省南京市雨花台区');INSERTINTO student(std_id,std_name,std_sex,std_birth,std_in,std_address)VALUES(26,'王八','男','1993-01-26','2011-09-01','江苏省南京市雨花台区');INSERTINTO student(std_id,std_name,std_sex,std_birth,std_in,std_address)VALUES(27,'王九','男','1993-01-27','2011-09-01','江苏省南京市雨花台区');INSERTINTO student(std_id,std_name,std_sex,std_birth,std_in,std_address)VALUES(28,'钱一','男','1993-01-28','2011-09-01','江苏省南京市雨花台区');INSERTINTO student(std_id,std_name,std_sex,std_birth,std_in,std_address)VALUES(29,'钱二','男','1993-01-29','2011-09-01','江苏省南京市雨花台区');INSERTINTO student(std_id,std_name,std_sex,std_birth,std_in,std_address)VALUES(30,'钱三','男','1993-01-30','2011-09-01','江苏省南京市雨花台区');INSERTINTO student(std_id,std_name,std_sex,std_birth,std_in,std_address)VALUES(31,'钱四','男','1993-02-01','2011-09-01','江苏省南京市雨花台区');INSERTINTO student(std_id,std_name,std_sex,std_birth,std_in,std_address)VALUES(32,'钱五','男','1993-02-02','2011-09-01','江苏省南京市雨花台区');INSERTINTO student(std_id,std_name,std_sex,std_birth,std_in,std_address)VALUES(33,'钱六','男','1993-02-03','2011-09-01','江苏省南京市雨花台区');INSERTINTO student(std_id,std_name,std_sex,std_birth,std_in,std_address)VALUES(34,'钱七','男','1993-02-04','2011-09-01','江苏省南京市雨花台区');INSERTINTO student(std_id,std_name,std_sex,std_birth,std_in,std_address)VALUES(35,'钱八','男','1993-02-05','2011-09-01','江苏省南京市雨花台区');INSERTINTO student(std_id,std_name,std_sex,std_birth,std_in,std_address)VALUES(36,'钱九','男','1993-02-06','2011-09-01','江苏省南京市雨花台区');INSERTINTO student(std_id,std_name,std_sex,std_birth,std_in,std_address)VALUES(37,'吴一','男','1993-02-07','2011-09-01','江苏省南京市雨花台区');INSERTINTO student(std_id,std_name,std_sex,std_birth,std_in,std_address)VALUES(38,'吴二','男','1993-02-08','2011-09-01','江苏省南京市雨花台区');INSERTINTO student(std_id,std_name,std_sex,std_birth,std_in,std_address)VALUES(39,'吴三','男','1993-02-09','2011-09-01','江苏省南京市雨花台区');INSERTINTO student(std_id,std_name,std_sex,std_birth,std_in,std_address)VALUES(40,'吴四','男','1993-02-10','2011-09-01','江苏省南京市雨花台区');INSERTINTO student(std_id,std_name,std_sex,std_birth,std_in,std_address)VALUES(41,'吴五','男','1993-02-11','2011-09-01','江苏省南京市雨花台区');INSERTINTO student(std_id,std_name,std_sex,std_birth,std_in,std_address)VALUES(42,'吴六','男','1993-02-12','2011-09-01','江苏省南京市雨花台区');INSERTINTO student(std_id,std_name,std_sex,std_birth,std_in,std_address)VALUES(43,'吴七','男','1993-02-13','2011-09-01','江苏省南京市雨花台区');INSERTINTO student(std_id,std_name,std_sex,std_birth,std_in,std_address)VALUES(44,'吴八','男','1993-02-14','2011-09-01','江苏省南京市雨花台区');INSERTINTO student(std_id,std_name,std_sex,std_birth,std_in,std_address)VALUES(45,'吴九','男','1993-02-15','2011-09-01','江苏省南京市雨花台区');INSERTINTO student(std_id,std_name,std_sex,std_birth,std_in,std_address)VALUES(46,'柳一','男','1993-02-16','2011-09-01','江苏省南京市雨花台区');INSERTINTO student(std_id,std_name,std_sex,std_birth,std_in,std_address)VALUES(47,'柳二','男','1993-02-17','2011-09-01','江苏省南京市雨花台区');INSERTINTO student(std_id,std_name,std_sex,std_birth,std_in,std_address)VALUES(48,'柳三','男','1993-02-18','2011-09-01','江苏省南京市雨花台区');INSERTINTO student(std_id,std_name,std_sex,std_birth,std_in,std_address)VALUES(49,'柳四','男','1993-02-19','2011-09-01','江苏省南京市雨花台区');INSERTINTO student(std_id,std_name,std_sex,std_birth,std_in,std_address)VALUES(50,'柳五','男','1993-02-20','2011-09-01','江苏省南京市雨花台区');
步骤 5数据查询统计。
postgres=# select count(*) from student;
 count
-------50(1row)

postgres=# select * from student order by std_id;
 std_id | std_name | std_sex |      std_birth      |       std_in        |     std_address
--------+----------+---------+---------------------+---------------------+----------------------1| 张一     | 男      |1993-01-0100:00:00|2011-09-0100:00:00| 江苏省南京市雨花台区
      2| 张二     | 男      |1993-01-0200:00:00|2011-09-0100:00:00| 江苏省南京市雨花台区
      3| 张三     | 男      |1993-01-0300:00:00|2011-09-0100:00:00| 江苏省南京市雨花台区
      4| 张四     | 男      |1993-01-0400:00:00|2011-09-0100:00:00| 江苏省南京市雨花台区
      5| 张五     | 男      |1993-01-0500:00:00|2011-09-0100:00:00| 江苏省南京市雨花台区
……………..
步骤 6查看表信息
postgres=# \d studentTable"public.student"Column|Type| Modifiers
-------------+--------------------------------+-----------
 std_id      |integer|notnull
 std_name    |charactervarying(20)|notnull
 std_sex     |charactervarying(6)|
 std_birth   |timestamp(0) without time zone |
 std_in      |timestamp(0) without time zone |notnull
 std_address |charactervarying(100)|
步骤 7使用VACUUM命令,进行磁盘空间回收
postgres=# vacuum student;
VACUUM
步骤 8删除表中数据
postgres=# delete from student where std_id>30;DELETE20
步骤 9使用VACUUM FULL命令,进行磁盘空间回收
postgres=# vacuum full student;
VACUUM
步骤 10使用ANALYZE语句更新统计信息
postgres=# analyze student;ANALYZE
步骤 11使用ANALYZE VERBOSE语句更新统计信息,并输出表的相关信息
postgres=# analyze verbose student;
INFO:  analyzing "public.student"(dn_6001 pid=37195)
INFO:  ANALYZE INFO : "student": scanned 1of1 pages, containing 30 live rowsand20 dead rows;30rowsin sample,30 estimated total rows(dn_6001 pid=37195)ANALYZE
步骤 12执行VACUUM ANALYZE命令进行查询优化
postgres=# vacuum analyze student;
VACUUM
步骤 13查看特定表的统计信息
postgres=# select relname,n_tup_ins,n_tup_upd,n_tup_del,last_analyze,vacuum_count from PG_STAT_ALL_TABLES where relname='student';
 relname | n_tup_ins | n_tup_upd | n_tup_del |         last_analyze         | vacuum_count
---------+-----------+-----------+-----------+------------------------------+--------------
 student |50|0|20|2020-07-2717:07:19.17167+08|3(1row)
postgres=#
PG_STAT_ALL_TABLES视图将包含当前数据库中每个表的一行统计信息,以上查询结果中各列分别表示:
Relname 表名
n_tup_ins 插入行数
n_tup_upd 更新行数
n_tup_del 删除行数
last_analyze 上次手动分析该表的时间
vacuum_count 这个表被手动清理的次数
步骤 14索引维护。
说明:
- 如果数据发生大量删除后,索引页面上的索引键将被删除,导致索引页面数量的减少,造成索引膨胀。重建索引可回收浪费的空间。
- 新建的索引中逻辑结构相邻的页面,通常在物理结构中也是相邻的,所以一个新建的索引比更新了多次的索引访问速度要快。
- 重建索引有以下两种方式: 1、使用REINDEX语句重建索引; 2、先删除索引(DROP INDEX),再创建索引(CREATE INDEX)。
先在student表的std_name列上创建一个索引,如下:
postgres=# create index inx_stu01 on student(std_name);CREATEINDEX
postgres=#
方式1:使用REINDEX语句重建索引,具体如下:
postgres=# reindex table student;
REINDEX
postgres=#
方式2:先删除索引(DROP INDEX),再创建索引(CREATE INDEX),具体如下:
postgres=# drop index inx_stu01;DROPINDEX
postgres=# create index inx_stu01 on student(std_name);CREATEINDEX
postgres=#
查看表结构信息,具体如下:
postgres=# \d student;Table"public.student"Column|Type| Modifiers
-------------+--------------------------------+-----------
 std_id      |integer|notnull
 std_name    |charactervarying(20)|notnull
 std_sex     |charactervarying(6)|
 std_birth   |timestamp(0) without time zone |
 std_in      |timestamp(0) without time zone |notnull
 std_address |charactervarying(100)|
Indexes:
      "inx_stu01"btree(std_name)TABLESPACE pg_default
步骤 15退出数据库
postgres=#\q
例行表、索引的维护实验结束。
至此,openGauss数据库维护管理指导结束。
版权归原作者 Gauss松鼠会 所有, 如有侵权,请联系我们删除。