
《博主简介》
小伙伴们好,我是阿旭。专注于人工智能、AIGC、python、计算机视觉相关分享研究。
✌更多学习资源,可关注公-仲-hao:【阿旭算法与机器学习】,共同学习交流~
👍感谢小伙伴们点赞、关注!
《------往期经典推荐------》
一、AI应用软件开发实战专栏【链接】
项目名称项目名称1.【人脸识别与管理系统开发】2.【车牌识别与自动收费管理系统开发】3.【手势识别系统开发】4.【人脸面部活体检测系统开发】5.【图片风格快速迁移软件开发】6.【人脸表表情识别系统】7.【YOLOv8多目标识别与自动标注软件开发】8.【基于YOLOv8深度学习的行人跌倒检测系统】9.【基于YOLOv8深度学习的PCB板缺陷检测系统】10.【基于YOLOv8深度学习的生活垃圾分类目标检测系统】11.【基于YOLOv8深度学习的安全帽目标检测系统】12.【基于YOLOv8深度学习的120种犬类检测与识别系统】13.【基于YOLOv8深度学习的路面坑洞检测系统】14.【基于YOLOv8深度学习的火焰烟雾检测系统】15.【基于YOLOv8深度学习的钢材表面缺陷检测系统】16.【基于YOLOv8深度学习的舰船目标分类检测系统】17.【基于YOLOv8深度学习的西红柿成熟度检测系统】18.【基于YOLOv8深度学习的血细胞检测与计数系统】19.【基于YOLOv8深度学习的吸烟/抽烟行为检测系统】20.【基于YOLOv8深度学习的水稻害虫检测与识别系统】21.【基于YOLOv8深度学习的高精度车辆行人检测与计数系统】22.【基于YOLOv8深度学习的路面标志线检测与识别系统】22.【基于YOLOv8深度学习的智能小麦害虫检测识别系统】23.【基于YOLOv8深度学习的智能玉米害虫检测识别系统】24.【基于YOLOv8深度学习的200种鸟类智能检测与识别系统】25.【基于YOLOv8深度学习的45种交通标志智能检测与识别系统】26.【基于YOLOv8深度学习的人脸面部表情识别系统】
二、机器学习实战专栏【链接】,已更新31期,欢迎关注,持续更新中~~
三、深度学习【Pytorch】专栏【链接】
四、【Stable Diffusion绘画系列】专栏【链接】
《------正文------》
实现效果
文章目录
前言
车牌识别在我们实际生活中十分常见,本文主要介绍一种基于YOLOv8目标检测与PaddleOcr进行车牌识别的实现方法。
本文提供了完整的数据集和代码,完全免费,供小伙伴们学习参考
。感兴趣的小伙伴们学习参考。
要进行车牌识别,主要分为两步。
第一步:进行车辆车牌位置的检测
,本文是使用yolov8训练一个车牌检测模型来进行车牌检测,
精度为0.99
;
第二步:对第一步检测出的车牌进行识别
,直接使用的是PaddleOCR对于车牌进行识别。
下面对这些内容进行详细介绍
1.第一步:车牌检测
本文主要基于yolov8训练了一个车牌检测模型,用于进行车牌位置的检测,主要步骤如下:
1.1 yolov8环境配置
pip install ultralytics -i https://pypi.tuna.tsinghua.edu.cn/simple
yolov8源码地址:https://github.com/ultralytics/ultralytics
1.2 数据集准备与处理
本文训练模型使用的数据集为CPDD2020数据集。
数据集下载地址:https://github.com/detectRecog/CCPD
CCPD是一个大型的、多样化的、经过仔细标注的中国城市车牌开源数据集。CCPD数据集主要分为CCPD2019数据集和CCPD2020(CCPD-Green)数据集。CCPD2019数据集车牌类型仅有普通车牌(蓝色车牌),CCPD2020数据集车牌类型仅有新能源车牌(绿色车牌)。
在CCPD数据集中,每张图片仅包含一张车牌,车牌的车牌省份主要为皖。CCPD中的每幅图像都包含大量的标注信息,但是CCPD数据集没有专门的标注文件,每张图像的文件名就是该图像对应的数据标注。
标注最困难的部分是注释四个顶点的位置。为了完成这项任务,数据发布者首先在10k图像上手动标记四个顶点的位置。然后设计了一个基于深度学习的检测模型,在对该网络进行良好训练后,对每幅图像的四个顶点位置进行自动标注。最后,数据发布者雇用了7名兼职工人在两周内纠正这些标注。CCPD提供了超过250k个独特的车牌图像和详细的注释。每张图像的分辨率为720(宽度)× 1160(高)× 3(通道)。实际上,这种分辨率足以保证每张图像中的车牌清晰可辨,但是该数据有些图片标注可能不准。不过总的来说CCPD数据集非常推荐研究车牌识别算法的人员学习使用。
CPDD2020数据集一共包含
11774张新能源汽车的车牌数据
。部分图片如下: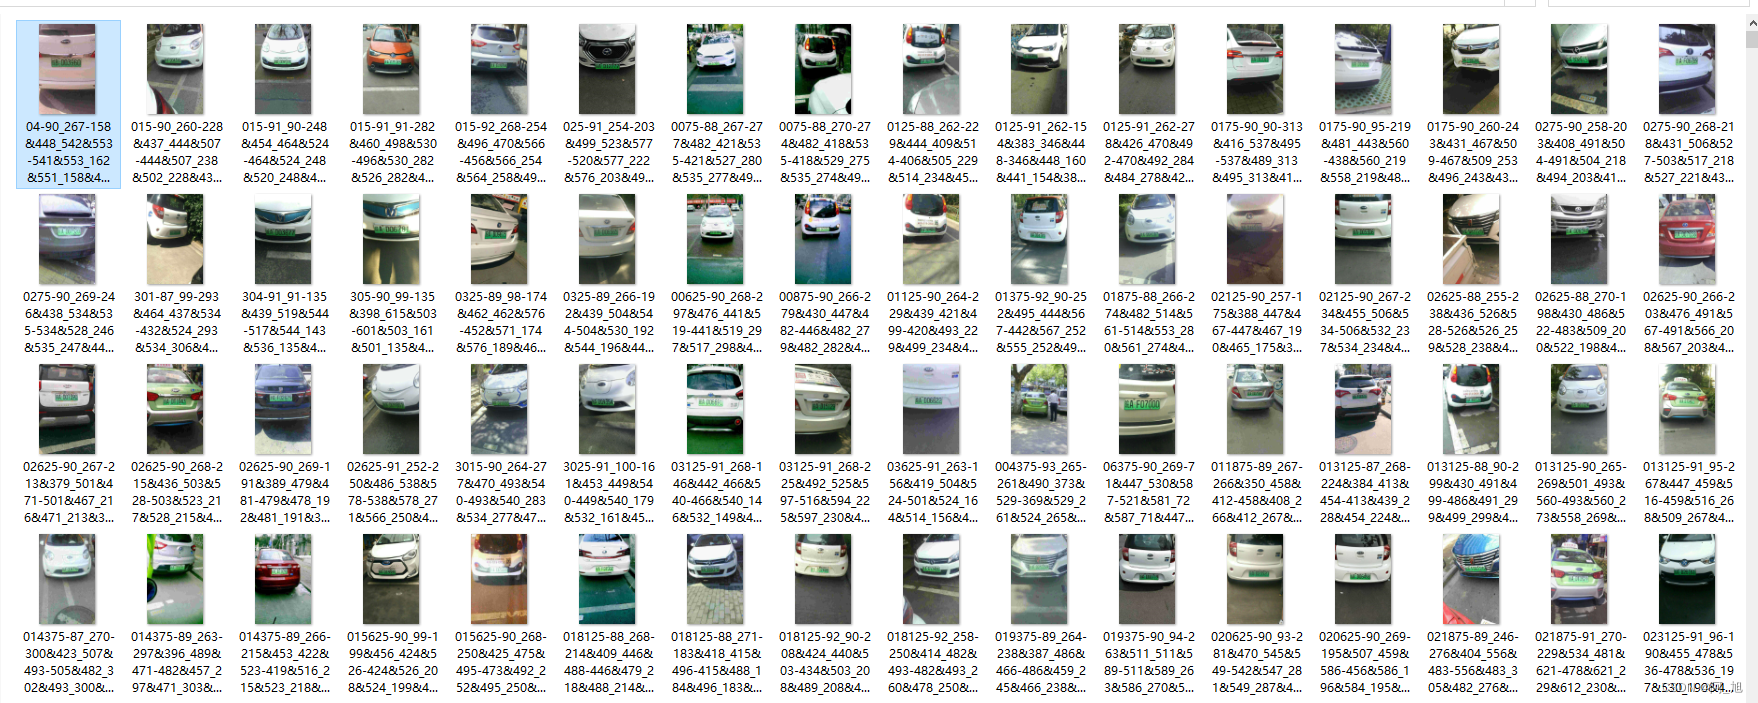
数据集中图片的命名规则如下:
图片命名:“025-95_113-154&383_386&473-386&473_177&454_154&383_363&402-0_0_22_27_27_33_16-37-15.jpg”
解释:
1. 025:车牌区域占整个画面的比例;
2. 95_113: 车牌水平和垂直角度, 水平95°, 竖直113°
3. 154&383_386&473:标注框左上、右下坐标,左上(154, 383), 右下(386, 473)
4. 86&473_177&454_154&383_363&402:标注框四个角点坐标,顺序为右下、左下、左上、右上
5. 0_0_22_27_27_33_16:车牌号码映射关系如下: 第一个0为省份 对应省份字典provinces中的’皖’,;第二个0是该车所在地的地市一级代码,对应地市一级代码字典alphabets的’A’;后5位为字母和文字, 查看车牌号ads字典,如22为Y,27为3,33为9,16为S,最终车牌号码为皖AY339S
省份:[“皖”, “沪”, “津”, “渝”, “冀”, “晋”, “蒙”, “辽”, “吉”, “黑”, “苏”, “浙”, “京”, “闽”, “赣”,
“鲁”, “豫”, “鄂”, “湘”, “粤”, “桂”, “琼”, “川”, “贵”, “云”, “藏”, “陕”, “甘”, “青”, “宁”,
“新”]
地市:[‘A’, ‘B’, ‘C’, ‘D’, ‘E’, ‘F’, ‘G’, ‘H’, ‘J’, ‘K’, ‘L’, ‘M’, ‘N’, ‘P’, ‘Q’,
‘R’, ‘S’, ‘T’, ‘U’, ‘V’, ‘W’,‘X’, ‘Y’, ‘Z’]
车牌字典:[‘A’, ‘B’, ‘C’, ‘D’, ‘E’, ‘F’, ‘G’, ‘H’, ‘J’, ‘K’, ‘L’, ‘M’, ‘N’, ‘P’,
‘Q’, ‘R’, ‘S’, ‘T’, ‘U’, ‘V’, ‘W’, ‘X’,‘Y’, ‘Z’, ‘0’, ‘1’, ‘2’, ‘3’, ‘4’, ‘5’,
‘6’, ‘7’, ‘8’, ‘9’]
制作车牌检测数据集:
这个数据集的检测和识别标签都在图片名中,可以直接
通过上述图片的命名规则
,从图片读取出来,再写入txt文件中即可。代码如下:
import shutil
import cv2
import os

deftxt_translate(path, txt_path):print(path)print(txt_path)for filename in os.listdir(path):# print(filename)

        list1 = filename.split("-",3)# 第一次分割,以减号'-'做分割
        subname = list1[2]
        list2 = filename.split(".",1)
        subname1 = list2[1]if subname1 =='txt':continue
        lt, rb = subname.split("_",1)# 第二次分割,以下划线'_'做分割
        lx, ly = lt.split("&",1)
        rx, ry = rb.split("&",1)
        width =int(rx)-int(lx)
        height =int(ry)-int(ly)# bounding box的宽和高
        cx =float(lx)+ width /2
        cy =float(ly)+ height /2# bounding box中心点

        img = cv2.imread(path + filename)if img isNone:# 自动删除失效图片(下载过程有的图片会存在无法读取的情况)print(path + filename)
            os.remove(path + filename)continue
        width = width / img.shape[1]
        height = height / img.shape[0]
        cx = cx / img.shape[1]
        cy = cy / img.shape[0]

        txtname = filename.split(".",1)
        txtfile = txt_path + txtname[0]+".txt"# 绿牌是第0类,蓝牌是第1类withopen(txtfile,"w")as f:
            f.write(str(0)+" "+str(cx)+" "+str(cy)+" "+str(width)+" "+str(height))if __name__ =='__main__':# det图片存储地址
    trainDir =r"G:/datasets/CarPlateData/CCPD2020/ccpd_green/train/"
    validDir =r"G:/datasets/CarPlateData/CCPD2020/ccpd_green/val/"
    testDir =r"G:/datasets/CarPlateData/CCPD2020/ccpd_green/test/"# det txt存储地址
    train_txt_path =r"G:/datasets/CarPlateData/CCPD2020/ccpd_green/train_labels/"
    val_txt_path =r"G:/datasets/CarPlateData/CCPD2020/ccpd_green/val_labels/"
    test_txt_path =r"G:/datasets/CarPlateData/CCPD2020/ccpd_green/test_labels/"
    txt_translate(trainDir, train_txt_path)
    txt_translate(validDir, val_txt_path)
    txt_translate(testDir, test_txt_path)
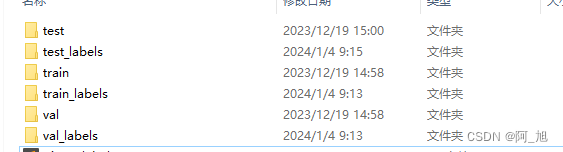
制作完成后,如上图所示。
1.3 目标检测模型训练
图片数据集的存放格式如下,在项目目录中新建
datasets
目录,同时将分类的图片分为训练集、验证集与测试集放入
PlateData
目录下。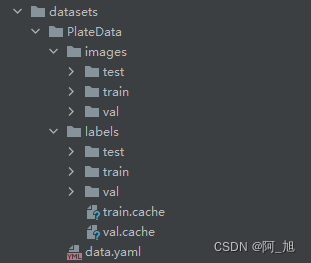
数据准备完成后,通过调用
train.py
文件进行模型训练,
epochs
参数用于调整训练的轮数,
batch
参数用于调整训练的批次大小【根据内存大小调整,最小为1】,代码如下:
#coding:utf-8from ultralytics import YOLO
# 加载预训练模型
model = YOLO("yolov8n.pt")# Use the modelif __name__ =='__main__':# Use the model
    results = model.train(data='datasets/PlateData/data.yaml', epochs=300, batch=4)# 训练模型# 将模型转为onnx格式# success = model.export(format='onnx')
训练结果评估
在深度学习中,我们通常用损失函数下降的曲线来观察模型训练的情况。YOLOv8在训练时主要包含三个方面的损失:定位损失(box_loss)、分类损失(cls_loss)和动态特征损失(dfl_loss),在训练结束后,可以在
runs/
目录下找到训练过程及结果文件,如下所示:
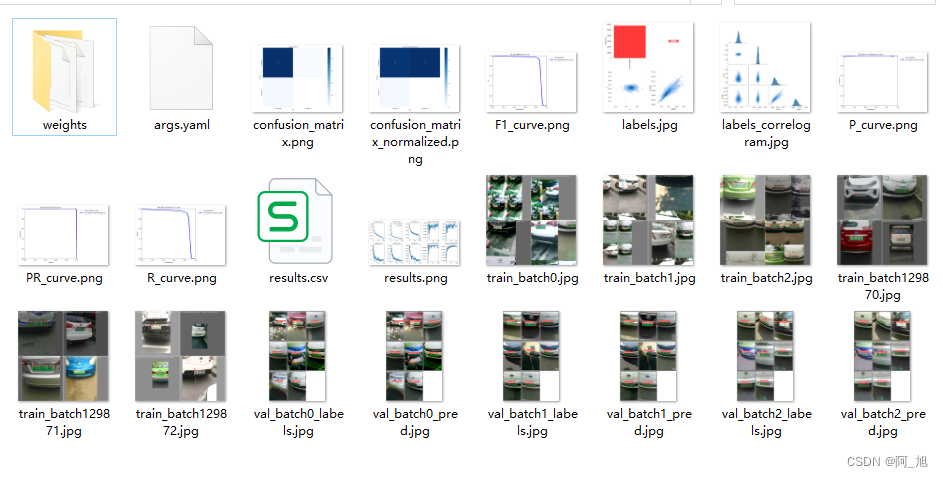
各损失函数作用说明:
定位损失box_loss
:预测框与标定框之间的误差(GIoU),越小定位得越准;
分类损失cls_loss
:计算锚框与对应的标定分类是否正确,越小分类得越准;
动态特征损失(dfl_loss)
:DFLLoss是一种用于回归预测框与目标框之间距离的损失函数。在计算损失时,目标框需要缩放到特征图尺度,即除以相应的stride,并与预测的边界框计算Ciou Loss,同时与预测的anchors中心点到各边的距离计算回归DFLLoss。这个过程是YOLOv8训练流程中的一部分,通过计算DFLLoss可以更准确地调整预测框的位置,提高目标检测的准确性。
本文训练结果如下: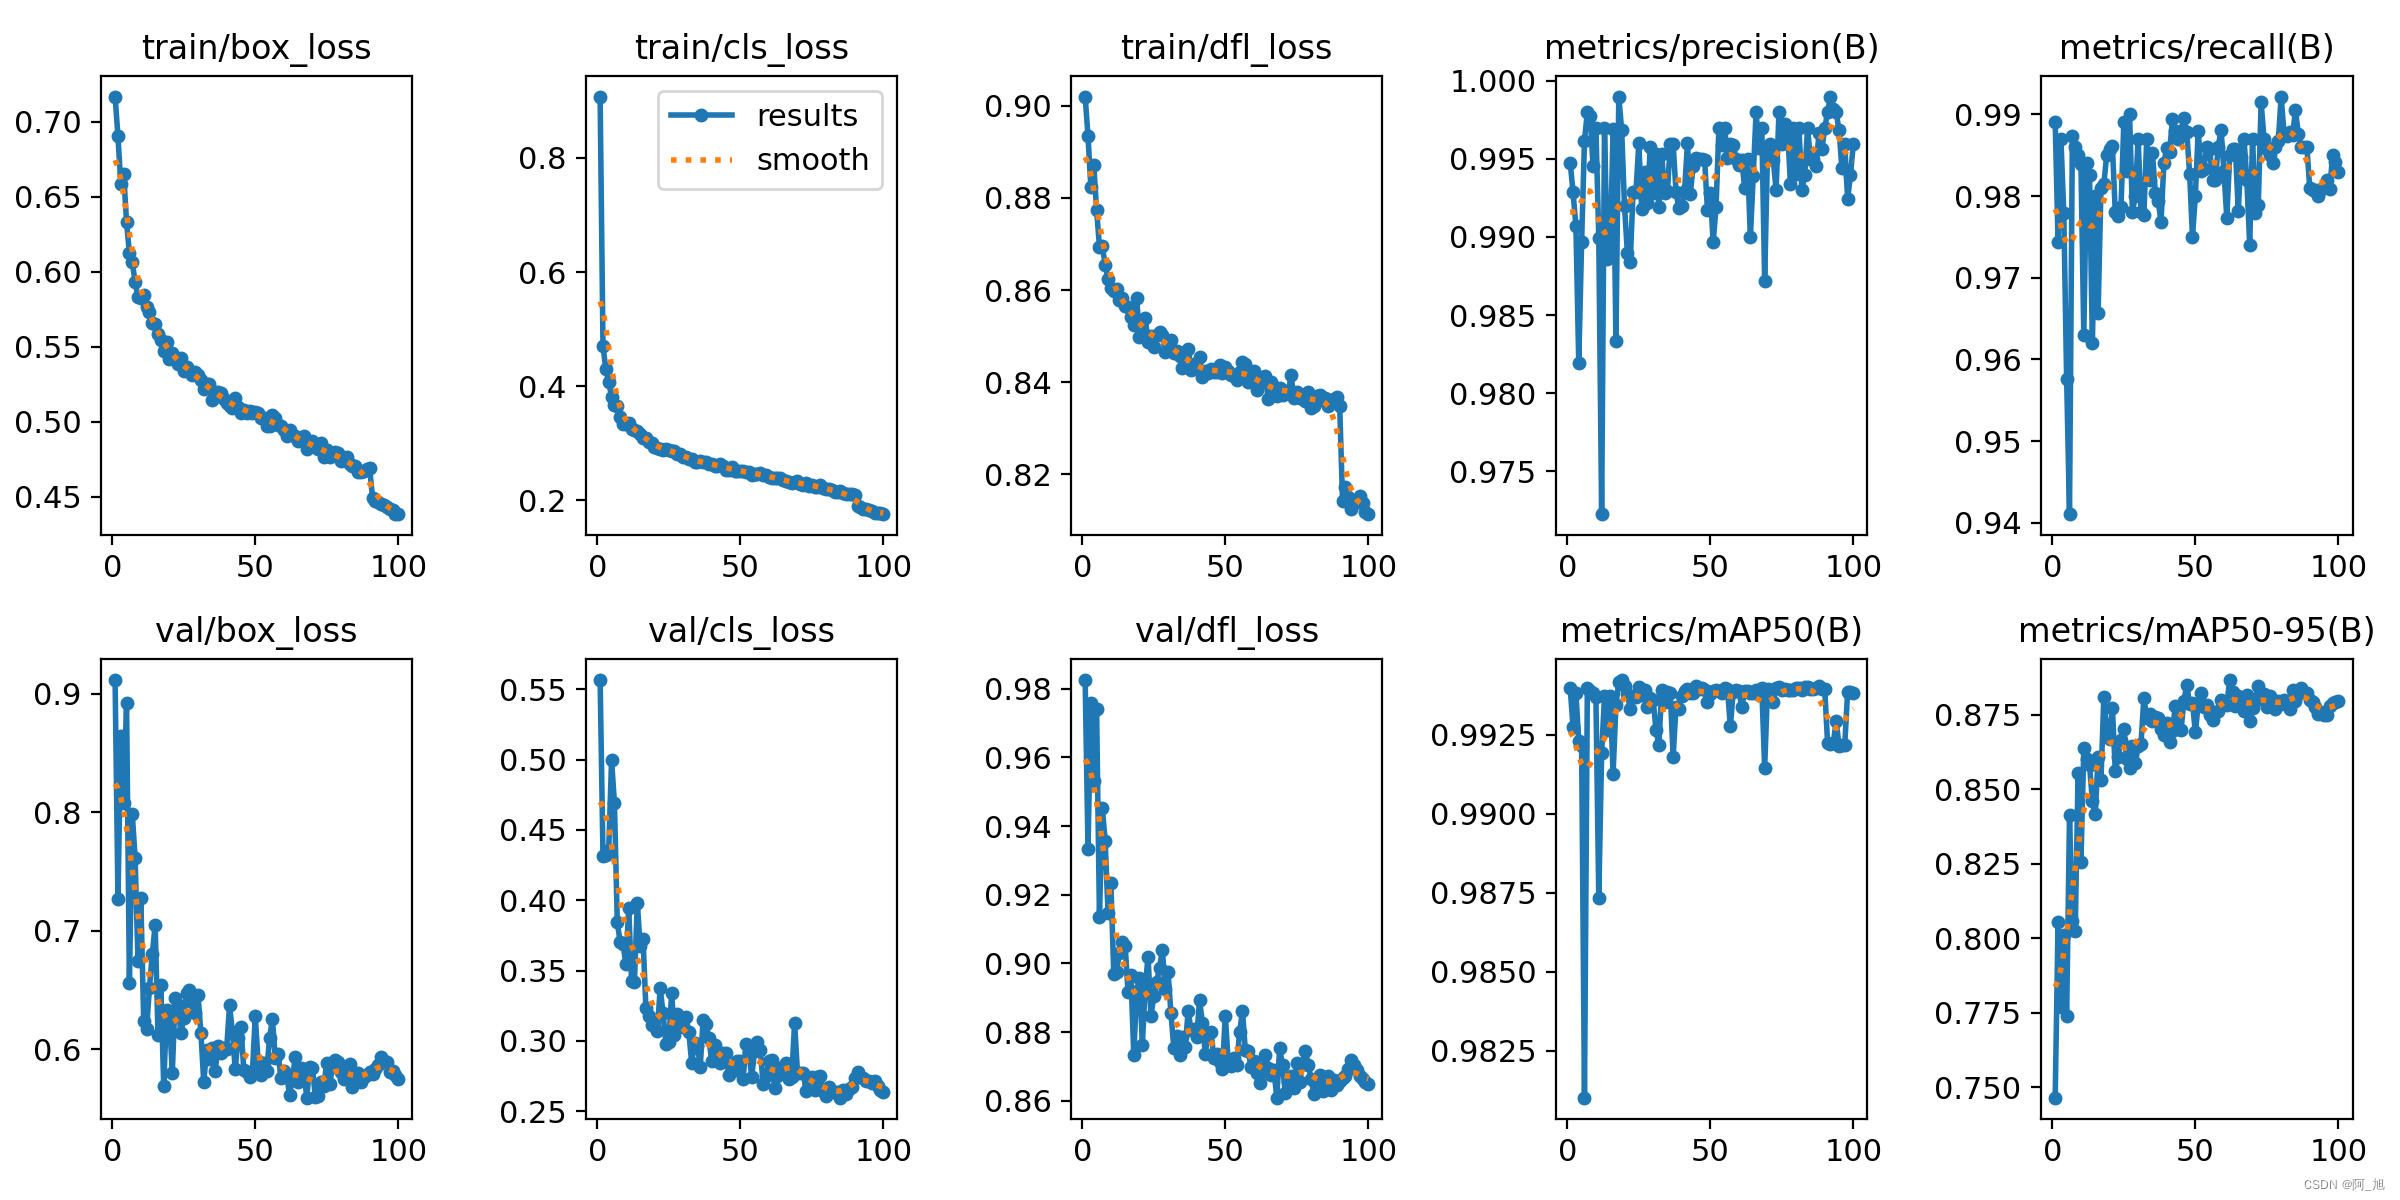
我们通常用
PR曲线
来体现精确率和召回率的关系,本文训练结果的PR曲线如下。
mAP
表示Precision和Recall作为两轴作图后围成的面积,m表示平均,@后面的数表示判定iou为正负样本的阈值。[email protected]:表示阈值大于0.5的平均mAP,可以看到本文模型目标检测的
[email protected]
平均值为
0.994
,结果相当不错。
4. 检测结果识别
模型训练完成后,我们可以得到一个最佳的训练结果模型
best.pt
文件,在
runs/trian/weights
目录下。我们可以使用该文件进行后续的推理检测。
图片检测代码如下:
#coding:utf-8from ultralytics import YOLO
import cv2
# 所需加载的模型目录
path ='models/best.pt'# 需要检测的图片地址
img_path ="TestFiles/013671875-93_102-226&489_426&558-426&558_234&546_226&489_417&494-0_0_5_25_33_24_24_33-86-80.jpg"# 加载预训练模型# conf    0.25    object confidence threshold for detection# iou    0.7    intersection over union (IoU) threshold for NMS
model = YOLO(path, task='detect')# model = YOLO(path, task='detect',conf=0.5)# 检测图片
results = model(img_path)
res = results[0].plot()# res = cv2.resize(res,dsize=None,fx=0.3,fy=0.3,interpolation=cv2.INTER_LINEAR)
cv2.imshow("YOLOv8 Detection", res)
cv2.waitKey(0)
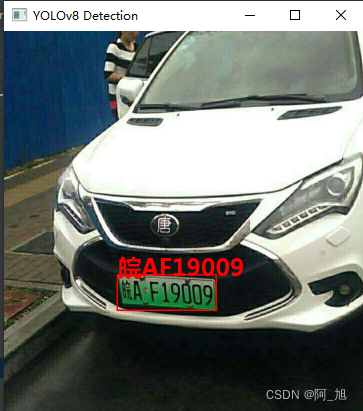
执行上述代码后,会将执行的结果直接标注在图片上,结果如下: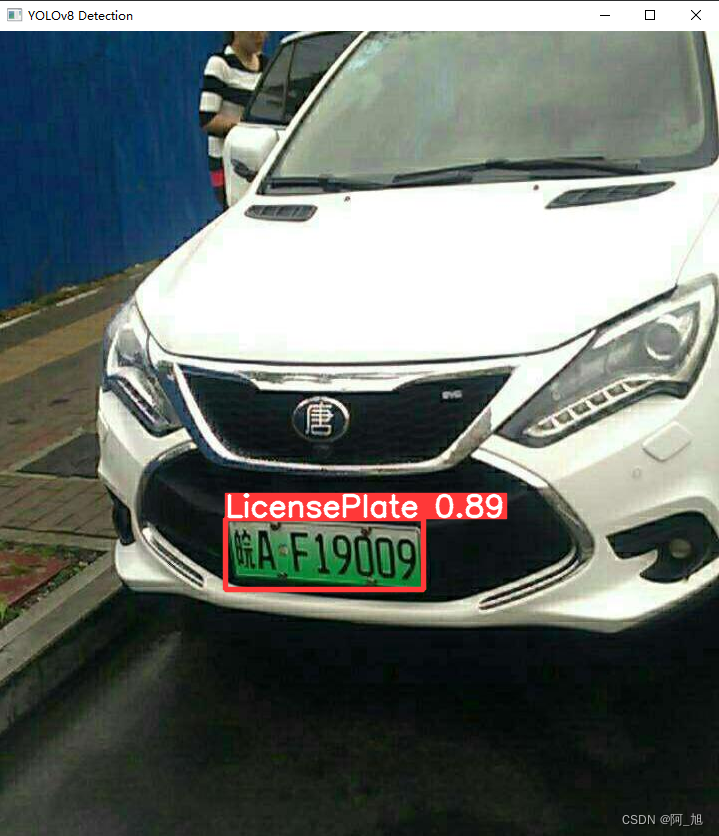
可以发现,该模型能够很好的检测出车牌区域。下面我们需要对检测出的车牌进行识别。
第二步:车牌识别
本文的车牌识别直接使用的是开源的PaddleOCR检测模型。
地址:https://github.com/PaddlePaddle/PaddleOCR
环境配置
pip install paddlepaddle2.5.2 -i https://pypi.tuna.tsinghua.edu.cn/simple
pip install paddleocr2.7.0.3 -i https://pypi.tuna.tsinghua.edu.cn/simple
pip install shapely -i https://pypi.tuna.tsinghua.edu.cn/simple
模型使用demo

from paddleocr import PaddleOCR, draw_ocr
# Paddleocr目前支持的多语言语种可以通过修改lang参数进行切换# 例如`ch`, `en`, `fr`, `german`, `korean`, `japan`
cls_model_dir='paddleModels/whl/cls/ch_ppocr_mobile_v2.0_cls_infer'
rec_model_dir='paddleModels/whl/rec/ch/ch_PP-OCRv4_rec_infer'
ocr = PaddleOCR(use_angle_cls=True, lang="ch", det=False,cls_model_dir=cls_model_dir,rec_model_dir=rec_model_dir)# need to run only once to download and load model into memory
img_path ='22.png'
result = ocr.ocr(img_path, cls=True)

license_name, conf = result[0][0][1]if'·'in license_name:
    license_name = license_name.replace('·','')print(license_name,conf)

加载ocr模型
# 加载ocr模型
cls_model_dir ='paddleModels/whl/cls/ch_ppocr_mobile_v2.0_cls_infer'
rec_model_dir ='paddleModels/whl/rec/ch/ch_PP-OCRv4_rec_infer'
ocr = PaddleOCR(use_angle_cls=False, lang="ch", det=False, cls_model_dir=cls_model_dir,rec_model_dir=rec_model_dir)
获取车牌位置信息
# 所需加载的模型目录
path ='models/best.pt'# 加载预训练模型# conf    0.25    object confidence threshold for detection# iou    0.7    int.ersection over union (IoU) threshold for NMS
model = YOLO(path, task='detect')# model = YOLO(path, task='detect',conf=0.5)# 检测图片
results = model(img_path)[0]# 车牌区域信息
location_list = results.boxes.xyxy.tolist()
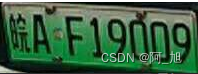
抠出上述车牌位置,并显示
iflen(location_list)>=1:
    location_list =[list(map(int, e))for e in location_list]# 截取每个车牌区域的照片
    license_imgs =[]for each in location_list:
        x1, y1, x2, y2 = each
        cropImg = now_img[y1:y2, x1:x2]
        license_imgs.append(cropImg)
        cv2.imshow('111',cropImg)
        cv2.waitKey(0)
使用ocr进行车牌识别
defget_license_result(ocr,image):"""
    image:输入的车牌截取照片
    输出,车牌号与置信度
    """
    result = ocr.ocr(image, cls=True)[0]if result:
        license_name, conf = result[0][1]if'·'in license_name:
            license_name = license_name.replace('·','')return license_name, conf
    else:returnNone,None# 车牌识别结果
lisence_res =[]
conf_list =[]for each in license_imgs:
    license_num, conf = get_license_result(ocr, each)if license_num:
        lisence_res.append(license_num)
        conf_list.append(conf)else:
        lisence_res.append('无法识别')
        conf_list.append(0)
将识别结果显示在图片上
for text, box inzip(lisence_res, location_list):
        now_img = tools.drawRectBox(now_img, box, text, fontC)
完整代码
#coding:utf-8from ultralytics import YOLO
import cv2
import detect_tools as tools
from PIL import ImageFont
from paddleocr import PaddleOCR

defget_license_result(ocr,image):"""
    image:输入的车牌截取照片
    输出,车牌号与置信度
    """
    result = ocr.ocr(image, cls=True)[0]if result:
        license_name, conf = result[0][1]if'·'in license_name:
            license_name = license_name.replace('·','')return license_name, conf
    else:returnNone,None# 需要检测的图片地址
img_path ="TestFiles/013671875-93_102-226&489_426&558-426&558_234&546_226&489_417&494-0_0_5_25_33_24_24_33-86-80.jpg"
now_img = tools.img_cvread(img_path)

fontC = ImageFont.truetype("Font/platech.ttf",50,0)# 加载ocr模型
cls_model_dir ='paddleModels/whl/cls/ch_ppocr_mobile_v2.0_cls_infer'
rec_model_dir ='paddleModels/whl/rec/ch/ch_PP-OCRv4_rec_infer'
ocr = PaddleOCR(use_angle_cls=False, lang="ch", det=False, cls_model_dir=cls_model_dir,rec_model_dir=rec_model_dir)# 所需加载的模型目录
path ='models/best.pt'# 加载预训练模型# conf    0.25    object confidence threshold for detection# iou    0.7    int.ersection over union (IoU) threshold for NMS
model = YOLO(path, task='detect')# model = YOLO(path, task='detect',conf=0.5)# 检测图片
results = model(img_path)[0]

location_list = results.boxes.xyxy.tolist()iflen(location_list)>=1:
    location_list =[list(map(int, e))for e in location_list]# 截取每个车牌区域的照片
    license_imgs =[]for each in location_list:
        x1, y1, x2, y2 = each
        cropImg = now_img[y1:y2, x1:x2]
        license_imgs.append(cropImg)
        cv2.imshow('111',cropImg)
        cv2.waitKey(0)# 车牌识别结果
    lisence_res =[]
    conf_list =[]for each in license_imgs:
        license_num, conf = get_license_result(ocr, each)if license_num:
            lisence_res.append(license_num)
            conf_list.append(conf)else:
            lisence_res.append('无法识别')
            conf_list.append(0)for text, box inzip(lisence_res, location_list):
        now_img = tools.drawRectBox(now_img, box, text, fontC)

now_img = cv2.resize(now_img,dsize=None,fx=0.5,fy=0.5,interpolation=cv2.INTER_LINEAR)
cv2.imshow("YOLOv8 Detection", now_img)
cv2.waitKey(0)

视频车牌识别
#coding:utf-8import cv2
from ultralytics import YOLO
import detect_tools as tools
from PIL import ImageFont
from paddleocr import PaddleOCR

defget_license_result(ocr,image):"""
    image:输入的车牌截取照片
    输出,车牌号与置信度
    """
    result = ocr.ocr(image, cls=True)[0]if result:
        license_name, conf = result[0][1]if'·'in license_name:
            license_name = license_name.replace('·','')return license_name, conf
    else:returnNone,None

fontC = ImageFont.truetype("Font/platech.ttf",50,0)# 加载ocr模型
cls_model_dir ='paddleModels/whl/cls/ch_ppocr_mobile_v2.0_cls_infer'
rec_model_dir ='paddleModels/whl/rec/ch/ch_PP-OCRv4_rec_infer'
ocr = PaddleOCR(use_angle_cls=False, lang="ch", det=False, cls_model_dir=cls_model_dir,rec_model_dir=rec_model_dir)# 所需加载的模型目录
path ='models/best.pt'# 加载预训练模型# conf    0.25    object confidence threshold for detection# iou    0.7    intersection over union (IoU) threshold for NMS
model = YOLO(path, task='detect')# 需要检测的图片地址
video_path ="TestFiles/1.mp4"

cap = cv2.VideoCapture(video_path)# Loop through the video frameswhile cap.isOpened():# Read a frame from the video
    success, frame = cap.read()if success:# Run YOLOv8 inference on the frame
        results = model(frame)[0]

        location_list = results.boxes.xyxy.tolist()iflen(location_list)>=1:
            location_list =[list(map(int, e))for e in location_list]# 截取每个车牌区域的照片
            license_imgs =[]for each in location_list:
                x1, y1, x2, y2 = each
                cropImg = frame[y1:y2, x1:x2]
                license_imgs.append(cropImg)# 车牌识别结果
            lisence_res =[]
            conf_list =[]for each in license_imgs:
                license_num, conf = get_license_result(ocr, each)if license_num:
                    lisence_res.append(license_num)
                    conf_list.append(conf)else:
                    lisence_res.append('无法识别')
                    conf_list.append(0)for text, box inzip(lisence_res, location_list):
                frame = tools.drawRectBox(frame, box, text, fontC)

        frame = cv2.resize(frame, dsize=None, fx=0.5, fy=0.5, interpolation=cv2.INTER_LINEAR)
        cv2.imshow("YOLOv8 Detection", frame)# Break the loop if 'q' is pressedif cv2.waitKey(1)&0xFF==ord("q"):breakelse:# Break the loop if the end of the video is reachedbreak# Release the video capture object and close the display window
cap.release()
cv2.destroyAllWindows()
以上便是关于
车牌检测与识别
的原理与代码介绍。感兴趣的小伙伴可以自行尝试。
【免费获取方式】
本文涉及到的完整全部程序文件:包括python源码、数据集、训练代码、测试图片视频等(见下图),获取方式见文末: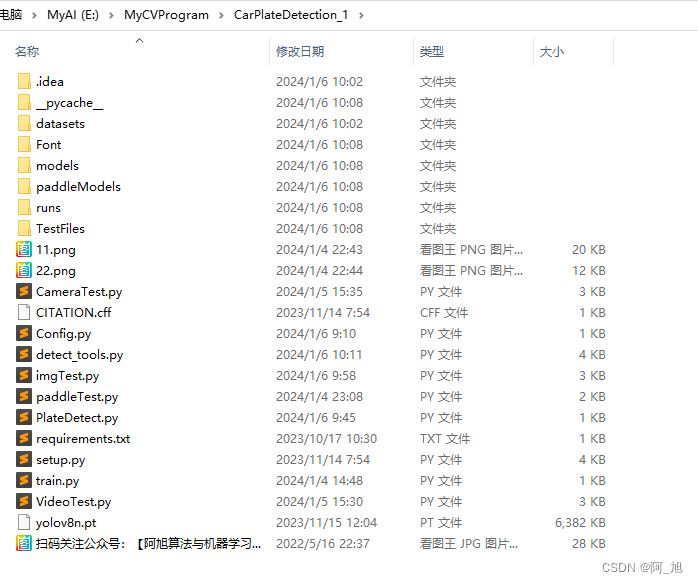
关于本篇文章大家有任何建议或意见,欢迎在评论区留言交流!
觉得不错的小伙伴,感谢点赞、关注加收藏哦!
版权归原作者 阿_旭 所有, 如有侵权,请联系我们删除。