介绍
参考视频教程:
https://www.bilibili.com/video/BV1Qf4y1T7Hx?p=92
https://www.bilibili.com/video/BV1Qf4y1T7Hx?p=93
- 集成本地Tomcat
- Tomcat mvaen插件配置tomcat 在IDEA中集成使用Tomcat有两种方式,分别是集成本地Tomcat和Tomcat Maven插件
1. 集成本地Tomcat
整体流程预览: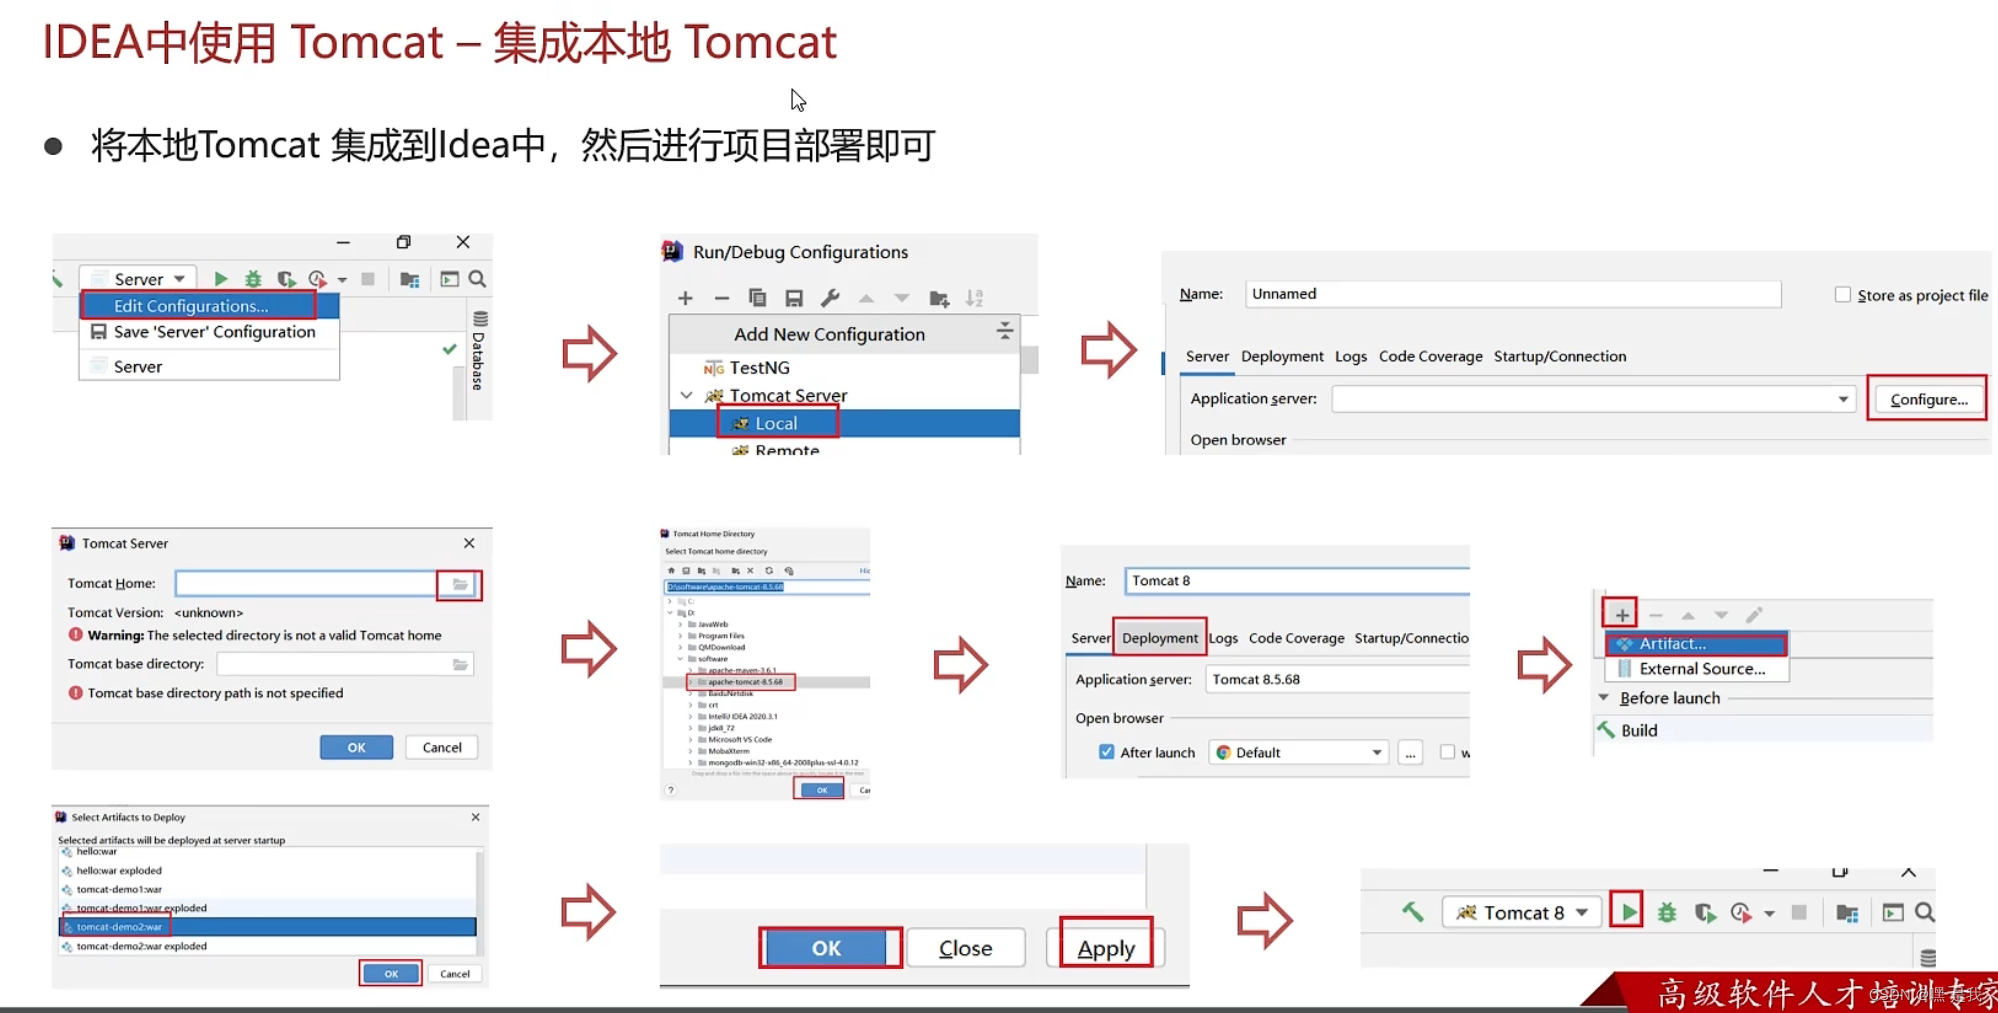
1.1配置本地tomcat
1.Add Configurations
2.点击+号---->Tomcat server---->local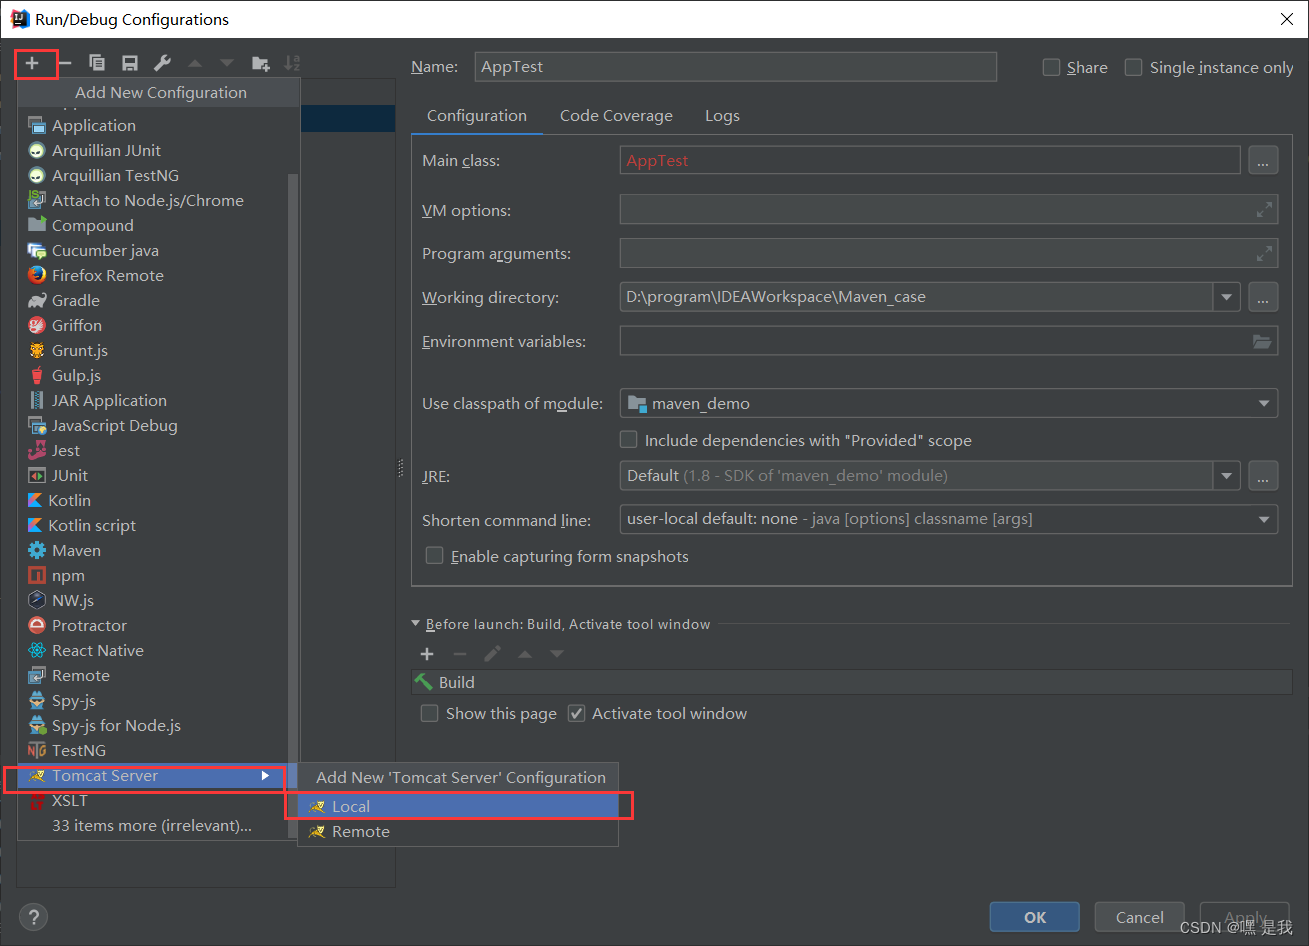
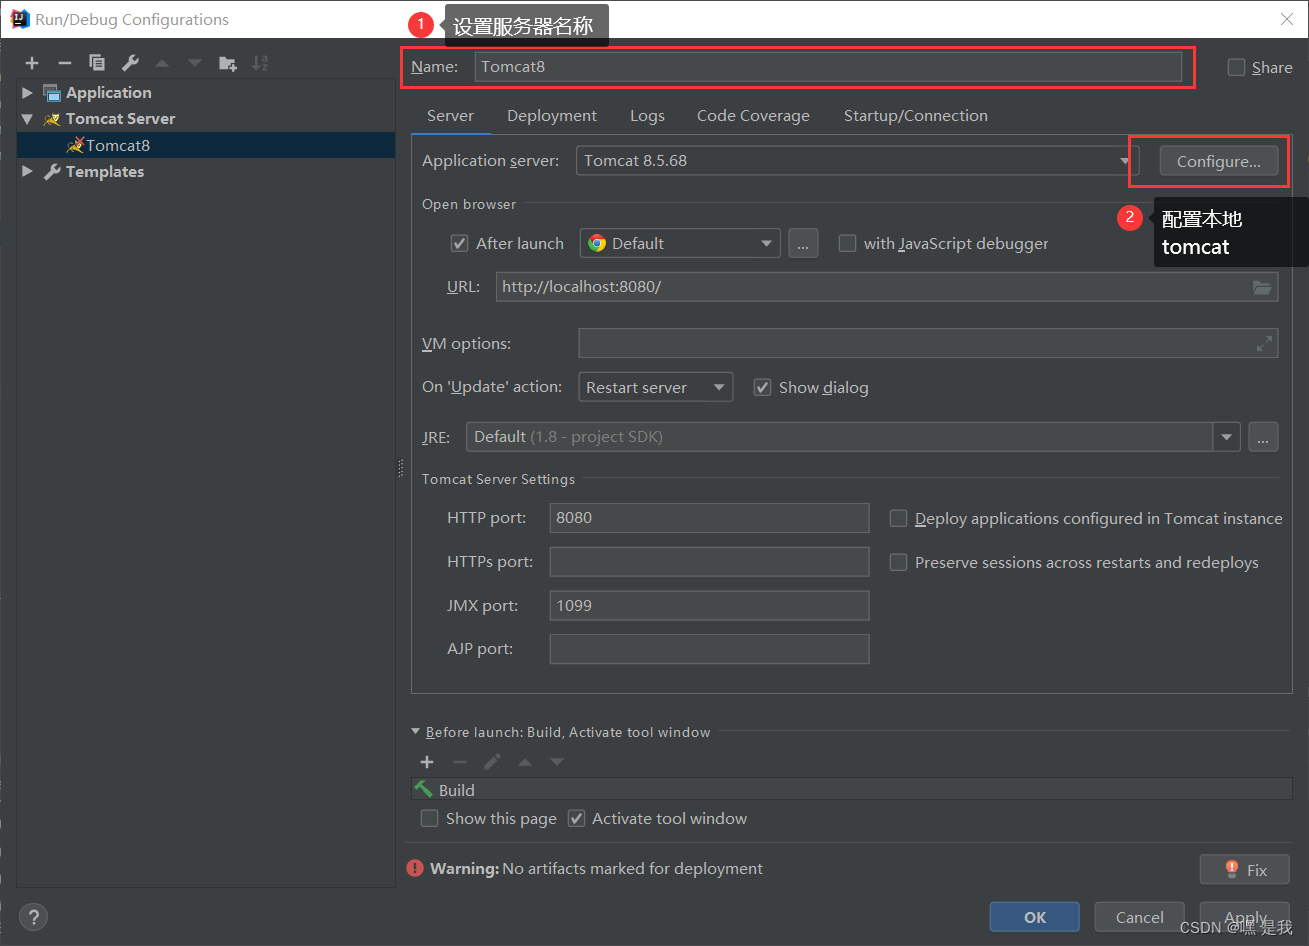
3.修改服务器名称---->点击配置Configurations
默认端口号8080
4.选择本地的tomcat目录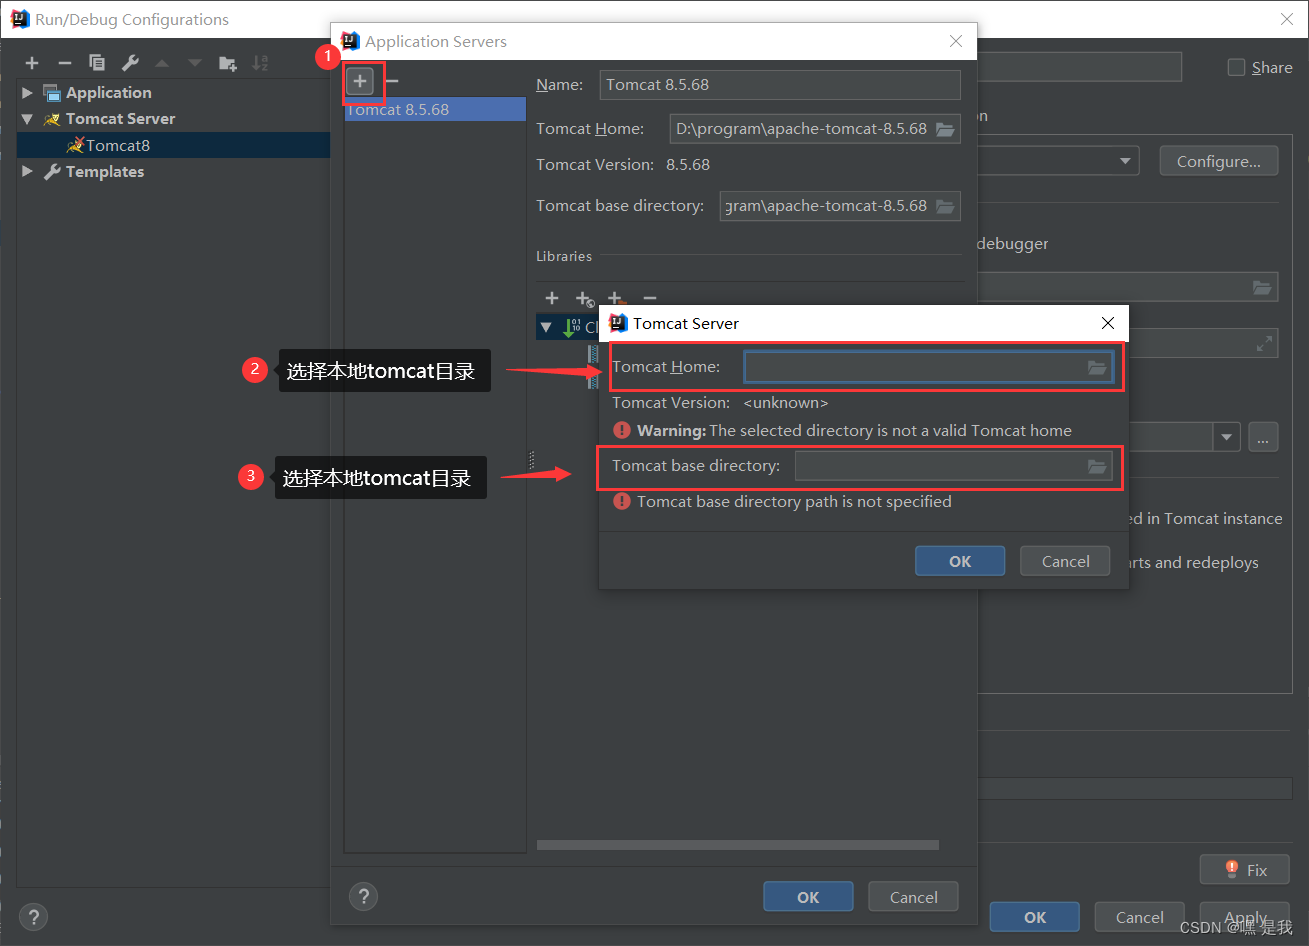
5.部署项目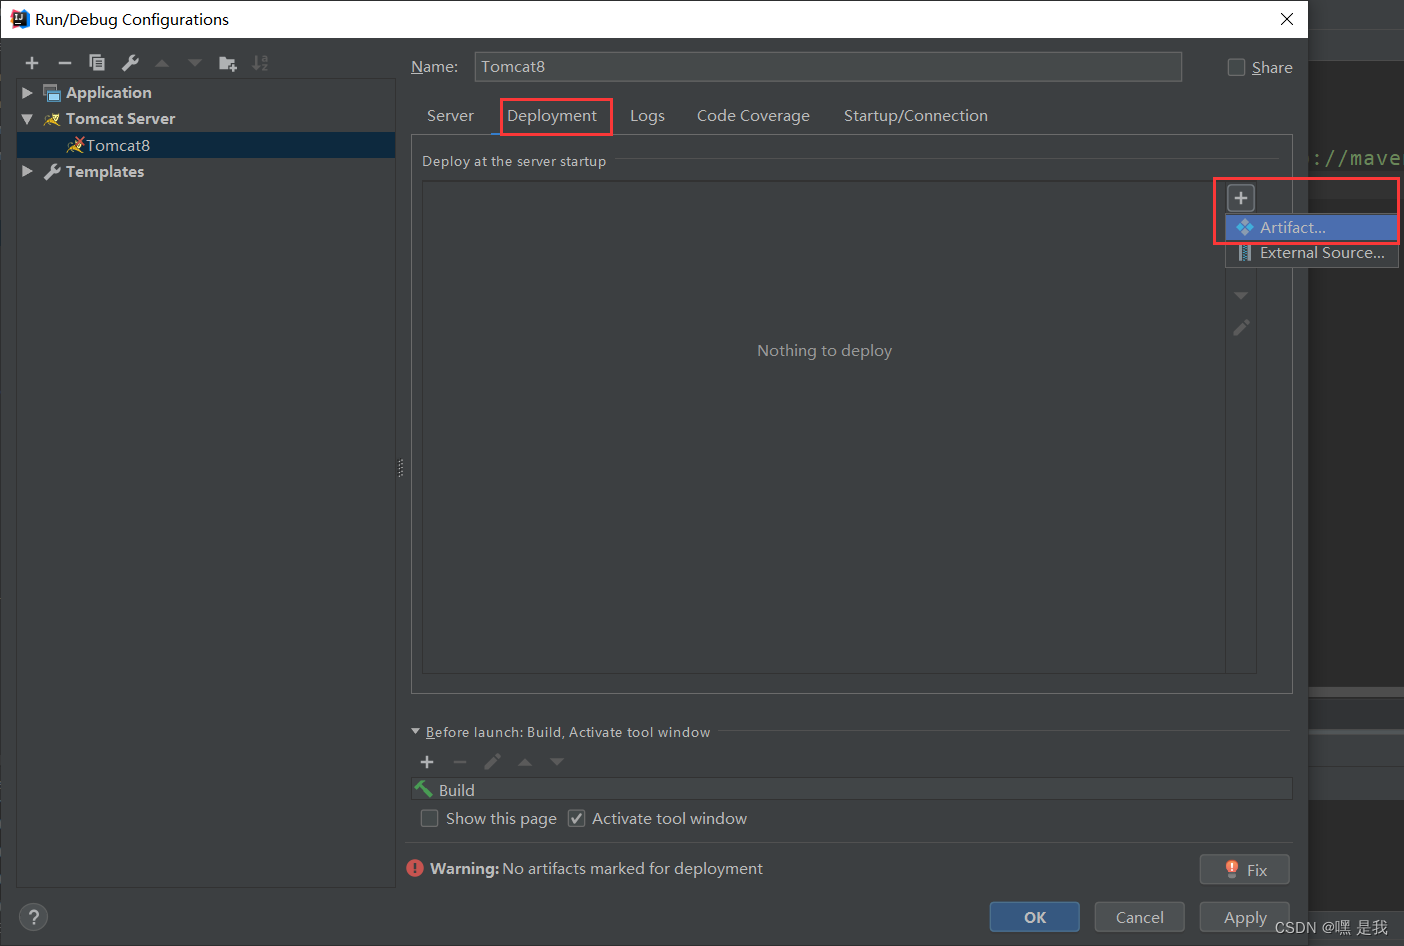
选择要部署的项目---->点击OK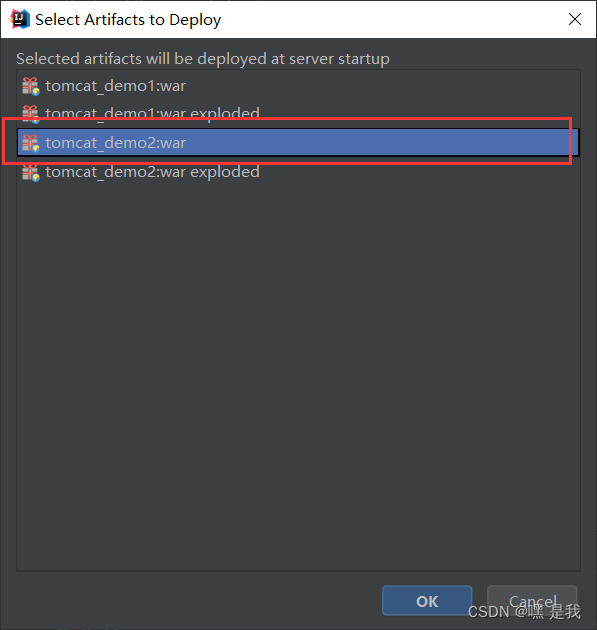
Application context表示虚拟目录一般和web项目名称相同
这里为例演示设置为helloworld, 那么到时候我访问这个web项目下的xxx资源就是
http://localhost:8080/helloworld/xxx
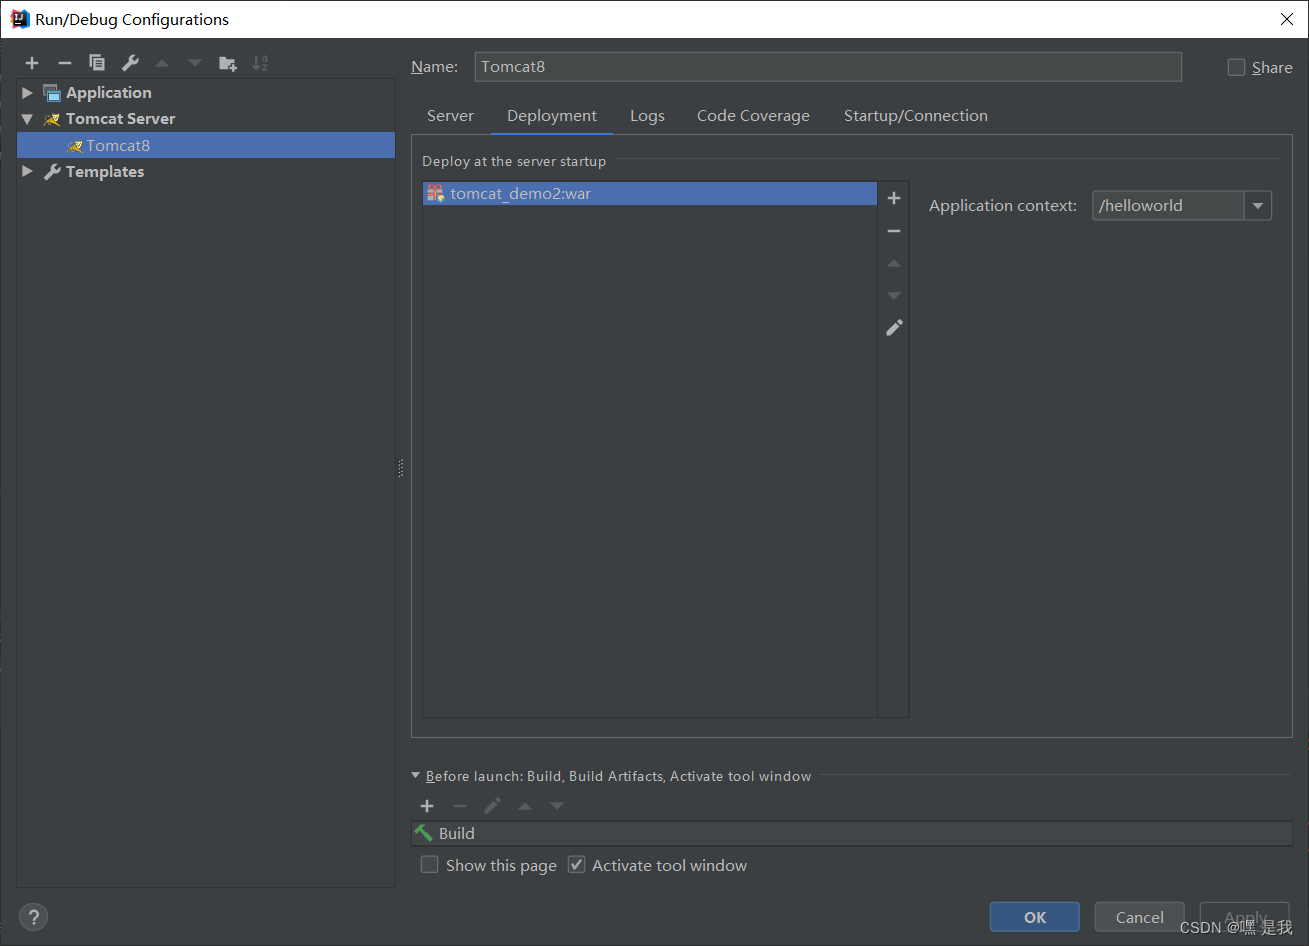
1.2启动tomcat进行测试
1.在webapp目录编写一个
test.html
页面进行测试(注意:web-info和test.html文件同级), 然后点击tomcat8旁边的按钮启动tomcat服务器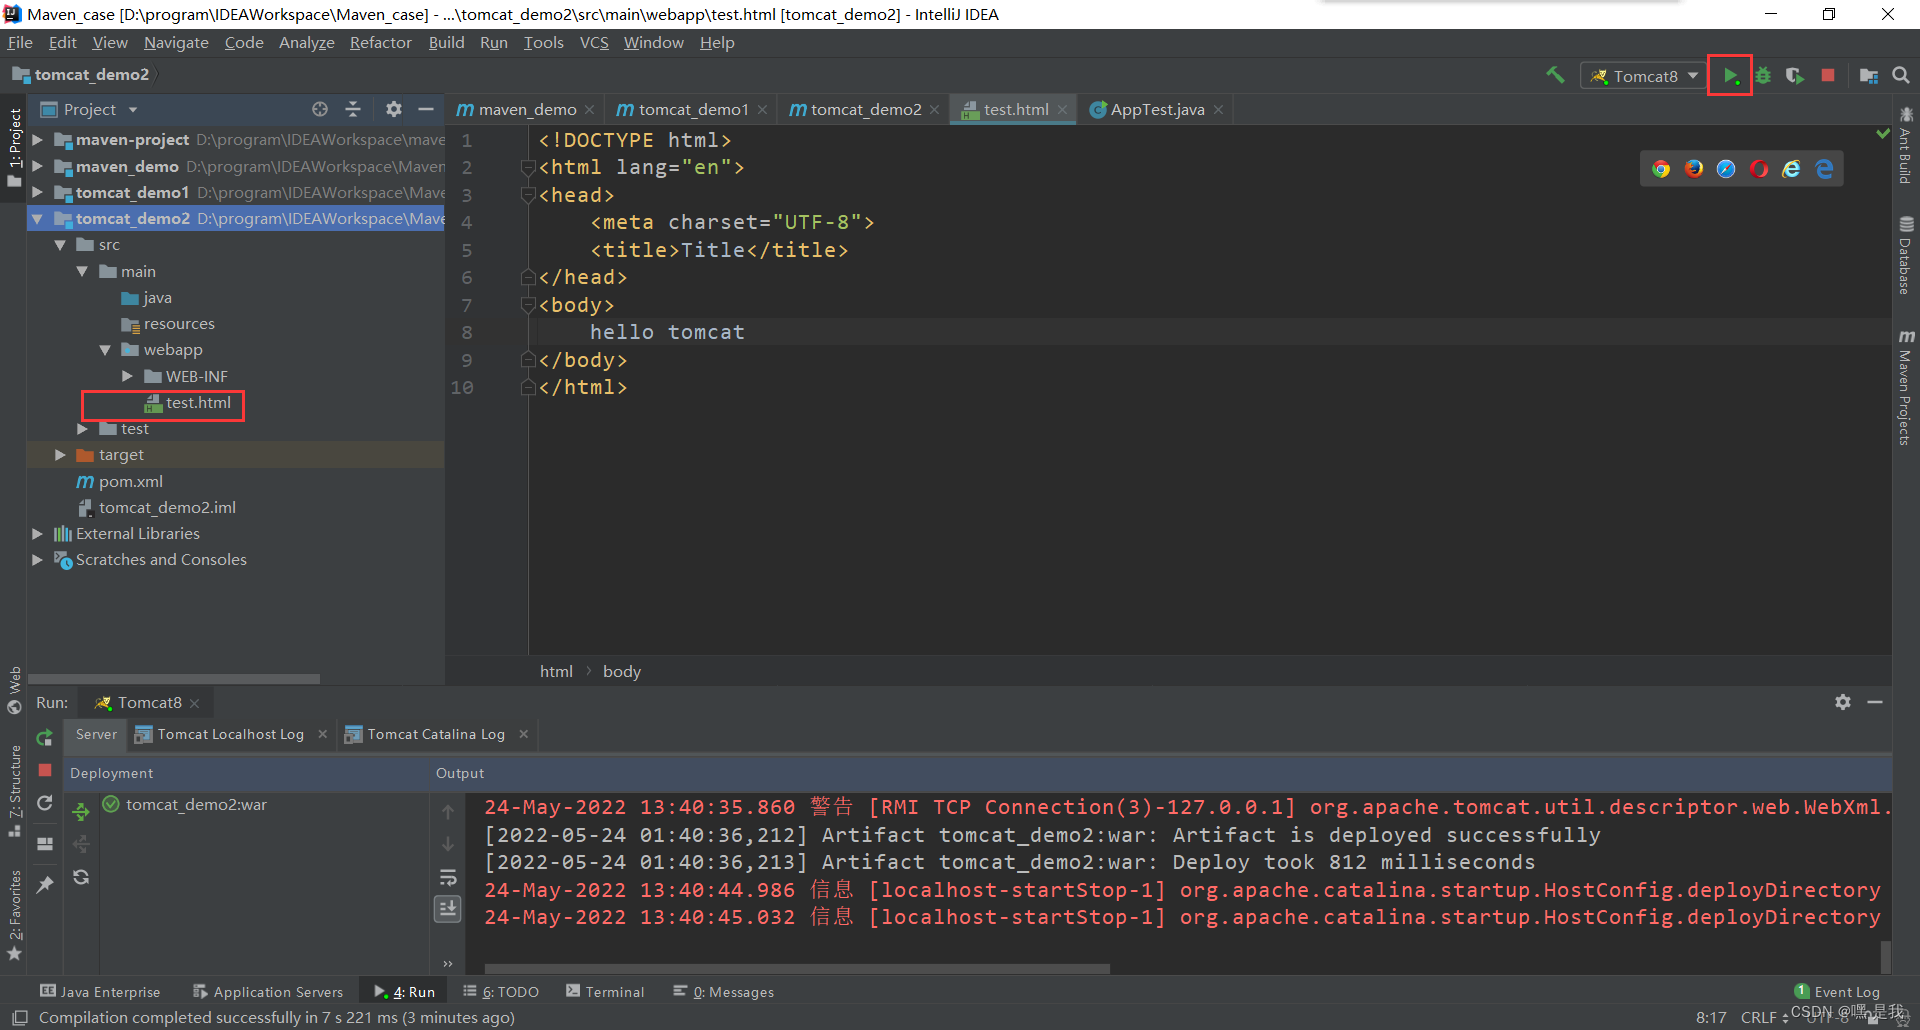
2.等待服务器启动成功在浏览器地址栏输入
http://localhost:8080/虚拟路径/test.html
注意:虚拟路径是自己设置的Application context
例如我这里Application context刚刚设置为helloworld那么就用
http://localhost:8080/helloworld/test.html
即可访问该界面, 如下图所示
1.3关闭服务器&重启
点击左侧就可完成关闭和重启
2. Tomcat mvaen插件配置tomcat(推荐使用)
总体流程预览: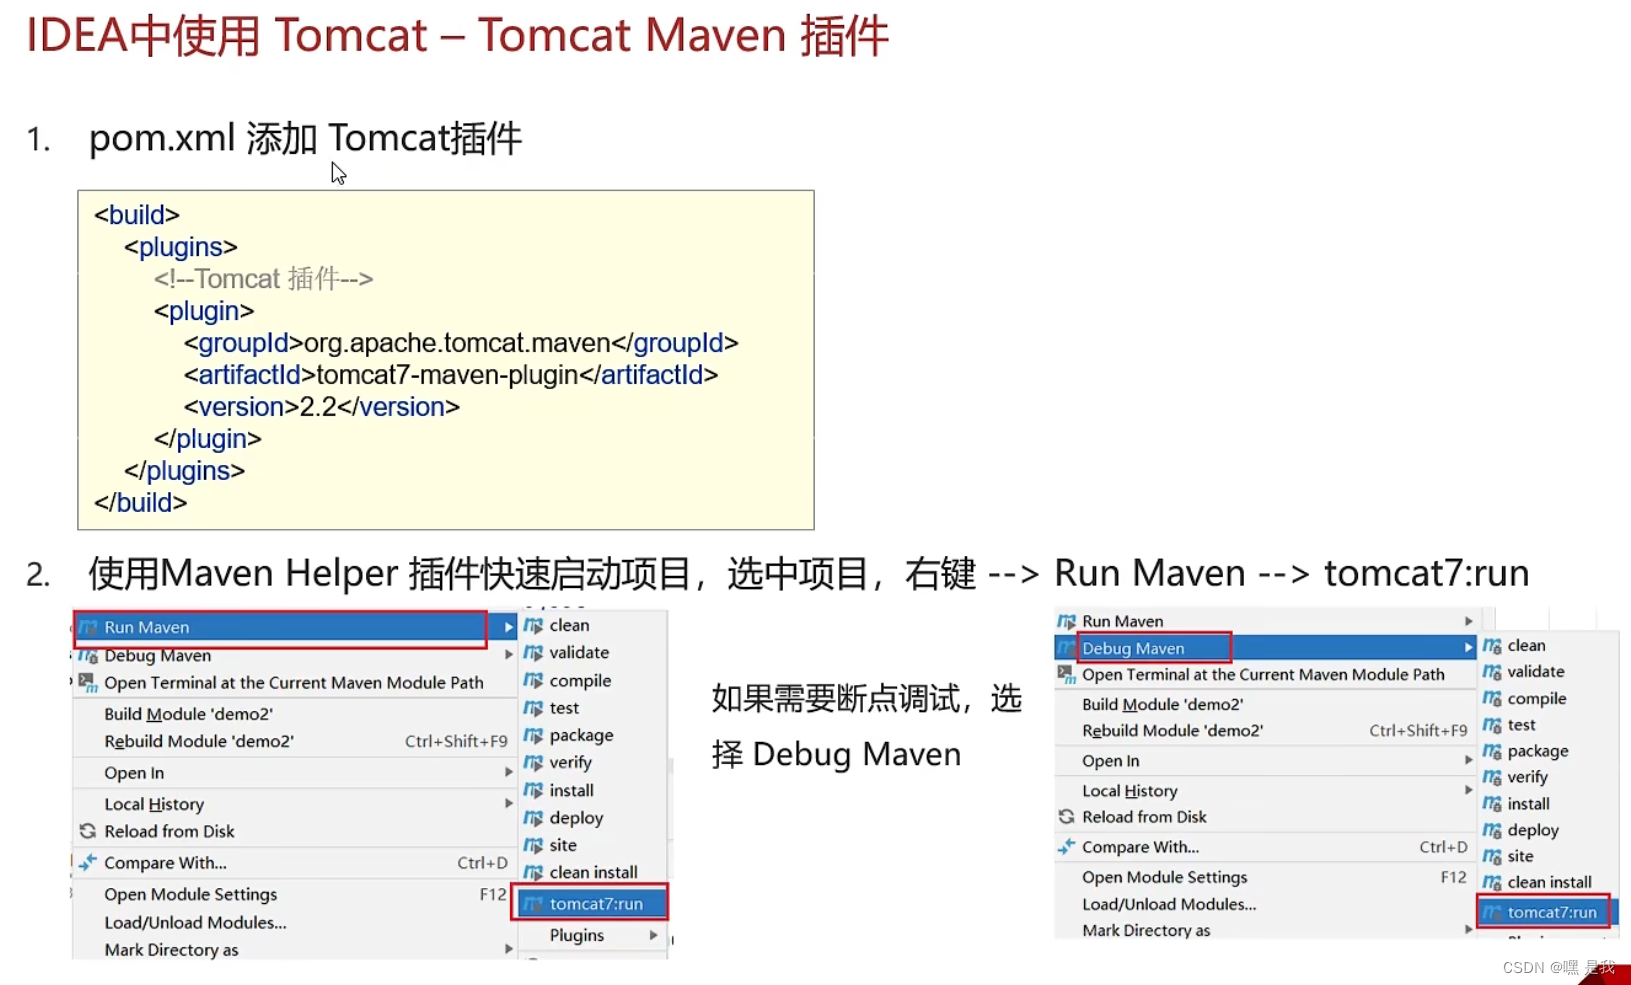
2.1.在pom.xml中添加Tomcat插件
找pom.xml文件----> alt+insert快捷键----->Plugin Template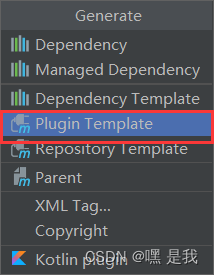
添加下面这串代码到pom.xml中
<build><plugins><!-- tomcat插件 --><plugin><groupId>org.apache.tomcat.maven</groupId><artifactId>tomcat7-maven-plugin</artifactId><version>2.2</version></plugin></plugins></build>
添加成功之后记得保存刷新:
这里Run Maven如果你没有就去下载一个Maven Helper插件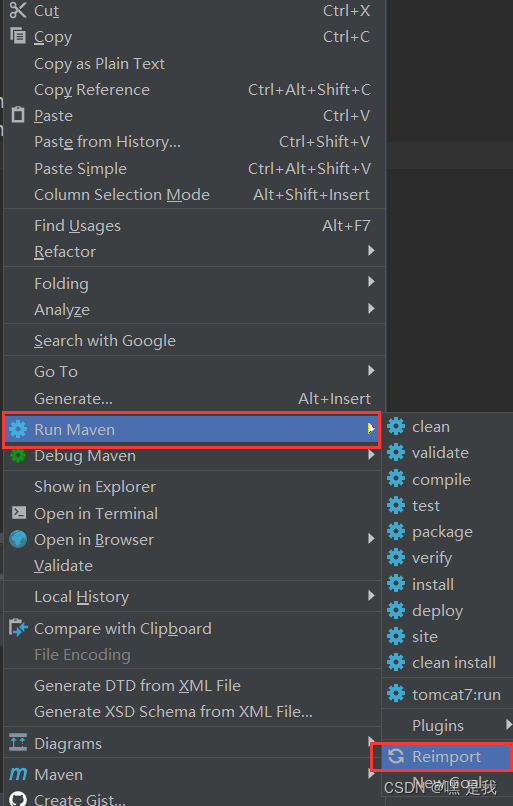
2.2使用Maven Helper插件快速启动项目
1.选中项目,右键–>Run Maven --> tomcat7:run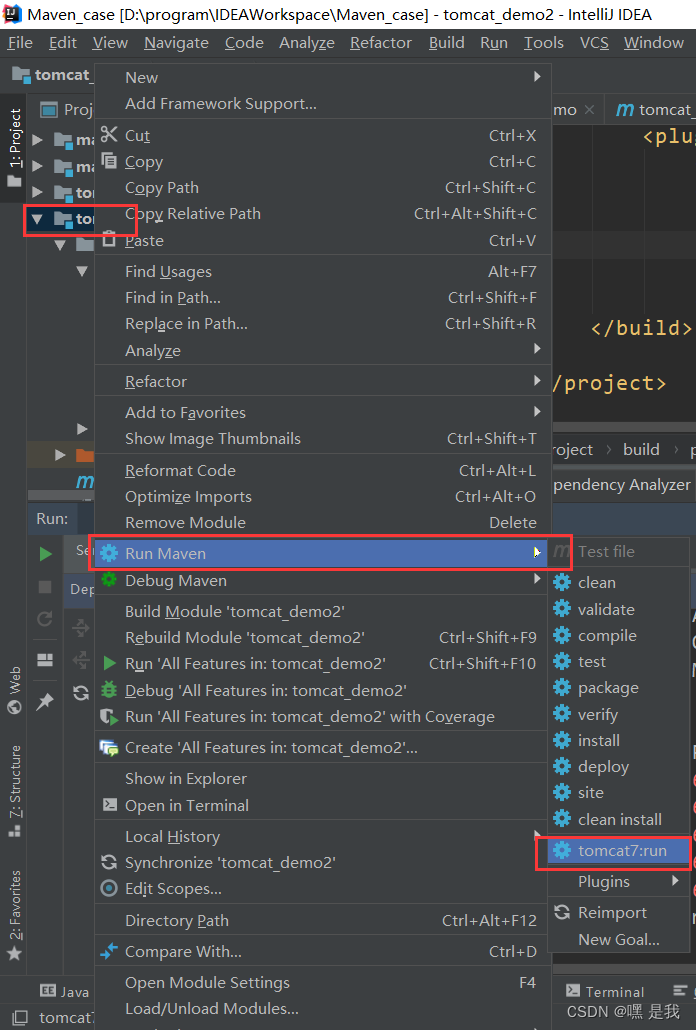
成功运行之后打开浏览器
http://localhost:8080/tomcat_demo2/test.html
注意: 默认的端口号是8080, 默认的项目访问路径(虚拟路径)是web项目名称这里就是tomcat_demo2

2.3修改端口号和虚拟路径(如果有需要)
在刚刚的文件中添加标签内
<configuration><port>8888</port><path>/helloworld</path></configuration>
添加之后为
<build><plugins><!-- tomcat插件 --><plugin><groupId>org.apache.tomcat.maven</groupId><artifactId>tomcat7-maven-plugin</artifactId><version>2.2</version><configuration><port>8888</port><path>/helloworld</path></configuration></plugin></plugins></build>
记得保存刷新(每次修改pom.xm文件之后要保存刷新)
重启浏览器打开输入
http://localhost:8888/helloworld/test.html

javaee学习笔记, 如有错误欢迎交流指正
版权归原作者 GD_Wang1206 所有, 如有侵权,请联系我们删除。