文章目录
ubuntu20.04关闭内核自动更新
问题背景:
ubuntu默认启动了自动更新内核,我们可以进一步关闭内核更新,使用当前内核。
解决方法:
cat /etc/issue
uname-r
查看安装内核
dpkg --list|grep linux-image
dpkg --list|grep linux-headers
dpkg --list|grep linux-modules
【推荐】方案一:
安全禁止ubuntu更新
vi /etc/apt/apt.conf.d/10periodic
vi /etc/apt/apt.conf.d/20auto-upgrades
后面部分全部改成 “0”
reboot
方案二:hold – 用户希望软件包保持现状,例如,用户希望保持当前的版本,当前的状态,当前的一切。
直接使用hold参数,固定内核版本:
# apt-mark hold linux-image-5.4.0-70-generic
linux-image-5.4.0-70-generic set on hold.
# apt-mark hold linux-headers-5.4.0-70-generic
linux-headers-5.4.0-70-generic set on hold.
# apt-mark hold linux-modules-extra-5.4.0-70-generic
linux-modules-extra-5.4.0-70-generic set on hold.
查询Ubuntu系统被锁定不更新的软件包状态(hold), 命令为:
sudo dpkg --get-selections |grep hold
ubuntu 禁止/取消系统自动更新的方法
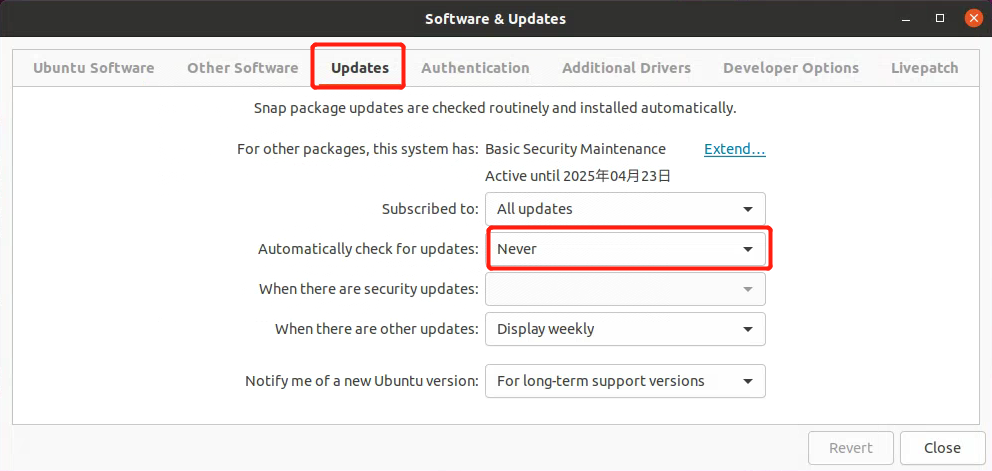
1.打开“Software & Updates(软件和更新)”,如下所示。 在界面上的“Update(更新)”选项卡中,如果要 开启 自动更新按如下界面进行设置。
版权归原作者 西京刀客 所有, 如有侵权,请联系我们删除。