Qt提供了QWebChannel实现和网页的通信,我们直接拿github上一个能直接运行的demo来做说明,demo是基于Widget,且页面是自己实现的页面,接着会介绍基于QML实现且页面是第三方网站如何使用的。
QWebChannel用法
我们先看看demo的运行效果

左边是widget界面,右边是QWebEngineView,两边支持互发消息。
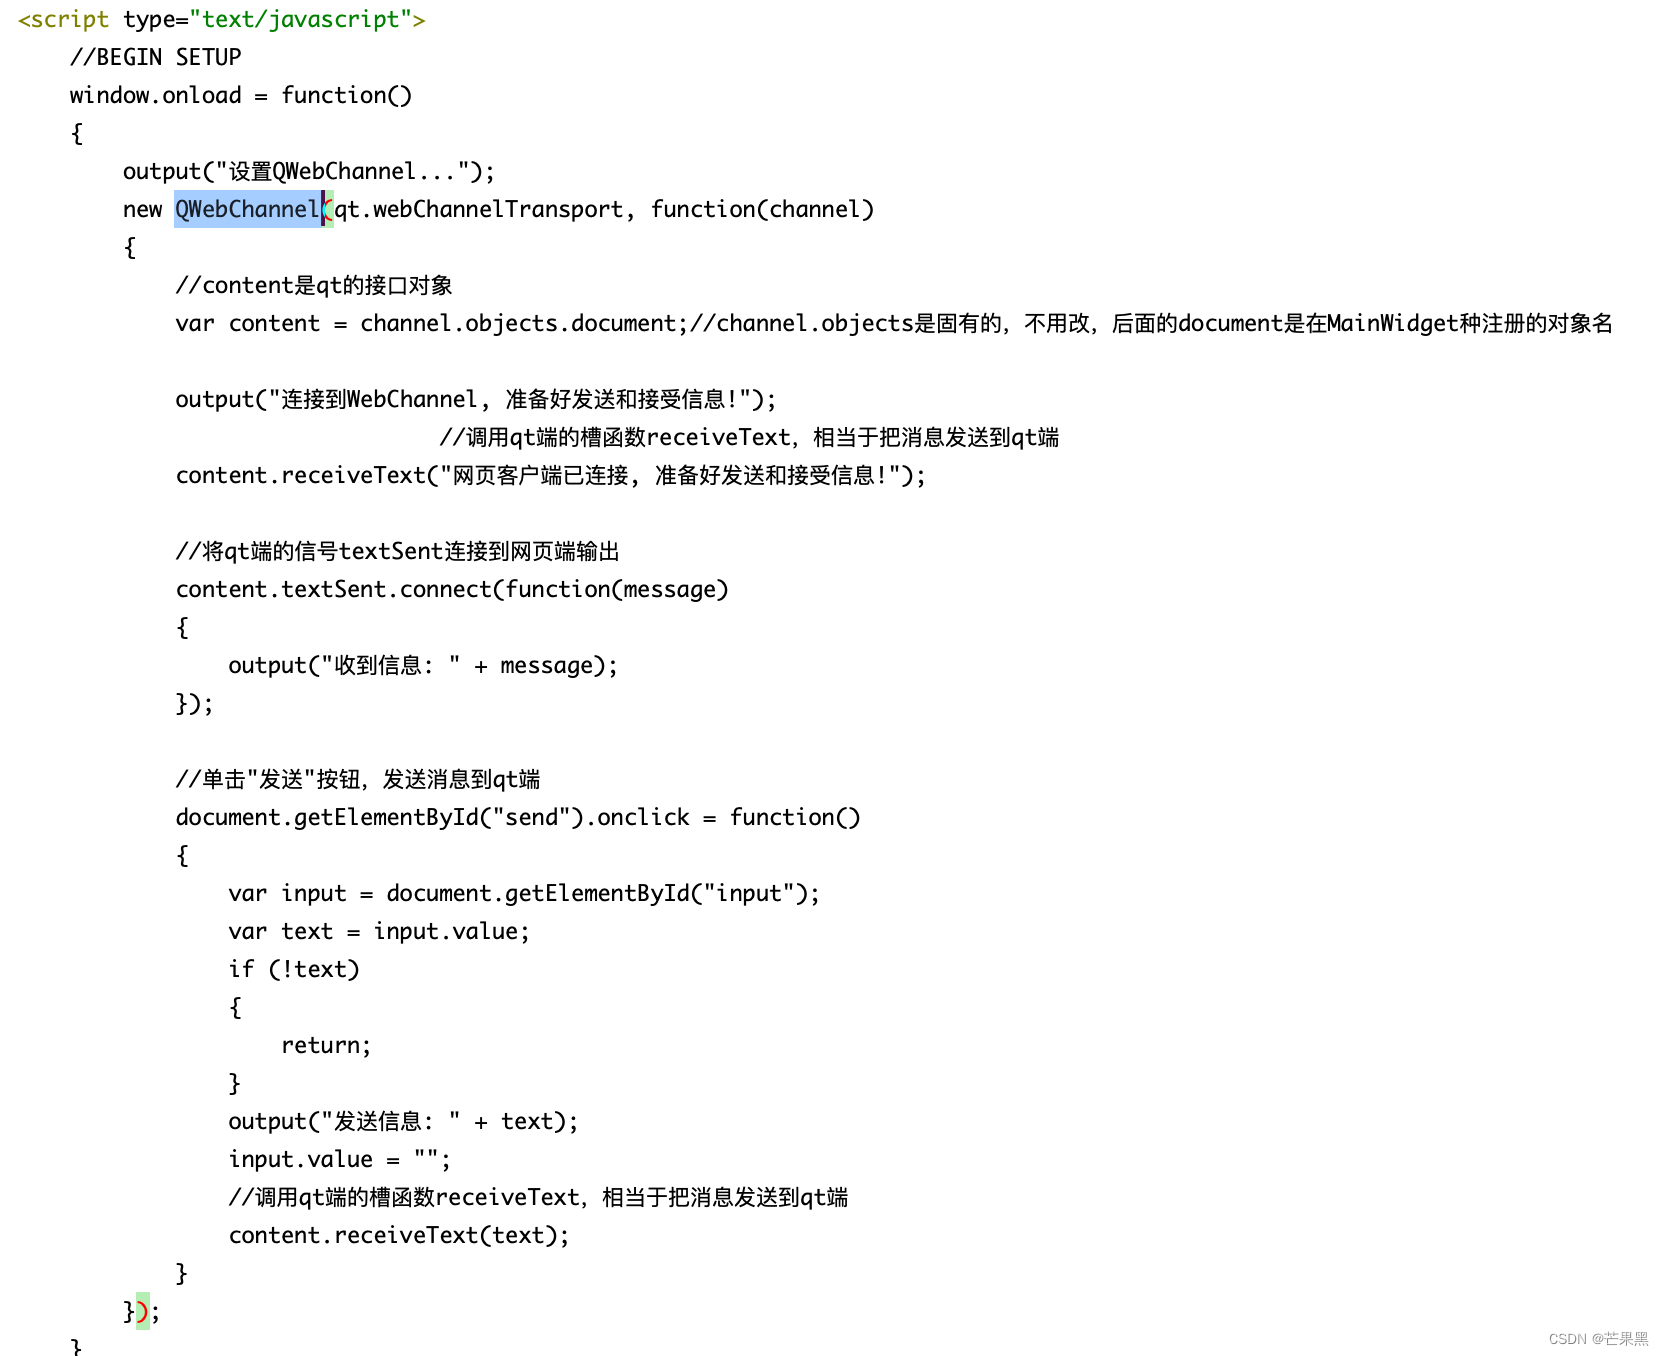
大体原理是定义一个通信类,这个类为Document,通过这个类发送和接收消息,QWebChannel绑定这个类
    m_webView = new QWebEngineView();
    QWebEnginePage *page = new QWebEnginePage(this); //创建一个网页视图对象
    m_webView->setPage(page);

    QWebChannel *channel = new QWebChannel(this); //为网页视图页面创建通道channel
    channel->registerObject(QStringLiteral("document"), &m_document);//注册通道对象供JS调用,"document"为注册名,JS调用的对象名必须和它相同
    page->setWebChannel(channel); //设置通道
// qt端和HTML页面之间交互要用到的类
class Document : public QObject
{
    Q_OBJECT

public:
    explicit Document(QObject *parent = nullptr){}

    void sendText(const QString &text)
    {
        emit textSent(text);//发送给html页面
    }

public slots:
    //在HTML端的JavaScript中调用,在qt端显示
    void receiveText(const QString &text)
    {
        emit textReceived(text);//发送给主界面
    }

signals:
    //发送消息给HTML页面(此信号在html端的JavaScript中进行连接)
    void textSent(const QString &text);

    //发送消息给主界面
    void textReceived(const QString &text);
};
在页面中加载qwebchannel.js,这样就可以在js中创建QWebChannel对象,然后通过Document对象互发消息


WebEngineView中使用
Qt封装的东西用法还是比较简单的,在QML中的用法流程原理是一样的,代码如下:
    WebChannel {
        id: webchannel2

    }

    Document {
        id: docObj

        onTextReceived: function(msg){
            console.log("recv msg" + msg)
        }

        Component.onCompleted: {
            webchannel2.registerObject("document", docObj)
        }
    }

    WebEngineView {
        id: webView
        anchors.fill: parent
        anchors.leftMargin: leftRect.width
        webChannel: webchannel2

        url: "qrc:/index.html"
    }
Document用的和上面例子是同一个类,只是注册到qml来使用,网页端代码不变。通信类也可以直接创建QtObject的QML类型,实现一套信号和槽也可以。
在第三方页面中使用
上面的实现是自己写的html页面,html里能引入qwebchannel.js和创建QWebChannel对象,但第三方网页是人家写好的,我们该如何使用呢?
这就需要用到我们之前了解到的注入javascript技术。
网页加载完成后,注入qwebchannel.js的内容,通信之前注入js创建QWebChannel对象就可以了。
    WebEngineView {
        id: webView
        anchors.fill: parent
        anchors.leftMargin: leftRect.width
        webChannel: webchannel2

        url: "qrc:/index.html"

        onLoadingChanged: function(loadRequest) {
            if (loadRequest.status === WebEngineView.LoadSucceededStatus) {
                //注入qwebchannel.js
                webView.runJavaScript(docObj.getWebchannelJs())
                //创建QWebChannel对象,并设置send点击效果
                var test = "var content = null; new QWebChannel(qt.webChannelTransport, function(channel){content = channel.objects.document;content.receiveText(\"redy.....\");});document.getElementById(\"send\").onclick = function(){var input = document.getElementById(\"input\");content.textSent.connect(function(message){output(\"recv data: \" + message);});var text = input.value;if (!text){return;}input.value = \"\";content.receiveText(text);}"
                webView.runJavaScript(test)
            }
        }
    }
需要注意的是需要定义document对象为全局变量,代码中用content接收document作为全局变量,这样其他地方才能使用document对象。
结语
关于QWebChannel实现与网页的通信就这些内容,因为网上基本都是基于QWebEngineView实现的,这里做了WebEngineView中使用的说明。
版权归原作者 芒果黑 所有, 如有侵权,请联系我们删除。