from time import sleep #设置强制等待用
from selenium.webdriver.support.ui import WebDriverWait #设置隐式等待用
from selenium.webdriver.support import expected_conditions as ec #设置显示等待用
from selenium.webdriver.common.alert import Alert #弹窗
from selenium.webdriver.common.keys import Keys#键盘
from selenium.webdriver.common.by import By #包含各种定位类型常量
from selenium.webdriver.support.select import Select #导入select工具
#启动浏览器
def setUp(self):#执行用例前的准备工作
self.options = webdriver.ChromeOptions()
options.add_experimental_option(“detach”, True)
self.driver = webdriver.Chrome(options=options)#变量加self.就变成了全局变量
self.driver.implicitly_wait(10)#设定隐式等待10秒
driver.maximize_window()#最大化浏览器
‘’‘显示等待
wdw=WebDriverWait(driver,16)#创建WebDriverWait对象,参数driver和时间
yuqi1=ec.title_contains(‘标题’)#预期条件标题包含标题
yuqi2=ec.title_is(‘标题’)#预期条件标题
yuqi3=ec.url_to_be(‘标题’)#预期条件标题
ec.url_contains()
ec.url_changes()
wdw.until(yuqi1)#等待知道预期条件成立
‘’’
def tearDown(self):#执行用例后的收尾工作
self.driver.quit()
断言:
def test_sub(self):
#####打开浏览器代码
检查元素<><>之间是否包含特定文本
shiji=driver.find_element(By.ID, ‘KW’).text#获得<>xx<>之间的文本
self.assertIn(‘yuqi’,shiji)
检查元素属性值是否包含特定文本
shiji2=driver.find_element(By.ID, ‘KW’).get_attribute(‘name’)#获取单标签的属 性值
检查单选框或单选按钮选中状态
result1=driver.find_element(By.ID, ‘KW’).is_selected()
self.assertTrue(result1)
判断消息弹窗:
from selenium.common.exceptions import NoAlertPresentException #导入异常类
定义一个通用方法,判断消息弹窗是否存在
try:#尝试
self.driver.switch_to.alert#切换到消息弹窗
except NoAlertPresentException:#如果捉到NoAlertPresentException异常代表消息弹窗不存在
return False #返回消息不存在或已消失
return True#返回消息存在
在测试方法里调用此方法
判断是否跳转页面
currentUrl=driver.current_url#获得当前页面url
currentPageSource=driver.page_source#获取当前网页源码
判断元素是否存在:
from selenium.common.exceptions import NoSuchElementException
try:#尝试
。。。
except NoSuchElementException:#如果捉到NoSuchElementException异常代表该元素不存在
。。。
数据驱动测试:
步骤一:
导入ddt三个装饰器
from ddt import ddt,data,unpack
import unittest
#下面这些有的用到了有的没用,为了省事复制的
from selenium import webdriver
from selenium.common.exceptions import NoAlertPresentException
from selenium.common.exceptions import NoSuchElementException
from time import sleep#模拟实际操作,引入time模块sleep函数
from selenium.webdriver.common.by import By #包含各种定位类型常量
from selenium.webdriver.common.alert import Alert
from selenium.webdriver.common.keys import Keys
from selenium.webdriver.support.select import Select
步骤二:
用@ddt装饰当前的测试用例管理类
@ddt
class MyTestCase(unittest.TestCase):
步骤三:
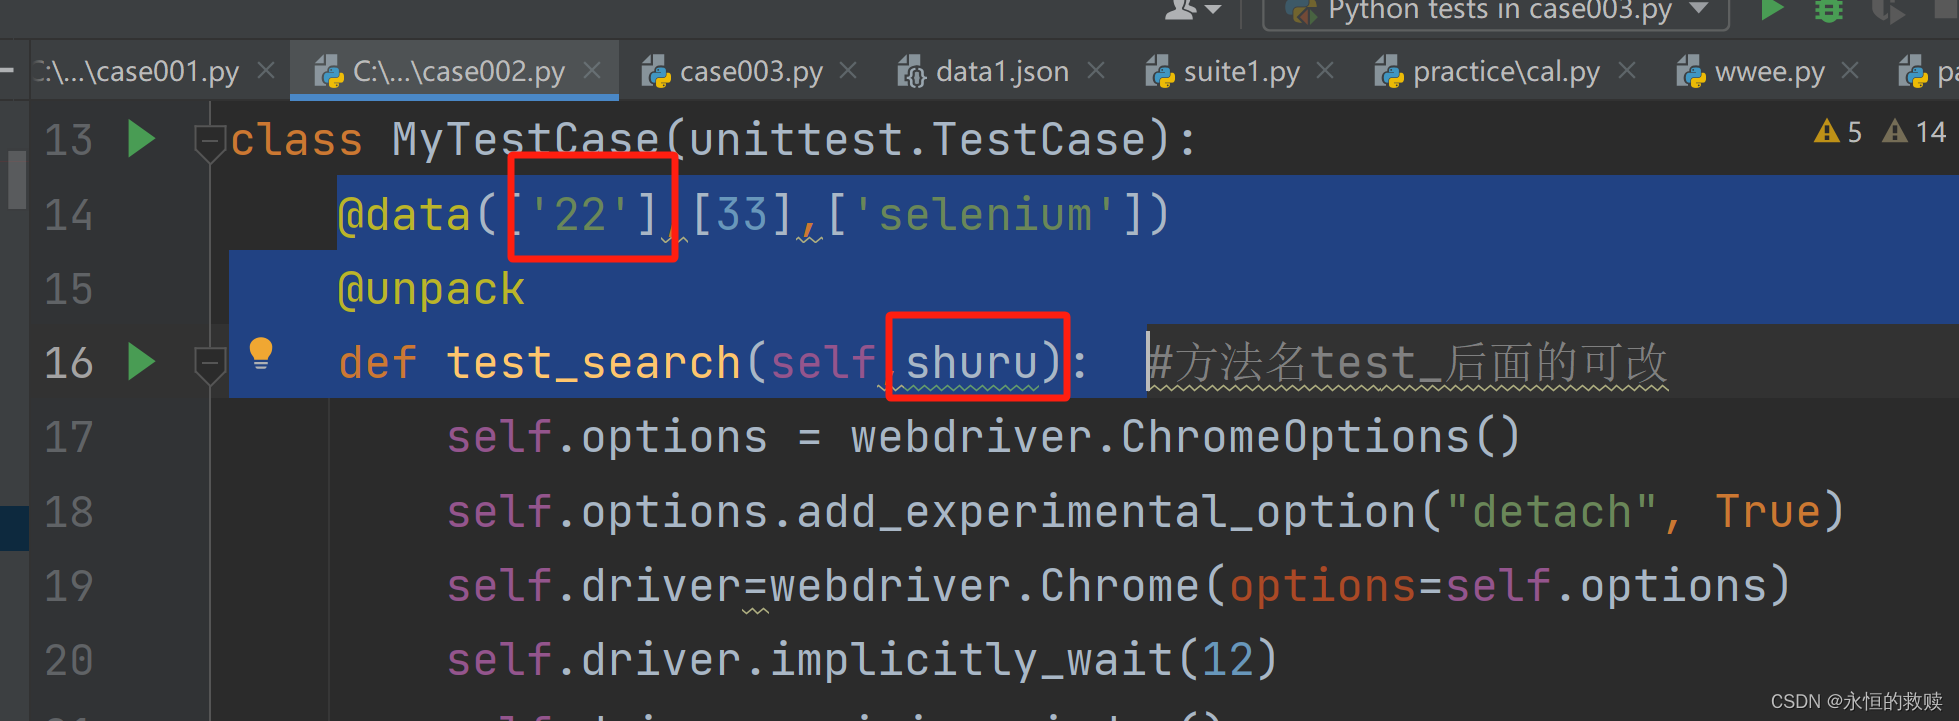
用@data装饰测试用例类里需要执行的测试方法,并提供数据
@data([‘22’],[33],[‘selenium’])
@unpack
def test_search(self,shuru):
步骤四:
用@unpack装饰步骤三的方法,作用是添加unpack之后,ddt会自动把元组或者列表对应到多个参数
步骤五:
修改测试方法,增加形参变量,数量应与data后面的列表一致
步骤六:
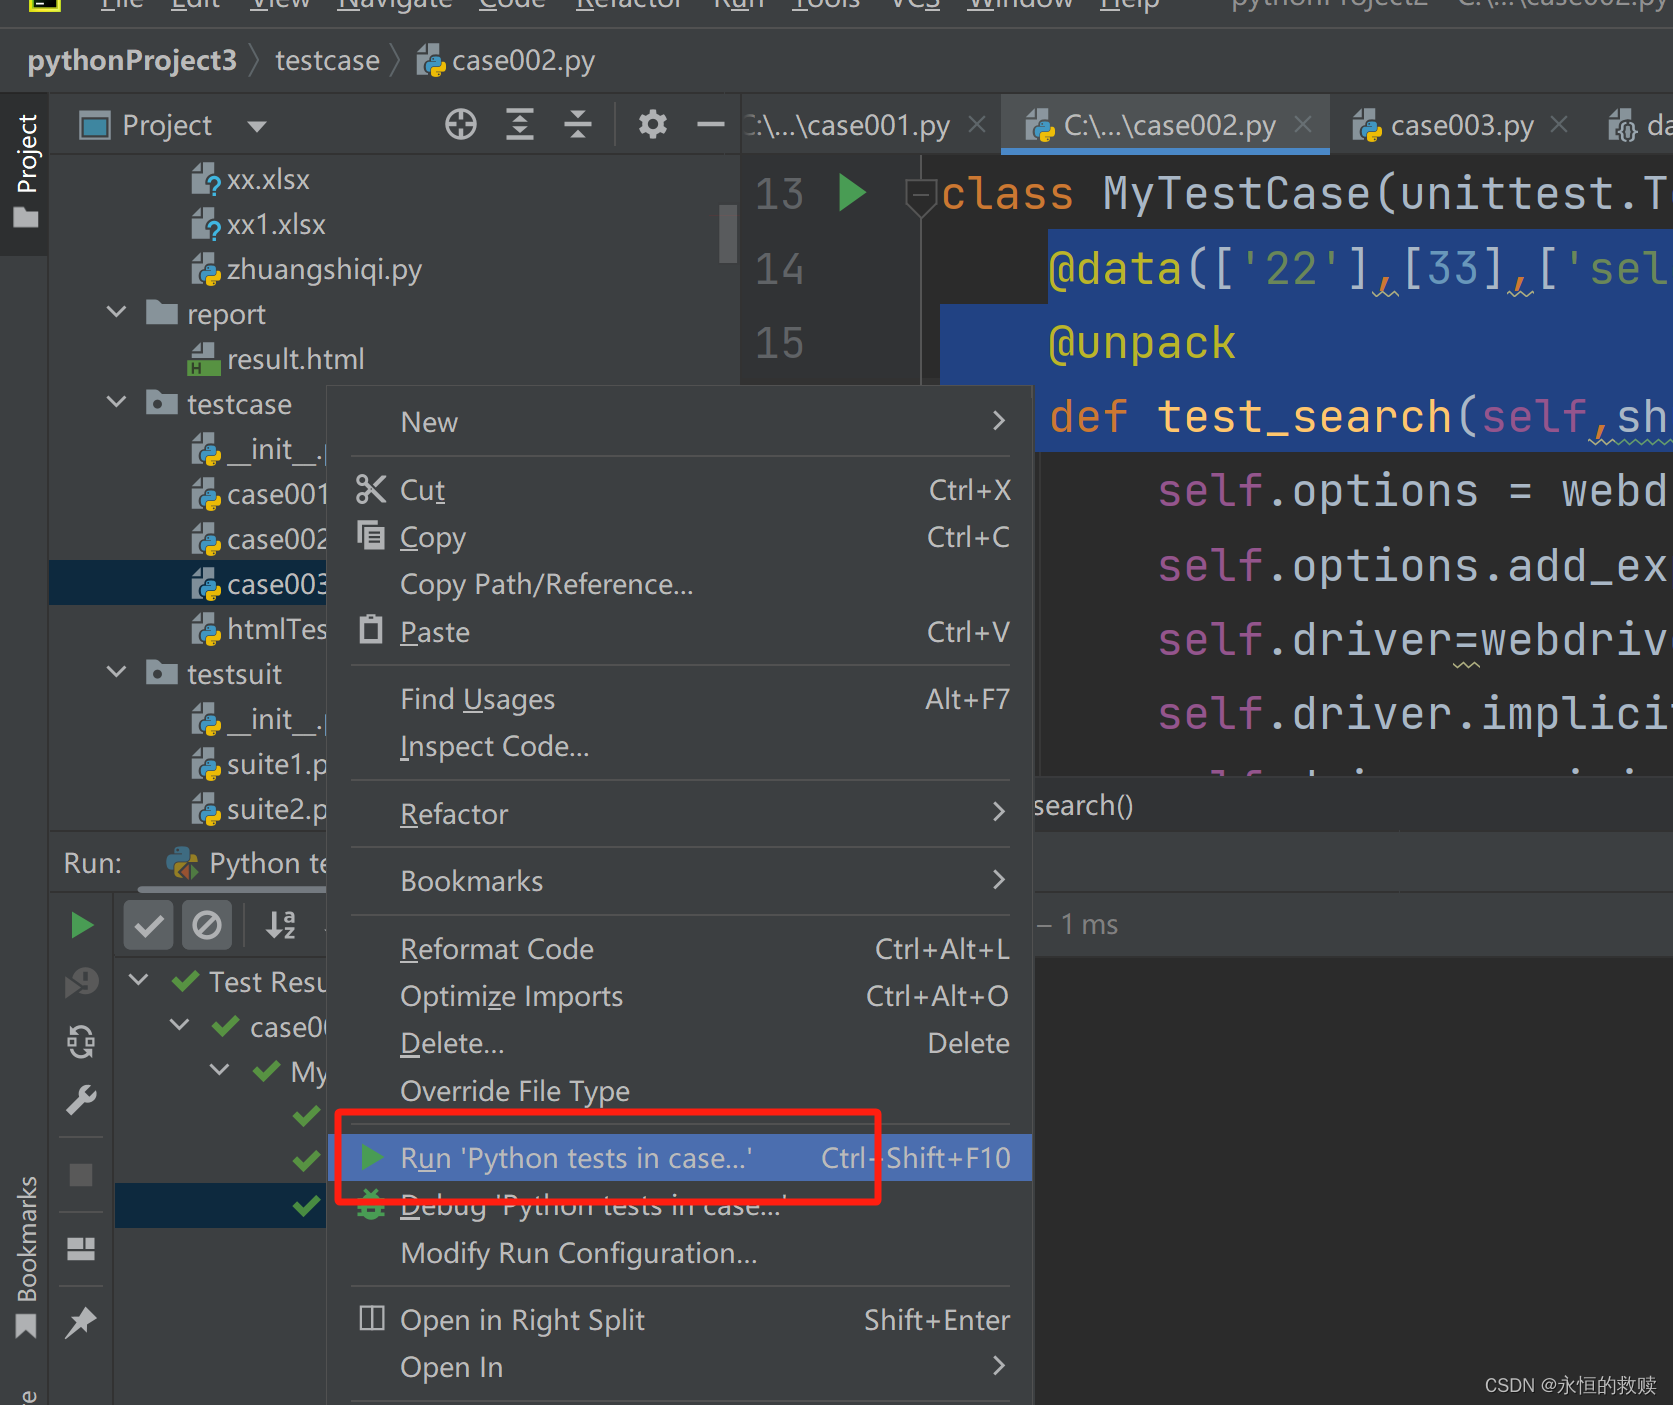
运行,通过点击左侧py文件右击点击运行unitest…
示例代码
@ddt
class MyTestCase(unittest.TestCase):
@file_data(“…\practice\data1.json”)#参数为数据文件地址ddt
@unpack
def test_search(self,name): #方法名test_后面的可改
print(name)
通过外部文件来读取测试数据
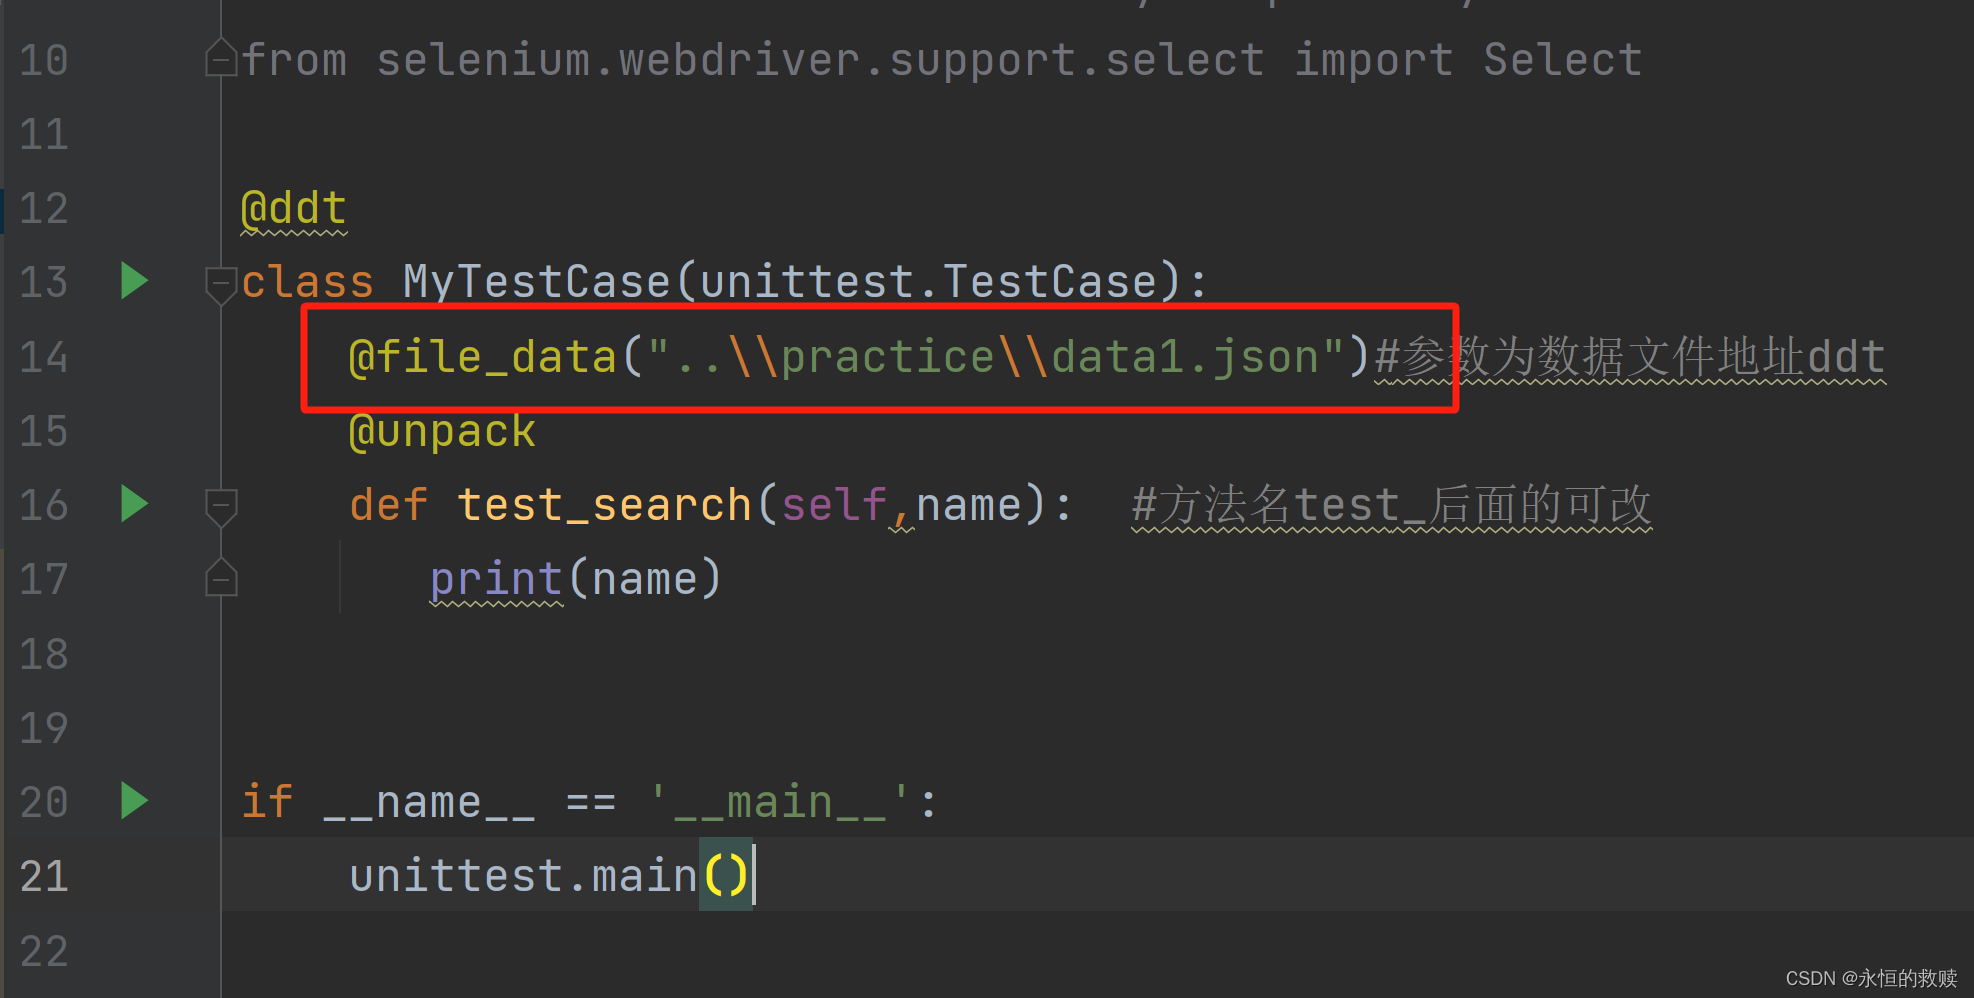
步骤与上面的数据驱动测试一致只需江引入的data改为file_data,测试方法上的@dataf改为@file_data,后面的参数列表改为(“数据文件路径”)
示例:
import unittest
from ddt import ddt,file_data,unpack
from selenium import webdriver
from selenium.common.exceptions import NoAlertPresentException
from selenium.common.exceptions import NoSuchElementException
from time import sleep#模拟实际操作,引入time模块sleep函数
from selenium.webdriver.common.by import By #包含各种定位类型常量
from selenium.webdriver.common.alert import Alert
from selenium.webdriver.common.keys import Keys
from selenium.webdriver.support.select import Select
@ddt
class MyTestCase(unittest.TestCase):
@file_data(“…\practice\data1.json”)#参数为数据文件地址ddt
@unpack
def test_search(self,name): #方法名test_后面的可改
print(name)
导入的修改
测试方法参数列表的修改
版权归原作者 永恒的救赎 所有, 如有侵权,请联系我们删除。