
介绍
driver.js:
轻量级、无依赖性、普通的 JavaScript 引擎,可在整个页面上推动用户的注意力;
- 🔆突出显示页面上的任何(字面上的任何)项目
- ✋阻止用户交互
- 📣 创建功能介绍
- 👓为用户添加焦点转移器
- 🛠️ 高度可定制——在任何地方使用它进行叠加
- ⌨️ 用户友好 –按键控制
- 🆓 MIT 许可– 免费供个人和商业使用
- 🕊️ 轻量级——压缩后只有~4kb
- 🌀跨所有主要浏览器的一致行为
1.安装
Node方式:
yarn add driver.js
# 或者
npm install driver.js
CDN方式:
<scriptsrc="https://unpkg.com/driver.js/dist/driver.min.js"></script><linkrel="stylesheet"href="https://unpkg.com/driver.js/dist/driver.min.css">
2.相关配置参数及接口
2.1.初始化参数
&:可通过在步骤定义中提供特定步骤来覆盖初始化配置(所有按钮选项)
const driver =newDriver({// className来包装驱动程序。js弹出窗口// className to wrap driver.js popoverclassName:'scoped-class',// 更改亮显元素时设置动画// Animate while changing highlighted elementanimate:true,// 背景不透明度(0表示仅弹出窗口,没有覆盖)// Background opacity (0 means only popovers and without overlay)opacity:0.75,// 元件与边缘周围的距离// Distance of element from around the edgespadding:10,// 单击覆盖是否应关闭// Whether clicking on overlay should close or notallowClose:true,// 如果移动到覆盖上的下一步,请单击// Should it move to next step on overlay clickoverlayClickNext:false,// 最后一个按钮上的文本// Text on the final buttondoneBtnText:'Done',// 此步骤关闭按钮上的文本// Text on the close button for this stepcloseBtnText:'Close',// 此步骤的下一个按钮文本// Next button text for this stepnextBtnText:'Next',// 此步骤的上一个按钮文本// Previous button text for this stepprevBtnText:'Previous',// 不在页脚中显示控制按钮// Do not show control buttons in footershowButtons:false,// 允许通过键盘进行控制(退出以关闭,箭头键移动)// Allow controlling through keyboard (escape to close, arrow keys to move)keyboardControl:true,// 如果可能,我们使用“scrollIntoView()”,如果需要,请将其选项传递给此处// We use `scrollIntoView()` when possible, pass here the options for it if you want anyscrollIntoViewOptions:{},// 当元素将被突出显示时调用// Called when element is about to be highlightedonHighlightStarted:(Element){},// 当元素完全突出显示时调用// Called when element is fully highlightedonHighlighted:(Element){},// 取消选择元素时调用// Called when element has been deselectedonDeselected:(Element){},// 在即将清除覆盖时调用// Called when overlay is about to be clearedonReset:(Element){},// 在任何步骤上移动到下一步骤时调用 // Called when moving to next step on any steponNext:(Element)=>{},// 在任何步骤上移动到下一步骤时调用// Called when moving to next step on any steponPrevious:(Element)=>{},});
2.2.步骤参数
// 以下是可在每个步骤中传递的一组选项const stepDefinition ={// 要突出显示的查询选择器字符串或节点// Query selector string or Node to be highlightedelement:'#some-item',// 如果为空或未给出,则不会弹出窗口// There will be no popover if empty or not givenpopover:{// className to wrap this specific step popover in addition to the general className in Driver optionsclassName:'popover-class',// 弹出窗口上的标题// Title on the popovertitle:'Title',// 主要描述内容 // Body of the popoverdescription:'Description',// 不在页脚中显示控制按钮// Do not show control buttons in footershowButtons:false,// 此步骤关闭按钮上的文本 // Text on the close button for this stepcloseBtnText:'Close',// 此步骤的下一个按钮文本// Next button text for this stepnextBtnText:'Next',// 此步骤的上一个按钮文本 // Previous button text for this stepprevBtnText:'Previous',}};
2.3.可支持的方法
const driver =newDriver(driverOptions);// 检查驱动程序是否激活// Checks if the driver is active or notconst isActivated = driver.isActivated;// 移至步骤列表中的下一步// Moves to next step in the steps list
driver.moveNext();// 移至步骤列表中的上一步// Moves to previous step in the steps list
driver.movePrevious();// 开始执行定义的步骤// Starts driving through the defined steps
driver.start(stepNumber =0);// 使用查询选择器或步骤定义突出显示元素// highlights the element using query selector or the step definition
driver.highlight(string|stepDefinition);// 重置覆盖并清除屏幕// Resets the overlay and clears the screen
driver.reset();// 检查是否有任何突出显示的元素// Checks if there is any highlighted element
driver.hasHighlightedElement();// 检查是否有下一步要移动// Checks if there is next step to move to
driver.hasNextStep();// 检查是否有上一步要移动到// Checks if there is previous step to move to
driver.hasPreviousStep();// 防止当前移动。如果需要,可在“onNext”或“onPrevious”中使用// Prevents the current move. Useful in `onNext` or `onPrevious` if you want to// 执行一些异步任务并手动转到下一步// perform some asynchronous task and manually move to next step
driver.preventMove();// 获取屏幕上当前突出显示的元素// Gets the currently highlighted element on screenconst activeElement = driver.getHighlightedElement();const lastActiveElement = driver.getLastHighlightedElement();// 获取活动元素的屏幕坐标// Gets screen co-ordinates of the active element
activeElement.getCalculatedPosition();// 隐藏弹出窗口// Hide the popover
activeElement.hidePopover();// 显示弹出窗口// Show the popover
activeElement.showPopover();// 获取此元素后面的DOM元素// Gets the DOM Element behind this element
activeElement.getNode();
3.示例
// 导入库和CSS文件import Driver from'driver.js';import'driver.js/dist/driver.min.css';
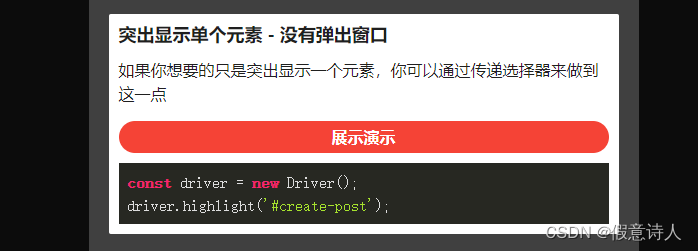
3.1.突出显示单个元素 - 没有弹出窗口
const driver =newDriver();
driver.highlight('#create-post');
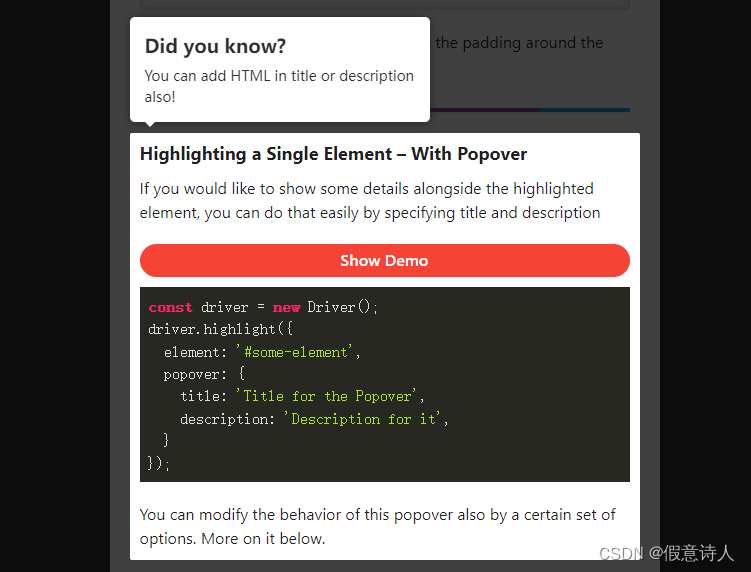
3.2.高亮单个元素 - 并弹出提示框
const driver =newDriver();
driver.highlight({element:'#some-element',popover:{title:'Did you know?',description:'You can add HTML in title or description also!',}});
本文转载自: https://blog.csdn.net/u011159821/article/details/128364818
版权归原作者 假意诗人 所有, 如有侵权,请联系我们删除。
版权归原作者 假意诗人 所有, 如有侵权,请联系我们删除。