
RabbitMQ消息队列
- 消息中间件是位于两个或多个应用程序之间的中介软件,它允许应用程序相互通信和数据交换,而无需直接连接和交互。
- RabbitMQ 作为消息中间件,提供了这种消息传递的机制和基础架构,使得不同系统之间能够通过异步消息队列进行有效通信。
- 它是一个基于AMQP(Advanced Message Queuing Protocol,高级消息队列协议)协议的消息代理,提供了跨应用和跨服务的异步通信能力。
- RabbitMQ的核心概念包括:- 消息(Message):数据的最小单位,包含了消息头和消息体。- 队列(Queue):用于存储消息,等待被消费者接收和处理。- 交换器(Exchange):负责接收消息并将其路由到合适的队列,基于预定义的规则。 - 直接交换(Direct Exchange):基于路由键的精确匹配。- 主题交换(Topic Exchange):基于路由键的模式匹配。- 扇形交换(Fanout Exchange):广播消息到所有绑定的队列。- 首选交换(Headers Exchange):基于消息头进行匹配。(headers交换机和direct交换机完全一致,但性能差很多,目前几乎用不到了)- 绑定(Binding):定义交换器与队列之间的关系,确定消息的路由规则。- 路由键(Routing Key):用于在交换器和队列之间路由消息。- 消费者(Consumer):从队列中接收和处理消息的应用程序或服务。- 发布者(Producer):向交换器发送消息的应用程序或服务。
- RabbitMQ广泛用于构建分布式系统、微服务架构和事件驱动架构,以实现异步通信、负载分担、数据解耦和高可用性。
项目总结
- 添加依赖:在Spring Boot项目的
pom.xml文件中添加RabbitMQ的依赖- 配置RabbitMQ连接信息:在
application.properties或application.yml文件中配置RabbitMQ的连接信息,包括主机名、端口号、用户名、密码等信息。- 创建配置类:1. 使用
@Bean注解定义Exchange和Queue,并绑定它们的关系,以确保消息能够被正确路由和传递。2. 使用@Bean注入CachingConnectionFactory缓存 连接工厂对象,用于开启RabbitMQ的消息发送确认模式- 创建生产者:编写一个发送消息的生产者(Producer),可以是一个服务类或控制器方法。使用
RabbitTemplate来发送消息到RabbitMQ的Exchange。- 创建消费者:编写一个接收消息的消费者(Consumer),使用@RabbitListener监听指定的Queue,并处理接收到的消息,比如打印在控制台上。
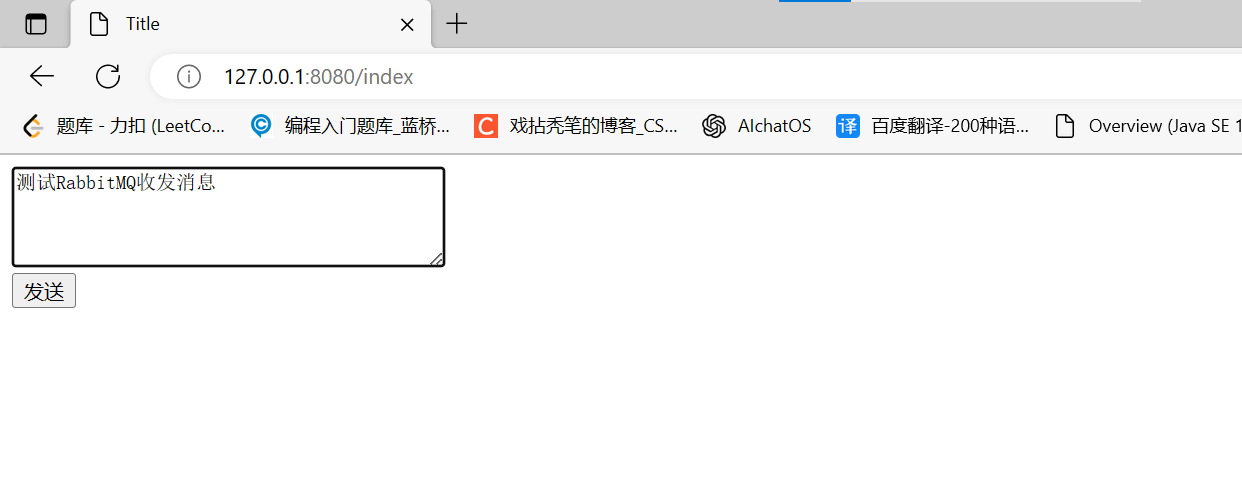
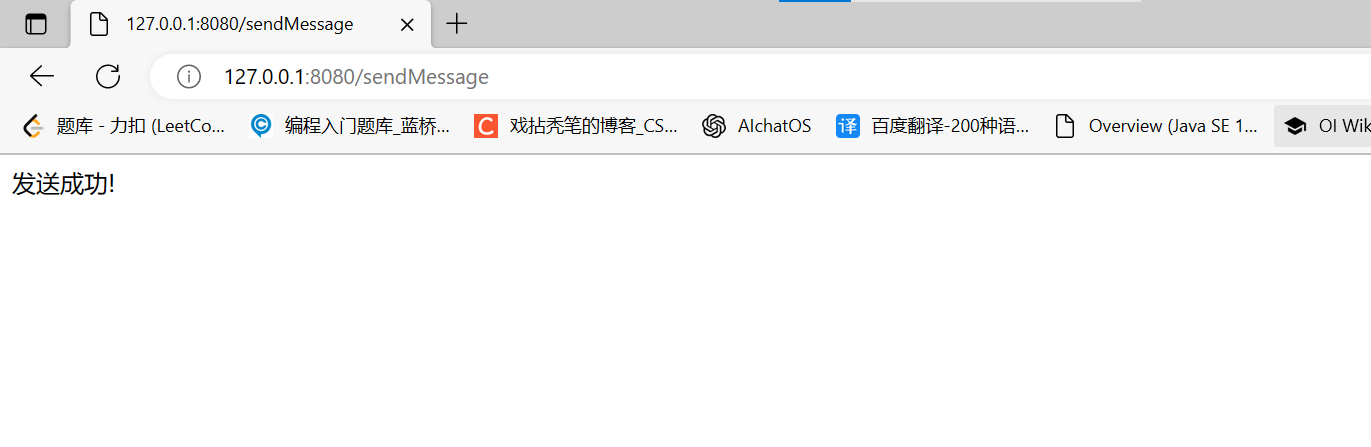
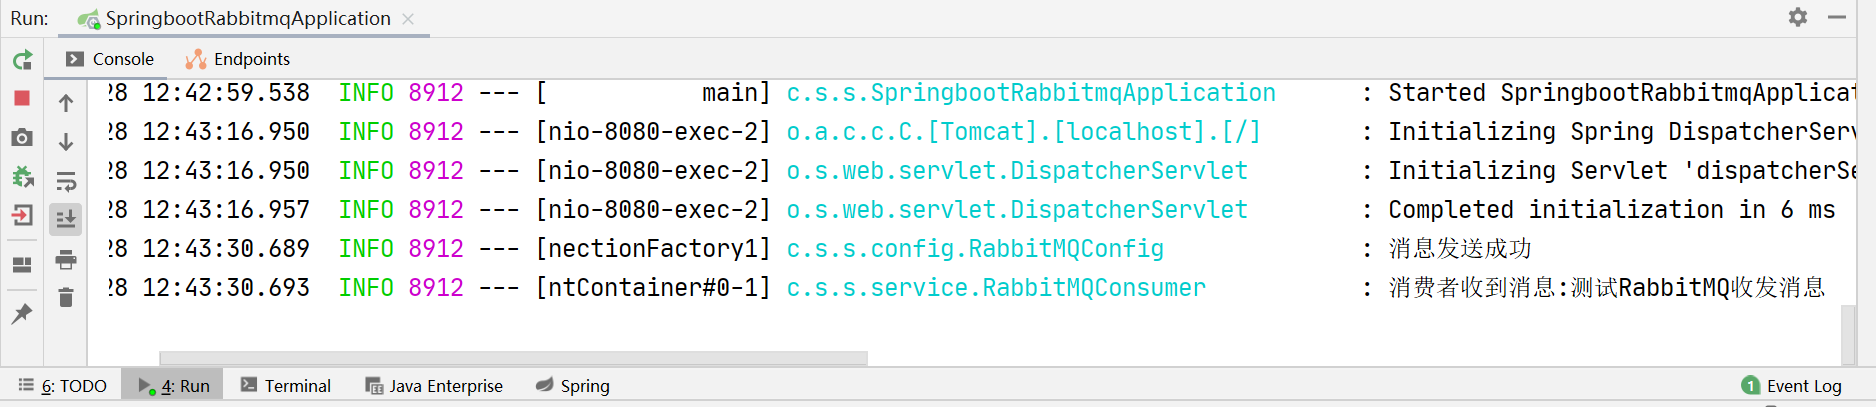
- 启动项目和RabbitMQ服务后,项目的工作流程:1. 打开浏览器访问页面,在文本域填写要发送信息,点击“发送”,2. 后端IndexController控制器接收到用户提交的消息后,由生产者将消息发送给RabbitMQ的交换机,RabbitMQ再将消息根据路由键路由到队列中,并且将结果反馈给服务器,服务器将打印”消息发送成功“的日志3. 消费者中监听此队列就会立刻收到并处理接收到的消息,打印到控制台上
自己从填写要发送的信息的地方开始分析,顺藤摸瓜,将项目的几个文件串连起来
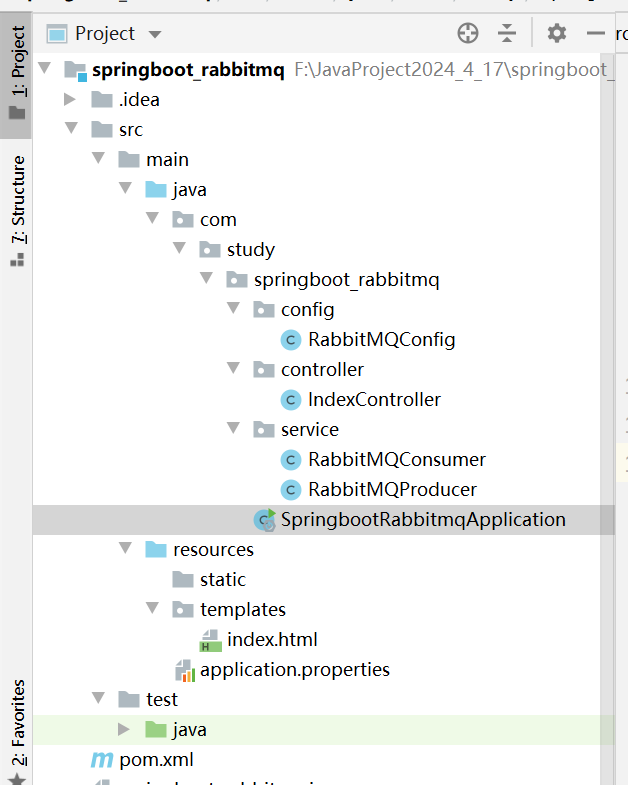
新建一个SpringBoot项目

项目结构:
pom.xml
<?xml version="1.0" encoding="UTF-8"?>
<project xmlns="http://maven.apache.org/POM/4.0.0" xmlns:xsi="http://www.w3.org/2001/XMLSchema-instance"
    xsi:schemaLocation="http://maven.apache.org/POM/4.0.0 https://maven.apache.org/xsd/maven-4.0.0.xsd">
    <modelVersion>4.0.0</modelVersion>
    <parent>
        <groupId>org.springframework.boot</groupId>
        <artifactId>spring-boot-starter-parent</artifactId>
        <version>2.3.12.RELEASE</version>
        <relativePath/> <!-- lookup parent from repository -->
    </parent>
    <groupId>com.study</groupId>
    <artifactId>springboot_rabbitmq</artifactId>
    <version>0.0.1-SNAPSHOT</version>
    <name>springboot_rabbitmq</name>
    <description>Demo project for Spring Boot</description>
    <properties>
        <java.version>8</java.version>
    </properties>
    <dependencies>
        <dependency>
            <groupId>org.springframework.boot</groupId>
            <artifactId>spring-boot-starter-amqp</artifactId>
        </dependency>
        <dependency>
            <groupId>org.springframework.boot</groupId>
            <artifactId>spring-boot-starter-thymeleaf</artifactId>
        </dependency>
        <dependency>
            <groupId>org.springframework.boot</groupId>
            <artifactId>spring-boot-starter-web</artifactId>
        </dependency>

        <dependency>
            <groupId>org.springframework.boot</groupId>
            <artifactId>spring-boot-starter-test</artifactId>
            <scope>test</scope>
        </dependency>
        <dependency>
            <groupId>org.springframework.amqp</groupId>
            <artifactId>spring-rabbit-test</artifactId>
            <scope>test</scope>
        </dependency>
    </dependencies>

    <build>
        <plugins>
            <plugin>
                <groupId>org.springframework.boot</groupId>
                <artifactId>spring-boot-maven-plugin</artifactId>
            </plugin>
        </plugins>
    </build>

</project>
application.properties配置文件
spring.rabbitmq.host=192.168.40.128
spring.rabbitmq.port=5672
spring.rabbitmq.username=admin
spring.rabbitmq.password=123456

# 指定队列,交换机,路由键的名称
#队列用于存储消息,生产者发送消息到队列,消费者从队列接收消息进行处理。
rabbit.queue.name=springboot.queue.test
#交换机负责将消息路由到一个或多个队列中,根据指定的路由键来确定消息的路由规则。
rabbit.exchange.name=springboot.exchange.test
#在消息发送时,会指定消息的路由键,交换机根据这个路由键来决定将消息路由到哪些队列中。
rabbit.routing.key=springboot.routingkey.test
index.html前端页面
<!DOCTYPE html>
<html lang="en">
<head>
    <meta charset="UTF-8">
    <title>Title</title>
</head>
<body>
    <!--发送后,会触发IndexController的sendMessage方法-->
    <form action="/sendMessage" method="post">
        <!--在文本域填写要发送的消息-->
        <textarea rows="4" cols="40" name="message"></textarea>
        <!--点击"发送"按钮-->
        <br><input type="submit" value="发送"/>
    </form>

</body>
</html>
RabbitMQConfig配置类
package com.study.springboot_rabbitmq.config;

import org.springframework.amqp.core.Binding;
import org.springframework.amqp.core.BindingBuilder;
import org.springframework.amqp.core.DirectExchange;
import org.springframework.amqp.core.Queue;
import org.springframework.beans.factory.annotation.Value;
import org.springframework.context.annotation.Bean;
import org.springframework.context.annotation.Configuration;

/**
 * 配置类: 绑定队列和交换器
 */
@Configuration
public class RabbitMQConfig {

    @Value("${rabbit.queue.name}")
    String queueName;

    @Value("${rabbit.exchange.name}")
    String exchangeName;

    @Value("${rabbit.routing.key}")
    String routingKey;

    @Bean()
    public Queue initQueue(){//创建队列
        return new Queue(queueName);
    }

    @Bean()
    public DirectExchange initDirectExchange(){//创建交换器
        return new DirectExchange(exchangeName);
    }

    @Bean
    public Binding bindingDirect(){//将队列与交换器绑定
        return BindingBuilder.bind(initQueue()).to(initDirectExchange()).with(routingKey);
    }
}
RabbitMQProducer生产者
package com.study.springboot_rabbitmq.service;

import org.springframework.amqp.rabbit.core.RabbitTemplate;
import org.springframework.beans.factory.annotation.Autowired;
import org.springframework.beans.factory.annotation.Value;
import org.springframework.stereotype.Service;

/**
 * 消息生产者
 */
@Service
public class RabbitMQProducer {

    @Autowired
    RabbitTemplate rabbitTemplate;

    //读取配置文件中的交换器名称和路由键名称
    @Value("${rabbit.exchange.name}")
    String exchangeName;

    @Value("${rabbit.routing.key}")
    String routingKey;

    //将消息发送给RabbitMQ的交换机,交换机通过路由键决定将消息路由到哪些队列
    public void send(String message){
        rabbitTemplate.convertAndSend(exchangeName,routingKey,message);
    }
}
RabbitMQConsumer消费者
package com.study.springboot_rabbitmq.service;

import org.slf4j.Logger;
import org.slf4j.LoggerFactory;
import org.springframework.amqp.rabbit.annotation.RabbitListener;
import org.springframework.stereotype.Service;

/**
 * 消息消费者
 */
@Service
public class RabbitMQConsumer {

    private static final Logger log= LoggerFactory.getLogger(RabbitMQConsumer.class);

    //使用@RabbitListener监听配置文件中的队列,当收到消息后,将其打印在控制台上
    @RabbitListener(queues = "${rabbit.queue.name}")
    public void getMessage(String message){
        log.info("消费者收到消息:{}",message);
    }
}
IndexController控制器
- 发送确认模式:在生产者向RabbitMQ发送消息后,RabbitMQ可以给生产者一个反馈消息,这个反馈消息中会包含接收是否成功、失败原因等一系列内容
package com.study.springboot_rabbitmq.config;

import org.slf4j.Logger;
import org.slf4j.LoggerFactory;
import org.springframework.amqp.core.*;
import org.springframework.amqp.rabbit.connection.CachingConnectionFactory;
import org.springframework.amqp.rabbit.connection.CorrelationData;
import org.springframework.amqp.rabbit.core.RabbitTemplate;
import org.springframework.beans.factory.annotation.Autowired;
import org.springframework.beans.factory.annotation.Value;
import org.springframework.cache.annotation.Caching;
import org.springframework.context.annotation.Bean;
import org.springframework.context.annotation.Configuration;

/**
 * 配置类: 绑定队列和交换器
 */
@Configuration
public class RabbitMQConfig {

    private static final Logger log= LoggerFactory.getLogger(RabbitMQConfig.class);

    @Autowired
    private CachingConnectionFactory connectionFactory;

    @Value("${rabbit.queue.name}")
    String queueName;

    @Value("${rabbit.exchange.name}")
    String exchangeName;

    @Value("${rabbit.routing.key}")
    String routingKey;

    @Bean()
    public Queue initQueue(){//创建队列
        return new Queue(queueName);
    }

    @Bean()
    public DirectExchange initDirectExchange(){//创建交换器
        return new DirectExchange(exchangeName);
    }

    @Bean
    public Binding bindingDirect(){//将队列与交换器绑定
        return BindingBuilder.bind(initQueue()).to(initDirectExchange()).with(routingKey);
    }

    //RabbitMQ收到消息后,把结果反馈给服务器,服务器将打印日志
    @Bean
    public RabbitTemplate rabbitTemplate(){
        //消息发送成功后触发确认方法
        connectionFactory.setPublisherConfirmType(CachingConnectionFactory.ConfirmType.CORRELATED);
        //消息发送失败后触发回调方法
        connectionFactory.setPublisherReturns(true);
        //通过连接工厂对象创建RabbitTemplate对象
        RabbitTemplate rabbitTemplate = new RabbitTemplate(connectionFactory);
        //若交换器无法匹配到指定队列,则取消发送消息
        rabbitTemplate.setMandatory(true);
        rabbitTemplate.setConfirmCallback(new RabbitTemplate.ConfirmCallback() {
            @Override
            public void confirm(CorrelationData correlationData, boolean ack, String cause) {//ack:RabbitMQ返回的应答
                if(ack){
                    log.info("消息发送成功");
                }else{
                    log.info("消息发送失败,原因: {}",cause);
                }
            }
        });
        rabbitTemplate.setReturnCallback(new RabbitTemplate.ReturnCallback() {
            @Override
            public void returnedMessage(Message message, int i, String s, String s1, String s2) {
                log.info("消息发送失败: {}",message);

            }
        });
        return rabbitTemplate;
    }
}
SpringbootRabbitmqApplication启动类
package com.study.springboot_rabbitmq;

import org.springframework.boot.SpringApplication;
import org.springframework.boot.autoconfigure.SpringBootApplication;

@SpringBootApplication
public class SpringbootRabbitmqApplication {

    public static void main(String[] args) {
        SpringApplication.run(SpringbootRabbitmqApplication.class, args);
    }

}
测试
开启RabbitMQ服务,启动项目
从Spring Boot项目的角度来看,无论RabbitMQ运行在Windows还是Linux上,整合RabbitMQ的方式都是基本一致的,只要你的Spring Boot应用程序连接到RabbitMQ服务器,并使用RabbitMQ客户端库进行通信即可

本文转载自: https://blog.csdn.net/weixin_72052233/article/details/139245231
版权归原作者 戏拈秃笔 所有, 如有侵权,请联系我们删除。
版权归原作者 戏拈秃笔 所有, 如有侵权,请联系我们删除。