本篇博文目录:
前言:
最近在回顾JavaSE部分的知识,对一些薄弱的知识进行记录,学习方式,通过视频和图书的进行学习,视频看B站韩顺平老师的【韩顺平讲Java】一天学会线程 Thread Synchronized 互斥锁 进程 并行 并发 死锁等,图书看Java核心技术 卷I 基础知识(原书第10版)。
【韩顺平讲Java】一天学会线程 Thread Synchronized 互斥锁 进程 并行 并发 死锁等:https://www.bilibili.com/video/BV1zB4y1A7rb?spm_id_from=333.999.0.0
一.线程相关概念
1.什么是程序(program)
是为完成特定任务、用某种语言编写的一组指令的集合。简单的说就是我们写的代码(数据结构+算法)。
备注:软件不等于程序,软件可以简单理解为由相关开发文档和程序组成
2.什么是进程
① 进程是指运行中的程序,比如我们使用QQ,就启动了一个进程,操作系统就会为该进程分配内存空间。当我们使用迅雷,又启动了一个进程,操作系统将为迅雷分配新的内存空间。
② 进程是程序的一次执行过程,或是正在运行的一个程序。是动态过程:有它自身的产生、存在和消亡的过程。
③ **进程是系统进⾏资源分配和调度的独⽴单位,每⼀个进程都有它⾃⼰的内存空间和系统资源。**

3.什么是线程
为了提⾼系统的执⾏效率,减少处理机的空转时间和调度切换的时间,以及便于系统管理,所以有了线程,线程取代了进程调度的基本功能(线程由进程创建,是进程的一个实体)。
4.单线程和多线程
单线程:
单线程:同一个时刻,只允许执行一个线程
多线程:
多线程:同一个时刻,可以执行多个线程,比如:一个qq进程,可以同时打开多个聊天窗口,一个迅雷进程,可以同时下载多个文件
5.并发和并行
并发:
并发:同一个时刻,多个任务交替执行,造成一种“貌似同时”的错觉,简单的说单核cpu实现的多任务就是并发。

并行:
并行:同一个时刻,多个任务同时执行。多核cpu可以实现并行。

二.线程的三种实现方式
创建线程的方式:
- 通过重写Runnable 接口的run方法;
- 通过继承 Thread 类,重写run方法;
- 通过 Callable 和 Future 创建线程。
方式一(通过重写Runnable 接口的run方法)
publicclassRunnableTestimplementsRunnable{@Overridepublicvoidrun(){for(int i =1; i <=10; i++){System.out.println("执行方式一:执行第"+ i +"次");}}}classTest{publicstaticvoidmain(String[] args){// 方式一Thread thread =newThread(newRunnableTest());
        thread.start();// 方式二Thread thread1 =newThread(()->{for(int i =1; i <=10; i++){System.out.println("执行方式二:执行第"+ i +"次");}});
        thread1.start();}}
备注: **
()->{}
** 这种写法是Java8的新特性Lambda表达式
运行效果: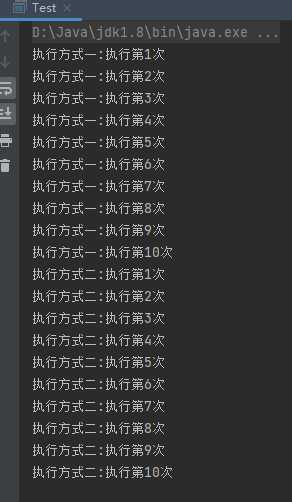
方式二(通过继承 Thread 类,重写run方法):
classThread_NEWextendsThread{@Overridepublicvoidrun(){// 重写run方法for(int i =1; i <=10; i++){System.out.println("执行方式三:执行第"+ i +"次");}}}classTest2{publicstaticvoidmain(String[] args){Thread_NEW thread_new =newThread_NEW();
        thread_new.start();}}
运行效果: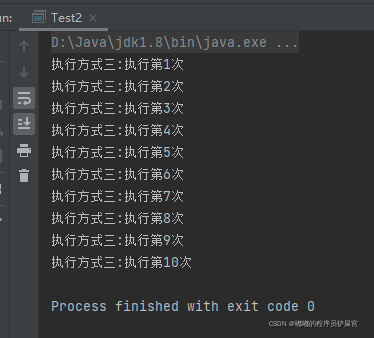
分析方式一和方式二:
线程通过start()方法启动,实际上该方法调用的是start0(),该方法被native关键字修饰,表示该方法是一个外部方法。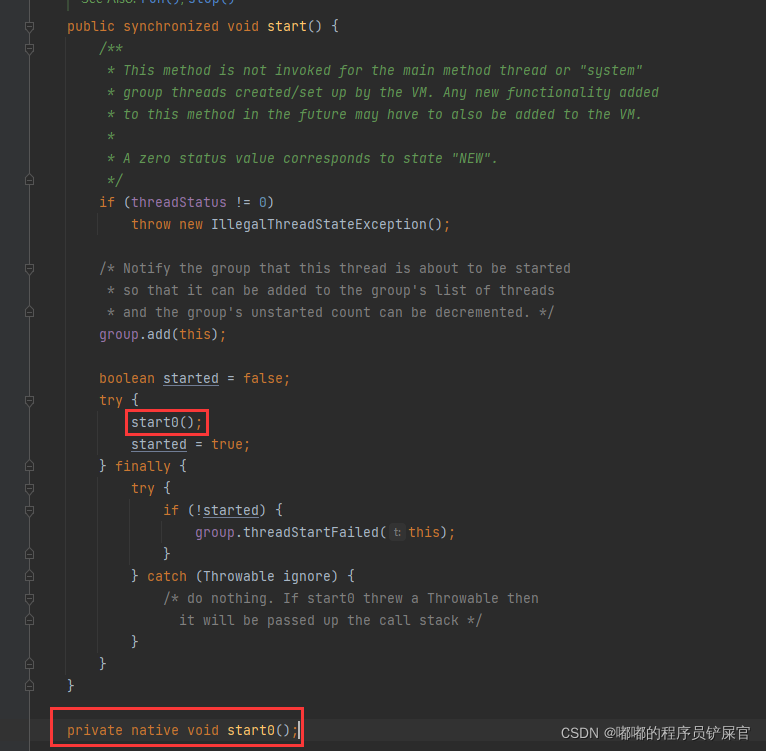
start()方法调用start0()方法后,该线程并不一定会立马执行,只是将线程变成了可运行状态。具体什么时候执行,取决于CPU,由CPU统一调度。
线程的执行方法体就是Runnable接口的run方法(下面的代码在Thread类中)
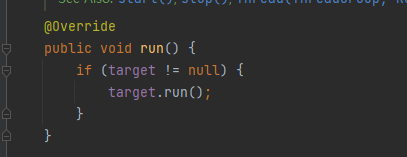
我们需要执行的内容,只需要重写Runnable接口的run方法,在run方法中编写我们要执行的内容即可
方式一和方式二区别:
① 从java的设计来看,通过继承Thread或者实现Runnable接口来创建线程本质上没有区别,从jdk帮助文档我们可以看到Thread类本身就实现了Runnable接口。
② 实现Runnable接口方式更加适合多个线程共享一个资源的情况,并且避免了单继承的限制,建议使用Runnable。
方式三(通过 Callable 和 Future 创建线程):
classTest3{publicstaticvoidmain(String[] args)throwsExecutionException,InterruptedException{FutureTask futureTask =newFutureTask(newRunnableTest(),22);
        futureTask.run();System.out.println("返回结果:"+futureTask.get());// 获取返回结果FutureTask<Boolean> futureTask1 =newFutureTask<>(newCallable(){@OverridepublicObjectcall()throwsException{for(int i =1; i <=10; i++){System.out.println("执行方式四:执行第"+ i +"次");}returntrue;}});
        futureTask1.run();System.out.println("返回结果:"+ futureTask1.get());}}
运行效果:
FutureTask 与Future 和Runnable的关系图如下:
进入到FutureTask的源码中,右击鼠标选择Diagrams,选择show Diagram…
从下图可知FutureTask是RunnableFuture接口的实现类,该接口继承 **
Runnable
** 和 **
Future<V>
** 接口
分析方式三:
FutureTask类通过Runnable接口进行初始化实际上还是在初始化 Callable
通过 **
Executors.callable(runnable, result);
** 获取Callable
FutureTask类可以通过get()方法获取线程中方法体的返回值 **
outcome
** ,如果初始化FutureTask的时候传递的是Runnable接口,通过get()方法获取的就是传入的result。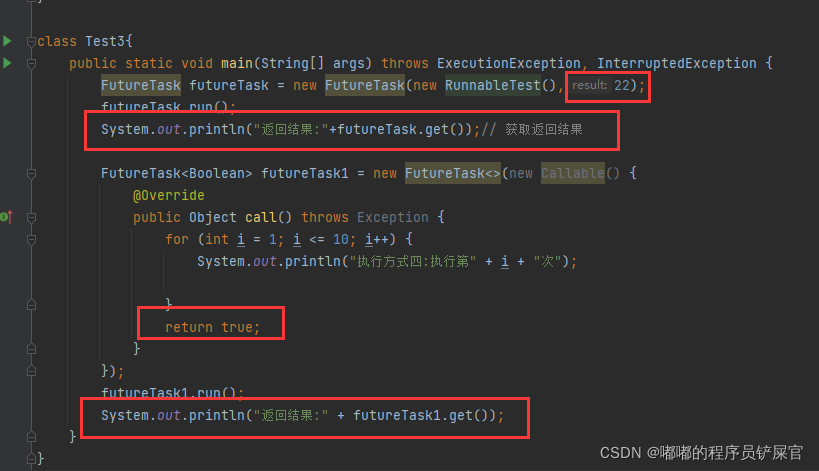

FutureTask通过run()方法开启线程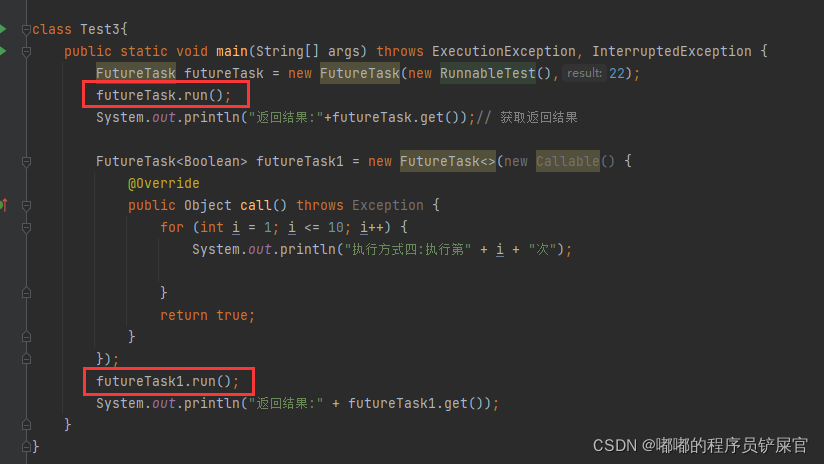
在执行run()方法的时候调用call()执行方法体,并将返回值赋值给result,然后通过set(result)初始化outcome

三.线程的终止
① 当线程完成任务后,会自动退出。
② 还可以通过使用变量来控制run方法退出的方式停止线程,即通知方式
需求:主线程休眠1s之后停止子线程运行,实现代码如下:
classRunnableControllerimplementsRunnable{// 定义一个线程状态标识privateboolean start;privateint i;publicRunnableController(){this.start =true;}@Overridepublicvoidrun(){while(start){++i;System.out.println("执行方式一:执行第"+ i +"次");}}// 通过set进行属性设置publicvoidsetStart(boolean start){this.start = start;}}classTest4{publicstaticvoidmain(String[] args)throwsInterruptedException{RunnableController runnableController =newRunnableController();Thread thread =newThread(runnableController);
        thread.start();// 1s钟后停止线程Thread.sleep(1000);
        runnableController.setStart(false);}}
运行效果: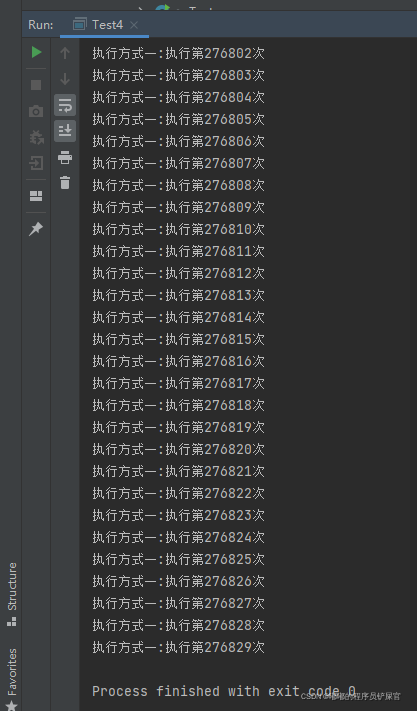
四.线程常用方法
1.第一组常用方法

- setName(),getName(),getPriority(),setPriority()
publicclassThreadMethod{publicstaticvoidmain(String[] args){Thread thread =newThread(()->System.out.println("当前线程名称:"+Thread.currentThread().getName()+"该线程的优先级:"+Thread.currentThread().getPriority()));
        thread.setName("线程1");
        thread.setPriority(1);// 1~10Thread thread2 =newThread(()->System.out.println("当前线程名称:"+Thread.currentThread().getName()+"该线程的优先级:"+Thread.currentThread().getPriority()));
        thread2.setName("线程2");
        thread2.setPriority(10);// 1~10Thread thread3 =newThread(()->System.out.println("当前线程名称:"+Thread.currentThread().getName()+"该线程的优先级:"+Thread.currentThread().getPriority()));
        thread2.setName("线程3");

        thread.start();
        thread2.start();
        thread3.start();}}
运行效果: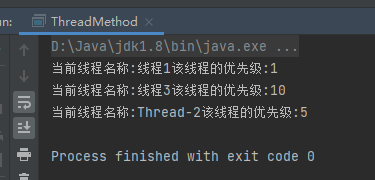
优先级必须设置在1~10闭区间,不然会引发 **
IllegalArgumentException
** 异常,数值越大优先级越高,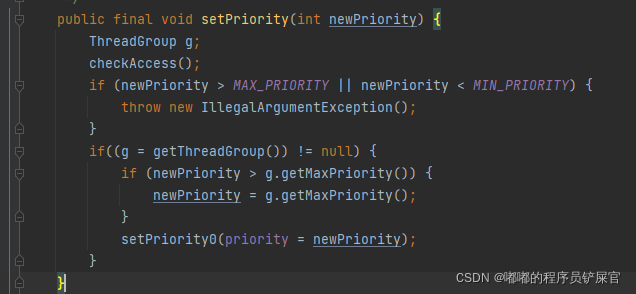
默认优先级为5,最小优先级为1,最大优先级为10
优先级越高并不是一定先执行,只是获得更多的执行机会
@Testpublicvoidtest(){Thread.currentThread().setPriority(6);for(int j =0; j <50; j++){if(j ==10){Thread thread1 =newThread(()->{for(int i =0; i <50; i++){System.out.println("优先级为---------"+Thread.currentThread().getPriority());}});
                thread1.setPriority(1);
                thread1.start();}elseif(j ==20){Thread thread2 =newThread(()->{for(int i =0; i <50; i++){System.out.println("优先级为---------"+Thread.currentThread().getPriority());}});
                thread2.setPriority(10);
                thread2.start();}}}
运行效果: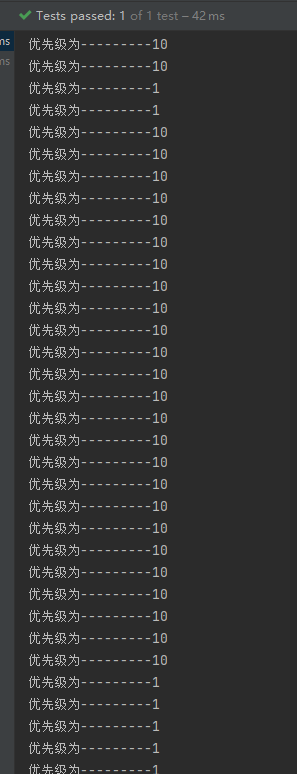
- run()
**
注意:执行run()方法并不是开启线程,只是通过对象调用run()方法!
**
@Testpublicvoidtest2(){Thread thread =newThread(()->System.out.println("-------调用run方法-----"+Thread.currentThread().getName()));
        thread.run();}
运行效果: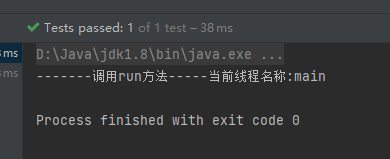
- interrupt
中断线程,但并没有真正的结束线程。所以一般用于中断正在休眠线程
publicclassThread_01extendsThread{@Overridepublicvoidrun(){for(int i =0; i <100; i++){System.out.println(Thread.currentThread().getName()+"吃包子-----------------"+i);}try{System.out.println(Thread.currentThread().getName()+"休眠中----------");Thread.sleep(20000);}catch(InterruptedException e){// 当该线程执行到一个interrupt方法时,就会catch一个异常,可以加入自己的业务代码System.out.println(Thread.currentThread().getName()+"被interrupt了");}}@Testpublicvoidtest3()throwsInterruptedException{Thread_01 thread_01 =newThread_01();
        thread_01.setPriority(Thread.MIN_PRIORITY);
        thread_01.start();Thread.sleep(3000);
        thread_01.interrupt();}}
运行效果:
2.第二组常用方法

完成需求代码:
publicclassThread_02extendsThread{@Overridepublicvoidrun(){for(int i =0; i <=10; i++){try{Thread.sleep(50);}catch(InterruptedException e){
                e.printStackTrace();}System.out.println("JoinThread----------------"+i);}}@Testpublicvoidtest4()throwsInterruptedException{Thread_02 thread_02 =newThread_02();
        thread_02.start();
        thread_02.join();// 插队for(int i =0; i <=20; i++){Thread.sleep(50);System.out.println("张三丰"+i);}}}
运行效果:
五.用户线程和守护线程
用户线程:
用户线程:也叫工作线程,当线程的任务执行完或通知方式结束
守护线程:
守护线程:一般是为工作线程服务的,当所有的用户线程结束,守护线程自动结束,常见的守护线程,垃圾回收机制。
通过 **
setDaemon(true);
** 设置该线程为守护线程,实例代码如下:
@Testpublicvoidtest5()throwsInterruptedException{Thread thread =newThread(()->{try{while(true){System.out.println("小偷正在偷钱..");Thread.sleep(50);}}catch(InterruptedException e){
                e.printStackTrace();}});// 将thread设置为守护线程
        thread.setDaemon(true);
        thread.start();for(int i =0; i <50; i++){System.out.println("警察正在来的路上.....");Thread.sleep(50);}System.out.println("警察赶到,小偷被抓,小偷停止偷钱");}
运行效果:
六.线程生命周期
JDK 中用 Thread.State 枚举表示了线程的几种状态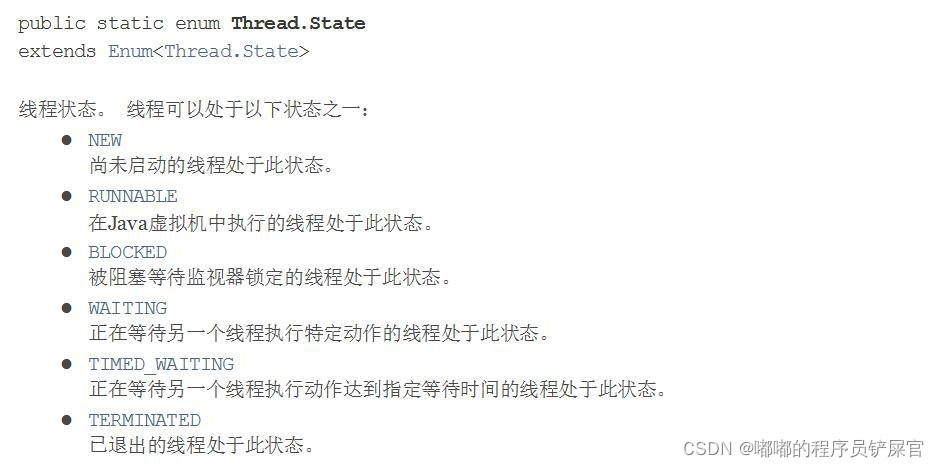
具体代码如下:
线程状态转换图
下面的内容来源于:https://www.pdai.tech/md/java/thread/java-thread-x-thread-basic.html
新建(New) 创建后尚未启动。
可运行(Runnable) 可能正在运行,也可能正在等待 CPU 时间片。 包含了操作系统线程状态中的 Running 和 Ready。
阻塞(Blocking) 等待获取一个排它锁,如果其线程释放了锁就会结束此状态。
无限期等待(Waiting) 等待其它线程显式地唤醒,否则不会被分配 CPU 时间片。
进入方法退出方法没有设置 Timeout 参数的 Object.wait() 方法Object.notify() / Object.notifyAll()没有设置 Timeout 参数的 Thread.join() 方法被调用的线程执行完毕LockSupport.park() 方法-限期等待(Timed Waiting) 无需等待其它线程显式地唤醒,在一定时间之后会被系统自动唤醒。 调用 Thread.sleep() 方法使线程进入限期等待状态时,常常用“使一个线程睡眠”进行描述。 调用 Object.wait() 方法使线程进入限期等待或者无限期等待时,常常用“挂起一个线程”进行描述。 睡眠和挂起是用来描述行为,而阻塞和等待用来描述状态。 阻塞和等待的区别在于,阻塞是被动的,它是在等待获取一个排它锁。而等待是主动的,通过调用 Thread.sleep() 和 Object.wait() 等方法进入。
进入方法退出方法Thread.sleep() 方法时间结束设置了 Timeout 参数的 Object.wait() 方法时间结束 / Object.notify() / Object.notifyAll()设置了 Timeout 参数的 Thread.join() 方法时间结束 / 被调用的线程执行完毕LockSupport.parkNanos() 方法-LockSupport.parkUntil() 方法-死亡(Terminated) 可以是线程结束任务之后自己结束,或者产生了异常而结束。
七.线程同步
什么是线程同步:
① 在多线程编程,一些敏感数据不允许被多个线程同时访问,此时就使用同步访问技术,保证数据在任何同一时刻,最多有一个线程访问,以保证数据的完整性。
② 也可以这里理解:线程同步,即当有一个线程在对内存进行操作时,其他线程都不可以对这个内存地址进行操作,直到该线程完成操作,其他线程才能对该内存地址进行操作.。
同步具体方法使用Synchronized关键字:
同步原理:
类似于生活中,在寝室上厕所,一次进入一个人(线程),等线程出来之后,再放其他线程进入(这里包括从厕所出来的线程),进入就关门(上锁,互斥锁),出来开门。

需求:网上售票,一段时间同时有多人进行购票,要保证同一张票不能被多人购买,造成票数出现负数情况。
出现票数负数的代码:
packagecom.zm.synchronization;publicclassSynChronZedTest{publicstaticvoidmain(String[] args){RunnableNew runnableNew =newRunnableNew();Thread thread =newThread();
        thread.setName("售票窗口1");
        thread.start();Thread thread2 =newThread(runnableNew);
        thread2.setName("售票窗口2");
        thread2.start();Thread thread3 =newThread(runnableNew);
        thread3.setName("售票窗口3");
        thread3.start();Thread thread4 =newThread(runnableNew);
        thread4.setName("售票窗口4");
        thread4.start();}}classRunnableNewimplementsRunnable{privateInteger tick =50;@Overridepublicvoidrun(){while(true){if(tick <=0){System.out.println("售票结束");break;}try{Thread.sleep(50);}catch(InterruptedException e){
                e.printStackTrace();}// 进行出售System.out.println(Thread.currentThread().getName()+"售出,还剩票数"+(--tick));}}}

改进使用同步代码块:
packagecom.zm.synchronization;publicclassSynChronZedTest{publicstaticvoidmain(String[] args){RunnableNew runnableNew =newRunnableNew();Thread thread =newThread();
        thread.setName("售票窗口1");
        thread.start();Thread thread2 =newThread(runnableNew);
        thread2.setName("售票窗口2");
        thread2.start();Thread thread3 =newThread(runnableNew);
        thread3.setName("售票窗口3");
        thread3.start();Thread thread4 =newThread(runnableNew);
        thread4.setName("售票窗口4");
        thread4.start();}}classRunnableNewimplementsRunnable{privateInteger tick =50;@Overridepublicvoidrun(){while(true){synchronized(RunnableNew.class){if(tick <=0){System.out.println("售票结束");break;}try{Thread.sleep(50);}catch(InterruptedException e){
                    e.printStackTrace();}// 进行出售System.out.println(Thread.currentThread().getName()+"售出,还剩票数"+(--tick));}}}}
运行效果: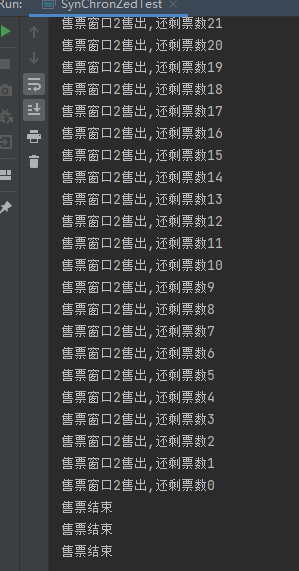
改进使用同步方法:
packagecom.zm.synchronization;publicclassSynChronZedTest{publicstaticvoidmain(String[] args){RunnableNew runnableNew =newRunnableNew();Thread thread =newThread();
        thread.setName("售票窗口1");
        thread.start();Thread thread2 =newThread(runnableNew);
        thread2.setName("售票窗口2");
        thread2.start();Thread thread3 =newThread(runnableNew);
        thread3.setName("售票窗口3");
        thread3.start();Thread thread4 =newThread(runnableNew);
        thread4.setName("售票窗口4");
        thread4.start();}}classRunnableNewimplementsRunnable{privateboolean tage =true;privateInteger tick =50;@Overridepublicvoidrun(){while(tage){sell();}}privatesynchronizedvoidsell(){if(tick <=0){System.out.println("售票结束");this.tage =false;return;}try{Thread.sleep(50);}catch(InterruptedException e){
            e.printStackTrace();}// 进行出售System.out.println(Thread.currentThread().getName()+"售出,还剩票数"+(--tick));}}
运行效果:
其实上面二种方式本质是一样的:
使用this进行上锁和未用static修饰的同步方法进行上锁本质上是一致的都是对当前对象进行上锁(上面锁的就是runnableNew对象,四个线程都是使用该对象进行上锁可以保证线程同步)
为了验证上面的说法,这里我们给四个线程分别传递不同的RunnableNew对象,该对象中tick通过static进行修饰保证数据共享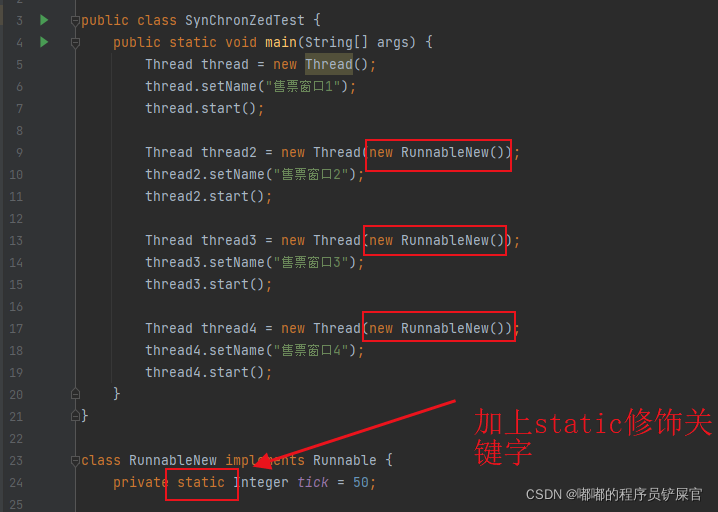
详细代码如下:
packagecom.zm.synchronization;publicclassSynChronZedTest{publicstaticvoidmain(String[] args){Thread thread =newThread();
        thread.setName("售票窗口1");
        thread.start();Thread thread2 =newThread(newRunnableNew());
        thread2.setName("售票窗口2");
        thread2.start();Thread thread3 =newThread(newRunnableNew());
        thread3.setName("售票窗口3");
        thread3.start();Thread thread4 =newThread(newRunnableNew());
        thread4.setName("售票窗口4");
        thread4.start();}}classRunnableNewimplementsRunnable{privatestaticInteger tick =50;@Overridepublicvoidrun(){while(true){synchronized(this){if(tick <=0){System.out.println("售票结束");break;}try{Thread.sleep(50);}catch(InterruptedException e){
                    e.printStackTrace();}// 进行出售System.out.println(Thread.currentThread().getName()+"售出,还剩票数"+(--tick));}}}}
运行效果( **
再次运行会发现票数出现负数
** ):
上面的操作类似于下图:
改进方法,同步代码块中将this换成RunnableNew.class或同步方法加上static关键字(提高锁对象的作用域)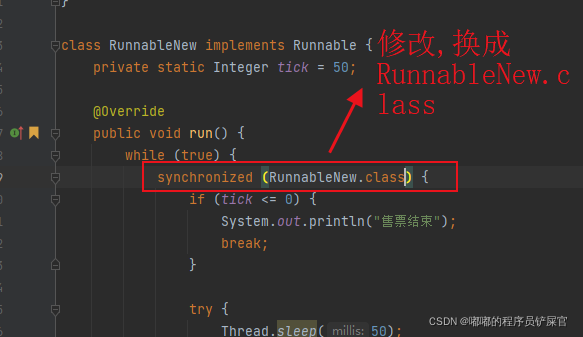
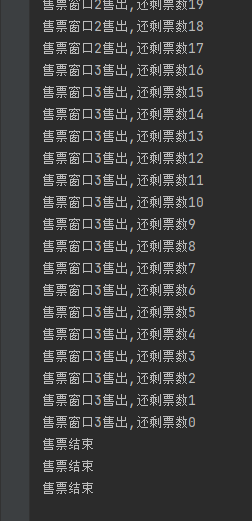
运行效果( **
问题解决
** ):
上面的操作类似与下图:
实际上像上面这种操作,效率是非常低的,运行多次发现大多数情况下只有一个线程在跑
八.线程死锁
1.什么是死锁
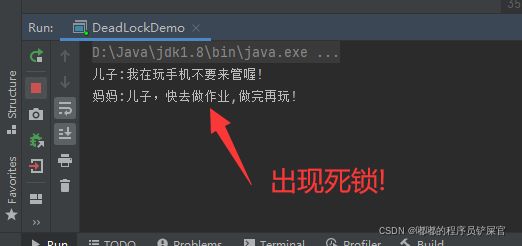
多个线程都占用了对方的锁资源,但不肯相让,导致了死锁,在编程是一定要避免死锁的发生.
应用案例:
实例代码如下:
packagecom.zm.synchronization;importorg.junit.Test;publicclassDeadLockDemoextendsThread{privatestaticObject playPhone =newObject();privatestaticObject doHomerWork =newObject();privateboolean tage;publicDeadLockDemo(boolean tage){this.tage = tage;}@Overridepublicvoidrun(){if(tage){// 先玩手机再做作业synchronized(playPhone){System.out.println(Thread.currentThread().getName()+":我在玩手机不要来管喔!");synchronized(doHomerWork){System.out.println(Thread.currentThread().getName()+":妈妈,我手机玩好啦,开始做作业啦");}}}else{synchronized(doHomerWork){System.out.println(Thread.currentThread().getName()+":儿子,快去做作业,做完再玩!");synchronized(playPhone){System.out.println(Thread.currentThread().getName()+":儿子真乖,去玩会手机吧");}}}}publicstaticvoidmain(String[] args){DeadLockDemo mom =newDeadLockDemo(false);
        mom.setName("妈妈");DeadLockDemo son =newDeadLockDemo(true);
        son.setName("儿子");
        mom.start();
        son.start();}}
运行效果( **
造成了死锁
** ):
2.释放锁
下面操作会释放锁:
下面操作不会释放锁:
版权归原作者 嘟嘟的程序员铲屎官 所有, 如有侵权,请联系我们删除。