
c#是微软提供的用于开发windows软件的开发语言,可以使用其快速的实现windows桌面软件的开发。这里基于C#开发了一款简单的绘图软件,可以用于绘制矩形、多边形的绘制(基于这些可以实现自己的数据标注软件),还实现了画笔、橡皮擦功能。开发C#软件通常使用Visual Studio软件开发,这里使用的是vs2019。
1、基本概念
使用c#实现绘图软件需要了解c#桌面软件所具备的控件(如按钮、文本框、进度条、下拉列表、图片显示控件等)和各种相关事件(如鼠标按下、鼠标拖动、控件点击、控件重绘等事件)。
1.1 相关桌面控件介绍
开发绘图软件需要用到的桌面控件有:按钮(Button)、文本框(Label)、下拉列表(ComboBox)、进度条(trackBar)、图片显示控件(PictureBox)等。博主使用以上控件实现了下图的操作界面,这里需要补充的是博主使用button来显示颜色(设置button的文本为空,然后修改了它的颜色),如果点击该按钮则会弹出颜色选择框。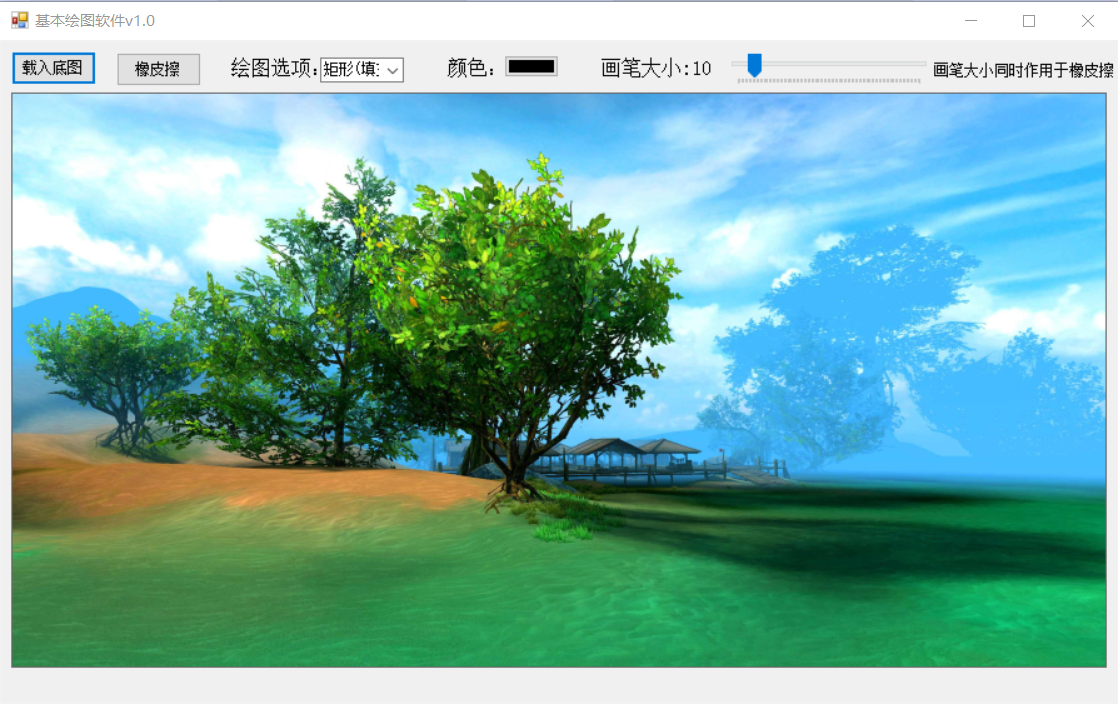
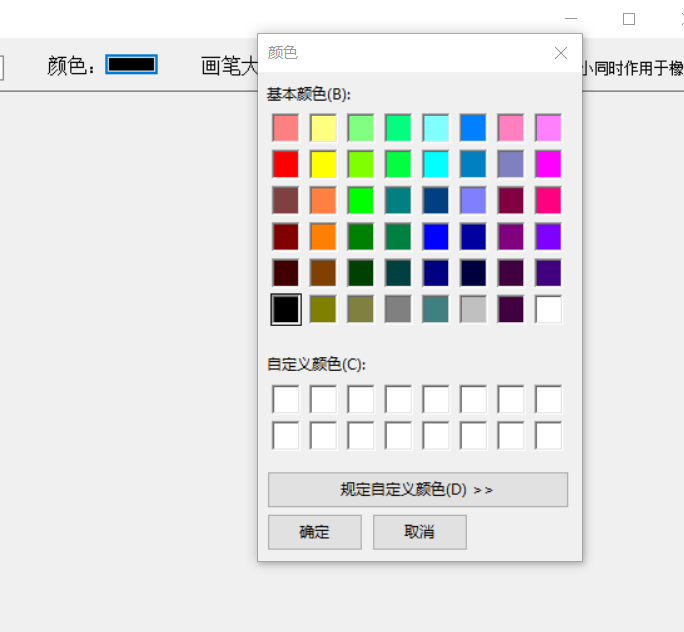
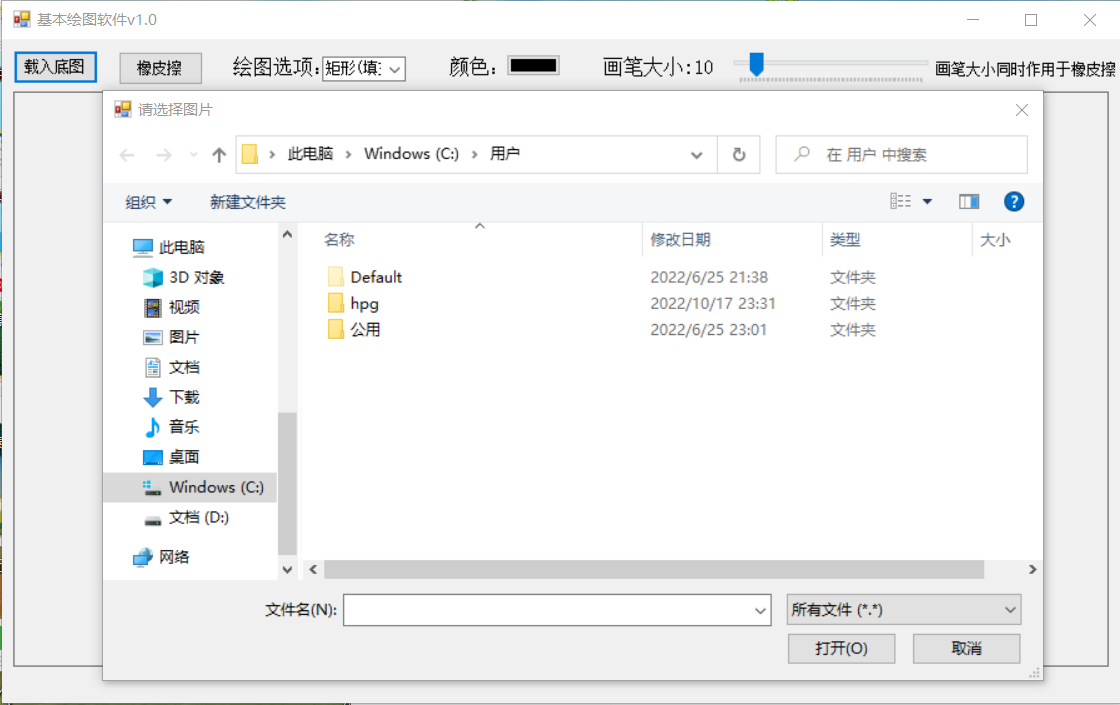
除了上述的控件外,还有一些对话框,如颜色对话框(用于选择颜色),文件选择框(用于选择文件)。
创建颜色对话框
ColorDialog cl =newColorDialog();if(cl.ShowDialog()== System.Windows.Forms.DialogResult.OK){
                fill_color = Color.FromArgb(cl.Color.A, cl.Color.R, cl.Color.G, cl.Color.B);
                btn_color.BackColor = fill_color;
                fill_brush =newSolidBrush(fill_color);
                line_color =newPen(fill_brush);}
创建文件选择框
    OpenFileDialog ofd = new OpenFileDialog();
    ofd.Title = "请选择图片";
    ofd.Filter = "所有文件|*.*";
    ofd.InitialDirectory = @"C:\Users";
    ofd.Multiselect = false;
    if (ofd.ShowDialog() == DialogResult.OK)
    {
        string image_path = ofd.FileName;
        bg_image = Image.FromFile(image_path);
        bg_image = ImgUtils.resizeImg(bg_image, pictureBox1.Width, pictureBox1.Height);
        //tmp_bitmap.Save("finish.bmp");
        pictureBox1.Image = bg_image;
    }
1.2 桌面控件相关事件
通过监听桌面控件的相关事件可以执行相应的代码流程,如点击打开文件,则弹出文件选择框,点击设置颜色则弹出颜色选择框,拖动进度条则改变画笔和橡皮擦的大小等等。
button点击事件
button通常是设置点击事件(Click事件),在软件设计界面双击特定按钮即可转到其点击事件的编辑代码。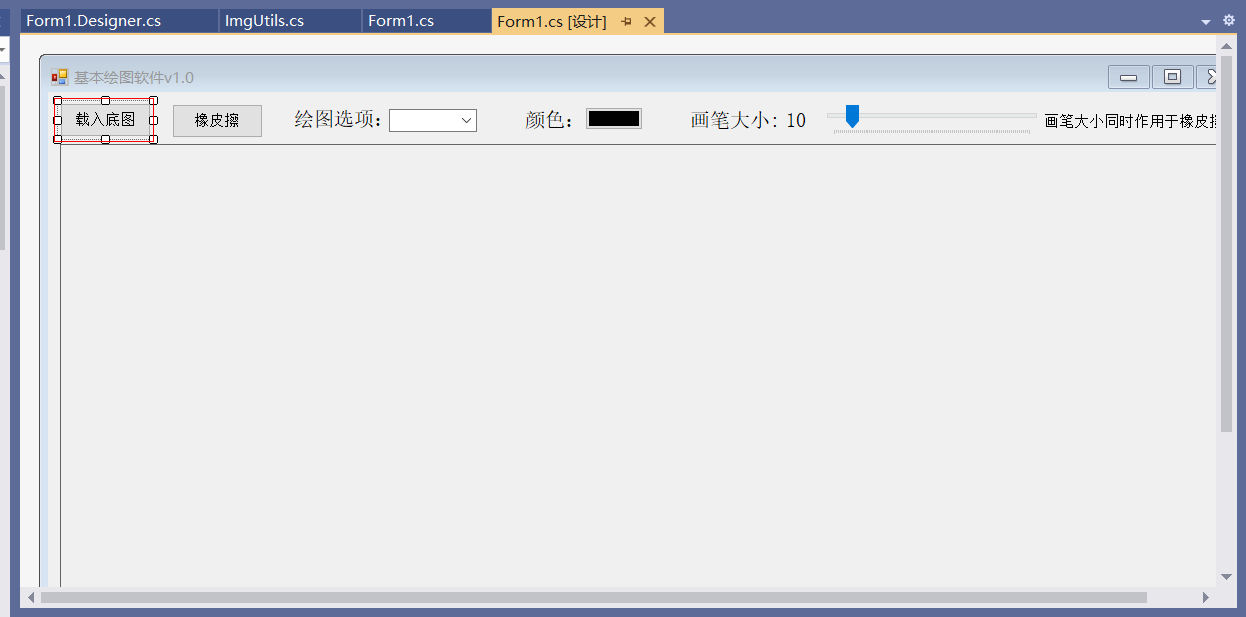
上图中“载入底图”按钮是用于选择图片,并加载到绘图框中,因此实现代码如下:
privatevoidbtn_load_bg_Click(object sender,EventArgs e){OpenFileDialog ofd =newOpenFileDialog();
    ofd.Title ="请选择图片";
    ofd.Filter ="所有文件|*.*";
    ofd.InitialDirectory =@"C:\Users";
    ofd.Multiselect =false;if(ofd.ShowDialog()== DialogResult.OK){string image_path = ofd.FileName;
        bg_image = Image.FromFile(image_path);
        bg_image = ImgUtils.resizeImg(bg_image, pictureBox1.Width, pictureBox1.Height);//tmp_bitmap.Save("finish.bmp");
        pictureBox1.Image = bg_image;}}
ComboBox选项切换事件
ComboBox选项切换事件也就是SelectedIndexChanged事件,设置这个事件需要先选择空间,然后点击图中标号为2的雷电符号(设置控件属性),找到SelectedIndexChanged然后在其空白处(图中绿色框处)双击,即可进入设置SelectedIndexChanged事件(获取ComboBox所选中的文本,然后修改相关变量);。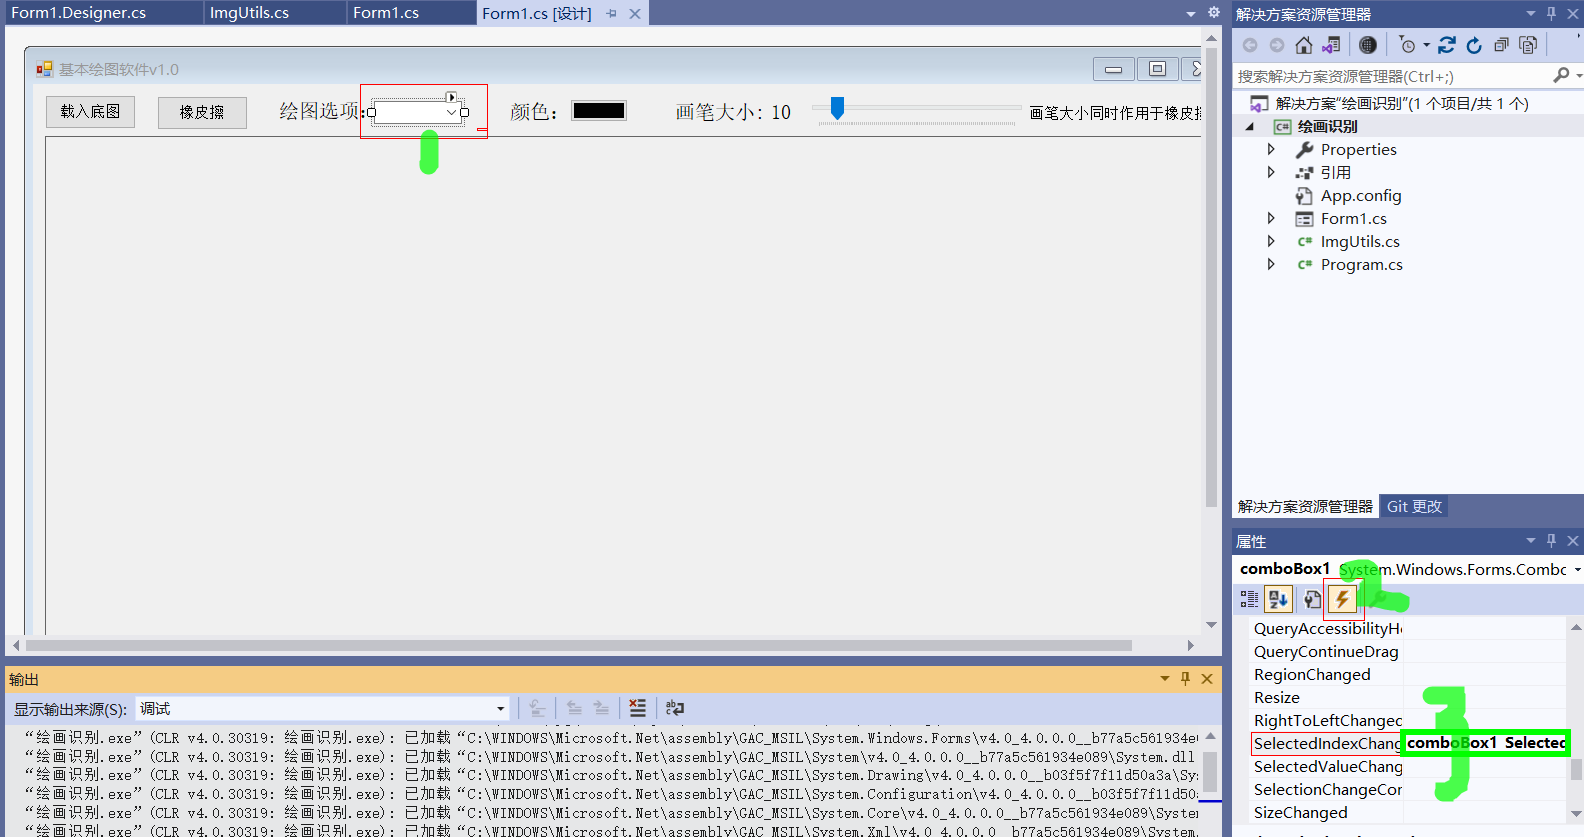
设置ComboBox的可选项需要先选中控件,然后单击右键,弹出选择框,接着点击“编辑项”,即可进入以下界面。这里博主设置了5个选项,分别为:矩形(填充)、矩形、多边形(填充)、多边形、画笔。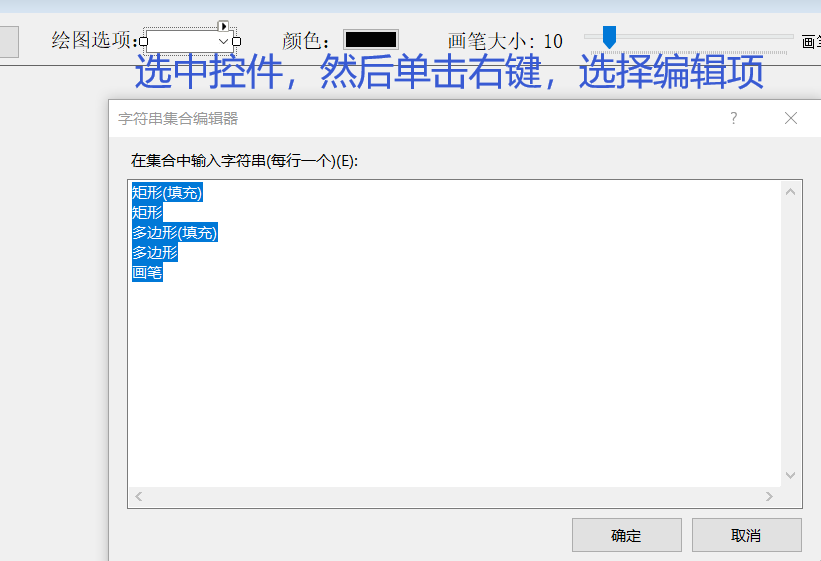
TrackBar的拖动事件
trackBar的拖动事件也就是Scroll事件,依照下图所点击的顺序,找到Scroll双击即可设置拖动事件(获取trackBar表示的数值,然后修改相关变量);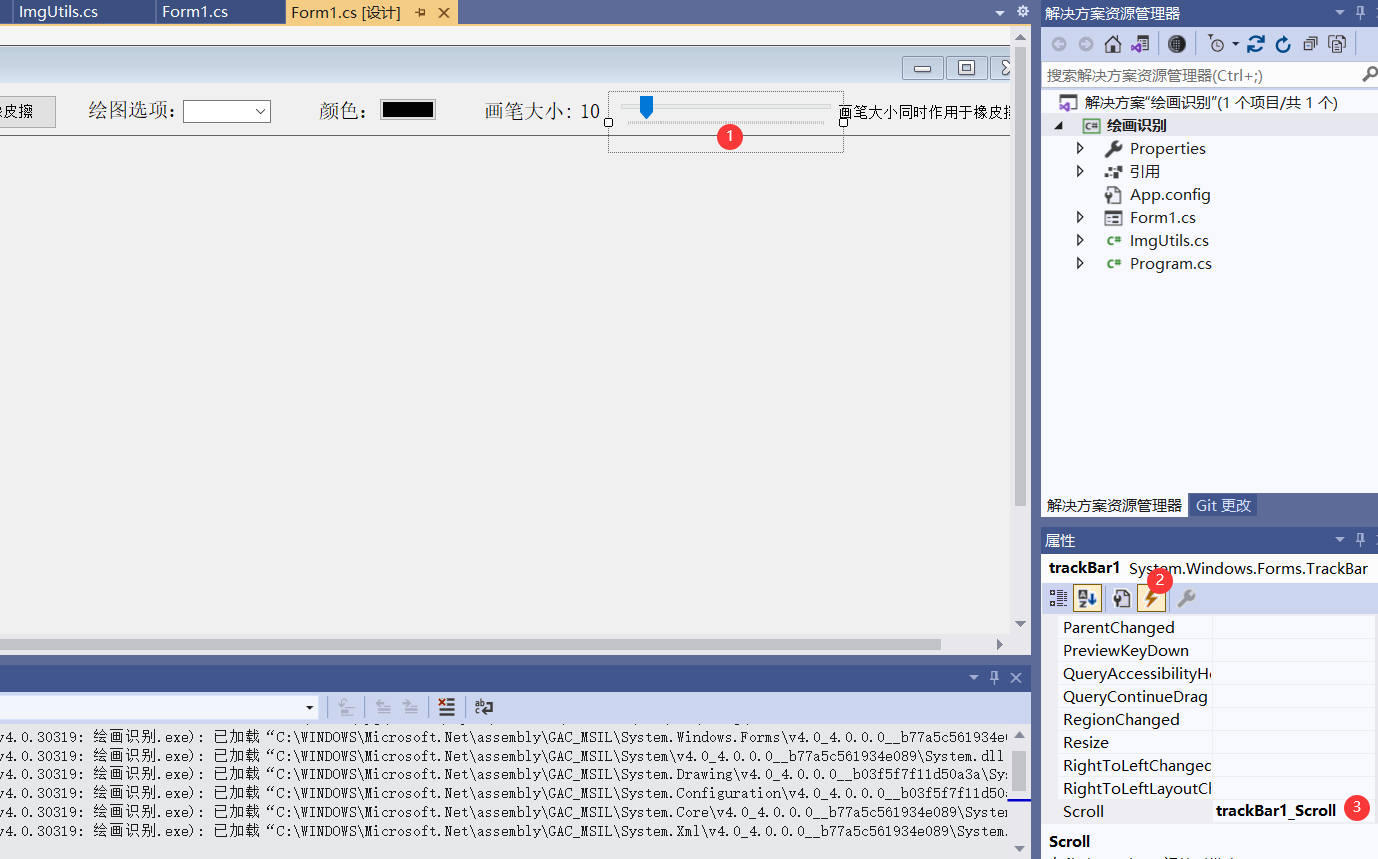
1.3 桌面控件通用事件
除了博主在上面描述的控件专用事件,针对桌面控件还有一些通用事件,如:鼠标按下(MouseDown)、鼠标移动(MouseMove)、鼠标松开(MouseUp)、控件重绘(Paint)等。在这里开发绘图软件,主要监听pictureBox的鼠标按下、鼠标移动、鼠标松开、控件重绘事件,设置这些事件同样需要在设计界面选择空间然后找到对应的事件进行双击。
其中,鼠标按下、鼠标移动、鼠标松开等事件,还可以是函数内部获取鼠标的位置、鼠标按下的按钮(鼠标左键或鼠标右键)。因为,不同的按钮按下可以不同的事件需求;此外,通过这些事件的组合,可以完成一下复杂的操作,如拖动(鼠标按下时设置press=true,鼠标移动且press=true既为拖动,鼠标松开时设置press=false);
这里有一个不一样的就是控件重绘事件,控件重绘事件无法被用户激发,只能被代码激活,如pictureBox1的重绘事件需要显性的调用pictureBox1.Invalidate()才能激发。这主要用户鼠标位置的绘制,同样也可以绘制特定形状是鼠标拖动过程中的参考线。
2、软件实现
2.1 软件布局
软件的界面设置如下所示,通过下拉框选择绘图功能,通过颜色按钮选择要绘图的颜色,通过拖动条设置橡皮擦和画笔的大小。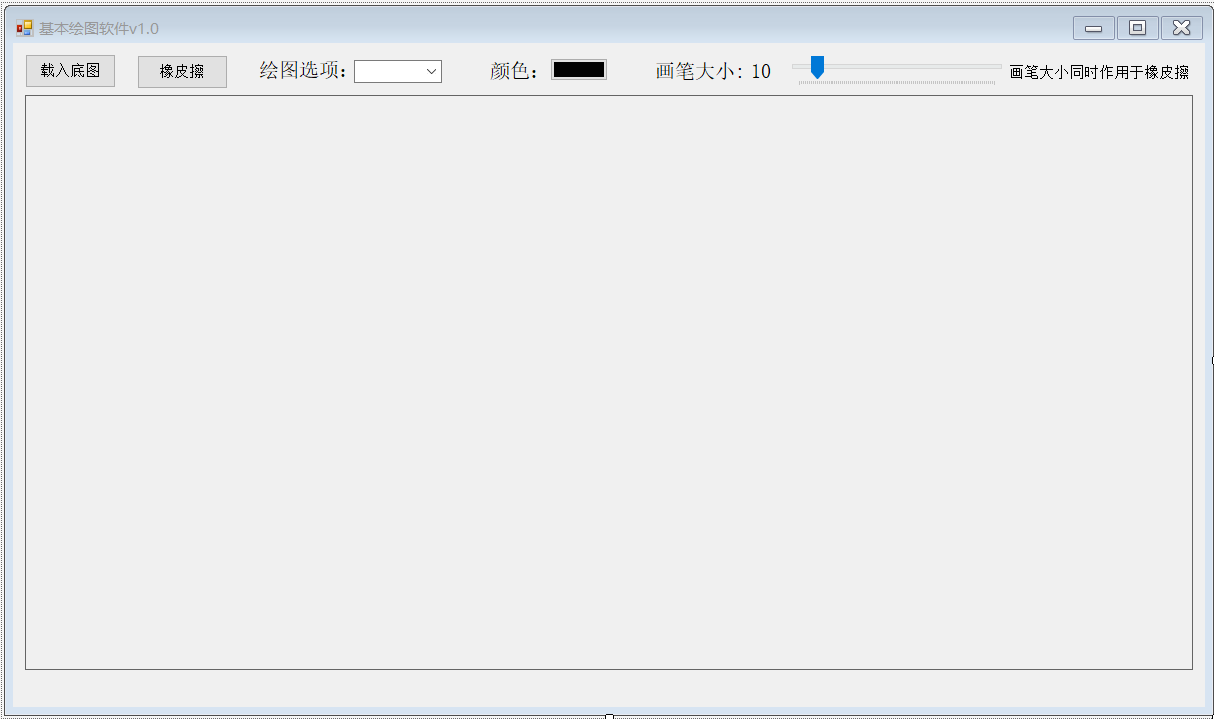
上面控件的定义代码如下所示
this.btn_load_bg =newSystem.Windows.Forms.Button();this.btn_eraser =newSystem.Windows.Forms.Button();this.pictureBox1 =newSystem.Windows.Forms.PictureBox();this.comboBox1 =newSystem.Windows.Forms.ComboBox();this.label1 =newSystem.Windows.Forms.Label();this.btn_color =newSystem.Windows.Forms.Button();this.trackBar1 =newSystem.Windows.Forms.TrackBar();//定义拖动条this.label2 =newSystem.Windows.Forms.Label();this.lab_line_width =newSystem.Windows.Forms.Label();this.label3 =newSystem.Windows.Forms.Label();this.label4 =newSystem.Windows.Forms.Label();
2.2 变量定义
这里定义了一些绘图颜色、线宽相关的变量
privateint line_width =10;//划线的宽度设置为10privateColor fill_color = Color.Black;//绘图区域的背景颜色privateSolidBrush fill_brush =newSolidBrush(Color.Black);privatePen line_color =newPen(newSolidBrush(Color.Black));privateSolidBrush eraser_brush =newSolidBrush(Color.Transparent);//橡皮擦颜色
这里定义了一些绘图过程需要的变量
privateGraphics draw_paint, merge_paint;//中间画板privateImage tmp_bitmap;//用来保存绘图痕迹List<Point> polyPoints =null;//存储绘制多边形的点集Rectangle rectA;//存储要用于绘图的矩形Image bg_image;//背景图片Point start;//起始点Point end;//结束点
这里定义了一些绘图判别相关的变量
bool need_draw_tmp;//在MouseMove事件中判断是否绘制矩形框string action_type ="";//绘图动作类型bool is_first_down =true;//判断是否第一次按下鼠标bool press_move_flag =true;
2.3 事件绑定
完整的变量定义和事件绑定代码如下所示,其核心在于区分开pictureBox的鼠标按下(MouseDown)、鼠标移动(MouseMove)、鼠标松开(MouseUp)、控件重绘(Paint)事件在不同的绘图动作类型(action_type )的实现代码。所以,代码中if用的比较多。其中控件重绘(Paint)事件在绘制矩形、多边形时用于绘制对应的参考线,在画笔和橡皮擦功能时用于绘制鼠标对应的点。
usingSystem;usingSystem.Collections.Generic;usingSystem.Drawing;usingSystem.Drawing.Drawing2D;usingSystem.Linq;usingSystem.Windows.Forms;namespace 绘画识别
{publicpartialclassForm1:Form{privateint line_width =10;//划线的宽度设置为10privateColor fill_color = Color.Black;//绘图区域的背景颜色privateSolidBrush fill_brush =newSolidBrush(Color.Black);privatePen line_color =newPen(newSolidBrush(Color.Black));privateSolidBrush eraser_brush =newSolidBrush(Color.Transparent);//橡皮擦颜色privateGraphics draw_paint, merge_paint;//中间画板privateImage tmp_bitmap;//用来保存绘图痕迹List<Point> polyPoints =null;//存储绘制多边形的点集Rectangle rectA;//存储要用于绘图的矩形Image bg_image;//背景图片Point start;//起始点Point end;//结束点bool need_draw_tmp;//在MouseMove事件中判断是否绘制矩形框string action_type ="";//绘图动作类型bool is_first_down =true;//判断是否第一次按下鼠标bool press_move_flag =false;publicForm1(){InitializeComponent();
            comboBox1.SelectedIndex =0;
            action_type ="矩形(填充)";
            bg_image =newBitmap(pictureBox1.Width, pictureBox1.Height);//中间画布
            tmp_bitmap =newBitmap(pictureBox1.Width, pictureBox1.Height);//创建空白画板
            draw_paint = Graphics.FromImage(tmp_bitmap);}privatevoidbtn_load_bg_Click(object sender,EventArgs e){OpenFileDialog ofd =newOpenFileDialog();
            ofd.Title ="请选择图片";
            ofd.Filter ="所有文件|*.*";
            ofd.InitialDirectory =@"C:\Users";
            ofd.Multiselect =false;if(ofd.ShowDialog()== DialogResult.OK){string image_path = ofd.FileName;
                bg_image = Image.FromFile(image_path);
                bg_image = ImgUtils.resizeImg(bg_image, pictureBox1.Width, pictureBox1.Height);//tmp_bitmap.Save("finish.bmp");
                pictureBox1.Image = bg_image;}}privatevoiddraw_ploy(bool fill =true){//绘制矩形框 并填充//抗锯齿
            draw_paint.SmoothingMode = SmoothingMode.HighQuality;//填充多边形if(fill){
                draw_paint.FillPolygon(fill_brush, polyPoints.ToArray());}else{
                draw_paint.DrawPolygon(line_color, polyPoints.ToArray());}
            pictureBox1.Image =get_merge_bitmap();
            is_first_down =true;
            need_draw_tmp =false;
            polyPoints =null;}privatevoidpictureBox1_MouseDown(object sender,MouseEventArgs e){if(action_type.IndexOf("矩形")>=0){if(e.Button == MouseButtons.Left){
                    start = e.Location;
                    need_draw_tmp =true;}}elseif(action_type.IndexOf("多边形")>=0){Graphics g = pictureBox1.CreateGraphics();//绘制多边形  low版本if(is_first_down)//首先第一次创建两个点如下(e.X, e.Y),( e.X + 1, e.Y + 1){//first point downif(e.Button == MouseButtons.Left){
                        is_first_down =false;if(polyPoints ==null) polyPoints =newList<Point>();
                        polyPoints.Add(e.Location);//Point point = new Point(e.X + 1, e.Y + 1);//polyPoints.Add(point);
                        need_draw_tmp =true;}}else{//add new pointif(e.Button == MouseButtons.Left){//添加新的点Point point =newPoint(e.X, e.Y);
                        polyPoints.Add(point);}elseif(e.Button == MouseButtons.Right){//把当前的点填充到顶点集合中去  方便填充
                        polyPoints.Add(e.Location);draw_ploy(action_type.IndexOf("填充")>=0);}}}elseif(action_type.IndexOf("画笔")>=0){if(e.Button == MouseButtons.Left){
                    press_move_flag =true;}}elseif(action_type.IndexOf("橡皮擦")>=0){if(e.Button == MouseButtons.Left){
                    press_move_flag =true;
                    start = e.Location;//模式转换为'CompositingMode.SourceCopy'
                    draw_paint.CompositingMode = CompositingMode.SourceCopy;//用透明色替换指定的区域
                    draw_paint.FillEllipse(eraser_brush, e.X - line_width /2, e.Y - line_width /2, line_width, line_width);//模式转换为'CompositingMode.SourceOver',这样后面可以进行绘图//draw_paint.CompositingMode = CompositingMode.SourceOver;}}
            end = e.Location;
            pictureBox1.Invalidate();}privatevoidpictureBox1_MouseMove(object sender,MouseEventArgs e){if(action_type.IndexOf("矩形")>=0){//绘制矩形框 并填充if(need_draw_tmp){if(e.Button != MouseButtons.Left)return;
                    end = e.Location;
                    pictureBox1.Invalidate();}}elseif(action_type.IndexOf("多边形")>=0){//绘制多边形if(need_draw_tmp){//if (e.Button != MouseButtons.Left) return;
                    end = e.Location;
                    pictureBox1.Invalidate();//此代码不可省略//Graphics g = pictureBox1.CreateGraphics();//抗锯齿}}elseif(action_type.IndexOf("画笔")>=0){if(press_move_flag ==true&& e.Button == MouseButtons.Left){
                    end = e.Location;
                    draw_paint.FillEllipse(fill_brush, e.X - line_width /2, e.Y - line_width /2, line_width, line_width);//画点(鼠标位置示意图)Graphics g = pictureBox1.CreateGraphics();

                    g.FillEllipse(Brushes.Blue, e.X - line_width /2, e.Y - line_width /2, line_width, line_width);

                    pictureBox1.Image =get_merge_bitmap();
                    pictureBox1.Invalidate();//此代码不可省略}}elseif(action_type.IndexOf("橡皮擦")>=0){if(press_move_flag ==true&& e.Button == MouseButtons.Left){
                    end = e.Location;//用透明色替换指定的区域
                    draw_paint.FillEllipse(eraser_brush, e.X - line_width /2, e.Y - line_width /2, line_width, line_width);
                    pictureBox1.Image =get_merge_bitmap();
                    pictureBox1.Invalidate();//此代码不可省略Refresh();}}}privateBitmapget_merge_bitmap(){Bitmap tmp_bmp =(Bitmap)bg_image.Clone();
            merge_paint = Graphics.FromImage(tmp_bmp);
            merge_paint.DrawImage(tmp_bitmap,0,0);//将中间画布绘制的内容绘制到原始画布上
            merge_paint.Dispose();return tmp_bmp;}privatevoidpictureBox1_MouseUp(object sender,MouseEventArgs e){if(action_type.IndexOf("矩形")>=0){//绘制矩形框 并填充if(e.Button == MouseButtons.Left){
                    end = e.Location;
                    need_draw_tmp =false;}Graphics g = pictureBox1.CreateGraphics();if(action_type.IndexOf("填充")>=0){
                    draw_paint.FillRectangle(fill_brush, rectA);//填充颜色}else{
                    draw_paint.DrawRectangle(line_color, rectA);//填充颜色}//g.DrawImage(img, 0, 0);//在目标绘图板上绘制图片
                pictureBox1.Image =get_merge_bitmap();
                g.Dispose();}elseif(action_type.IndexOf("画笔")>=0){
                press_move_flag =false;
                pictureBox1.Invalidate();//此代码不可省略}elseif(action_type.IndexOf("橡皮擦")>=0){//模式转换为'CompositingMode.SourceOver',这样后面可以进行绘图
                draw_paint.CompositingMode = CompositingMode.SourceOver;
                press_move_flag =false;
                pictureBox1.Invalidate();//此代码不可省略}}privatevoidpictureBox1_Paint(object sender,PaintEventArgs e){PictureBox pic = sender asPictureBox;if(action_type.IndexOf("矩形")>=0){//绘制矩形框 并填充Pen pen =newPen(Color.Red,3);
                pen.DashStyle = System.Drawing.Drawing2D.DashStyle.Dot;//绘制线的格式//绘制矩形框 并填充if(need_draw_tmp){//此处是为了在绘制时可以由上向下绘制,也可以由下向上
                    rectA =newRectangle(Math.Min(start.X, end.X), Math.Min(start.Y, end.Y), Math.Abs(start.X - end.X), Math.Abs(start.Y - end.Y));
                    e.Graphics.DrawRectangle(pen, rectA);}
                pen.Dispose();}elseif(action_type.IndexOf("多边形")>=0){//多边形if(polyPoints !=null){if(need_draw_tmp){//抗锯齿
                        e.Graphics.SmoothingMode = SmoothingMode.AntiAlias;
                        e.Graphics.DrawLine(Pens.Yellow, polyPoints.First(), end);
                        e.Graphics.DrawLine(Pens.Red, polyPoints.Last(), end);if(polyPoints.Count >1){for(int i =0; i < polyPoints.Count -1; i++){
                                e.Graphics.DrawLine(Pens.Yellow, polyPoints[i], polyPoints[i +1]);}}}}}elseif(action_type.IndexOf("画笔")>=00){if(press_move_flag){
                    e.Graphics.FillEllipse(Brushes.Blue, end.X -(line_width /2), end.Y -(line_width /2), line_width, line_width);}}elseif(action_type.IndexOf("橡皮擦")>=0){if(press_move_flag){
                    e.Graphics.FillEllipse(Brushes.Blue, end.X -(line_width /2), end.Y -(line_width /2), line_width, line_width);}}}privatevoidcomboBox1_SelectedIndexChanged(object sender,EventArgs e){
            action_type = comboBox1.Text;
            Console.WriteLine(comboBox1.Text);}privatevoidbtn_color_Click(object sender,EventArgs e){//选择颜色 进行填充ColorDialog cl =newColorDialog();if(cl.ShowDialog()== System.Windows.Forms.DialogResult.OK){
                fill_color = Color.FromArgb(cl.Color.A, cl.Color.R, cl.Color.G, cl.Color.B);
                btn_color.BackColor = fill_color;
                fill_brush =newSolidBrush(fill_color);
                line_color =newPen(fill_brush);}}privatevoidtrackBar1_Scroll(object sender,EventArgs e){
            line_width = trackBar1.Value;
            lab_line_width.Text = Convert.ToString(line_width);}privatevoidbtn_eraser_Click(object sender,EventArgs e){
            action_type ="橡皮擦";}}}
3、软件使用
3.1 绘制矩形
绘制矩形时有两种选择,填充和不填充。每一次绘制前可以先选择颜色。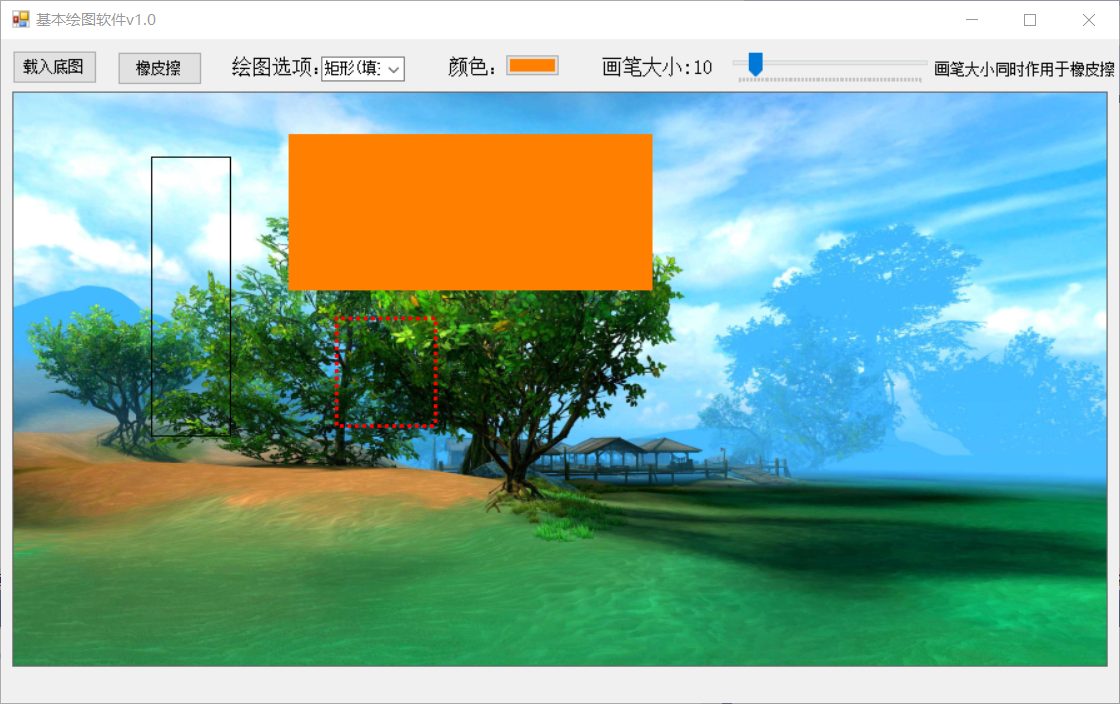
3.2 绘制多边形
绘制矩形时有两种选择,填充和不填充。每一次绘制前可以先选择颜色。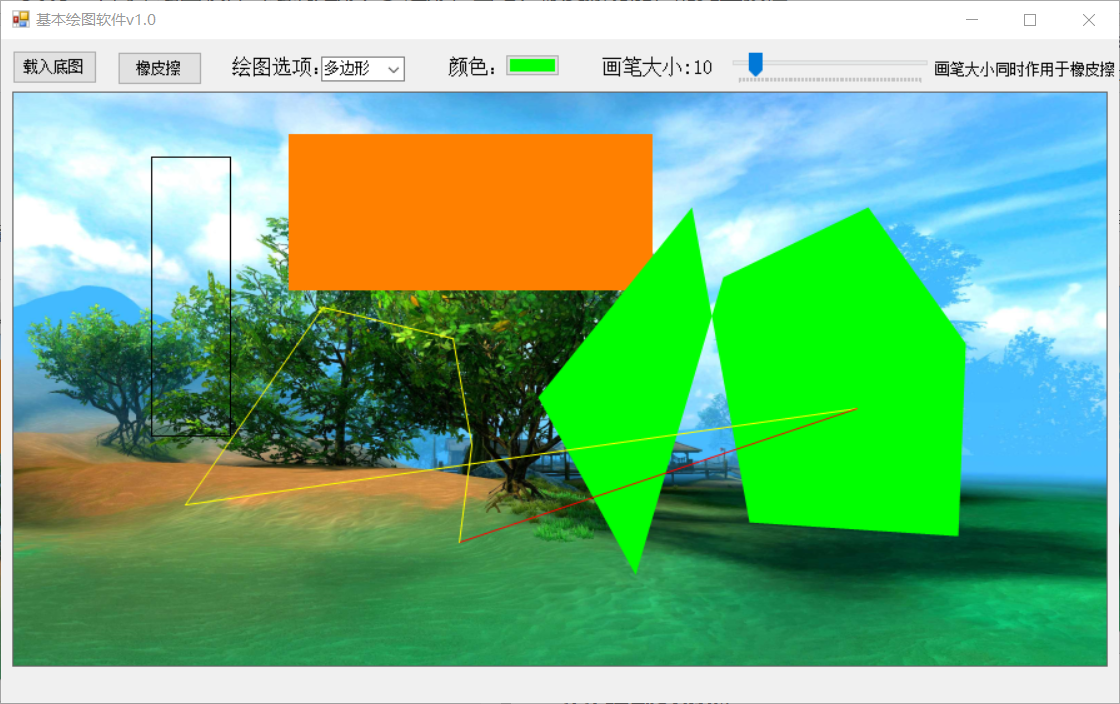
3.3 使用画笔
使用画笔前可以先拖动进度条设置画笔大小,然后再设置颜色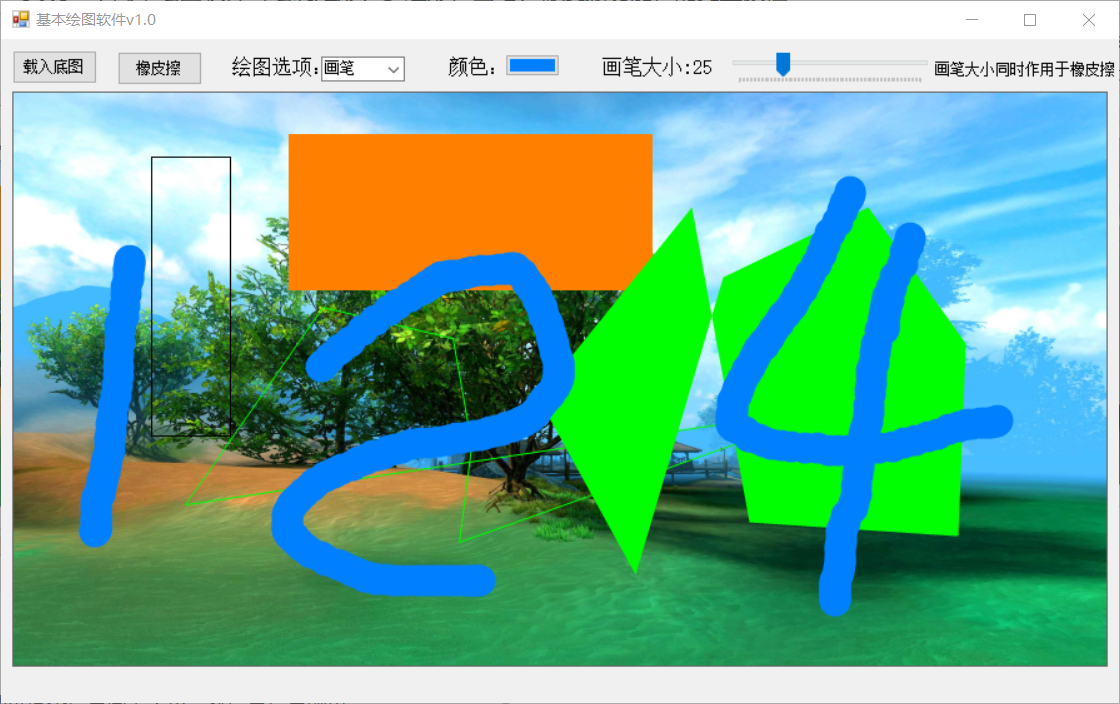
3.4 使用橡皮擦
点击橡皮擦即可使用橡皮擦功能,点击绘图框中的其他按钮即可退出橡皮擦选择其他绘图功能。使用橡皮擦前可以先拖动进度条设置橡皮擦的大小。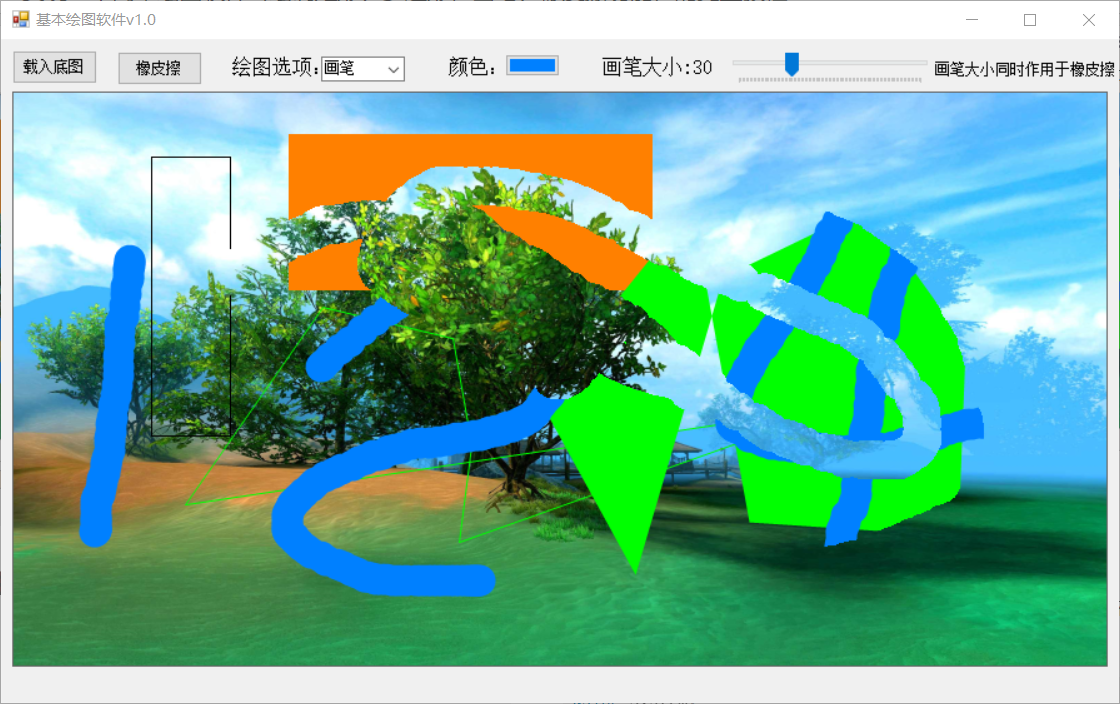
4、补充代码
上面代码中进行图像resize的时候用到了以下工具代码,可以保存为ImgUtils.cs。
usingSystem;usingSystem.Collections.Generic;usingSystem.Drawing;usingSystem.IO;usingSystem.Linq;usingSystem.Text;usingSystem.Threading.Tasks;namespace 绘画识别
{classImgUtils{privatestaticchar[] base64CodeArray =newchar[]{'A','B','C','D','E','F','G','H','I','J','K','L','M','N','O','P','Q','R','S','T','U','V','W','X','Y','Z','a','b','c','d','e','f','g','h','i','j','k','l','m','n','o','p','q','r','s','t','u','v','w','x','y','z','0','1','2','3','4','5','6','7','8','9','+','/','='};publicstaticboolIsBase64(string base64Str){//string strRegex = "^([A-Za-z0-9+/]{4})*([A-Za-z0-9+/]{4}|[A-Za-z0-9+/]{3}=|[A-Za-z0-9+/]{2}==)$";if(string.IsNullOrEmpty(base64Str))returnfalse;else{if(base64Str.Contains(","))
                    base64Str = base64Str.Split(',')[1];if(base64Str.Length %4!=0)returnfalse;if(base64Str.Any(c =>!base64CodeArray.Contains(c)))returnfalse;}try{returntrue;}catch(FormatException){returnfalse;}}publicstaticstringConvertImageToBase64(Image bmp){try{MemoryStream ms =newMemoryStream();
                bmp.Save(ms, System.Drawing.Imaging.ImageFormat.Jpeg);byte[] arr =newbyte[ms.Length]; ms.Position =0;
                ms.Read(arr,0,(int)ms.Length); ms.Close();return Convert.ToBase64String(arr);}catch(Exception ex){return"转换错误";}}publicstaticImageConvertBase64ToImage(string base64String){try{byte[] imageBytes = Convert.FromBase64String(base64String);using(MemoryStream ms =newMemoryStream(imageBytes,0, imageBytes.Length)){
                    ms.Write(imageBytes,0, imageBytes.Length);return Image.FromStream(ms,true);}}catch(Exception ex){returnnull;}}publicstaticImageresizeImg(Image sourceImage,int targetWidth,int targetHeight){int width;//图片最终的宽int height;//图片最终的高try{//获取图片宽度int sourceWidth = sourceImage.Width;//获取图片高度int sourceHeight = sourceImage.Height;System.Drawing.Imaging.ImageFormat format = sourceImage.RawFormat;Bitmap targetPicture =newBitmap(targetWidth, targetHeight);Graphics g = Graphics.FromImage(targetPicture);
                g.Clear(Color.White);
                g.DrawImage(sourceImage,0,0, targetWidth, targetHeight);
                sourceImage.Dispose();return targetPicture;}catch(Exception ex){}returnnull;}}}
版权归原作者 万里鹏程转瞬至 所有, 如有侵权,请联系我们删除。