
前言:记录自己使用WebHook实现自动化部署项目
个人博客 已更新该文章— 详解git自动化部署WebHook
WebHook 简介
WebHook 功能是帮助用户 push 代码后,自动回调一个设定的 http 地址。
简单来说 就是 监听 执行git操作后向指定 http 地址 发送一个请求。
同时
WebHook是一个通用的解决方案,可以根据不同的需求,来编写自己的脚本程序(例如发邮件,自动部署等)
添加WebHook
gitee
仓库主页
管理页面
WebHooks
添加 WebHook
WebHook可以多个 ,根据不同的事件,设置不同的请求地址,达到不同的需求. 具体webhook 钩子数据返回格式
事件钩子描述PushPush Hook仓库推送代码、推送、删除分支TagTag Hook新建、删除 tagIssueIssue Hook新建任务、删除任务、变更任务状态、更改任务指派人Pull RequestPull Request Hook新建、更新、合并、关闭 Pull Request,新建、更新、删除 Pull Request 下标签,关联、取消关联 ssue评论Note Hook评论仓库、任务、Pull Request、 Commit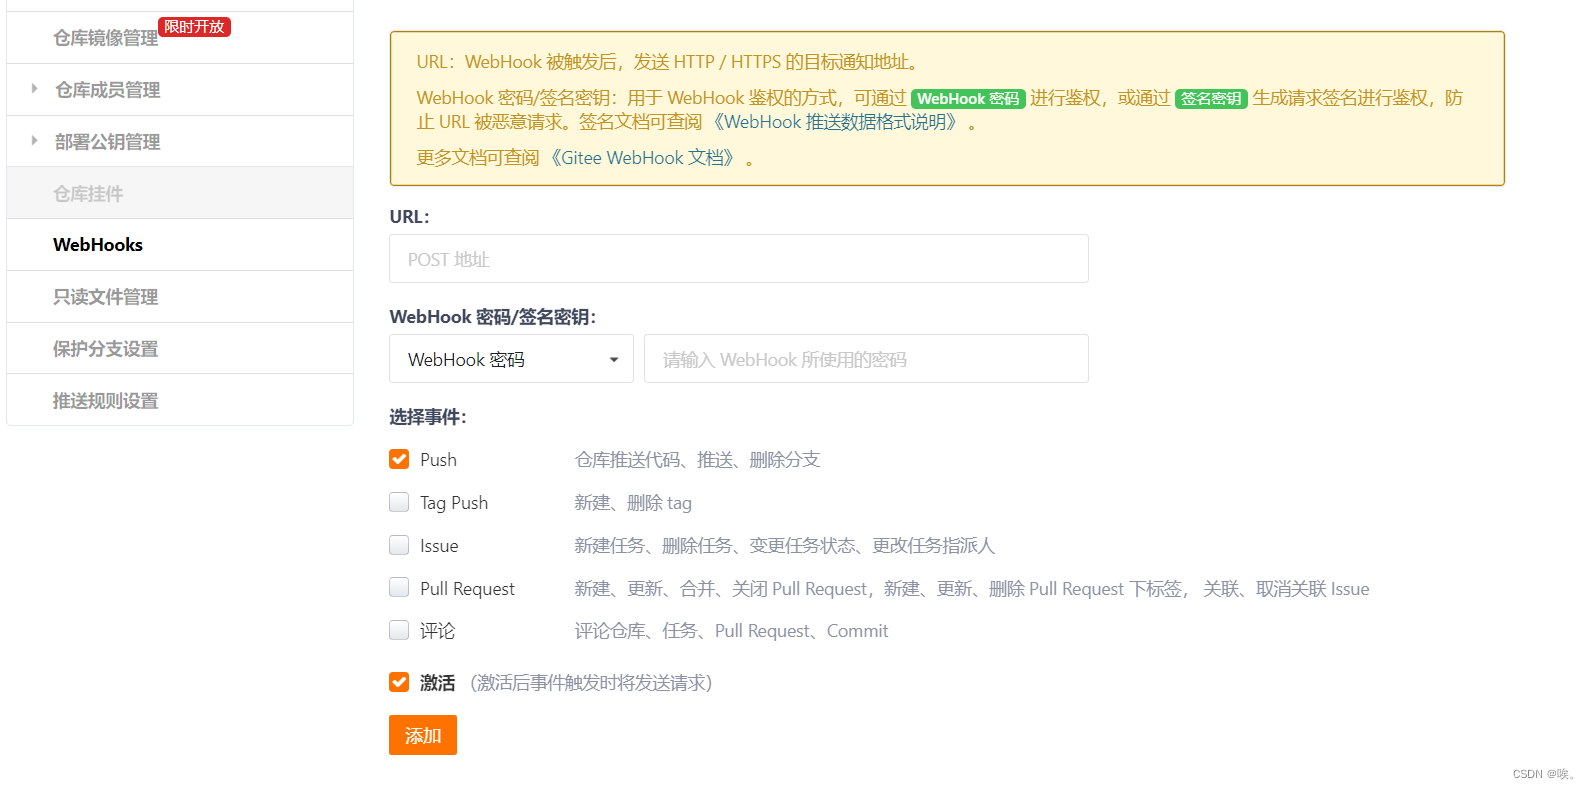
初始化项目
yarn init
npm init

使用
yarn或者
npm安装依赖库
gitee
gitee-webhook-handlergithub
github-webhook-handler
// *****新建 index.js //引入 node http模块  var http =require('http')//引入 gitee-webhook-handler依赖var createHandler =require('/webServer/webhooks/node_modules/gitee-webhook-handler')//path: 地址后面路径 http://127.0.0.1:9000/webhooks   secret:填写 gitee || github 配置的webHook密码var handler =createHandler({path:'/webhooks',secret:'*****'})//引入 child_process  创建一个子进程 函数functionrun_cmd(cmd, args, callback){var spawn =require('child_process').spawn;var child =spawn(cmd, args);var resp ="";

  child.stdout.on('data',function(buffer){ resp += buffer.toString();});
  child.stdout.on('end',function(){callback(resp)});}//创建一个 HTTP 代理服务器
http.createServer(function(req, res){// handler  传入 req, reshandler(req, res,function(err){// 发生错误 error
    res.statusCode =404
    res.end('no such location')})}).listen(9000,function(){
  console.log((newDate())+'WebHook启动运行端口:',9000);})//监听push钩子 时触发函数
handler.on('Push Hook',function(event){// 执行 sh 文件
    console.log('执行server脚本中----')run_cmd('sh',['./serverHooks.sh',event.payload.repository.name],function(text){
            console.log('------走了',text)});
    console.log('Received a push event for %s to %s',
    event.payload.repository.name,
    event.payload.ref)})//监听Issue
handler.on('Issue Hook',function(event){
  console.log('Received an issue event for %s action=%s: #%d %s',
    event.payload.repository.name,
    event.payload.action,
    event.payload.issue.number,
    event.payload.issue.title)})//监听发生错误
handler.on('error',function(err){
  console.error('Error:', err.message)})
# ******* serverHooks.sh#!/bin/bash# unset GIT_DIRecho"开始部署"
cd '/webServer/dl-blog-node-server'echo"正在拉源代码…"
git config pull.rebase false # 设置策略
git pull origin master
yarn

echo"完成"
github
Settings
WebHooks
Add WebHook
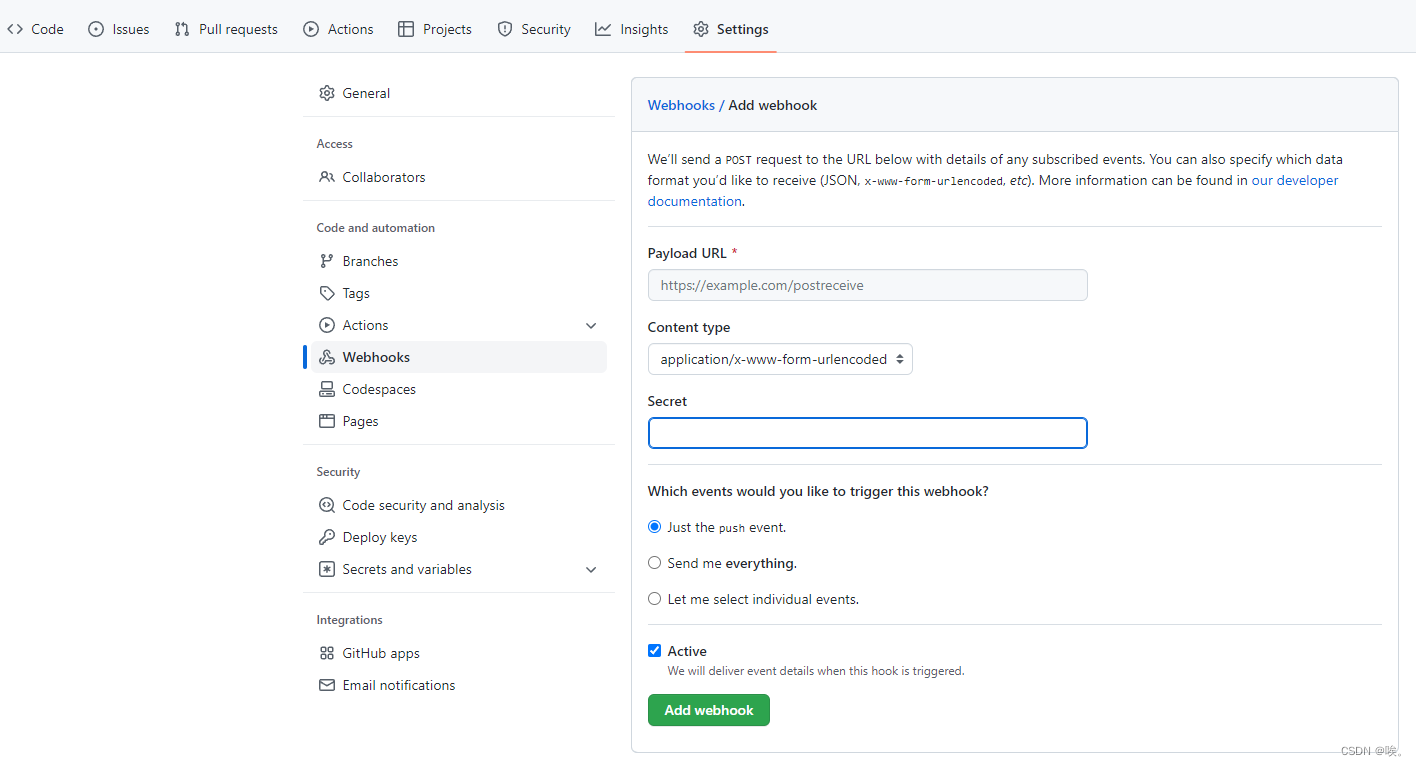
设置方法本质上与gitee 类似 写法上基本一样 ,在监听钩子 的名称不同而已 github—WebHook文档
注意事项
- 初始化项目 > 可以看到我是初始化一个小工程,启动一个服务来控制WebHook的,独立出我的项目。核心代码在index.js上,大家可以在自己的项目封装出核心代码,直接引用。
- 执行sh脚本 > 用户不同可能会出现权限问题,导致无法更改代码。执行某些命令会占用内存,导致卡顿(比如我想执行quasar项目的打包命令 ,我是用宝塔面板 操作访问文件,会导致内存不足,宝塔面板卡住了。大致可能是我的内存不够吧,具体我也不太清除)> 腾讯服务器: CPU: 2核 内存: 2GB — CentOS 8.2.2004 x86_64> 宝塔面板 : 7.9.7
结束:自动化部署 – 简化操作流程 灵活,执行一键部署。Node.js Web 服务器的一个小型处理程序(如果需要,也可以称为“中间件”),它处理从 Gitee/GitHub 接收和验证 Webhook 请求的所有逻辑。
本文转载自: https://blog.csdn.net/qq_52021866/article/details/129115908
版权归原作者 极客博文 所有, 如有侵权,请联系我们删除。
版权归原作者 极客博文 所有, 如有侵权,请联系我们删除。