
Websocket 和 Http
WebSocket 是 HTML5 出的东西(协议),也就是说HTTP协议没有变化,或者说没关系,但HTTP是不支持持久连接的(长连接,循环连接的不算)
首先HTTP有 1.1 和 1.0 之说,也就是所谓的 keep-alive ,把多个HTTP请求合并为一个,但是 Websocket 其实是一个新协议,跟HTTP协议基本没有关系,只是为了兼容现有浏览器的握手规范而已,也就是说它是HTTP协议上的一种补充可以通过这样一张图理解: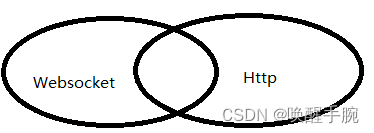
有交集,但是并不是全部
GET /chat HTTP/1.1
Host: server.example.com
Upgrade: websocket
Connection: Upgrade
Sec-WebSocket-Key: x3JJHMbDL1EzLkh9GBhXDw==
Sec-WebSocket-Protocol: chat, superchat
Sec-WebSocket-Version:13
Origin: http://example.com
服务器端 flask_sockets
flask实现 websocket 的两种方式
第一种是 flask_sockets 方式,该方式是flask对websocket的最原始封装,功能较为单一。
第二种方式 Flask-SocketIO 对 websocket 的封装,该方式所能提供功能较多,不但实现了socket的基本通信功能,也可以结合flask相关接口,使其更加完备,因此网上对该api介绍也较多。
flask_sockets 实现介绍
@sockets.route('/echo')defecho_socket(ws):print("connection start")whilenot ws.closed:
        msg = ws.receive()# 同步阻塞print(msg)
        now = datetime.datetime.now().isoformat()
        ws.send(now)# 发送数据
        time.sleep(1)
客户端发送数据实现
<button onclick="send()">发送</button>var ws =newWebSocket("ws://127.0.0.1:8080/echo")
ws.onmessage=function(event){
    console.log(event.data)};functionsend(){
    ws.send("hello world")}
服务器端完整代码展示
from flask import Flask
from flask_sockets import Sockets
import datetime

app = Flask(__name__)
sockets = Sockets(app)from flask_cors import*
CORS(app, supports_credentials=True)@sockets.route('/echo')defecho_socket(ws):print("hello")whilenot ws.closed:
        msg = ws.receive()print(msg)
        now = datetime.datetime.now().isoformat()
        ws.send(now)#发送数据@app.route('/')defhello_world():return'Hello World!'if __name__ =="__main__":from gevent import pywsgi
    from geventwebsocket.handler import WebSocketHandler
    server = pywsgi.WSGIServer(('0.0.0.0',8080), app, handler_class=WebSocketHandler)print('server start')
    server.serve_forever()
var ws =newWebSocket("ws://127.0.0.1:8080/echo")
ws.onmessage=function(event){
    console.log(event.data)}
ws.onopen=function(){
    console.log("start connection")}
ws.onclose=function(e){
    console.log("connection closed ("+ e.code +")");}
服务器端 Flask-SocketIO
debug的好处:已经run过的程序,Ctrl+S,保存一下,自动重启,(节省时间,提高效率)
可以分为开发模式,和生产模式;在程序员自己写代码的时候,即 app.run(debug=True),写完程序,递交项目最终成果时,要将其关闭,即 app.run()
from flask import Flask, render_template
from flask_socketio import SocketIO, emit

app = Flask(__name__)
app.config['SECRET_KEY']='secret_key'

socketio = SocketIO()
socketio.init_app(app, cors_allowed_origins='*')

name_space ='/echo'@app.route('/')defindex():return render_template('index.html')@app.route('/push')defpush_once():
    event_name ='echo'
    broadcasted_data ={'data':"test message!"}# 设置广播数据
    socketio.emit(event_name, broadcasted_data, broadcast=False, namespace=name_space)return'done!'@socketio.on('connect', namespace=name_space)defconnected_msg():print('client connected.')@socketio.on('disconnect', namespace=name_space)defdisconnect_msg():print('client disconnected.')@socketio.on('my_event', namespace=name_space)defmtest_message(message):print(message)
    emit('my_response',{'data': message['data'],'count':1})if __name__ =='__main__':
    socketio.run(app, host='0.0.0.0', port=5000)
客户端的实现:
<div id="data_show"></div><script>$(document).ready(function(){
    namespace ='/echo';var socket = io.connect(location.protocol +'//'+ document.domain +':'+ location.port + namespace);
    socket.on('echo',function(res){var data_show = res.data;if(data_show){$("#data_show").append(data_show).append('<br/>');}});});</script>
socketio 中的 namespace 的概念
如果希望服务端发送的信息在所有客户端都能收到,那么使用默认的namespace / 就好了。但是如果想把发送信息的服务器作为第三方应用给不同客户端使用,就需要为每一个客户端定义一个namespace.
跨域问题的解决方案:
采用 flask_cors 进行解决跨域问题
socketio = SocketIO(app, cors_allowed_origins='*')
版本不兼容问题:
pip list 查看 服务器端 Flask-SocketIO 版本
查看 vue 客户端的 socketIO 版本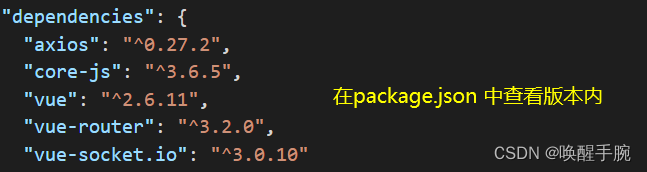
Vue 使用 socket.io
通过最近一系列的踩坑之后,总结出了这篇相对较为完善的关于vue-socket.io的使用文章,包含大家困扰的(socket连接、断开重连,以及当连接的地址是动态的情况下,我们应该注意的事项。
如何安装 socket.io
npm install vue-socket.io --save
第一种:引用 socket.io,在组件中直接引入
import io from 'socket.io-client'
第二种:引用 socket.io,在 main.js 中直接这样写
import VueSocketIO from'vue-socket.io'

Vue.use(newVueSocketIO({debug:true,connection:'ws://localhost:5000/echo',//}))
这里要提示的一点就是,当连接的地址是动态的,代码的执行顺序就很重要了,即 new VueSocket 在main.js中的位置
如何进行建立 socket.io 连接
在 html 中直接实现:
<html lang="en"><head><meta charset="UTF-8"><meta http-equiv="X-UA-Compatible" content="IE=edge"><meta name="viewport" content="width=device-width, initial-scale=1.0"><script src="https://cdn.bootcdn.net/ajax/libs/socket.io/4.4.1/socket.io.min.js"></script><title>socket.io</title></head><button onclick="send()">发送信息</button><body><script>
        var socket = null
        function initWebSocket(){
            socket = io.connect('ws://localhost:5000/echo',{
                timeout:300000,
                reconnectionDelayMax:1000,
                reconnectionDelay:500})
            socket.on('connect',()=>{
                console.log('建立链接')
                socket.emit('message',{'data':'I\'m connected!'})})
            socket.on('disconnect',()=>{
                console.log('连接断开')
                socket.emit('message',{'data':'I\'m disconnected!'});})
            socket.on('card message', msg =>{// 接受数据
            })
            socket.on('error message', msg =>{
                console.log('error:'+ msg)})}
        function send(){
            socket.emit('message',{'data':'I\'m disconnected!'})}

        initWebSocket()</script></body></html>
在 Vue 组件 中直接实现:
initWebSocket (){
    this.socket = null
    this.socket = io.connect('ws://localhost:5000/namespace',{
        timeout:300000,
        reconnectionDelayMax:1000,
        reconnectionDelay:500})
    this.socket.on('connect',()=>{
        console.log('建立链接')
        this.socket.emit(传参)})
    this.socket.on('disconnect',()=>{
        console.log('连接断开')})
    this.socket.on('card message', msg =>{// 接受数据
    })
    this.socket.on('error message', msg =>{
        console.log('error:'+ msg)})}
网页客户端实现
首先看下四个方法
onclose:((this: WebSocket,ev: CloseEvent)=> any)|null;onerror:((this: WebSocket,ev: Event)=> any)|null;onmessage:((this: WebSocket,ev: MessageEvent)=> any)|null;onopen:((this: WebSocket,ev: Event)=> any)|null;
建立 ws 对象,绑定 onmessage 方法进行接受服务器端传来的数据
var ws =newWebSocket("ws://127.0.0.1:8080/echo")

ws.onmessage=function(event){
    console.log(event.data)};

ws.onopen=function(){
   console.log("start connection")};

ws.onclose=function(e){
   console.log("connection closed ("+ e.code +")");};
BootCDN 稳定、快速、免费的前端开源项目 CDN 加速服务
https://cdn.bootcdn.net/ajax/libs/socket.io/4.4.1/socket.io.esm.min.js

<script src="https://cdn.bootcdn.net/ajax/libs/socket.io/4.4.1/socket.io.esm.min.js"></script>
常见问题报错解决方案
ImportError 无法导入 ContextVar 包
ImportError: cannot import name ‘ContextVar’
pip uninstall flask
# 卸载  你也可以省略这步,直接pip install flask==1.0
pip install flask==1.0# 我这里改成1.0就行了,改成其他低版本应该也没问题,有兴趣自己试下
关于 Werkzeug 缺失,或者版本过低问题
werkzeug.routing.WebsocketMismatch:400 Bad Request: The browser (or proxy) sent a request that this server could not understand.
2022-04-27T12:31:24Z { REMOTE_ADDR : 127.0.0.1 , REMOTE_PORT : 63825 , HTTP_HOST : 127.0.0.1:8080 , (hidden keys: 30)} failed with WebsocketMismatch
pip install Werkzeug==1.0.1-i https://mirrors.aliyun.com/pypi/simple/
flask 缺少 Werkzeug,或者 Werkzeug 版本不兼容 flask 等问题
flask 2.0.2 requires Werkzeug>=2.0, but you have werkzeug 1.0.1 which is incompatible.
关于客户端的 socket 和 flask 端的 socket 版本不兼容
The client is using an unsupported version of the Socket.IO or Engine.IO protocols (further occurrences of this error will be logged with level INFO)
版权归原作者 唤醒手腕 所有, 如有侵权,请联系我们删除。