本专栏内容代码来自《响应式web(HTML5+CSS3+Bootstrap)》教材。
导航栏
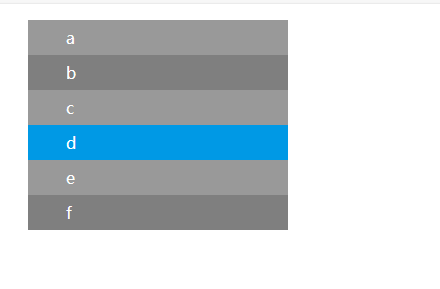
实现代码:
<!DOCTYPEhtml><htmllang="en"><head><metacharset="UTF-8"><metaname="viewport"content="width=device-width, initial-scale=1.0"><title>选择器的使用</title><style>.nav{width: 300px;}li{background-color:rgba(0, 0, 0,0.4);height: 35px;line-height: 35px;overflow: hidden;}li:nth-of-type(2n){background-color:rgba(0,0,0,0.5);}li:hover{background: #0099E5;}a{text-decoration: none;display: block;color: #fff;height: 35px;padding: 0 38px;}</style></head><body><divclass="nav"><ul><li><ahref="#">a</a></li><li><ahref="#">b</a></li><li><ahref="#">c</a></li><li><ahref="#">d</a></li><li><ahref="#">e</a></li><li><ahref="#">f</a></li></ul></div></body></html>
实现效果:
笔记:
- li 标签中
height:35px;line-height:35px;
height属性和line-height属性设值相同,达到行中文字垂直居中的效果。
原理:
height: 这是一个基本的CSS属性,用于设置元素的高度。在你提供的例子中,height: 35px;意味着li元素的高度被设定为35像素。
line-height: 这个属性用于设置行之间的距离,也就是行的高度。在你提供的例子中,line-height: 35px;意味着li元素内文字的行高(即从一行文字的基线到下一行文字的基线的距离)被设定为35像素。这也间接决定了文字的垂直居中显示,换句话说,当一个容器的height和line-height被设定为相同的值时,这个容器内的文字会垂直居中。
- li:nth-of-type(n) : 这是一个CSS选择器,它会选择其父元素的第n个li元素。其中,n可以是数字,表达式或关键字 “even” 和 “odd”。 例如,li:nth-of-type(2n) { background-color: rgba(0,0,0,0.5); }这行代码表示每个父元素的第2n个li元素(即偶数位置的li元素)的背景色设置为半透明的黑色.
- a标签中的display属性: display 属性在CSS中用于定义如何展示一个元素,或者说如何对元素进行布局。下面是一些常见的display属性值及其含义:
- none: 元素不会被显示。
- inline: 默认的属性值。将元素显示为内联元素,元素前后没有换行符。例如,span就是典型的内联元素。这类元素只接受左右的margin和padding,不接受宽高设置。
- block: 元素会被展示为块级元素,元素前后会带有换行符。例如,div就是典型的块级元素。块级元素会独占一行,宽度默认拉伸到其父元素的宽度,可以接受所有的margin, padding, width及height设置。
- inline-block: 行内块元素。元素会被展示为内联元素,同时也会具有块元素的属性。即可以与其他元素同一行内显示,同时可以接受宽高,margin,padding等属性。
- flex: 元素变为弹性盒子模型。这是一种现代网页布局的方式,可以轻松的实现多种复杂布局。它的子元素也会按照特定的方式进行布局。
- grid: 元素会变为网格容器,实现复杂的二维布局。
- table、table-row、table-cell等: 用于使元素像HTML表格一样显示。
实现一个横向的网站导航栏
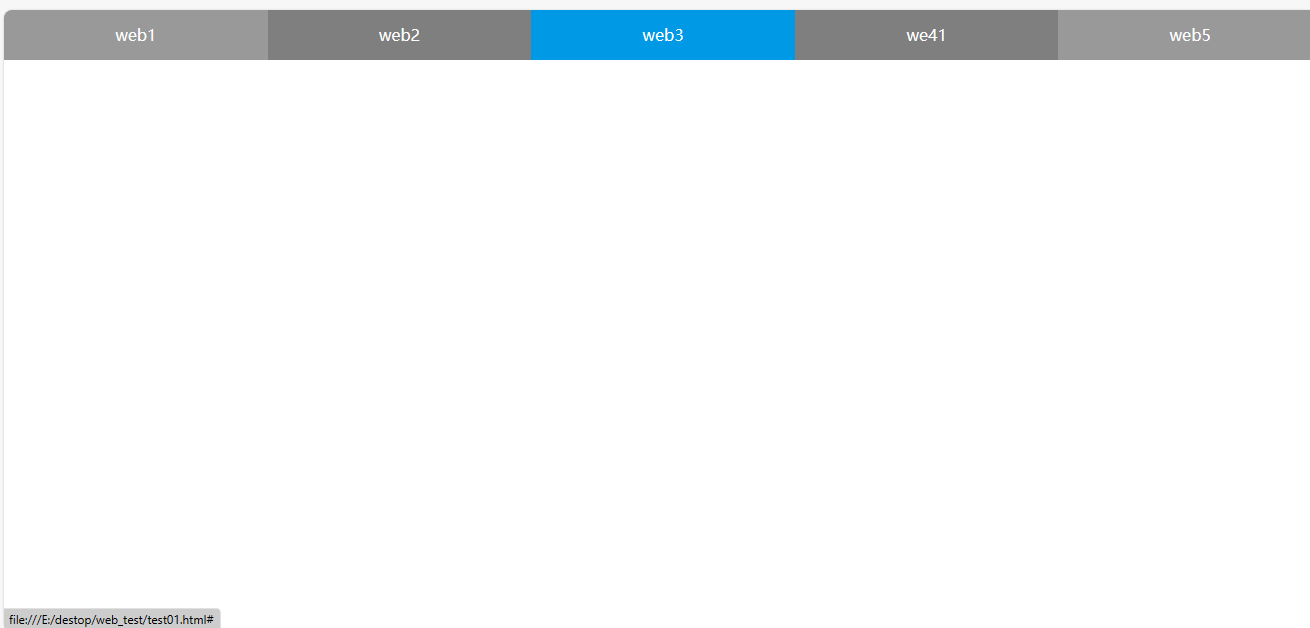
实现代码:
<!DOCTYPEhtml><htmllang="en"><head><metacharset="UTF-8"><metaname="viewport"content="width=device-width, initial-scale=1.0"><title>横向导航栏</title><style>html body{width: 100%;height: 100%;margin: 0;padding: 0;}.nav ul{width: 100%;height: 50px;/* 也是为了紧贴窗口 */margin: 0;padding: 0;}.nav-item{/* 横向排列 */float: left;/* 因为是五个li,所以是20% */width: 20%;height: 100%;/* 去掉列表点 */list-style: none;background-color:rgba(0,0,0,0.4);/* 让文字水平居中、垂直居中 */text-align: center;line-height: 50px;}.nav-item:nth-of-type(2n){background-color:rgba(0,0,0,0.5);}.nav-item:hover{background-color: #0099E5;}.nav-item
        a{color:white;text-decoration: none;}</style></head><body><divclass="nav"><ul><!-- 设置类名有助于代码管理 --><liclass="nav-item"><ahref="#">web1</a></li><liclass="nav-item"><ahref="#">web2</a></li><liclass="nav-item"><ahref="#">web3</a></li><liclass="nav-item"><ahref="#">we41</a></li><liclass="nav-item"><ahref="#">web5</a></li></ul></div></body></html>
实现效果:
根据上面的知识,我们自己编写实现一个网站的横向导航栏
笔记:
- 将html对象和body对象的height和width属性都设置为100%,是为了让后面的内容对象(如导航栏),可以占满整个窗口。
- body对象中的 margin:0; 和 padding: 0; 使得内容紧贴窗口,不然会有空白间隙,可以自己实践下看看效果。
版权归原作者 阿常11 所有, 如有侵权,请联系我们删除。