概述
gtest是Google的一套用于编写C++测试的框架,可以运行在很多平台上(包括Linux、Mac OS X、Windows、Cygwin等等)。基于xUnit架构。支持很多好用的特性,包括自动识别测试、丰富的断言、断言自定义、死亡测试、非终止的失败、生成XML报告等等。
安装
gtest 下载地址: https://github.com/google/googletest
下载方法是:
git clone https://github.com/google/googletest.git
$ cd googletest
注意:如果在
make
过程中报错,可在CMakeLists.txt 中增加如下行,再执行下面的命令:
SET(CMAKE_CXX_FLAGS "-std=c++11")
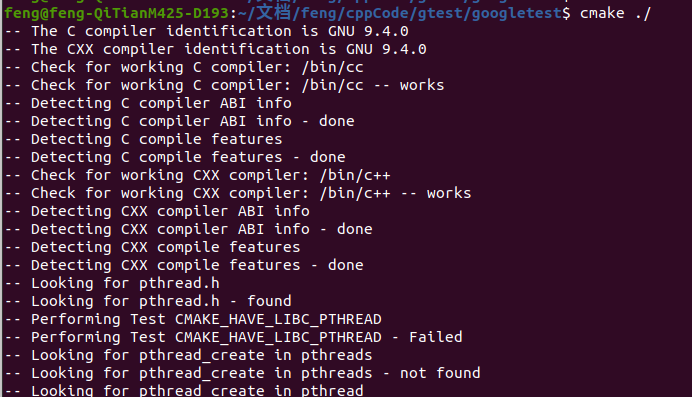
$ cmake .
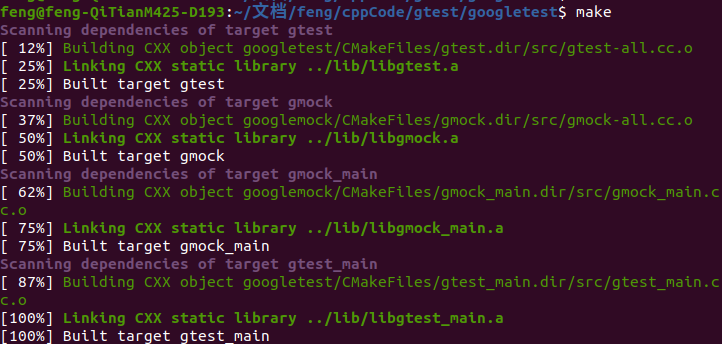
$ make
然后在lib目录下会生成:libgmock.a libgmock_main.a libgtest.a libgtest_main.a
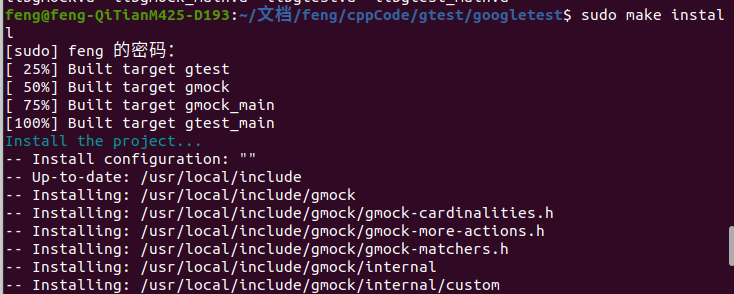
最后我们再
sudo make install
。


测试Demo
第一步:假设实现两个函数:
// Returns n! (the factorial of n).  For negative n, n! is defined to be 1.intFactorial(int n){int result =1;for(int i =1; i <= n; i++){
    result *= i;}return result;}// Returns true iff n is a prime number.boolIsPrime(int n){// Trivial case 1: small numbersif(n <=1)returnfalse;// Trivial case 2: even numbersif(n %2==0)return n ==2;// Now, we have that n is odd and n >= 3.// Try to divide n by every odd number i, starting from 3for(int i =3;; i +=2){// We only have to try i up to the square root of nif(i > n/i)break;// Now, we have i <= n/i < n.// If n is divisible by i, n is not prime.if(n % i ==0)returnfalse;}// n has no integer factor in the range (1, n), and thus is prime.returntrue;}
这两个函数定义在sample1.cc文件里,函数声明在
sample1.h
里:
#ifndefGTEST_SAMPLES_SAMPLE1_H_#defineGTEST_SAMPLES_SAMPLE1_H_// Returns n! (the factorial of n). For negative n, n! is defined to be 1.intFactorial(int n);// Returns true iff n is a prime number.boolIsPrime(int n);#endif
第二步:现在我们就是要测试Factorial和IsPrime两个函数是否正确,好了开始写我们的测试用例把。新建一个文件,命名为sample_unittest.cc,代码如下:
#include<limits.h>#include"sample1.h"#include"gtest/gtest.h"namespace{TEST(FactorialTest, Negative){// This test is named "Negative", and belongs to the "FactorialTest"// test case.EXPECT_EQ(1,Factorial(-5));EXPECT_EQ(1,Factorial(-1));EXPECT_GT(Factorial(-10),0);}TEST(FactorialTest, Zero){EXPECT_EQ(1,Factorial(0));}TEST(FactorialTest, Positive){EXPECT_EQ(1,Factorial(1));EXPECT_EQ(2,Factorial(2));EXPECT_EQ(6,Factorial(3));EXPECT_EQ(40320,Factorial(8));}// Tests IsPrime()TEST(IsPrimeTest, Negative){EXPECT_FALSE(IsPrime(-1));EXPECT_FALSE(IsPrime(-2));EXPECT_FALSE(IsPrime(INT_MIN));}TEST(IsPrimeTest, Trivial){EXPECT_FALSE(IsPrime(0));EXPECT_FALSE(IsPrime(1));EXPECT_TRUE(IsPrime(2));EXPECT_TRUE(IsPrime(3));}TEST(IsPrimeTest, Positive){EXPECT_FALSE(IsPrime(4));EXPECT_TRUE(IsPrime(5));EXPECT_FALSE(IsPrime(6));EXPECT_TRUE(IsPrime(23));}}// namespace
TEST是gtest的测试宏,我们的测试用例必须按照这样格式写,isPrimeTest是测试套的名字,一个测试套下可以有多个测试用例,那么Positive、Trivial就是我们测试用例的名称,EXPECT_EQ、EXPECT_FALSE和EXPECT_TRUE等等,都是gtest提供的测试断言,比如 EXPECT_EQ(1, Factorial(1));就是表示Factorial(1)和1是不是相等的,如果是则表示EXPECT_EQ会返回成功,否则失败,也即我们测试用例会失败或者成功。
第三步: 实现测试的main函数,当然我们也可以不用写 main 函数,那就需要连接gtest_main.a这个库。比如这样子编译:
g++ sample1.cc sample1_unittest.cc -lgtest-std=c++14 -lgtest_main-lpthread-o test1

然后运行测试程序test:
$ ./test1
会有以下输出: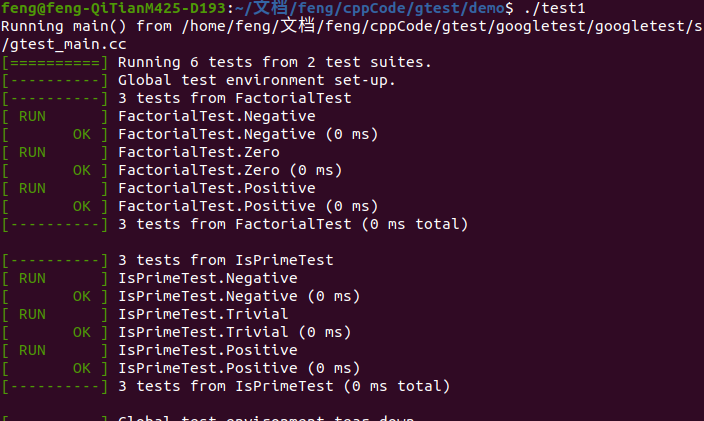
添加main 函数后,编译命令改为:
g++ sample1.cc sample_unittest_main.cc -lgtest-std=c++14 -lpthread-o test2
测试程序解读
首先,测试时使用 gtest 需包含头文件
gtest/gtest.h
,并链接库 gtest_main.lib 和 gtest.lib.
TEST(分类名, 测试名){
    测试代码
    也是如何测试,设置测试力
    }
test 中对数值的测试后缀: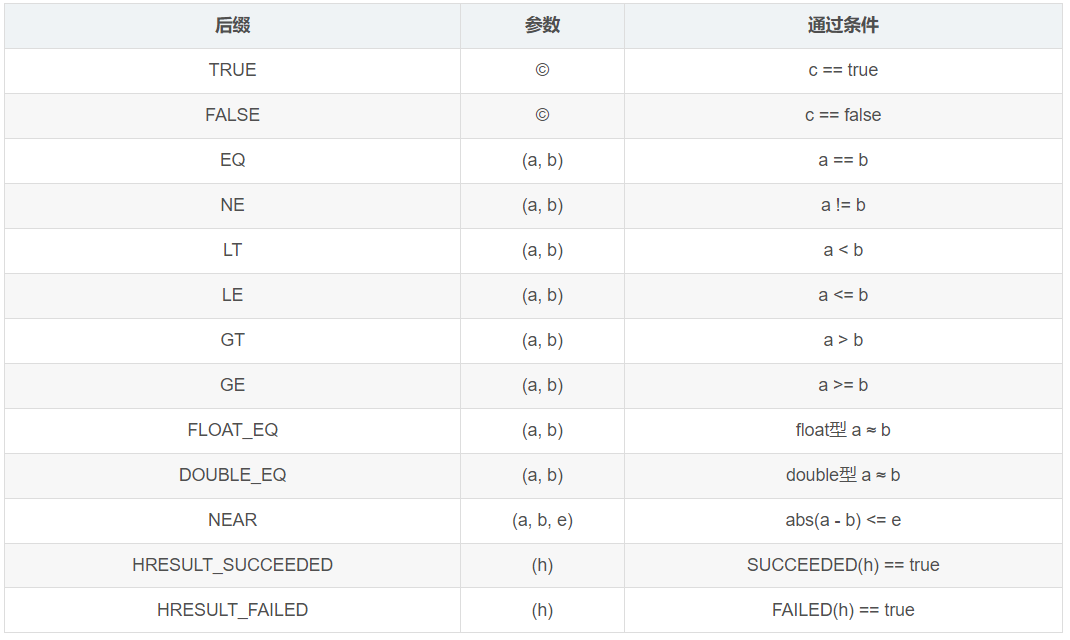
对字符串的检查后缀:
gtest入门教程
版权归原作者 飞大圣 所有, 如有侵权,请联系我们删除。