
环境搭配
想要针对公司集群环境学习一下Flink对接MySQL CDC写入Hive的方法,并对过程进行记录。公司环境为CDH 6.3.2搭建的集群,MySQL使用的是AWS RDS,对应MySQL5.7版本。CDH 6.3.2的Hadoop和Hive分别是3.0.0和2.1.1。但是由于开源版本的Hive2.1.1不支持Hadoop 3.x的版本,因此使用Hadoop前最后的版本2.9.2。整个环境组件版本如下:
- MySQL 5.7
- Hadoop 2.9.2
- Hive 2.1.1
- zookeeper 3.4.10
- Kafka 2.3.0
- Flink 1.13.5
搭建MySQL
参考MySQL5.7版本在CentOS系统安装 保姆级教程 从小白开始 步骤清晰简单明了_centos安装mysql5.7_不染_是非的博客-CSDN博客
adoop
搭建Hadoop + Hive
Hadoop参考https://www.lmlphp.com/user/62384/article/item/2432751/,链接中版本就是2.9.2的。
<property>
    <name>hive.metastore.uris</name>
    <value>thrift://master:9083</value>
</property>
搭建zookeeper
kafka依赖zookeeper,如果是使用kafka 3.x版本则不需要单独进行安装,我们这里测试使用的是2.3.0版本,简单搭建一个单机的zookeeper。zookeeper编译好的链接如下:https://archive.apache.org/dist/zookeeper/zookeeper-3.4.10/zookeeper-3.4.10.tar.gz
下载后解压,并更改zookeeper的配置
tar -xzvf zookeeper-3.4.10.tar.gz
cd zookeeper-3.4.10
mkdir -p /data/zookeeper  # 创建zookeeper数据文件的路径
cp conf/zoo_sample.cfg conf/zoo.cfg
vi conf/zoo.cfg
配置内容如下
# The number of milliseconds of each tick
tickTime=2000
# The number of ticks that the initial
# synchronization phase can take
initLimit=10
# The number of ticks that can pass between
# sending a request and getting an acknowledgement
syncLimit=5
# the directory where the snapshot is stored.
# do not use /tmp for storage, /tmp here is just
# example sakes.
dataDir=/data/zookeeper
# the port at which the clients will connect
clientPort=2181
# the maximum number of client connections.
# increase this if you need to handle more clients
#maxClientCnxns=60
#
# Be sure to read the maintenance section of the
# administrator guide before turning on autopurge.
#
# http://zookeeper.apache.org/doc/current/zookeeperAdmin.html#sc_maintenance
#
# The number of snapshots to retain in dataDir
#autopurge.snapRetainCount=3
# Purge task interval in hours
# Set to "0" to disable auto purge feature
#autopurge.purgeInterval=1
之后运行zookeeper即可
bin/zkServer.sh start
搭建kafka
kafka下载链接如下:
https://archive.apache.org/dist/kafka/2.3.0/kafka_2.11-2.3.0.tgz
解压后修改kafka目录config路径下的zookeeper配置
tar -xzvf kafka_2.11-2.3.0.tar.gz
cd kafka_2.11-2.3.0
mkdir -p /data/kafka/zookeeper  # 创建zookeeper数据文件的路径
vi config/zookeeper.properties
修改内容为
# Licensed to the Apache Software Foundation (ASF) under one or more
# contributor license agreements.  See the NOTICE file distributed with
# this work for additional information regarding copyright ownership.
# The ASF licenses this file to You under the Apache License, Version 2.0
# (the "License"); you may not use this file except in compliance with
# the License.  You may obtain a copy of the License at
#
#    http://www.apache.org/licenses/LICENSE-2.0
#
# Unless required by applicable law or agreed to in writing, software
# distributed under the License is distributed on an "AS IS" BASIS,
# WITHOUT WARRANTIES OR CONDITIONS OF ANY KIND, either express or implied.
# See the License for the specific language governing permissions and
# limitations under the License.
# the directory where the snapshot is stored.
dataDir=/data/kafka/zookeeper
# the port at which the clients will connect
clientPort=2181
# disable the per-ip limit on the number of connections since this is a non-production config
maxClientCnxns=0
# Disable the adminserver by default to avoid port conflicts.
# Set the port to something non-conflicting if choosing to enable this
# admin.enableServer=false
admin.serverPort=8080
tickTime=2000
initLimit=5
syncLimit=2
server.1=master:2888:3888
之后修改kafak server配置文config/server.properties,修改几个默认项即可
# vi config/server.properties

# The address the socket server listens on. It will get the value returned from
# java.net.InetAddress.getCanonicalHostName() if not configured.
#   FORMAT:
#     listeners = listener_name://host_name:port
#   EXAMPLE:
#     listeners = PLAINTEXT://your.host.name:9092
listeners=PLAINTEXT://master:9092

# Zookeeper connection string (see zookeeper docs for details).
# This is a comma separated host:port pairs, each corresponding to a zk
# server. e.g. "127.0.0.1:3000,127.0.0.1:3001,127.0.0.1:3002".
# You can also append an optional chroot string to the urls to specify the
# root directory for all kafka znodes.
zookeeper.connect=master:2181/kafka
之后后台运行kafka
nohup bin/kafka-server-start.sh config/server.properties &
搭建Flink
下载编译好的flink,链接如下:https://archive.apache.org/dist/flink/flink-1.13.5/flink-1.13.5-bin-scala_2.11.tgz
之后再下载flink sql的hive connector的jar包,对接kafka以及mysql-cdc的jar包,链接如下:
- hive: https://repo.maven.apache.org/maven2/org/apache/flink/flink-sql-connector-hive-2.2.0_2.11/1.13.5/flink-sql-connector-hive-2.2.0_2.11-1.13.5.jar
- kafka:https://repo.maven.apache.org/maven2/org/apache/flink/flink-sql-connector-kafka_2.11/1.13.5/flink-sql-connector-kafka_2.11-1.13.5.jar
- mysql: https://repo.maven.apache.org/maven2/com/alibaba/ververica/flink-sql-connector-mysql-cdc/1.4.0/flink-sql-connector-mysql-cdc-1.4.0.jar
解压后将hive connector的jar包放在flink目录的lib路径下,若没有此连接hive的jar包,将导致时候在flinksql中无法创建hive相关的catalog。
tar -xzvf flink-1.13.5-bin-scala_2.11.tgz
mv flink-sql-connector-*.jar flink-1.13.5/lib/
在集群中启动flinksql的客户端可以通过flink的standalone或者hadoop集群中的YARN。
启动flink standalone集群
cd flink-1.13.5/bin
./start-cluster.sh
启动集群后即可通过节点的8081端口查看flink的ui页面,例如如下

之后使用bin路径下的sql-client.sh即可启动一个flinksql的客户端
./sql-client.sh embedded
如果不想使用flink的standalone集群而是统一使用yarn话,则通过yarn-session.sh来提交一个常运行的yarn application。
首先,在环境变量中添加HADOOP_CLASSPATH的相关配置,否则会出现YARN的相关Exception。
# vi /etc/profile

export HADOOP_CLASSPATH=`hadoop classpath`
之后创建YARN Sesson,注意jobmanager memory不宜过小,默认堆内内存至少为128M,考虑到默认堆外内存最小值(192M)和metastore内存(256M),jobmanager memory至少设置为576M。相关说明可以参考https://www.jianshu.com/p/c47c1756d29b
./yarn-session.sh -d -s 1 -jm 768 -tm 1024 -nm flink-cdc-hive
之后查看Resource Manager的UI页面可以看到任务已经在运行

之后同样适用sql-client.sh启动flinksql客户端,记得指定session
./sql-client.sh embedded -s flink-cdc-hive
FlinkSQL代码编写
FlinkSQL对接Hive
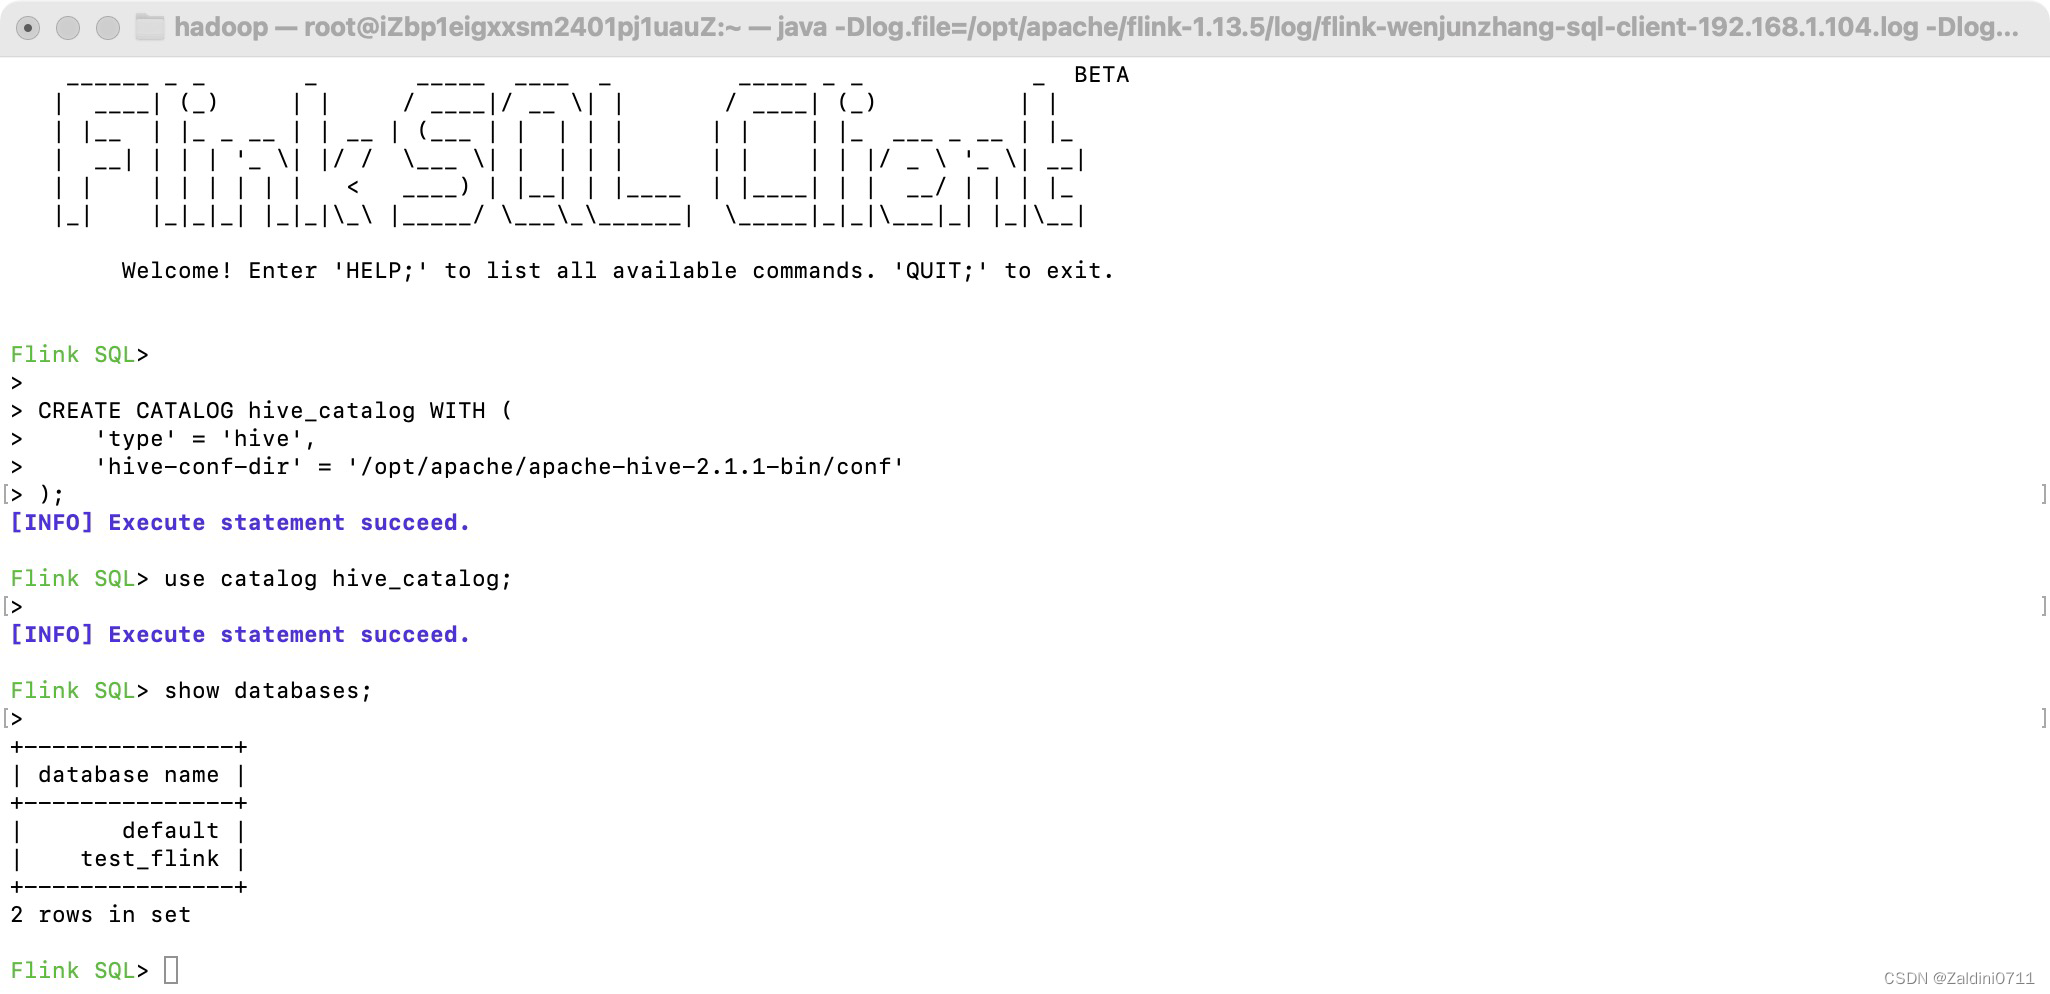
首先在flinksql的client中创建一个hive的catalog,需要确保flinksql客户端的节点上有hive的相关配置文件hive-site.xml,另外注意hive中的metastore不允许是Embedded类型的,hive-site.xml中需要有明确的hive.metastore.uris配置
CREATE CATALOG hive_catalog WITH (
    'type' = 'hive',
    'hive-conf-dir' = '/opt/apache/apache-hive-2.1.1-bin/conf'
);
添加完之后使用hive catalog,已经可以查看到hive中的表格了
use catalog hive_catalog;
show databases;
在查询时出现了"java.lang.ClassNotFoundException: org.apache.hadoop.mapred.JobConf"的问题

需要将hadoop目录下share/hadoop/mapreduce/hadoop-mapreduce-client-core-2.9.2.jar的jar包放置在flink的lib路径下
cp /opt/apache/hadoop-2.9.2/share/hadoop/mapreduce/hadoop-mapreduce-client-core-2.9.2.jar /opt/apache/flink-1.13.5/lib/
之后重启standalone集群或者重新提交yarn-session,重新查询发现不报错了
MySQL-Flink-Hive
MySQL数据流式写入Hive通过将CDC写入Kafka,之后Flink对接Kafka从而将数据写入Hive。
MySQL CDC - Kafka
首先在mysql中创建一张表,并写入测试数据
CREATE TABLE `product_view` (
`id` int(11) NOT NULL AUTO_INCREMENT,
`user_id` int(11) NOT NULL,
`product_id` int(11) NOT NULL,
`server_id` int(11) NOT NULL,
`duration` int(11) NOT NULL,
`times` varchar(11) NOT NULL,
`time` datetime NOT NULL,
PRIMARY KEY (`id`),
KEY `time` (`time`),
KEY `user_product` (`user_id`,`product_id`) USING BTREE,
KEY `times` (`times`) USING BTREE
) ENGINE=InnoDB DEFAULT CHARSET=utf8mb4;

-- 样本数据
INSERT INTO `product_view` VALUES ('1', '1', '1', '1', '120', '120', '2020-04-24 13:14:00');
INSERT INTO `product_view` VALUES ('2', '1', '1', '1', '120', '120', '2020-04-24 13:14:00');
INSERT INTO `product_view` VALUES ('3', '1', '1', '3', '120', '120', '2020-04-24 13:14:00');
INSERT INTO `product_view` VALUES ('4', '1', '1', '2', '120', '120', '2020-04-24 13:14:00');
INSERT INTO `product_view` VALUES ('5', '8', '1', '1', '120', '120', '2020-05-14 13:14:00');
INSERT INTO `product_view` VALUES ('6', '8', '1', '2', '120', '120', '2020-05-13 13:14:00');
INSERT INTO `product_view` VALUES ('7', '8', '1', '3', '120', '120', '2020-04-24 13:14:00');
INSERT INTO `product_view` VALUES ('8', '8', '1', '3', '120', '120', '2020-04-23 13:14:00');
INSERT INTO `product_view` VALUES ('9', '8', '1', '2', '120', '120', '2020-05-13 13:14:00');
之后,在flinksql中创建相应的mysql表
CREATE TABLE product_view_source (
`id` int,
`user_id` int,
`product_id` int,
`server_id` int,
`duration` int,
`times` string,
`time` timestamp,
PRIMARY KEY (`id`) NOT ENFORCED
) WITH (
'connector' = 'mysql-cdc',
'hostname' = 'master',
'port' = '3306',
'username' = 'bigdata',
'password' = 'Bigdata@123',
'database-name' = 'test',
'table-name' = 'product_view'
);
这样,我们在flink sql client操作这个表相当于操作mysql里面的对应表。
select count(1) as cnt from product_view_source;
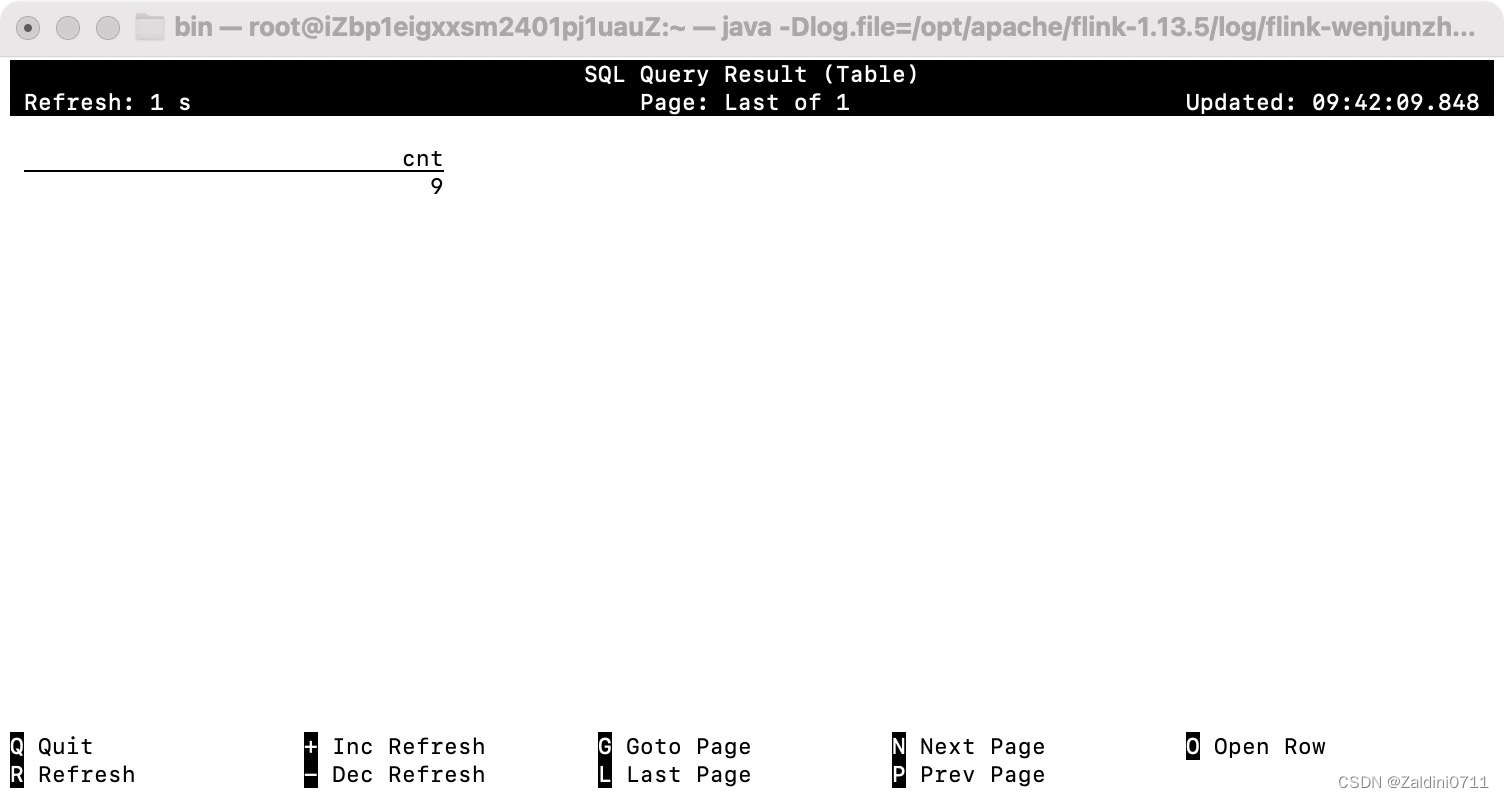
在mysql中插入新的数据,之后flinksql中的查询结果也会自动刷新
INSERT INTO `product_view` VALUES ('10', '8', '1', '3', '120', '120', '2020-04-24 13:14:00');

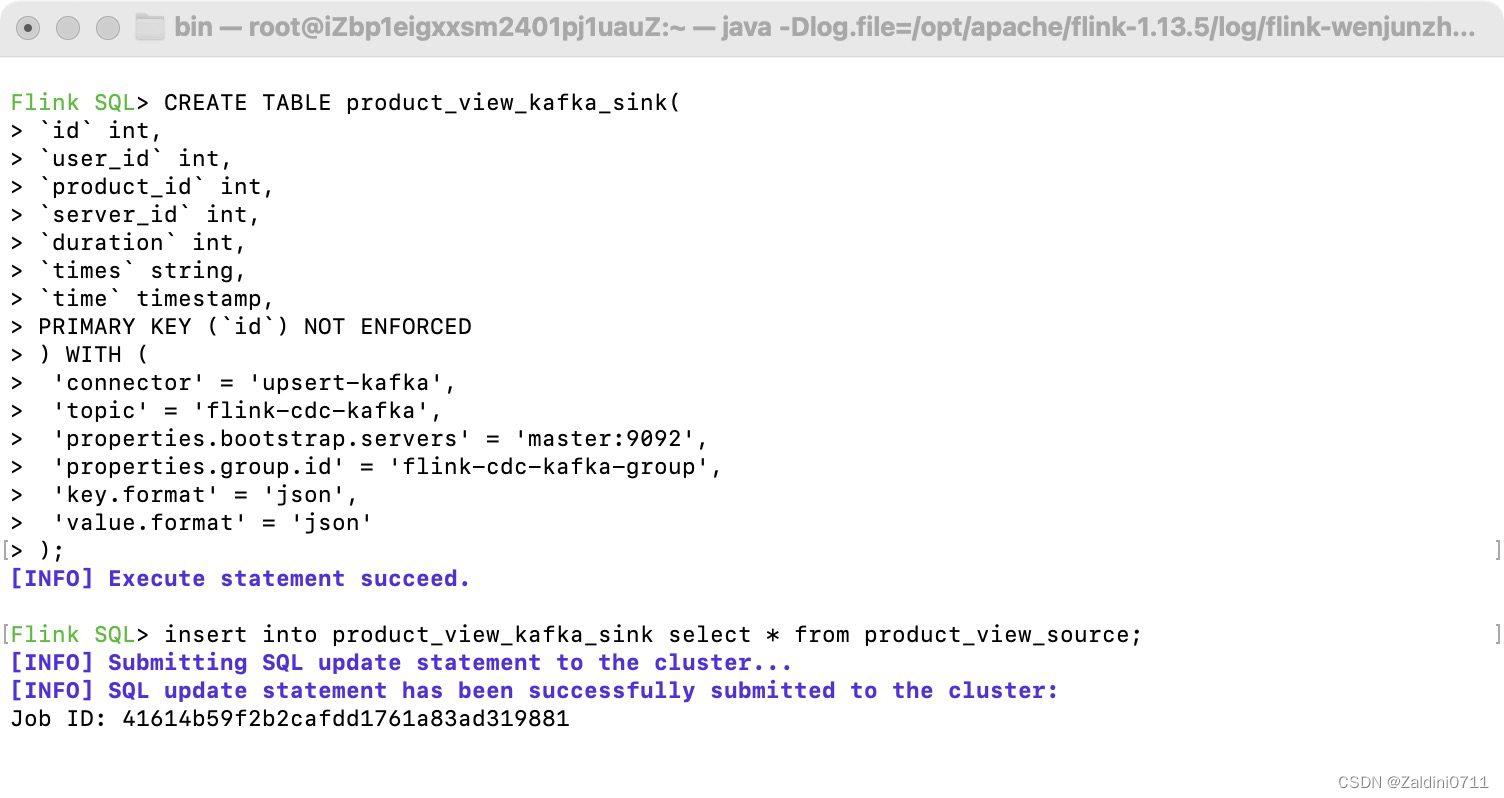
之后创建数据表关联kafka
CREATE TABLE product_view_kafka_sink(
`id` int,
`user_id` int,
`product_id` int,
`server_id` int,
`duration` int,
`times` string,
`time` timestamp,
PRIMARY KEY (`id`) NOT ENFORCED
) WITH (
 'connector' = 'upsert-kafka',
 'topic' = 'flink-cdc-kafka',
 'properties.bootstrap.servers' = 'master:9092',
 'properties.group.id' = 'flink-cdc-kafka-group',
 'key.format' = 'json',
 'value.format' = 'json'
);
这样,kafka里面的flink-cdc-kafka这个主题会被自动创建,如果想指定一些属性,可以提前手动创建好主题。
有了一个mysql的source和kafka的sink后。我们使用product_view_source往product_view_kafka_sink里面插入数据。任务就会提交到flink的cluster。
insert into product_view_kafka_sink select * from product_view_source;
之后使用kafka的console可以发现kafka中已经有数据了。
/opt/apache/kafka_2.11-2.3.0/bin/kafka-console-consumer.sh --bootstrap-server master:9092 --topic flink-cdc-kafka

Kafka - Flink - Hive
前面完成了mysql实时同步数据到kafka,下面实现kafka实时写入数据到Hive的过程。
首先在flinksql中建表,现在使用kafka作为source
CREATE TABLE product_view_mysql_kafka_parser(
`id` int,
`user_id` int,
`product_id` int,
`server_id` int,
`duration` int,
`times` string,
`time` timestamp
) WITH (
 'connector' = 'kafka',
 'topic' = 'flink-cdc-kafka',
 'properties.bootstrap.servers' = 'master:9092',
 'scan.startup.mode' = 'earliest-offset',
 'format' = 'json'
);
查一查看看,没有问题
select * from product_view_mysql_kafka_parser;

之后在Hive cli中建表,注意当中TBLPROPERTIES的配置,建表后可在flinksql中看到建好的表格。
CREATE TABLE product_view_kafka_hive_cdc (
  `id` int,
`user_id` int,
`product_id` int,
`server_id` int,
`duration` int,
`times` string,
`time` timestamp
) STORED AS parquet TBLPROPERTIES (
  'sink.partition-commit.trigger'='partition-time',
  'sink.partition-commit.delay'='0S',
  'sink.partition-commit.policy.kind'='metastore,success-file',
  'auto-compaction'='true',
  'compaction.file-size'='128MB'
);
最终将kafka source表的数据写入Hive的sink表中,注意这里因为我的表都是在hive_catalog中的一个表中建的,且当前我使用着hive_catalog,所以省略了部分说明。如果使用了不同的catalog,可以通过${catalog}.${database}.${table}的方式来指定表。
insert into product_view_kafka_hive_cdc
select *
from
product_view_mysql_kafka_parser;
版权归原作者 Zaldini0711 所有, 如有侵权,请联系我们删除。