
在vue开发中,我们每次新建页面都会需要写一大部分重复代码。那么有什么办法,能够建立模版:vscode是可以进行相关配置的。
1、这里点击用户代码片段,1. 用快捷Ctrl + Shift + P唤出控制台也可以,然后输入

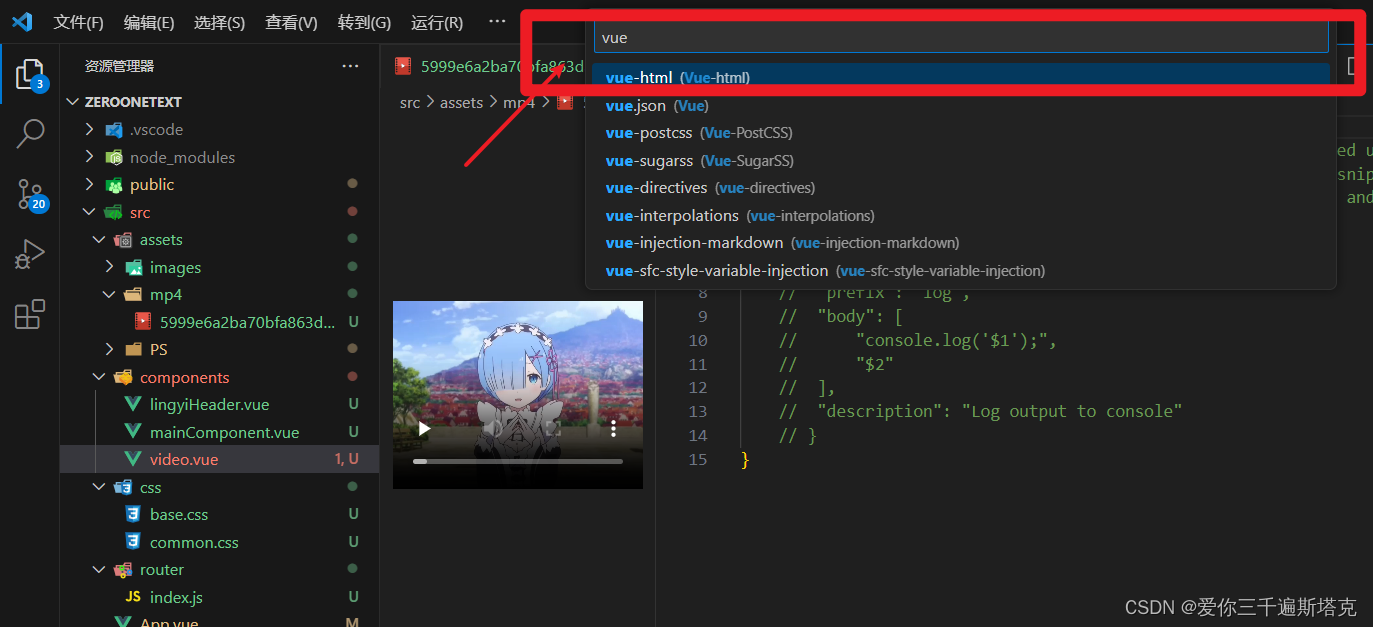
1.1 接着输入vue
 j
j
第二种打开方式

1、输入vue
2、vue2的模版
{
    // Place your snippets for vue here. Each snippet is defined under a snippet name and has a prefix, body and
    // description. The prefix is what is used to trigger the snippet and the body will be expanded and inserted. Possible variables are:
    // $1, $2 for tab stops, $0 for the final cursor position, and ${1:label}, ${2:another} for placeholders. Placeholders with the
    // same ids are connected.
    // Example:
    "Print to console": {
        "prefix": "vue2",
        "body": [
            "<!-- $1 -->",
            "<template>",
            "  <div class='$2'>$5</div>",
            "</template>",
            "",
            "<script>",
            "export default {",
            "  //import引入的组件需要注入到对象中才能使用",
            "  components: {},",
            "    data() {",
            "    //这里存放数据",
            "      return {",
            "",
            "      };",
            "    },",
            "  //监听属性 类似于data概念",
            "  computed: {},",
            "  //监控data中的数据变化",
            "  watch: {},",
            "  //方法集合",
            "  methods: {",
            "",
            "  },",
            "  //生命周期 - 创建完成(可以访问当前this实例)",
            "  created() {",
            "",
            "  },",
            "  //生命周期 - 挂载完成(可以访问DOM元素)",
            "  mounted() {",
            "",
            "  },",
            "  beforeCreate() {}, //生命周期 - 创建之前",
            "  beforeMount() {}, //生命周期 - 挂载之前",
            "  beforeUpdate() {}, //生命周期 - 更新之前",
            "  updated() {}, //生命周期 - 更新之后",
            "  beforeDestroy() {}, //生命周期 - 销毁之前",
            "  destroyed() {}, //生命周期 - 销毁完成",
            "  activated() {}, //如果页面有keep-alive缓存功能,这个函数会触发",
            "}",
            "</script>",
            "<style lang='scss' scoped>",
            "  //@import url($3); 引入公共css类",
            "$4",
            "</style>"
        ],
        "description": "A vue file template"
    }
}
3、下面是vue3的配置代码
{
    "Print to console": {
      "prefix": "vue3",
      "body": [
        "<template>",
        "  <div></div>",
        "</template>",
        "",
        "<script>",
        "import { reactive, toRefs, onBeforeMount, onMounted } from 'vue'",
        "export default {",
        "  name: '',",
        "  setup() {",
        "    console.log('1-开始创建组件-setup')",
        "    const data = reactive({})",
        "    onBeforeMount(() => {",
        "      console.log('2.组件挂载页面之前执行----onBeforeMount')",
        "    })",
        "    onMounted(() => {",
        "      console.log('3.-组件挂载到页面之后执行-------onMounted')",
        "    })",
        "    return {",
        "      ...toRefs(data),",
        "    }",
        "  },",
        "}",
        "",
        "</script>",
        "<style scoped lang='less'>",
        "</style>",

    ],
      "description": "Log output to console"
    }
  }
4、vue3.2 的配置代码
{
  "Print to console": {
    "prefix": "vue3",
    "body": [
      "<template>",
      "  <div $1></div>",
      "</template>",
      "",
      "<script setup>",
       "import { ref, reactive, toRefs, onBeforeMount, onMounted, watchEffect, computed, getCurrentInstance } from 'vue';",
      "import { useStore } from 'vuex';",
      "import { useRoute, useRouter } from 'vue-router';",
       "const { proxy } = getCurrentInstance();",
        "// proxy 替代 this",
      "/**",
      "* 仓库",
      "*/",
      "const store = useStore();",
      "/**",
      "* 路由对象",
      "*/",
      "const route = useRoute();",
      "/**",
      "* 路由实例",
      "*/",
      "const router = useRouter();",
      "//console.log('1-开始创建组件-setup')",
      "/**",
      "* 数据部分",
      "*/",
      "const data = reactive({})",
      "onBeforeMount(() => {",
      "  //console.log('2.组件挂载页面之前执行----onBeforeMount')",
      "})",
      "onMounted(() => {",
      "  //console.log('3.-组件挂载到页面之后执行-------onMounted')",
      "})",
      "watchEffect(()=>{",
      "})",
      "// 使用toRefs解构",
      "// let { } = { ...toRefs(data) } ",
      "defineExpose({",
      "  ...toRefs(data)",
      "})",
      "",
      "</script>",
      "<style scoped lang='less'>",
      "</style>"
    ],
    "description": "Log output to console"
  }
}
5、新建完页面,输入vue3,按Tab键或者回车都可以出现

本文转载自: https://blog.csdn.net/weixin_54048131/article/details/135579006
版权归原作者 爱你三千遍斯塔克 所有, 如有侵权,请联系我们删除。
版权归原作者 爱你三千遍斯塔克 所有, 如有侵权,请联系我们删除。