篇一:部署Kubesphere
关注博主B站,录有实操
ID:老白嫖大怪兽
更多运维分享
该公司决定采用Kubernetes + GitLab + Harbor + KubeSphere(集成了Jenkins、Istio等工具) 架构来构建CICD环境,以缩短新功能开发上线周期,及时满足客户的需求,实现DevOps的部分流程,来减轻部署运维的负担,实现可视化容器生命周期管理、应用发布和版本迭代更新,请完成CICD环境部署。CICD应用系统架构如下: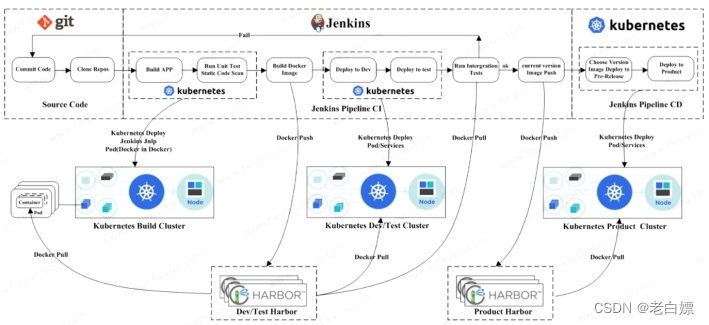
1.准备KubeSphere环境
1.1部署前提
- 如需在 Kubernetes 上安装 KubeSphere 3.2.1,您的 Kubernetes 版本必须为:1.19.x、1.20.x、1.21.x 或 1.22.x(实验性支持)。
- 确保您的机器满足最低硬件要求:CPU > 1 核,内存 > 2 GB。
- 在安装之前,需要配置 Kubernetes 集群中的默认存储类型。
1.2部署检查
1.查看kubectl的版本是否符合要求。
$ kubectl version
2.检查集群中的可用资源是否满足最低要求。
# free -g
total    used     free    shared  buff/cache  available
Mem:  14350511
Swap:  000
3.检查集群中是否有默认 StorageClass(准备默认 StorageClass 是安装 KubeSphere 的前提条件)
## 创建了一个存储类apiVersion: storage.k8s.io/v1
kind: StorageClass
metadata:name: nfs-storage
  annotations:storageclass.kubernetes.io/is-default-class:"true"provisioner: k8s-sigs.io/nfs-subdir-external-provisioner
parameters:archiveOnDelete:"true"## 删除pv的时候,pv的内容是否要备份---apiVersion: apps/v1
kind: Deployment
metadata:name: nfs-client-provisioner
  labels:app: nfs-client-provisioner
  # replace with namespace where provisioner is deployednamespace: default
spec:replicas:1strategy:type: Recreate
  selector:matchLabels:app: nfs-client-provisioner
  template:metadata:labels:app: nfs-client-provisioner
    spec:serviceAccountName: nfs-client-provisioner
      containers:-name: nfs-client-provisioner
          image: registry.cn-hangzhou.aliyuncs.com/lfy_k8s_images/nfs-subdir-external-provisioner:v4.0.2
          # resources:#    limits:#      cpu: 10m#    requests:#      cpu: 10mvolumeMounts:-name: nfs-client-root
              mountPath: /persistentvolumes
          env:-name: PROVISIONER_NAME
              value: k8s-sigs.io/nfs-subdir-external-provisioner
            -name: NFS_SERVER
              value: 10.18.4.10 ## 指定自己nfs服务器地址-name: NFS_PATH
              value: /data/k8s  ## nfs服务器共享的目录volumes:-name: nfs-client-root
          nfs:server: 10.18.4.10
            path: /data/k8s
---apiVersion: v1
kind: ServiceAccount
metadata:name: nfs-client-provisioner
  # replace with namespace where provisioner is deployednamespace: default
---kind: ClusterRole
apiVersion: rbac.authorization.k8s.io/v1
metadata:name: nfs-client-provisioner-runner
rules:-apiGroups:[""]resources:["nodes"]verbs:["get","list","watch"]-apiGroups:[""]resources:["persistentvolumes"]verbs:["get","list","watch","create","delete"]-apiGroups:[""]resources:["persistentvolumeclaims"]verbs:["get","list","watch","update"]-apiGroups:["storage.k8s.io"]resources:["storageclasses"]verbs:["get","list","watch"]-apiGroups:[""]resources:["events"]verbs:["create","update","patch"]---kind: ClusterRoleBinding
apiVersion: rbac.authorization.k8s.io/v1
metadata:name: run-nfs-client-provisioner
subjects:-kind: ServiceAccount
    name: nfs-client-provisioner
    # replace with namespace where provisioner is deployednamespace: default
roleRef:kind: ClusterRole
  name: nfs-client-provisioner-runner
  apiGroup: rbac.authorization.k8s.io
---kind: Role
apiVersion: rbac.authorization.k8s.io/v1
metadata:name: leader-locking-nfs-client-provisioner
  # replace with namespace where provisioner is deployednamespace: default
rules:-apiGroups:[""]resources:["endpoints"]verbs:["get","list","watch","create","update","patch"]---kind: RoleBinding
apiVersion: rbac.authorization.k8s.io/v1
metadata:name: leader-locking-nfs-client-provisioner
  # replace with namespace where provisioner is deployednamespace: default
subjects:-kind: ServiceAccount
    name: nfs-client-provisioner
    # replace with namespace where provisioner is deployednamespace: default
roleRef:kind: Role
  name: leader-locking-nfs-client-provisioner
  apiGroup: rbac.authorization.k8s.io
1.3安装准备
1.3.1准备私有镜像仓库
离线安装几乎与在线安装相同,不同之处是必须有一个本地仓库(这里延用集群中创建的harbor)来托管 Docker 镜像。
1.3.2准备安装镜像
当您在离线环境中安装 KubeSphere 时,需要事先准备一个包含所有必需镜像的镜像包(这些都是提前准备好的)。
(1)下载镜像清单文件 images-list.txt。
curl-L-O\
https://github.com/kubesphere/ks-installer/releases/download/v3.2.1/images-list.txt
(2)下载 offline-installation-tool.sh。
curl-L-O\
https://github.com/kubesphere/ks-installer/releases/download/v3.2.1/offline-installation-tool.sh
(3)使 .sh 文件可执行。
chmod +x offline-installation-tool.sh
(4)在offline-installation-tool.sh 中拉取镜像。
./offline-installation-tool.sh -s-l images-list.txt \-d ./kubesphere-images
可以不用下载,毕竟东西不少,使用我给到的镜像包,在这里直接把镜像导入即可
#这里只导入如下镜像
example-images.tar.gz
istio-images.tar.gz
kubesphere-devops-images.tar.gz
kubesphere-images.tar.gz
kubesphere-logging-images.tar.gz
kubesphere-monitoring-images.tar.gz
![[外链图片转存失败,源站可能有防盗链机制,建议将图片保存下来直接上传(img-83QRcpmT-1676425069211)(image/image-20220621191409134.png)]](https://img-blog.csdnimg.cn/75452bbb0b37470784268bbd195e2b27.png)
1.3.3推送镜像至私有仓库
(1)将脚本将下载到本地的镜像推送到私有仓库中。
./offline-installation-tool.sh -l images-list.txt \-d ./kubesphere-images -r10.18.4.10/kubesphere
1.3.4部署yaml文件
需要事先准备好 cluster-configuration.yaml 与kubesphere-installer.yaml。
curl -L -O \
https://github.com/kubesphere/ks-installer/releases/download/v3.2.1/kubesphere-installer.yaml

curl -L -O \
https://github.com/kubesphere/ks-installer/releases/download/v3.2.1/cluster-configuration.yaml
(1)修改部署文件。
编辑 cluster-configuration.yaml 添加您的私有镜像仓库,如下所示。
spec:
 persistence:
  storageClass: ""
 authentication:
  jwtSecret: ""
 local_registry: 10.18.4.10/kubesphere
(3)使用以下命令将curl -L -O \ 替换为自己仓库的地址。
sed-i"s#^\s*image: kubesphere.*/ks-installer:.*# image: dockerhub.kubekey.local/kubesphere/ks-installer:v3.0.0#" kubesphere-installer.yaml
(4)修改集群配置文件,启用相关组件。
Etcd(键值数据库),redis(非关系型的数据库),Openldap(轻型目录访问协议),monitoring(集群监控),alerting(集群告警),auditing(集群审计),devops,events,Logging(集群日志),networkpolicy,openpitrix(应用商店),servicemesh(服务网格)
(5)验证安装。
Console: http://10.18.4.10:30880
Account: admin
初始Password: P@88w0rd

#登陆后需要修改密码
![[外链图片转存失败,源站可能有防盗链机制,建议将图片保存下来直接上传(img-pP97VGHS-1676425069212)(image/image-20220623170542394.png)]](https://img-blog.csdnimg.cn/08421f523eac4dc393d6c066d811824f.png)
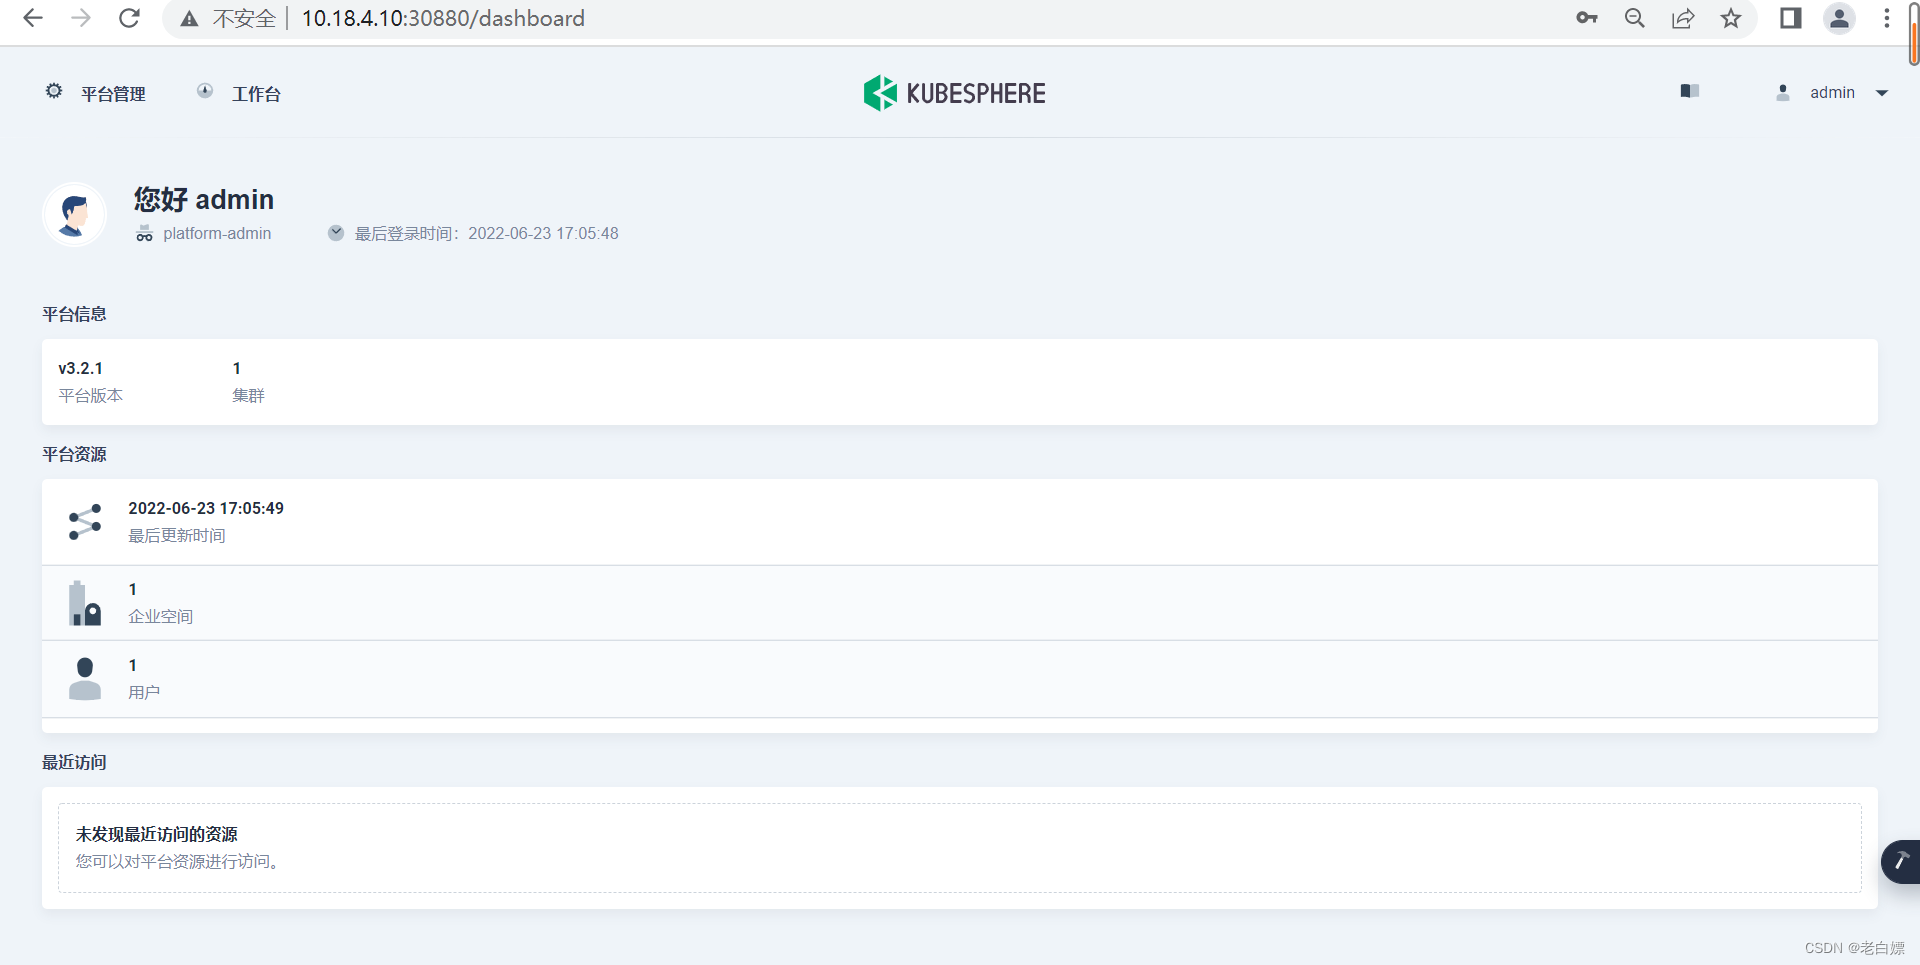
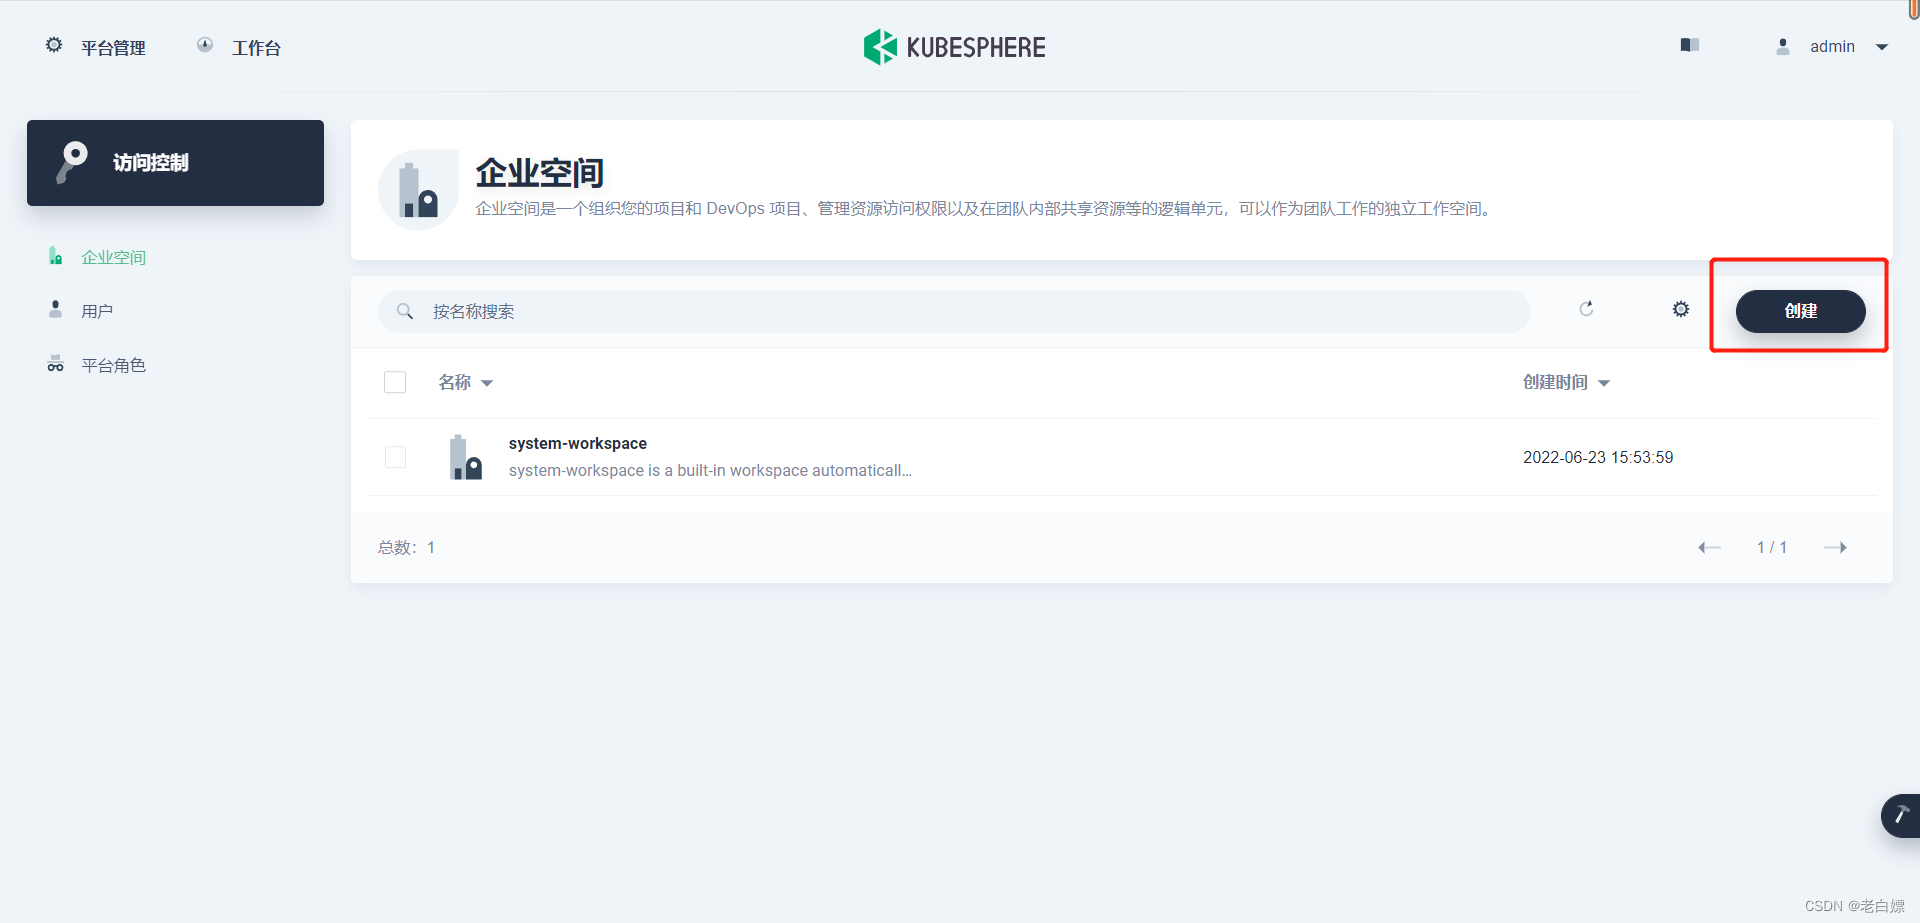
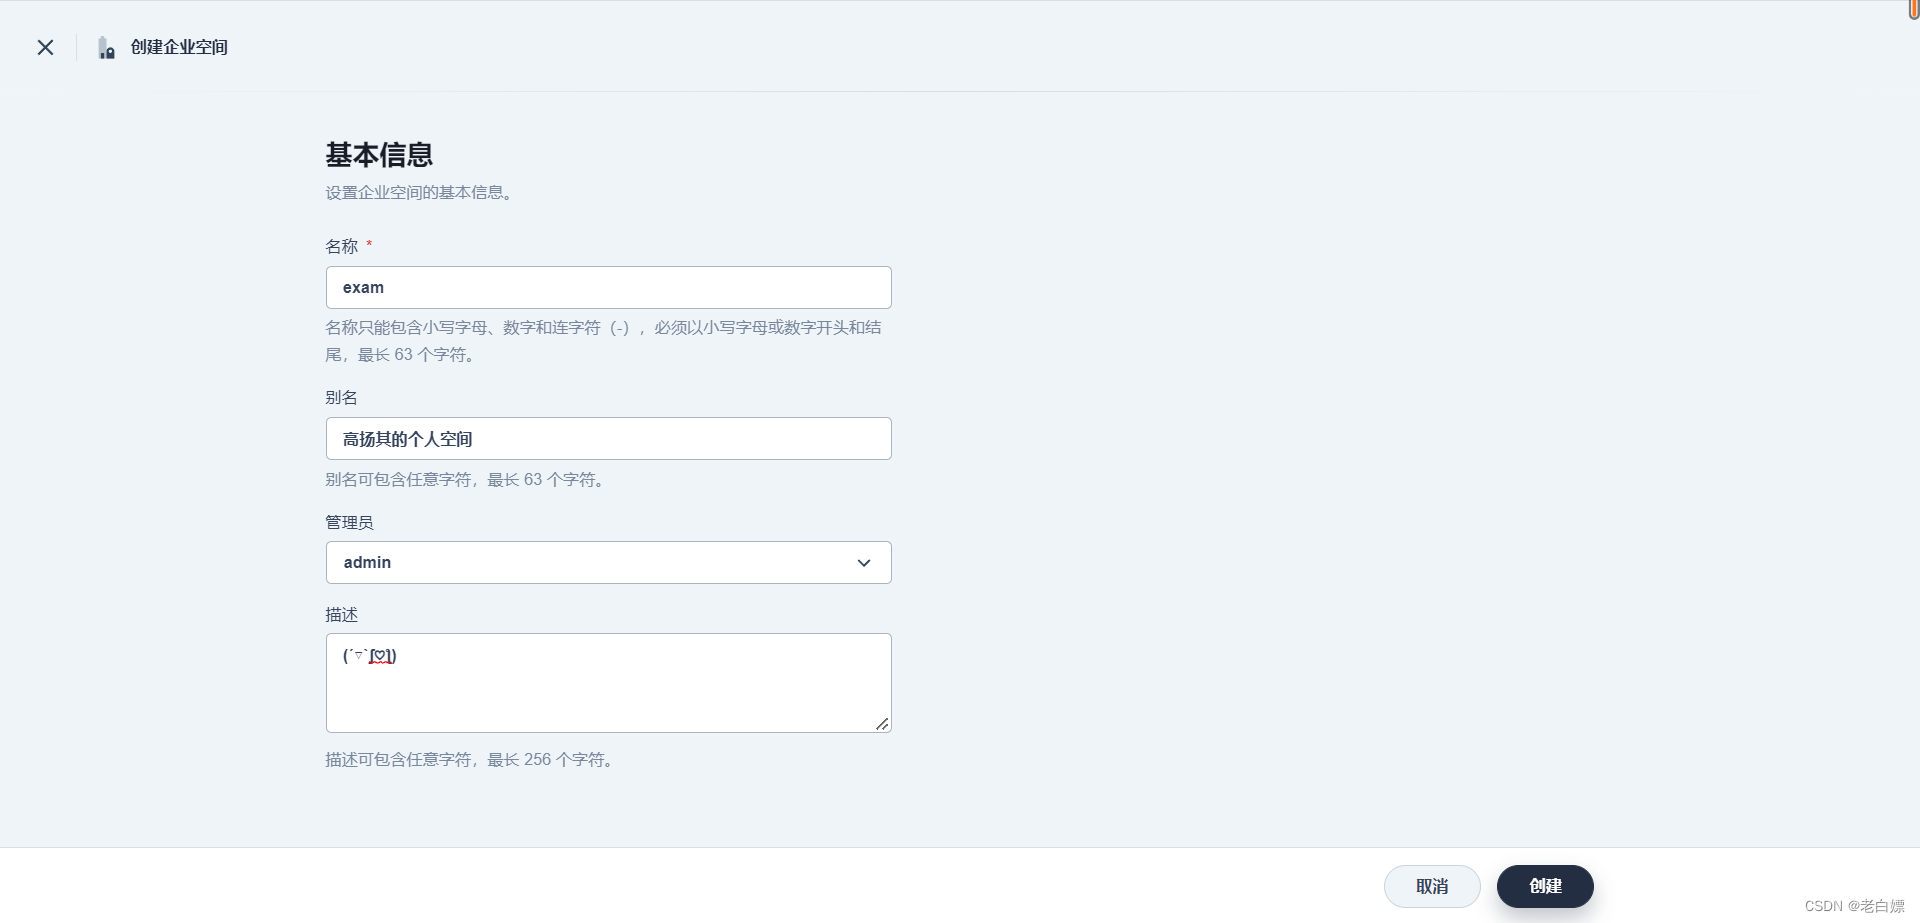
部署完成以后,可以模拟创建创建一个企业空间exam,并有examuser1来创建管理一个DevOps项目。
篇二:环境预配
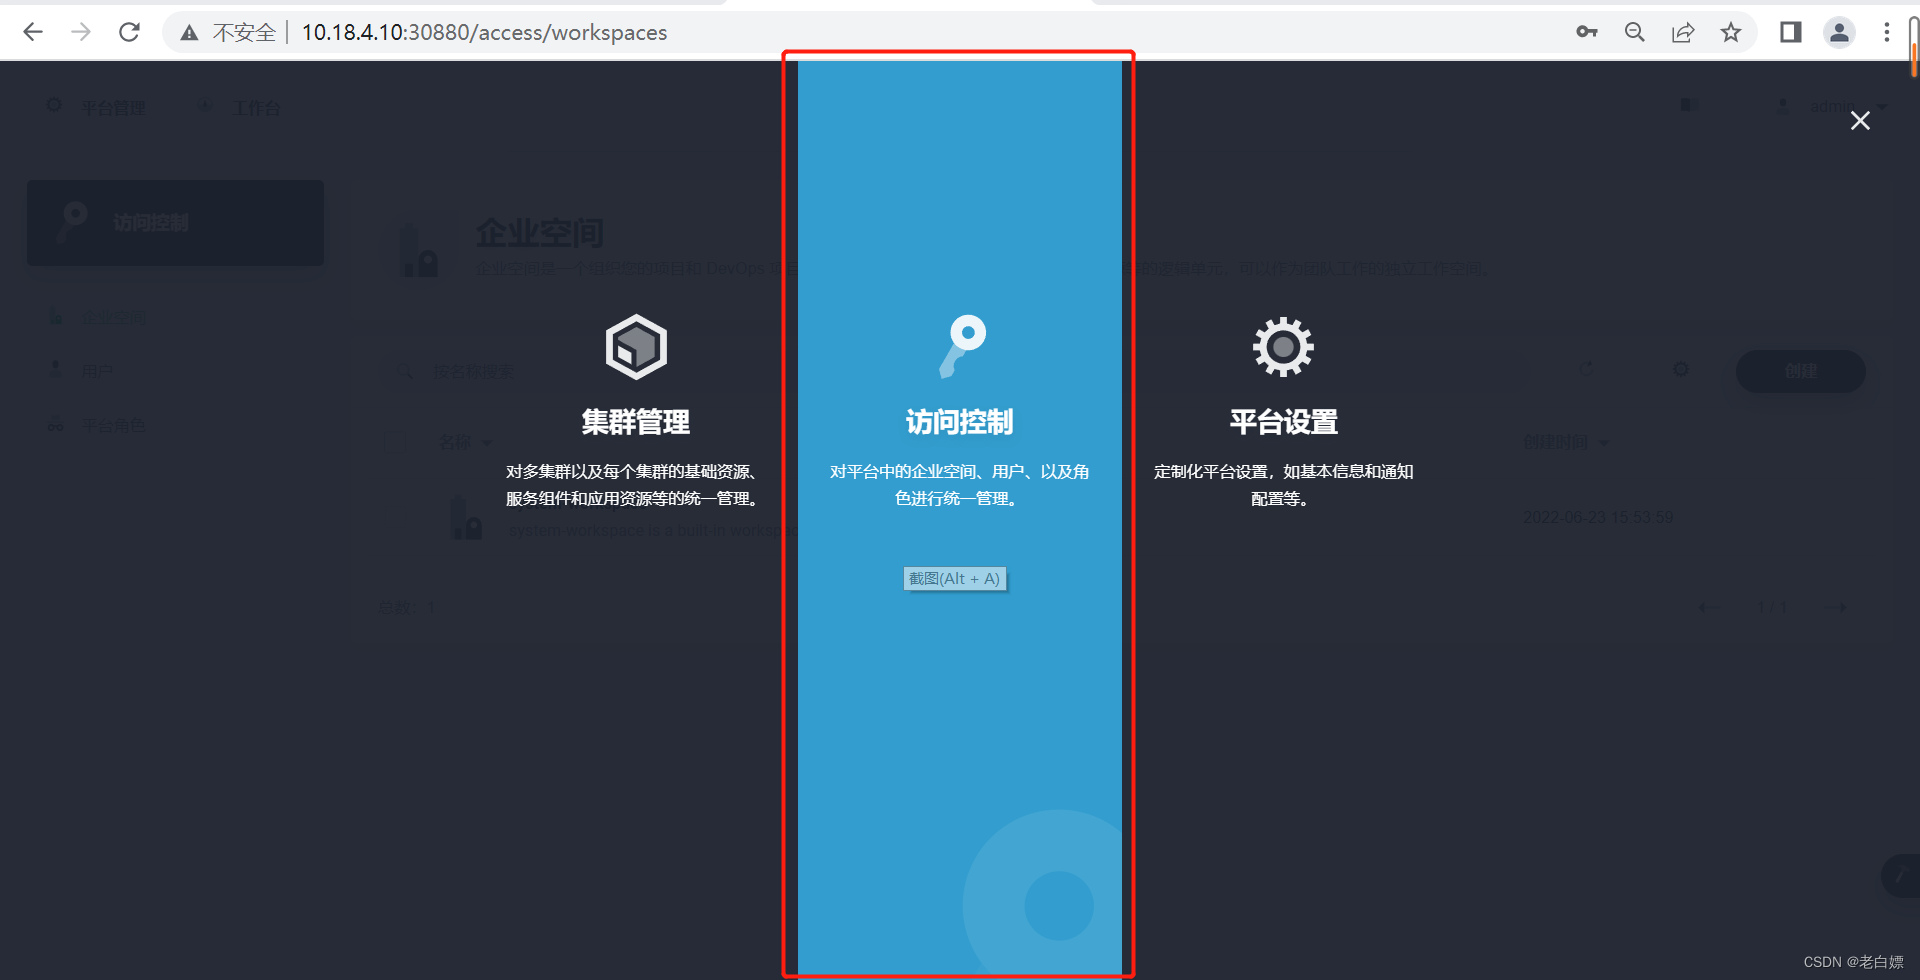
1.管理企业空间
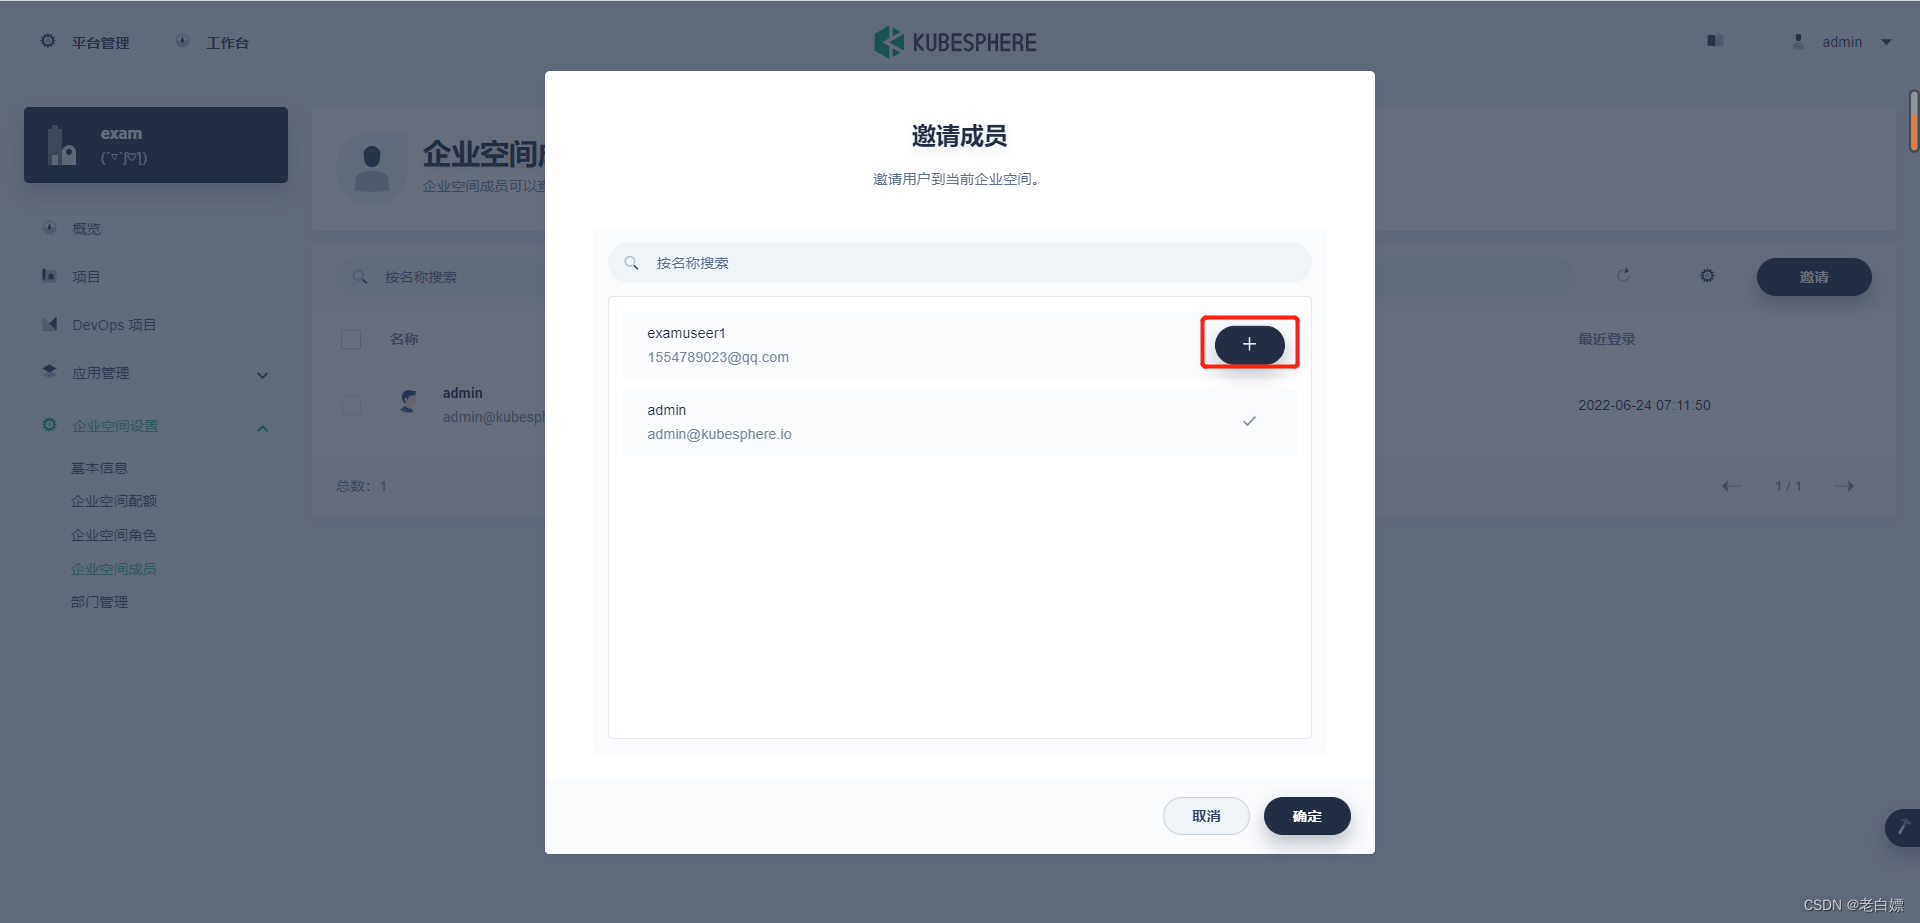
2.邀请用户管理企业空间
邀请用户进入企业空间,为用户分配企业空间角色,从而更好的管理集群资源。

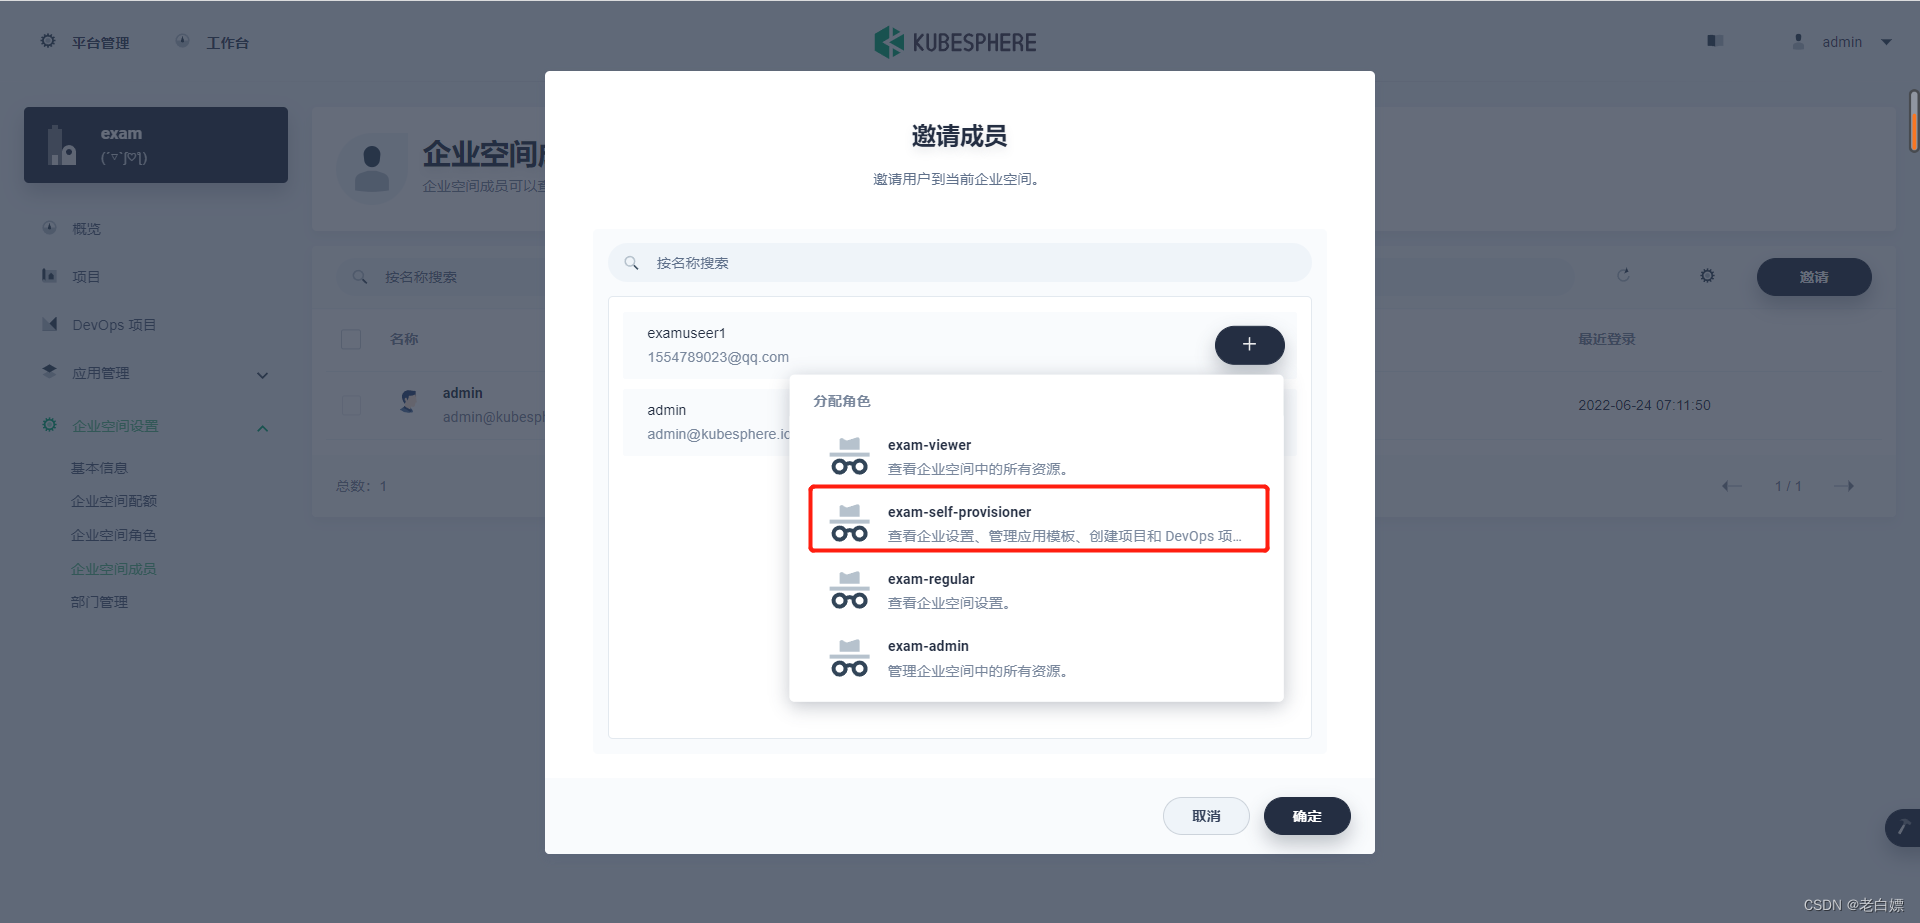
3.使用创建的用户登录平台
可以看到,当前用户因为我们分配的企业空间角色,对企业空间只有如下权限。

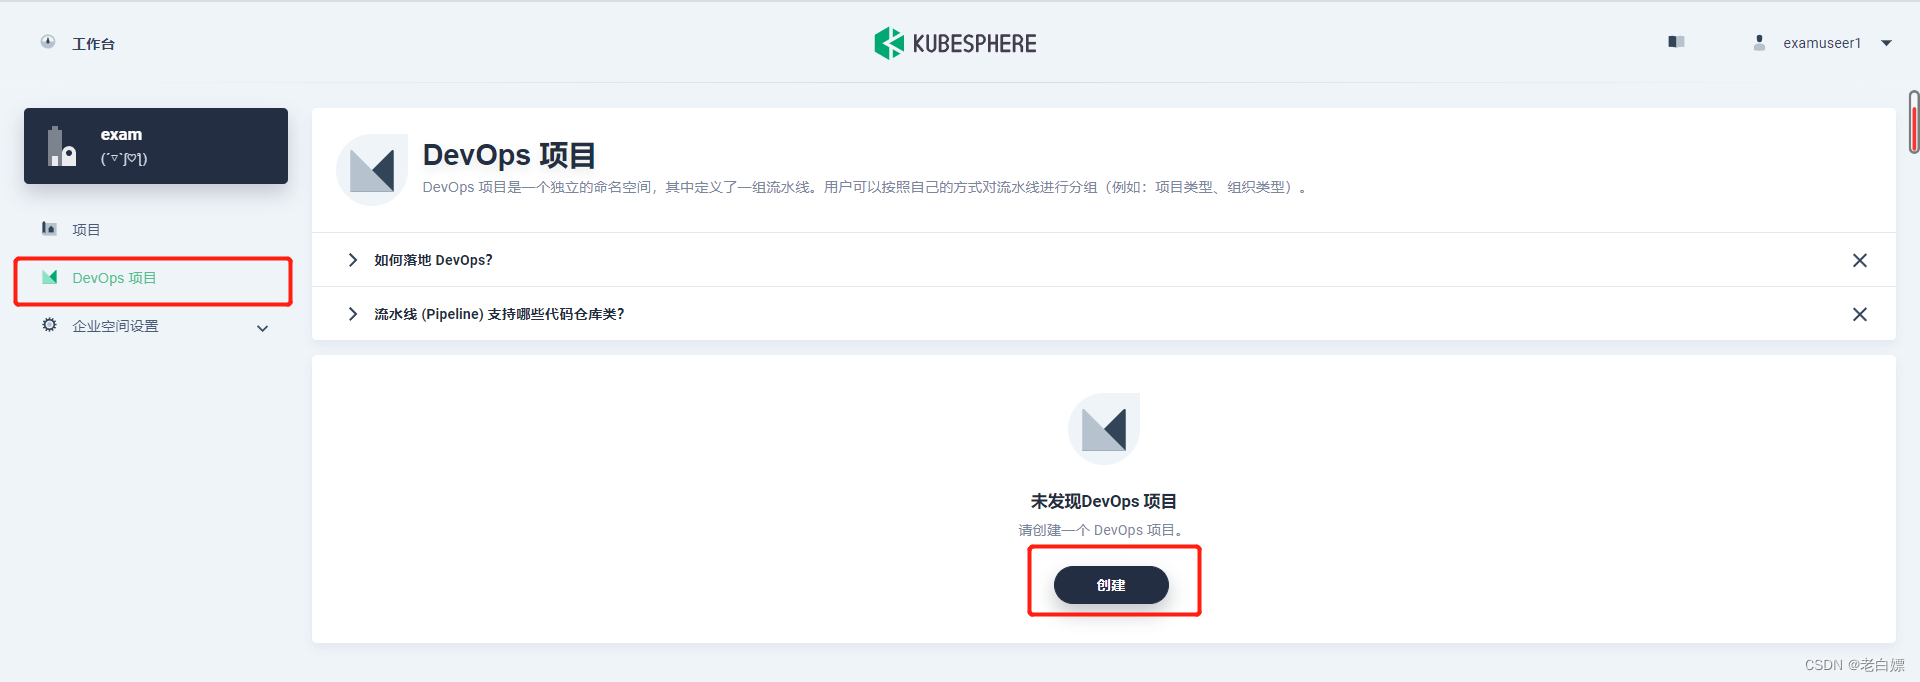
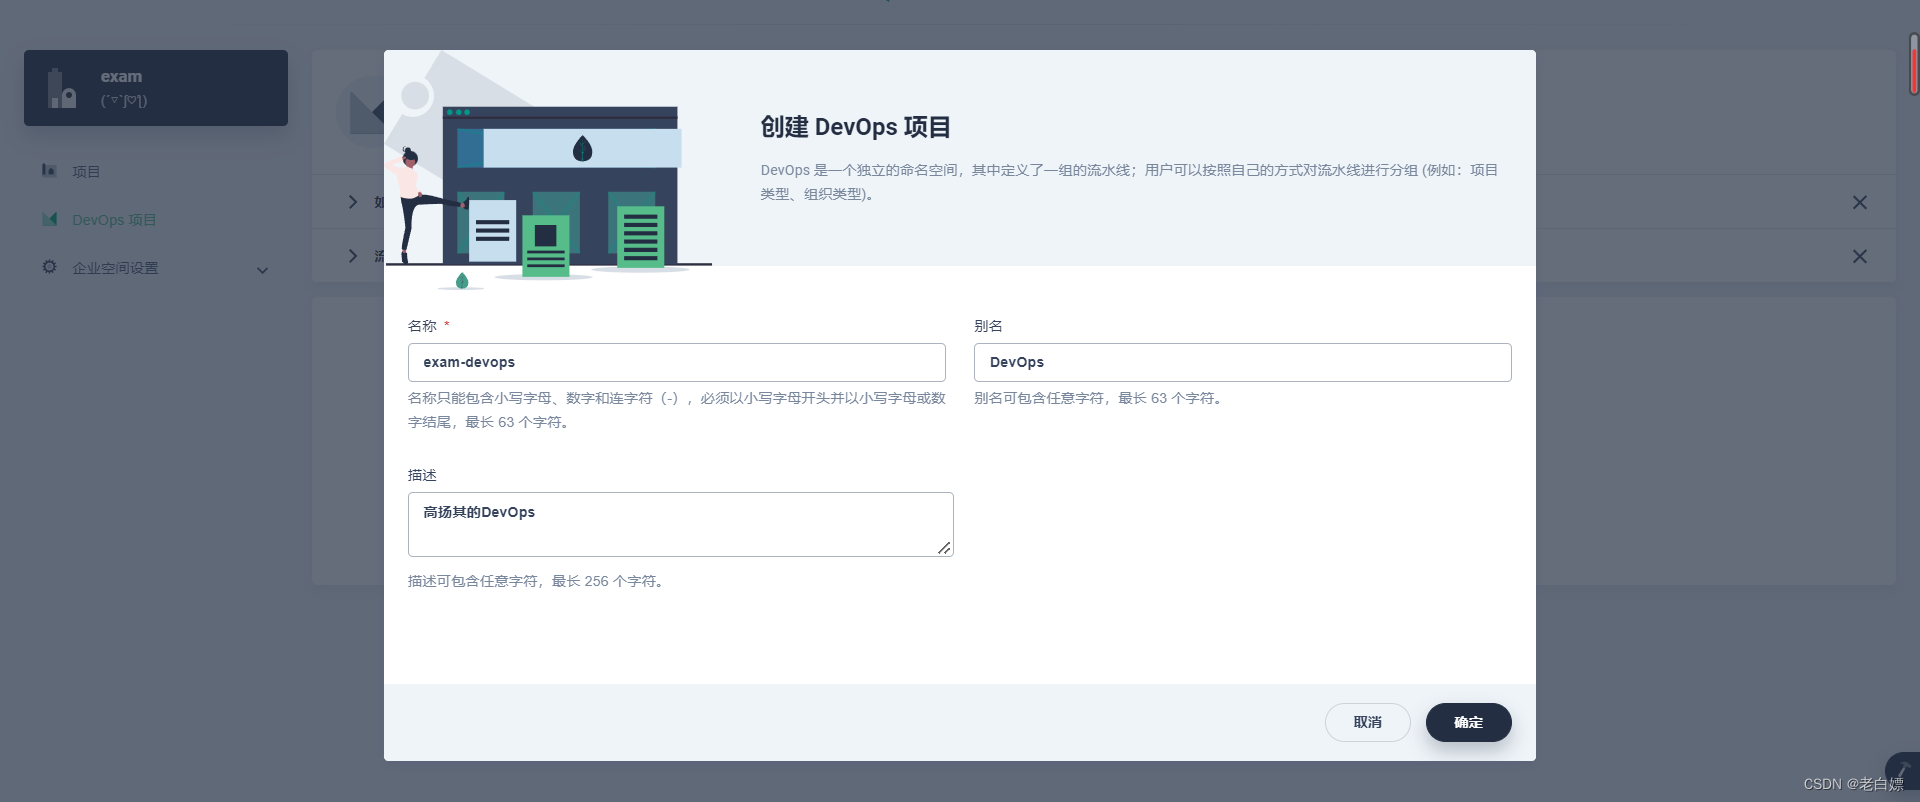
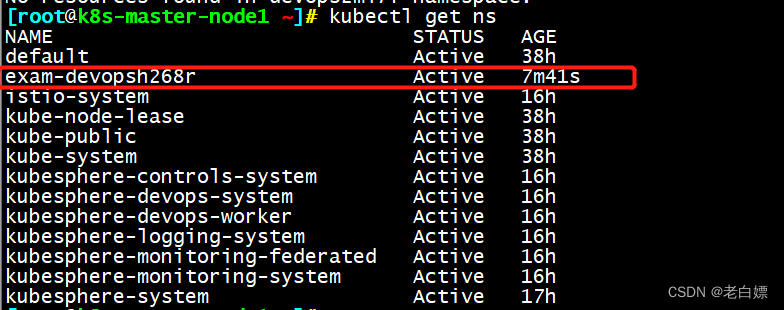
4.创建DevOps项目

版权归原作者 老白嫖 所有, 如有侵权,请联系我们删除。
