
富文本编辑器Tinymce
一、Tinymce可视化编辑器
参考
https://panjiachen.gitee.io/vue-element-admin/#/components/tinymce
https://panjiachen.gitee.io/vue-element-admin/#/example/create
二、组件初始化
Tinymce是一个传统javascript插件,默认不能用于Vue.js因此需要做一些特殊的整合步骤。
1. 复制脚本库
将脚本库复制到项目的static目录下(在vue-element-admin-master的static路径下)。
2. 配置html变量
在
build/webpack.dev.conf.js
中添加配置
使在html页面中可是使用这里定义的BASE_URL变量
new HtmlWebpackPlugin({
    ......,
    templateParameters: {
        BASE_URL: config.dev.assetsPublicPath + config.dev.assetsSubDirectory
    }
})
3. 引入js脚本
在
/index.html
中引入js脚本
<script src=<%= BASE_URL %>/tinymce4.7.5/tinymce.min.js></script>
<script src=<%= BASE_URL %>/tinymce4.7.5/langs/zh_CN.js></script>
三、组件引入
为了让Tinymce能用于Vue.js项目,vue-element-admin-master对Tinymce进行了封装,下面我们将它引入到我们的课程信息页面。
1. 复制组件
src/components/Tinymce
2. 引入组件
课程信息组件中引入
Tinymce
//引入Tinymce富文本编辑器组件
import Tinymce from '@/components/Tinymce';

export default {
    ....
  components: { Tinymce },
}
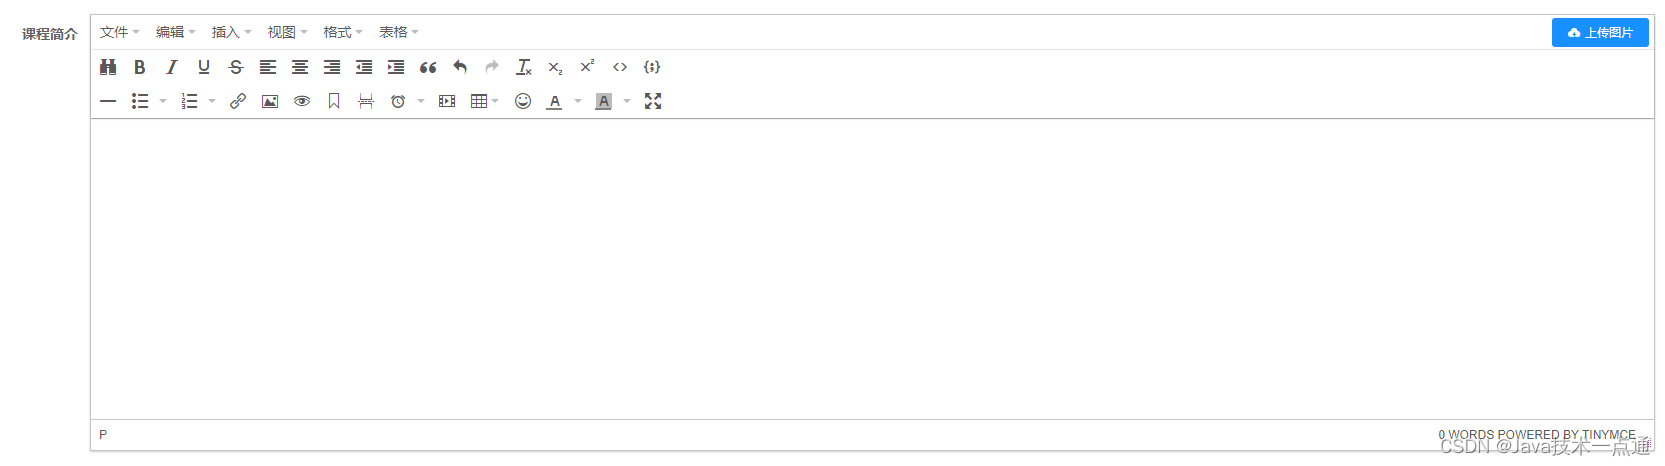
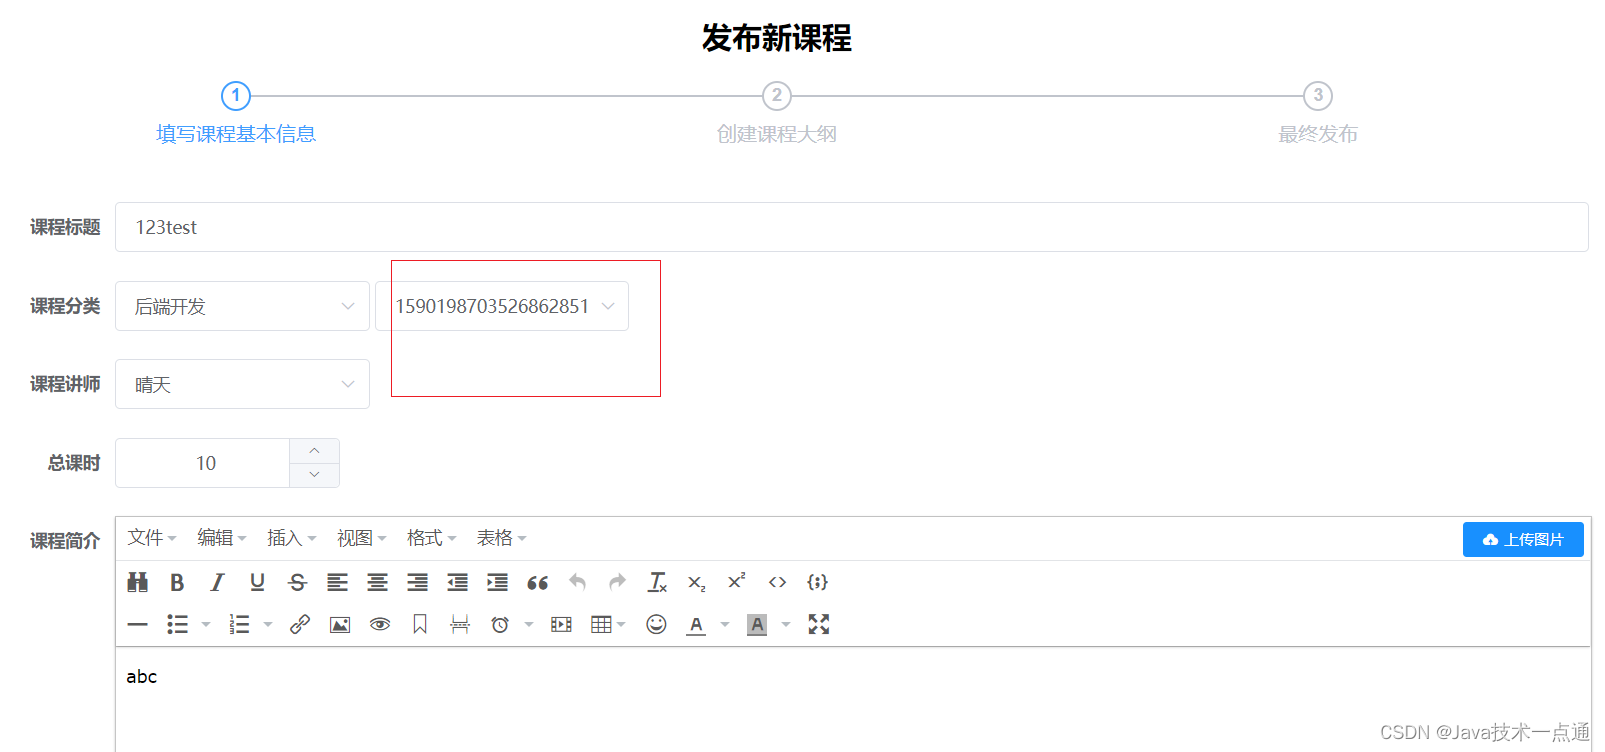
3. 组件模板
      <!-- 课程简介-->
      <el-form-item label="课程简介">
        <tinymce :height="300" v-model="courseInfo.description"/>
      </el-form-item>
4. 组件样式
在
info.vue
文件的最后添加如下代码,调整上传图片按钮的高度。
<style scoped>
  .tinymce-container {
  line-height: 29px;
  }
</style>
5. 效果测试
四、测试
- 图片的base64编码 Tinymce中的图片上传功能直接存储的是图片的base64编码,因此无需图片服务器
- 后台报错

- 修改数据库description字段类型

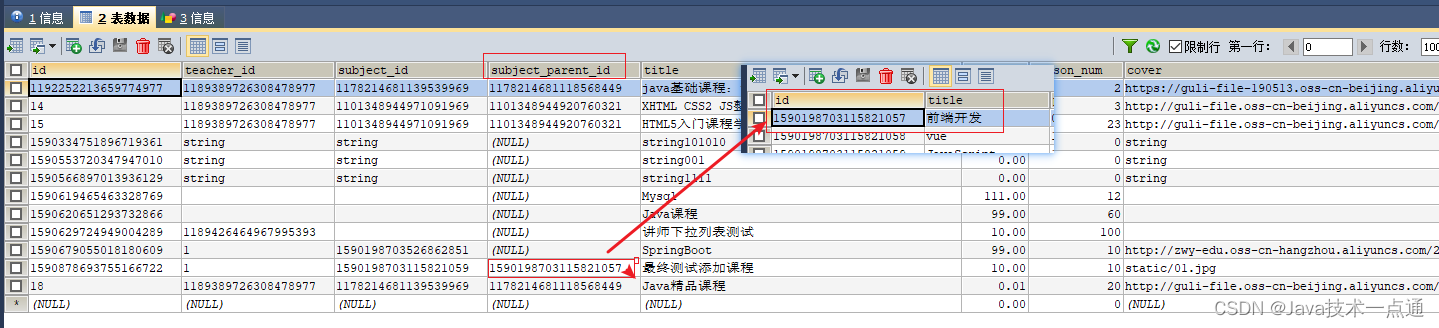
- 添加的数据中发现一级分类没有值
 在
在 eduservice.entity.vo.CourseInfo中添加一级分类属性。 要求跟前端一级分类属性的名称一样,否则获取不到数据。@ApiModelProperty(value = "一级分类ID") private String subjectParentId; - 重启服务,再次进行测试,添加的课程就有对应的一级分类对应的id值
课程大纲列表显示
一、后端实现
1. 实体类
创建
chapter
包,在此包下创建
ChapterVo
和
VideoVo
实体类。
chapterVo
:
@Data
public class ChapterVo {
    private static final long serialVersionUID = 1L;

    private String id;

    private String title;

    //表示小节
    private List<VideoVo> children = new ArrayList<VideoVo>();

}
VideoVo
:
@Data
public class VideoVo {
    private static final long serialVersionUID = 1L;

    private String id;

    private String title;

    private Boolean free;
}
2. controller
创建
EduChapterController
类:
@RestController
@CrossOrigin
@RequestMapping("/eduservice/chapter")
public class EduChapterController {

    @Autowired
    private EduChapterService eduChapterService;

    // 课程大纲列表,根据课程id进行查询
    @GetMapping("getChapterVideo/{courseId}")
    public R getChapterVideo(@PathVariable String courseId) {
        List<ChapterVo> list = eduChapterService.getChapterVideoByCourseId(courseId);
        return  R.ok().data("allChapterVideo", list);
    }

}
3. service
EduChapterService
接口:
public interface EduChapterService extends IService<EduChapter> {

    // 课程大纲列表,根据课程id进行查询
    List<ChapterVo> getChapterVideoByCourseId(String courseId);
}
EduChapterServiceImpl
实现类:
@Service
public class EduChapterServiceImpl extends ServiceImpl<EduChapterMapper, EduChapter> implements EduChapterService {

    @Autowired
    private EduVideoService videoService;

    // 课程大纲列表,根据课程id进行查询
    @Override
    public List<ChapterVo> getChapterVideoByCourseId(String courseId) {

        // 1. 根据课程id查询课程里面所有的章节
        QueryWrapper<EduChapter> wrapperChapter = new QueryWrapper<>();
        wrapperChapter.eq("course_id", courseId);
        List<EduChapter> eduChapterList = baseMapper.selectList(wrapperChapter);

        // 2. 根据课程id查询课程里面所有的小节
        QueryWrapper<EduVideo> wrapperVideo = new QueryWrapper<>();
        wrapperVideo.eq("course_id", courseId);
        List<EduVideo> eduVideoList = videoService.list(wrapperVideo);

        // 创建list集合,用于最终封装数据
        List<ChapterVo> finalList = new ArrayList<>();

        // 3. 遍历查询章节list集合进行封装
        //遍历查询章节list集合
        for (int i = 0; i < eduChapterList.size(); i ++) {
            // 每个章节
            EduChapter eduChapter = eduChapterList.get(i);
            // eduChapter 对象值复制到ChapterVo里面
            ChapterVo chapterVo = new ChapterVo();
            BeanUtils.copyProperties(eduChapter, chapterVo);
            // 把chapterVo放到最终list集合
            finalList.add(chapterVo);

            // 创建集合,用于封装章节的小节
            List<VideoVo> videoList  = new ArrayList<>();

            // 4. 遍历查询小节list集合,进行封装
            for (int j = 0; j < eduVideoList.size(); j++) {
                // 得到每个小节
                EduVideo eduVideo = eduVideoList.get(j);
                // 判断:小节里面chapterId和章节里面id是否一样
                if (eduVideo.getChapterId().equals(eduChapter.getId())) {
                    // 进行封装
                    VideoVo videoVo = new VideoVo();
                    BeanUtils.copyProperties(eduVideo, videoVo);
                    // 放到小节封装集合
                    videoList.add(videoVo);
                }
            }
            // 把封装之后小节list集合,放到章节对象里面
            chapterVo.setChildren(videoList);
        }

        return finalList;
    }
}
4. Swagger测试
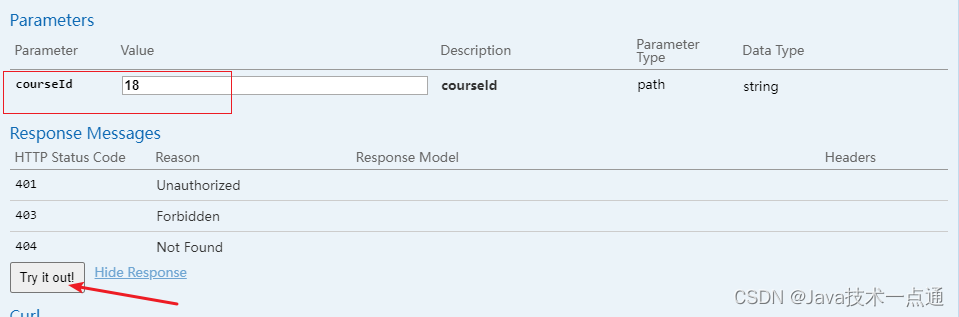
测试结果如下:
// Response Body
{
  "success": true,
  "code": 20000,
  "message": "成功",
  "data": {
    "allChapterVideo": [
      {
        "id": "1",
        "title": "第一章:HTML",
        "children": [
          {
            "id": "17",
            "title": "第一节:Java简介",
            "free": null
          },
          {
            "id": "19",
            "title": "第三节:String类",
            "free": null
          }
        ]
      },
      {
        "id": "2",
        "title": "第二章:CSS",
        "children": [
          {
            "id": "18",
            "title": "第二节:表达式和赋值语句",
            "free": null
          },
          {
            "id": "20",
            "title": "第四节:程序风格",
            "free": null
          }
        ]
      },
      {
        "id": "32",
        "title": "第二章:控制台输入和输出",
        "children": [
          {
            "id": "1182499307429339137",
            "title": "第一节",
            "free": null
          }
        ]
      },
      {
        "id": "44",
        "title": "第三章:控制流",
        "children": []
      }
    ]
  }
}
二、前端实现
1. 定义api
api/edu/chapter.js
import request from '@/utils/request' //引入已经封装好的axios 和 拦截器

export default{
    //根据课程id获取章节和小节数据列表
    getAllChapterVideo(courseId){
        return request({
            url:`/eduservice/chapter/getChapterVideo/${courseId}`,
            method: 'get',
        })
    },
}
2. 定义组件脚本
- 引入api脚本方法
import chapter from '@/api/edu/chapter' - 定义data
data() { return { ......... chapterVideoList:[] }; }, - 定义相关methods获取章节和课时列表
methods: { // 根据课程id查询对应的课程章节和小节 getChapterVideo() { chapter.getAllChapterVideo(this.courseId) .then(response => { this.chapterVideoList = response.data.allChapterVideo }) }, - 定义created方法
created() { // 获取路由的id值 if(this.$route.params && this.$route.params.id) { this.courseId = this.$route.params.id } // 根据课程id查询对应的课程章节和小节 this.getChapterVideo() },
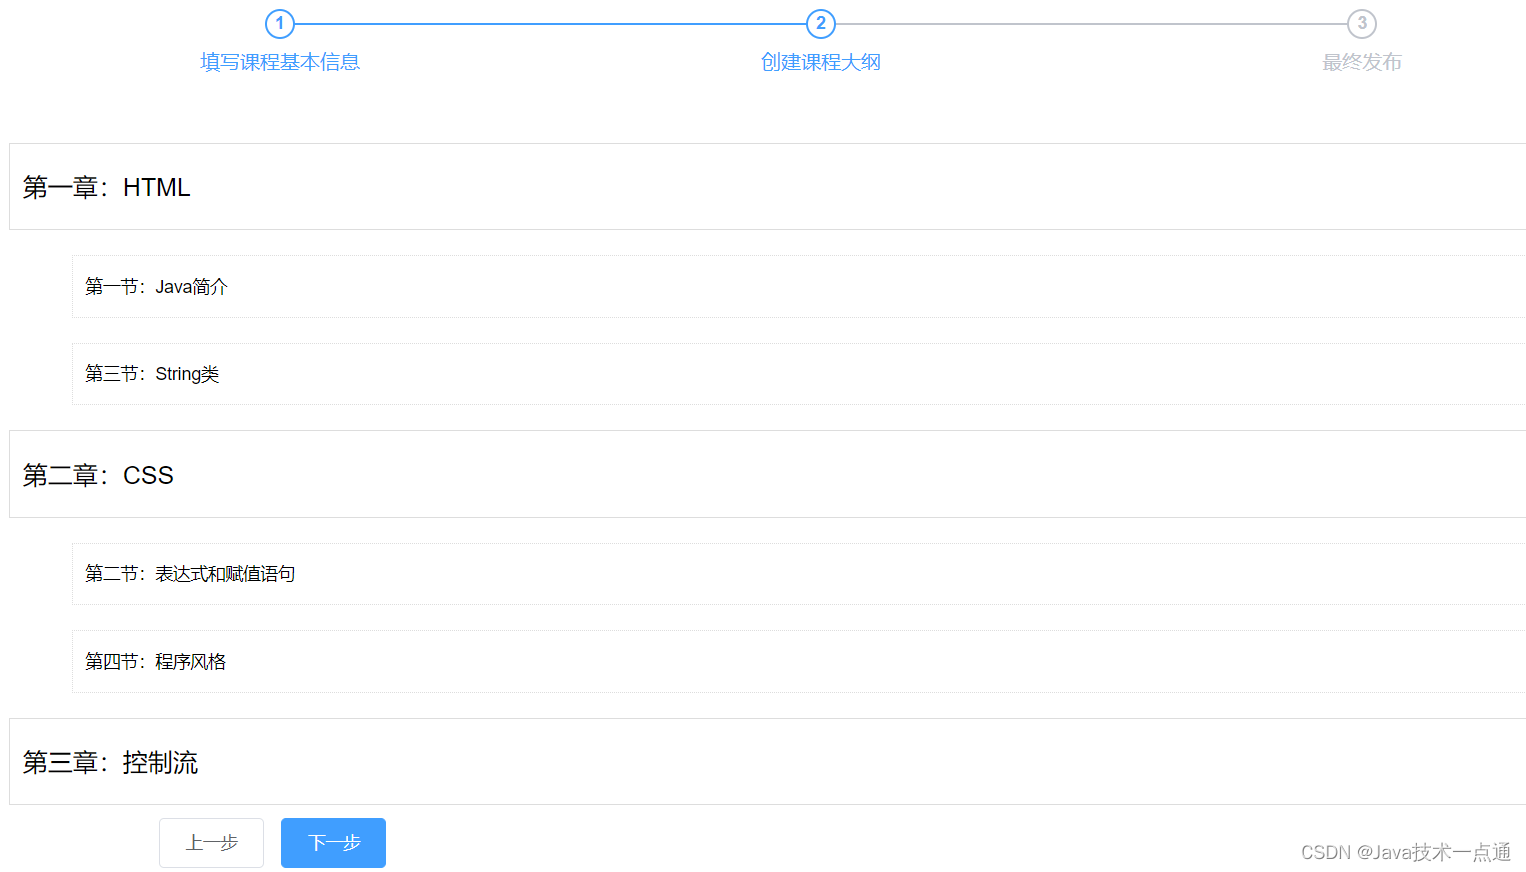
3. 定义组件模板
<template>
  <div class="app-container">
    <h2 style="text-align: center">发布新课程</h2>
    <el-steps :active="2" process-status="wait" align-center style="margin-bottom: 40px;">
      <el-step title="填写课程基本信息" />
      <el-step title="创建课程大纲" />
      <el-step title="最终发布" />
    </el-steps>

    <!-- 章节 -->
    <ul class="chanpterList">
      <li v-for="chapter in chapterVideoList" :key="chapter.id">
        <p>
          {{ chapter.title }}
        </p>

        <!-- 小节 -->
        <ul class="chanpterList videoList">
          <li v-for="video in chapter.children" :key="video.id">
            <p>
                {{ video.title }}
            </p>
          </li>
        </ul>
      </li>

    </ul>

    <el-form label-width="120px">
      <el-form-item>
        <el-button @click="previous">上一步</el-button>
        <el-button :disabled="saveBtnDisabled" type="primary" @click="next"
          >下一步</el-button
        >
      </el-form-item>
    </el-form>
  </div>
</template>
4. 定义样式
将样式的定义放在页面的最后。
scope
表示这里定义的样式只在当前页面范围内生效,不会污染到其他的页面。
<style scoped>
.chanpterList{
    position: relative;
    list-style: none;
    margin: 0;
    padding: 0;
}
.chanpterList li{
  position: relative;
}
.chanpterList p{
  float: left;
  font-size: 20px;
  margin: 10px 0;
  padding: 10px;
  height: 70px;
  line-height: 50px;
  width: 100%;
  border: 1px solid #DDD;
}
.chanpterList .acts {
    float: right;
  font-size: 14px;
}

.videoList{
  padding-left: 50px;
}
.videoList p{
  float: left;
  font-size: 14px;
  margin: 10px 0;
  padding: 10px;
  height: 50px;
  line-height: 30px;
  width: 100%;
  border: 1px dotted #DDD;
}

</style>
5. 测试
修改课程信息
一、后端实现
1. 根据课程id查询课程基本信息
EduCourseController// 根据课程id查询课程基本信息 @GetMapping("getCourseInfo/{courseId}") public R getCourseInfo(@PathVariable String courseId) { CourseInfoVo courseInfoVo = courseService.getCourseInfo(courseId); return R.ok().data("courseInfoVo", courseInfoVo); }EduCourseService// 根据课程id查询课程基本信息 CourseInfoVo getCourseInfo(String courseId);EduCourseServiceImpl// 根据课程id查询课程基本信息 @Override public CourseInfoVo getCourseInfo(String courseId) { // 查询课程表 EduCourse eduCourse = baseMapper.selectById(courseId); CourseInfoVo courseInfoVo = new CourseInfoVo(); BeanUtils.copyProperties(eduCourse, courseInfoVo); // 查询描述表 EduCourseDescription courseDescription = courseDescriptionService.getById(courseId); courseInfoVo.setDescription(courseDescription.getDescription()); return courseInfoVo; }
2. 修改课程信息
EduCourseController// 修改课程信息 @PostMapping("updateCourseInfo") public R updateCourseInfo(@RequestBody CourseInfoVo courseInfoVo) { courseService.updateCourseInfo(courseInfoVo); return R.ok(); }EduCourseService// 修改课程信息 void updateCourseInfo(CourseInfoVo courseInfoVo);EduCourseServiceImpl// 修改课程信息 @Override public void updateCourseInfo(CourseInfoVo courseInfoVo) { // 1.修改课程表 EduCourse eduCourse = new EduCourse(); BeanUtils.copyProperties(courseInfoVo, eduCourse); int update = baseMapper.updateById(eduCourse); if (update == 0) { throw new GuliException(20001, "修改课程信息失败"); } // 2.修改描述表 EduCourseDescription description = new EduCourseDescription(); description.setId(courseInfoVo.getId()); description.setDescription(courseInfoVo.getDescription()); courseDescriptionService.updateById(description); }
二、前端实现
- 定义api
src\api\edu\course.js`````` //根据课程id 查询课程基本信息 getCourseInfoId(id){ return request({ url:`/eduservice/course/getCourseInfo/${id}`, method: 'get', }) }, //修改课程信息 updateCourseInfo(courseInfo){ return request({ url:"/eduservice/course/updateCourseInfo", method: 'post', data: courseInfo }) } - 修改chapter页面跳转路径
//跳转到上一步 previous() { this.$router.push({ path: "/course/info/"+this.courseId}); }, next() { //跳转到第三步 this.$router.push({ path: "/course/publish/"+this.courseId}); }, - info页面 data
data() { return { ... courseId: "", }; } - info页面 methods
methods: { // 根据课程id查询 getInfo() { course.getCourseInfoId(this.courseId) .then(response => { this.courseInfo = response.data.courseInfoVo }) }, .....} - info页面 created()
created(){ // 获取路由id值 if (this.$route.params && this.$route.params.id) { this.courseId = this.$route.params.id // 调用根据id查询课程的方法 this.getInfo() } .... }, - 测试
- 上面测试,二级分类中的数据显示出现了问题
created(){ // 获取路由id值 if (this.$route.params && this.$route.params.id) { this.courseId = this.$route.params.id // 调用根据id查询课程的方法 this.getInfo() } else { // 初始化所有讲师 this.getListTeacher() // 初始化一级分类 this.getOneSubject() } },getInfo() { course.getCourseInfoId(this.courseId) .then(response => { // 在courseInfo课程信息基本信息,包含一级分类id 和 二级分类id this.courseInfo = response.data.courseInfoVo // 1. 查询所有的分类,包含一级和二级 subject.getSubjectList() .then(response => { // 2.获取所有一级分类 this.subjectOneList = response.data.list //3. 把所有的一级分类数组进行遍历 for (var i=0;i<this.subjectOneList.length;i++) { //获取每一个一级分类 var oneSubject = this.subjectOneList[i] // 比较当前courseInfo里面一级分类id和所有一级 分类id if(this.courseInfo.subjectParentId == oneSubject.id) { //获取一级分类所有的二级分类 this.subjectTwoList=oneSubject.children } } }) //初始化所有讲师 this.getListTeacher() }) },

- 还有一个问题,就是回显数据后,再点击添加课程,数据还在,应该是清空数据 添加监听器,监听路由,如果路由变化,就将courseInfo的数据清空:
watch: { $route(to, from) { //路由变化方式,当路由发送变化,方法就执行 console.log("watch $route"); this.courseInfo={} }, } - 实现修改功能
src\views\edu\course\info.vue`````` //添加课程 //添加课程addCourse() { course.addCourseInfo(this.courseInfo).then(response => { this.$message({ message: "添加课程信息成功", type: "success", }); //跳转到第二步,并带着这个课程生成的id this.$router.push({ path: "/course/chapter/" + resp.data.courseId }); });},//修改课程updateCourse() { course.updateCourseInfo(this.courseInfo).then(response => { this.$message({ message: "修改课程信息成功", type: "success", }); //跳转到第二步,并带着这个课程生成的id this.$router.push({ path: "/course/chapter/" + this.courseId }); });},//判断是修改还是新增saveOrUpdate() { //判断courseInfo中是否有id值 if (this.courseInfo.id) { //有id值,为修改 this.updateCourse(); } else { //没id值,为添加 this.addCourse(); }}
课程章节添加、修改、删除功能
一、后端实现
EduChapterController:// 添加章节 @PostMapping("addChapter") public R addChapter(@RequestBody EduChapter eduChapter) { eduChapterService.save(eduChapter); return R.ok(); } // 根据章节id查询 @GetMapping("getChapterInfo/{chapterId") public R getChapterInfo(@PathVariable String chapterId) { EduChapter eduChapter = eduChapterService.getById(chapterId); return R.ok().data("chapter", eduChapter); } // 修改章节 @PostMapping("updateChapter") public R updateChapter(@RequestBody EduChapter eduChapter) { eduChapterService.updateById(eduChapter); return R.ok(); } // 删除的方法 @DeleteMapping("{chapterId}") public R deleteChapter(@RequestBody String chapterId) { boolean flag = eduChapterService.deleteChapter(chapterId); if (flag) { return R.ok(); } else { return R.error(); } }EduChapterService:// 删除的方法 boolean deleteChapter(String chapterId);EduChapterServiceImpl:// 删除的方法 @Override public boolean deleteChapter(String chapterId) { // 根据chapterId章节id 查询小节表,如果查询到数据则不进行删除 QueryWrapper<EduVideo> wrapper = new QueryWrapper<>(); wrapper.eq("chapter_id", chapterId); int count = videoService.count(wrapper); // 判断 if (count > 0) { // 查询出小节,不进行删除 throw new GuliException(20001, "不能删除"); } else { // 不能查询数据,进行删除 // 删除章节 int result = baseMapper.deleteById(chapterId); return result > 0; } }
二、前端实现
1. 课程添加功能
- 定义api
//添加章节 addChapter(chapter) { return request({ url: `/eduservice/chapter/addChapter`, method: `post`, data: chapter }) }, //根据id查询章节 getChapter(chapterID) { return request({ url: `/eduservice/chapter/getChapterInfo/${chapterID}`, method: `get`, }) }, //修改章节 updateChapter(chapter) { return request({ url: `/eduservice/chapter/updateChapter`, method: `post`, data: chapter }) }, //删除章节 deleteChapter(chapterID) { return request({ url: `/eduservice/chapter/${chapterID}`, method: `delete`, }) } - 引入api
import chapter from '@/api/edu/chapter' - methods方法
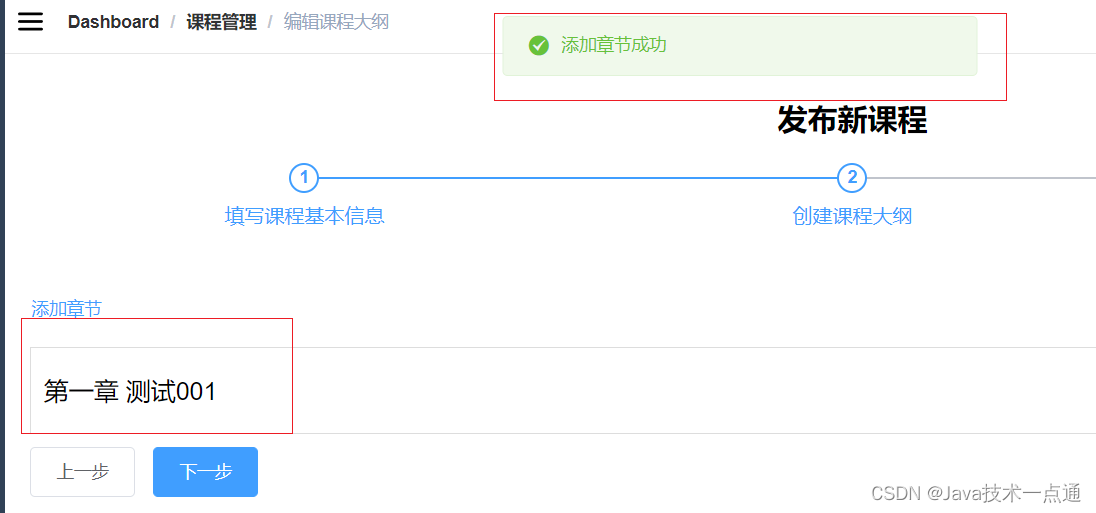
methods: { //添加章节 saveChapter() { //设置课程id到chapter对象中 this.chapter.courseId = this.courseId chapter.addChapter(this.chapter).then((resp) => { //关闭弹框 this.dialogChapterFormVisible = false; //提示信息 this.$message({ message: "添加章节成功", type: "success", }); //刷新页面 this.getChapterVideoByCourseId() }); }, saveOrUpdate() { this.saveChapter() }} - 测试
- 设置弹出表单时,清空数据
<el-button type="text" @click="openChapterDialog()">添加章节</el-button>``````openChapterDialog(){ // 弹框 this.dialogChapterFormVisible = true // 表单数据清空 this.chapter.title = '' this.chapter.sort = 0 },
2. 修改课程功能
- template
<p> {{ chapter.title }} <span class="acts"> <el-button style="" type="text" @click="openEditChapter(chapter.id)">编辑</el-button> <el-button type="text">删除</el-button> </span></p> - methods方法
// 修改章节弹框数据回显 openEditChapter(chapterId) { // 弹框 this.dialogChapterFormVisible = true // 调用接口 chapter.getChapter(chapterId) .then(response => { this.chapter = response.data.chapter }) },``````// 添加章节 addChapter() { // 设置课程id到chapter对象里面 this.chapter.courseId = this.courseId chapter.addChapter(this.chapter) .then(response => { // 关闭弹框 this.dialogChapterFormVisible = false // 提示 this.$message({ message: "添加章节成功", type: "success", }); // 刷新页面 this.getChapterVideo() }) }, // 修改章节的方法 updateChapter() { chapter.updateChapter(this.chapter) .then(response => { // 关闭弹框 this.dialogChapterFormVisible = false // 提示 this.$message({ message: "修改章节成功", type: "success", }); // 刷新页面 this.getChapterVideo() }) }, saveOrUpdate() { if(!this.chapter.id) { this.addChapter() } else { this.updateChapter() } },
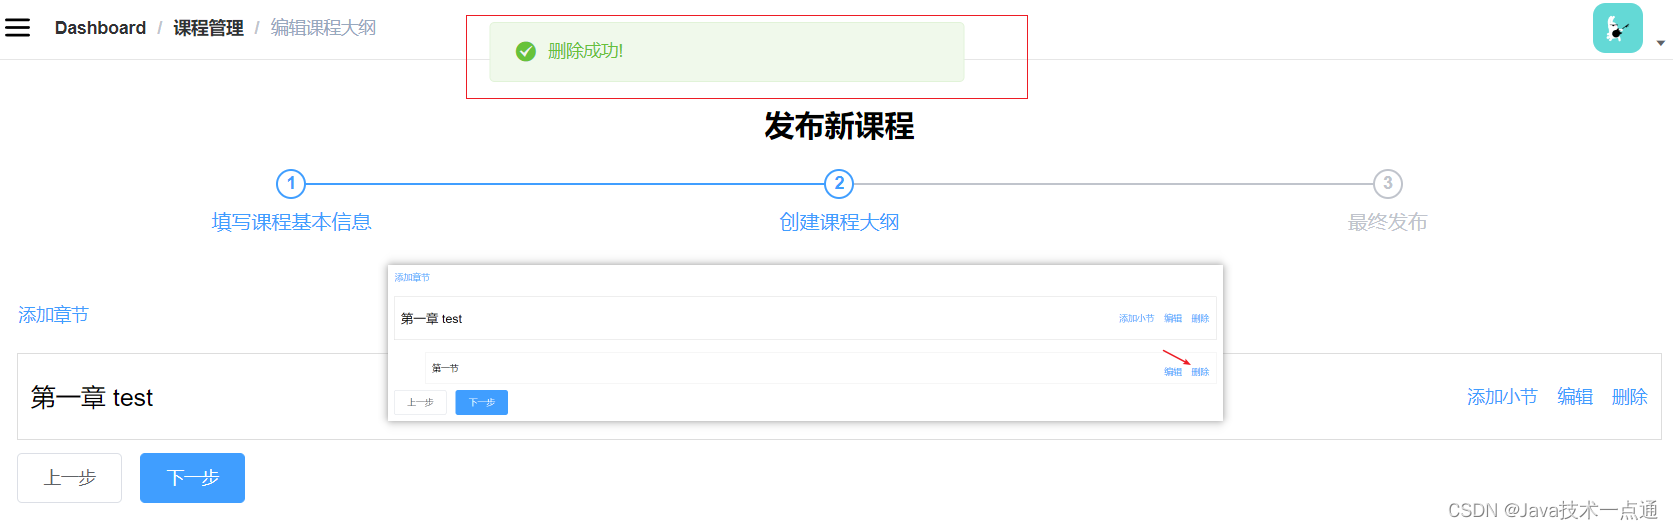
3. 删除课程功能
<el-button type="text" @click="removeChapter(chapter.id)">删除</el-button>
 // 删除章节
       removeChapter(chapterId) {
            this.$confirm('此操作将永久删除课程记录, 是否继续?', '提示', {
                confirmButtonText: '确定',
                cancelButtonText: '取消',
                type: 'warning'
            }).then(() => {  //点击确定,执行then方法
                //调用删除的方法
                chapter.deleteChapter(chapterId)
                    .then(response =>{//删除成功
                    //提示信息
                    this.$message({
                        type: 'success',
                        message: '删除成功!'
                    });
                    // 刷新页面
                    this.getChapterVideo()
                })
            }) //点击取消,执行catch方法
        },
课程章节小节功能
一、后端实现
EduVideoController:@RestController@CrossOrigin@RequestMapping("/eduservice/video")public class EduVideoController { @Autowired private EduVideoService videoService; // 添加小节 @PostMapping("addVideo") public R addVideo(@RequestBody EduVideo eduVideo) { videoService.save(eduVideo); return R.ok(); } // 删除小节 @DeleteMapping("{id}") public R deleteVideo(@PathVariable String id) { videoService.removeById(id); return R.ok(); } // 根据小节id查询 @PostMapping("getVideoById/{videoId}") public R getVideoById(@PathVariable String videoId) { EduVideo eduVideo = videoService.getById(videoId); return R.ok().data("video", eduVideo); } // 修改小节 @PostMapping("/updateVideo") public R updateVideo(@PathVariable EduVideo eduVideo) { videoService.updateById(eduVideo); return R.ok(); }}EduVideo:@ApiModelProperty(value = "创建时间") @TableField(fill = FieldFill.INSERT) private Date gmtCreate; @ApiModelProperty(value = "更新时间") @TableField(fill = FieldFill.INSERT_UPDATE) private Date gmtModified;
二、前端实现
1. 添加小节功能
- template
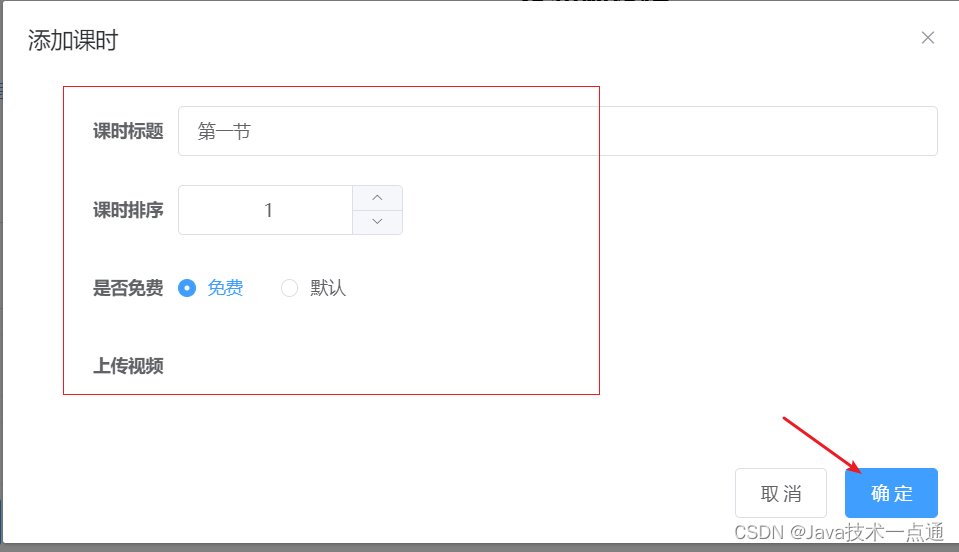
<el-button style="" type="text" @click="openVideo(chapter.id)">添加小节</el-button>`````` <!-- 添加和修改课时表单 --> <el-dialog :visible.sync="dialogVideoFormVisible" title="添加课时"> <el-form :model="video" label-width="120px"> <el-form-item label="课时标题"> <el-input v-model="video.title"/> </el-form-item> <el-form-item label="课时排序"> <el-input-number v-model="video.sort" :min="0" controls-position="right"/> </el-form-item> <el-form-item label="是否免费"> <el-radio-group v-model="video.free"> <el-radio :label="true">免费</el-radio> <el-radio :label="false">默认</el-radio> </el-radio-group> </el-form-item> <el-form-item label="上传视频"> <!-- TODO --> </el-form-item> </el-form> <div slot="footer" class="dialog-footer"> <el-button @click="dialogVideoFormVisible = false">取 消</el-button> <el-button :disabled="saveVideoBtnDisabled" type="primary" @click="saveOrUpdateVideo">确 定</el-button> </div> </el-dialog> - 定义api
src\api\edu\video.js``````import request from '@/utils/request' //引入已经封装好的axios 和 拦截器export default{ //添加小节 addVideo(video) { return request({ url: `/eduservice/video/addVideo`, method: `post`, data: video }) }, //根据id查询小节 getVideoById(videoId) { return request({ url: `/eduservice/video/getVideoById/${videoId}`, method: `get`, }) }, //修改小节 updateVideo(video) { return request({ url: `/eduservice/video/updateVideo`, method: `post`, data: video }) }, //删除小节 deleteChapter(id) { return request({ url: `/eduservice/video/${id}`, method: `delete`, }) } } - 引入js
import video from '@/api/edu/video' - methods方法
openVideo(chapterId) { // 弹框 this.dialogVideoFormVisible = true // 清空数据 this.video={}, // 设置章节id this.video.chapterId = chapterId },``````// 添加小节 addVideo() { // 设置课程id this.video.courseId = this.courseId video.addVideo(this.video) .then(response => { // 关闭弹框 this.dialogVideoFormVisible = false // 提示 this.$message({ message: "添加小节成功", type: "success", }); // 刷新页面 this.getChapterVideo() }) }, saveOrUpdateVideo() { this.addVideo() }, - 测试
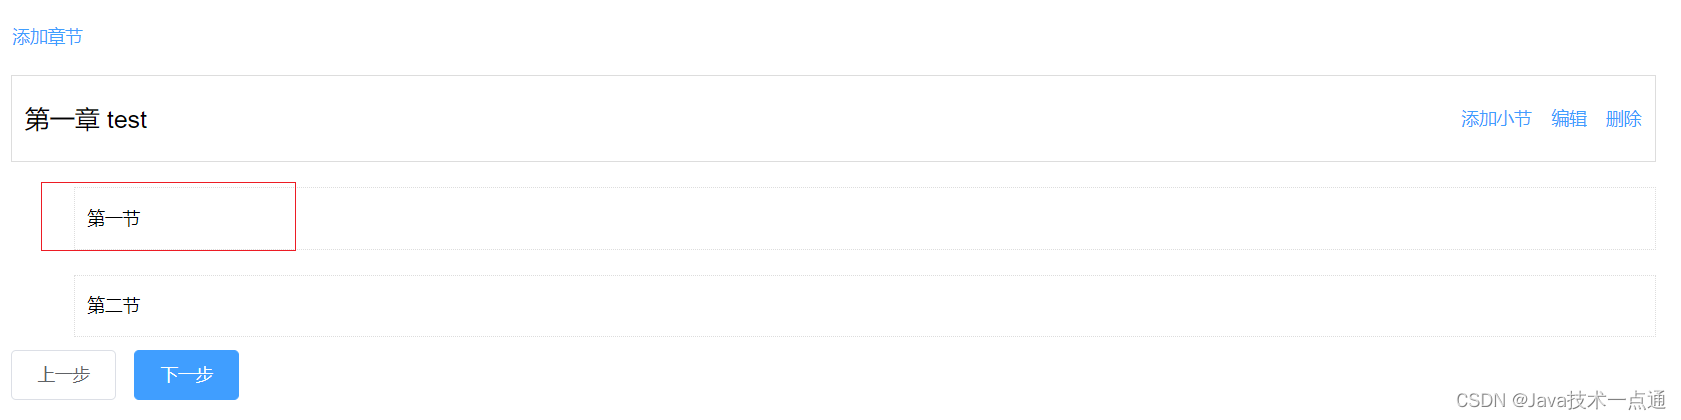
2. 删除小节功能
- template
<span class="acts"> <el-button style="" type="text" >编辑</el-button> <el-button type="text" @click="removeVideo(video.id)">删除</el-button> </span> - methods方法
// 删除小节 removeVideo(id) { this.$confirm('此操作将永久删除小节记录, 是否继续?', '提示', { confirmButtonText: '确定', cancelButtonText: '取消', type: 'warning' }).then(() => { //点击确定,执行then方法 //调用删除的方法 video.deleteChapter(id) .then(response =>{//删除成功 //提示信息 this.$message({ type: 'success', message: '删除成功!' }); // 刷新页面 this.getChapterVideo() }) }) //点击取消,执行catch方法 }, - 测试
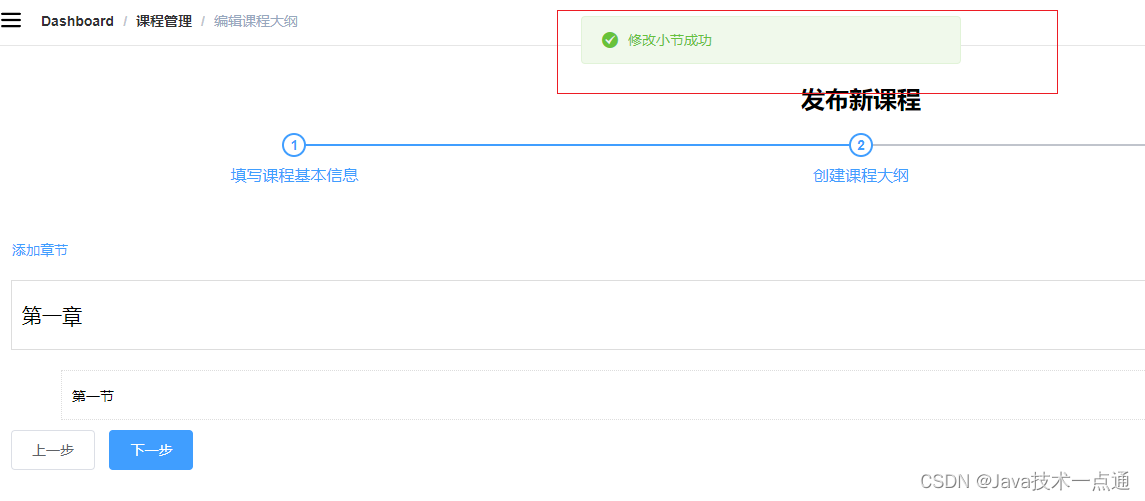
3. 修改小节功能
- template
<p> {{ video.title }} <span class="acts"> <el-button style="" type="text" @click="openEditVideo(video.id)">编辑</el-button> <el-button type="text" @click="removeVideo(video.id)">删除</el-button> </span> </p> - methods方法
//修改小节表单回显 openEditVideo(videoId) { // 弹框 this.dialogVideoFormVisible = true // 调用接口 video.getVideoById(videoId) .then(response => { this.video = response.data.video }) },`````` // 添加小节 addVideo() { // 设置课程id this.video.courseId = this.courseId video.addVideo(this.video) .then(response => { // 关闭弹框 this.dialogVideoFormVisible = false // 提示 this.$message({ message: "添加小节成功", type: "success", }); // 刷新页面 this.getChapterVideo() }) }, // 修改小节 updateVideoById(videoId) { video.updateVideo(this.video) .then(response => { // 关闭弹框 this.dialogVideoFormVisible = false // 提示 this.$message({ message: "修改小节成功", type: "success", }); // 刷新页面 this.getChapterVideo() }) }, saveOrUpdateVideo() { if(!this.video.id) { this.addVideo() } else { this.updateVideoById() } },
- 测试
课程最终发布
一、后端实现
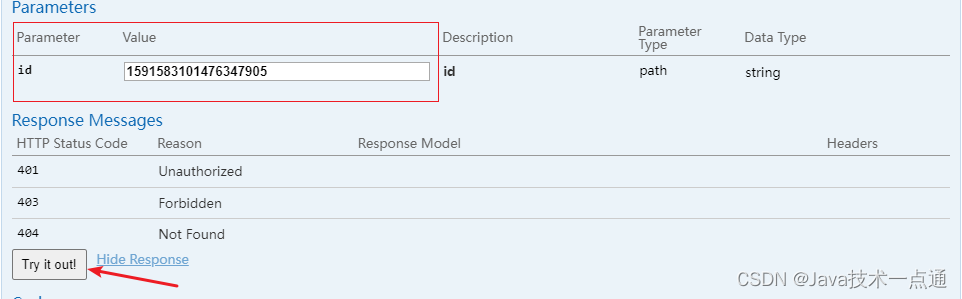
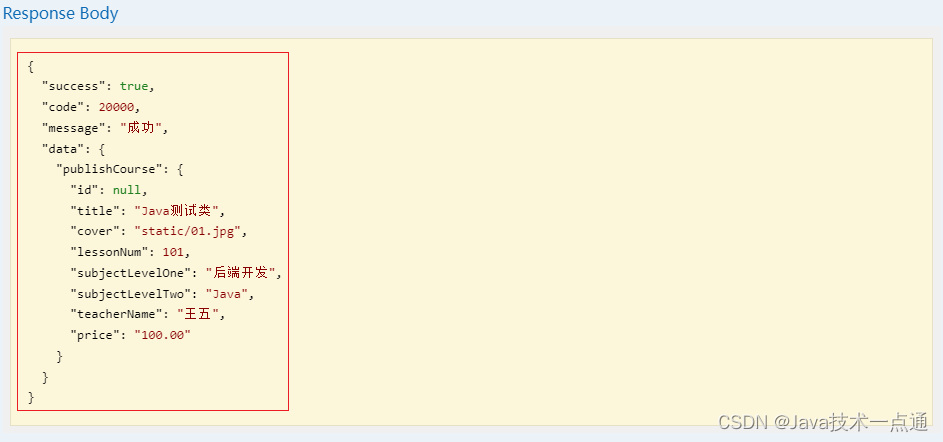
CoursePublishVo``````@ApiModel(value = "课程发布信息")@Datapublic class CoursePublishVo implements Serializable { private static final long serialVersionUID = 1L; private String id; //课程id private String title; //课程名称 private String cover; //封面 private Integer lessonNum;//课时数 private String subjectLevelOne; //一级分类 private String subjectLevelTwo; //二级分类 private String teacherName; //讲师名称 private String price; //价格 ,只用于显示}EduCourseController``````// 根据课程id查询课程确认信息 @GetMapping("getPublishCourseInfo/{id}") public R getPublishCourseInfo(@PathVariable String id) { CoursePublishVo coursePublishVo = courseService.publishCourseInfo(id); return R.ok().data("publishCourse", coursePublishVo); }EduCourseMapper``````public interface EduCourseMapper extends BaseMapper<EduCourse> { public CoursePublishVo getPublishCourseInfo(String courseId);}EduCourseMapper.xml``````<?xml version="1.0" encoding="UTF-8"?><!DOCTYPE mapper PUBLIC "-//mybatis.org//DTD Mapper 3.0//EN" "http://mybatis.org/dtd/mybatis-3-mapper.dtd"><mapper namespace="com.atguigu.eduservice.mapper.EduCourseMapper"> <!--sql语句:根据课程id查询课程确认信息--> <select id="getPublishCourseInfo" resultType="com.atguigu.eduservice.entity.vo.CoursePublishVo"> SELECT c.title, c.cover, c.lesson_num AS lessonNum, CONVERT(c.price, DECIMAL(8,2)) AS price, s1.title AS subjectLevelOne, s2.title AS subjectLevelTwo, t.name AS teacherName FROM edu_course c LEFT JOIN edu_teacher t ON c.teacher_id = t.id LEFT JOIN edu_subject s1 ON c.subject_parent_id = s1.id LEFT JOIN edu_subject s2 ON c.subject_id = s2.id WHERE c.id = #{id} </select></mapper>EduCourseService`````` // 根据课程id查询课程确认信息 CoursePublishVo publishCourseInfo(String id);EduCourseServiceImpl``````// 根据课程id查询课程确认信息 @Override public CoursePublishVo publishCourseInfo(String id) { // 调用mapper return baseMapper.getPublishCourseInfo(id); }Swagger测试- 报错

- 报错原因以及解决方案****原因: 这个错误是
maven默认加载机制造成问题,maven加载的时候,把java文件夹里面.java类型文件进行编译,如果其他类型文件,不会加载。解决方法:- 1.复制xml到target目录中- 2.把xml文件放到resourses目录中- 3.推荐使用:使用配置实现 (1)pom.xml(2)项目application.properties - 在
service模块下的pom.xml加入配置<!-- 项目打包时会将java目录中的*.xml文件也进行打包 --> <build> <resources> <resource> <directory>src/main/java</directory> <includes> <include>**/*.xml</include> </includes> <filtering>false</filtering> </resource> </resources> </build> application.properties下指定xml文件夹#配置mapper xml文件的路径mybatis-plus.mapper-locations=classpath:com/atguigu/eduservice/mapper/xml/*.xml- 再次进行测试
二、前端实现
- 定义api
// 课程确认信息 getPublishCourseInfo(id){ return request({ url:"/eduservice/course/getPublishCourseInfo/"+id, method: 'get', }) } - 导入api方法
import course from "@/api/edu/course" - 定义方法
export default { data() { return { saveBtnDisabled: false, // 保存按钮是否禁用 courseId: '', coursePublish: {} }; }, created() { //获取路由中的id值 if(this.$route.params && this.$route.params.id){ this.courseId = this.$route.params.id //调用接口方法根据课程id查询课程信息 this.getCoursePublishId() } }, methods: { // 根据课程id查询 getCoursePublishId() { course.getPublishCourseInfo(this.courseId) .then(response => { this.coursePublish = response.data.publishCourse }) }, ...... },}; - 组件模板
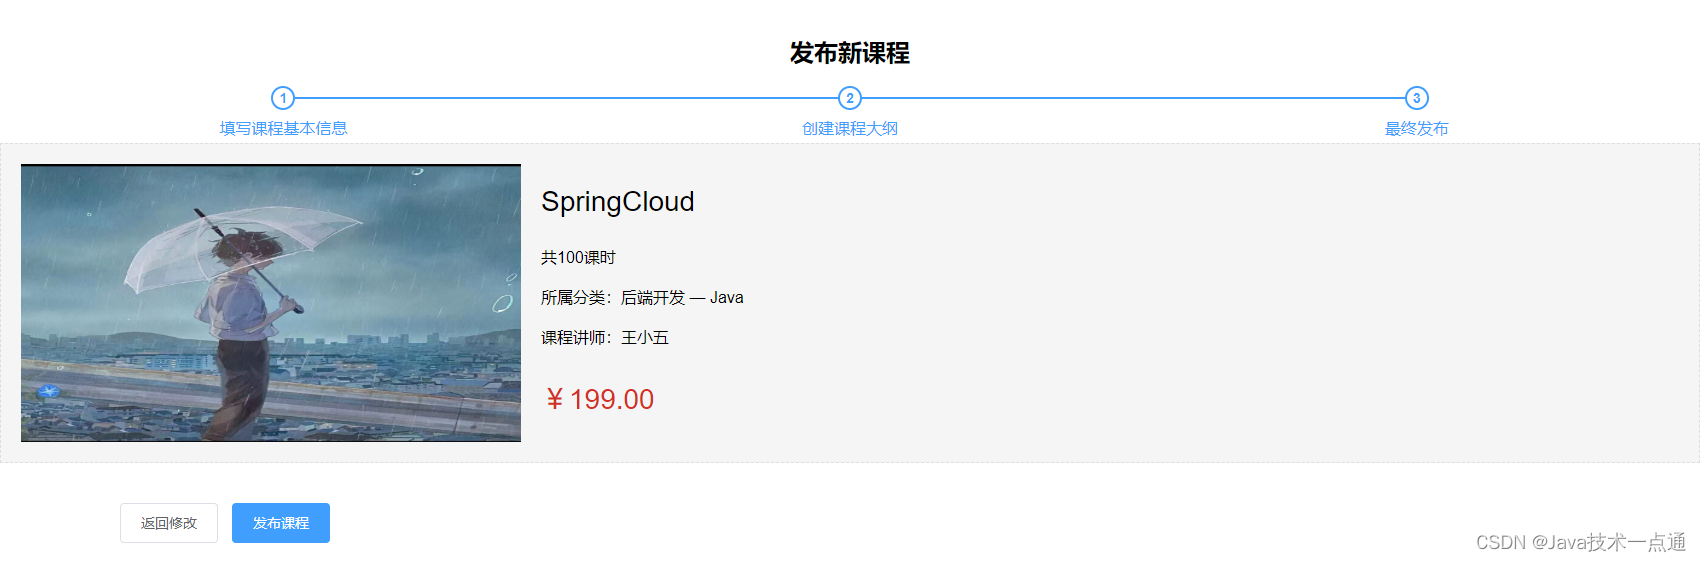
<template> <div class="app-container"> <h2 style="text-align: center">发布新课程</h2> <el-steps :active="3" process-status="wait" align-center style="margin-bottom: 40px;" > <el-step title="填写课程基本信息" /> <el-step title="创建课程大纲" /> <el-step title="最终发布" /> </el-steps> <div class="ccInfo"> <img :src="coursePublish.cover" /> <div class="main"> <h2>{{ coursePublish.title }}</h2> <p class="gray"> <span>共{{ coursePublish.lessonNum }}课时</span> </p> <p> <span >所属分类:{{ coursePublish.subjectLevelOne }} — {{ coursePublish.subjectLevelTwo }}</span > </p> <p>课程讲师:{{ coursePublish.teacherName }}</p> <h3 class="red">¥{{ coursePublish.price }}</h3> </div> </div> <el-form label-width="120px"> <el-form-item> <el-button @click="previous">返回修改</el-button> <el-button :disabled="saveBtnDisabled" type="primary" @click="publish" >发布课程</el-button > </el-form-item> </el-form> </div></template> - 页面样式
<style scoped>.ccInfo { background: #f5f5f5; padding: 20px; overflow: hidden; border: 1px dashed #ddd; margin-bottom: 40px; position: relative;}.ccInfo img { background: #d6d6d6; width: 500px; height: 278px; display: block; float: left; border: none;}.ccInfo .main { margin-left: 520px;}.ccInfo .main h2 { font-size: 28px; margin-bottom: 30px; line-height: 1; font-weight: normal;}.ccInfo .main p { margin-bottom: 10px; word-wrap: break-word; line-height: 24px; max-height: 48px; overflow: hidden;}.ccInfo .main p { margin-bottom: 10px; word-wrap: break-word; line-height: 24px; max-height: 48px; overflow: hidden;}.ccInfo .main h3 { left: 540px; bottom: 20px; line-height: 1; font-size: 28px; color: #d32f24; font-weight: normal; position: absolute;}</style> - 测试
课程最终发布
一、后端实现
EduCourseController
// 课程最终发布
// 修改课程状态
@PostMapping("publishCourse/{id}")
public R publishCourse(@PathVariable String id) {
EduCourse eduCourse = new EduCourse();
eduCourse.setId(id);
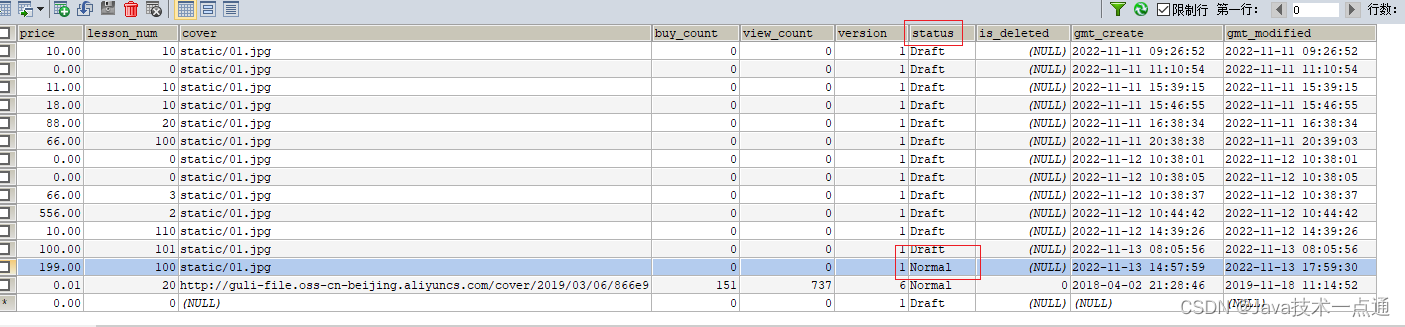
eduCourse.setStatus("Normal"); // 设置课程发布状态
boolean flag = courseService.updateById(eduCourse);
if (flag) {
return R.ok();
} else {
return R.error();
}
}
二、前端实现
- 定义api
//课程最终发布 publishCourse(id) { return request({ url: "/eduservice/course/publishCourse/" + id, method: 'post', }) } - 定义方法
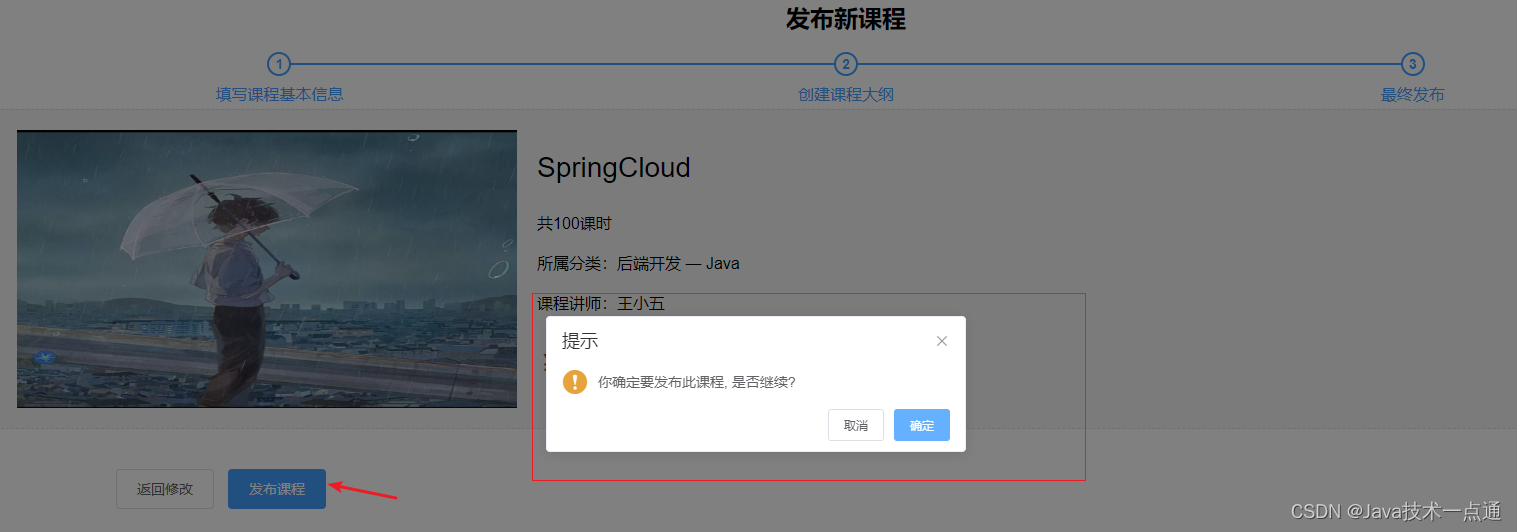
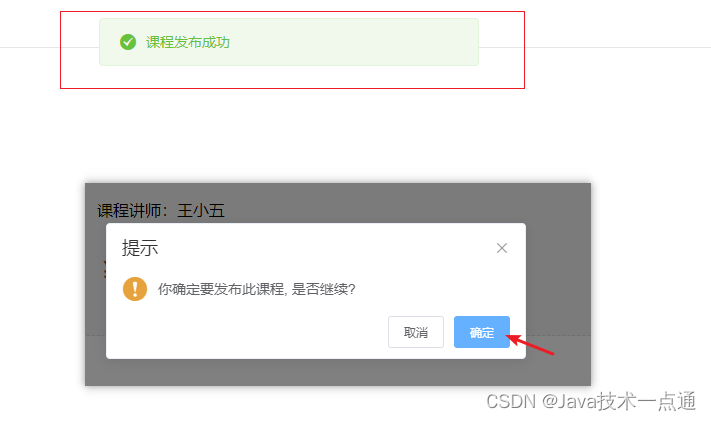
<el-button :disabled="saveBtnDisabled" type="primary" @click="publish">发布课程</el-button>``````//发布课程 publish() { this.$confirm("你确定要发布此课程, 是否继续?", "提示", { confirmButtonText: "确定", cancelButtonText: "取消", type: "warning", }).then(() => { course.publishCourse(this.courseId).then(response => { //提示信息 this.$message({ message: "课程发布成功", type: "success", }); //跳转课程列表页面 this.$router.push({ path: "/course/list" }); }); }); } - 测试
课程列表功能
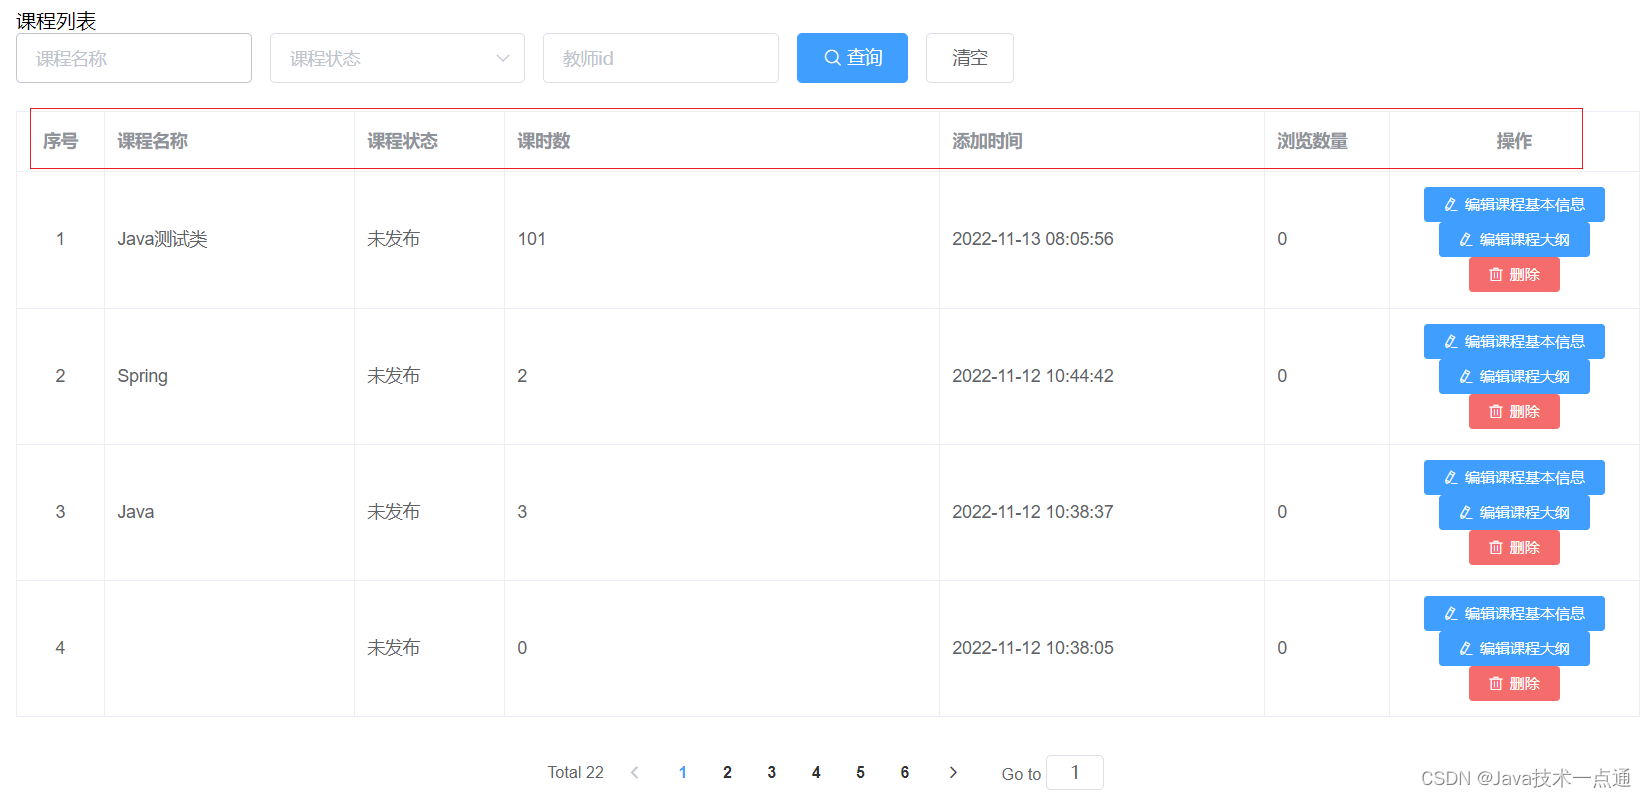
1. 课程列表展示功能
EduCourseController`````` // 查询课程所有信息 @GetMapping public R getCourseList() { List<EduCourse> list = courseService.list(null); return R.ok().data("list", list); }- 定义api
//课程列表 getListCourse() { return request({ url: "/eduservice/course/", method: 'get', }) }, template`````` <!-- 表格 --> <el-table :data="list" border fit highlight-current-row> <el-table-column label="序号" width="70" align="center"> <template slot-scope="scope"> {{ (page - 1) * limit + scope.$index + 1 }} </template> </el-table-column> <el-table-column prop="title" label="课程名称" width="200" /> <el-table-column label="课程状态" width="120"> <template slot-scope="scope"> {{ scope.row.status===Normal?'已发布':'未发布' }} </template> </el-table-column> <el-table-column prop="lessonNum" label="课时数" /> <el-table-column prop="gmtCreate" label="添加时间" width="260"/> <el-table-column prop="viewCount" label="浏览数量" width="100" /> <el-table-column label="操作" width="200" align="center"> <template slot-scope="scope"> <router-link :to="'/teacher/edit/'+scope.row.id"> <el-button type="primary" size="mini" icon="el-icon-edit">编辑课程基本信息</el-button> </router-link> <router-link :to="'/teacher/edit/'+scope.row.id"> <el-button type="primary" size="mini" icon="el-icon-edit">编辑课程大纲</el-button> </router-link> <el-button type="danger" size="mini" icon="el-icon-delete" @click="removeDataById(scope.row.id)">删除</el-button> </template> </el-table-column> </el-table>- methods方法
// 课程列表的方法 getList(page = 1) { this.page = page; course .getListCourse(this.page, this.limit, this.courseQuery) .then((response) => { //请求成功 //response接口返回的数据 this.list = response.data.rows this.total = response.data.total }); }, - 测试
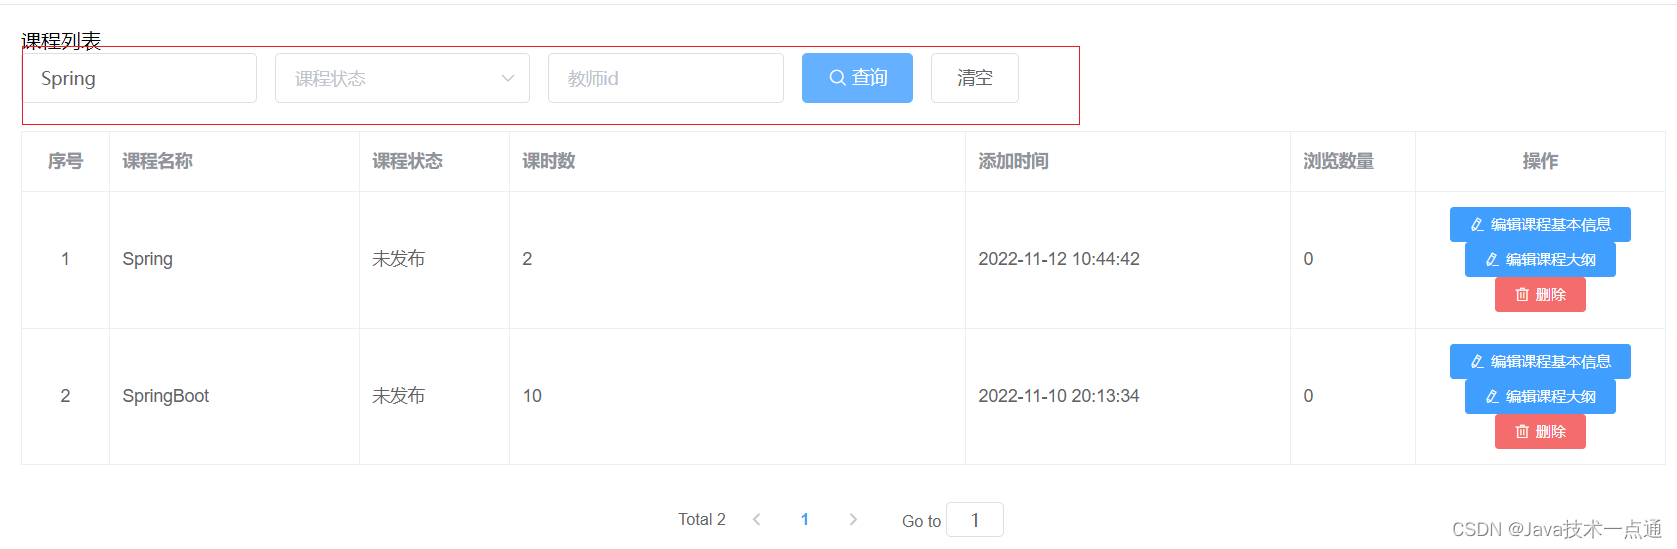
2. 课程列表查询功能
EduCourseController``````// 多条件查询课程带分页 @ApiOperation(value = "多条件查询讲师带分页") @PostMapping("pageCourseCondition/{page}/{limit}") public R pageTeacherCondition(@ApiParam(name = "page", value = "当前页码", required = true)@PathVariable Long page, @ApiParam(name = "limit", value = "每页记录数", required = true)@PathVariable Long limit, // required = false 表示此条件对象可以不传入值 @RequestBody(required = false) CourseQuery courseQuery) { // 创建分页page对象 Page<EduCourse> pageParam = new Page<>(page, limit); // 调用方法实现多条件分页查询 courseService.pageQuery(pageParam, courseQuery); // 获取查询到的数据 List<EduCourse> records = pageParam.getRecords(); // 获取总记录数 long total = pageParam.getTotal(); return R.ok().data("total", total).data("rows", records); }EduCourseService`````` // 多条件查询课程带分页 void pageQuery(Page<EduCourse> pageParam, CourseQuery courseQuery);EduCourseServiceImpl`````` // 多条件查询课程带分页 @Override public void pageQuery(Page<EduCourse> eduCoursePage, CourseQuery courseQuery) { QueryWrapper<EduCourse> queryWrapper = new QueryWrapper<>(); queryWrapper.orderByDesc("gmt_create"); if(courseQuery==null){ this.page(eduCoursePage,queryWrapper); return; } String title = courseQuery.getTitle(); String teacherId = courseQuery.getTeacherId(); String subjectId = courseQuery.getSubjectId(); String subjectParentId = courseQuery.getSubjectParentId(); String status = courseQuery.getStatus(); if(!StringUtils.isEmpty(title)){ queryWrapper.like("title",title); } if(!StringUtils.isEmpty(teacherId)){ queryWrapper.eq("teacher_id",teacherId); } if(!StringUtils.isEmpty(status)){ queryWrapper.eq("status",status); } if(!StringUtils.isEmpty(subjectId)){ queryWrapper.eq("subject_id", subjectId); } if(!StringUtils.isEmpty(subjectParentId)){ queryWrapper.eq("subject_parent_id", subjectParentId); } this.page(eduCoursePage,queryWrapper); }- 定义api
// 课程列表(条件查询分页) getListCourse(page,limit,courseQuery) { return request({ url: `/eduservice/course/pageCourseCondition/${page}/${limit}`, method: 'post', data:courseQuery }) }, - template
<!--查询表单--> <el-form :inline="true" class="demo-form-inline"> <el-form-item> <el-input v-model="courseQuery.title" placeholder="课程名称" /> </el-form-item> <el-form-item> <el-select v-model="courseQuery.status" clearable placeholder="课程状态" > <el-option value="Normal" label="已发布" /> <el-option value="Draft" label="未发布" /> </el-select> </el-form-item> <el-form-item> <el-input v-model="courseQuery.teacherId" placeholder="教师id" /> </el-form-item> <el-button type="primary" icon="el-icon-search" @click="getList()" >查询</el-button > <el-button type="default" @click="resetData()">清空</el-button> </el-form> - methods方法
getList(page = 1) { this.page = page; course .getListCourse(this.page, this.limit, this.courseQuery) .then((response) => { //请求成功 //response接口返回的数据 this.list = response.data.rows this.total = response.data.total }); }, resetData() { // 清空的方法 // 表单输入项数据清空 this.courseQuery = {} // 查询所有讲师数据 this.getList() }, - 测试
3. 课程列表删除课程功能
一、后端实现
- controller层
EduCourseController`````` // 删除课程 @DeleteMapping("{courseId}") public R deleteCourse(@PathVariable String courseId) { courseService.removeCourse(courseId); return R.ok(); } - service层 如果用户确定删除,则首先删除
video记录,然后删除chapter记录,再删除description记录,最后删除Course记录.
EduVideoService`````` // 根据课程id删除小节 void removeVideoByCourseId(String courseId);EduVideoServiceImpl`````` // 根据课程id删除小节 @Override public void removeVideoByCourseId(String courseId) { QueryWrapper<EduVideo> queryWrapper = new QueryWrapper<>(); queryWrapper.eq("course_id", courseId); baseMapper.delete(queryWrapper); }EduChapterService``````//根据课程id删除章节 void removeChapterByCourseId(String courseId);EduChapterServiceImpl``````//根据课程id删除章节 @Override public void removeChapterByCourseId(String courseId) { QueryWrapper<EduChapter> queryWrapper = new QueryWrapper<>(); queryWrapper.eq("course_id", courseId); baseMapper.delete(queryWrapper); }EduCourseService`````` // 删除课程 void removeCourse(String courseId);EduCourseServiceImpl`````` // 删除课程 @Override public void removeCourse(String courseId) { // 1.根据课程id删除小节 // TODO 删除小节,删除对应视频文件 eduVideoService.removeVideoByCourseId(courseId); //2.根据课程id删除章节 eduChapterService.removeChapterByCourseId(courseId); //3.根据课程id删除描述 courseDescriptionService.removeById(courseId); //4.根据课程id删除课程本身 int result = baseMapper.deleteById(courseId); if (result == 0) { throw new GuliException(20001, "删除失败"); } }
二、前端实现
- 定义api
// 删除课程 deleteCourseId(id) { return request({ url: `/eduservice/course/${id}`, method: 'delete' }) }, - template
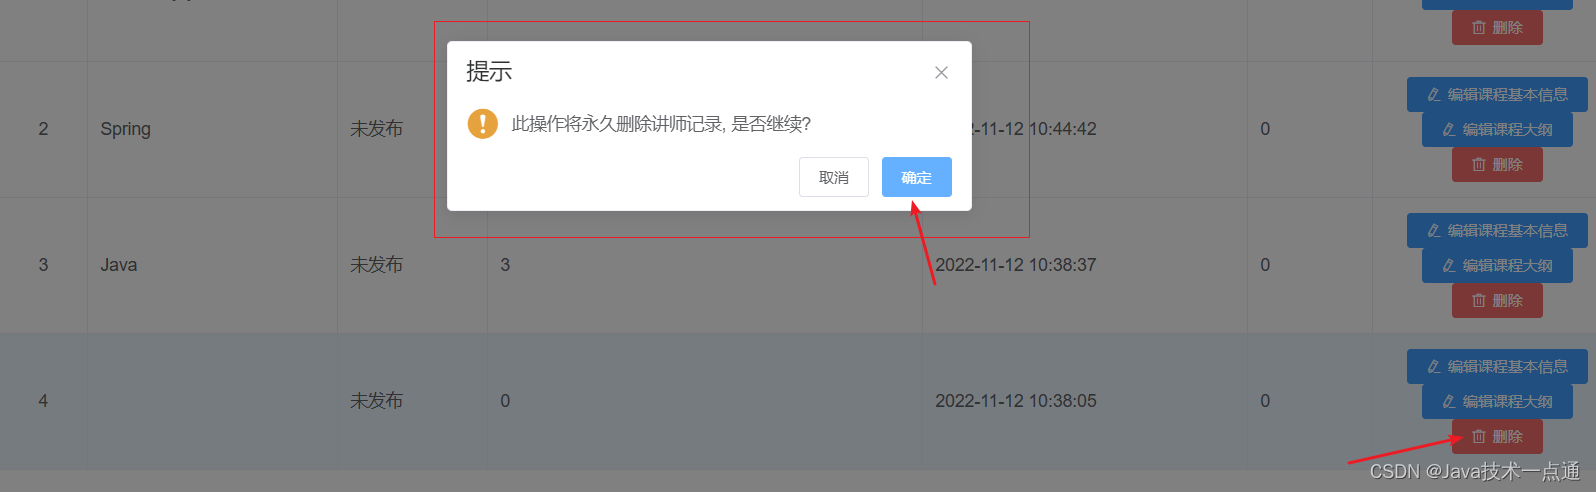
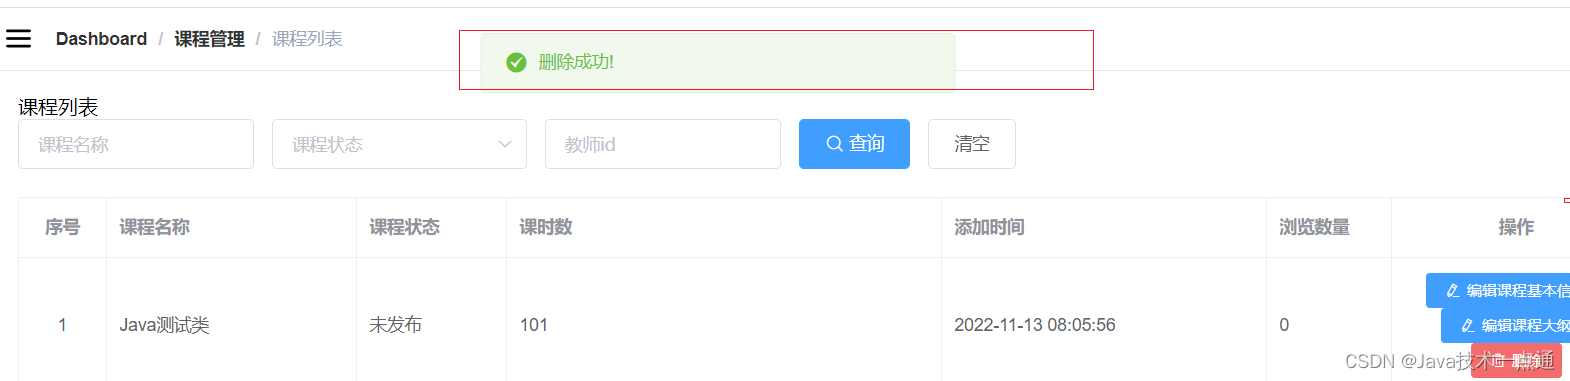
<el-button type="danger" size="mini" icon="el-icon-delete" @click="removeDataById(scope.row.id)">删除</el-button> - methods方法
//删除课程的方法 removeDataById(id) { this.$confirm('此操作将永久删除讲师记录, 是否继续?', '提示', { confirmButtonText: '确定', cancelButtonText: '取消', type: 'warning' }).then(() => { //点击确定,执行then方法 //调用删除的方法 course.deleteCourseId(id) .then(response =>{//删除成功 //提示信息 this.$message({ type: 'success', message: '删除成功!' }); //回到列表页面 this.getList() }) }) //点击取消,执行catch方法 } - 测试
创作不易,如果有帮助到你,请给文章点个赞和收藏,让更多的人看到!!!
关注博主不迷路,内容持续更新中。
本文转载自: https://blog.csdn.net/m0_52691962/article/details/127795960
版权归原作者 Java技术一点通 所有, 如有侵权,请联系我们删除。
版权归原作者 Java技术一点通 所有, 如有侵权,请联系我们删除。