
前端工作笔记之---页面路由跳转vue2
前言
1.安装vue-router
npm i vue-router
2.配置路由
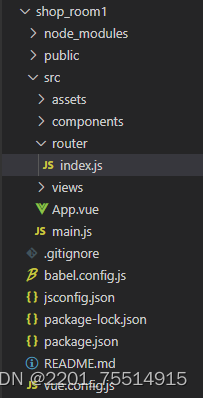
在src文件夹下创建router文件夹,然后在router文件夹下创建index.js文件,如下图
在index.js文件夹中进行配置
import Vue from 'vue'
import VueRouter from 'vue-router'

// 导入一级路由
import Goods from '@/views/Goods'
import Particulars from '@/views/Particulars'
Vue.use(VueRouter)

const routes = [{
        path: '/',
        redirect: '/goods'
    },
    {
        path: '/goods',
        name: 'goods',
        component: Goods,
    },
    {
        path: '/particulars',
        name: 'particulars',
        component: Particulars
    }
]

const router = new VueRouter({
    routes
})

export default router
在src文件夹下创建view文件夹,在里边放路由文件,如下图

在main.js文件中注册路由
import router from '@/router/index.js'
new Vue({
  render: h => h(App),
  router
}).$mount('#app')
接下来就是使用啦
一、单页面路由跳转
首先强调一点,使用路由跳转需要放置路由挂载点**<router-view></router-view>**,放置在你需要显示的地方。
这里我将挂载点放置在App.vue中了
<template>
  <div id="app">
<router-view></router-view>
  </div>
</template>
1.使用<router-link></router-link>的方式进行跳转
<router-link :to="{ path: '/particulars'}">跳转</router-link>
2.使用**
this.$router.push()的方式进行跳转
**
<el-button type="text" size="small" @click="toEdit()">编辑</el-button>
methods: {
        toEdit() {
            this.$router.push({ path: '/particulars' })
        },
    },
**
this.$router.replace(),用法同上。
**
二、跳转到新页面(打开一个新窗口)
1.<router-link></router-link>
    <router-link target="_blank" :to="{ path: '/catalog', query: { id: '1' } }"

      >打开新的标签页</router-link>
2.**
this.$router.push()
**
      const routeUrl = this.$router.resolve({

        path: "/targetUrl",

        query: { id: 96 },

      });

      window.open(routeUrl.href, "_blank");

    },
本文转载自: https://blog.csdn.net/2201_75514915/article/details/129547169
版权归原作者 馨雨lxy 所有, 如有侵权,请联系我们删除。
版权归原作者 馨雨lxy 所有, 如有侵权,请联系我们删除。